... >
Edit Content

Food That’s Made from the Heart
We’re all about turning simple ingredients into magical moments. From kitchen newbies to seasoned chefs, our recipes are designed to keep things fun and easy! Let’s cook, laugh, and eat together. 🥰

Contact Us

Delicious Homemade Vanilla Cookies – Easy Recipe

vanilla cookie recipe

What makes a perfect vanilla cookie recipe? Is it the simple ingredients, the easy prep, or the taste? Homemade cookies, especially vanilla ones, can be a real game-changer. They impress everyone and are fun to make.

A top vanilla cookie recipe should be simple and need few ingredients. Quality ingredients and a straightforward process are key. With practice, you can make delicious cookies that everyone loves. So, what makes a great vanilla cookie recipe, and how can you make it your own? Let’s explore the world of homemade cookies and easy recipes.

Key Takeaways

  • A great vanilla cookie recipe should be easy to make and require minimal ingredients
  • High-quality ingredients are essential for a perfect easy cookie recipe
  • Homemade cookies can be a fun and rewarding experience
  • A simple and reliable vanilla cookie recipe is key to creating delicious treats
  • With a little practice and patience, you can create a batch of delicious homemade cookies
  • Vanilla cookie recipe can be customized to suit your taste preferences
  • Easy cookie recipe can be a great way to spend quality time with family and friends

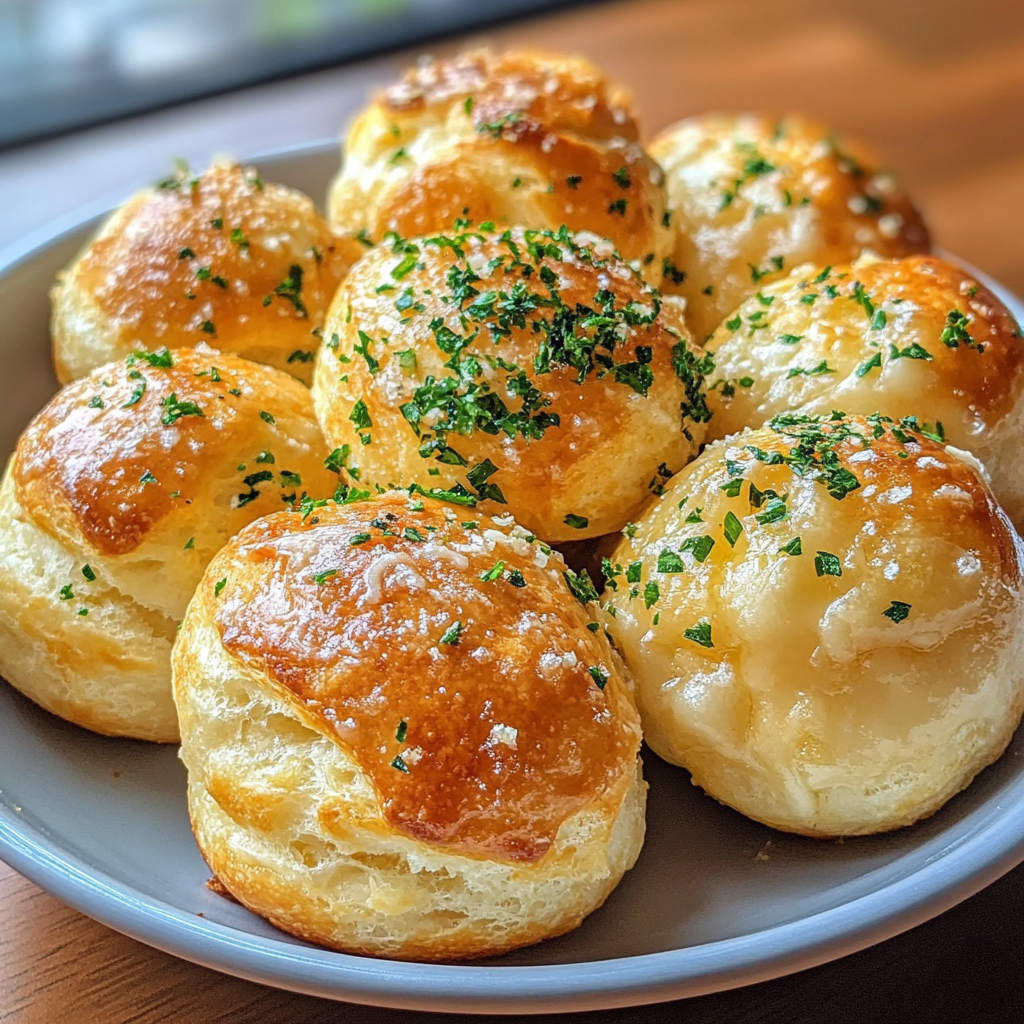
Why These Vanilla Cookies Will Become Your Family Favorite

The smell of best vanilla cookies baking is amazing. It brings families together, creating lasting memories. These cookies are loved for their perfect taste and texture.

Enjoying vanilla cookie benefits is a special experience. It’s a way to spend quality time with loved ones. Biting into a warm cookie feels like coming home.

Here’s why these best vanilla cookies are so special:

  • Simple yet delicious ingredients
  • Easy to make and customize
  • Perfect for any occasion, from holidays to everyday snacks

Adding vanilla cookie benefits to your baking can change your life. Try these family favorite cookies and see the difference for yourself.

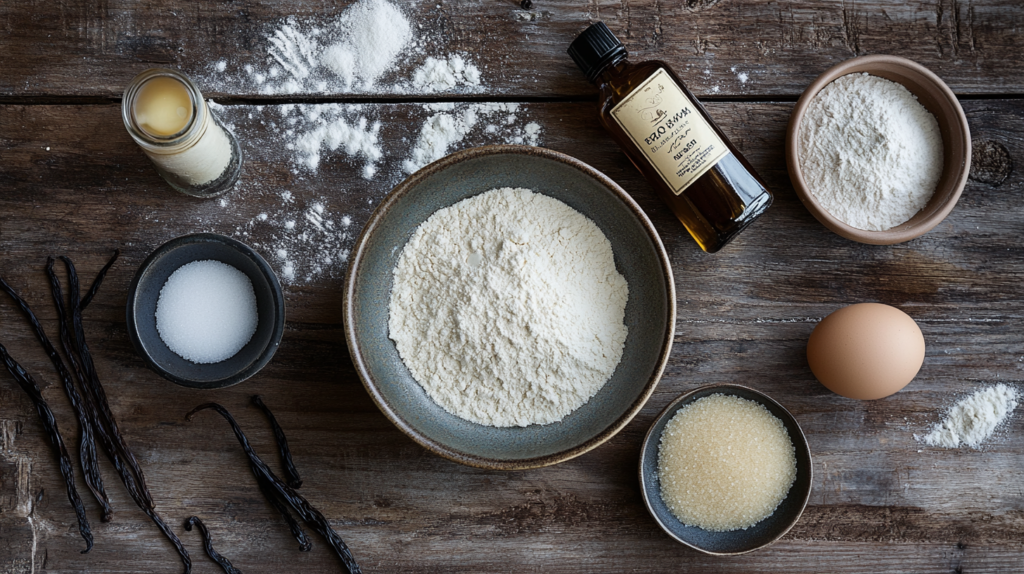
Essential Ingredients for Perfect Vanilla Cookies

To make delicious vanilla cookies, it’s crucial to use the right vanilla cookie ingredients. The quality of these ingredients can significantly impact the taste and texture of the cookies. When it comes to vanilla, there are several options available, including extract, beans, and paste. Each of these options can affect the flavor of the cookies in a unique way.

Using high-quality baking essentials is also vital for achieving the perfect texture and flavor. This includes quality baking ingredients such as flour, sugar, and butter. The type of flour used, for example, can affect the structure of the cookies, with all-purpose flour being a popular choice for its versatility.

Here are some key considerations when selecting vanilla cookie ingredients:

  • Choose high-quality vanilla extract or beans for the best flavor
  • Select the right type of flour for the desired texture
  • Use quality baking ingredients such as real butter and pure sugar

By using the right baking essentials and vanilla cookie ingredients, you can create delicious and flavorful cookies that are sure to please. Remember to always choose quality baking ingredients for the best results.

IngredientDescription
Vanilla ExtractA high-quality extract that adds flavor to the cookies
All-Purpose FlourA versatile flour that provides structure to the cookies
Unsalted ButterA high-quality butter that adds flavor and texture to the cookies

Kitchen Tools You’ll Need

To make delicious vanilla cookies, you’ll need some essential baking tools. These tools help you get the perfect texture and flavor. You’ll need a mixing bowl, whisk, rubber spatula, and a baking sheet.

Here are some of the key tools you’ll need:

  • Mixing bowl
  • Whisk
  • Rubber spatula
  • Baking sheet
  • Measuring cups and spoons

Theseessential kitchen gadgets help you measure, mix, and bake your cookies. If you’re missing some tools, don’t worry. You can find alternatives or substitutes.

For example, a fork can replace a whisk. And you can use a cake pan or muffin tin if you don’t have a baking sheet. Being creative and resourceful with your baking tools is key.

With the right cookie-making equipment and essential kitchen gadgets, you can make amazing vanilla cookies. These will impress your family and friends. So, get creative and try different tools and techniques to find what works best for you.

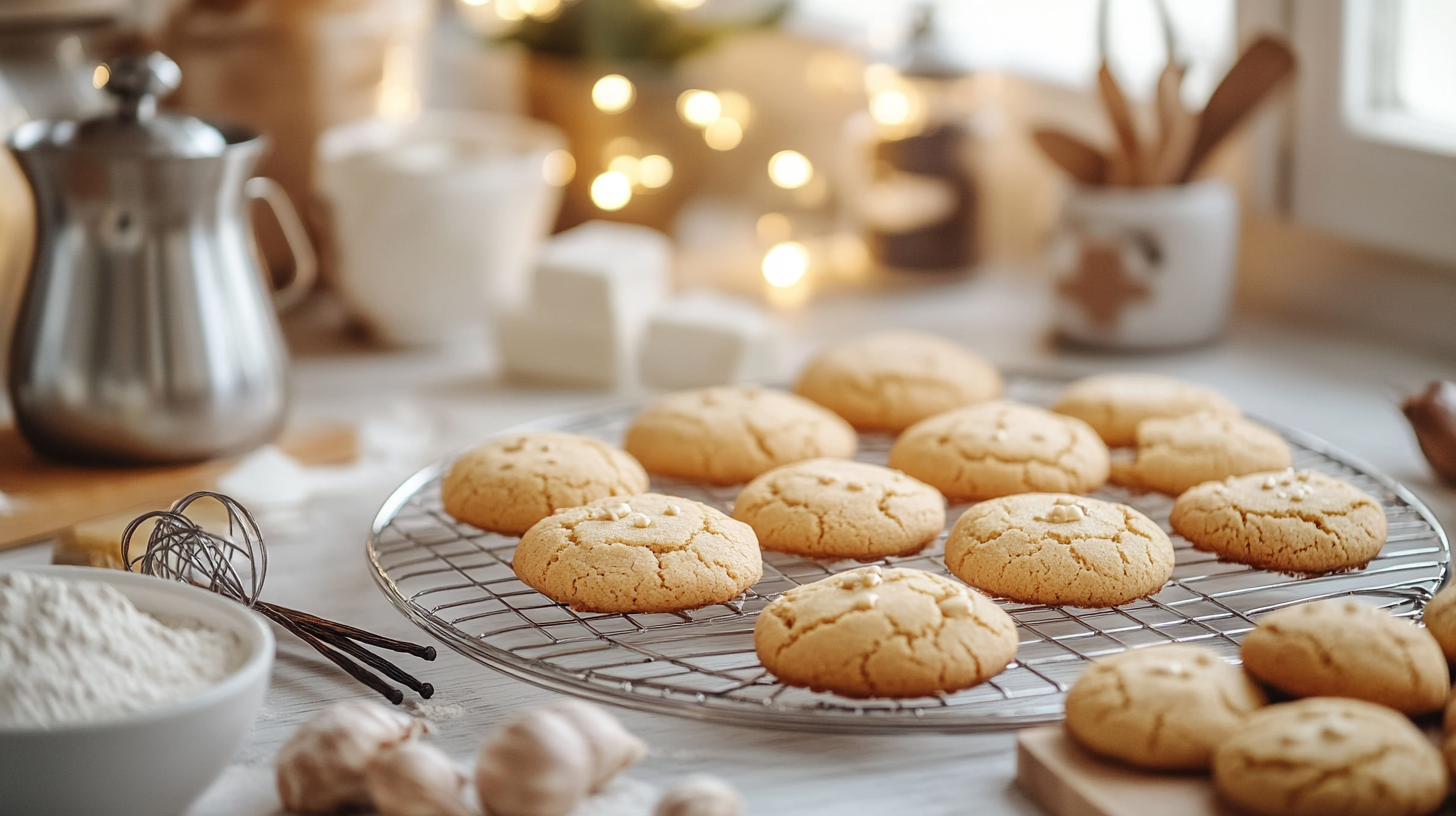
The Ultimate Vanilla Cookie Recipe

To make delicious vanilla cookies, start by preheating your oven to 375°F (190°C). Prepare your baking sheets with parchment paper. The whole process, from making the dough to baking, takes about 20-25 minutes. You’ll get 12-15 cookies per batch.

When preparing the cookie dough, mixing the ingredients right is key. In a large bowl, whisk together the dry ingredients. Then, cream the butter and sugar in another bowl. Slowly add the dry ingredients to the wet ingredients, mixing until a dough forms.

Preparation Time and Yield

The preparation time for this recipe is about 10 minutes. Baking takes around 10-12 minutes. You can adjust the recipe to make more or fewer cookies, based on your needs.

Mixing the Dough

Mixing the dough is a critical step. Make sure to cream the butter and sugar until they’re light and fluffy. Then, add the dry ingredients gradually. The dough should be smooth and even.

Shaping and Baking Instructions

To shape the cookies, scoop tablespoon-sized balls of dough onto the prepared baking sheets. Leave about 2 inches of space between each cookie. Bake for 10-12 minutes, or until the edges are lightly golden brown. Follow these baking instructions for perfect results.

Pro Tips for Soft and Chewy Texture

To get the perfect soft cookies, you need to know the science behind cookie texture. The secret is in the right mix of ingredients and controlling the temperature. Follow these tips to make soft cookies that everyone will love.

Temperature control is key. Make sure your oven is at the correct temperature. An oven thermometer can help you get consistent results. Also, chilling the dough stops cookies from spreading too much. This ensures they stay chewy.

Temperature Control Secrets

Temperature is crucial for the perfect soft and chewy texture. It keeps cookies from getting too hard or too soft. The type of sugar used also matters. Brown sugar, for example, adds more moisture, making cookies chewier.

Moisture Balance Tips

Getting the right moisture balance is essential for soft and chewy cookies. The dough’s moisture affects the cookies’ texture. Eggs and butter are key to keeping the dough moist. Adjusting their amounts helps achieve the perfect texture. Follow these tips to make delicious soft cookies for any occasion.

Common Baking Mistakes to Avoid

When baking vanilla cookies, it’s easy to make cookie baking errors. These mistakes can change the texture and taste of your cookies. We’ve listed common mistakes to help you troubleshoot cookies and solve baking problem solutions.

Some common mistakes include overmixing the dough, which can make cookies tough. Also, not leaving enough space between cookies on the baking sheet can cause them to spread too much. Knowing these cookie baking errors helps you avoid them and get perfect cookies.

Here are some tips to help you avoid common baking mistakes:

  • Use the right type of flour and leavening agents to ensure that your cookies have the right texture.
  • Don’t overbake your cookies – take them out of the oven when they’re lightly golden brown.
  • Let your cookies cool on the baking sheet for a few minutes before transferring them to a wire rack to cool completely.

By following these tips and being mindful of potential cookie baking errors, you can ensure that your vanilla cookies turn out delicious and perfect every time. Always troubleshoot cookies and find baking problem solutions to get the best results.

MistakeSolution
Overmixing the doughMix the dough just until the ingredients are combined, then stop mixing.
Not leaving enough space between cookiesLeave at least 2 inches of space between each cookie on the baking sheet.

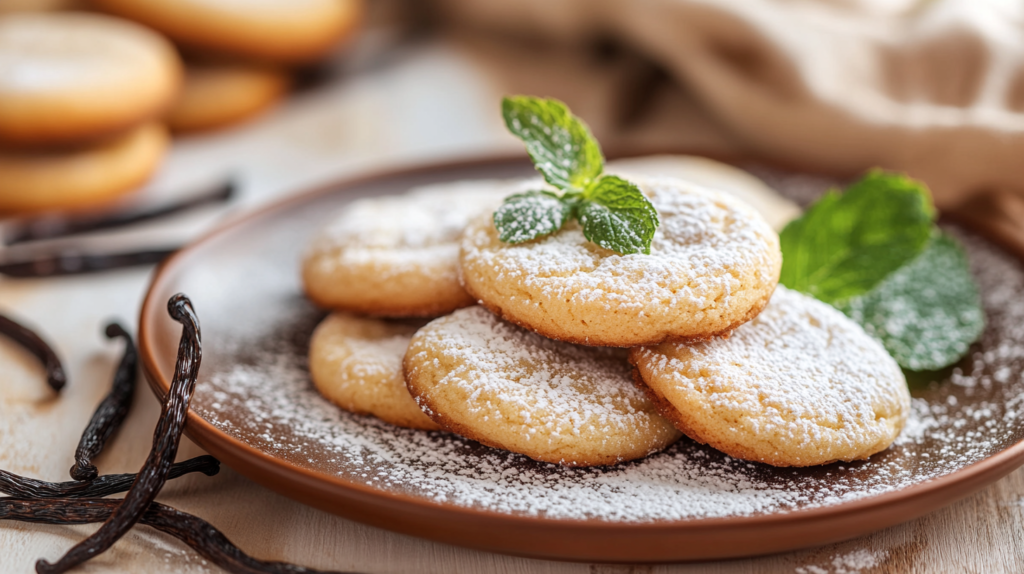
Creative Vanilla Cookie Variations

Vanilla cookies are a classic favorite. But why not try some creative cookie variations? You can change your basic vanilla cookie recipe into many flavored vanilla cookies. Just add different ingredients like chocolate chips, nuts, or fruit zest.

Decorated cookies offer endless possibilities. Use icing, sprinkles, and other decorations to make your cookies stand out. Try using colored sugar or edible markers for a personal touch. With a bit of creativity, your vanilla cookies can become beautiful decorated treats for any occasion.

Flavor Add-ins

  • Chocolate chips: Add a handful of dark or milk chocolate chips to your dough for a delicious twist.
  • Nuts: Walnuts, almonds, or pecans add a nice texture and flavor to your cookies.
  • Fruit zest: Incorporate the zest of oranges, lemons, or limes to give your cookies a burst of citrus flavor.

Decorating Ideas

Get creative with your cookie decorating. Use royal icing for intricate designs or sprinkle colored sugar on top. Try using cookie cutters in various shapes to make your cookies more interesting.

Holiday Special Touches

Make your vanilla cookies extra special for holidays. Add seasonal flavors like cinnamon or nutmeg for a warm winter taste. Use holiday-themed cookie cutters to create fun shapes.

Storage and Freshness Guidelines

To keep cookies fresh, it’s key to know the best storage practices. Storing cookies right can make them last longer. Use airtight containers to keep them fresh when stored at room temperature.

Store cookies in a cool, dry spot, away from sunlight. This keeps them fresh and prevents staleness. Freezing cookies is also a great way to keep them fresh for longer.

Counter Storage Methods

Use an airtight, moisture-proof container for counter storage. This keeps cookies fresh and prevents odors or flavors from other foods. You can also use wax paper or parchment paper to keep cookies from sticking together.

Freezing Instructions

To freeze cookies, place them on a baking sheet and freeze. Then, move them to an airtight container or freezer bag. To enjoy frozen cookies, thaw at room temperature or reheat in the oven.

Follow these easy storage and freezing tips to keep your vanilla cookies fresh. Always store cookies in a cool, dry place. Freezing is a great option for longer storage. With the right storage, your homemade vanilla cookies will stay delicious for weeks.

Nutritional Information and Dietary Modifications

Looking at cookie nutrition facts is key to our health. Vanilla cookies have sugar, butter, eggs, and flour. These can be a problem for those with dietary restrictions. But, making a few changes can make healthier cookie alternatives for everyone.

For those with gluten issues, try almond or coconut flour instead. Using honey or maple syrup can cut down sugar. Vegans can use flaxseed or chia seeds and plant-based milk.

  • Use gluten-free flour for gluten-free cookies
  • Replace traditional sugar with natural sweeteners
  • Choose plant-based milk and egg substitutes for vegan cookies
  • Opt for low-sugar or sugar-free options for health-conscious individuals

By looking at cookie nutrition facts and making small changes, you can make healthy cookie alternatives. These are great for anyone, no matter their dietary restrictions. So, start baking and enjoy the perfect sweet treat for you!

IngredientTraditionalModified
FlourWheat flourGluten-free flour
SugarRefined sugarNatural sweeteners
MilkDairy milkPlant-based milk

Conclusion: Mastering Your Vanilla Cookie Recipe

Baking the perfect vanilla cookies is within reach with the right skills and practice. Every batch you make is a chance to improve your baking confidence and cookie mastery. Don’t worry if your first batch isn’t perfect – just keep trying and enjoying the process.

The real joy of baking homemade cookies is the journey, not just the end result. Cherish the small victories, enjoy the smell of fresh cookies, and share them with your loved ones. With each batch you make, you’ll get better and appreciate the art of baking more.

So, get your oven ready, collect your ingredients, and start baking some irresistible vanilla cookies. The more you bake, the better you’ll get. And you’ll feel more confident in your baking abilities.

FAQ

What are the key ingredients needed to make the perfect vanilla cookies?

To make delicious vanilla cookies, you need a few key ingredients. High-quality vanilla extract or a vanilla bean is a must. You’ll also need all-purpose flour, butter, and sugar (both white and brown).

Baking powder and eggs are also important. They help the cookies turn out right.

How do I achieve the perfect soft and chewy texture in my vanilla cookies?

For soft and chewy cookies, control the baking temperature. Keep the dough’s moisture just right. Chilling the dough before baking helps too.

Adjusting the ingredients can also make a big difference. This way, you get the perfect cookie texture.

Can I customize the basic vanilla cookie recipe to create different flavors?

Yes, you can! The vanilla cookie recipe is a great starting point. Add chocolate chips, nuts, or dried fruit for new flavors.

You can also try different extracts and spices. This lets you create unique tastes.

How should I store homemade vanilla cookies to keep them fresh?

To keep cookies fresh, store them in an airtight container at room temperature. This helps them stay soft and tasty.

If you want to keep them longer, freeze the dough or baked cookies. They can last up to 3 months in the freezer.

Are there any healthy or dietary-friendly modifications I can make to the vanilla cookie recipe?

Yes, you can make healthier vanilla cookies. Try using whole wheat flour instead of all-purpose flour.

Reduce the sugar or use less of it. You can also substitute vegan ingredients. This makes the cookies better for you.

Easy Banana Bread Recipe with 2 Bananas

banana bred

Have you ever wondered how to create a delightfully moist and flavorful homemade banana bread using just 2 bananas? This quick and easy recipe is the answer! Discover the secret to whipping up a fluffy, irresistible loaf that will have your family and friends raving. Get ready to fill your kitchen with the heavenly aroma of freshly baked homemade banana bread.

Key Takeaways

  • This quick banana bread recipe requires just 2 medium ripe bananas
  • The moist banana bread has a light texture and big banana flavor
  • It’s a relatively low-fat and low-sugar option that keeps well for several days
  • The recipe can be easily frozen for up to 2 months
  • The preparation time is just 10 minutes, making it a hassle-free baking experience

Why This 2-Banana Bread Recipe Works

This easy banana bread recipe is perfect for when you have just a couple of ripe bananas on hand. While a typical banana bread calls for 3-4 large bananas, this recipe is specially designed to deliver moist and flavorful results with only 2 very ripe bananas.

Perfect for Limited Ingredients

By substituting some of the missing banana moisture with milk, this recipe ensures the bread doesn’t turn out dry or dense. The addition of just the right amount of brown sugar also helps compensate for the lower banana content, resulting in a consistently moist and tender crumb.

Quick Preparation Time

One of the best things about this quick baking banana bread is how quickly it comes together. The entire preparation and cleanup process takes around 10 minutes, excluding the baking time. This makes it an ideal choice for busy weekdays or when you need a last-minute baked treat.

Consistently Moist Results

Unlike mini-sized banana breads that can often turn out too dense or crusty, this recipe yields a normal-sized loaf with the perfect balance of moisture and texture. The use of melted butter, along with the precise measurement of dry and wet ingredients, ensures moist banana bread every time.

“This 2-banana bread recipe is a lifesaver when you have limited ingredients on hand but still crave that delicious, homemade banana bread flavor.”

Essential Ingredients for Perfect Banana Bread

Crafting the ultimate banana bread requires a careful selection of key ingredients. At the heart of this delectable treat are ripe bananas, the star of the show. You’ll need about 3 medium bananas, or roughly 1 1/2 cups of mashed banana goodness. Pair these with essential baking essentials like all-purpose flour, baking soda, baking powder, and salt to create the perfect canvas for your banana bread.

To add richness and moisture, you’ll want to incorporate melted butter, room temperature eggs, and a touch of vanilla extract. The sugar content is flexible, allowing you to adjust the sweetness level to your preference, using a combination of light brown sugar and white granulated sugar for a delightful flavor profile.

For an extra boost of flavor, consider adding a sprinkle of ground cinnamon or a handful of toasted, chopped walnuts. These optional ingredients can elevate your banana bread to new heights of deliciousness.

With the right balance of banana bread ingredients, you’ll be well on your way to baking a moist, flavorful loaf that will have your family and friends reaching for seconds.

Remember, the key to a perfect banana bread is using ripe, flavorful bananas and ensuring all your ingredients are at room temperature for optimal blending and rising. Follow this essential ingredient list, and you’re well on your way to baking a banana bread that will have everyone raving.

Step-by-Step Banana Bread Recipe with 2 Bananas

Crafting the perfect banana bread doesn’t have to be a daunting task, especially when you have the right method. This easy-to-follow recipe using just 2 bananas will guide you through the process, ensuring moist and flavorful results every time.

Preparing Your Bananas

Begin by preheating your oven to 350°F (175°C). The key to this recipe is using 2 very ripe bananas, which will provide the necessary moisture and natural sweetness. Mash the bananas thoroughly using a fork or potato masher until they reach a smooth, lump-free consistency.

Mixing the Wet Ingredients

In a large mixing bowl, combine the mashed bananas with 8 tablespoons (115g) of melted and cooled butter. Whisk in 3/4 cup (150g) of light brown sugar, 2 large eggs at room temperature, and 2 teaspoons of vanilla extract. Blend these wet ingredients until well-incorporated.

Combining Dry Ingredients

In a separate bowl, whisk together 1 1/2 cups (195g) of all-purpose flour, 1 teaspoon of baking soda, 1/2 teaspoon of baking powder, and 1/2 teaspoon of salt. Gradually add the dry ingredients to the wet mixture, gently folding until just combined, being careful not to overmix.

Pour the banana bread batter into a greased and floured 8×4-inch loaf pan. Bake for 55 to 65 minutes, or until a toothpick inserted into the center comes out clean. Allow the banana bread to cool in the pan for 10 minutes before transferring it to a wire rack to cool completely.

With this straightforward banana bread method, you’ll have a moist and flavorful loaf in no time, despite using just 2 bananas. The combination of baking steps and mixing ingredients ensures a delightful result that’s sure to satisfy your cravings.

Tips for Making Moist Banana Bread

Baking the perfect moist banana bread can be an art, but with a few simple tips, you can achieve consistently delightful results. The key lies in selecting the right ingredients and techniques to ensure your banana bread is soft, tender, and bursting with flavor.

First and foremost, use very ripe bananas for maximum moisture and sweetness. The riper the bananas, the more natural sugars they’ll contribute, resulting in a moist and flavorful bread. Don’t be afraid to use bananas with plenty of brown speckles or even a few soft spots – they’ll provide the best texture and taste.

Secondly, be mindful of your mixing technique. Overmixing the batter can lead to a tough, dense crumb, so gently fold the ingredients together until just combined. The addition of milk or yogurt can also help maintain moisture by providing a tender, moist crumb.

  • Avoid overbaking by checking the bread early and using the toothpick test for doneness. A toothpick inserted into the center should come out clean when the bread is ready.
  • Consider substituting some of the butter with mashed ripe bananas or unsweetened applesauce to reduce fat and calories while still preserving moisture.
  • Experiment with different flours, such as whole wheat or gluten-free blends, to add additional nutrients and texture without compromising the moist, tender crumb.

By following these simple tips, you’ll be well on your way to baking the most delectable, moist banana bread that’s sure to impress family and friends. Enjoy the comforting aroma and satisfying texture of this homemade treat.

“The secret to moist banana bread is in the ripeness of the bananas and the gentle handling of the batter.”

Baking Temperature and Timing Guide

Achieving the perfect texture and doneness for your banana bread is crucial. Here’s a comprehensive guide to help you nail the baking temperature and timing for delightfully moist and flavorful results.

Proper Pan Selection

The type of baking pan you choose can significantly impact the outcome of your banana bread. For best results, opt for an 8×4-inch loaf pan. This pan size will ensure your banana bread bakes evenly and maintains a moist, tender crumb.

Testing for Doneness

To check if your banana bread is fully baked, insert a toothpick or skewer into the center of the loaf. If it comes out clean, with no wet batter clinging to it, your banana bread is ready. Keep in mind that the toothpick may have a few moist crumbs attached, which is perfectly normal.

Cooling Process

Once your banana bread has finished baking, it’s essential to allow it to cool properly. Leave the bread in the pan for 10 minutes before transferring it to a wire rack. This cooling process helps the bread finish setting and prevents it from becoming overly dense or gummy.

Pan SizeBaking TimeOven Temperature
8×4-inch loaf pan60-65 minutes325°F
8.5×4.5-inch loaf pan47-57 minutes325°F
9×5-inch loaf pan45-55 minutes325°F

Remember, the baking time may vary slightly depending on your oven and the doneness of your bananas. Always use the toothpick test to ensure your banana bread is perfectly baked.

By following these guidelines, you’ll be able to create a beautifully baked and perfectly cooled banana bread every time.

Recipe Variations and Add-ins

Elevating the classic banana bread recipe is a breeze with a variety of add-ins and customizations. From chocolate chips to chopped nuts, these simple variations can transform your banana bread into a truly personalized treat.

Start by incorporating 1 cup of your favorite mix-ins, such as semisweet chocolate chips, toasted walnuts, or plump raisins. For a richer flavor, try swapping the granulated sugar with brown sugar. You can also experiment with other tasty additions like pineapple tidbits, peanut butter chips, or a blend of cranberries and pecans.

If you’re feeling adventurous, consider baking banana bread muffins instead of a traditional loaf. This versatile recipe also lends itself well to a chocolate-banana version, where you can fold in cocoa powder or melted chocolate for a decadent twist.

VariationIngredientsResult
Dairy-FreeSubstitute butter with 1 cup neutral oilMoist, dairy-free loaf
Gluten-FreeUse King Arthur’s measure-for-measure GF flourSlightly denser loaf with less rise
Deep Rich FlavorSwap sugar with brown sugar, add bourbon or whiskeyEnhanced depth of flavor
Winter VibeUse dark brown sugar, add cinnamon, top with cinnamon sugarCozy, seasonal twist
Multi-GrainReplace 1 cup all-purpose flour with whole wheat flour, add flax seedsHeartier, more nutritious loaf
Vegan/EgglessSubstitute butter with oil, eggs with a mixture of applesauce, flax seed, and waterMoist, eggless loaf with less rise

With so many banana bread variations and add-ins to choose from, the possibilities for customizing your banana bread are endless. Experiment and find the perfect combination to satisfy your cravings and personal preferences.

Storage Tips and Shelf Life

Properly stored, your delicious homemade banana bread can maintain its freshness and flavor for several days. When kept at room temperature, banana bread typically lasts 2 to 3 days before it starts to dry out or stale. To extend its shelf life, you can refrigerate the bread for up to a week.

Room Temperature Storage

For the best texture and taste, store your banana bread at room temperature. Make sure it has cooled completely before wrapping it tightly in plastic or placing it in an airtight container. This will help retain the bread’s moisture and prevent it from drying out. Homemade banana bread can stay fresh on the counter for 2 to 3 days when stored properly.

Freezing Instructions

If you want to enjoy your banana bread for longer, freezing is the way to go. Wrap the cooled loaf tightly in plastic wrap or aluminum foil, then place it in a freezer-safe bag or airtight container. Frozen banana bread can last up to 3 months in the freezer. When ready to serve, thaw the bread at room temperature, which takes about 1-2 hours for a few slices or 3-4 hours for a whole loaf.

Slicing the banana bread before freezing can make it easier to thaw and serve individual portions. You can also toast frozen slices directly in the toaster for a quick and convenient snack.

No matter how you choose to store your banana bread, be sure to keep an eye out for signs of spoilage, such as mold, off-flavors, or a sour smell. If the bread shows any of these signs, it’s best to discard it to avoid any food safety concerns.

Common Baking Mistakes to Avoid

Baking banana bread may seem like a straightforward task, but even the slightest misstep can derail the process and lead to disappointing results. As an experienced copywriting journalist, I’m here to share some common baking mistakes you should steer clear of to achieve the perfect, moist, and flavorful banana bread every time.

  1. Using Underripe Bananas: Overripe bananas (spotted to black) provide more moisture, sweetness, and flavor to your banana bread. Avoid using underripe, bright-yellow bananas as they can result in a dry, flavorless loaf.
  2. Overmixing the Batter: Excessive mixing can develop too much gluten in the batter, leading to a tough, chewy texture instead of the desired soft and delicate crumb. Be gentle when combining the wet and dry ingredients.
  3. Incorrect Oven Temperature: Ensuring the oven is preheated to the right temperature is crucial for even baking. A temperature that’s too low can result in an undercooked, gummy center, while too high can cause the exterior to brown too quickly before the interior is done.
  4. Removing the Bread Too Soon: Resist the temptation to take the banana bread out of the pan right after baking. Allowing it to cool completely on a wire rack will prevent the bottom from becoming soggy.

To avoid these common banana bread troubleshooting issues and achieve the perfect baking errors free loaf, make sure your ingredients are at room temperature, don’t substitute baking soda for baking powder, and keep the oven door closed during baking to maintain the temperature. With these tips in mind, you’ll be well on your way to perfect banana bread every time.

“The key to a moist and flavorful banana bread is not just in the recipe, but in avoiding common baking mistakes that can ruin the final product.”

Nutritional Information and Benefits

While the aroma and taste of freshly baked banana bread can be irresistible, it’s important to consider the nutritional profile of this delectable treat. A typical 3.5-ounce (100-gram) slice of store-bought banana bread contains approximately 421 calories, 15.8 grams of fat, 68.4 grams of carbohydrates, and 5.3 grams of protein.

However, this recipe for 2-Banana Bread aims to be a healthier alternative. By using only two ripe bananas, the calorie and carbohydrate content is reduced compared to traditional recipes. Additionally, the use of whole wheat pastry flour, almond flour, and healthier fats like olive oil can enhance the nutritional value of this banana bread.

Nutritional InformationPer Slice (4 oz/115g)
Calories254
Carbohydrates38g
Protein4g
Fat10g
Fiber3g
Potassium320mg (8% DV)
Vitamin B60.4mg (14% DV)

Bananas, the star ingredient in this recipe, are a rich source of potassium and vitamin B6, providing 8% and 14% of the Daily Value (DV) respectively in a 4-ounce (115-gram) serving. Additionally, this recipe is relatively low in added sugar compared to many traditional banana bread recipes, making it a healthier choice.

To further enhance the nutritional profile, this recipe can be made with whole wheat flour or by reducing the sugar content. With the right ingredients and modifications, banana bread can be a delicious and nutritious treat that provides various health benefits.

Conclusion

This 2-banana bread recipe offers a quick and easy solution for using up those ripe bananas on your counter. With its moist texture, rich banana flavor, and versatile nature, it’s the perfect homemade quick bread for breakfast, snacks, or dessert. The simplicity of the recipe and consistent results make it suitable for bakers of all skill levels, from novice to experienced. Whether you enjoy it as-is or with your favorite add-ins, this easy banana bread is sure to become a new staple in your baking repertoire.

The 2-banana variation provides a great alternative to traditional 3-banana recipes, allowing you to utilize fewer ingredients while still achieving the same delightful outcome. With its balanced sweetness, the right amount of cinnamon, and the option to incorporate yogurt or sour cream, this recipe delivers a moist and flavorful homemade quick bread that’s perfect for any occasion.

So, whether you’re looking for an easy way to use up ripe bananas or simply craving a comforting and satisfying homemade treat, this 2-banana bread recipe is the answer. Give it a try and enjoy the delicious results!

FAQ

What makes this 2-banana bread recipe special?

This recipe uses only 2 bananas and regular pantry items to create a flavorful, moist banana bread. It’s quick to prepare, filling your house with wonderful baking smells. The bread has a light texture and color but is big on banana flavor. It’s relatively low in fat and sugar, keeps well for several days, and can be frozen for later.

Why is this recipe ideal for when you have only 2 ripe bananas?

This recipe replaces the missing banana with milk, adding necessary moisture without overwhelming the banana taste. The recipe takes about 10 minutes to prepare and clean up, excluding baking time. It produces a normal-sized loaf rather than a mini-sized one, avoiding issues with too much crust or density.

What are the key ingredients in this banana bread recipe?

Key ingredients include 2 very ripe bananas (about 1 cup mashed), butter, white sugar, eggs, all-purpose flour, baking powder, baking soda, and salt. Room temperature ingredients work best. The recipe is flexible with sugar amounts, allowing for adjustments based on sweetness preference. Milk is used to compensate for the reduced number of bananas.

How do you prepare the banana bread batter?

Start by preheating the oven to 350°F (175°C). Mash the bananas and mix with melted butter. Add sugar, beaten eggs, and vanilla extract. In a separate bowl, whisk together flour, baking soda, baking powder, and salt. Gradually combine wet and dry ingredients. Pour the batter into a prepared 8×4-inch loaf pan and bake for 55-65 minutes.

What tips can help ensure a moist banana bread?

To ensure moist banana bread, use very ripe bananas for maximum flavor and moisture. Don’t overmix the batter as this can lead to tough bread. The addition of milk or yogurt helps maintain moisture. Avoid overbaking by checking the bread early and using the toothpick test for doneness.

What are the recommended baking time and temperature?

Bake at 325°F for 60-65 minutes in an 8×4-inch pan. Adjust time for different pan sizes: 47-57 minutes for 8.5×4.5-inch, 45-55 minutes for 9×5-inch. Test doneness with a toothpick or skewer. Cool in the pan for 10 minutes before transferring to a wire rack for complete cooling, which may take 1-2 hours.

Can I add any extra ingredients to the banana bread?

Enhance the recipe by adding 1 cup of chocolate chips, chopped nuts, or raisins. Try using brown sugar for a richer flavor. Some variations include adding pineapple tidbits, peanut butter chips, or a combination of cranberries and pecans. You can also make muffins instead of a loaf or create a chocolate banana bread version.

How long does banana bread last, and how can I store it?

Properly wrapped, banana bread keeps at room temperature for 4 days. For longer storage, refrigerate for up to 5 days or freeze. When freezing, wrap the bread tightly in plastic wrap and place in a freezer bag. It can be frozen for up to 2 months. Thaw at room temperature before serving.

What are some common mistakes to avoid when making banana bread?

Common mistakes include using underripe bananas, overmixing the batter, incorrect oven temperature, and removing the bread from the pan too soon. Ensure ingredients are at room temperature before starting. Don’t substitute baking soda for baking powder. Avoid opening the oven door frequently during baking as it can cause uneven cooking.

What are the nutritional benefits of this banana bread recipe?

A typical slice contains about 254 calories, 38g carbohydrates, 4g protein, and 10g fat. Bananas provide potassium, vitamin B6, and fiber. This recipe is relatively low in added sugar compared to many traditional recipes. The bread can be made healthier by using whole wheat flour or reducing sugar content.