... >
Edit Content

Food That’s Made from the Heart
We’re all about turning simple ingredients into magical moments. From kitchen newbies to seasoned chefs, our recipes are designed to keep things fun and easy! Let’s cook, laugh, and eat together. 🥰

Contact Us

Sourdough Dessert Recipes: Satisfy Your Cravings

sourdough dessert recipes​

What makes sourdough desserts so special? Is it the tangy taste, the chewy texture, or the natural starter? It’s clear that homemade sourdough treats are a must-try for anyone who loves sweets. With simple sourdough dessert ideas, you can make a variety of tasty treats for any event.

Sourdough desserts range from classic cakes to creative pastries. They’re perfect for both experienced bakers and beginners. They let you try new flavors and techniques. So, why wait? Explore sourdough dessert recipes and enjoy baking with a sourdough starter.

Key Takeaways

  • Homemade sourdough desserts offer a unique flavor and texture
  • Easy sourdough dessert ideas are perfect for bakers of all levels
  • Sourdough dessert recipes can be used to create a variety of delicious treats
  • Sourdough starters are a natural and healthy alternative to commercial yeast
  • Sourdough desserts are a great way to experiment with new flavors and techniques
  • With sourdough dessert recipes, you can create classic cakes, innovative pastries, and more
  • Sourdough baking is a fun and rewarding hobby that can be enjoyed by anyone

Getting Started with Sourdough Dessert Recipes

To start sourdough baking, you need to know the basics. It uses a natural starter instead of commercial yeast. This means you’ll need patience and practice. Creating and keeping a healthy starter is key for tasty sourdough desserts.

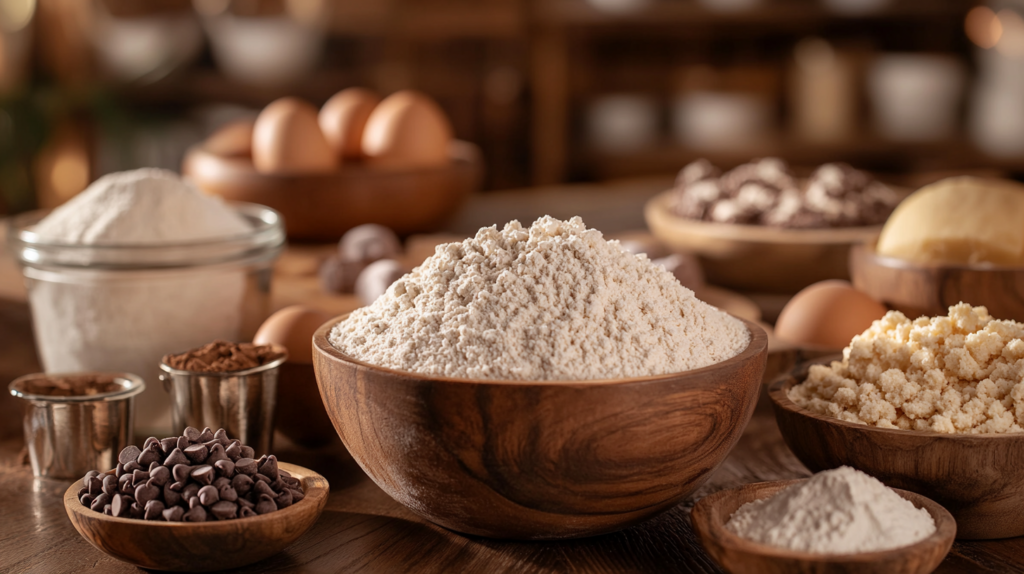
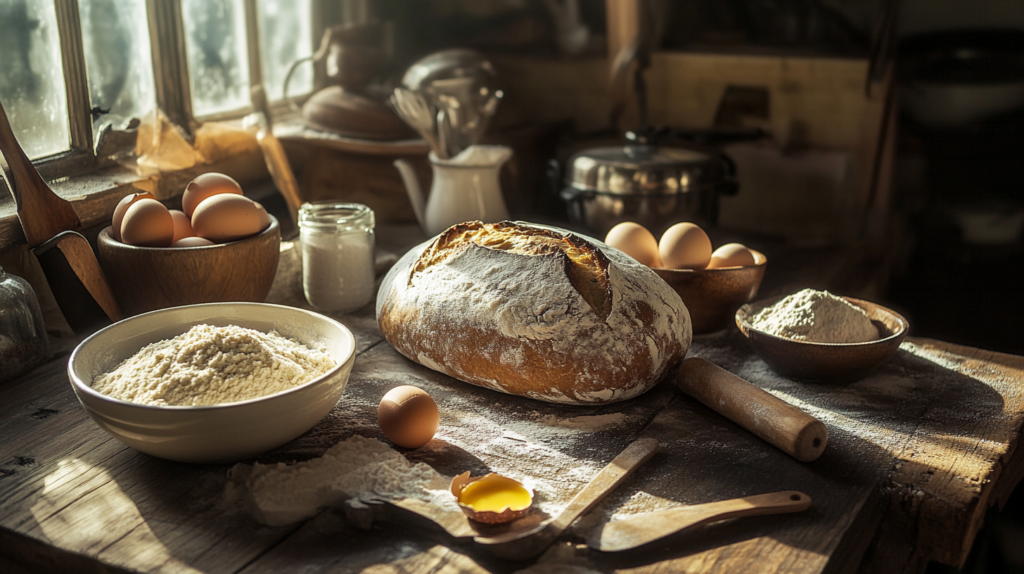
Before you start, get your equipment ready. You’ll need mixing bowls, measuring cups, and a Dutch oven. Also, have flour, sugar, and eggs on hand. Learning to make and care for your starter is essential for your baking journey.

Essential Equipment for Sourdough Desserts

  • Mixing bowls
  • Measuring cups
  • Dutch oven

Basic Ingredients You’ll Need

  • Flour
  • Sugar
  • Eggs

Understanding Sourdough Starter for Sweets

Making a sourdough starter from scratch is fun and rewarding. With patience and the right ingredients, you’ll make tasty sourdough desserts. Always use your starter in recipes made for sourdough baking. This ensures the best results.

Follow these tips and practice your sourdough baking. You’ll soon make delicious desserts that will wow everyone. Sourdough baking is a rewarding hobby that brings joy and satisfaction.

The Science Behind Sweet Sourdough Baking

Creating delicious sourdough desserts starts with understanding the science. The fermentation process, powered by wild yeast and bacteria, breaks down sugars. This creates the unique flavors and textures of sweet sourdough treats. It’s what makes sourdough special, and mastering it can help bakers solve problems and try new recipes.

The wild yeast and bacteria in the sourdough starter are key. They break down sugars, producing lactic acid. This acid gives sourdough its tangy taste. The type of flour, the environment’s temperature and humidity, and how long the dough ferments all affect the final product. By knowing these factors, bakers can make a variety of sourdough desserts, from cakes and cookies to complex pastries and breads.

  • Temperature: Warmer temperatures speed up fermentation, while cooler temperatures slow it down
  • Humidity: A humid environment can help to create a more sour flavor, while a dry environment can result in a milder flavor
  • Flour type: The type of flour used can impact the flavor and texture of the final product, with some flours producing a more sour flavor than others

By controlling these factors and understanding sourdough baking, bakers can make a variety of delicious desserts. Whether you’re experienced or new, trying sweet sourdough treats is a great way to mix up your baking. It lets you explore the possibilities of sourdough.

Type of FlourCharacteristicsBest Used For
All-purpose flourMild flavor, medium protein levelCakes, cookies, and other sweet sourdough treats
Bread flourStronger flavor, higher protein levelHearty breads and pastries
Pastry flourMild flavor, low protein levelDelicate pastries and desserts

Classic Sourdough Cake Recipes

Cakes are a fantastic starting point for sourdough dessert recipes. They offer a unique flavor and texture. You can try many types, from chocolate to vanilla.

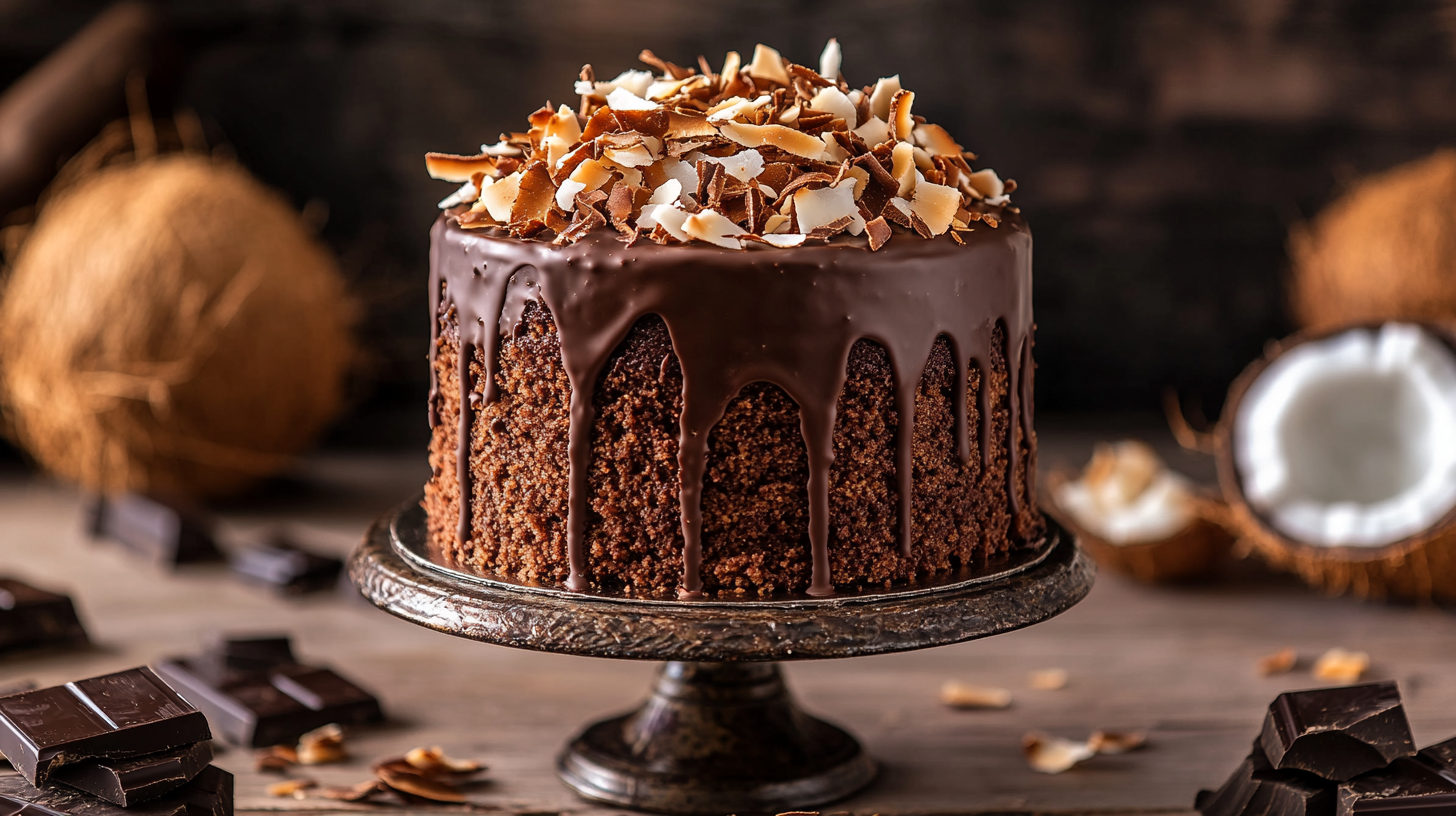
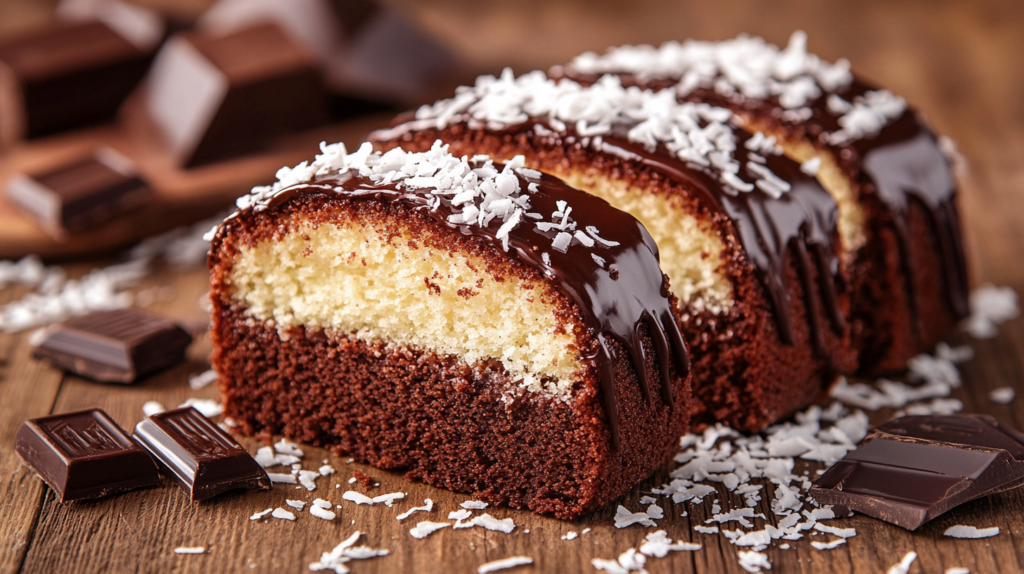
Some popular sourdough cake recipes include:

  • Chocolate sourdough cake, made with rich, dark chocolate and a hint of sourdough tang
  • Vanilla bean sourdough pound cake, featuring the sweetness of vanilla and the complexity of sourdough
  • Fruit-filled sourdough coffee cake, perfect for a breakfast or brunch treat

These recipes bring a variety of flavors and textures. With practice and patience, you can make delicious sourdough cakes. They’re sure to impress.

Whether you’re an experienced baker or new to it, sourdough cake recipes are a great choice. They let you explore the world of sourdough desserts. So, why not try one today and see the delicious results for yourself?

RecipeIngredientsInstructions
Chocolate Sourdough CakeFlour, sugar, cocoa powder, sourdough starterMix ingredients, proof, and bake
Vanilla Bean Sourdough Pound CakeFlour, sugar, vanilla beans, sourdough starterMix ingredients, proof, and bake
Fruit-Filled Sourdough Coffee CakeFlour, sugar, fruit, sourdough starterMix ingredients, proof, and bake

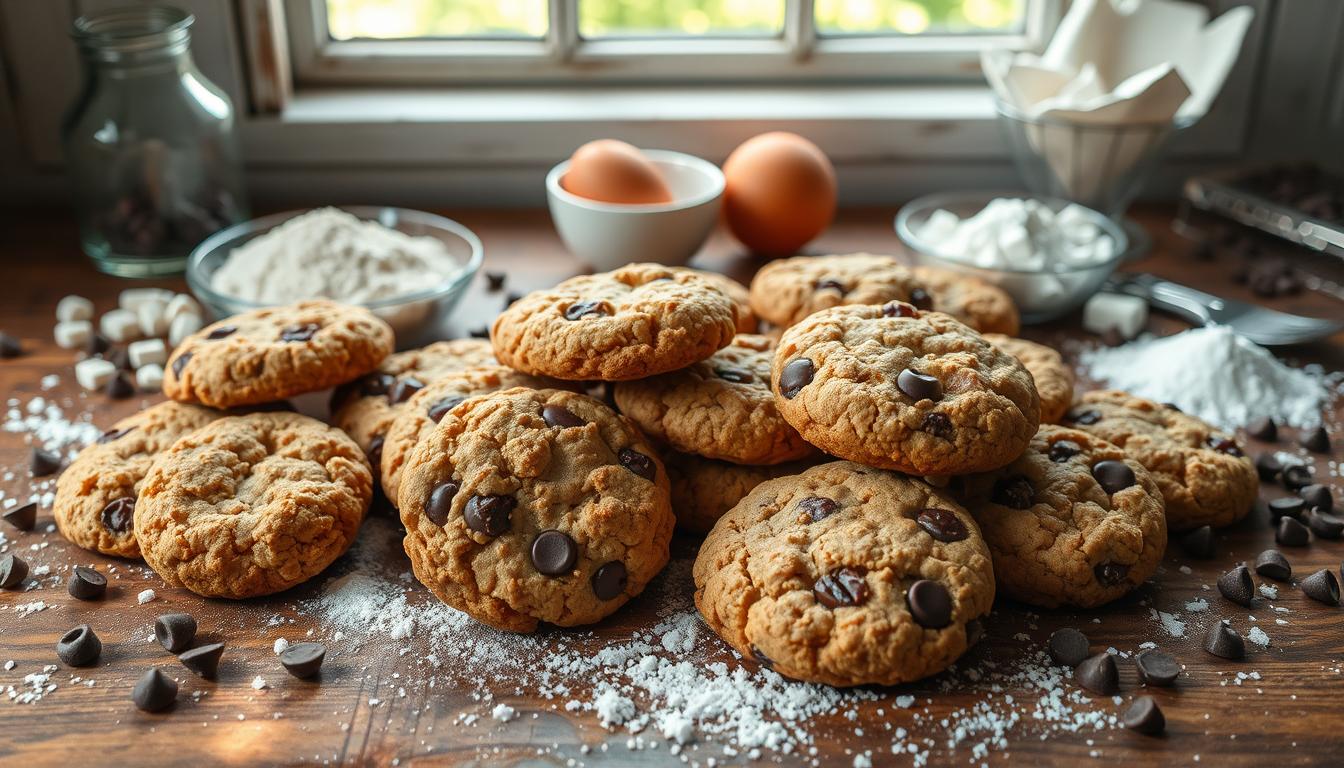
Delicious Sourdough Cookie Variations

Starting with sourdough cookies is a great idea for easy desserts. Sourdough baking gives traditional cookies a tangy twist. To make sourdough cookie dough, mix your starter with flour, sugar, and more.

Popular flavors include chocolate chip, oatmeal raisin, and peanut butter. You can add chocolate chips, oats, or peanut butter to your dough. Try mixing flavors for unique and tasty cookies.

Here are some tips for baking sourdough cookies:

  • Use a mix of white and brown sugar for a richer taste
  • Add-ins like nuts or dried fruit add texture and flavor
  • Chill the dough to keep cookies in shape

Follow these tips and try different flavors. You’ll make delicious sourdough desserts for any event. Sourdough baking is fun for both new and seasoned bakers.

Cookie VariationIngredientsBaking Time
Chocolate ChipSourdough starter, flour, sugar, chocolate chips10-12 minutes
Oatmeal RaisinSourdough starter, flour, sugar, rolled oats, raisins12-15 minutes
Peanut ButterSourdough starter, flour, sugar, peanut butter10-12 minutes

Creative Sourdough Pastries and Sweet Breads

Sourdough baking opens up a world of creative possibilities. You can make delicious treats by using sourdough starter recipes. Sourdough discard recipes are perfect for those who want to reduce waste.

Using sourdough starter recipes lets you create complex, tangy flavors. This is especially true for sweet breads. The sourdough starter adds a depth of flavor that’s hard to get with traditional yeast. For more ideas on using sourdough discard, check out sourdough discard recipes.

Mastering the Art of Lamination

To make flaky, layered pastries, you need to master lamination. This involves folding and rolling the dough to create layers. These layers expand during baking, making the pastry light and airy. Using sourdough starter recipes and sourdough discard in your dough makes your pastries truly unique and delicious.

Exploring Sweet Sourdough Options

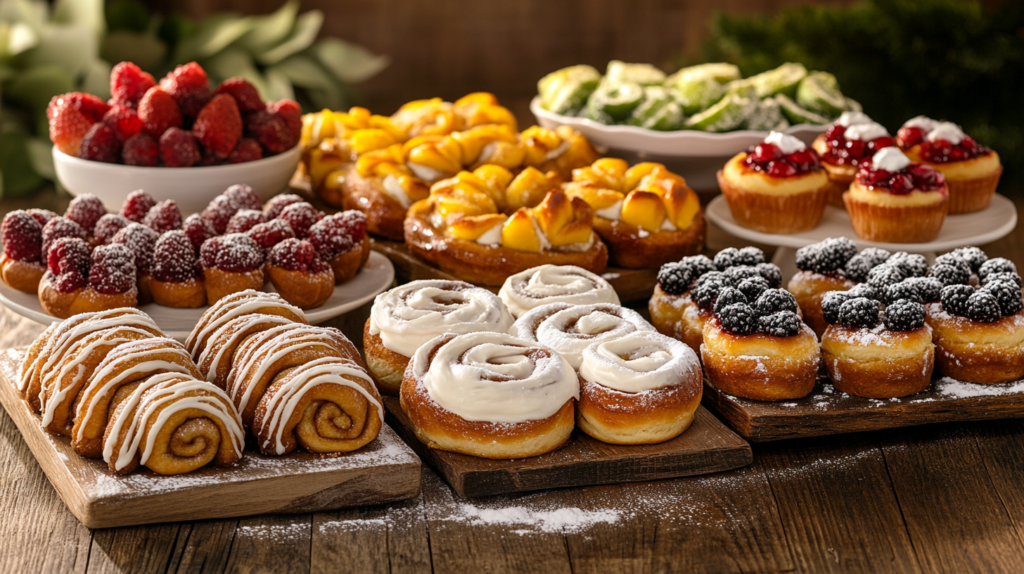
There are endless sweet sourdough treats to try, like sourdough cinnamon rolls and fruit-filled braids. By trying different sourdough starter and discard recipes, you can make a variety of tasty baked goods. Whether you’re an experienced baker or just starting, sourdough pastries and sweet breads will inspire and delight you.

Making the Most of Your Sourdough Discard

Sourdough baking is all about using every part of your starter. Instead of tossing the discard, you can make tasty treats like pancakes, waffles, muffins, and even desserts. This way, you reduce waste and make the most of your sourdough starter.

Try making sourdough chocolate chip cookies, sourdough cinnamon rolls, or sourdough apple muffins with your discard. These recipes not only save waste but also bring a special flavor and texture to your baked goods. Feel free to mix and match ingredients to create your own unique sourdough recipes.

Here are some ideas to get you started:

  • Use sourdough discard to make a delicious sourdough pancake batter
  • Add sourdough discard to your favorite muffin recipe for an extra boost of flavor
  • Experiment with sourdough discard recipes for cakes, such as a sourdough vanilla cake or a sourdough chocolate cake

By using sourdough discard in your baking, you can make a variety of unique desserts. These are not only yummy but also eco-friendly. So, next time you’re about to throw away your sourdough discard, think of all the tasty possibilities.

Advanced Sourdough Dessert Techniques

To improve your sourdough baking, learning advanced techniques is key. One important skill is lamination. This involves folding and rolling dough to create layers of butter and dough. This method is essential for making flaky, tasty sourdough desserts.

Another crucial part of sourdough baking is proofing. Perfect proofing times greatly impact your desserts’ texture and flavor. Also, controlling the temperature is vital. It affects how your sourdough treats rise and feel.

Lamination Methods

  • Fold and roll the dough to create layers of butter and dough
  • Use a gentle touch to avoid developing the gluten
  • Allow the dough to rest and relax between folds

Perfect Proofing Times

The proofing time varies based on the dessert type, temperature, and environment. It’s best to proof your sourdough desserts at room temperature, away from drafts.

Temperature Control Tips

Temperature control is crucial in sourdough baking. It impacts the rise and texture of your desserts. Temperature control tips include using a thermometer to monitor the temperature. Adjust it as needed for the perfect rise.

By mastering these advanced techniques, you’ll make delicious sourdough desserts. With practice and patience, you’ll become a skilled sourdough baker. You’ll be able to create a variety of tasty treats.

Seasonal Sourdough Dessert Ideas

As the seasons change, so do the flavors and ingredients we use in baking. Sweet sourdough treats offer endless possibilities. From pumpkin sourdough bread in fall to lemon sourdough cakes in spring, each season brings new ideas.

Some popular seasonal ingredients for sourdough desserts include:

  • Cranberries and orange zest for a winter wonderland-inspired muffin
  • Strawberries and rhubarb for a sweet and tangy summer crisp
  • Pumpkin puree and spices for a cozy autumnal bread
  • Lemons and lavender for a refreshing springtime cake

These ingredients can make a variety of sweet sourdough treats. From cakes and cookies to muffins and breads, you can create unique desserts. By using fresh fruits, herbs, and spices, you can make delicious treats for any time of year.

Whether you’re a seasoned baker or just starting, sourdough desserts offer endless possibilities. So, why not try new seasonal ideas? With a bit of creativity and patience, you can make impressive sweet sourdough treats.

Troubleshooting Common Sourdough Dessert Issues

Even with great sourdough baking skills and recipes, problems can still happen. We’ve listed common issues and how to solve them.

Common problems include dense textures, too sour flavors, and moisture issues. These can be fixed with simple recipe or technique tweaks.

To solve dense textures, tweak the flour to liquid ratio. Also, extend proofing time for full rise. For sour flavors, cut down sourdough starter or adjust fermentation. Moisture problems can be fixed by adjusting liquid or flour type.

IssueSolution
Dense textureAdjust flour to liquid ratio, add more proofing time
Overly sour flavorReduce sourdough starter, adjust fermentation time
Moisture content issuesAdjust liquid in recipe, use different type of flour

Fixing Dense Textures

Dense textures are common in sourdough dessert recipes. Adjust flour to liquid ratio and extend proofing time for better rise.

Addressing Sourness Levels

Too sour flavors can be a problem. Reduce sourdough starter or adjust fermentation time to fix it.

Managing Moisture Content

Moisture issues can be fixed by adjusting liquid or using different flour. These tweaks help make sourdough dessert recipes tender and delicious.

Health Benefits of Sourdough Desserts

Many people are surprised to learn that sourdough dessert recipes have health benefits. The fermentation process breaks down sugars and starches, making them easier to digest. Using whole grains in homemade sourdough desserts also increases nutrients and fiber.

Some key health benefits of sourdough desserts include:

  • Improved digestion due to the fermentation process
  • Increased nutrient absorption from whole grains
  • Potential for lower glycemic indexes, helping regulate blood sugar

Choosing the right ingredients boosts the health benefits of sourdough dessert recipes. Using natural sweeteners like honey or maple syrup reduces calories and adds nutrients. Adding fruits, nuts, or seeds increases fiber and antioxidants.

Sourdough dessert recipes are a great way to enjoy sweets while getting health benefits. By using whole grains, natural sweeteners, and nutritious ingredients, you can make homemade sourdough desserts that are tasty and healthy.

Storing and Preserving Your Sourdough Treats

To keep your sourdough desserts fresh, it’s key to know how to store them right. Sourdough baking needs careful attention, especially when it comes to keeping your treats fresh. This ensures they stay tasty and of high quality.

For sourdough baking, controlling the storage environment is crucial. Use airtight containers, freeze, or refrigerate your treats. For instance, sourdough cookies can stay fresh in an airtight container at room temperature for up to 3 days.

Freezing Guidelines

Freezing is a great way to keep your sourdough desserts fresh for longer. Wrap your treats tightly in plastic wrap or foil and put them in a freezer-safe bag. This helps keep their texture and taste.

Storage Container Recommendations

The right containers are vital for keeping your sourdough desserts fresh. Choose containers that are airtight, moisture-proof, and seal well. Glass or plastic containers with tight lids are best for storing these treats.

Shelf Life Information

The shelf life of your sourdough desserts varies based on the dessert type, storage method, and environment. Generally, they can last up to 3 days at room temperature, 5 days in the fridge, and 2 months in the freezer. Here’s a table showing the shelf life of different sourdough desserts:

Dessert TypeRoom TemperatureRefrigeratorFreezer
Sourdough Cookies3 days5 days2 months
Sourdough Cakes2 days4 days1 month
Sourdough Pastries1 day3 days1 month

By following these storage and preservation tips, you can enjoy your sourdough desserts for longer. This way, you can keep their quality and flavor intact.

Conclusion: Mastering the Art of Sourdough Desserts

The world of sourdough desserts is vast and exciting. It offers endless possibilities, from classic treats to innovative creations. The unique flavors and textures of sourdough open up a world of possibilities.

If you love baking, or just starting out, keep exploring sourdough dessert recipes. Try new things and let your creativity shine. You’ll make treats that will impress everyone you share them with.

Mastering sourdough desserts takes dedication and patience. Learn new techniques, use seasonal ingredients, and solve any problems that come up. With each try, you’ll get better and discover new flavors.

Keep baking and sharing your sourdough desserts online. Connect with other bakers and share your passion. Together, we can make sourdough dessert baking even better.

FAQ

What is the difference between regular desserts and sourdough desserts?

Sourdough desserts use a sourdough starter for a tangy flavor and chewy texture. This is different from desserts made with regular yeast or baking powder. The fermentation process makes sourdough desserts more digestible and may offer health benefits.

How do I get started with baking sourdough desserts?

First, you need a healthy sourdough starter. Feed and care for it over time. Once it’s thriving, start trying different sourdough dessert recipes. Adjust ingredients and techniques to get the results you want.

What are some classic sourdough cake recipes to try?

Try making chocolate sourdough cake, vanilla bean sourdough pound cake, or fruit-filled sourdough coffee cake. These recipes show how sourdough can make desserts rich, moist, and flavorful.

Can I use sourdough discard in dessert recipes?

Yes, you can! Use sourdough discard in pancakes, waffles, muffins, and even brownies and cakes. It’s a great way to use up discard and get the most from your starter.

What are some advanced sourdough dessert techniques I should know?

Learn advanced techniques like lamination for flaky pastries. Also, master proofing times and temperature control for the perfect rise and texture in your desserts.

How can I troubleshoot common issues with sourdough desserts?

Common problems include dense textures, sour flavors, and moisture issues. Try adjusting ingredients, proofing times, and baking temperatures. Understanding sourdough baking science can help solve these problems.

Crumbl Cookie Recipe: Bake the Perfect Cookies at Home

crumbl cookie recipe

So, why do crumbl cookies have so many fans in the United States? It’s because of their special flavors and soft texture. Now, you can make these delicious cookies at home with the right ingredients and techniques. This article will show you how.

The crumbl cookie recipe has become a hit worldwide. By using the tips in this article, you can make cookies that will wow your loved ones. So, let’s start making crumbl cookies and uncover their secrets.

Key Takeaways

  • Learn the basics of the crumbl cookie recipe and its unique characteristics
  • Discover the essential ingredients and equipment needed to bake crumbl cookies at home
  • Master the techniques for achieving the perfect soft-baked texture and flavor combinations
  • Get tips on how to customize your crumbl cookie recipe with different flavors and toppings
  • Find out how to store and freshen your crumbl cookies to maintain their quality and texture
  • Explore the various crumbl cookie flavors and recipes that you can try at home

The Story Behind Crumbl Cookies’ Success

Crumbl cookies have become a global hit with their unique crumbl cookie flavors and fresh take on cookie shops. Starting small, they’ve grown into a national favorite. Fans rush to try their latest flavors.

So, what makes Crumbl cookies stand out? They use top-quality ingredients and mix flavors in new ways. Whether you want something classic or something bold, Crumbl has it all.

From Small Shop to National Sensation

Crumbl’s success comes from blending tradition with innovation. They offer a new crumbl cookie flavors every week. This keeps their menu exciting and quality high, pleasing their loyal fans.

What Makes Crumbl Cookies Special

Several things make Crumbl cookies a hit. These include:

  • Unique and delicious flavor combinations
  • High-quality ingredients
  • Innovative approach to the traditional cookie shop
  • Rotating selection of crumbl cookie flavors

The Weekly Flavor Rotation Concept

Crumbl’s weekly flavor change is a big reason for their success. It keeps their menu fresh and exciting. This encourages fans to keep coming back for more.

Essential Equipment for Baking Crumbl-Style Cookies

To make the perfect Crumbl cookie, you need the right tools. A digital scale helps with exact measurements. A stand mixer makes mixing easier. And a baking sheet with parchment paper ensures even baking. These tools help you make cookies that are both tasty and have the right texture, using top-notch crumbl cookie ingredients.

Here’s what you need to start:

  • Digital scale
  • Stand mixer
  • Baking sheet
  • Parchment paper
  • Measuring cups and spoons
  • Whisk
  • Rubber spatula

With the right gear and crumbl cookie ingredients, your cookies will be yummy and look great. Always choose fresh, quality ingredients for the best taste.

Investing in the right tools and crumbl cookie ingredients will help you bake amazing Crumbl-style cookies. With time and effort, you’ll get better at baking. Soon, you’ll be making delicious treats for your loved ones.

Must-Have Ingredients for the Perfect Crumbl Cookie Recipe

To make delicious Crumbl cookies, you need the right ingredients. A crumbl cookie tutorial will show you how. But first, you must know what to use. The basic ingredients are all-purpose flour, baking soda, salt, granulated sugar, brown sugar, and butter.

For special add-ins and toppings, you can get creative. Try chocolate chips, nuts, sprinkles, or candy pieces. Online tutorials or your own experiments can help you find unique flavors.

Base Cookie Ingredients

  • All-purpose flour
  • Baking soda
  • Salt
  • Granulated sugar
  • Brown sugar
  • Butter

Special Add-ins and Toppings

  • Chocolate chips
  • Nuts
  • Sprinkles
  • Candy pieces

To learn how to make crumbl cookies, quality matters. Fresh ingredients make a big difference. Always check expiration dates and store them well.

Ingredient Quality Tips

Choose fresh, high-quality ingredients for the best taste and texture. With the right stuff and practice, you’ll master Crumbl cookies. Follow a tutorial, and you’ll make treats that everyone will enjoy.

Mastering the Basic Crumbl Cookie Dough

To make the basic Crumbl cookie dough, you need the right ingredients and techniques. A good crumbl copycat recipe will help you get the perfect texture and flavor. Start by getting all the ingredients, like high-quality flour, sugar, and butter.

Here are some tips for making the basic Crumbl cookie dough:

  • Use room temperature ingredients for smooth dough.
  • Avoid overmixing to prevent tough cookies.
  • Use both white and brown sugar for a rich flavor.

By following these tips and a reliable crumbl copycat recipe, you’ll make delicious cookies. Stay tuned for the next section on mixing and shaping.

Step-by-Step Mixing and Shaping Technique

To make the perfect crumbl cookie, follow a specific mixing and shaping method. This method includes mixing ingredients in the right order, portioning the dough, and shaping the cookies into perfect circles. By mastering this technique, you can make delicious crumbl dessert ideas just like the originals.

The crumbl cookie recipe needs a certain mixing order. Start by creaming the butter and sugar together. Then, add the eggs and vanilla extract. Finally, mix in the flour, salt, and any extra ingredients. Don’t overmix the dough, as it can make the cookies tough.

Proper Mixing Order

  • Cream the butter and sugar
  • Add the eggs and vanilla extract
  • Gradually mix in the flour, salt, and additional ingredients

After mixing the dough, portion it out into individual cookies. Use a cookie scoop or spoon to make uniform balls of dough. Place these balls on a baking sheet lined with parchment paper, leaving space for them to spread while baking.

Cookie Portioning Guide

To get perfect circles, use a cookie scoop or spoon to portion the dough. You can also shape the cookies into uniform circles using a glass or cup.

Cookie SizePortion Size
Small1 tablespoon
Medium2 tablespoons
Large3 tablespoons

By following these steps and using the right crumbl dessert ideas, you’ll make delicious cookies that will impress everyone. Don’t forget to try different flavors and ingredients to create unique crumbl cookie recipe variations.

Baking Temperature and Timing Secrets

To get the perfect Crumbl cookies, mastering baking temperature and timing is key. The right mix of these can highlight the special qualities of crumbl cookie flavors. Baking at 375°F (190°C) for 10-12 minutes, or until they’re lightly golden, is a good starting point.

The baking time can change based on the crumbl cookie ingredients used. This includes the sugar type or add-ins like nuts or chocolate chips. To get the best results, watch your cookies closely and adjust the time if needed. Here are some tips:

  • Use a thermometer to ensure your oven is at the correct temperature.
  • Rotate your cookie sheet halfway through the baking time to promote even cooking.
  • Keep an eye on your cookies’ texture and color, and remove them from the oven when they’re lightly golden brown.

By following these tips and experimenting with different baking temperatures and times, you’ll be well on your way to creating delicious Crumbl cookies. Remember to always use high-quality crumbl cookie ingredients for the best flavor and texture.

Popular Crumbl Cookie Flavors to Try at Home

Exploring how to make crumbl cookies opens up a world of possibilities. You can mix and match ingredients to craft your own crumbl copycat recipe.

Let’s dive into some favorite Crumbl cookie flavors to try at home. These include:

  • Chocolate Chip: a classic favorite that combines the richness of chocolate with the sweetness of sugar
  • Pink Sugar: a sweet and tangy flavor that’s perfect for those who love a little extra sparkle in their cookies
  • Specialty Seasonal Variations: from pumpkin spice to peppermint, these limited-edition flavors are sure to add some excitement to your cookie-baking routine

By following these tips and experimenting with different flavors, you can create your own delicious crumbl copycat recipe. Enjoy the perfect cookies at home. Whether you’re a seasoned baker or just starting out, the key is to have fun and be creative.

Decorating Tips for Professional-Looking Results

To get a professional look on your Crumbl cookies, you need to learn decorating techniques. With the right tools and practice, you can make amazing crumbl dessert ideas. Start by getting a good set of piping bags and tips. These help you make detailed designs on your cookies.

A crumbl cookie tutorial is great for learning new techniques and getting ideas. You can find many tutorials online with step-by-step guides and tips. Some popular techniques include:

  • Using colored sugar for detailed designs and patterns
  • Adding sprinkles or nonpareils for a festive look
  • Creating fancy borders and edges with piping bags and tips

Always use top-quality ingredients and tools for the best results. With practice and patience, you can make Crumbl cookies that look like they were made by a pro.

By following these tips and practicing, you can make stunning crumbl dessert ideas that everyone will love. So, why not try decorating your own Crumbl cookies today? With a crumbl cookie tutorial and some practice, you can make your cookies look amazing.

Storage and Freshness Guidelines

To keep your crumbl cookie recipe fresh, follow these storage tips. Let your cookies cool on a wire rack for 10-15 minutes after baking. This helps keep their texture and freshness.

Use airtight containers to store your cookies. They can stay fresh at room temperature for up to 3 days. Or, freeze them for later. When freezing, put the cookies in a single layer in an airtight container or freezer bag to prevent sticking.

Proper Cooling Methods

Cooling your cookies right is key to keeping them fresh. Use a wire rack or a paper towel-lined plate to cool them. This absorbs moisture and prevents sogginess.

Storage Container Recommendations

Choose an airtight container with a tight-fitting lid for storage. This keeps air and moisture out, keeping your cookies fresh. Glass or plastic containers with airtight lids or freezer bags work well for longer storage.

Freezing Instructions

To freeze your cookies, lay them out in a single layer in an airtight container or freezer bag. Store them in the freezer for up to 2 months. To serve, thaw at room temperature or reheat in the microwave or oven.

Follow these guidelines to enjoy your crumbl cookies longer. Store them in a cool, dry place. Freeze them if you won’t eat them in a few days.

Storage MethodStorage Time
Airtight Container (Room Temperature)Up to 3 days
Airtight Container (Refrigerator)Up to 5 days
Freezer Bag (Freezer)Up to 2 months

Troubleshooting Common Cookie Problems

When baking crumbl cookies, knowing common problems is key. The right crumbl cookie ingredients are crucial. Understanding texture and size issues is important.

Learning how to make crumbl cookies goes beyond just a recipe. It’s about the science behind baking. Knowing what can go wrong helps prevent mistakes and ensures perfect cookies every time.

Texture Issues and Solutions

  • Overmixing: This can make cookies tough. Mix your crumbl cookie ingredients just until they come together.
  • Underbaking: This can make cookies too soft. Bake for the recommended time for the perfect texture.

Size and Shape Corrections

To get the right size and shape, scoop cookie dough into balls of the same size. This ensures even baking and uniform shapes.

Follow these tips and use the right crumbl cookie ingredients for perfect cookies. Always follow the recipe and troubleshoot any issues that come up.

Conclusion: Creating Your Own Crumbl Cookie Magic

Mastering Crumbl-style cookies at home is exciting and rewarding. You learn about key ingredients, techniques, and flavors. This lets you create amazing crumbl copycat recipes that match the bakery’s.

Feel free to try new crumbl dessert ideas and add your twist to classic flavors. Baking Crumbl cookies is all about making each batch your own. Try new ingredient combinations and enjoy the weekly flavor rotation.

Cookie perfection comes from paying attention to details, being patient, and learning from mistakes. With creativity and the right tools, you can make Crumbl cookies at home. Share your creations with family and friends.

So, heat up your oven, get your ingredients ready, and start baking. The world of crumbl cookie baking is full of possibilities. Enjoy the journey and the sweet rewards. Happy baking!

FAQ

What is the secret to making the perfect Crumbl cookie?

To make the perfect Crumbl cookie, use top-notch ingredients. Follow the right mixing and shaping steps. Also, control the baking temperature and time closely. This attention to detail is what makes Crumbl cookies so soft, thick, and chewy.

What are some of the most popular Crumbl cookie flavors?

Favorites include Chocolate Chip and Pink Sugar Cookie. Seasonal hits like Pumpkin Chocolate Chip and Peppermint Bark are also loved. Crumbl’s weekly flavor changes mean there’s always something new to try.

What equipment is needed to bake Crumbl-style cookies at home?

You’ll need a stand mixer, a big baking sheet, parchment paper, and a cookie scoop. Good baking sheets and pans help shape and texture your cookies just right.

How can I achieve the soft, thick, and chewy texture of Crumbl cookies?

The secret is in the mixing and baking. Mix the dough right, with the right ingredients. Baking at the correct temperature and time also matters. This combo gives you that signature Crumbl texture.

Can I freeze Crumbl cookies for later enjoyment?

Yes, you can freeze Crumbl cookies. Cool them down first, then store in an airtight container or bag. To enjoy, thaw at room temperature or warm in the oven for a few minutes.

How can I create my own unique Crumbl cookie flavors?

Baking Crumbl-style cookies at home lets you try new flavors. Start with the basic dough, then add your favorite mix-ins, toppings, and garnishes. The possibilities are endless for creating your own unique flavors.

​Irresistible Mounds Cake Recipe​: Coconut Delight

mounds cake recipe​

What makes a mounds cake recipe​​ unforgettable? It’s the mix of chocolate and coconut’s richness with coconut’s flaky texture. This balance creates a chocolate coconut cake that’s irresistible. With this recipe, you can make a decadent dessert that will wow everyone.

Exploring coconut and chocolate together reveals their magic. The mounds cake recipe​ is a lesson in mixing textures and tastes. It results in a dessert that’s hard to resist. So, what are the secrets behind this beloved coconut cake recipe?

Key Takeaways

  • Learn the basics of the mounds cake recipe​ and its components
  • Discover the importance of balancing flavors and textures in a chocolate coconut cake
  • Explore the world of coconut cake and its various variations
  • Get tips on creating a decadent and irresistible mounds cake recipe
  • Understand the role of coconut cake in the world of desserts
  • Find inspiration for your next baking project with the mounds cake recipe

The Magic Behind Mounds Cake Recipe​

The Mounds candy bar has a rich mounds candy bar history, dating back to the 1950s. Its unique chocolate coconut combination has won over many, leading to the creation of Mounds cake. This cake is a moist, decadent treat that brings together chocolate’s richness and coconut’s flakiness.

At the heart of the Mounds cake are its key flavor components: chocolate and coconut. The chocolate coconut combination is a perfect match, offering a delightful contrast of textures and flavors. The cake’s mounds cake flavors are enhanced by high-quality ingredients, making it unforgettable.

  • Its unique blend of flavors, which sets it apart from other desserts
  • Its moist and fluffy texture, making it a delight to eat
  • Its versatility, allowing it to be served at various occasions, from casual gatherings to special events

The mounds candy bar history has shaped the cake’s flavor profile, with the chocolate coconut combination at its core. As we explore mounds cake recipe​ further, we’ll look at ways to boost its mounds cake recipe​ flavors and make it a standout dessert.

Essential Ingredients for Your Mounds Cake Recipe​

To make a real Mounds cake, you need the right mounds cake ingredients. It’s important to use top-notch chocolate cake ingredients and coconut cake ingredients. High-quality dark chocolate and fresh coconut flakes are key.

Here’s what you’ll need:

  • 1 1/2 cups all-purpose flour
  • 1 cup granulated sugar
  • 1/2 cup unsweetened cocoa powder
  • 1 teaspoon baking powder
  • 1/2 teaspoon salt
  • 1 cup unsweetened coconut milk
  • 1/2 cup shredded coconut
  • 1/4 cup dark chocolate chips

For the coconut cake ingredients, pick a fresh coconut. This will make your cake taste better. For chocolate cake ingredients, choose dark chocolate with lots of cocoa. It makes your cake taste richer.

You’ll also need basic things like eggs, butter, and vanilla extract. With these mounds cake ingredients, you’re all set to bake a tasty Mounds cake.

IngredientQuantity
Flour1 1/2 cups
Sugar1 cup
Cocoa powder1/2 cup
Coconut milk1 cup
Shredded coconut1/2 cup

Kitchen Tools and Equipment Needed

To bake a cake successfully, you need the right tools and equipment. For cake baking equipment, you’ll need mixing bowls, measuring cups, and a good oven. The right baking tools can greatly improve your cake’s quality.

There are also optional tools that can make baking easier. These include a stand mixer, food processor, or pastry brush. While not essential, they can help with texture and appearance.

Basic Baking Tools

  • Mixing bowls
  • Measuring cups
  • Oven
  • Whisk
  • Rubber spatula

Optional Special Equipment

  • Stand mixer
  • Food processor
  • Pastry brush

Preparation Setup Tips

To bake well, set up your kitchen right. Clear a space, preheat your oven, and have everything ready. These tips will help you make a tasty Mounds cake.

ToolDescription
Mixing BowlsStainless steel or glass bowls for mixing ingredients
Measuring CupsAccurate measurements for ingredients
OvenReliable oven for consistent baking results

Preparing the Perfect Chocolate Base

To make a tasty Mounds cake, you need a moist and rich chocolate base. The secret is in the cake batter technique. A good method makes your cake moist and full of flavor. It’s important to mix the ingredients correctly and avoid overmixing to prevent a dense cake.

A moist chocolate cake is key for a great Mounds cake. Use top-notch ingredients like dark chocolate and unsweetened cocoa powder. The flour you choose also impacts the cake’s texture. The right mix of ingredients and techniques will make your chocolate base perfect for your Mounds cake.

  • Use room temperature ingredients for better mixing.
  • Avoid overmixing to prevent a dense cake.
  • Choose the right flour, like all-purpose or cake flour.
  • Don’t overbake to keep your cake moist.

By following these tips and mastering the cake batter technique, you’ll create a delicious and moist chocolate base. This will be perfect for your Mounds cake.

IngredientQuantity
Dark chocolate1 cup
Unsweetened cocoa powder1/2 cup
All-purpose flour2 cups

Creating the Coconut Filling Layer

To make a delicious mounds cake, the coconut filling layer is key. It’s a sweet and creamy contrast to the chocolate base. The secret is finding the right balance of flavors and textures.

The coconut mixture is made with shredded coconut, sweetened condensed milk, and vanilla extract. The best mix is 1 part sweetened condensed milk to 2 parts shredded coconut. This mix makes the filling creamy and sweet, but not too strong.

Coconut Mixture Ratios

  • 1 part sweetened condensed milk
  • 2 parts shredded coconut
  • 1/4 teaspoon vanilla extract

When mixing the coconut mixture, focus on the texture. It should be smooth and creamy, without lumps. Make sure to mix well and adjust the milk to coconut ratio as needed.

Texture Tips

To avoid mistakes, don’t overmix the coconut mixture. This can make it dense and chunky. Also, be careful not to add too much sweetened condensed milk. This can make it too sweet.

Coconut Mixture RatioTextureTaste
1:2Smooth and creamySweet and creamy
1:1Dense and chunkyToo sweet and overpowering

By following these tips and using the right coconut mixture ratios, you can make a delicious coconut filling layer. This layer will add a sweet and creamy contrast to your mounds cake, making it a true delight.

Dark Chocolate Ganache Topping

To finish the mounds cake recipe​, a rich dark chocolate ganache topping is key. This chocolate ganache adds a velvety texture and deep flavor. It’s all about using high-quality dark chocolate and getting the right consistency.

When making the ganache, heating the cream to the right temperature is crucial. Pour it over the chocolate for a smooth and glossy cake topping. Letting it cool to room temperature is important for it to set right.

Here are some tips for working with mounds cake frosting:

  • Use a high-quality dark chocolate with a high cocoa content for the best flavor.
  • Heat the cream to the correct temperature to avoid burning the chocolate.
  • Let the ganache cool to room temperature before using it to frost the cake.

By following these tips and using the right ingredients, you can make a delicious dark chocolate ganache topping. This chocolate ganache adds a luxurious touch to the coconut delight of the mounds cake recipe​.

IngredientQuantity
Dark Chocolate1 cup
Heavy Cream1 cup
Unsalted Butter2 tablespoons

Assembly and Decoration Techniques

Now that you have everything ready, it’s time to make your mounds cake recipe​ come to life. The cake assembly is key, as it lays the groundwork for a beautiful mounds cake presentation. Begin by placing the chocolate base on a plate or cake stand. Then, add a layer of coconut filling, and top it off with dark chocolate ganache.

To give your cake decoration a personal touch, think about using fresh coconut flakes, chopped nuts, or edible flowers. You can also try out various mounds cake presentation styles. For example, go for a rustic, ombre look or a sleek, modern design.

Layer Building Steps

  • Place the chocolate base on a serving plate or cake stand
  • Add a layer of coconut filling, making sure to leave a small border around the edges
  • Top with the dark chocolate ganache, smoothing out any air pockets or imperfections

Presentation Ideas

Get creative with your cake decoration by trying out different presentation ideas, such as:

  1. Using a turntable to showcase your cake from all angles
  2. Adding a sprinkle of edible glitter or dust for extra sparkle
  3. Creating a themed cake topper, such as a miniature coconut tree or a chocolate seashell

Storage and Serving Suggestions

Keeping your mounds cake fresh is key. The right storage and serving can make a big difference. Store your cake in an airtight container at room temperature.

For up to 3 days, keep it at room temperature. For longer storage, refrigerate or freeze it. Refrigeration can last up to 5 days, and freezing up to 2 months.

Temperature Guidelines

Follow temperature guidelines to keep your cake fresh and safe. Bring it to room temperature before serving. This enhances flavors and textures.

Shelf Life Information

Maximize your cake’s shelf life by avoiding sunlight and moisture. Use cake storage containers or keepers for freshness. These tips help you enjoy your cake longer.

For serving, use a cake stand or pedestal to show off your cake. Add fresh fruits or nuts for color and texture. Proper storage and serving impress guests and keep your cake fresh.

Recipe Variations and Substitutions

Exploring mounds cake variations opens up a world of possibilities. You can try different ingredients to create new flavors. For example, use white chocolate or dark chocolate instead of traditional chocolate. You can also add nuts like almonds or walnuts for extra texture and taste.

If you follow a special diet, there are many alternatives. You can use gluten-free flour or vegan chocolate to make your cake fit your needs. Some tasty variations include:

  • Coconut lime mounds cake: Add lime zest and juice to the coconut filling for a zesty twist.
  • Espresso mounds cake: Mix a shot of espresso into the chocolate base for a mocha flavor.
  • Raspberry mounds cake: Add fresh raspberries to the coconut filling for a fruity and sweet treat.

These variations and substitutions let you make a dessert that’s just right for you. Feel free to try new things and share your favorite mounds cake recipe​ with us!

Troubleshooting Common Issues

When making a mounds cake recipe​​, bakers might run into problems. Cake troubleshooting helps solve these issues. One common problem is cake texture issues. These can happen if the ingredients are not mixed right or if the recipe is not followed.

To fix this, it’s important to stick to the recipe. Make sure all ingredients are mixed well together.

Bakers might also face baking problems like uneven cooking or undercooked layers. To solve this, keep an eye on the cake while it’s baking. Adjust the time as needed. Here are some common problems and how to fix them:

  • Crumbly texture: Check ingredient ratios and mixing time
  • Uneven cooking: Adjust baking time and temperature
  • Undercooked layers: Increase baking time or use a water bath

Knowing these issues and how to prevent them can help bakers make a perfect Mounds cake.

IssueCauseSolution
Crumbly textureIncorrect ingredient ratiosCheck recipe and adjust ratios
Uneven cookingIncorrect baking time or temperatureAdjust baking time and temperature

Conclusion

This journey through the mounds cake recipe​ shows us a true celebration of chocolate and coconut. By mastering the chocolate base, coconut filling, and dark chocolate ganache, you’re ready to bake with success.

Whether you’re experienced or new to baking, this recipe is a fun challenge. It will impress your loved ones. From the first bite, you’ll enjoy a world of rich chocolate and toasted coconut.

Now, it’s time to start baking. Get your ingredients ready and preheat your oven. Let’s dive into this sweet adventure together. Enjoy the process, follow the tips, and make a homemade mounds cake recipe​ that will delight everyone. Success and chocolate coconut joy are waiting for you!

FAQ

What is the origin of the mounds cake recipe​ candy bar?

The Mounds candy bar was introduced in 1920 by Peter Paul Manufacturing Company. It has a coconut center coated in dark chocolate. This inspired the mounds cake recipe.

What makes this mounds cake recipe​​ special?

This recipe captures the Mounds candy bar’s flavors. It layers a moist chocolate cake with coconut filling and dark chocolate ganache. The mix of chocolate and coconut is irresistible.

What are the key flavor components in this mounds cake recipe​?

The cake’s deliciousness comes from high-quality chocolate and sweet coconut. The balance of these flavors is key to the authentic Mounds taste.

What tools and equipment are needed to make this mounds cake recipe​​?

You’ll need mixing bowls, a mixer, cake pans, and a spatula. Optional tools include a food processor for coconut and a double boiler for chocolate.

How do I ensure the chocolate base for the mounds cake recipe​ is moist and flavorful?

For a moist base, follow the mixing techniques closely. Use high-quality cocoa powder and melted chocolate for flavor.

What is the best way to achieve the perfect coconut filling layer?

For a great coconut filling, balance the ingredients and texture. Aim for a smooth consistency. Avoid over-mixing and use the right coconut-to-milk ratio.

How do I make the dark chocolate ganache topping?

To make the ganache, use high-quality chocolate and heavy cream. Use a double boiler and cool it to the right consistency for the perfect texture.

How do I assemble and decorate the mounds cake recipe​?

Assemble the cake by layering chocolate cake, coconut filling, and chocolate ganache. Decorate with techniques like smoothing the ganache and adding toasted coconut flakes.

How should I store the mounds cake recipe​, and how long will it keep?

Store the cake in the fridge, covered tightly. This way, it will stay fresh for up to 5 days.

Can I make any variations or substitutions to the mounds cake recipe​?

Yes! Try different chocolates or add flavors like caramel or espresso. For dietary needs, use gluten-free flour or dairy-free chocolate.

What are some common issues I might encounter when making the mounds cake recipe​, and how can I fix them?

Issues like dry cake or problems with the coconut or ganache can happen. We have quick fixes and tips to help you make the perfect Mounds cake.