... >
Edit Content

Food That’s Made from the Heart
We’re all about turning simple ingredients into magical moments. From kitchen newbies to seasoned chefs, our recipes are designed to keep things fun and easy! Let’s cook, laugh, and eat together. 🥰

Contact Us

Discover Irresistible Ricotta Dessert Recipes

ricotta dessert recipes

What makes ricotta desserts so appealing? Is it the creamy texture, the versatility, or the ease of making them at home? Whatever the reason, homemade ricotta sweets hold a special place in many hearts. We’ll explore classic Italian desserts, modern twists, and creative variations that highlight the best of ricotta desserts.

Whether you’re new to baking or experienced, you’ll find inspiration here. This guide focuses on easy ricotta desserts and homemade sweets. It’s perfect for anyone wanting to enjoy the creamy goodness of ricotta.

Key Takeaways

  • Explore a variety of ricotta dessert recipes, from classic to modern twists
  • Learn to make easy ricotta desserts at home with simple ingredients
  • Discover the versatility of ricotta in homemade ricotta sweets
  • Get inspired by creative variations of ricotta-based desserts
  • Find guidance on making delicious and irresistible ricotta desserts
  • Focus on easy ricotta desserts and homemade ricotta sweets for a sweet treat

The Sweet History of Ricotta in Dessert Making

Ricotta cheese has been a key part of Italian desserts for centuries. Its history is both rich and fascinating. This cheese is perfect for making ricotta dessert recipes because of its creamy texture and mild taste.

The story of ricotta cheese starts in ancient Italy. It was first made as a byproduct of cheese making. Italian chefs and bakers soon started using it in desserts like cannoli, cheesecakes, and tiramisu. These ricotta cheese desserts are now beloved in Italian cuisine.

Origins of Ricotta Cheese

Ricotta cheese comes from the whey of milk, leftover from cheese making. This whey is heated and mixed with acid. This causes it to curdle into curds and whey.

The curds are then strained and shaped. This creates the cheese’s unique texture and flavor.

Traditional Italian Ricotta Desserts

Desserts like cannoli, cheesecakes, and tiramisu are classic ricotta dessert recipes. They use fresh ricotta cheese mixed with sugar, eggs, and other ingredients. This makes a creamy and sweet filling.

Evolution of Modern Ricotta Treats

Modern ricotta cheese desserts have introduced new flavors and ingredients. Chefs and food bloggers are always coming up with new creamy ricotta desserts recipes. They share their creations online, inspiring others to try new things.

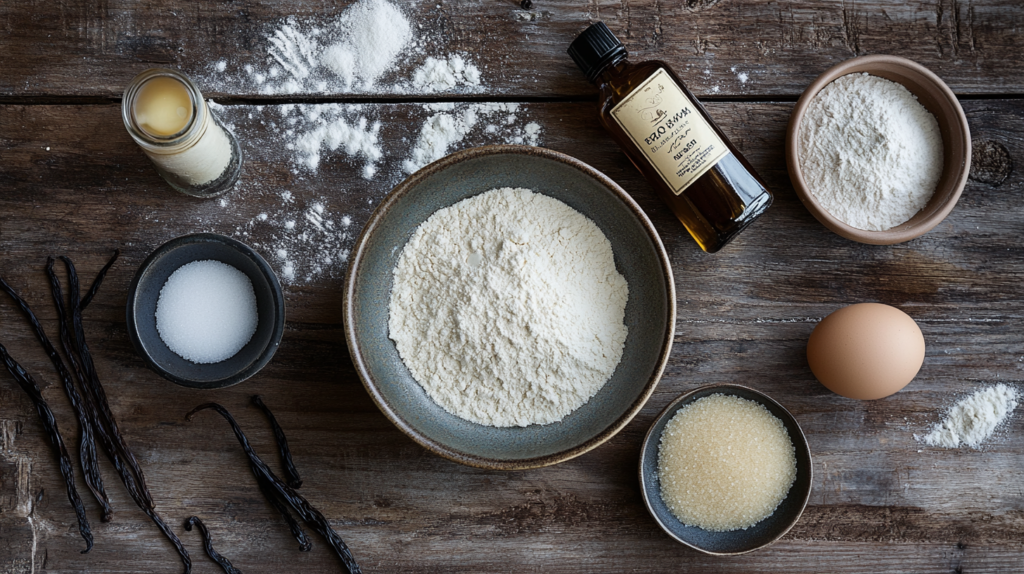
Essential Ingredients for Perfect Ricotta Desserts

To make tasty ricotta desserts, you need the right ingredients. High-quality ricotta cheese is key. Look for brands with a smooth, creamy texture and mild flavor. You can find these at most grocery stores or online. For a simple 3-ingredient biscuit recipe, check out this website.

Other important ingredients include sweeteners like sugar or honey, and flavorings like vanilla or lemon zest. Eggs or cream are also crucial. Freshness and quality matter a lot. Make sure to store ingredients well and use them before they go bad. Some desserts, like cannoli or cheesecake, need special ingredients like chocolate chips or fruit preserves.

Here are some tips for choosing the best ingredients for your ricotta desserts:

  • Opt for high-quality ricotta cheese that is fresh and has a smooth texture
  • Choose sweeteners that complement the flavor of your dessert, such as sugar or honey
  • Use flavorings like vanilla or lemon zest to add depth and complexity to your desserts

By following these tips and using the right ingredients, you’ll make delicious ricotta treats. They’re sure to impress everyone.

Classic Ricotta Dessert Recipes You Must Try

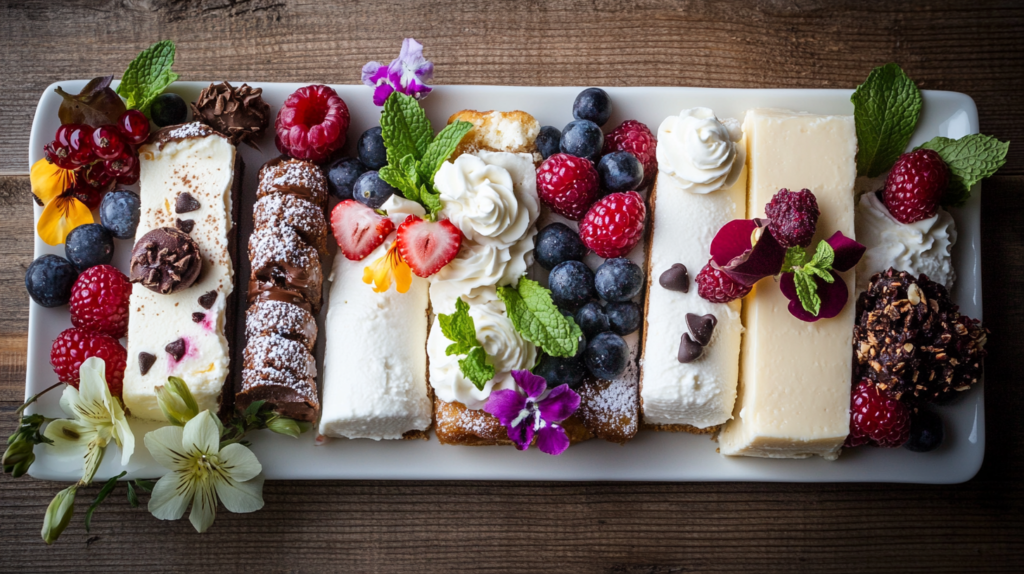
Explore the world of ricotta desserts, where creamy textures meet sweet flavors. These treats are unforgettable. From traditional Italian sweets to modern twists, there’s something for everyone. Whether you’re after easy desserts or homemade sweets, these classic recipes will inspire you.

Some of the most beloved ricotta dessert recipes include:

  • Cannoli with sweet ricotta filling, a classic Italian dessert that’s both crispy and creamy
  • Ricotta cheesecake, a creamy and rich dessert that’s perfect for special occasions
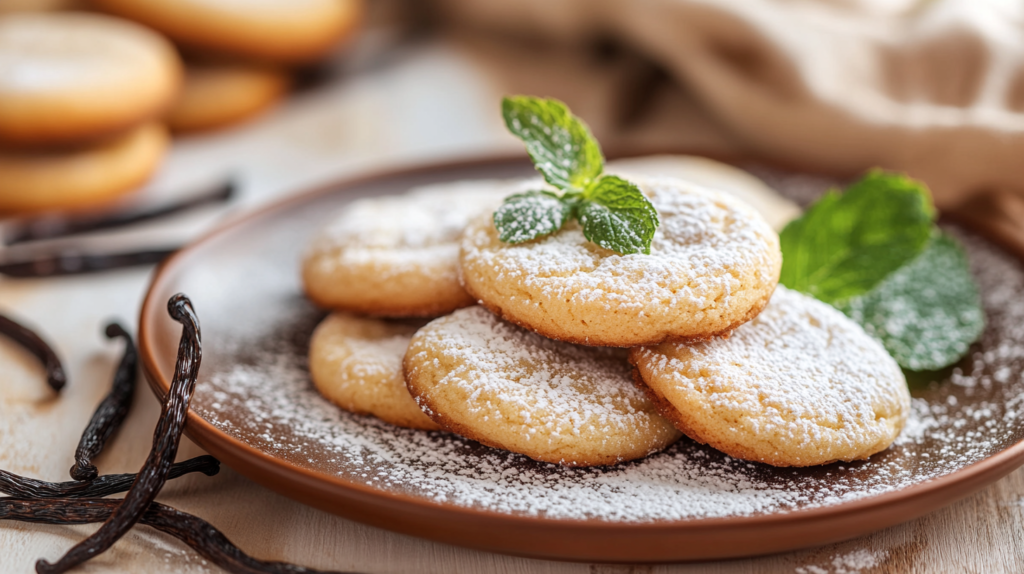
  • Italian ricotta cookies, a crumbly and sweet treat that’s perfect for snacking

These ricotta desserts are not only delicious but also easy to make. With simple ingredients and basic cooking skills, you can create stunning desserts. So why not try them and discover the joy of easy ricotta desserts and homemade sweets?

Whether you’re new to baking or experienced, these classic ricotta desserts will become favorites. So, get creative and indulge in the world of ricotta desserts. Your taste buds will love you for it!

Dessert RecipeIngredientsDifficulty Level
Cannoli with sweet ricotta fillingRicotta cheese, confectioners’ sugar, cinnamonMedium
Ricotta cheesecakeRicotta cheese, cream cheese, eggsHard
Italian ricotta cookiesRicotta cheese, flour, sugarEasy

Quick and Easy Ricotta Dessert Ideas

Looking for a sweet treat? Quick ricotta dessert ideas are perfect. They’re fast to make and great for any time. You can whip up dips or no-bake desserts in minutes.

Some top best ricotta dessert recipes are creamy cheesecakes, fluffy pancakes, and rich chocolate truffles. These delicious ricotta treats will wow anyone. You can also tweak them to fit any event or taste.

Here are a few quick ricotta dessert ideas to start with:

  • Ricotta and fruit parfait
  • No-bake ricotta cheesecake
  • Ricotta chocolate chip cookies

These recipes are easy and tasty. They’re sure to delight everyone. So, why not try them and enjoy the creamy, sweet taste of ricotta?

Healthy Alternatives in Ricotta-Based Sweets

Ricotta-based desserts are a great choice for healthier options. They offer many healthy ricotta dessert choices for different diets. You can make creamy ricotta desserts that are both tasty and good for you.

Looking for healthier ricotta desserts? Start with low-sugar options. Cutting down on sugar makes them better for you. Try using honey or maple syrup instead of sugar. Or, use fruit purees to sweeten them.

Gluten-Free Variations

Gluten-free options are another healthy choice. They’re perfect for those who can’t eat gluten. Use almond flour or coconut flour to make gluten-free cheesecakes or cookies.

Finally,

Protein-Rich Ricotta Treats

Adding protein to ricotta desserts boosts their nutrition. Nuts or seeds can make them creamy and nutritious. Try making ricotta and nut energy balls or adding seeds to cheesecakes.

With these healthy alternatives, you can enjoy ricotta desserts without feeling guilty. Look for low-sugar, gluten-free, or protein-rich options. There are many ways to make ricotta sweets healthier and more nutritious.

Mastering Ricotta Dessert Techniques

To make amazing ricotta dessert recipes, you need to get good at working with ricotta cheese. This means learning how to mix and whip it right, and how to bake and decorate your desserts. With a bit of practice and patience, you can become a pro at making easy ricotta desserts that wow everyone.

Mixing ricotta cheese with sugar, eggs, and flavorings is a key skill. It can be tricky because ricotta cheese is delicate and can separate easily. But, with the right methods and tools, you can make smooth and creamy homemade ricotta sweets that everyone will love.

If you want to get even better at making ricotta desserts, there are lots of online resources out there. You can find high-protein dessert recipes that use ricotta cheese. With a little creativity and trying new things, you can make all sorts of delicious and impressive ricotta desserts.

Here are some tips for getting better at making ricotta desserts:

  • Use high-quality ricotta cheese that’s fresh and has a good texture
  • Try different flavorings and ingredients to find your favorite mix
  • Be patient and take your time to get the techniques right

By following these tips and practicing your skills with ricotta cheese, you can make amazing ricotta dessert recipes that will impress everyone.

Seasonal Ricotta Dessert Variations

Ricotta desserts are perfect for any time of year. Each season brings new chances to make tasty treats. You can mix quick ideas into amazing desserts, from summer fruits to winter warmers.

Seasonal ingredients make the best ricotta desserts. In summer, ricotta pairs well with fresh fruits like strawberries or blueberries. For winter, warm spices like cinnamon add a cozy feel.

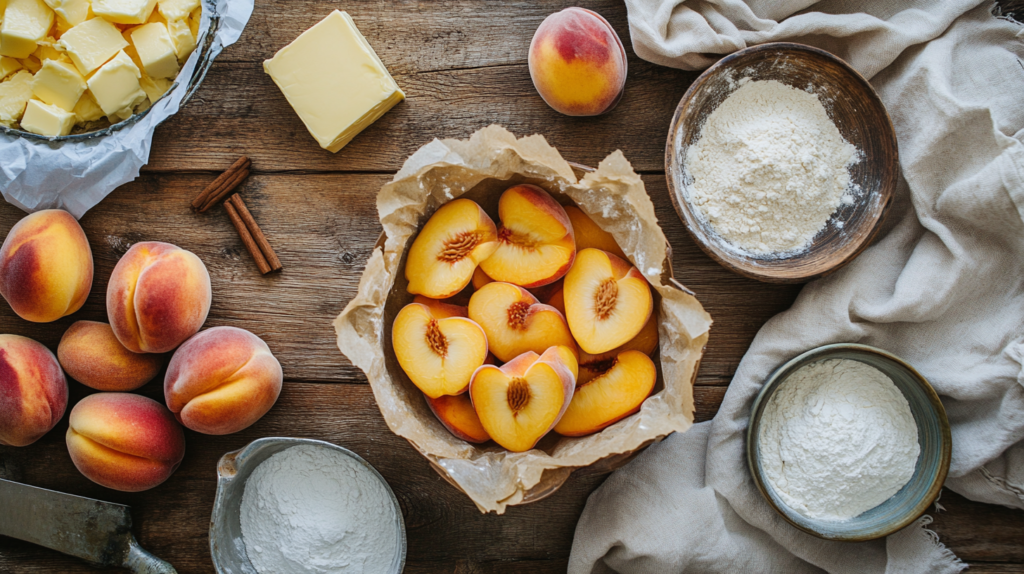
Summer Fruit and Ricotta Combinations

  • Strawberry and ricotta salad with balsamic glaze
  • Blueberry and ricotta tart with a hint of lemon
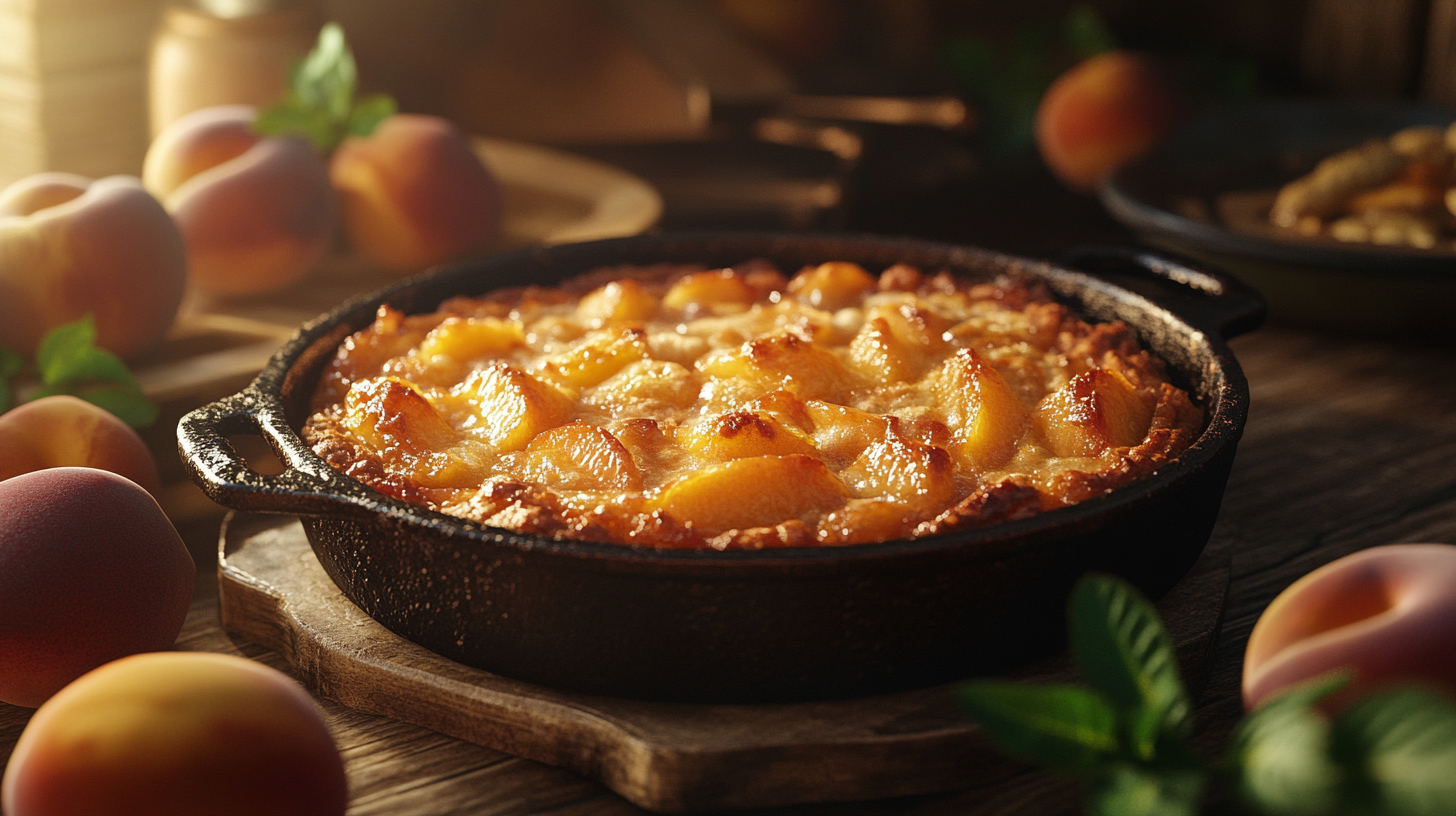
  • Peach and ricotta cobbler with a crunchy oat topping

Seasonal ideas can spark new dessert creations. Ricotta is great for both cool summer treats and warm winter desserts. It’s a versatile ingredient for any season.

Warm Winter Ricotta Treats

When it gets chilly, warm ricotta desserts are perfect. Mix ricotta with cinnamon, nutmeg, honey, or chocolate. These treats will be a hit during winter.

Troubleshooting Common Ricotta Dessert Challenges

When making ricotta dessert recipes, you might face some challenges. To get your easy ricotta desserts just right, let’s tackle common problems and their fixes. Issues like overmixing, underbaking, and wrong ingredient ratios can ruin your dessert.

Understanding texture and consistency is key to making great homemade ricotta sweets. If your ricotta is too runny, it won’t hold its shape. But if it’s too thick, it can become hard and dense. Getting the right consistency is essential.

Here are some common problems and how to solve them:

  • Overmixing: Stop mixing as soon as the ingredients come together.
  • Underbaking: Check your desserts frequently to avoid undercooking.
  • Incorrect ingredient ratios: Double-check your recipe to ensure you’re using the right proportions.

Knowing these common issues and how to avoid them will help you make delicious ricotta dessert recipes. With a bit of practice and patience, you’ll master making easy ricotta desserts and homemade ricotta sweets in no time.

The secret to success is paying attention to details and being open to trying new things. Don’t get discouraged if your first tries don’t work out. With time and practice, you’ll get better at making stunning ricotta dessert recipes that everyone will love.

Common IssueSolution
OvermixingStop mixing as soon as ingredients come together
UnderbakingCheck desserts frequently to avoid undercooking
Incorrect ingredient ratiosDouble-check recipe for correct proportions

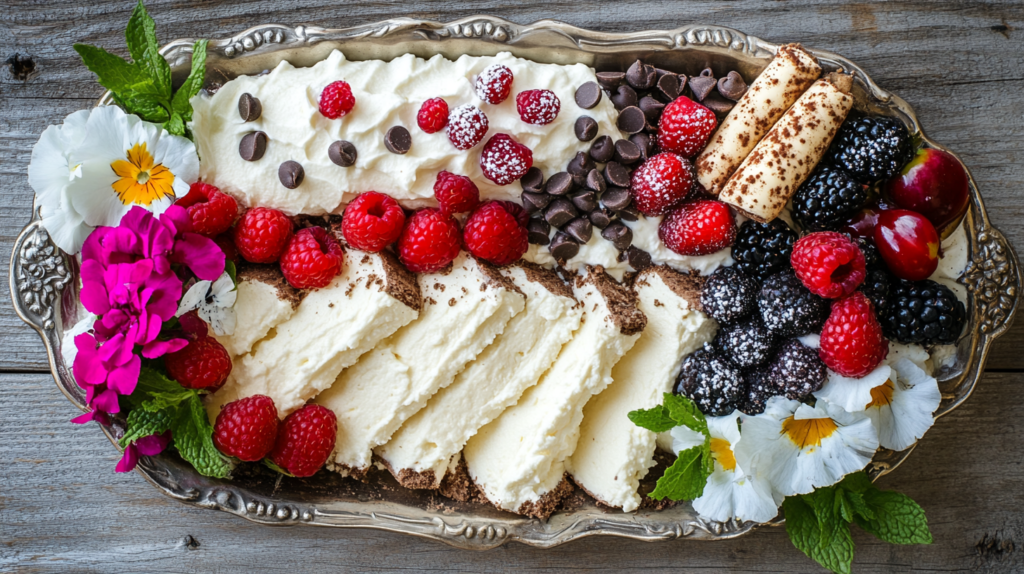
Pairing and Presentation Tips

To make your ricotta desserts stand out, focus on pairing and presentation. The right flavors and looks can transform a simple dessert into a masterpiece. For example, adding a fruit compote or honey can bring elegance to your dish.

For plating, aim for simplicity yet impact. A sprinkle of powdered sugar or fresh berries can brighten up your dessert. Here are some tips to improve your presentation:

  • Use different textures to add depth, like nuts or smooth sauces.
  • Experiment with colors for a beautiful look, pairing creamy ricotta with bright fruits.
  • Try unique shapes, like cookie cutters, to make your desserts fun.

By using these tips, you can elevate your ricotta desserts. Whether they’re creamy or healthy, the right presentation can enhance your guests’ experience.

Storage and Make-Ahead Guidelines

To keep your delicious ricotta treats fresh and tasty, it’s key to follow proper storage and make-ahead guidelines. Whether you’re making quick ricotta dessert ideas or more complex best ricotta dessert recipes, knowing how to store and thaw is crucial.

Here are some tips for storing and preparing your ricotta desserts in advance:

  • Refrigerate your ricotta desserts at a temperature of 40°F (4°C) or below to prevent bacterial growth.
  • Freeze your ricotta desserts at 0°F (-18°C) or below to preserve their texture and flavor.
  • When thawing frozen ricotta desserts, do so in the refrigerator or at room temperature, depending on the type of dessert.

By following these guidelines, you can enjoy your best ricotta dessert recipes anytime. Whether for a special occasion or a quick dessert. Always check the freshness and quality before serving.

With these storage and make-ahead guidelines, you can make and enjoy many quick ricotta dessert ideas and delicious ricotta treats. Try different recipes and storage methods to find what works best for you and your creations.

Dessert TypeStorage MethodShelf Life
CheesecakesRefrigerate5-7 days
CannoliFreeze2-3 months
Ricotta CookiesRoom Temperature3-5 days

Conclusion: Creating Your Perfect Ricotta Dessert Adventure

The world of ricotta desserts is full of fun and endless choices. You can make everything from simple treats to unique sweets. This guide has given you the tools and ideas to start your own ricotta dessert journey.

Creating the perfect ricotta dessert is all about trying new things and being creative. Don’t be scared to try something different. Baking is all about the fun of finding new flavors and techniques.

So, what are you waiting for? Get your ingredients ready, turn on your oven, and let your creativity flow. Enjoy the creamy taste of ricotta and make desserts that everyone will love. Happy baking, and enjoy your delicious ricotta dessert adventure!

FAQ

What are some easy ricotta dessert recipes?

Easy ricotta desserts include no-bake cheesecakes and ricotta-stuffed apples. You can also make ricotta-lemon parfaits. These are quick to make and feature creamy ricotta.

How can I make homemade ricotta sweets?

Making homemade ricotta sweets is simple. Try making ricotta cookies or cake. You can even make cannoli with fresh ricotta. The key is using top-quality ricotta and the right mix of flavors.

What are some quick ricotta dessert ideas for last-minute gatherings?

For quick desserts, make a ricotta dip or layered parfaits. You can also whip up no-bake truffles. These ideas are perfect for sudden guests or quick parties.

What are the best ricotta dessert recipes to try?

Try classic Italian cheesecakes or homemade cannoli. Ricotta-stuffed peaches are also great. These recipes highlight ricotta’s creamy goodness in desserts.

Are there any healthy ricotta dessert options?

Yes, there are healthy options like low-sugar mousse and gluten-free tarts. Ricotta parfaits with protein are also good. These use ricotta with healthier ingredients for a guilt-free treat.

How do I store and make ahead ricotta desserts?

Store ricotta desserts in the fridge in a sealed container for 5 days. For make-ahead, prepare parts like filling or baked parts ahead. Then, assemble and serve on the day. This keeps your desserts fresh and tasty.

Delicious Homemade Vanilla Cookies – Easy Recipe

vanilla cookie recipe

What makes a perfect vanilla cookie recipe? Is it the simple ingredients, the easy prep, or the taste? Homemade cookies, especially vanilla ones, can be a real game-changer. They impress everyone and are fun to make.

A top vanilla cookie recipe should be simple and need few ingredients. Quality ingredients and a straightforward process are key. With practice, you can make delicious cookies that everyone loves. So, what makes a great vanilla cookie recipe, and how can you make it your own? Let’s explore the world of homemade cookies and easy recipes.

Key Takeaways

  • A great vanilla cookie recipe should be easy to make and require minimal ingredients
  • High-quality ingredients are essential for a perfect easy cookie recipe
  • Homemade cookies can be a fun and rewarding experience
  • A simple and reliable vanilla cookie recipe is key to creating delicious treats
  • With a little practice and patience, you can create a batch of delicious homemade cookies
  • Vanilla cookie recipe can be customized to suit your taste preferences
  • Easy cookie recipe can be a great way to spend quality time with family and friends

Why These Vanilla Cookies Will Become Your Family Favorite

The smell of best vanilla cookies baking is amazing. It brings families together, creating lasting memories. These cookies are loved for their perfect taste and texture.

Enjoying vanilla cookie benefits is a special experience. It’s a way to spend quality time with loved ones. Biting into a warm cookie feels like coming home.

Here’s why these best vanilla cookies are so special:

  • Simple yet delicious ingredients
  • Easy to make and customize
  • Perfect for any occasion, from holidays to everyday snacks

Adding vanilla cookie benefits to your baking can change your life. Try these family favorite cookies and see the difference for yourself.

Essential Ingredients for Perfect Vanilla Cookies

To make delicious vanilla cookies, it’s crucial to use the right vanilla cookie ingredients. The quality of these ingredients can significantly impact the taste and texture of the cookies. When it comes to vanilla, there are several options available, including extract, beans, and paste. Each of these options can affect the flavor of the cookies in a unique way.

Using high-quality baking essentials is also vital for achieving the perfect texture and flavor. This includes quality baking ingredients such as flour, sugar, and butter. The type of flour used, for example, can affect the structure of the cookies, with all-purpose flour being a popular choice for its versatility.

Here are some key considerations when selecting vanilla cookie ingredients:

  • Choose high-quality vanilla extract or beans for the best flavor
  • Select the right type of flour for the desired texture
  • Use quality baking ingredients such as real butter and pure sugar

By using the right baking essentials and vanilla cookie ingredients, you can create delicious and flavorful cookies that are sure to please. Remember to always choose quality baking ingredients for the best results.

IngredientDescription
Vanilla ExtractA high-quality extract that adds flavor to the cookies
All-Purpose FlourA versatile flour that provides structure to the cookies
Unsalted ButterA high-quality butter that adds flavor and texture to the cookies

Kitchen Tools You’ll Need

To make delicious vanilla cookies, you’ll need some essential baking tools. These tools help you get the perfect texture and flavor. You’ll need a mixing bowl, whisk, rubber spatula, and a baking sheet.

Here are some of the key tools you’ll need:

  • Mixing bowl
  • Whisk
  • Rubber spatula
  • Baking sheet
  • Measuring cups and spoons

Theseessential kitchen gadgets help you measure, mix, and bake your cookies. If you’re missing some tools, don’t worry. You can find alternatives or substitutes.

For example, a fork can replace a whisk. And you can use a cake pan or muffin tin if you don’t have a baking sheet. Being creative and resourceful with your baking tools is key.

With the right cookie-making equipment and essential kitchen gadgets, you can make amazing vanilla cookies. These will impress your family and friends. So, get creative and try different tools and techniques to find what works best for you.

The Ultimate Vanilla Cookie Recipe

To make delicious vanilla cookies, start by preheating your oven to 375°F (190°C). Prepare your baking sheets with parchment paper. The whole process, from making the dough to baking, takes about 20-25 minutes. You’ll get 12-15 cookies per batch.

When preparing the cookie dough, mixing the ingredients right is key. In a large bowl, whisk together the dry ingredients. Then, cream the butter and sugar in another bowl. Slowly add the dry ingredients to the wet ingredients, mixing until a dough forms.

Preparation Time and Yield

The preparation time for this recipe is about 10 minutes. Baking takes around 10-12 minutes. You can adjust the recipe to make more or fewer cookies, based on your needs.

Mixing the Dough

Mixing the dough is a critical step. Make sure to cream the butter and sugar until they’re light and fluffy. Then, add the dry ingredients gradually. The dough should be smooth and even.

Shaping and Baking Instructions

To shape the cookies, scoop tablespoon-sized balls of dough onto the prepared baking sheets. Leave about 2 inches of space between each cookie. Bake for 10-12 minutes, or until the edges are lightly golden brown. Follow these baking instructions for perfect results.

Pro Tips for Soft and Chewy Texture

To get the perfect soft cookies, you need to know the science behind cookie texture. The secret is in the right mix of ingredients and controlling the temperature. Follow these tips to make soft cookies that everyone will love.

Temperature control is key. Make sure your oven is at the correct temperature. An oven thermometer can help you get consistent results. Also, chilling the dough stops cookies from spreading too much. This ensures they stay chewy.

Temperature Control Secrets

Temperature is crucial for the perfect soft and chewy texture. It keeps cookies from getting too hard or too soft. The type of sugar used also matters. Brown sugar, for example, adds more moisture, making cookies chewier.

Moisture Balance Tips

Getting the right moisture balance is essential for soft and chewy cookies. The dough’s moisture affects the cookies’ texture. Eggs and butter are key to keeping the dough moist. Adjusting their amounts helps achieve the perfect texture. Follow these tips to make delicious soft cookies for any occasion.

Common Baking Mistakes to Avoid

When baking vanilla cookies, it’s easy to make cookie baking errors. These mistakes can change the texture and taste of your cookies. We’ve listed common mistakes to help you troubleshoot cookies and solve baking problem solutions.

Some common mistakes include overmixing the dough, which can make cookies tough. Also, not leaving enough space between cookies on the baking sheet can cause them to spread too much. Knowing these cookie baking errors helps you avoid them and get perfect cookies.

Here are some tips to help you avoid common baking mistakes:

  • Use the right type of flour and leavening agents to ensure that your cookies have the right texture.
  • Don’t overbake your cookies – take them out of the oven when they’re lightly golden brown.
  • Let your cookies cool on the baking sheet for a few minutes before transferring them to a wire rack to cool completely.

By following these tips and being mindful of potential cookie baking errors, you can ensure that your vanilla cookies turn out delicious and perfect every time. Always troubleshoot cookies and find baking problem solutions to get the best results.

MistakeSolution
Overmixing the doughMix the dough just until the ingredients are combined, then stop mixing.
Not leaving enough space between cookiesLeave at least 2 inches of space between each cookie on the baking sheet.

Creative Vanilla Cookie Variations

Vanilla cookies are a classic favorite. But why not try some creative cookie variations? You can change your basic vanilla cookie recipe into many flavored vanilla cookies. Just add different ingredients like chocolate chips, nuts, or fruit zest.

Decorated cookies offer endless possibilities. Use icing, sprinkles, and other decorations to make your cookies stand out. Try using colored sugar or edible markers for a personal touch. With a bit of creativity, your vanilla cookies can become beautiful decorated treats for any occasion.

Flavor Add-ins

  • Chocolate chips: Add a handful of dark or milk chocolate chips to your dough for a delicious twist.
  • Nuts: Walnuts, almonds, or pecans add a nice texture and flavor to your cookies.
  • Fruit zest: Incorporate the zest of oranges, lemons, or limes to give your cookies a burst of citrus flavor.

Decorating Ideas

Get creative with your cookie decorating. Use royal icing for intricate designs or sprinkle colored sugar on top. Try using cookie cutters in various shapes to make your cookies more interesting.

Holiday Special Touches

Make your vanilla cookies extra special for holidays. Add seasonal flavors like cinnamon or nutmeg for a warm winter taste. Use holiday-themed cookie cutters to create fun shapes.

Storage and Freshness Guidelines

To keep cookies fresh, it’s key to know the best storage practices. Storing cookies right can make them last longer. Use airtight containers to keep them fresh when stored at room temperature.

Store cookies in a cool, dry spot, away from sunlight. This keeps them fresh and prevents staleness. Freezing cookies is also a great way to keep them fresh for longer.

Counter Storage Methods

Use an airtight, moisture-proof container for counter storage. This keeps cookies fresh and prevents odors or flavors from other foods. You can also use wax paper or parchment paper to keep cookies from sticking together.

Freezing Instructions

To freeze cookies, place them on a baking sheet and freeze. Then, move them to an airtight container or freezer bag. To enjoy frozen cookies, thaw at room temperature or reheat in the oven.

Follow these easy storage and freezing tips to keep your vanilla cookies fresh. Always store cookies in a cool, dry place. Freezing is a great option for longer storage. With the right storage, your homemade vanilla cookies will stay delicious for weeks.

Nutritional Information and Dietary Modifications

Looking at cookie nutrition facts is key to our health. Vanilla cookies have sugar, butter, eggs, and flour. These can be a problem for those with dietary restrictions. But, making a few changes can make healthier cookie alternatives for everyone.

For those with gluten issues, try almond or coconut flour instead. Using honey or maple syrup can cut down sugar. Vegans can use flaxseed or chia seeds and plant-based milk.

  • Use gluten-free flour for gluten-free cookies
  • Replace traditional sugar with natural sweeteners
  • Choose plant-based milk and egg substitutes for vegan cookies
  • Opt for low-sugar or sugar-free options for health-conscious individuals

By looking at cookie nutrition facts and making small changes, you can make healthy cookie alternatives. These are great for anyone, no matter their dietary restrictions. So, start baking and enjoy the perfect sweet treat for you!

IngredientTraditionalModified
FlourWheat flourGluten-free flour
SugarRefined sugarNatural sweeteners
MilkDairy milkPlant-based milk

Conclusion: Mastering Your Vanilla Cookie Recipe

Baking the perfect vanilla cookies is within reach with the right skills and practice. Every batch you make is a chance to improve your baking confidence and cookie mastery. Don’t worry if your first batch isn’t perfect – just keep trying and enjoying the process.

The real joy of baking homemade cookies is the journey, not just the end result. Cherish the small victories, enjoy the smell of fresh cookies, and share them with your loved ones. With each batch you make, you’ll get better and appreciate the art of baking more.

So, get your oven ready, collect your ingredients, and start baking some irresistible vanilla cookies. The more you bake, the better you’ll get. And you’ll feel more confident in your baking abilities.

FAQ

What are the key ingredients needed to make the perfect vanilla cookies?

To make delicious vanilla cookies, you need a few key ingredients. High-quality vanilla extract or a vanilla bean is a must. You’ll also need all-purpose flour, butter, and sugar (both white and brown).

Baking powder and eggs are also important. They help the cookies turn out right.

How do I achieve the perfect soft and chewy texture in my vanilla cookies?

For soft and chewy cookies, control the baking temperature. Keep the dough’s moisture just right. Chilling the dough before baking helps too.

Adjusting the ingredients can also make a big difference. This way, you get the perfect cookie texture.

Can I customize the basic vanilla cookie recipe to create different flavors?

Yes, you can! The vanilla cookie recipe is a great starting point. Add chocolate chips, nuts, or dried fruit for new flavors.

You can also try different extracts and spices. This lets you create unique tastes.

How should I store homemade vanilla cookies to keep them fresh?

To keep cookies fresh, store them in an airtight container at room temperature. This helps them stay soft and tasty.

If you want to keep them longer, freeze the dough or baked cookies. They can last up to 3 months in the freezer.

Are there any healthy or dietary-friendly modifications I can make to the vanilla cookie recipe?

Yes, you can make healthier vanilla cookies. Try using whole wheat flour instead of all-purpose flour.

Reduce the sugar or use less of it. You can also substitute vegan ingredients. This makes the cookies better for you.

Peach Cobbler Recipe with Cake Mix – Easy & Delicious!

peach cobbler recipe with cake mix

What makes a Peach Cobbler Recipe with Cake Mix special? Using a cake mix can make it easier without losing flavor. This mix of old and new creates a simple yet impressive dessert. It’s perfect for both new and seasoned bakers who want a quick, tasty treat.

A peach cobbler with cake mix is easy to make and offers a fresh twist. It combines the ease of a cake mix with peaches’ natural sweetness. Try this innovative recipe and find a new favorite!

Key Takeaways

  • Using a cake mix can simplify the peach cobbler recipe without sacrificing flavor
  • This easy dessert is perfect for both novice and experienced bakers
  • Cake mix cobbler offers a unique twist on the traditional peach cobbler recipe
  • Natural sweetness of peaches combines perfectly with the simplicity of a cake mix
  • This recipe is ideal for those looking for a quick and delicious treat
  • The cake mix cobbler is a great way to enjoy the classic comfort of peach cobbler with minimal effort

The History and Appeal of Peach Cobbler

Peach cobbler is a classic dessert with a long history. It started in Europe, where fruit was topped with pastry or biscuits. Today, using cake mix benefits makes it easier to bake.

This dessert is loved for its simplicity and quick preparation. It’s a favorite in many American homes. Served warm with vanilla ice cream, it’s a perfect treat.

Origins of Cobbler Desserts

Cobbler desserts have been around since the early American colonies. They were made with fresh fruit, sugar, and pastry. Over time, the recipe changed, and so did the crust.

Why Cake Mix Makes It Better

Using cake mix benefits has changed peach cobbler making. Now, you can make a delicious cobbler quickly. The cake mix adds a moist, fluffy crust that pairs well with peaches.

Traditional vs. Quick Method

Both traditional and quick peach cobbler recipes are popular. The quick method uses cake mix benefits for a faster recipe. Here’s how they compare:

MethodIngredientsPrep Time
TraditionalFresh peaches, sugar, flour, butter30 minutes
QuickCake mix, canned peaches, sugar, butter15 minutes

In conclusion, peach cobbler’s history and appeal come from its long tradition and the ease of using cake mix benefits in quick dessert recipes.

Essential Ingredients for Your Peach Cobbler

To make a delicious peach cobbler, you’ll need the right peach cobbler ingredients. High-quality ingredients are key, including fresh peaches, sugar, and a cake mix for desserts. You can use fresh peaches, frozen, or canned, depending on what you prefer.

Here are the basic ingredients you’ll need:

  • 2 cups of fresh or frozen peaches, sliced
  • 1 package of cake mix, designed for desserts like peach cobbler
  • 1/4 cup of granulated sugar
  • 1/4 cup of all-purpose flour
  • 1/2 teaspoon of cinnamon
  • 1/4 teaspoon of nutmeg
  • 1/4 teaspoon of salt
  • 1/2 cup of unsalted butter, melted

Using a cake mix makes making a peach cobbler easier. It saves you from measuring out flour, sugar, and spices. Just pick a cake mix made for cake mix desserts like peach cobbler.

With these ingredients, you’re ready to make a tasty peach cobbler. It’s perfect for any event. The secret is using high-quality ingredients and a simple recipe, no matter the type of peach you choose.

IngredientQuantity
Peaches2 cups
Cake mix1 package
Sugar1/4 cup
Flour1/4 cup

Kitchen Tools and Equipment Needed

To make a tasty peach cobbler with cake mix, you’ll need some basic kitchen essentials. These baking tools will help you prepare and bake your cobbler perfectly. A baking dish is essential, as it’s where you’ll bake your cobbler in the oven.

Here are some basic utensils you’ll need:

  • Measuring cups and spoons
  • Mixing bowls
  • Whisk
  • Rubber spatula
  • Baking dish

These tools will make measuring, mixing, and baking your cobbler easy. You might also want a stand mixer or food processor to simplify the process.

Basic Utensils Required

You’ll also need a few basic kitchen essentials like an oven and stove. They’re crucial for baking and cooking your cobbler right.

Optional Equipment for Better Results

Optional tools like a pastry brush or silicone mat can improve your results. They help create a golden crust and prevent sticking to the baking dish.

Choosing and Preparing Your Peaches

Choosing the right peaches is key to a great peach cobbler. You can pick between fresh peaches or canned ones. Each has its own benefits, depending on what you like and when peaches are in season.

Fresh peaches are perfect when they’re in season. They taste sweet and tender. But, they take more time to prepare since you have to peel, slice, and remove the pits. Canned peaches, on the other hand, save you time. They’re already peeled and sliced, ready to go.

Fresh vs. Canned Peaches

Here are some things to think about when choosing between fresh and canned peaches:

  • Fresh peaches give a brighter flavor and texture. But, they can be messy and take longer to prepare.
  • Canned peaches are easy to use. They might not taste as sweet or flavorful as fresh ones.

Proper Peach Preparation Techniques

To make the most of your peaches, whether they’re fresh or canned, proper preparation is key. For fresh peaches, wash them well, then peel and slice them into thin wedges. Take out the pits and any extra juice to avoid a soggy cobbler. If you’re using canned peaches, just drain the liquid and rinse them with water to get rid of excess syrup.

By following these steps and picking the right peaches, you’ll make a delicious cobbler. It’s sure to impress your loved ones.

Step-by-Step Peach Cobbler Recipe with Cake Mix

To make an easy peach cobbler, start by preheating your oven to 375°F. Next, mix the cake mix dessert recipe according to the instructions on the box. But add a twist by incorporating fresh peaches into the batter. This will give your cobbler a unique flavor and texture.

Here’s a list of baking instructions to follow:

  • Mix the cake mix with 1 cup of milk and 1/2 cup of melted butter.
  • Add 1 cup of sliced peaches to the mixture and stir well.
  • Pour the mixture into a 9×13 inch baking dish and top with additional sliced peaches.

As you follow these baking instructions, remember to keep an eye on your cobbler while it’s in the oven. The easy peach cobbler should be golden brown on top and bubbly around the edges. With these simple steps, you’ll have a delicious cake mix dessert recipe that’s perfect for any occasion.

By following these steps and using a cake mix dessert recipe, you’ll be able to create a mouth-watering peach cobbler. It’s sure to impress your friends and family. So go ahead, give it a try, and enjoy the warm, fuzzy feeling of baking something truly special.

Tips for the Perfect Cobbler Texture

Getting the perfect cobbler texture can be tricky. But with the right baking tips, you can make a delicious dessert. The secret is to get the fruit filling and cake topping just right. Use the right amount of sugar and flour in the filling, and don’t overmix the batter.

For a golden crust, brush the cobbler’s top with milk or beaten egg before baking. This will make the crust brown and crispy. Here are more tips for the perfect cobbler texture:

  • Use the right type of flour: All-purpose flour is best for cobbler, as it provides a tender and flaky texture.
  • Don’t overbake: Take the cobbler out of the oven when it’s still slightly tender in the center. Overbaking can make the filling too dry and the crust too hard.
  • Let it rest: Let the cobbler rest for at least 30 minutes before serving. This will allow the filling to set and the crust to cool down.

By following these tips and using the right baking techniques, you can create a delicious cobbler. Remember, practice makes perfect. So, don’t get discouraged if your first attempt doesn’t turn out exactly as you hoped. Keep trying, and you’ll soon be a cobbler-baking pro!

Baking TipsBenefits
Use the right amount of sugarBalances the flavor of the filling
Don’t overmix the batterPrevents a tough and dense crust
Brush the top with milk or eggGives the crust a golden brown color

Delicious Variations to Try

Exploring peach cobbler variations opens up a world of possibilities. You can mix in different fruits like blueberries, strawberries, or raspberries. This creates unique fruit cobbler recipes. For a twist, add a pinch of cinnamon or nutmeg for extra flavor.

Some dessert twists include a crunchy topping. Try chopped nuts or oatmeal. Or, use brown sugar or honey instead of regular sugar. You can even use almond or soy milk for a non-dairy version.

  • Blueberry peach cobbler: Add fresh or frozen blueberries to the peach filling for a sweet and tangy flavor combination.
  • Peach cobbler with pecans: Add chopped pecans to the topping for a crunchy texture and nutty flavor.
  • Strawberry peach cobbler: Use a combination of fresh strawberries and peaches for a sweet and fruity flavor.

The secret to great fruit cobbler recipes is to have fun and experiment. Don’t be afraid to try new things and make it your own!

Serving Suggestions and Pairings

Presenting your peach cobbler well is key. A well-presented dessert can make any occasion special. Try adding some creative dessert pairings to enhance your cobbler.

Enjoying peach cobbler with ice cream is a classic choice. Vanilla, caramel, or butter pecan ice cream works great. You can also add fresh fruit, nuts, or candy for a unique taste.

For a stunning cobbler presentation, use garnishes. Fresh fruit like peaches or blueberries add color and flavor. A sprinkle of powdered sugar or caramel sauce can also elevate your cobbler.

Best Ice Cream Combinations

  • Vanilla ice cream with caramel sauce
  • Caramel ice cream with fresh peaches
  • Butter pecan ice cream with powdered sugar

Garnishing Ideas

  • Fresh fruit, such as peaches or blueberries
  • Powdered sugar
  • Caramel sauce
  • Chopped nuts, such as pecans or walnuts
Dessert PairingIce Cream ToppingGarnish
Peach CobblerVanilla Ice CreamFresh Peaches
Peach CobblerCaramel Ice CreamPowdered Sugar

Storage and Reheating Guidelines

To keep your peach cobbler fresh, proper storage is key. You can store leftover cobbler in several ways. For a short time, keep it at room temperature for up to two days. For longer storage, refrigerate or freeze it.

Refrigerate the cobbler in an airtight container for up to five days. Freeze it by wrapping it tightly in plastic or foil for up to three months. To reheat, use the oven or microwave.

Preheat your oven to 350°F (180°C) for 15-20 minutes. This will warm the cobbler and make the fruit tender. You can also reheat in the microwave. Place it in a dish and heat for 30-60 seconds.

Always check the cobbler’s temperature to ensure it’s hot. By following these steps, you can enjoy your cobbler for days.

Proper Storage Methods

  • Short-term storage: room temperature for up to two days
  • Long-term storage: refrigerate or freeze the cobbler

Reheating Instructions

  • Oven: preheat to 350°F (180°C) and bake for 15-20 minutes
  • Microwave: heat for 30-60 seconds, or until the cobbler is warm and the fruit is tender

Seasonal Adaptations for Your Cobbler

To enjoy your favorite cobbler all year, try seasonal desserts with fruit substitutions. This makes a year-round cobbler that’s always fresh.

Here are some fruit substitutions for different seasons:

  • Summer: Peaches, blueberries, or raspberries
  • Autumn: Apples, pears, or cranberries
  • Winter: Quince, persimmons, or citrus fruits
  • Spring: Strawberries, rhubarb, or apricots

By using these seasonal desserts, you can try new flavors and ingredients. This keeps your cobbler exciting and tasty all year. You can make a classic peach cobbler or try something new like strawberry rhubarb.

Remember, the secret to a great year-round cobbler is to be creative and have fun. Don’t hesitate to experiment with different fruit substitutions and flavors. This will make your cobbler truly special.

With a bit of experimentation, you can enjoy your favorite cobbler in any season. This makes it a true year-round cobbler that’s always a pleasure to eat.

SeasonFruit SubstitutionsFlavor Combinations
SummerPeaches, blueberries, raspberriesVanilla, cinnamon, nutmeg
AutumnApples, pears, cranberriesCinnamon, nutmeg, allspice
WinterQuince, persimmons, citrus fruitsOrange, lemon, ginger
SpringStrawberries, rhubarb, apricotsVanilla, strawberry, balsamic glaze

Nutritional Information and Dietary Considerations

It’s key to think about the calories in your peach cobbler. A classic recipe can have 300 to 500 calories per serving. But, you can make healthier versions that fit different diets.

If you follow a gluten-free or vegan diet, there are options. You can swap all-purpose flour for almond or coconut flour. Also, use non-dairy milk instead of regular milk. These changes make a tasty, healthy dessert for your needs.

  • Caloric content: Be mindful of the calorie count in your peach cobbler, especially if you’re watching your weight.
  • Dietary restrictions: Consider using alternative ingredients to accommodate gluten-free, vegan, or other dietary needs.
  • Nutrient balance: Aim for a balance of nutrients, including protein, healthy fats, and complex carbohydrates, to create a satisfying and nutritious dessert.

Caloric Content

The calories in your peach cobbler depend on the ingredients. A traditional recipe can have 300 to 500 calories per serving. But, you can make a version with fewer calories that’s still sweet.

Dietary Modifications

To fit different diets, try these changes:

  • Gluten-free: Swap all-purpose flour for almond or coconut flour.
  • Vegan: Use non-dairy milk and a vegan-friendly sweetener.

Conclusion

As we wrap up our exploration of easy peach cobbler, we hope you’re excited to give it a try. Whether you stick to the classic recipe or try new twists, the most important thing is to have fun. Enjoy every step of the way.

Making a peach cobbler with cake mix is a great way to satisfy your sweet cravings. The mix of juicy peaches and a soft, buttery crust is truly special. It’s a treat that will impress anyone.

So, put on your apron and get ready to bake. With the right ingredients, you’ll create a peach cobbler that everyone will love. Enjoy the homemade taste and share your creations with others. Happy baking!

FAQ

What is the origin of cobbler desserts?

Cobbler desserts come from early American cooking. They were a simple way to use seasonal fruits. The dish evolved from English puddings and pies, adapting to colonial ingredients and baking.

Why does using cake mix make peach cobbler better?

Cake mix adds moisture and richness to peach cobbler. It’s a quick and easy way to prepare the dish. The mix eliminates the need for measuring and combining many ingredients.

What’s the difference between traditional and quick peach cobbler methods?

Traditional peach cobbler uses homemade biscuit or pie dough. The quick method uses cake mix. Cake mix is faster but may lack the authentic flavor and texture of homemade.

What are the essential ingredients for peach cobbler with cake mix?

You’ll need canned or fresh peaches, yellow cake mix, butter or margarine, and optional spices like cinnamon. Vanilla extract or lemon juice can also be added.

What basic kitchen tools are needed to make peach cobbler?

You’ll need a baking dish, mixing bowl, spoon or whisk, and a paring knife. A stand or hand mixer is best for blending the cake mix topping.

How do I choose and prepare the peaches for my cobbler?

Choose ripe, juicy peaches with a bright color. Canned peaches are easy, but fresh peaches need peeling and slicing. Add sugar or lemon juice to enhance flavor.

How do I get the perfect cobbler texture?

Ensure the fruit filling isn’t too watery and the cake topping is light and golden. Adjust liquid, thicken the filling, and watch the baking time for the perfect texture.

What are some tasty variations to try with peach cobbler?

Try apple-peach, blueberry-peach, or mixed berry cobbler. Experiment with spices, liqueurs, or streusel toppings for a unique twist.

What are the best ways to serve and pair peach cobbler?

Serve warm with vanilla ice cream for the best taste. Top with whipped cream, caramel or chocolate sauce, or chopped nuts for a special touch.

How should I store and reheat leftover peach cobbler?

Store in an airtight container in the fridge for up to 4 days. Reheat in the microwave or oven until warm. You can also freeze and thaw when ready.

How can I adapt the peach cobbler recipe for different seasons?

Peach cobbler can be enjoyed all year. Use apples, berries, or pumpkin in different seasons to celebrate the flavors of the moment.

What are the nutritional considerations for peach cobbler?

Peach cobbler is rich, but you can make it healthier. Use low-fat or sugar-free cake mix, reduce butter, and add more fresh fruit for a lighter version.