>
Edit Content

Food That’s Made from the Heart
We’re all about turning simple ingredients into magical moments. From kitchen newbies to seasoned chefs, our recipes are designed to keep things fun and easy! Let’s cook, laugh, and eat together. 🥰

Contact Us

Chicken Dressing Recipe: Mouthwatering Comfort Food

chicken dressing recipe​

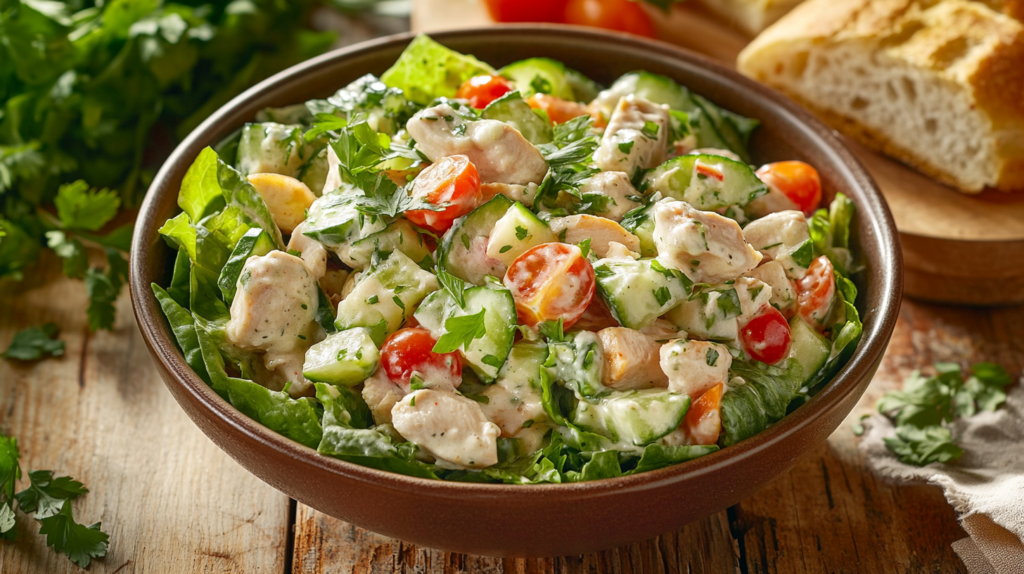
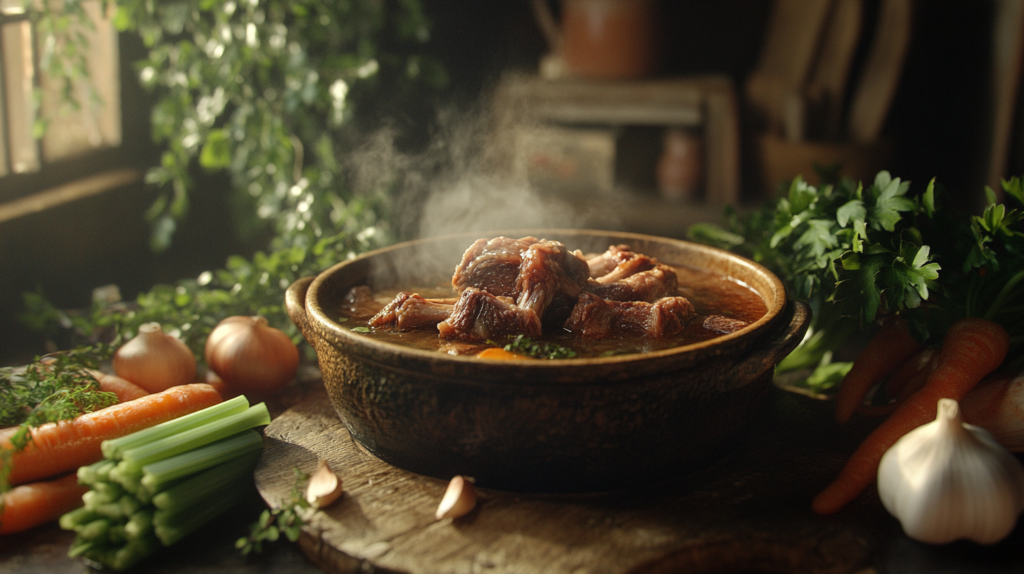
What makes a chicken dressing recipe unforgettable? Is it the tender chicken, savory herbs, and crunchy bread? Or is there something more to this beloved comfort food? For many, homemade chicken dressing is more than a side dish. It’s a warm feeling that brings back memories of family gatherings and cozy nights.

Whether you’re an experienced cook or just starting out, a tasty chicken dressing recipe is a must-have. Its perfect mix of flavors and textures makes it a favorite among home cooks. So, what are the secrets to making the ultimate chicken dressing? Let’s explore.

Key Takeaways

  • A chicken dressing recipe is a classic comfort food that combines tender chicken, savory herbs, and crunchy bread.
  • Homemade dressing for chicken is a staple in many households, evoking memories of family gatherings and cozy nights in.
  • The key to a great chicken dressing recipe lies in its combination of flavors and textures.
  • There are endless variations of chicken dressing recipe, from traditional to modern twists.
  • With a few simple ingredients and some basic cooking skills, anyone can create a delicious homemade dressing for chicken.
  • A chicken dressing recipe is perfect for special occasions, holidays, or everyday meals.

The Art of Perfect Chicken Dressing

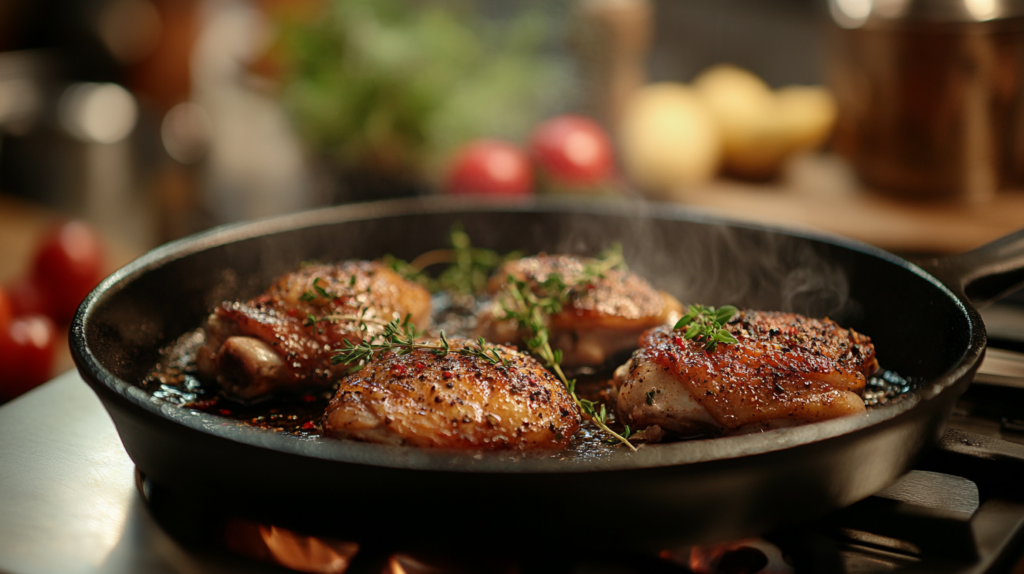
Making delicious chicken dressing is a skill that needs a good grasp of flavors and textures. It’s about finding the right mix of herbs, spices, and seasonings. This mix makes the dish truly tasty. Whether you’re making a classic or trying something new, using quality ingredients and careful preparation is key.

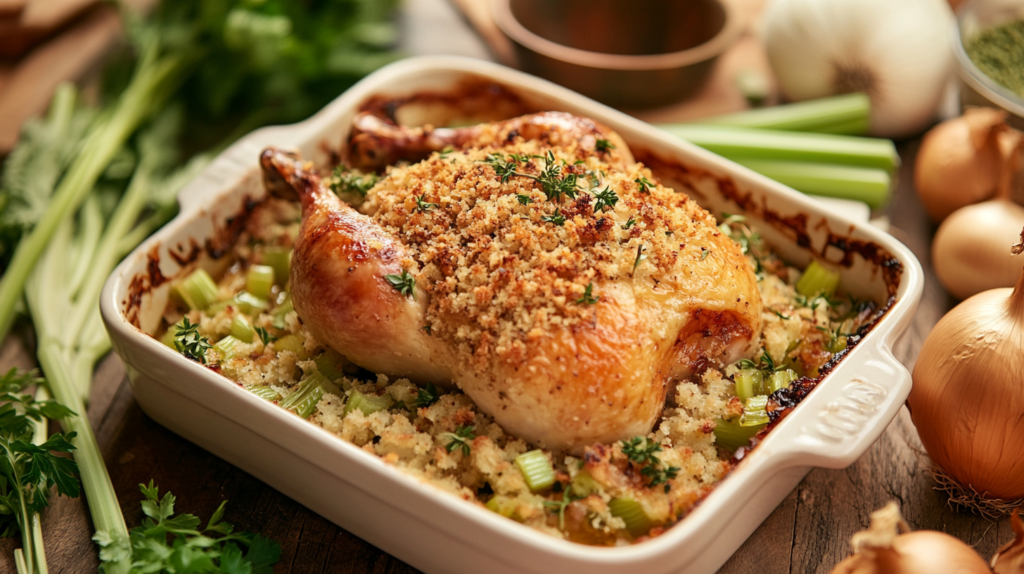
Traditional chicken dressing stands out because of its key ingredients. Classic chicken dressing combines bread, veggies, and seasonings with a savory broth. The bread adds crunch, veggies bring sweetness, and seasonings give it a unique taste and smell.

In the United States, chicken dressing is a cherished comfort food with different styles across regions. Some popular ones include:

  • Southern-style dressing, made with cornbread and a hint of spice
  • New England-style dressing, featuring a blend of herbs and a touch of maple syrup
  • Midwestern-style dressing, made with a hearty mix of bread and vegetables

These regional styles offer unique takes on the classic recipe. They all share a love for traditional chicken dressing and a focus on using the best ingredients.

RegionTraditional Chicken Dressing Style
SouthernCornbread-based, spicy
New EnglandHerb-infused, sweet
MidwesternHearty, bread-based

Essential Ingredients for Classic Chicken Dressing

To make the best chicken dressing, use top-notch ingredients. A classic recipe includes bread, veggies, and spices. Choose fresh and flavorful items for a tasty dish.

Focus on celery, onions, and herbs like sage or thyme. They bring out the chicken’s flavor. You can use store-bought bread or homemade cornbread. The right mix of textures and tastes is key.

  • Fresh bread, preferably a day-old for better absorption
  • Chopped celery and onions for extra flavor
  • Herbs like sage, thyme, or parsley for a savory taste
  • Chicken broth to keep it moist

With these ingredients and a simple recipe, you’ll make a delicious chicken dressing. The secret is using quality ingredients and trying new spices.

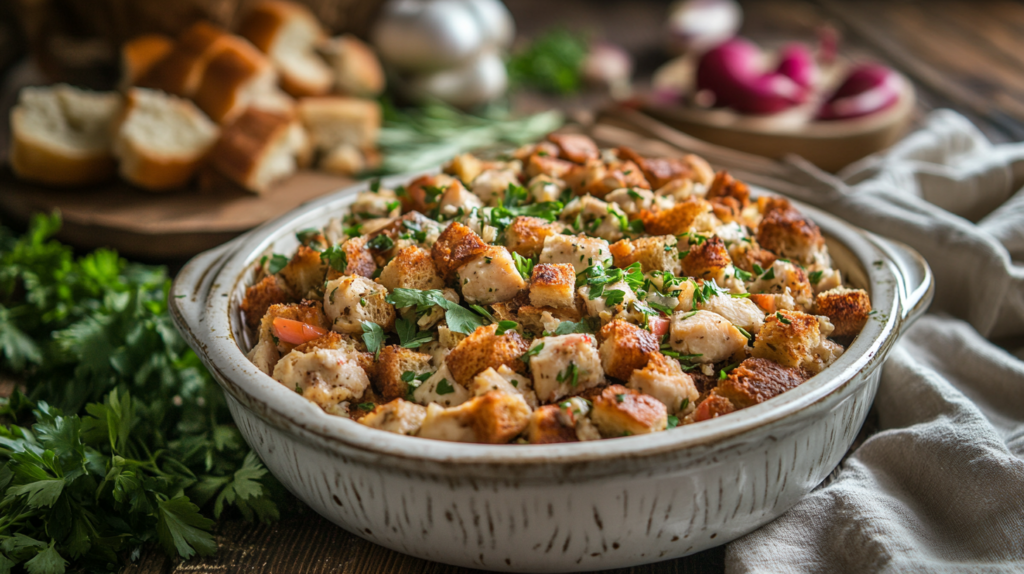
Step-by-Step Chicken Dressing Recipe

To make a tasty homemade chicken dressing, start by preheating your oven to 350°F (175°C). Let’s look at the preparation time and serving size for this recipe.

Preparation Time and Serving Size

This chicken dressing recipe takes about 20 minutes to prepare. It cooks for 35-40 minutes. It serves 6-8 people, great for family dinners or small gatherings.

Cooking Instructions

First, mix 4 cups of cubed bread, 2 tablespoons of butter, and 1 onion, diced. Add 2 celery stalks, diced, and 2 cloves of garlic, minced. In another bowl, whisk 1 egg, 1/2 cup of chicken broth, and 1 teaspoon of poultry seasoning.

Pour the wet ingredients over the dry ingredients. Mix until everything is well combined.

Important Temperature Guidelines

When cooking your homemade chicken dressing, make sure it reaches 165°F (74°C). Use a meat thermometer to check the temperature. Here’s a simple table to help you remember the key temperatures:

IngredientInternal Temperature
Chicken165°F (74°C)
Turkey165°F (74°C)
Dressing165°F (74°C)

By following these simple steps and temperature guidelines, you’ll make a delicious chicken dressing. Use fresh ingredients and avoid overmixing your homemade dressing.

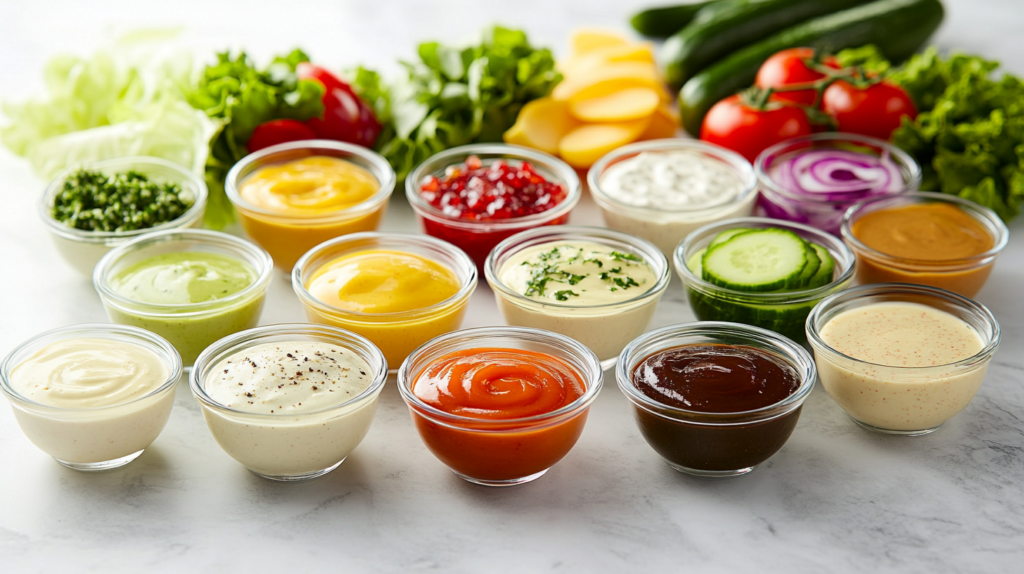
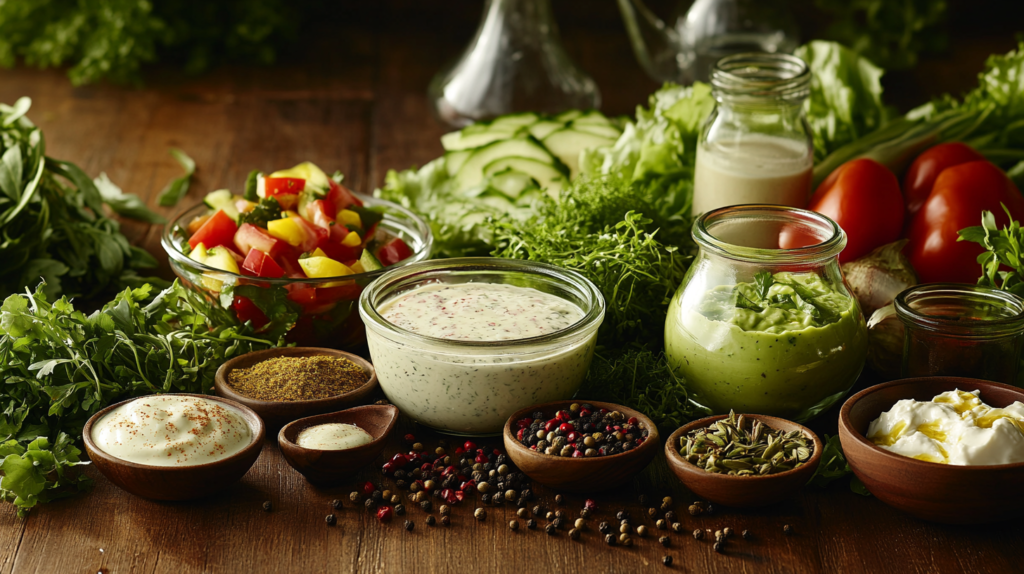
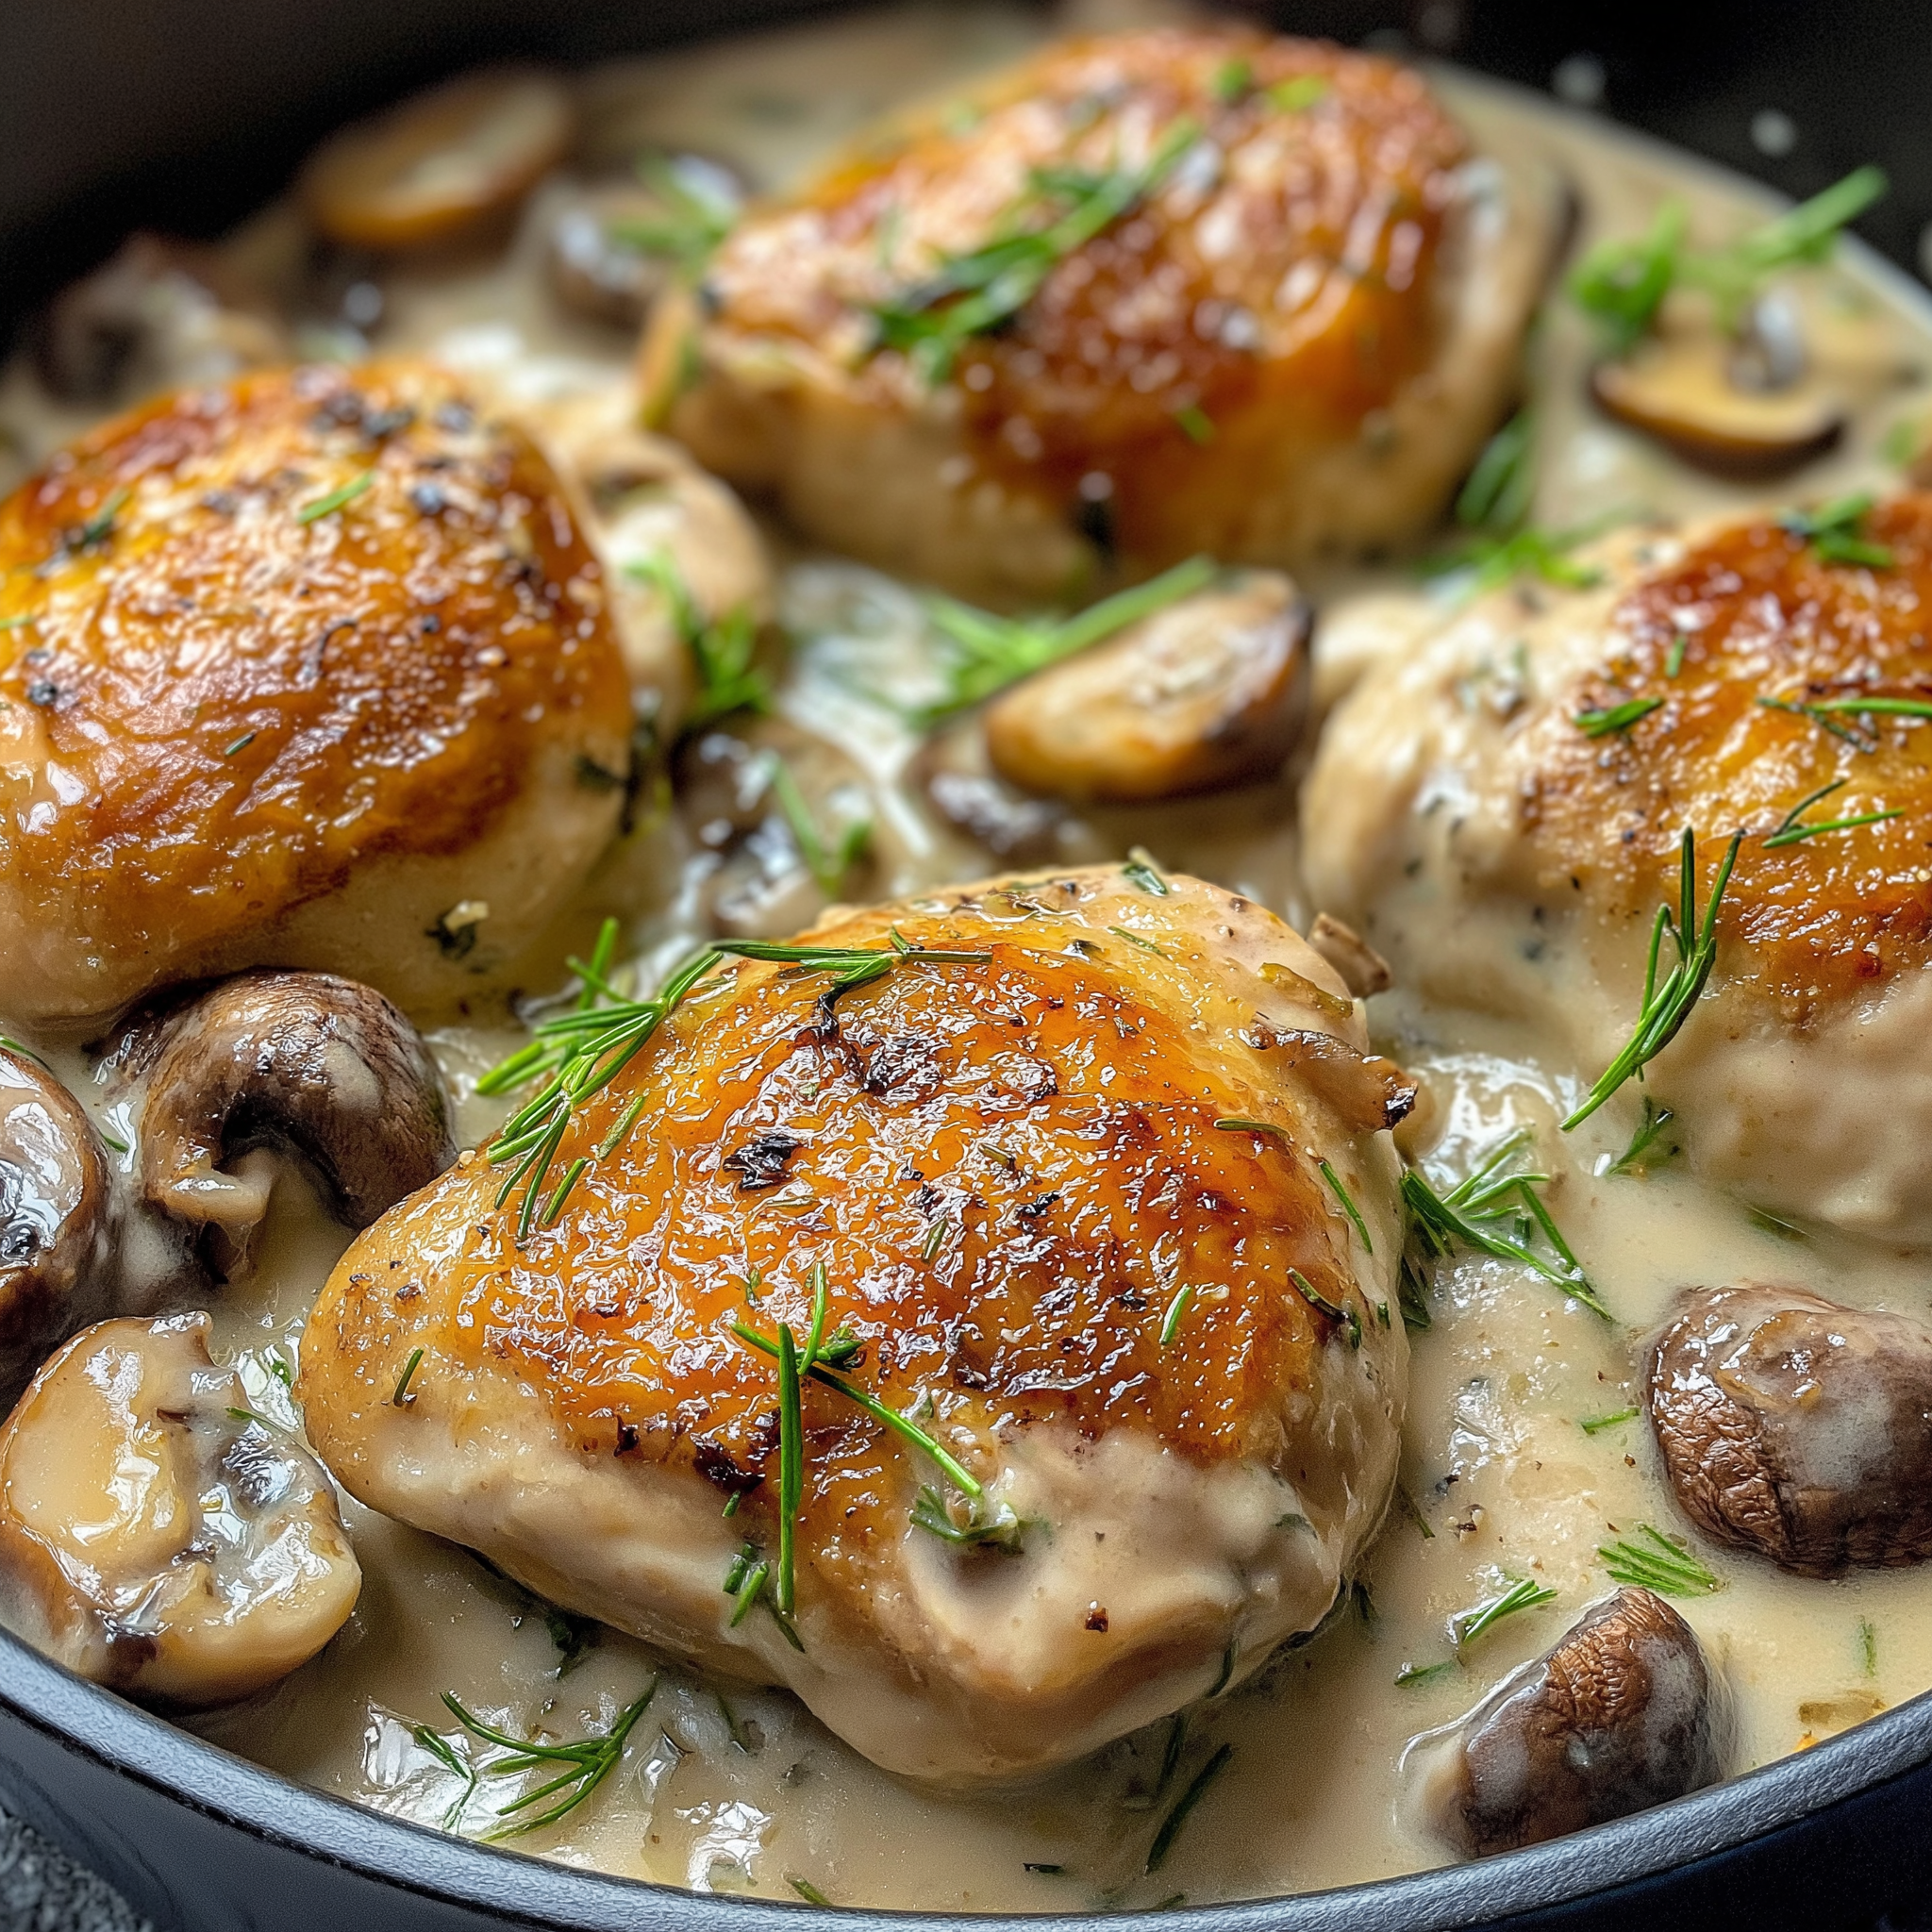
Secret Tips for Moist and Flavorful Dressing

To make a flavorful chicken dressing, focus on the right techniques and ingredients. The key to a moist and delicious dressing is the bread. Choose a bread that’s sturdy yet tender and fresh. For inspiration, check out websites with creative recipes.

The liquid ratio is also crucial. Your dressing should not be too dry or too soggy. Use chicken broth, cream, and melted butter for the perfect balance. Adding sautéed garlic and mushrooms will enhance the flavor.

Seasoning is where you can get creative. Try dried herbs like thyme and sage, and a pinch of salt and pepper. Remember, taste and adjust as you go. This way, you can fine-tune the dressing until it’s just right.

By using these tips, you’ll make a flavorful chicken dressing that will wow everyone. It’s perfect as a side dish or a main ingredient in your recipes. A moist and delicious chicken dressing is always a hit.

Making Your Chicken Dressing Ahead of Time

Preparing chicken dressing in advance saves a lot of time, especially for those with busy schedules. You can enjoy your favorite chicken dressing recipe whenever you like. Just remember to store it in an airtight container in the fridge to keep it fresh and flavorful.

To reheat, you can use the oven or microwave. For the oven, preheat to 350°F (180°C) and heat for 20-25 minutes. For the microwave, heat on high for 30-45 seconds until it’s hot and steaming. Here are some tips for making your chicken dressing ahead of time:

  • Store in an airtight container in the refrigerator for up to 3 days
  • Freeze for up to 2 months and thaw overnight in the refrigerator
  • Reheat to an internal temperature of 165°F (74°C) to ensure food safety

By following these tips, you can enjoy your chicken dressing whenever you want. It’s perfect for any occasion, from special events to weeknight dinners. Your chicken dressing will always be ready to go.

With these tips, making chicken dressing ahead of time is easy. Try it out and enjoy the convenience and taste of an easy chicken dressing recipe.

Storage MethodShelf LifeReheating Instructions
RefrigeratorUp to 3 daysOven: 350°F (180°C) for 20-25 minutes
FreezerUp to 2 monthsMicrowave: high for 30-45 seconds

Common Mistakes to Avoid

When making traditional chicken dressing, it’s easy to make mistakes. These can ruin the dish’s texture and taste. To avoid a dry dressing, don’t over-mix. Also, finding the right balance between wet and dry ingredients is key.

Seasoning is another area to watch. Too little seasoning makes it taste bland, while too much is overpowering. Start with a basic recipe and adjust the seasoning as needed. Here are some common mistakes to avoid:

  • Using low-quality ingredients that can affect the flavor and texture of the dressing
  • Not following the recipe instructions, which can lead to inconsistent results
  • Not testing the dressing as you go, which can make it difficult to adjust the seasoning

By knowing these mistakes, you can make a delicious chicken dressing. Whether it’s traditional or a new twist, focus on the details. With practice, you’ll master making savory chicken dressing.

Creating a great chicken dressing takes effort, but it’s worth it. By avoiding common mistakes and following simple tips, you’ll make a dish everyone will love.

Delicious Variations of Traditional Chicken Dressing

There are many ways to make a popular chicken dressing recipe your own. Traditional chicken dressing is loved by many in America. But, you can add your own twist by using different ingredients and cooking methods.

Start by trying out different regional flavors. For a Southern twist, add spicy sausage or jalapenos for a kick. Or, go for a cornbread version for a crumbly texture.

Southern Style Adaptation

This version adds a spicy kick to traditional chicken dressing. Diced jalapenos or red pepper flakes will make it hot and exciting.

Cornbread Version

Use cornbread for a gluten-free chicken dressing. It’s a great texture and fits dietary needs well.

Gluten-Free Options

For those with gluten intolerance, there are many options. Use gluten-free bread or cornbread and add unique seasonings for flavor.

Other tasty variations include:

  • Adding dried herbs like thyme or rosemary for a savory taste
  • Trying different breads, like whole wheat or sourdough, for texture
  • Adding sautéed vegetables, like onions or bell peppers, for extra flavor and nutrients

Remember, the secret to great chicken dressing is to experiment and have fun. Try new ingredients and flavors to make it your own.

VariationIngredientsInstructions
Southern StyleSpicy sausage, jalapenos, chicken brothCook the sausage and jalapenos in a skillet, then add the chicken broth and bread
Cornbread VersionCornbread, chicken, vegetablesCook the cornbread according to the recipe, then crumble it and mix with the chicken and vegetables
Gluten-FreeGluten-free bread, chicken, spicesCook the chicken and spices in a skillet, then add the gluten-free bread and mix well

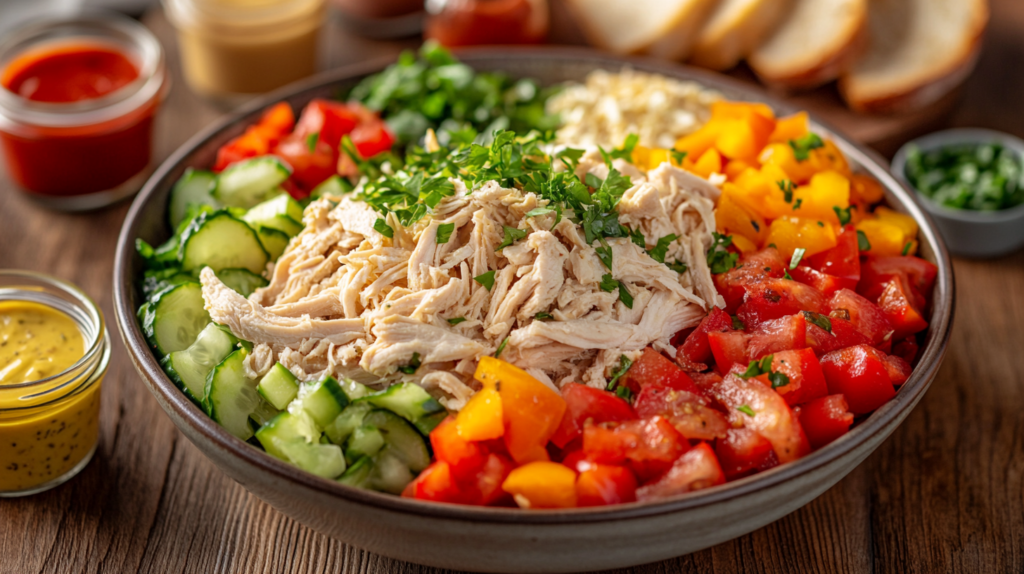
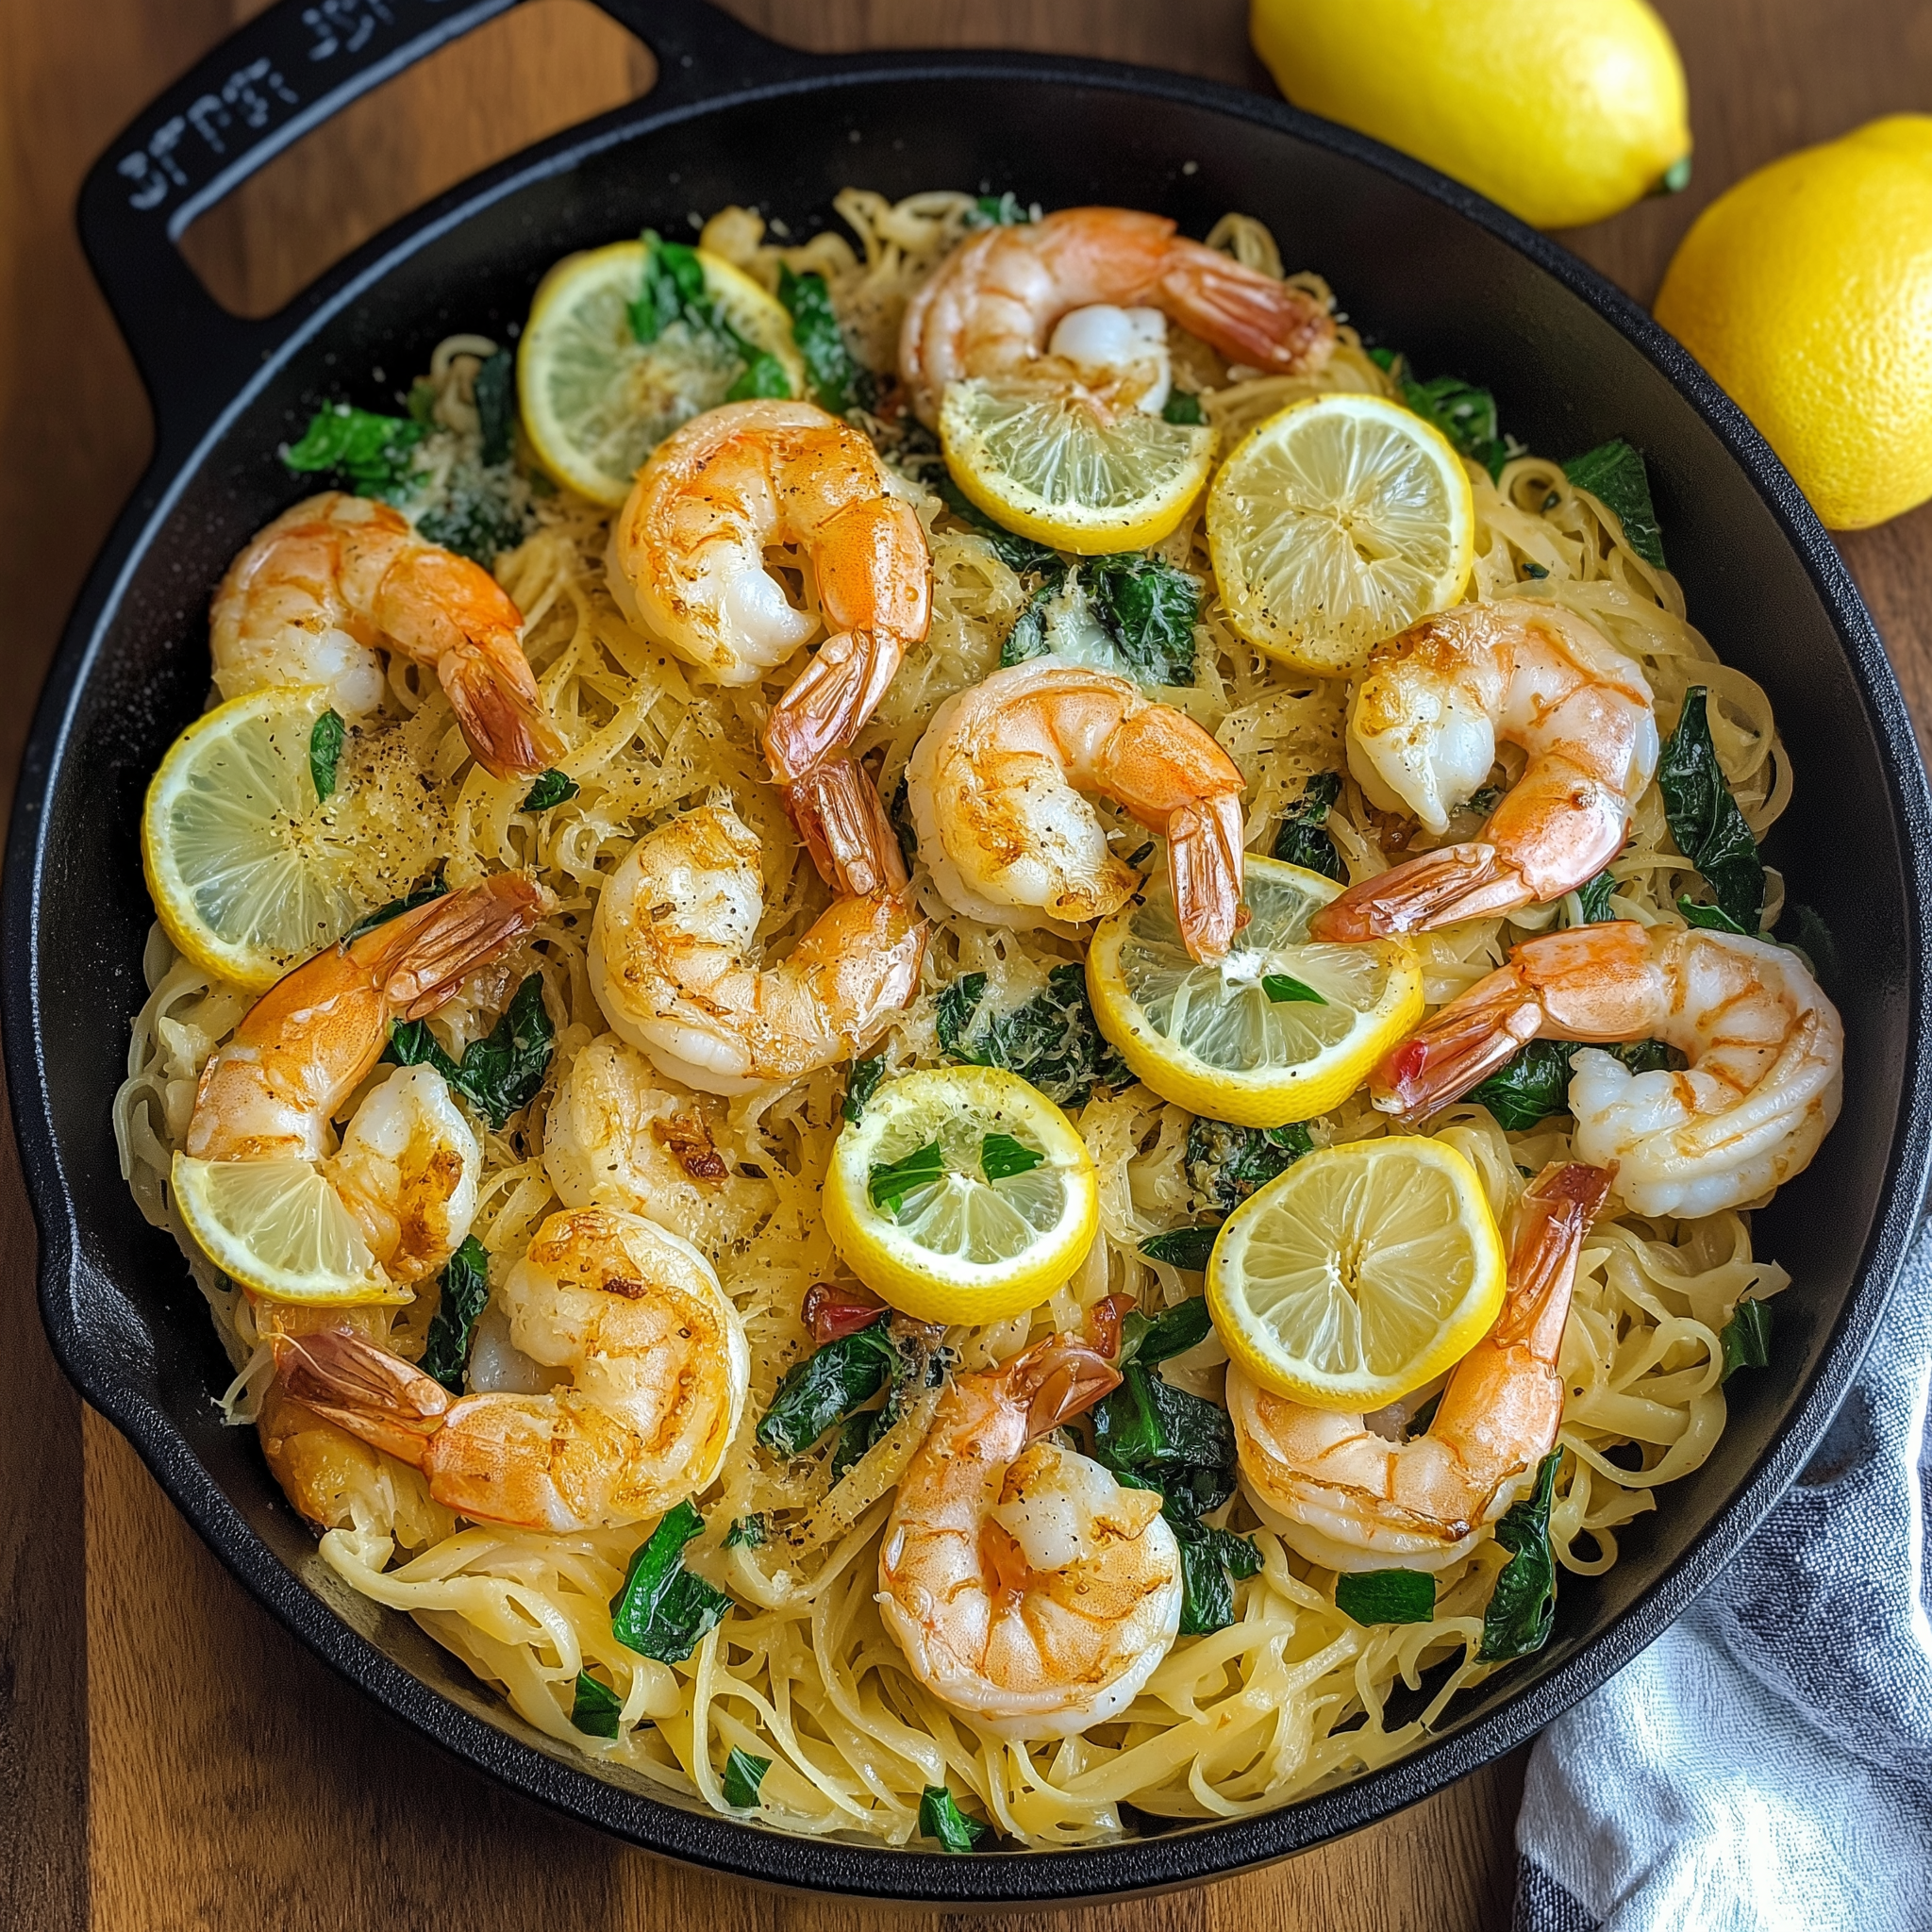
Perfect Pairings and Side Dishes

When serving classic chicken dressing, the right pairings can make it even better. A delicious chicken dressing is best with dishes, veggies, and drinks that bring out its taste.

Some great pairings for chicken dressing include:

  • Roasted turkey or chicken
  • Mashed potatoes or sweet potatoes
  • Steamed vegetables, such as green beans or carrots
  • Fresh salads with a light vinaigrette

To make your meal look good, add a centerpiece. Try a bowl of fresh fruit or a vase with flowers. A refreshing drink, like iced tea or lemonade, also pairs well with classic chicken dressing.

Choosing the right pairings and side dishes makes your meal complete. Whether it’s a holiday feast or a simple dinner, the right pairings can elevate your meal’s flavor and enjoyment.

PairingDescription
Roasted TurkeyA classic combination that is sure to please
Mashed PotatoesA comforting side dish that complements the dressing
Steamed VegetablesA light and healthy option that adds some color to the plate

Troubleshooting Your Chicken Dressing

When you make homemade chicken dressing, you might face some problems. Whether you’re experienced or new to cooking, issues like dryness or sogginess can happen. We’ve got some tips and solutions to help your easy chicken dressing recipe come out just right.

Getting the right texture is key. If your dressing feels too dry, add a bit more chicken broth or melted butter. If it’s too wet, add more bread or cook it a bit longer to dry it out.

Common Texture Problems and Solutions

  • Dryness: Add more chicken broth or melted butter
  • Sogginess: Add extra bread or cook for a few more minutes

Seasoning can also be tricky. To get the perfect flavor, adjust the herbs and spices you use. You can also add salt or pepper to taste. Remember, tasting and adjusting as you go is the secret to a great homemade dressing.

Seasoning Adjustments

By following these tips and making a few simple changes, you can make a delicious homemade chicken dressing. Whether you’re making a classic recipe or trying something new, be patient and flexible. With practice and a bit of experimentation, you’ll soon be a pro at making homemade chicken dressing.

ProblemSolution
DrynessAdd more chicken broth or melted butter
SogginessAdd extra bread or cook for a few more minutes
Flavor imbalanceAdjust seasoning with herbs, spices, salt, and pepper

Nutritional Information and Dietary Considerations

When making a tasty chicken dressing recipe, think about what’s in it. Traditional chicken dressing recipes can have a lot of calories, fat, and salt. But, you can make it healthier by using whole wheat bread and less butter or oil.

A flavorful chicken dressing can be made with herbs and spices. These add taste without extra calories. To make it healthier, use chicken breast and add more veggies like onions and celery. Here are some tips for a healthier chicken dressing recipe:

  • Use whole wheat bread instead of white bread
  • Reduce the amount of butter or oil used in the recipe
  • Add more vegetables, like onions and celery
  • Use leaner proteins, such as chicken breast

If you have dietary restrictions, you can still enjoy a chicken dressing recipe. Use gluten-free bread for those with gluten intolerance. Vegetarians can use plant-based proteins instead of chicken. A few simple changes can make a delicious and flavorful chicken dressing that meets your dietary needs.

A chicken dressing recipe can be both nutritious and tasty. It’s all about using good ingredients and watching portion sizes. Knowing what’s in your food and making a few tweaks can make a flavorful chicken dressing that’s healthy and fulfilling.

NutrientAmount per serving
Calories250-300
Protein20-25g
Fat10-12g
Sodium400-500mg

Conclusion: Mastering Your Homemade Chicken Dressing

We’ve explored the art of making the best chicken dressing recipe together. You now have the knowledge to create your own special version. We’ve shared the key ingredients and steps to make a standout chicken dressing.

Homemade chicken dressing is all about making it your own. Try out different flavors, textures, and styles to find what your family loves. With what you’ve learned, you’re ready to improve your chicken dressing skills and impress everyone.

Now, it’s time to get creative and enjoy the fruits of your labor. Share the joy of your homemade chicken dressing with your loved ones. It’s a moment to cherish. Bon appétit!

FAQ

What makes a great chicken dressing?

A great chicken dressing has the right mix of flavors and textures. It should be moist and taste savory. The seasonings should enhance the chicken and bread.

The dressing should also have a smooth texture that stays together well.

Where does chicken dressing come from?

Chicken dressing comes from Southern cuisine. It’s a comfort food loved across America. Families used stale bread and leftover chicken to make it.

How do I choose the best ingredients for my chicken dressing?

For classic chicken dressing, use fresh, quality ingredients. Choose sturdy bread like white, sourdough, or cornbread. Pair it with juicy chicken.

Season with herbs, spices, and aromatics for the best flavor.

What’s the best way to prepare chicken dressing?

To make perfect chicken dressing, start by cubing the bread. Sauté onions, celery, and seasonings. Then, mix the bread, chicken, and broth carefully.

Bake it at the right temperature until it’s golden and delicious.

How can I make my chicken dressing extra moist and flavorful?

To make chicken dressing moist and flavorful, use the right bread-to-broth ratio. Don’t over-dry the bread. Add sautéed veggies, fresh herbs, and a bit of cream or butter.

Can I make chicken dressing ahead of time?

Yes, chicken dressing is great to make ahead. Prepare it, then store it in the fridge or freezer. Just follow storage and reheating tips to keep it tasty.

What are some common mistakes to avoid when making chicken dressing?

Avoid over-mixing to prevent a dense dressing. Don’t forget to add enough moisture to avoid dryness. Season well and keep it moist while baking.

Can I make variations on traditional chicken dressing?

Yes! Try Southern-style, cornbread, or gluten-free versions. These twists let you add your own flavor to this classic dish.

What are some good side dishes and pairings for chicken dressing?

Chicken dressing goes well with many dishes. Try it with roasted chicken, green beans, mashed potatoes, and salads. Enjoy it with sweet tea or fruity white wine.

How can I troubleshoot any issues with my chicken dressing?

If your dressing has texture or seasoning problems, don’t worry. Adjust the liquid ratio for dryness or sogginess. Fine-tune the seasoning for the perfect taste. A bit of experimentation will fix it.

Is chicken dressing a healthy dish?

Chicken dressing is tasty but can be high in calories and fat. Make it healthier by using whole grain bread, reducing butter or oil, and adding more veggies. This way, it can be part of a balanced diet.

Enjoy a Tasty Chicken Salad Chick Recipe in Minutes

chicken salad chick recipe

What makes chicken salad chick recipes so loved? It’s the mix of flavors and textures that make them delicious. You can make a tasty, healthy meal in just minutes with a homemade recipe. These recipes are perfect for a quick lunch or dinner, needing only simple ingredients and little equipment. Try an easy chicken salad chick recipe today and find a new favorite dish!

Introduction to Chicken Salad Chick

A chicken salad chick recipe is a tasty and easy meal option. Whether you like classic chicken salad or something new, a homemade recipe will satisfy. Its rich flavors and textures have made chicken salad chick recipes a hit in America. So, why wait? Try a chicken salad chick recipe today and enjoy the homemade taste.

Key Takeaways

  • Chicken salad chick recipes are easy to make and require minimal equipment
  • A homemade chicken salad chick recipe can be made in just minutes
  • Chicken salad chick recipes are perfect for a quick lunch or dinner
  • Easy chicken salad chick recipes can be made with simple ingredients
  • Chicken salad chick recipes are a healthy and delicious meal option
  • Homemade chicken salad chick recipes are customizable to your taste preferences

The Story Behind Chicken Salad Chick’s Famous Recipe

Chicken Salad Chick is a favorite restaurant chain known for its tasty chicken salad. The story of their famous recipe is filled with passion, dedication, and a focus on fresh ingredients. It has grown from humble beginnings to a beloved choice for many, offering the best chicken salad chick experience.

The secret to their classic chicken salad chick recipe is a closely guarded secret. But, it’s the unique mix of ingredients and cooking methods that makes it special. This results in a healthy and flavorful chicken salad chick. It’s perfect for a quick lunch or a satisfying dinner.

Origins of the Restaurant Chain

Chicken Salad Chick was started with a focus on serving high-quality food made with love. The chain has grown fast, but it still uses only the freshest ingredients. Today, it’s a top choice for a tasty meal, with many options including the delicious chicken salad chick.

What Makes Their Recipe Special

So, what makes Chicken Salad Chick’s recipe stand out? It’s the unique mix of ingredients and cooking techniques. The recipe is a perfect blend of flavors and textures, making it a joy to eat. Whether you love classic chicken salad or want to try something new, Chicken Salad Chick’s recipe will impress, offering the best chicken salad chick experience.

Essential Ingredients for the Perfect Chicken Salad Chick Recipe

To make a tasty chicken salad chick recipe, you need a few key ingredients. These include cooked chicken breast, mayonnaise, and spices. The secret to a fantastic homemade chicken salad chick is using fresh, top-notch ingredients.

A simple easy chicken salad chick recipe calls for:

  • 1 pound cooked chicken breast
  • 1/2 cup mayonnaise
  • 1/4 cup chopped onion
  • 1/4 cup chopped celery
  • Salt and pepper to taste

When picking your ingredients, choose the freshest ones you can find. For example, fresh parsley or dill add a bright, fresh taste to your chicken salad chick recipe. Feel free to add other ingredients, like diced apples or chopped nuts, to make your recipe unique.

By using these key ingredients and a simple easy chicken salad chick recipe, you can make a delicious meal. It’s perfect for lunch or dinner. Whether you want a classic chicken salad chick or something new, the secret is using quality ingredients and preparing them with care.

Kitchen Tools and Equipment You’ll Need

To make a quick chicken salad chick recipe, you need the right tools. Having these essentials makes preparing the salad faster. This way, you can enjoy a healthy chicken salad chick quickly.

A well-stocked kitchen is key for efficient food prep. For a chicken salad chick, you’ll need basic utensils and some optional equipment. These tools help make the process smoother.

Must-Have Utensils

  • Large bowl for mixing
  • Measuring cups and spoons
  • Whisk or spoon for mixing
  • Cutting board and knife for chopping ingredients

Optional Equipment for Easier Preparation

Some equipment can make prep easier and faster. These include:

  • Food processor for chopping ingredients
  • Stand mixer for mixing the salad
  • Refrigerator for chilling the salad

Storage Containers Recommendations

For storing your chicken salad chick, use airtight containers. This keeps it fresh. Consider these options:

Container TypeSizeMaterial
Plastic container1-2 cupsBPA-free plastic
Glass container1-2 cupsGlass

Step-by-Step Chicken Salad Chick Recipe Instructions

To make a tasty chicken salad chick recipe, start by cooking the chicken. You can boil, bake, or grill it, as you like. Let the chicken cool down before shredding it into small pieces. This is key for a classic chicken salad chick recipe.

Next, get ready the salad ingredients. You’ll need mayonnaise, mustard, chopped onions, and diced celery. Mix these in a bowl until smooth and creamy. Add the shredded chicken and mix well. You can also add chopped hard-boiled eggs or diced pickles for extra flavor. This easy chicken salad chick recipe is perfect for a quick meal.

Now, let’s talk about seasoning. Use salt, pepper, and paprika for flavor. Mix everything and taste it. If needed, add more seasoning. You can also add chopped fresh herbs like parsley or dill for a fresh taste. This chicken salad chick recipe is a healthy and delicious meal option.

Here are some tips for the best chicken salad chick recipe:

  • Use fresh and high-quality ingredients
  • Don’t overmix the salad
  • Add the seasoning to taste
  • Chill the salad in the refrigerator before serving

By following these steps and tips, you can make a delicious classic chicken salad chick recipe. It’s perfect for any occasion. Whether you’re looking for a quick lunch or a healthy dinner, this easy chicken salad chick recipe is a great choice. So, go ahead and try it!

Secret Tips for the Best Chicken Preparation

To make a delicious chicken salad chick recipe, start with the right chicken. Choose high-quality chicken breasts. Cook it well, then cool and shred it perfectly. These tips will help you make a flavorful chicken salad chick dish that everyone will love.

Choosing the Right Chicken

It’s important to pick the best chicken for your salad. Look for high-quality chicken breasts. You can find great chicken recipes online, like the creamy garlic chicken with mushrooms recipe.

Proper Cooking Methods

Cooking the chicken right is key to a best chicken salad chick recipe. Cook the chicken breasts until they’re tender and juicy. You can bake, grill, or sauté them.

Cooling and Shredding Techniques

After cooking, let the chicken cool to room temperature. Then, shred it into small pieces. This makes your delicious chicken salad chick recipe even better. Follow these tips to make a flavorful chicken salad chick dish that everyone will enjoy.

Mixing and Seasoning Your Chicken Salad

To make a tasty chicken salad chick recipe, mixing and seasoning are key. You need to blend chicken, mayonnaise, and spices just right. This creates a mix that’s both tangy and savory. When you’re making a homemade chicken salad chick, taste and adjust as you go. This ensures the flavors are balanced and the seasoning is perfect.

Quality ingredients are crucial for a great easy chicken salad chick recipe. Fresh, high-quality chicken and mayonnaise make a big difference. Adding diced onions, celery, and herbs can also boost the flavor and add crunch.

  • Start with a base of mayonnaise and mix in your diced chicken, onions, and celery.
  • Add some salt, pepper, and any other desired spices, such as paprika or garlic powder.
  • Taste and adjust the seasoning as needed, adding more mayonnaise or spices to achieve the perfect balance of flavors.

By following these tips and using top-notch ingredients, you can whip up a delicious chicken salad chick recipe. It’s perfect for lunch or dinner. Whether you’re making a homemade chicken salad chick or using a store-bought mix, the secret to a great salad is in the mixing and seasoning.

Creative Serving Suggestions and Pairings

There are many ways to serve your quick chicken salad chick recipe. You can make it a healthy option or add twists for more flavor. Here are some ideas to get you started:

Bread and Wrap Options

Try serving your chicken salad on a bed of lettuce or in a whole wheat tortilla. It’s a healthy and easy meal. You can also use it as a filling for sandwiches or wraps.

Side Dish Recommendations

Pair your chicken salad with fruit salad, carrot sticks, or a green salad. You can also serve it with whole grain crackers or chips for a snack.

Garnishing Ideas

Add elegance with fresh herbs like parsley or dill. A sprinkle of paprika or a lemon slice can also add color and flavor.

These ideas will make your chicken salad chick recipe both healthy and flavorful. It’s perfect for any occasion, whether you need a quick meal or a tasty snack.

Storage Tips and Shelf Life

Proper storage is key to enjoying your chicken salad chick recipe. Store it in a sealed container in the fridge at 40°F (4°C) or below. This keeps it fresh and safe.

Your chicken salad chick recipe can stay fresh for 3 to 5 days in the fridge. If you won’t eat it in that time, freeze it. Freezing is a great way to keep it for longer.

Refrigeration Guidelines

  • Store the chicken salad in a shallow, airtight container to prevent moisture and other contaminants from entering.
  • Keep the container away from strong-smelling foods, as chicken salad can absorb odors easily.
  • Label the container with the date it was prepared and what it contains.

Freezing Instructions

To freeze your chicken salad chick recipe, place it in an airtight container or freezer bag. Remove as much air as possible before sealing. Frozen chicken salad can be stored for up to 3 months. When you’re ready to eat it, thaw it in the fridge overnight and stir well before serving.

By following these storage tips and shelf life guidelines, you can enjoy your delicious chicken salad chick recipe for a longer period. This way, you maintain its quality and safety.

Storage MethodShelf Life
Refrigeration3 to 5 days
FreezingUp to 3 months

Healthy Variations and Dietary Modifications

For a healthy chicken salad chick recipe, use low-calorie ingredients and gluten-free options. Here are some tips to make a quick chicken salad chick recipe that fits your diet:

  • Choose lean proteins like chicken breast or turkey breast
  • Opt for low-calorie mayonnaise or Greek yogurt
  • Add lots of fruits and veggies for fiber and nutrients

To make a flavorful chicken salad chick recipe, use herbs and spices for flavor. Instead of salt and sugar, try:

  1. Paprika for a smoky taste
  2. Dill for a fresh, tangy flavor
  3. Garlic powder for an extra kick

With these simple changes, you can enjoy a healthy chicken salad chick recipe. It’s delicious and fits your dietary needs. Whether you want a quick chicken salad chick recipe or a flavorful chicken salad chick recipe, these tips will help you.

Dietary ModificationIngredients to UseIngredients to Avoid
Gluten-freeGluten-free mayonnaise, gluten-free breadRegular mayonnaise, regular bread
Low-calorieLow-calorie mayonnaise, lean protein sourcesRegular mayonnaise, high-calorie ingredients

Conclusion: Mastering Your Homemade Chicken Salad Chick Experience

You now have all the knowledge to make a tasty homemade chicken salad chick recipe. You know how to pick the best ingredients and use secret tips. This means you can make a chicken salad chick as good as the restaurant.

Whether you want an easy chicken salad chick recipe or something healthier, we’ve got you covered. Our detailed instructions will help you every step of the way.

With practice, you’ll enjoy the real taste of chicken salad chick at home. Try different breads, sides, and toppings to make it your own. Your family and friends will love it.

Learning to make chicken salad chick is fun and rewarding. We hope this guide has helped you improve your cooking. Happy cooking, and enjoy your meal!

FAQ

What are the main ingredients in a Chicken Salad Chick recipe?

The main ingredients are cooked and shredded chicken breast, mayonnaise, and chopped onion. You also need celery and seasonings like salt and pepper. Sometimes, herbs or spices are added too.

How do I make the chicken salad chick recipe at home?

First, cook and shred the chicken. Then, mix it with mayonnaise, chopped onion, and celery. Add your favorite seasonings to get the right taste and texture.

What makes the Chicken Salad Chick recipe so special?

It’s special because of its delicious flavors and perfect texture. The recipe uses high-quality, fresh ingredients. It’s a classic favorite among many.

How long does the Chicken Salad Chick recipe last in the refrigerator?

It can last 3-5 days in the fridge if stored properly. Keep it chilled in an airtight container. This helps keep it fresh and safe to eat.

Can I make the Chicken Salad Chick recipe healthier?

Yes, you can make it healthier. Use low-calorie mayonnaise and add more veggies like celery and onions. You can also use Greek yogurt instead of some mayonnaise.

What are some creative ways to serve the Chicken Salad Chick recipe?

You can serve it on croissants, in lettuce wraps, or on crackers. It’s also great with a side salad. Try using it as a filling in stuffed tomatoes or avocado halves for a unique look.

Chick-fil-A’s Signature Salad Dressings: Delicious & Creamy

chick fil a salad dressings

What makes Chick-fil-A’s salad dressings so irresistible? Is it the rich, creamy texture or the burst of flavor? For many, it’s the perfect mix of both. This makes chick fil a salad dressings a staple in their meals.

With a variety of options, there’s something for everyone. You can explore more recipes and cooking ideas at chick fil a salad dressings to find your new favorite.

Key Takeaways

  • Chick-fil-A offers a range of delicious and creamy salad dressings
  • Their salad dressings are a perfect combination of texture and flavor
  • There are various options to choose from, catering to different tastes and preferences
  • Chick-fil-A’s salad dressings are a favorite among many due to their unique taste
  • Exploring different recipes and cooking ideas can help find the perfect salad dressing
  • Understanding the ingredients and nutritional value of chick fil a salad dressings can enhance the dining experience
  • Best chick fil a salad dressings can be discovered by trying out different options and flavors

Understanding Chick-fil-A Salad Dressings: A Flavorful Introduction

Chick-fil-A is famous for its tasty chicken sandwiches. But, they also have a variety of salad dressings that make meals better. With chick fil a salad dressing options, there’s something for everyone. You can choose from classic tastes to lighter, zesty ones.

The story of Chick-fil-A’s dressings is one of innovation and making customers happy. They always aim to offer top-quality products that match what people like. Now, the chick fil a salad dressing flavors are a big part of their menu. They include Avocado Lime Ranch and Honey Mustard, making salads even more delicious.

The History of Chick-fil-A’s Dressing Development

Chick-fil-A’s salad dressings show their commitment to quality and making customers happy. They use only the freshest ingredients and unique flavors. This makes their dressings a key part of the Chick-fil-A brand.

What Makes These Dressings Special

So, what makes Chick-fil-A’s salad dressings stand out? It’s their focus on using the best ingredients and creating unique flavors. Whether you want something classic or something light and zesty, there’s a chick fil a salad dressing option for you.

Current Dressing Lineup Overview

Chick-fil-A’s dressing lineup now includes Avocado Lime Ranch, Garden Herb Ranch, and Honey Mustard. With so many chick fil a salad dressing flavors, you’re sure to find the perfect one for your salad.

The Complete Guide to Chick-fil-A Salad Dressing Options

Choosing the right salad dressing is important, and chick fil a salad dressing ingredients are key. Chick-fil-A has many options, making it hard to pick just one. Each dressing has its own mix of ingredients and calories.

Here are some popular salad dressings at Chick-fil-A:

  • Avocado Lime Ranch Dressing
  • Garden Herb Ranch Dressing
  • Honey Mustard Dressing

Here’s a look at the chick fil a salad dressing calories and ingredients:

Dressing OptionCaloriesIngredients
Avocado Lime Ranch Dressing140Avocado, lime juice, buttermilk, herbs
Garden Herb Ranch Dressing120Buttermilk, herbs, garlic, onion
Honey Mustard Dressing160Honey, mustard, vinegar, spices

Think about the chick fil a salad dressing ingredients and chick fil a salad dressing calories when choosing. This way, you can pick a dressing that tastes good and fits your diet.

Signature Creamy Favorites: Taste Profile Analysis

Chick-fil-A’s creamy dressings are loved by many. Chick fil a salad dressing reviews often highlight their rich texture. These dressings are high in calories but use top-notch ingredients.

Some top creamy dressings include:

  • Avocado Lime Ranch Dressing: a creamy and tangy dressing made with avocado and lime juice
  • Garden Herb Ranch Dressing: a fresh and herbaceous dressing made with garden herbs and a hint of garlic
  • Honey Mustard Dressing: a sweet and tangy dressing made with honey and mustard

Avocado Lime Ranch Dressing

This dressing is a hit, with fans loving its creamy and tangy mix. It’s high in calories but packed with avocado and lime juice.

Garden Herb Ranch Dressing

For a lighter taste, try this dressing. It’s made with fresh herbs and garlic, and has fewer calories than some others.

Honey Mustard Dressing

This dressing is sweet and tangy, perfect for those who enjoy honey. It’s made with quality honey and mustard, and has fewer calories than some.

Light and Zesty Selections for Health-Conscious Diners

Looking for something light? Chick fil a salad dressings have many healthy options. These lighter and zesty choices come in various flavors to please everyone.

Some favorites include:

  • Lemon Pepper Dressing
  • Balsamic Vinaigrette Dressing
  • Light Italian Dressing

These dressings are not only tasty but also lower in calories and fat. They’re perfect for those on a diet.

Chick fil a salad dressings are made with quality ingredients. They have a balanced flavor. The lighter and zesty options are ideal for those who want a tasty salad without sacrificing nutrition.

In conclusion, chick fil a salad dressings have something for everyone. From light and zesty to creamy and rich, there’s a choice for every taste and dietary need. By picking the best options, diners can enjoy a healthy and delicious meal.

Dressing OptionCaloriesFat
Lemon Pepper Dressing707g
Balsamic Vinaigrette Dressing808g
Light Italian Dressing606g

Nutritional Breakdown of Chick-fil-A Salad Dressings

Choosing the right salad dressing is key. Chick-fil-A offers many options. Knowing the chick fil a salad dressing calories and chick fil a salad dressing nutrition facts helps you pick wisely.

Most Chick-fil-A salad dressings have 100 to 200 calories per serving. A serving is usually 1-2 tablespoons. Always check the chick fil a salad dressing nutrition facts to match your diet.

Calories and Serving Sizes

  • Avocado Lime Ranch Dressing: 140 calories per serving
  • Garden Herb Ranch Dressing: 120 calories per serving
  • Honey Mustard Dressing: 160 calories per serving

Dietary Considerations

For those with dietary needs, it’s important to look at the ingredients. Some dressings are gluten-free, while others have a lot of sugar or sodium. Always check the chick fil a salad dressing nutrition facts to find the right fit.

Allergen Information

Chick-fil-A labels their salad dressings with allergen info. This helps those with allergies make safe choices. Always check the chick fil a salad dressing nutrition facts for allergens like soy, dairy, or eggs.

DressingCaloriesServing SizeAllergen Information
Avocado Lime Ranch1401 tablespoonSoy, Dairy
Garden Herb Ranch1201 tablespoonEggs, Soy
Honey Mustard1601 tablespoonSoy, Dairy

Perfect Pairing Guide: Which Dressing for Which Salad

Choosing the right chick fil a salad dressing options can be tough. With many tasty flavors, finding the perfect match for your salad is key. We’ll look at great pairings for Market Salad, Cobb Salad, and Spicy Southwest Salad.

To learn more, visit our website for chick fil a salad dressing flavors and options.

Market Salad Pairings

The Market Salad is a mix of greens, fruits, and nuts. It’s perfect for different chick fil a salad dressing flavors. Here are some top choices:

  • Avocado Lime Ranch Dressing for a creamy and tangy twist
  • Garden Herb Ranch Dressing for a refreshing and herbaceous flavor
  • Honey Mustard Dressing for a sweet and savory combination

Cobb Salad Combinations

The Cobb Salad is a classic with greens, proteins, and cheeses. It needs a dressing that matches its rich taste. Here are some great chick fil a salad dressing options:

  • Avocado Lime Ranch Dressing for a creamy and zesty flavor
  • Garden Herb Ranch Dressing for a fresh and herbaceous taste

Spicy Southwest Salad Matches

The Spicy Southwest Salad is bold and spicy. It needs a dressing that can handle its strong flavors. Here are some chick fil a salad dressing flavors that work well:

  • Honey Mustard Dressing for a sweet and tangy combination
  • Avocado Lime Ranch Dressing for a creamy and spicy twist

How to Store and Serve Your Chick-fil-A Dressings

Storing and serving chick fil a salad dressings right is key. Keep them in the fridge at 40°F (4°C) or below. Always check the expiration date and shake the bottle before using.

There are many ways to use chick fil a salad dressings. You can dip veggies or top your salad. Here are some ideas:

  • Drizzle them over greens
  • Use them as a marinade for grilled chicken or fish
  • Add them to your favorite recipes for flavor

By following these tips, you can enjoy your chick fil a salad dressings longer. Always check the label for storage or serving tips. Don’t be afraid to get creative and find your favorite way to use them.

Beyond Salads: Creative Uses for Chick-fil-A Dressings

Chick-fil-A salad dressings are more than just for salads. Their special chick fil a salad dressing ingredients make them great for dips, sandwich toppings, and more. Many people love their taste and versatility, as seen in chick fil a salad dressing reviews.

Dipping Sauce Applications

Use Chick-fil-A dressings as a dip for chicken nuggets, fries, or veggies. They bring a creamy flavor that goes well with many foods.

Sandwich Enhancement Ideas

Chick-fil-A dressings can make sandwiches better by adding flavor and texture. Try them as a spread or topping on burgers, chicken sandwiches, or wraps.

Home Recipe Inspirations

Chick-fil-A dressings are perfect for making your own recipes. Use them in pasta salads, with baked chicken, or on roasted veggies. They add a tasty twist to many dishes.

Chick-fil-A salad dressings are a tasty addition to any meal. They’re great for dips, sandwich toppings, or as a recipe idea. They’re sure to be a hit.

Making the Most of Your Dressing Choices

Exploring chick fil a salad dressing options can really enhance your salad experience. Try out different chick fil a salad dressing flavors to find your favorite. Think about the salad you’re eating and its ingredients. For instance, a grilled chicken salad might go great with a zesty dressing. On the other hand, a garden salad could pair better with a light vinaigrette.

To get the most out of your chick fil a salad dressing options, here are some tips:

  • Start with a small amount of dressing and add more to taste
  • Experiment with different chick fil a salad dressing flavors to find your favorite
  • Consider the nutritional content of your dressing and choose a lighter option if you’re watching your calorie intake

By following these tips, you can improve your salad experience. Choose a dressing that complements your salad and enhances its flavor. With a bit of experimentation, you’ll find the perfect chick fil a salad dressing for you.

These flavors cater to various tastes and preferences. Whether you prefer something creamy and rich or light and zesty, there’s a chick fil a salad dressing for you.

Dressing FlavorDescription
Avocado Lime RanchA creamy and refreshing dressing with a hint of lime
Garden Herb RanchA classic ranch dressing with a blend of herbs and spices
Honey MustardA sweet and tangy dressing with a hint of honey

Insider Tips for Ordering and Customization

Customizing your salad at Chick Fil A is key. Ask for extra dressing or a certain type of lettuce. This can make your meal even better.

Special Requests and Modifications

Some people like to get extra dressing as a dipping sauce. You can also ask for grilled chicken or salmon in your salad.

Availability Information

Chick Fil A salad dressings are common, but check your local spot. Some dressings, like avocado lime ranch, are only around for a bit.

Seasonal Offerings

Chick Fil A introduces new dressings seasonally. Keep an eye on their website or social media for the latest. You might find your new favorite dressing.

Conclusion: Elevating Your Chick-fil-A Experience with the Perfect Dressing

Exploring Chick-fil-A’s salad dressings shows how the right dressing can make your meal better. Whether you love the creamy Avocado Lime Ranch or the zesty Honey Mustard, there’s something for everyone. Chick-fil-A has a dressing for every taste.

Knowing the nutrition facts and tastes of each dressing helps you choose the best one. You can pair them with salads, sandwiches, or use them as dips. This way, you can make your Chick-fil-A meal a special experience.

Next time at Chick-fil-A, try out their different dressings. Find the one that matches your taste. Enjoy your meal more, knowing you picked the perfect dressing to make it unforgettable.

FAQ

What are the different salad dressing options available at Chick-fil-A?

Chick-fil-A has many salad dressings. You can choose from Avocado Lime Ranch, Garden Herb Ranch, Creamy Salsa, Zesty Apple Cider Vinaigrette, and Honey Mustard.

Which Chick-fil-A salad dressing is the most popular?

Avocado Lime Ranch and Garden Herb Ranch are top choices. They are the best-sellers at Chick-fil-A.

Are Chick-fil-A’s salad dressings available for purchase separately?

Yes, you can buy Chick-fil-A’s salad dressings in 8-ounce bottles. They’re great for home use or with your meal.

What are the ingredients in Chick-fil-A’s salad dressings?

Chick-fil-A’s dressings have a mix of oils, vinegars, herbs, and spices. This blend creates their unique flavors.

How many calories are in Chick-fil-A’s salad dressings?

The calories in Chick-fil-A’s dressings vary. Zesty Apple Cider Vinaigrette has about 60 calories per 2-tablespoon serving. Avocado Lime Ranch has 170 calories per 2-tablespoon serving.

Can Chick-fil-A’s salad dressings be used for more than just salads?

Yes, Chick-fil-A’s dressings are versatile. You can use them as dipping sauces, sandwich toppings, or in home recipes. They add flavor to many dishes.

Are Chick-fil-A’s salad dressings available year-round, or are there seasonal offerings?

Chick-fil-A’s main salad dressings are always available. But, they also offer limited-time or seasonal dressings. These match their menu changes throughout the year.

Mouth-Watering Beef Neck Bones Recipe for Flavorful Comfort Food

beef neck bones recipe

What makes a beef neck bones recipe unforgettable? Is it the tender meat or the deep flavor from slow cooking? A great recipe turns any meal into a cozy, satisfying dish. If you want the best beef neck bones recipe, you’re in the right spot. Our recipe is easy to follow and full of flavor, perfect for trying this tasty meat.

A good beef neck bones recipe can change your cooking game. It offers a delicious, comforting meal that will be a hit with your family. Beef neck bones are great for stews and soups, thanks to their rich flavor and tender texture. Whether you’re an experienced chef or new to cooking, our recipe is a great starting point.

Key Takeaways

  • Our beef neck bones recipe is easy to follow and packed with flavor
  • Beef neck bones are a great choice for a variety of dishes, from stews to soups
  • A good beef neck bones recipe can be a game-changer for any home cook
  • Beef neck bones have a rich, meaty flavor and tender texture
  • Our recipe is perfect for anyone looking to try this delicious cut of meat
  • The best beef neck bones recipe is one that’s slow-cooked to perfection
  • Our beef neck bones recipe is a great addition to any culinary repertoire

Understanding Beef Neck Bones: A Hidden Culinary Gem

Beef neck bones are a hidden treasure in cooking. They offer a rich flavor and tender texture. This makes them perfect for many dishes. To enjoy their full potential, it’s key to know what they are and their health benefits.

Beef neck bones are packed with protein, collagen, and other nutrients. These help keep your skin, hair, and joints healthy. Adding them to your meals can boost your nutrition while making your food taste great.

What Are Beef Neck Bones?

Beef neck bones come from the cow’s neck and shoulder. They have bone, cartilage, and meat. They’re also cheaper than other beef cuts, which is good for your wallet.

Nutritional Benefits

Beef neck bones are full of good stuff. They include:

  • High-quality protein for muscle health
  • Collagen for better skin, hair, and joints
  • Minerals like calcium and phosphorus for strong bones

Why Choose Beef Neck Bones for Cooking

Beef neck bones are great for cooking. They have a rich flavor and are tender. You can use them in soups, stews, braises, and roasts. Learning to cook them can make your meals more delicious and comforting.

Essential Ingredients for Perfect Beef Neck Bones

To make a delicious beef neck bones recipe, you need some key ingredients. These include beef neck bones, vegetables, and seasonings. The quality of the ingredients is key for flavor and texture.

A great beef neck bones recipe starts with the right meat. Look for neck bones with a lot of meat for flavor and texture. You’ll also need aromatic veggies like onions, carrots, and celery for depth.

Other must-haves for a perfect easy beef neck bones recipe are:

  • Beef broth
  • Red wine
  • Tomato paste
  • Herbs and spices, such as thyme and bay leaves

Using these ingredients, you can make a rich, flavorful beef neck bones recipe. Choose the best ingredients you can find. With practice and patience, you’ll get great at cooking beef neck bones.

How to Select and Prepare Beef Neck Bones

Choosing the right beef neck bones is key to a tasty dish. Look for bones with plenty of meat for extra flavor. You can find them at butchers or supermarkets, labeled as “beef neck bones” or “beef neck bone pieces”.

After picking your bones, clean and trim them. Rinse under cold water to remove impurities. Then, trim off excess fat or cartilage. This step prevents unwanted flavors and textures in your dish. Finally, season the bones with your favorite herbs and spices.

Choosing Quality Neck Bones

To pick quality neck bones, consider these factors:

  • Look for bones with a good amount of meat on them
  • Choose bones that are fresh and have no signs of spoilage
  • Consider the size of the bones, as larger bones may be more suitable for certain recipes

Pre-cooking Preparation Steps

Before cooking, enhance the flavor of your beef neck bones. Marinate them in your favorite seasonings and sauces. Or, brown the bones in a pan for a rich, caramelized crust. These steps will make your dish more flavorful and satisfying.

By carefully selecting and preparing your beef neck bones, your dish will be both flavorful and tender. Whether it’s a hearty stew or a comforting soup, beef neck bones are a great choice. Follow these tips to make a delicious meal that everyone will enjoy.

Beef Neck Bones RecipePrep TimeCook Time
Beef Neck Bones Stew30 minutes2 hours
Beef Neck Bones Soup20 minutes1 hour

Classic Beef Neck Bones Recipe

A classic beef neck bones recipe is a comfort food staple. It’s rich, flavorful, and easy to make. This recipe is a simple example of a beef neck bones recipe you can make at home.

To make this classic beef neck bones recipe, you’ll need a few ingredients:

  • 2 pounds beef neck bones
  • 1 onion, chopped
  • 3 cloves garlic, minced
  • 1 cup beef broth
  • 1 tablespoon tomato paste
  • Salt and pepper, to taste

The steps for this classic beef neck bones recipe are straightforward. First, brown the beef neck bones in a pan. Then, add the chopped onion and minced garlic and cook until the onion is translucent. Next, add the beef broth, tomato paste, salt, and pepper, and bring to a boil. Finally, reduce the heat and simmer for 2-3 hours, or until the meat is tender and falls off the bone.

This beef neck bones recipe is a hearty, comforting dish. It’s easy to make and requires minimal effort. The slow-cooked beef neck bones are tender and flavorful. The rich broth is great with crusty bread or over mashed potatoes.

IngredientQuantity
Beef neck bones2 pounds
Onion1
Garlic3 cloves
Beef broth1 cup
Tomato paste1 tablespoon

Slow Cooker Magic: Tender Beef Neck Bones

Slow cooking makes beef neck bones tender and flavorful. It breaks down the meat’s connective tissues. This results in a delicious dish. Use a slow cooker recipe with liquid and spices.

Cooking the neck bones low and slow is key. This means a low temperature for 8-10 hours. Add veggies and seasonings like carrots, potatoes, onions, garlic, thyme, and rosemary for extra flavor.

Preparation Method

First, brown the beef neck bones in a pan. This creates a rich crust. Then, add them to the slow cooker with liquid and spices. Cook on low for 8-10 hours.

Cooking Time and Temperature

The cooking time and temperature vary by recipe. Cook on low for 8-10 hours or high for 4-6 hours. The slow cooker should be at 275-300°F (135-150°C).

Adding Vegetables and Seasonings

Adding veggies and seasonings boosts the dish’s flavor. Popular choices include:

  • Carrots
  • Potatoes
  • Onions
  • Garlic
  • Thyme
  • Rosemary

These ingredients make a tasty beef neck bones slow cooker recipe. It’s great for a cold winter’s night.

Braising Techniques for Rich, Flavorful Results

To get tender and flavorful braised beef neck bones, you need to know how to braise. Braising means cooking the bones in liquid at low heat for a long time. This makes the meat fall-off-the-bone tender. Beef neck bones braising brings out the bones’ full flavor.

Here are some tips for braising:

  • Use a heavy pot with a tight lid to keep heat and moisture in.
  • Choose the right liquid, like stock or wine, to enhance the beef’s flavor.
  • Cook the bones low and slow for 2-3 hours to soften the connective tissue.

By using these tips and the right technique, you can make delicious braised beef neck bones. They’re perfect as a main dish or in other recipes. Beef neck bones braising is a great way to enjoy this often-neglected cut.

TechniqueDescription
BraisingCooking beef neck bones in liquid over low heat for a long period
RoastingCooking beef neck bones in the oven using dry heat
StewingCooking beef neck bones in liquid over low heat for a shorter period

Creating the Perfect Beef Neck Bones Soup

To make a delicious beef neck bones soup, start with the right ingredients. A good beef neck bones soup recipe includes beef neck bones, veggies, and aromatics. Carrots, celery, and onions are common base ingredients.

Seasoning can make or break a beef neck bones soup recipe. Thyme, rosemary, and bay leaves are popular choices. You can also add garlic, salt, and pepper to taste. Here are some seasoning tips:

  • Use fresh herbs whenever possible
  • Don’t be afraid to experiment with different spice combinations
  • Adjust the amount of salt and pepper to your taste

Now, let’s cook. Brown the neck bones in a pot, then add veggies and aromatics. Next, pour in the broth and simmer until the meat is tender. Here’s a simple beef neck bones soup recipe to start with:

  1. Brown the beef neck bones in a pot
  2. Add the vegetables and aromatics
  3. Pour in the broth and bring to a boil
  4. Reduce heat and let simmer until the meat is tender

With these tips and a good beef neck bones soup recipe, you’ll make a delicious meal. Whether you prefer something classic or a new twist, beef neck bones soup is a great choice.

Flavor Variations and Regional Twists

Beef neck bones offer a wide range of flavors. From traditional to innovative, there’s something for everyone. You can add different regional twists to make your dish unique.

There are countless ways to cook beef neck bones. For example, a Southern-style dish might use slow-cooked barbecue sauce. An Asian-inspired version could include soy sauce, ginger, and garlic. The Mediterranean method might use herbs like thyme and rosemary, with a squeeze of lemon.

Southern Style

This style is all about comfort food. It’s perfect for cold winter nights. It includes beef neck bones, barbecue sauce, and vegetables like carrots and potatoes.

Asian-Inspired

This method adds a bold twist to the traditional recipe. It uses soy sauce, ginger, and garlic for a savory flavor. It’s great for those who want to try something new.

Mediterranean Method

This approach focuses on freshness and flavor. It uses herbs like thyme and rosemary for a bright taste. It’s perfect for a lighter, refreshing dish.

Exploring different beef neck bones recipes can be exciting. Whether you prefer classic comfort or something new, there’s a recipe for you. It’s a great way to enhance your cooking experience.

Serving Suggestions and Side Dishes

There are many ways to serve beef neck bones. For tasty beef neck bones serving suggestions, try them with mashed potatoes, roasted veggies, or warm bread. These beef neck bones side dishes bring out the rich flavor of the beef, making a complete meal.

Some favorite beef neck bones serving suggestions are:

  • Grilled or roasted veggies like carrots, Brussels sprouts, or asparagus
  • Mashed or baked potatoes with butter, cheese, or sour cream on top
  • Warm bread, like crusty baguette or cornbread, great for dipping in juices
  • Salads, like a simple green salad or a hearty grain salad, for a refreshing contrast

To make your dish look good, add a garnish like fresh herbs or paprika. It adds color and boosts the flavor and aroma.

Trying these beef neck bones serving suggestions and beef neck bones side dishes will make your meal memorable. It highlights the rich flavor and tender texture of beef neck bones.

Side DishDescription
Mashed PotatoesA classic comfort food, perfect for pairing with beef neck bones
Roasted VegetablesA colorful and flavorful option, with a variety of vegetables to choose from
Warm BreadCrusty bread, ideal for dipping in the juices of the beef neck bones

Conclusion: Mastering Your Beef Neck Bones Recipe

Beef neck bones are a hidden gem in cooking, full of flavor and versatility. By following the techniques from this article, you’re ready to make delicious beef neck bones recipes. These dishes will make your taste buds happy and fill your belly with comfort.

Perfecting beef neck bones means trying different cooking ways, seasonings, and flavors. Feel free to add your own twist to the classic recipes. You can make them tender and slow-cooked or rich and soupy. The choices are endless with this underused meat.

Now, use what you’ve learned and start cooking in your kitchen. You’re about to begin a tasty adventure with beef neck bones. Your taste buds and loved ones will love your homemade dishes.

FAQ

What are beef neck bones?

Beef neck bones come from the cow’s neck. They are tough but full of flavor. People often use them in stews and soups.

What are the nutritional benefits of beef neck bones?

Beef neck bones are packed with protein, collagen, and nutrients. They also have lots of iron and calcium. This makes them a healthy choice for cooking.

Why should I choose beef neck bones for cooking?

Beef neck bones taste great and become tender when cooked right. They’re also cheap and versatile for many dishes.

How do I select and prepare beef neck bones?

Choose fresh, clean beef neck bones without bad smells. Clean and trim them before cooking. You might need to pre-cook to remove impurities.

What is the best way to cook beef neck bones?

You can slow cook them in a crockpot, braise on the stovetop, or make a soup. Cooking them low and slow makes them tender and flavorful.

Can I make beef neck bones in the slow cooker?

Yes, slow cookers are perfect for tender beef neck bones. The long cooking time breaks down the connective tissues, making the dish rich and flavorful.

How do I braise beef neck bones?

Braising means cooking them in liquid over low heat for a long time. This method tenderizes the bones and makes the dish rich and flavorful.

What ingredients should I use to make beef neck bones soup?

For a tasty soup, start with beef broth or stock. Add onions, carrots, and celery. Herbs and spices can also enhance the flavor.

Are there any flavor variations or regional twists I can try with beef neck bones?

Yes, you can try many variations. For a southern twist, add smoky bacon and barbecue sauce. For an Asian dish, use soy sauce and ginger. Mediterranean-style braise with tomatoes and olives is another option.

What are some good side dishes to serve with beef neck bones?

Serve them with mashed potatoes, rice, cornbread, or a green salad. Gravy, chimichurri, or gremolata can also add flavor.

Savor the Flavors of a French-Style Breakfast

french breakfast

What makes a traditional French breakfast so special? Is it the flaky croissants, the rich flavors, or the dishes that make you feel cozy? As we explore French breakfast, you’ll learn how to create a warm atmosphere. We’ll cover traditional recipes and modern twists for a memorable morning meal.

On this culinary journey, you’ll discover the key parts of a French breakfast. You’ll learn about the perfect pastries, artisanal cheeses, and coffee. This guide is for foodies, coffee lovers, and anyone who adores French culture. It will help you make a French breakfast at home, using traditional recipes and techniques.

Key Takeaways

  • Discover the art of crafting a traditional French breakfast with flaky croissants and rich flavors
  • Learn about the essential components of a French breakfast, including pastries, cheeses, and coffee
  • Explore the world of French breakfast recipes and techniques for creating a warm and inviting atmosphere
  • Get inspired by modern twists on traditional French breakfast dishes
  • Find out how to create a authentic French breakfast experience in the comfort of your own home
  • Learn about the importance of using high-quality ingredients in French breakfast recipes

The Art of French Breakfast Culture

French breakfast, or le petit déjeuner, is a tradition that shows France’s rich culture. It often includes fresh croissants, baguettes, and cheeses with jams. There are many dishes to try, each with its own taste and story.

For a true French taste, there are many breakfast ideas to try. You can enjoy coffee with croissants or try quiche and crepes. Every meal is a chance to taste France’s famous foods. Whether you want something sweet or savory, there’s always something new to try.

  • Pain au chocolat: a chocolate-filled pastry that is perfect for satisfying your sweet tooth
  • Croque-madame: a toasted ham and cheese sandwich topped with a fried egg
  • Crêpes: thin pancakes that can be filled with a variety of sweet or savory ingredients

These dishes are key to French breakfast culture. Their flavors and smells inspire chefs and food lovers everywhere.

DishDescriptionPopularity
Pain au chocolatChocolate-filled pastryHigh
Croque-madameToasted ham and cheese sandwich with a fried eggMedium
CrêpesThin pancakes with various fillingsHigh

Essential Components of a Traditional French Breakfast

A traditional French breakfast, or petit déjeuner, includes bread, pastries, cheese, and charcuterie. It’s important to use high-quality ingredients for an authentic experience. Popular items are freshly baked croissants, baguettes, and pain au chocolat.

Creating a delicious French breakfast involves several key elements. These include:

  • Freshly baked bread and pastries
  • A selection of artisanal cheeses and charcuterie
  • High-quality jams and preserves
  • A variety of authentic French breakfast beverages, such as coffee and tea

By adding these essential components to your breakfast, you can enjoy a truly authentic French breakfast. Whether you’re trying a new recipe or learning about French breakfast customs, there are many resources to help you.

The presentation and atmosphere of a French breakfast are also crucial. Set the table with a beautiful tablecloth, fine china, and fresh flowers. With practice, you can create a French breakfast experience that feels like dining in a charming café.

ComponentDescription
Bread and PastriesFreshly baked croissants, baguettes, and pain au chocolat
Cheese and CharcuterieArtisanal cheeses and cured meats, such as brie and prosciutto
Jams and PreservesHigh-quality, homemade jams and preserves made with fresh fruit

The Perfect French Pastry Selection

Choosing the right pastry is key for a traditional French breakfast. With so many tasty options, picking the right ones can be tough. Flaky croissants, rich pain au chocolat, buttery brioche, and crispy baguettes are just a few choices.

A traditional french breakfast often includes a mix of pastries. Each one has its own special taste and texture. Here are some favorites:

  • Croissants: Flaky, buttery, and great for dipping in coffee or chocolate
  • Pain au chocolat: A chocolate-filled pastry that’s perfect for sweet lovers
  • Brioche: A rich, buttery bread that’s great for toast or sandwiches

To find authentic French pastries in America, look for bakeries that focus on French recipes. Some top spots include:

BakeryLocationSpecialties
LaduréeNew York CityCroissants, macarons, and other French pastries
Boudin BakerySan FranciscoSourdough bread, croissants, and other French breads
Pierre HerméLos AngelesMacarons, madeleines, and other French pastries

Mastering French Coffee Traditions

French coffee culture is key to a traditional French-Style Breakfast . The art of brewing coffee is deeply rooted in French history. It’s a big part of the country’s culinary identity. Coffee is often the main attraction in french breakfast recipes, paired with fresh pastries and bread.

To master French coffee traditions, you need to know the different types of coffee in France. This includes café au lait and espresso. French breakfast rituals often feature a strong, rich coffee in a small cup. The secret to the perfect cup is using high-quality coffee beans and the right brewing technique.

Some tips for mastering French coffee traditions include using a French press or espresso machine. Also, serve the coffee in a warm and inviting atmosphere. By adding these elements to your traditional French-Style Breakfast routine, you can create a real French coffee experience.

  • Use high-quality coffee beans
  • Pay attention to brewing technique
  • Serve coffee in a warm and inviting atmosphere

By following these tips and trying out different french breakfast recipes, you can become a pro at French coffee traditions. Enjoy a delicious and authentic french breakfast every day.

French Breakfast Spreads and Accompaniments

A traditional French-Style Breakfast menu shines with the right spreads and accompaniments. You’ll find everything from classic jams and preserves to rich butters and cheeses. Choosing high-quality, authentic ingredients is key to a true French-Style Breakfast experience.

Spreads are a crucial part of any French-Style Breakfast. Freshly baked croissants and pain au chocolat pair well with many options. Here are some favorites:

  • Homemade jam made with fresh fruits and no added preservatives
  • Artisanal honey harvested from local bees
  • Whipped butter infused with herbs and spices

There are also many cheeses and meats to enjoy with your breakfast. Some top picks include:

Spread/AccompanimentDescription
French jamMade with fresh fruits and no added preservatives
Artisanal honeyHarvested from local bees
Whipped butterInfused with herbs and spices

Adding these French-Style Breakfast ideas to your morning can make it delicious and authentic. Whether you’re trying new things or sticking with classics, there’s something for everyone.

Creating Your Own French-Style Breakfast at Home

Enjoying a French breakfast at home is easy. You don’t need to be a great chef or have lots of time. With a few key items and ingredients, you can make a tasty French-Style Breakfast right in your kitchen.

Essential Equipment and Ingredients

For a great French-Style Breakfast, use top-notch ingredients. Think freshly baked bread, artisanal cheeses, and fresh fruits. You’ll also need basic tools like a coffee maker, toaster, and frying pan.

Step-by-Step Preparation Guide

Here’s how to make your own French-Style Breakfast at home:

  • Begin by brewing a fresh cup of coffee with a French coffee maker.
  • Toast some fresh bread and add butter, jam, or cheese on top.
  • Make a fruit salad with strawberries, grapes, and bananas.

Follow these easy steps to make a delicious French breakfast at home. Use the best ingredients and focus on presentation. This way, your French breakfast will be a special treat.

Modern Interpretations of French Breakfast

French breakfast recipes have changed over time. They now include new flavors and ingredients. Yet, they still keep the heart of a traditional French breakfast. Today’s French-Style Breakfast menus mix classic dishes with fresh ideas.

Some modern French breakfasts include croque-madame with a twist, like caramelized onions or different cheeses. Another twist is pain perdu made with brioche, topped with fresh fruits or nuts.

A traditional French breakfast is simple: a baguette with jam and coffee. But now, there are many more choices. For example, a French breakfast menu might have oeufs en cocotte with smoked salmon or crêpes with sweet or savory fillings.

To make a modern French breakfast, mix old flavors with new ingredients. Try different recipes and techniques. This way, you can make a unique and tasty French breakfast that highlights French cuisine’s best.

Health Benefits and Nutritional Considerations

A traditional French-Style Breakfast includes pastries, bread, and coffee. These foods are high in calories and sugar. But, they also offer important nutrients and health benefits. For instance, whole grain bread and pastries are rich in fiber. Coffee also has antioxidants.

To make French-Style Breakfast s healthier, try using whole grain flour and less sugar. Adding fresh fruits and nuts can boost vitamins and minerals. A balanced French breakfast gives you energy and satisfies hunger until lunch.

  • Choosing whole grain bread and pastries
  • Using fresh fruits and nuts as toppings
  • Reducing the amount of sugar used in recipes
  • Incorporating healthy fats such as butter and cheese

With a few tweaks, your French-Style Breakfast can be both nutritious and tasty. It will keep you energized and focused all morning. Whether you prefer something sweet or savory, there are many healthy options.

FoodCaloriesFatCarbohydratesProtein
Croissant1207g15g2g
Pain au Chocolat1508g20g3g
Baguette1002g20g4g

Conclusion: Embracing the French Breakfast Experience

The French-Style Breakfast is more than just a meal; it’s a tradition that brings people together. It’s filled with flaky croissants and aromatic coffee. Each part of the French breakfast is full of passion, community, and joy.

By trying the traditional French breakfast, we learn to appreciate the simple things. We can make our own French-Style Breakfast or find a Parisian café. This journey enriches our lives, nourishing both our bodies and souls.

Let’s celebrate the French-Style Breakfast with a cup of coffee and a toast. By adding these delightful elements to our days, we find joy in sharing and savoring life’s moments.

FAQ

What are the essential components of a traditional French breakfast?

A traditional French-Style Breakfast, or “petit déjeuner,” includes freshly baked bread like baguettes or croissants. You’ll also find butter, jam, and sometimes charcuterie or cheese. Coffee, often with steamed milk (café au lait), is a key part of this meal.

Where can I find authentic French pastries in America?

To find authentic French pastries in the U.S., look for specialty bakeries or patisseries. These places focus on traditional French baking. Many big cities have bakeries that offer croissants, pain au chocolat, brioche, and more.

How can I create a French-style breakfast at home?

To make a French-style breakfast at home, start with the right equipment and ingredients. You’ll need a French press for coffee, high-quality butter, and artisanal breads and pastries. Follow step-by-step guides to make your breakfast authentic and tasty.

What are some health benefits of a traditional French breakfast?

A French breakfast can be indulgent but also healthy. Choose fresh, whole ingredients and add nutrient-dense foods like yogurt or fruit. Practice portion control to enjoy the flavors of a French-Style Breakfast while staying healthy.

How do regional variations influence French-Style Breakfast traditions?

Different regions in France have their own breakfast traditions. In the north, breakfasts might include quiche or croque-monsieur. In the south, breakfasts are lighter, with fresh fruits and pastries. These differences make French-Style Breakfast culture rich and varied.

Carnitas & Egg Breakfast Recipe You’ll Love

carnitas breakfast recipe with eggs

What makes a delicious carnitas breakfast recipe with eggs unforgettable? It’s the tender, slow-cooked beef and perfectly cooked eggs. This combo is a match made in heaven. We’ll guide you through making this mouth-watering dish.

A delicious carnitas breakfast is perfect for starting your day. It combines flavors and textures beautifully. This recipe is great for fans of Mexican cuisine or anyone looking for a new breakfast idea.

Key Takeaways

  • Learn how to make a mouth-watering carnitas breakfast recipe with eggs
  • Discover the essential ingredients for a delicious carnitas breakfast
  • Get step-by-step cooking instructions for the perfect carnitas and eggs
  • Find out how to create a delicious and balanced breakfast dish
  • Explore the world of Mexican cuisine and its flavorful breakfast options
  • Get inspired to try new breakfast recipes and ideas

Introduction to Mexican-Style Carnitas Breakfast

Mexican carnitas breakfast is a dish loved for centuries. It offers a unique and tasty start to the day. “Carnitas” means “little meats” in Spanish, referring to slow-cooked beef in its own lard. This dish is a key part of Mexican cuisine, with a history that goes back a long way.

This breakfast is special because of its mix of flavors and textures. The combination of carnitas, eggs, and other ingredients makes it a must-try. It’s a way to experience the real flavors of Mexico.

What Makes Carnitas Special

Carnitas is cooked slowly in its own lard, making it tender and juicy. This method also adds a rich flavor to the meat. The result is a delicious breakfast that will satisfy any taste.

The Perfect Breakfast Fusion

A traditional mexican carnitas breakfast includes carnitas, eggs, and more. Ingredients like salsa, avocado, and tortillas add to the flavor and texture. This mix makes for a filling and tasty breakfast, perfect for starting your day.

History of Carnitas in Mexican Cuisine

Carnitas has a rich history in Mexican cooking, dating back centuries. Each region in Mexico has its own twist on the recipe. From the spicy flavors of the Yucatan to the rich tastes of the central region, there’s a carnitas for everyone.

RegionCharacteristics
YucatanSpicy and smoky flavors
Central RegionRich and indulgent flavors
Northern MexicoHearty and comforting flavors

Essential Ingredients for Your Carnitas Breakfast Recipe with Eggs

To make a tasty carnitas breakfast, you need some key ingredients. These include beef shoulder, lard or oil, eggs, onions, garlic, and spices. You can find these in most supermarkets, making your homemade breakfast easy.

Some important ingredients for your carnitas breakfast are:

  • Beef shoulder
  • Lard or vegetable oil
  • Eggs
  • Onions
  • Garlic
  • Spices, such as cumin and oregano

For serving, have tortillas, salsa, and avocado or sour cream ready. With these, you can make a flavorful homemade carnitas breakfast. It’s perfect for any morning.

Remember, the key to a great carnitas breakfast is using high-quality ingredients and taking the time to prepare them properly. By following a simple recipe and using the right ingredients, you can create a delicious and easy carnitas breakfast recipe that’s sure to please.

Having these essential ingredients ready lets you make a homemade carnitas breakfast that’s easy and full of flavor. Whether you’re looking for a quick breakfast or a delicious brunch idea, a homemade carnitas breakfast is a great choice.

IngredientQuantity
beef shoulder1 pound
Lard or vegetable oil1/4 cup
Eggs4-6
Onions1 medium
Garlic3-4 cloves

Preparing the Perfect Carnitas

To make a delicious carnitas breakfast, start with the right ingredients and techniques. It’s important to pick a tender beef cut with the right fat and lean meat mix. This mix is what makes a tasty carnitas breakfast with eggs truly special.

Marinating the beef is a key step. It adds flavor and tenderizes the meat, making it easier to cook and more enjoyable to eat. By using the right beef cut and marination techniques, you can make a dish that’s both flavorful and satisfying.

Choosing the Right Cut of Beef

The traditional way to cook carnitas is slow-cooking the beef in its own lard. This method gives the meat a rich and unctuous texture. To achieve this, choose a beef cut like beef shoulder or beef belly, which is well-suited for slow cooking.

Marination Techniques

Marination is crucial for perfect carnitas. By marinating the beef in a spice, herb, and acid mix, you add depth and complexity. This is especially important for a tasty carnitas breakfast with eggs, as the beff and eggs’ flavors need to complement each other.

Traditional Cooking Method

The traditional cooking method for carnitas is slow and labor-intensive. But the end result is well worth the effort. By slow-cooking the beef in its own lard, you create a dish that’s rich, flavorful, and delicious. This method is the key to a flavorful carnitas breakfast recipe that will leave you wanting more.

IngredientQuantity
beef shoulder2 pounds
Lard1 cup
Spices and herbs1 tablespoon

Mastering the Egg Component

To make a tasty quick carnitas breakfast, mastering the egg part is key. You can choose from scrambled, fried, poached, or boiled eggs. Each type adds its own flavor and texture to the dish.

Timing is everything when cooking eggs for a quick carnitas breakfast. You want the eggs to be just right when you serve them with the carnitas. Cooking the eggs while preparing the carnitas makes it easy to put the dish together.

Different Egg Cooking Styles

  • Scrambled eggs: fluffy and soft, perfect for wrapping in a tortilla with carnitas
  • Fried eggs: crispy on the bottom and runny on the inside, adding a rich texture to the dish
  • Poached eggs: delicate and moist, providing a subtle contrast to the crispy carnitas
  • Boiled eggs: a classic choice, offering a firm and creamy texture

Mastering the egg part makes your quick carnitas breakfast dish even better. With a bit of practice, you can make a breakfast that everyone will love. It’s perfect for busy mornings.

Timing Your Egg Preparation

Getting your eggs just right is important. Cook them while you’re making the carnitas. This way, you can put the dish together smoothly. With these tips, you’ll make a delicious and easy carnitas breakfast any time.

Egg Cooking StyleCooking TimeTexture
Scrambled2-3 minutesFluffy and soft
Fried3-4 minutesCrispy and runny
Poached4-5 minutesDelicate and moist
Boiled6-7 minutesFirm and creamy

Step-by-Step Cooking Instructions

To make a real carnitas breakfast, start by browning beef in a big skillet over medium-high heat. This step adds a rich, caramelized flavor to your homemade dish. While the beef cooks, get your eggs ready. You can scramble, fry, or poach them as you like.

After browning the beef, add onions and garlic to the skillet. Cook until they’re soft. Then, add broth or water and let it simmer. Let the carnitas cook for 2-3 hours. This way, the meat will be tender and easy to shred.

While the carnitas cook, prepare your eggs. Try making huevos rancheros for a tasty breakfast. It has fried eggs on tortillas, topped with spicy tomato sauce and cheese. This dish goes great with the carnitas’ rich flavor.

Here are some tips for your authentic carnitas breakfast:

  • Use a large skillet to cook all the ingredients evenly.
  • Get creative with toppings like diced onions, radishes, and sour cream.
  • Using a slow cooker can make cooking the carnitas easier and hands-off.

Follow these steps and tips to make a delicious homemade carnitas breakfast. It will impress your family and friends.

Creating the Perfect Breakfast Assembly

To make a tasty carnitas breakfast, you need to arrange the ingredients well. This means layering the carnitas, eggs, and other items. It’s important to make it look good and taste great.

When layering, start with carnitas at the bottom. Then, add eggs on top. Next, add salsa, avocado, and sour cream. This makes a filling and tasty breakfast.

Layering Techniques

  • Start with a base layer of carnitas
  • Add a layer of eggs on top of the carnitas
  • Include other ingredients, such as salsa, avocado, and sour cream, to add flavor and texture

Using these layering tips, you can make a carnitas breakfast that’s both delicious and satisfying. Remember to add garnishes like fresh cilantro or scallions. They add color and freshness.

Garnish Options

Here are some great garnish options for a carnitas breakfast:

  • Fresh cilantro
  • Scallions
  • Diced tomatoes
  • Shredded cheese

Adding these garnishes makes your carnitas breakfast look and taste amazing.

IngredientQuantity
Carnitas1 cup
Eggs2
Salsa1/4 cup
Avocado1/2

Complementary Side Dishes and Toppings

To make your mexican carnitas breakfast even better, try adding some side dishes and toppings. They bring more flavor and texture, making your meal truly special. Think about adding salsa, avocado, sour cream, and shredded cheese.

Don’t forget about diced onions, cilantro, or radishes for extra taste and crunch. These can really boost the flavor of your mexican carnitas breakfast. Here are some ideas to get you started:

  • Salsa: a spicy and tangy sauce made from tomatoes, onions, and jalapenos
  • Avocado: sliced or diced, adding a creamy and rich texture to your dish
  • Sour cream: a tangy and cooling topping that pairs well with the richness of the carnitas
  • Shredded cheese: adding a melty and creamy element to your breakfast

Creating an authentic carnitas breakfast is all about balance. By adding these side dishes and toppings, you’ll get a meal that’s both delicious and satisfying.

Time-Saving Tips and Make-Ahead Options

To make a quick carnitas breakfast, it helps to have some shortcuts. A tasty easy carnitas breakfast recipe can be ready fast if you prep ahead. This way, you can make a great meal quickly.

For meal prep, cook the carnitas a day or two before. Then, store it in the fridge. This makes reheating it easy in the morning. Here are some tips:

  • Store cooked carnitas in an airtight container in the refrigerator for up to 3 days.
  • Reheat the carnitas in the microwave or on the stovetop until warmed through.
  • Prepare your eggs and other toppings in advance, such as chopping vegetables or cooking sausage.

By using these simple tips, you can have a quick and easy carnitas breakfast.

Meal Prep StrategyStorage GuidelinesReheating Instructions
Cook carnitas in advanceRefrigerate for up to 3 daysReheat in microwave or on stovetop
Prepare eggs and toppingsStore in airtight containersReheat as needed

With these tips, you can make a delicious easy carnitas breakfast. It’s perfect for any morning.

Recipe Variations and Dietary Adaptations

To make your flavorful carnitas breakfast recipe more versatile, try different variations and dietary adaptations. This will help you create a delicious carnitas breakfast that suits various tastes and dietary needs.

Adapting your recipe to be low-carb is a great idea. Swap traditional tortillas for low-carb options like lettuce wraps or portobello mushroom caps. This reduces the carb content of your dish. You can also play with spice levels to deepen the flavor of your breakfast.

Low-Carb Options

  • Use lettuce wraps instead of traditional tortillas
  • Opt for portobello mushroom caps as a low-carb alternative
  • Experiment with cauliflower tortillas for a low-carb twist

Spice Level Adjustments

To change the spice level of your delicious carnitas breakfast, add more or less of certain ingredients:

  • Jalapeños or other hot peppers for an extra kick
  • Mild peppers or omitting seeds and membranes for a milder flavor
  • Spicy seasonings, such as cumin or chili powder, to add depth

By adding these variations and adaptations to your flavorful carnitas breakfast recipe, you can make a dish that’s both tasty and fits your needs. Whether you’re looking for low-carb options or adjusting the spice, the key is to experiment. Find the perfect balance of flavors to make your delicious carnitas breakfast unforgettable.

VariationDescription
Low-CarbUse lettuce wraps, portobello mushroom caps, or cauliflower tortillas
Spice Level AdjustmentAdd or subtract jalapeños, mild peppers, or spicy seasonings

Conclusion: Mastering Your Carnitas Breakfast Creation

Mastering a carnitas breakfast recipe with eggs is a rewarding and delicious journey. This article has given you the knowledge and techniques to make an authentic carnitas breakfast. It will impress your family and friends, whether you’re a seasoned cook or a breakfast lover.

The secret to a perfect carnitas breakfast is in the preparation of the carnitas and pairing them with eggs. Follow the step-by-step instructions and master the recipe’s nuances. You’ll take your taste buds on a trip to Mexico’s vibrant flavors. So, get your ingredients ready, fire up the stove, and enjoy the delicious outcome of your cooking.

Embrace the art of authentic carnitas breakfast and enjoy making a remarkable meal. It celebrates Mexican gastronomy’s rich heritage. Happy cooking!

FAQ

What makes carnitas special for a breakfast dish?

Carnitas, meaning “little meats” in Spanish, is a slow-cooked beef dish. It’s tender, juicy, and full of flavor. The mix of savory beef and rich eggs makes for a unique breakfast experience, a key part of Mexican cuisine.

What are the essential ingredients needed for a carnitas breakfast recipe with eggs?

You’ll need beef shoulder, lard or oil, eggs, onions, garlic, and spices. Don’t forget tortillas, salsa, and avocado or sour cream for serving.

What is the traditional cooking method for preparing the perfect carnitas?

To make perfect carnitas, slow-cook the beef in its own lard. This method makes the meat rich and tender. It’s important to pick the right beef cut for the best flavor and texture.

How can I master the egg component of the carnitas breakfast recipe?

Mastering the egg part is key. You can scramble, fry, poach, or boil eggs. Make sure they’re cooked just right to go with the carnitas.

What are some complementary side dishes and toppings that can enhance the carnitas breakfast?

Add salsa, avocado, sour cream, cheese, onions, cilantro, and radishes. These toppings bring extra flavor and texture to your dish.

Are there any time-saving tips or make-ahead options for preparing a carnitas breakfast?

Yes, there are ways to save time. Use meal prep, follow storage and reheating tips. These can make your breakfast prep easier.

Can I adapt the carnitas breakfast recipe to accommodate different dietary needs or preferences?

Absolutely! You can make it low-carb or adjust the spice level. These changes make the dish more versatile and appealing to everyone.

Delicious Gluten-Free Breakfast Casserole Recipes

gluten free breakfast casserole recipes

What makes a breakfast casserole unforgettable? Can easy gluten free breakfast casseroles be just as tasty? With more people following gluten-free diets, making delicious gluten-free breakfast casseroles is easier than ever. They’re perfect for busy parents or food lovers, offering convenience and variety for any meal.

There are countless options, from comforting dishes to innovative ideas. You can customize gluten-free breakfast casseroles to fit your taste, using different ingredients and methods. In this article, we’ll explore the best gluten-free breakfast casserole recipes, tips, and tricks for unforgettable meals.

Key Takeaways

  • Gluten free breakfast casserole recipes offer a convenient and versatile breakfast solution
  • Easy gluten free breakfast casserole options can be just as delicious as their traditional counterparts
  • Delicious gluten free breakfast casserole ideas can be tailored to suit various tastes and dietary needs
  • Gluten free breakfast casserole recipes can be perfect for busy parents, foodies, and anyone looking for a stress-free breakfast solution
  • With the right ingredients and cooking techniques, anyone can create mouth-watering gluten free breakfast casserole recipes

Understanding Gluten-Free Breakfast Casseroles

Gluten-free breakfast casseroles are made without gluten. They use ingredients like gluten-free flours, meats, and veggies. This is great for those with gluten issues and a healthy breakfast choice for everyone.

These casseroles have eggs, cheese, and veggies for protein and fiber. Some may include gluten-free grains like quinoa or brown rice. This makes for a tasty, gluten-free breakfast.

What Makes a Breakfast Casserole Gluten-Free

To make a gluten-free casserole, use gluten-free ingredients. Be careful not to mix them with gluten foods. Use separate tools and places to cook. Look for gluten-free certified ingredients for safety.

Benefits of Gluten-Free Breakfast Casseroles

Gluten-free casseroles help with digestion and reduce inflammation. They’re also good for weight loss and blood sugar control. Plus, they’re easy to make with many ingredients.

Essential Ingredients for Success

For a great gluten-free casserole, use gluten-free flours, eggs, cheese, and veggies. Add meats like sausage or beef for extra protein and taste. With these ingredients and a simple recipe, you’ll have a delicious gluten-free breakfast casserole.

Essential Kitchen Tools for Perfect Gluten-Free Breakfast Casseroles

To make a tasty simple gluten free breakfast casserole, you need the right tools. A 9×13 inch baking dish is essential for a big casserole. You’ll also need a whisk, spatula, and wooden spoons for mixing and stirring.

A gluten free breakfast casserole with beef needs special tools. You’ll need a skillet for cooking the beef and a colander to drain the grease. Don’t forget a set of measuring cups and spoons for accurate measurements.

  • Baking dish (9×13 inch)
  • Utensils (whisk, spatula, wooden spoons)
  • Skillet (for cooking beef)
  • Colander (for draining grease)
  • Measuring cups and spoons

With these tools, you’re ready to make a delicious gluten free breakfast casserole with beef. Always use fresh, high-quality ingredients for the best taste and texture.

Basic Gluten-Free Breakfast Casserole Recipes

Starting your day with a tasty gluten-free breakfast casserole can really boost your mood. Whether you’re new to cooking or just want simple recipes, we’ve got you covered. These recipes offer a mix of flavors and textures to please everyone.

Creating a great gluten-free breakfast casserole is all about balance and simplicity. You can make a simple casserole by mixing eggs, cheese, and veggies, then baking until it’s just right. For new ideas, try adding different ingredients and spices to make your dish stand out.

Classic Egg and Cheese Base

This basic recipe is a solid choice for any gluten-free breakfast casserole. It’s easy to make and can be customized with your favorite veggies or meats.

Hash Brown Bottom Casserole

Give your breakfast a crispy twist with a hash brown bottom. This idea is great for those who love a crunchy texture in their meals.

Quinoa-Based Morning Bake

Start your day with a quinoa-based morning bake for a nutritious meal. This option is not only tasty but also full of protein and fiber, making it a healthy choice for breakfast.

Protein-Packed Options with Meat

For a hearty and satisfying breakfast, add extra protein to your gluten free breakfast casserole with beef. You can use meats like sausage, ham, or turkey. A healthy gluten free breakfast casserole with beef and sausage makes a delicious and filling start to your day.

Some popular options for protein-packed gluten free breakfast casseroles include:

  • Beef and Sausage Supreme: a rich and savory combination of beef, sausage, and eggs
  • Ham and Swiss Delight: a classic pairing of ham and Swiss cheese, perfect for a gluten free breakfast casserole
  • Turkey and Vegetable Medley: a balanced and nutritious option, featuring turkey, vegetables, and a healthy gluten free breakfast casserole with beef

These recipes add extra protein to your breakfast while keeping it healthy and gluten-free. A gluten free breakfast casserole with beef makes a delicious and satisfying start to your day.

A healthy gluten free breakfast casserole is not only delicious but also nutritious. With these protein-packed options, you can enjoy a satisfying and filling breakfast that will keep you going throughout the morning.

RecipeIngredientsPrep Time
Beef and Sausage SupremeBeef, sausage, eggs, cheese30 minutes
Ham and Swiss DelightHam, Swiss cheese, eggs, gluten-free bread25 minutes
Turkey and Vegetable MedleyTurkey, vegetables, eggs, cheese35 minutes

Vegetarian Gluten-Free Breakfast Casseroles

Finding tasty breakfasts on a vegetarian diet can be tough. But, making a vegetarian gluten free breakfast casserole is easy with the right ingredients. Choose simple, gluten-free foods for a healthy and tasty dish.

A simple gluten free breakfast casserole can use veggies like bell peppers, onions, and mushrooms. Add eggs, cheese, and gluten-free grains like quinoa or brown rice. This mix lets you create a dish that’s just right for you.

  • Roasted vegetable and egg casserole
  • Quinoa and black bean breakfast bake
  • Grilled portobello mushroom and spinach strata

These dishes are not only yummy but also full of nutrients. They’re perfect for anyone, whether you’re a vegetarian or just want a meatless breakfast. A simple gluten free breakfast casserole is a great choice.

RecipeIngredientsPrep Time
Roasted Vegetable and Egg CasseroleVegetables, eggs, cheese, gluten-free grains30 minutes
Quinoa and Black Bean Breakfast BakeQuinoa, black beans, eggs, cheese, vegetables40 minutes
Grilled Portobello Mushroom and Spinach StrataMushrooms, spinach, eggs, cheese, gluten-free bread35 minutes

Make-Ahead Breakfast Casserole Solutions

For those with busy lives, making a breakfast casserole ahead of time is a lifesaver. A gluten-free breakfast casserole made in advance saves time and energy. It also ensures a nutritious and tasty meal.

When making a gluten-free breakfast casserole ahead, think about how to store and reheat it. Store it in an airtight container in the fridge overnight. Then, reheat it in the morning. This keeps the casserole fresh and hot, without losing its flavor or texture.

Here are some tips for making a gluten-free breakfast casserole ahead of time:

  • Prep ingredients the night before to save time in the morning
  • Use a freezer-friendly container to store the casserole for up to 3 months
  • Reheat the casserole in the oven or microwave for a quick and easy breakfast

By following these tips, you can make a delicious gluten-free breakfast casserole ahead of time. It’s perfect for busy mornings and quick breakfasts on the go.

Make Ahead Gluten Free Breakfast Casserole TipsBenefits
Overnight preparationSaves time and energy
Storage and reheating guidelinesEnsures freshness and texture
Freezer-friendly optionsConvenient for meal prep

Quick and Easy Morning Recipes

For busy mornings, a simple gluten free breakfast casserole is perfect. These casseroles are quick to make and full of nutrients. They taste great and are easy to prepare. You can use leftover veggies, lean proteins, and whole grains for a filling meal.

Quick and easy morning recipes are all about simplicity. Using a few ingredients and saving time on prep can make a big difference. Here are some tips for a tasty gluten free breakfast casserole:

  • Use pre-cooked ingredients, such as sausage or beef, to save time.
  • Choose simple ingredients, like eggs, cheese, and vegetables, that are easy to prepare.
  • Consider using a one-dish recipe to minimize cleanup and preparation time.

A simple gluten free breakfast casserole can be made with just a few ingredients. Eggs, cheese, and veggies are all you need. These casseroles are great for busy mornings and can be tailored to your taste. With a bit of creativity, you can make a delicious gluten free breakfast casserole that’s both easy and enjoyable.

Seasonal Variations and Special Occasions

As the seasons change, so do our tastes in gluten free breakfast casserole recipes. Whether you want a hearty winter dish or a light summer brunch, there’s a healthy gluten free breakfast casserole for you.

Here are some ideas for seasonal and special occasion gluten-free breakfast casseroles:

  • Holiday breakfast casseroles, such as a Christmas morning strata or a Thanksgiving brunch casserole
  • Summer brunch ideas, like a quiche Lorraine or a fruit-filled breakfast casserole
  • Winter comfort casseroles, such as a creamy egg and sausage casserole or a warm and spicy sweet potato casserole

These gluten free breakfast casserole recipes are perfect for holidays, birthdays, or family gatherings. They’re also great for everyday meals. You can easily change them to fit your tastes and dietary needs.

With a little creativity, you can make many healthy gluten free breakfast casserole recipes for any season or occasion. So why not start today and see what delicious dishes you can make?

SeasonRecipe IdeaIngredients
WinterCreamy Egg and Sausage CasseroleEggs, sausage, cream, cheese, gluten-free bread
SummerFruit-Filled Breakfast CasseroleEggs, fruit, cream, cheese, gluten-free bread
HolidayChristmas Morning StrataEggs, bread, cheese, sausage, cream

Healthy Substitutions and Modifications

Creating a healthy gluten free breakfast casserole is easy with the right substitutions. Try using almond milk or coconut milk instead of regular milk. Vegan cheese shreds or soy cheese can replace traditional cheese.

For a healthier breakfast bake, use low-carb ingredients. Try cauliflower instead of hash browns. Add nuts or seeds for more protein. You can also use egg whites, spinach, or kale for extra nutrition. Whole grain gluten-free flours like brown rice or quinoa are great options too.

Dairy-Free Alternatives

  • Almond milk or coconut milk instead of regular milk
  • Vegan cheese shreds or soy cheese as a substitute for traditional cheese
  • Coconut yogurt or soy yogurt as a substitute for traditional yogurt

Low-Carb Options

  • Cauliflower instead of traditional hash browns
  • Adding more protein-rich ingredients like nuts or seeds
  • Using low-carb gluten-free flours like almond flour or coconut flour

By making these healthy changes, your gluten free breakfast casserole will be both tasty and nutritious. Whether you need a dairy-free, low-carb, or high-protein option, there are many ways to make your breakfast bake healthier and more satisfying.

IngredientHealthy Substitute
MilkAlmond milk or coconut milk
CheeseVegan cheese shreds or soy cheese
Hash brownsCauliflower

Troubleshooting Common Issues

When making gluten free breakfast casseroles, you might face some problems. These issues can affect how your dish turns out. To make a tasty and easy gluten free breakfast casserole, you need to tackle these common problems.

One big issue is sogginess. This can be fixed by using the right amount of liquid and cooking it at the right temperature.

Another problem is getting the right texture. You can solve this by mixing gluten-free flours with eggs, cheese, or veggies. Ingredient substitutions can be tricky, but with some trial and error, you can find great alternatives.

Here are some common issues and how to fix them:

  • Preventing sogginess: use the right amount of liquid ingredients and cook at the correct temperature
  • Achieving the right texture: use a combination of gluten-free flours and add ingredients like eggs, cheese, or vegetables
  • Ingredient substitutions: experiment with different alternatives to find the perfect combination

By following these tips, you can make a delicious and easy gluten free breakfast casserole. Your family and friends will love it. Always use the best ingredients and try different combinations to find your favorite recipe.

Conclusion: Creating Your Perfect Gluten-Free Breakfast Casserole

The world of delicious gluten free breakfast casserole ideas is huge and exciting. You can find everything from simple egg and cheese dishes to big, protein-rich meals and fresh veggie casseroles. There’s a gluten free breakfast casserole recipe for everyone, no matter what you like or need.

Looking for a quick breakfast or something fancy to serve guests? The secret is finding the right mix of tastes, textures, and ingredients. Try different base recipes, use your favorite gluten-free foods, and be bold with your ideas.

Now you know how to make a gluten-free breakfast casserole that everyone will love. Start exploring new flavors and making healthy, tasty breakfasts for yourself and your loved ones.

FAQ

What makes a breakfast casserole gluten-free?

A gluten-free breakfast casserole uses ingredients without gluten. This includes eggs, cheese, and veggies. It also uses gluten-free grains like quinoa or rice.

What are the benefits of choosing a gluten-free breakfast casserole?

Gluten-free breakfast casseroles are perfect for those with gluten issues. They’re tasty and safe for breakfast. They offer a great alternative to traditional casseroles.

What are the essential ingredients for a successful gluten-free breakfast casserole?

Key ingredients are gluten-free bread, eggs, and dairy. You also need veggies and proteins like meat or tofu.

What kitchen tools are needed to make perfect gluten-free breakfast casseroles?

You’ll need a baking dish, whisk, spatula, and bowls. For beef, use a skillet and tongs.

How can I make a gluten-free breakfast casserole ahead of time?

Prepare it the night before, cover, and refrigerate. Bake it in the morning. You can also freeze it for later.

What are some healthy substitutions for gluten-free breakfast casseroles?

Try dairy-free milk or cheese. Use low-carb veggies and add protein with eggs or lean meats.

How can I troubleshoot common issues with gluten-free breakfast casseroles?

For sogginess or dryness, adjust cooking times and liquid. Make sure ingredients are evenly spread. Follow recipes closely for the best results.

Puff Pastry Breakfast Ideas: Easy and Tasty Recipes

puff pastry breakfast recipes

What makes puff pastry breakfast recipes so appealing? Can anyone create delicious morning treats with this versatile ingredient? Puff pastry breakfast recipes offer a wide range of easy and tasty options for starting your day. With the right techniques and recipes, you can create mouth-watering breakfast dishes using puff pastry, from simple to gourmet.

Easy puff pastry breakfast ideas are perfect for busy mornings. They can be customized to suit any taste or dietary preference. Whether you’re looking for sweet or savory options, puff pastry is a great choice for breakfast. In this article, we’ll explore the world of puff pastry breakfast recipes and provide you with the inspiration and guidance you need to create your own delicious morning treats.

Key Takeaways

  • Puff pastry breakfast recipes are easy to make and offer a wide range of options
  • Easy puff pastry breakfast ideas are perfect for busy mornings
  • Puff pastry can be used to create both sweet and savory breakfast dishes
  • Customization options are endless, making puff pastry a great choice for any taste or dietary preference
  • Puff pastry breakfast recipes can be made ahead of time for added convenience
  • With the right techniques and recipes, anyone can create delicious puff pastry breakfast treats

Understanding the Magic of Puff Pastry for Breakfast

Puff pastry is a versatile and delicious ingredient that can elevate your breakfast game. It’s perfect for making homemade breakfast dishes. You can make everything from flaky, buttery croissants to savory quiches.

Using puff pastry for breakfast is easy. You can make it yourself or buy it. With just a few ingredients and tools, you can make a variety of tasty breakfast treats.

What Makes Puff Pastry Perfect for Morning Meals

Puff pastry is made from flour, butter, and water. These ingredients are layered and rolled to create its flaky texture. This texture, along with the rich butter flavor, makes it ideal for breakfast.

Some popular homemade puff pastry breakfast dishes include:

  • Breakfast strata
  • Quiches
  • Croissants
  • Puff pastry sandwiches

Store-bought vs Homemade Puff Pastry

Store-bought puff pastry is convenient, but making your own is rewarding. With simple ingredients and tools, you can make your own puff pastry at home. Essential tools include:

ToolDescription
Rolling pinUsed to roll out puff pastry to the desired thickness
Pastry brushUsed to brush puff pastry with egg wash or melted butter
Baking sheetUsed to bake puff pastry breakfast dishes

Quick and Simple Puff Pastry Breakfast Recipes

Looking for a fast breakfast? Try quick and simple puff pastry breakfast recipes. They’re easy to make and taste great. Perfect for when you’re in a rush.

Here are some ideas for quick and simple puff pastry breakfast recipes:

  • Breakfast strata: a layered dish made with puff pastry, eggs, and cheese
  • Puff pastry sandwiches: filled with scrambled eggs, bacon, or sausage
  • Puff pastry pinwheels: filled with cream cheese and smoked salmon

These recipes are not only tasty but also simple to prepare. You can adjust them to your liking. With quick and simple puff pastry breakfast recipes, you can enjoy a great start to your day, even on the busiest mornings.

Adding quick and simple puff pastry breakfast recipes to your morning routine is a smart move. They offer a delicious and quick breakfast. So, why not try them and make your mornings a little brighter with a tasty puff pastry treat?

RecipeIngredientsPrep Time
Breakfast StrataPuff pastry, eggs, cheese20 minutes
Puff Pastry SandwichesPuff pastry, scrambled eggs, bacon15 minutes
Puff Pastry PinwheelsPuff pastry, cream cheese, smoked salmon25 minutes

Sweet Puff Pastry Morning Delights

Indulge in the sweetness of puff pastry with these delicious breakfast ideas. From classic French treats to fruit-filled pastries, there’s a sweet delight for every taste. These best puff pastry breakfast recipe ideas are perfect for special occasions or as a weekend treat, offering a delicious start to the day.

Classic French Pain au Chocolat

This classic French pastry is a staple of gourmet puff pastry breakfast options. Flaky puff pastry, rich chocolate, and a hint of sweetness make for a delightful breakfast treat.

Fruit-filled Turnovers

These sweet pastries are filled with fresh fruit and wrapped in flaky puff pastry. They’re a great way to enjoy a best puff pastry breakfast recipe idea that’s both sweet and satisfying.

Cinnamon Sugar Twists

These sweet and crispy twists are made with puff pastry, cinnamon, and sugar. They’re a delicious addition to any breakfast spread and offer a gourmet puff pastry breakfast option that’s easy to make.

Puff Pastry Breakfast IdeaDescription
Pain au ChocolatFlaky puff pastry, rich chocolate, and a hint of sweetness
Fruit-filled TurnoversFresh fruit and flaky puff pastry
Cinnamon Sugar TwistsPuff pastry, cinnamon, and sugar

Savory Puff Pastry Breakfast Ideas

Looking for a tasty breakfast? Try savory puff pastry options. These tasty puff pastry breakfast treats offer a unique twist to morning meals. You can make spinach and feta turnovers, breakfast quiches, or sausage rolls.

Savory puff pastry is very versatile. You can fill it with many ingredients. From ham and cheese to mushroom and spinach, the choices are endless. This makes it easy to find a breakfast that fits your taste and diet.

  • Spinach and feta turnovers: Fill puff pastry with a mixture of spinach, feta cheese, and spices for a delicious and savory breakfast treat.
  • Breakfast quiches: Use puff pastry as the crust for a quiche filled with eggs, cheese, and your choice of vegetables or meats.
  • Sausage rolls: Wrap puff pastry around sausage and bake until golden brown for a satisfying breakfast snack.

These ideas are great for a tasty puff pastry breakfast treat. Whether you want something classic or something new, there’s a savory option for you.

Savory Puff Pastry RecipeIngredientsInstructions
Spinach and Feta TurnoversSpinach, feta cheese, puff pastryFill puff pastry with spinach and feta mixture, bake until golden brown
Breakfast QuichesEggs, cheese, puff pastry, vegetables or meatsUse puff pastry as crust, fill with eggs, cheese, and chosen ingredients, bake until set

Make-Ahead Puff Pastry Breakfast Options

Preparing flavorful puff pastry breakfast dishes ahead of time can make mornings easier. With a few simple tips and recipes, you can make delicious breakfasts that can be frozen, stored, and reheated with ease.

Freezing and Storage Tips

When freezing puff pastry, it’s important to follow some basic guidelines. Here are a few tips to keep in mind:

  • Freeze puff pastry as soon as possible after purchase or preparation
  • Store frozen puff pastry in an airtight container or freezer bag
  • Label and date the container or bag for easy identification

Reheating Guidelines

Reheating puff pastry can be tricky, but with the right techniques, you can achieve a flaky and flavorful breakfast dish. Here are some guidelines to follow:

  • Preheat your oven to 375°F (190°C)
  • Place the frozen puff pastry on a baking sheet lined with parchment paper
  • Bake for 15-20 minutes, or until golden brown

Best Make-Ahead Recipes

Some of the best make-ahead puff pastry breakfast recipes include:

  • Puff pastry quiche
  • Breakfast strata
  • Puff pastry cinnamon rolls

These recipes can be prepared ahead of time, frozen, and reheated for a delicious and stress-free breakfast.

Gourmet Puff Pastry Breakfast Creations

To make your breakfast better, try gourmet puff pastry breakfast options. These dishes can turn a simple meal into a fancy treat. Perfect for special days or a weekend brunch, puff pastry can be filled with many ingredients. For example, prosciutto and egg make a tasty and pretty breakfast strata.

Some ideas for gourmet puff pastry breakfast options include:

  • Prosciutto and egg breakfast strata
  • Spinach and feta turnover
  • Cinnamon sugar puff pastry sticks

These dishes are not only delicious but also simple to make. They need just a few ingredients and are quick to prepare. Adding gourmet puff pastry breakfast options to your morning can make it more elegant.

For inspiration, consider the following quote:

A good breakfast is the key to a great day, and with gourmet puff pastry, you can make every day a special occasion.

To start, pick your favorite filling and wrap it in puff pastry. Bake until it’s golden, then serve with fresh fruit or whipped cream. With these steps, you can make a gourmet puff pastry breakfast that will wow your loved ones.

RecipeIngredientsDifficulty Level
Prosciutto and Egg Breakfast StrataPuff pastry, prosciutto, eggs, cheeseEasy
Spinach and Feta TurnoverPuff pastry, spinach, feta cheeseMedium
Cinnamon Sugar Puff Pastry SticksPuff pastry, cinnamon, sugarEasy

Tips for Perfect Puff Pastry Every Time

To get perfect puff pastry, follow some key tips. Temperature is key in puff pastry breakfast recipes. Keeping everything at the right temperature is crucial for flaky and tasty pastry.

Don’t make common mistakes like overworking the dough or not letting it rest. Also, baking at the wrong temperature can ruin it. Avoid these to get light, flaky, and delicious pastry.

Temperature Control Secrets

It’s important to keep your puff pastry at the right temperature. This means cold ingredients and a consistent environment. This helps the pastry rise and bake evenly, giving it a flaky texture.

Common Mistakes to Avoid

Don’t overwork the dough to avoid a tough pastry. Handle it gently and let it rest as recommended. Also, baking at the wrong temperature can mess up the texture and flavor. Always follow the recipe carefully.

Professional Finishing Techniques

To elevate your puff pastry, try professional finishing techniques. Brush with egg wash, sprinkle with sugar or cinnamon, or use a pastry brush for a decorative edge. These tips will make your puff pastry breakfast dishes look and taste great.

Tips for Perfect Puff PastryDescription
Temperature ControlKeep ingredients and environment at the right temperature
Avoid OverworkingHandle dough gently and minimally, let it rest
Professional FinishingUse egg wash, sugar, or cinnamon to add flavor and texture

Seasonal Puff Pastry Breakfast Specialties

As the seasons change, so do the ingredients and flavors of our delicious puff pastry morning meals. From summer fruit tarts to winter quiches, each season brings new opportunities to create unique and tasty puff pastry breakfast specialties.

Some popular seasonal puff pastry breakfast ideas include:

  • Summer: fruit tarts with fresh berries, peaches, or nectarines
  • Autumn: pumpkin or apple-filled puff pastry pastries
  • Winter: quiches with roasted vegetables, cheese, and herbs
  • Spring: asparagus or spinach-filled puff pastry rolls

These delicious puff pastry morning meals are perfect for special occasions or everyday breakfast. You can also experiment with different ingredients and flavors to create your own unique seasonal puff pastry breakfast specialties.

By incorporating fresh and seasonal ingredients into your puff pastry breakfast recipes, you can create dishes that are not only delicious but also reflective of the current season. So why not get creative and try out some new seasonal puff pastry breakfast ideas today?

Serving and Presentation Ideas

When serving puff pastry breakfast dishes, aim for a look that’s both appealing and inviting. With the right recipe ideas, you can make a breakfast spread that wows everyone.

Start by thinking about how to make your puff pastry stand out. Here are some ideas:

Plating Techniques

  • Use different colors and textures to add depth to your plate.
  • Make a pattern with the puff pastry, like a spiral or circle.
  • Add fresh herbs or edible flowers as garnishes.

Garnishing Suggestions

Adding garnishes can also enhance your dish’s presentation. Here are some suggestions:

  • Top with whipped cream or powdered sugar for sweetness.
  • Add fresh berries or sliced fruit for flavor and color.
  • Use cinnamon or cocoa powder for a warm aroma.

Complementary Beverages

Think about what drinks to serve with your puff pastry dishes. Here are some ideas:

BeveragePairing Suggestions
CoffeePair with a rich and chocolatey filling.
TeaPair with a fruity and sweet filling.
JuicePair with a light and airy filling.

By using these ideas, you can create a stunning puff pastry breakfast spread. With endless possibilities, your dishes are sure to impress!

Nutritional Considerations and Modifications

Enjoying flavorful puff pastry breakfast dishes means thinking about nutrition. Puff pastry can have a lot of calories, fat, and sodium. This might be a problem for those watching their diet.

To make healthier options, try using whole-wheat puff pastry. Or, use less cheese and meat. Adding more fruits and veggies can also boost nutrition. Here are some healthier ideas:

  • Spinach and feta puff pastry triangles
  • Berry and cream cheese puff pastry tart
  • Mushroom and egg puff pastry quiche

These tweaks let you enjoy flavorful puff pastry breakfast dishes while staying healthy. Always check the labels and ingredients to make smart choices.

Being aware of nutrition and making a few changes can make your breakfasts tasty and healthy. You don’t have to give up flavor to stay on track with your health goals.

Conclusion: Elevating Your Breakfast Game with Puff Pastry

Puff pastry is a versatile and delightful addition to any breakfast. It offers a world of possibilities, from classic French delights like pain au chocolat to innovative savory creations. By adding puff pastry breakfast recipes to your morning, you can make your breakfast more indulgent.

Whether you like sweet or savory, puff pastry is perfect. It’s flaky and buttery, making it a great base for many flavors and textures. Its ease of use and impressive results make it a game-changer for breakfast.

So, why not let puff pastry elevate your breakfast? With the recipes and tips from this article, you’ll be on your way to making amazing puff pastry breakfasts. Bon appétit!

FAQ

What makes puff pastry a great choice for breakfast recipes?

Puff pastry is perfect for breakfast because it’s light and flaky. It’s great for both sweet and savory dishes. Plus, it’s easy to make and full of flavor.

Is homemade puff pastry better than store-bought?

Homemade puff pastry gives you control over ingredients and can be flakier. But, store-bought is convenient and still delicious.

What are some essential tools and equipment needed for working with puff pastry?

You’ll need a rolling pin, sharp knife or cutter, baking sheet, and parchment paper. These tools make working with puff pastry easier.

Can I make puff pastry breakfast dishes in advance?

Yes, many dishes can be made ahead. Freeze them and reheat when you’re ready. Just remember to store and reheat correctly for the best taste.

What are some tips for achieving perfect puff pastry every time?

For perfect puff pastry, keep it at the right temperature and avoid overmixing. Use the right folding and rolling techniques. These tips will help your pastry be light and flaky.

Can I make puff pastry breakfast dishes with seasonal ingredients?

Yes! Using seasonal ingredients adds fresh flavors. Try summer fruit tarts or winter quiches for endless possibilities.

How can I present and serve puff pastry breakfast dishes?

There are many ways to present puff pastry dishes. Use plating techniques, garnishes, and pair with drinks to enhance the look and taste.

Are there any nutritional considerations or modifications for healthier puff pastry breakfast options?

While puff pastry is rich, you can make healthier versions. Use different fillings, reduce butter, and add wholesome ingredients for nutritious dishes.

Chicken Breakfast Recipes: Quick, Easy, and Delicious

chicken breakfast recipes​

What makes chicken breakfast recipes a great way to start your day? Is it the quick preparation time, the ease of cooking, or the delicious flavors? Chicken is a popular choice for breakfast meals, and for good reason. It’s packed with health benefits and is super versatile in cooking.

Many people choose chicken breakfast recipes for a nutritious and tasty start. From savory chicken breakfast ideas to easy chicken breakfast dishes, there are endless options.

Chicken breakfast recipes offer a great alternative to traditional breakfast foods. They provide a boost of protein to keep you energized throughout the morning. Whether you’re looking for a simple and easy breakfast solution or a more elaborate dish, chicken is a great choice.

With its mild flavor, chicken can be paired with a variety of ingredients. This creates a range of delicious and savory chicken breakfast ideas.

Key Takeaways

  • Chicken breakfast recipes are quick and easy to prepare
  • Chicken is a versatile ingredient that can be paired with many different flavors
  • Chicken breakfast dishes provide a boost of protein to keep you energized
  • Savory chicken breakfast ideas can be created with a variety of ingredients
  • Easy chicken breakfast dishes are perfect for busy mornings
  • Chicken breakfast recipes offer a healthy alternative to traditional breakfast foods

Why Chicken Makes the Perfect Breakfast Protein

Chicken is a great choice for breakfast because it’s full of nutrients. It’s a lean protein that keeps you feeling full and satisfied. This makes it perfect for those who want healthy breakfast options.

Chicken is also very affordable. It’s cheaper than bacon and sausage, which is great for families or anyone watching their budget. Plus, chicken can be cooked in many ways, like grilling, roasting, sautéing, or boiling. This means you can make a variety of healthy breakfast dishes.

Nutritional Benefits of Morning Chicken

Chicken is packed with protein, vitamins, and minerals. It’s also low in calories and fat, which is good for weight management or a healthy diet. Some of the key benefits include:

  • High-quality protein to build and repair muscles
  • Rich in vitamins B6 and niacin for energy production
  • Good source of minerals like phosphorus and selenium for immune function

Protein Content Comparison with Traditional Breakfast Meats

Chicken has more protein than bacon and sausage. This is great for those who want to eat more protein to help muscles grow and repair. With its lean protein and low fat, chicken is a top choice for healthy breakfasts.

Essential Chicken Breakfast Recipes for Beginners

Starting your day with a tasty chicken breakfast can really energize you. It’s a great way to begin the day on a positive note. For beginners, it’s best to start with simple recipes that need just a few ingredients. Some great options include scrambled eggs with chicken sausage, chicken and avocado toast, and chicken breakfast burritos.

These recipes are great for beginners because they’re straightforward and don’t require complex cooking skills. You can start by mastering basic cooking methods like grilling, sautéing, and baking. These skills can be used in many chicken breakfast dishes. With a bit of practice, you’ll soon be making delicious chicken breakfasts that everyone will love.

  • Chicken and waffles: a classic breakfast combination that is easy to make and always a crowd-pleaser
  • Chicken omelette: a simple and versatile recipe that can be filled with a variety of ingredients such as cheese, vegetables, and meats
  • Chicken breakfast tacos: a fun and easy recipe that can be customized with your favorite toppings and fillings

Remember, the secret to making great chicken breakfast meals is using fresh, quality ingredients. Don’t be afraid to try new things and get creative. With a little bit of effort, you can make a wide range of tasty chicken breakfasts to start your day off right.

Make-Ahead Chicken Breakfast Ideas

Busy mornings can be tough. But, having some creative chicken breakfast recipes ready can save the day. Making filling chicken breakfast dishes ahead of time saves time and ensures a great start. Overnight chicken breakfast casseroles are perfect for this. They’re easy to make, can be made in big batches, and heat up well in the morning.

Batch cooking has its own set of tips. First, cook your chicken well before storing it. This cooked chicken can then be used in many breakfast dishes, like omelets or burritos. Also, using a slow cooker is a great way to cook chicken while you sleep. This way, you wake up to a hot, delicious meal.

Overnight Chicken Breakfast Casseroles

These casseroles are a fantastic way to prep a chicken breakfast dish ahead. Just mix cooked chicken, eggs, cheese, and veggies in a dish, then refrigerate it. In the morning, bake it until the eggs are set and it’s hot.

Batch Cooking Tips for Weekly Prep

  • Cook chicken in large batches and store it in the fridge or freezer for later use
  • Use a slow cooker to prepare chicken breakfast meals while you sleep
  • Prepare individual portions of chicken breakfast dishes and store them in the fridge or freezer for easy reheating

Storage and Reheating Guidelines

When storing and reheating chicken breakfast dishes, follow safe food handling. Cooked chicken should be in a covered container in the fridge or freezer. Reheat it to 165°F (74°C) before eating.

By using these tips and ideas, you can make tasty, filling chicken breakfast dishes ahead of time. This way, even on the busiest mornings, you can start your day off right.

RecipeIngredientsInstructions
Overnight Chicken Breakfast CasseroleCooked chicken, eggs, cheese, vegetablesCombine ingredients in a baking dish, refrigerate overnight, and bake in the morning
Chicken OmeletCooked chicken, eggs, cheese, vegetablesWhisk eggs, add cooked chicken and cheese, and cook in a skillet until set

Quick 15-Minute Chicken Breakfast Dishes

For those busy mornings, quick chicken breakfast recipes are a lifesaver. They offer delicious and nutritious options without taking too much time. You can enjoy scrambled eggs with chicken or chicken and avocado toast, among many other choices.

Some popular easy chicken breakfast dishes include:

  • Chicken and cheese omelets
  • Chicken sausage and egg burritos
  • Chicken and mushroom breakfast skillet

These quick chicken breakfast recipes are fast to make and great for a quick, healthy meal. You can also make them your own by adding your favorite ingredients.

Here’s a simple recipe to get you started:

“Combine 1 cup of diced chicken, 1/2 cup of scrambled eggs, and 1/2 cup of shredded cheese. Cook in a skillet over medium heat until the eggs are set and the cheese is melted. Serve with toast or hash browns for a filling breakfast.”

With these easy chicken breakfast dishes, you can enjoy a delicious and satisfying breakfast even on the busiest of mornings. So why not give them a try and start your day off right?

RecipePrep TimeCook Time
Chicken and Cheese Omelet5 minutes5 minutes
Chicken Sausage and Egg Burrito10 minutes5 minutes
Chicken and Mushroom Breakfast Skillet10 minutes10 minutes

Healthy Chicken Breakfast Bowls

Starting your day with a nutritious meal is key. Healthy chicken breakfast options give you the energy you need. You can choose from many savory chicken breakfast ideas to fit your diet.

A chicken breakfast bowl is a great way to start your day. It has protein, complex carbs, and healthy fats. Try adding roasted veggies, quinoa, and lean chicken breast. For a twist, add feta cheese, olives, and sun-dried tomatoes.

Low-Carb Options

For a low-carb diet, there are many healthy chicken breakfast options. Try a bowl with grilled chicken, roasted broccoli, and a fried egg on spinach. It’s a great mix of protein and healthy fats.

High-Protein Variations

For a high-protein breakfast, go for a bowl with lean chicken breast, Greek yogurt, and nuts. This combo keeps you full and satisfied until lunchtime.

Mediterranean-Style Bowls

Mediterranean-style chicken breakfast bowls add excitement to your morning. Try a bowl with grilled chicken, hummus, and tabbouleh, topped with feta cheese. It’s a tasty mix of protein, carbs, and fats.

Breakfast BowlIngredientsCalories
Low-Carb BowlGrilled chicken, roasted broccoli, fried egg, spinach350
High-Protein BowlLean chicken breast, Greek yogurt, nuts400
Mediterranean-Style BowlGrilled chicken, hummus, tabbouleh, feta cheese450

Global-Inspired Chicken Breakfast Recipes

Chicken breakfast recipes from around the world bring new flavors to your morning. You can enjoy spicy Mexican dishes or flavorful Asian stir-fries. Try chicken fajitas with scrambled eggs and salsa, or chicken and vegetable skewers with quinoa and soy sauce for a global start.

In many places, chicken is a key ingredient in breakfast. In India, chicken tikka masala is served with naan and basmati rice. In Japan, chicken teriyaki comes with steamed veggies and buns. These recipes can make your mornings more exciting and delicious.

  • Chicken and waffles with a Korean-style fried chicken and spicy maple syrup
  • Chicken and mushroom crepes with a French-inspired filling and sauce
  • Chicken and spinach omelette with a Greek-style feta cheese and olives

These delicious chicken breakfast ideas are easy to add to your daily routine. They offer a tasty start to your day. With a bit of creativity, you can turn breakfast into a journey around the world, discovering new tastes and ingredients.

RecipeIngredientsCooking Time
Chicken FajitasChicken breast, bell peppers, onions, tortillas20 minutes
Chicken and Vegetable SkewersChicken breast, vegetables, quinoa, soy sauce25 minutes
Chicken Tikka MasalaChicken breast, tomato sauce, naan bread, basmati rice30 minutes

These global chicken breakfast recipes can make your mornings more exciting. They let you explore the rich flavors of international cuisine. Whether you like spicy or mild, there’s a creative chicken breakfast recipe for you. So, why not start your day with a global twist and try something new and tasty?

Best Ways to Season Your Chicken for Breakfast

To make your chicken breakfast meals tasty, pick the right seasonings. Whether it’s a simple omelette or a complex casserole, the right seasonings matter. For a savory dish, mix herbs and spices to add depth.

Classic breakfast seasonings include salt, pepper, and garlic powder. They’re favorites for a reason. They add a lot of flavor. For a twist, try cumin and chili powder for a Mexican dish, or paprika and garlic for Mediterranean.

Marinade Ideas for Morning Meals

A good marinade can make your chicken breakfast meals unforgettable. Mix olive oil, lemon juice, and herbs like thyme or rosemary for a bright flavor. For a richer taste, use yogurt or sour cream with spices like cumin or coriander.

  • Use a mix of acid (like lemon juice or vinegar) and oil for balanced flavor
  • Add herbs and spices to taste, based on your desired flavor
  • Marinate your chicken for at least 30 minutes to soak up flavors

By trying different seasonings and marinades, you can make delicious chicken breakfast ideas. Whether it’s a quick omelette or a complex casserole, the right seasonings are key.

SeasoningFlavor ProfileUsage
Salt and pepperClassic, savoryUse as a base seasoning for most dishes
Cumin and chili powderMexican-inspired, spicyUse for tacos, burritos, or other Mexican-style dishes
Paprika and garlicMediterranean-style, smokyUse for dishes like shakshuka or chicken and rice bowls

Using Leftover Chicken for Breakfast Creations

Turning leftover chicken into easy chicken breakfast dishes is smart. It helps cut down on waste and makes mornings better. Try adding shredded or chopped chicken to creative chicken breakfast recipes like omelets, frittatas, or breakfast burritos.

Here are some tips for using leftover chicken in breakfast recipes:

  • Use leftover chicken to make chicken and waffles, a classic breakfast combination.
  • Add shredded chicken to your favorite breakfast tacos or wraps.
  • Mix diced chicken with scrambled eggs and cheese for a hearty breakfast skillet.

Getting creative chicken breakfast recipes with leftover chicken is easy. Just add it to a breakfast casserole or quiche. You can also make chicken and egg muffins. They’re a tasty, easy chicken breakfast dish for when you’re in a hurry.

By turning leftover chicken into creative chicken breakfast recipes, you can enjoy many easy chicken breakfast dishes. This also helps reduce waste and saves time in the kitchen.

Reducing food waste is an important step towards a more sustainable lifestyle, and using leftover chicken in breakfast recipes is a great way to do your part.

Kitchen Tools and Equipment for Perfect Chicken Breakfasts

To make quick chicken breakfast recipes and easy dishes, you need the right tools. A well-stocked kitchen makes cooking chicken breakfasts more fun and efficient.

A good chef’s knife, cutting board, and skillet are key. They help you chop and cook chicken breakfast ingredients easily. Also, appliances like slow cookers or instant pots can save you time, making quick chicken breakfasts.

Essential Cooking Tools

  • Chef’s knife
  • Cutting board
  • Skillet

Time-Saving Appliances

  • Slow cooker
  • Instant pot

Storage Container Recommendations

Use airtight containers for leftovers and ingredients. They keep your kitchen tidy and make meal prep easy. Choose containers that are dishwasher safe and good for storing and reheating.

Investing in these tools and appliances will help you make tasty and easy chicken breakfasts. Whether you’re cooking quick meals or meal prepping, the right tools are crucial.

Kitchen ToolDescription
Chef’s KnifeA versatile knife for chopping and slicing ingredients
Cutting BoardA durable surface for preparing ingredients
SkilletA versatile pan for cooking a variety of chicken breakfast dishes

Conclusion: Elevating Your Morning Routine with Chicken Breakfast Dishes

Chicken breakfast recipes are a great way to start your day. They are packed with protein, giving you a morning energy boost. You can choose from many different ways to make chicken breakfasts, from quick dishes to casseroles you can make ahead.

Chicken is a smart choice for breakfast. It saves time, is budget-friendly, and tastes amazing. Try out some of the recipes and ideas we’ve shared. Make chicken your go-to breakfast food and enjoy the benefits it brings to your morning routine.

FAQ

What are the nutritional benefits of using chicken for breakfast?

Chicken is packed with protein, which is key for muscle growth and repair. It’s also low in fat and calories. This makes it a great choice for a healthy and filling breakfast.

How does the protein content of chicken compare to traditional breakfast meats?

Chicken has more protein per serving than bacon or sausage. This makes it a healthier and more satisfying start to your day.

What are some easy and delicious chicken breakfast recipes for beginners?

Beginners can try chicken and egg scrambles, chicken breakfast burritos, and chicken and veggie bowls. These recipes are simple and tasty.

How can I make chicken breakfast meals ahead of time?

Prepare chicken breakfast casseroles, sandwiches, or meal-prepped bowls in advance. Store them in the fridge or freezer for quick reheating on busy mornings.

What are some quick 15-minute chicken breakfast dishes I can make?

For fast meals, try chicken breakfast hash, chicken avocado toast, or a quick chicken burrito bowl. These can be made in 15 minutes or less.

What are some healthy chicken breakfast bowl ideas?

Healthy options include a low-carb bowl with veggies and eggs, a high-protein bowl with quinoa and avocado, or a Mediterranean bowl with feta and olives.

What are some global-inspired chicken breakfast recipes I can try?

Try Mexican chicken burritos, Thai chicken stir-fries, or Mediterranean chicken pita. These dishes bring flavors from around the world to your breakfast table.

How can I season my chicken for breakfast to make it more flavorful?

Use classic breakfast spices like paprika, garlic powder, and onion powder. Or try international flavors like cumin, chili powder, and oregano. Marinate in yogurt, citrus, or herbs for extra taste.

How can I use up leftover chicken for breakfast?

Use leftover chicken in breakfast fried rice, vegetable frittatas, or hash. Get creative and turn leftovers into tasty morning meals.

What kitchen tools and equipment are essential for making perfect chicken breakfasts?

You’ll need a good skillet, sharp knife, cutting board, and storage containers. Appliances like Instant Pots or air fryers can also speed up your breakfast prep.

Seared Chicken Thighs: A Delicious, Easy-to-Make Dish

seared chicken thighs recipe

Why do so many people love seared chicken thighs? Is it because the recipe is simple? Or is it because the results are impressive with just a few ingredients? Or maybe it’s because chicken thighs are so versatile? Let’s explore how to make seared chicken thighs that are both tasty and easy to make.

Seared chicken thighs are perfect for any meal because they’re both flavorful and moist. The secret to a great dish is using top-notch ingredients and cooking the chicken to the right temperature. With a few simple steps, you can make a dish that will wow your guests.

Key Takeaways

  • Seared chicken thighs are a delicious and easy-to-make dish
  • A basic seared chicken thighs recipe can be made with minimal ingredients and effort
  • Chicken thighs are a versatile ingredient that can be used in a variety of dishes
  • Cooking seared chicken thighs to the right temperature is key to a great dish
  • Using high-quality ingredients is important for a delicious seared chicken thighs recipe
  • Learning how to make seared chicken thighs can be a great addition to your cooking skills

Understanding the Appeal of Seared Chicken Thighs

Seared chicken thighs are a favorite in many homes. They offer a great mix of taste and texture. But why do chicken thighs stand out, and why is searing so effective?

Chicken thighs are known for their fat, which makes them tender and juicy. When seared, this fat stays inside, creating crispy thighs full of flavor. The science is simple: a hot pan creates a crispy crust on the outside, while the inside stays moist.

Why Choose Chicken Thighs Over Breast Meat

Chicken thighs have a richer taste and are more tender than breast meat. They’re also cheaper, which is a plus for budget-conscious cooks. The secret to the best seared chicken thighs is cooking them at the right temperature. This way, you get a crispy outside and a juicy inside.

Benefits of the Searing Method

The searing method is perfect for cooking chicken thighs. It creates a crispy outside while keeping the inside tender. This method also keeps the juices in, making the dish more flavorful. Some key benefits include:

  • Even cooking: Searing ensures the chicken is cooked evenly, avoiding overcooking or undercooking.
  • Flavor enhancement: Searing boosts the chicken’s flavor, making the dish more delicious.
  • Texture: Searing gives a crispy exterior and a juicy interior.

Flavor Profile and Texture

Seared chicken thighs have a unique flavor and texture. The crispy outside gives way to a tender, juicy inside. The searing method enhances the flavor, making any recipe a hit.

Essential Equipment for Perfect Searing

To get perfectly seared chicken thighs, you need the right tools. A cast iron skillet is best because it keeps heat well. This helps create a nice crust on the chicken. Always preheat your cast iron skillet before adding the chicken.

Here are some key pieces of equipment you’ll need:

  • A cast iron skillet or other oven-safe skillet
  • A stovetop or oven for cooking
  • Tongs or a spatula for turning the chicken

Using a cast iron skillet makes a big difference. It distributes heat evenly, creating a crispy crust. At the same time, it keeps the inside juicy and tender. For the best seared chicken thighs, choose cast iron.

By getting the right equipment, like a cast iron skillet, you’re on your way to making delicious seared chicken thighs. They’re sure to impress everyone.

Ingredients for Classic Seared Chicken Thighs Recipe

To make delicious seared chicken thighs, you need a few key ingredients. The secret to tasty chicken thighs is mixing basic pantry items with the right seasonings. Start with bone-in, skin-on chicken thighs for the best taste.

A classic recipe includes olive oil, salt, and pepper. Adding garlic and onions can make the flavor even better. For a richer taste, try herbs like thyme or rosemary with your chicken.

Main Ingredients List

  • Chicken thighs (bone-in, skin-on)
  • Olive oil
  • Salt
  • Pepper
  • Garlic
  • Onions

Optional Seasonings and Aromatics

  • Thyme
  • Rosemary
  • Lemon juice
  • Paprika

Recommended Marinades

Marinating your chicken thighs before searing can add more flavor. A simple marinade of olive oil, lemon juice, and herbs can make your chicken even better. Try different marinades to find your favorite.

MarinadeIngredients
Classic Herb MarinadeOlive oil, lemon juice, thyme, rosemary
Spicy MarinadeOlive oil, lemon juice, paprika, garlic

With these ingredients and marinades, you’re on your way to making tasty seared chicken thighs. They’re sure to impress anyone.

Preparing Your Chicken Thighs for Searing

To get the best seared chicken thighs with garlic butter, you need to prep your chicken right. This means trimming off extra fat and seasoning the meat. This boosts the flavor and texture.

Begin by rinsing the chicken thighs in cold water. Then, dry them with paper towels. Next, remove any extra fat or connective tissue. This makes the chicken cook better and prevents it from getting too greasy.

After trimming, season the chicken. Use herbs and spices to add flavor, but for a classic seared chicken thighs with garlic butter recipe, stick to salt, pepper, and garlic powder.

  • Salt: enhances the natural flavor of the chicken
  • Pepper: adds a subtle kick of heat
  • Garlic powder: provides a rich, savory flavor

Now, make the garlic butter by mixing softened butter with minced garlic and a pinch of salt. This will be brushed on the chicken during searing. It adds more flavor and moisture.

By following these steps, you’re on your way to making tasty seared chicken thighs with garlic butter. They’re sure to wow your family and friends.

IngredientQuantity
Chicken thighs4-6
Garlic powder1-2 teaspoons
Salt1-2 teaspoons
Pepper1/2-1 teaspoon
Garlic butter2-3 tablespoons

The Perfect Seared Chicken Thighs Recipe

To get the perfect crispy skin seared chicken thighs, you need a good recipe. It’s important to know the right temperatures and how to get crispy skin. A great seared chicken thighs recipe will tell you about temperatures and how to sear.

Getting the perfect crispy skin seared chicken thighs takes focus and the right methods. Here are some important tips:

  • Preheat the skillet to the right temperature, usually medium-high heat, to achieve a nice sear on the chicken thighs.
  • Pat the chicken thighs dry with paper towels to remove excess moisture, which helps create a crispy skin.
  • Use a small amount of oil in the skillet to prevent the chicken from sticking and to promote even browning.

By following these tips and using a reliable seared chicken thighs recipe, you can make delicious and crispy crispy skin seared chicken thighs. Always cook the chicken to the right internal temperature for safety.

With practice and patience, you can get better at searing chicken thighs. Whether you’re experienced or new in the kitchen, a good seared chicken thighs recipe is key for tasty dishes.

Common Mistakes to Avoid When Searing Chicken

Learning to sear chicken thighs well means knowing what not to do. One big mistake is not controlling the temperature right. This can make the chicken either too raw or too cooked. Make sure your skillet is hot before adding the chicken.

Another error is putting too much chicken in the skillet at once. This makes the chicken steam instead of sear, leaving it soft. Always cook the chicken in batches if you have to, so each piece can cook well. To get perfect seared chicken thighs, just follow a few easy steps.

  • Use a thermometer to ensure the skillet is at the right temperature.
  • Pat the chicken dry with paper towels before cooking to remove excess moisture.
  • Don’t overcrowd the skillet, as this can prevent the chicken from searing properly.

By avoiding these mistakes and following some tips, you’ll make delicious, restaurant-quality seared chicken thighs. Remember, getting it right takes practice. So, don’t get discouraged if it takes a few tries. With patience and practice, you’ll soon be a pro at searing chicken thighs.

Learning to sear chicken thighs well takes focus and practice. But with the right methods and a few tips, you can make chicken that’s crispy on the outside and juicy inside. So, go ahead and try it out – your taste buds will love you for it!

MistakeCorrection
Incorrect temperatureUse a thermometer to ensure the skillet is at the right temperature.
Overcrowding the skilletCook the chicken in batches if necessary, to ensure each piece has enough room to cook evenly.

Flavor Variations and Seasoning Combinations

Seared chicken thighs offer endless flavor options. Try different herbs, spices, and marinades to find your favorite. The right mix can make the chicken taste amazing.

Mediterranean style uses olives, lemon, and oregano. Asian flavors include soy sauce, ginger, and garlic. A classic mix is herbs and garlic for a savory taste.

Mediterranean Style

Mediterranean style adds feta cheese, sun-dried tomatoes, and parsley. Marinate the chicken in olive oil, lemon juice, and oregano for a tasty dish.

Asian-Inspired Flavors

Asian flavors use soy sauce, honey, and ginger. A marinade with these adds a sweet and savory taste.

Classic Herb and Garlic

Herbs like thyme and rosemary with garlic make a classic flavor. Mix minced garlic with chopped herbs and olive oil for a great marinade.

Experiment with flavors to make a unique seared chicken dish. Choose from Mediterranean, Asian, or classic herb and garlic. Use quality ingredients and don’t be afraid to try new things.

Tips for Achieving Restaurant-Quality Results

To get restaurant-quality seared chicken thighs, focus on precise temperature control and doneness tests. These techniques will boost your cooking skills. You’ll impress everyone with a tasty seared chicken thighs recipe.

Temperature control is key. Use a thermometer to check your pan’s temperature. This ensures a perfect sear on your chicken thighs. Also, avoid overcrowding your pan. It can lower the temperature and ruin your sear.

Temperature Control Techniques

  • Use a thermometer to ensure your pan is at the right temperature
  • Don’t overcrowd your pan to maintain a consistent temperature
  • Adjust your heat source as needed to prevent burning or undercooking

Timing and Doneness Tests

For perfectly cooked easy seared chicken thighs, use timing and doneness tests. A meat thermometer checks the chicken’s internal temperature. Or, you can use the touch test to see if it’s done.

By following these tips, you can make restaurant-quality seared chicken thighs. Always use fresh, high-quality ingredients. Don’t hesitate to try different seasonings and marinades to enhance your dish’s flavor.

TechniqueDescription
Temperature ControlUsing a thermometer to ensure the right temperature
Doneness TestsUsing a meat thermometer or the touch test to check for doneness

Serving Suggestions and Pairings

There are many ways to serve seared chicken thighs with garlic butter. These crispy, flavorful thighs go well with different sides and salads. Try them with roasted veggies and quinoa or mashed potatoes for a classic taste.

Here are some ideas for serving seared chicken thighs with garlic butter:

  • Grilled asparagus with a squeeze of lemon
  • Roasted sweet potatoes with a drizzle of balsamic glaze
  • A simple green salad with a light vinaigrette

You can also pair crispy seared chicken thigh with drinks like dry white wine or craft beer. For something non-alcoholic, try lemon or lime sparkling water.

Here’s a sample menu with seared chicken thighs with garlic butter:

CourseMenu Item
Main CourseSeared Chicken Thighs with Garlic Butter
Side DishRoasted Asparagus with Lemon
SaladSimple Green Salad with Light Vinaigrette
BeverageSparkling Water with Lemon

Storage and Reheating Guidelines

Mastering seared chicken thighs cast iron cooking is just the start. Knowing how to store and reheat them is key to keeping their quality. Whether you’re using easy seared chicken thighs recipes or more complex ones, proper storage and reheating are crucial.

To store seared chicken thighs cast iron, let them cool down first. Then, place them in an airtight container. Refrigerate or freeze them. For reheating, the oven is best to keep the skin crispy.

Proper Storage Methods

  • Let the seared chicken thighs cast iron cool down completely before storing.
  • Use an airtight container to prevent moisture and other flavors from affecting the chicken.
  • Label the container with the date and contents for easy identification.

Reheating Without Losing Crispiness

To reheat easy seared chicken thighs without losing crispiness, follow these steps:

  1. Preheat your oven to 400°F (200°C).
  2. Place the seared chicken thighs cast iron on a baking sheet lined with parchment paper.
  3. Reheat for about 15-20 minutes or until the chicken is warmed through and the skin is crispy.

By following these guidelines, you can enjoy your seared chicken thighs cast iron or easy seared chicken thighs anytime. They’ll still taste delicious and have great texture.

Storage MethodReheating Method
Airtight container in the refrigeratorOven reheating at 400°F (200°C) for 15-20 minutes
Airtight container in the freezerOven reheating at 400°F (200°C) for 20-25 minutes

Conclusion

As we wrap up our exploration of seared chicken thighs, it’s clear they offer a lot of tasty options. We’ve learned about the appeal of thigh meat and how to sear it for a crispy, flavorful crust. These steps can make your cooking at home much better.

The seared chicken thighs recipe we’ve looked at is a great starting point. But the real fun is in trying out different flavors. Try Mediterranean, Asian, or herb-infused versions to find your favorite.

For top-notch results, pay close attention to details like temperature and timing. With the tips from this article, you can make seared chicken thighs that taste like they came from a restaurant.

So, what are you waiting for? Get your skillet ready and start cooking. Your taste buds and dinner guests will love this delicious adventure.

FAQ

What makes seared chicken thighs so special?

Seared chicken thighs are loved for their amazing flavor and juicy texture. The searing process makes the skin crispy while keeping the meat moist. This makes for a delicious eating experience.

Why should I choose chicken thighs over chicken breasts?

Chicken thighs are richer in flavor and have more fat, making them moist and tender. The dark meat of the thigh also gets crispy on the outside and juicy on the inside when seared.

What type of cookware works best for searing chicken thighs?

A cast iron skillet is great for searing chicken thighs. It can get very hot and keep the heat well. This ensures even cooking and a crispy skin.

What ingredients do I need for a classic seared chicken thighs recipe?

You’ll need bone-in, skin-on chicken thighs, salt, pepper, and a high-heat oil like avocado or canola oil. You can also add seasonings, marinades, or aromatics like garlic, herbs, or citrus to boost the flavor.

How do I properly prepare the chicken thighs for searing?

Start by drying the chicken thighs with paper towels to get crispy skin. Trim excess fat or skin, then season with salt and pepper. Let the seasoned chicken come to room temperature before searing.

What is the best way to achieve a perfect sear on chicken thighs?

Heat your cast iron skillet or heavy-duty pan over high heat until it’s very hot. Add oil, then place the chicken thighs skin-side down. Sear for 4-5 minutes until the skin is golden, then flip and finish cooking.

What are some common mistakes to avoid when searing chicken thighs?

Avoid overcrowding the pan, as it can steam the chicken instead of sear it. Use a hot pan and let the chicken come to room temperature before searing for crispy skin.

How can I add different flavors to my seared chicken thighs?

Try Mediterranean flavors like oregano, lemon, and garlic, or Asian flavors like soy sauce, ginger, and scallions. You can also use different marinades or sauces to enhance the flavor of the crispy, juicy chicken.

What are some tips for achieving restaurant-quality seared chicken thighs at home?

Focus on precise temperature control and ensure your pan is very hot before adding the chicken. Pay attention to timing and use a meat thermometer to check for doneness. Letting the chicken rest before serving is key for juicy results.

How can I store and reheat leftover seared chicken thighs without losing their crispiness?

Cool the chicken completely, then refrigerate it in an airtight container for up to 4 days. To reheat, warm it in a 400°F oven for 10-15 minutes. This will restore the crispy skin without drying out the meat.