>
Edit Content

Food That’s Made from the Heart
We’re all about turning simple ingredients into magical moments. From kitchen newbies to seasoned chefs, our recipes are designed to keep things fun and easy! Let’s cook, laugh, and eat together. 🥰

Contact Us

Mouthwatering Deer Roast Recipe – Perfect for Dinner

deer roast recipe

What makes a deer roast recipe unforgettable? Is it the tender venison, the rich flavors, or the ease of making it? A delicious deer roast recipe can change the game in wild game cooking. It’s perfect for dinner, blending flavors and being easy to prepare. Whether you’re a seasoned hunter or new to cooking, this recipe will wow you.

A great deer roast recipe can make any meal special. With the right ingredients and techniques, you can make a dish that’s truly delicious. From start to finish, every step is important in wild game cooking. In this article, we’ll cover the basics of making the perfect deer roast recipe. We’ll talk about essential ingredients, preparation, and cooking techniques.

Key Takeaways

  • Learn the basics of wild game cooking and how to prepare a delicious deer roast recipe
  • Discover the essential ingredients and techniques for a tender and flavorful venison roast
  • Understand the importance of proper preparation and cooking methods for a perfect deer roast
  • Explore different seasoning and marination options to enhance the flavor of your deer roast recipe
  • Get tips on how to serve and present your venison roast for a memorable dining experience
  • Find out how to store and reheat your deer roast recipe for maximum flavor and convenience

Understanding the Perfect Deer Roast

Preparing a delicious deer roast requires knowing the different cuts of venison. A slow cooker venison recipe is great for tender and flavorful results. The best deer roast marinade also plays a big role in the final taste.

Venison is a lean protein source with a rich flavor. A roasted venison loin is a fantastic way to enjoy it. It pairs well with various sides and sauces. Some favorites include:

  • Roasted vegetables
  • Mashed potatoes
  • Gravy or sauce

The marinade and seasoning are key to a great deer roast. A good best deer roast marinade adds flavor and tenderness. A slow cooker venison recipe makes cooking easy and convenient.

To make the perfect deer roast, consider the meat cut, cooking method, and seasoning. By choosing the right slow cooker venison recipe and best deer roast marinade, you’ll have a memorable meal.

Cut of MeatCooking MethodMarinade and Seasoning
Venison loinRoastingHerbs and spices
Venison roastSlow cookingMarinade and sauce

Essential Ingredients for Your Deer Roast Recipe

To make a delicious deer roast, you need a few key ingredients. Look for a good cut of venison, like a rump or round roast. You’ll also need basic spices and marinades. For easy recipes, keep it simple to let the meat’s natural flavor stand out.

Other important ingredients include olive oil, garlic, and herbs like thyme or rosemary. These add flavor without overpowering the meat. Cooking the deer roast low and slow is key. It makes the meat tender and juicy.

  • Venison roast (rump or round)
  • Olive oil
  • Garlic
  • Herbs (such as thyme or rosemary)
  • Salt and pepper

With these ingredients, you’re on your way to a tasty deer roast. Just remember to keep it simple and let the meat’s flavor shine. And don’t forget to check out easy venison recipes for inspiration and guidance.

Preparing Your Venison for Roasting

To make delicious wild game meals, like a tasty deer roast, you need to prepare your venison right. This means following a few steps to improve the flavor and texture. It’s important to do this well to get a tender and juicy deer roast.

For tips and ideas, check out websites with recipes. Start by trimming and cleaning the venison. This means removing any extra fat, skin, or connective tissue. Trimming is key to a flavorful and tender deer roast.

Once you’ve trimmed and cleaned, it’s time for marination. Marinating adds flavor and makes the meat tender. You can use olive oil, garlic, and herbs in your marinade. Dry rubs or wet marinades can also enhance your dish’s taste.

Marination Techniques and Seasoning Methods

  • Use acidic ingredients like vinegar or lemon juice to break down the meat’s connective tissues.
  • Add onions and garlic to the marinade for extra flavor.
  • Try different seasoning blends, like salt, pepper, and herbs, to find the perfect taste for your deer roast.

By following these steps and techniques, you can make a delicious and memorable deer roast. It’s sure to impress your guests. Always handle and store your venison safely for quality and food safety.

Best Marinades and Rubs for Tender Deer Roast

To get a tender and tasty deer roast, the right marinade is key. A good marinade boosts the meat’s flavor and texture. This makes it perfect for any event, especially with roasted venison loin.

Ingredients like olive oil, garlic, and herbs like thyme and rosemary are popular. They add flavor and tenderize the meat. For venison loin, a mix of soy sauce, brown sugar, and vinegar creates a sweet and savory taste.

Here are some tips for the best deer roast marinade:

  • Use a mix of acid and oil to tenderize the meat
  • Add garlic and onions for extra flavor
  • Avoid over-marinating to prevent toughness

A great marinade can make a roasted venison loin truly special. By using the best marinade and following these tips, you’ll get a delicious, tender deer roast. It’s sure to impress everyone.

With some experimentation and patience, you’ll find the perfect marinade for your venison loin. Whether you’re a seasoned hunter or just love food, a well-marinated deer roast will be a hit.

Marinade IngredientQuantityPurpose
Olive Oil1/4 cupMakes the meat tender
Garlic3 clovesEnhances flavor
Thyme1 tablespoonProvides a savory flavor

Step-by-Step Deer Roast Recipe

To make a delicious deer roast, follow a step-by-step guide. This ensures your slow cooker venison is tender and flavorful. Easy venison recipes help you create a dish that will wow your guests.

Before cooking, gather all needed ingredients and tools. You’ll need a slow cooker, meat thermometer, and spices. For a classic recipe, you’ll mix:

  • 2 pounds of venison roast
  • 1 onion, chopped
  • 3 cloves of garlic, minced
  • 1 cup of beef broth
  • 1 tablespoon of tomato paste
  • 1 teaspoon of dried thyme
  • Salt and pepper to taste

With your ingredients ready, start cooking your deer roast. Place the venison in the slow cooker. Add the onion, garlic, beef broth, tomato paste, and thyme. Season with salt and pepper. Cook on low for 8-10 hours or high for 4-6 hours.

After cooking, let the deer roast rest for 10-15 minutes. This makes the meat tender and juicy. Serve with sides like mashed potatoes, roasted veggies, or a salad.

Cooking MethodTemperatureCooking Time
Slow CookerLow8-10 hours
Slow CookerHigh4-6 hours
Oven300°F2-3 hours

By following this guide, you’ll make a tender and delicious deer roast. Whether using a slow cooker or oven, these recipes are easy to follow. They ensure a flavorful dish that will impress everyone.

Slow Cooker vs. Oven Methods

There are two main ways to cook deer roast: slow cooker venison and roasted venison loin. Each method has its own advantages and disadvantages. The choice depends on what you like and what you’re aiming for.

Slow cooker venison is perfect for those who don’t want to spend much time cooking. You just put the venison in a slow cooker with some liquid and spices. Let it cook for hours. The result is a tender, flavorful roast that’s great for a quick dinner.

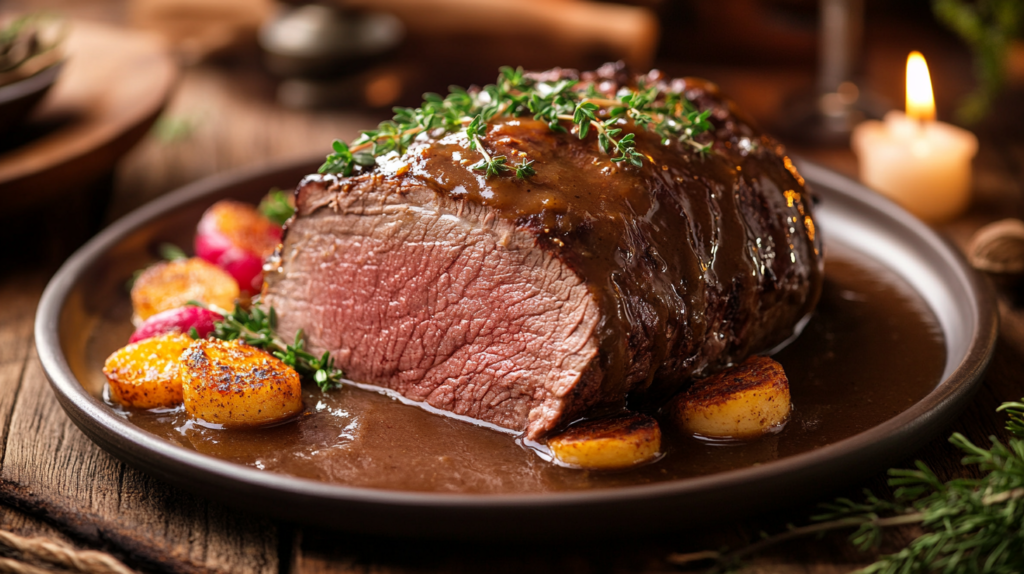
Roasted venison loin is a classic method that involves roasting the venison in the oven. This method creates a crispy crust on the outside while keeping the inside juicy. It’s ideal for special events or holidays.

Here are some key differences between the two methods:

  • Cooking time: Slow cooker venison takes several hours, while roasted venison loin takes about 20-30 minutes.
  • Effort: Slow cooker venison is easy, while roasted venison loin needs more attention.
  • Texture: Slow cooker venison is tender, while roasted venison loin is crispy and juicy.

Choosing between slow cooker venison and roasted venison loin comes down to what you like. Both methods can make delicious dishes. It’s worth trying both to see which one you prefer.

MethodCooking TimeEffortTexture
Slow Cooker VenisonSeveral hoursMinimalTender and fall-apart
Roasted Venison Loin20-30 minutesMore attention requiredCrispy on the outside, juicy on the inside

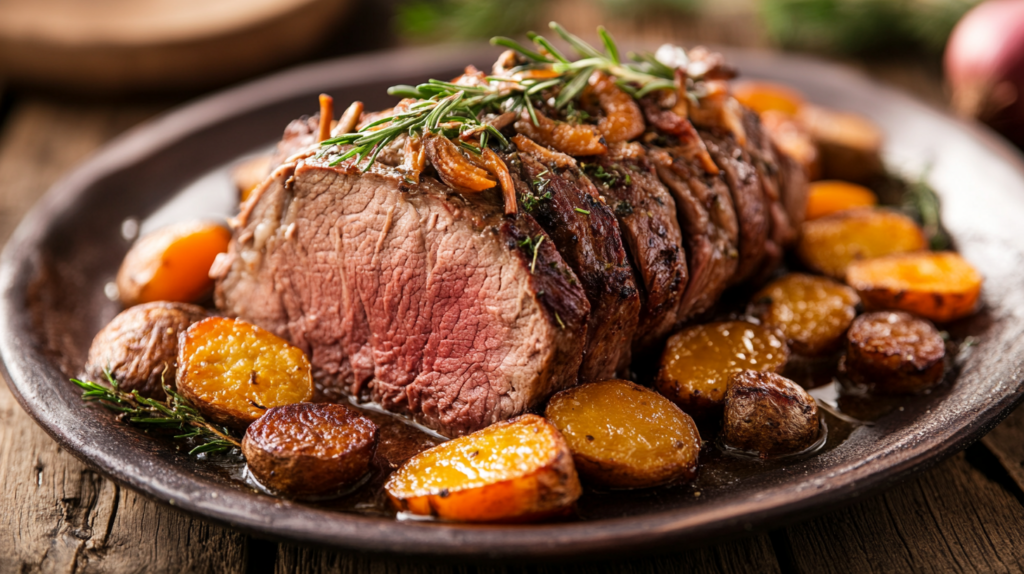
Serving Suggestions and Side Dishes

When serving wild game meals, how you present them matters a lot. A beautifully set deer roast can make your meal unforgettable. Pair your deer roast with a full-bodied wine like Cabernet Sauvignon, Merlot, or Syrah. These wines match the bold flavors of the deer roast.

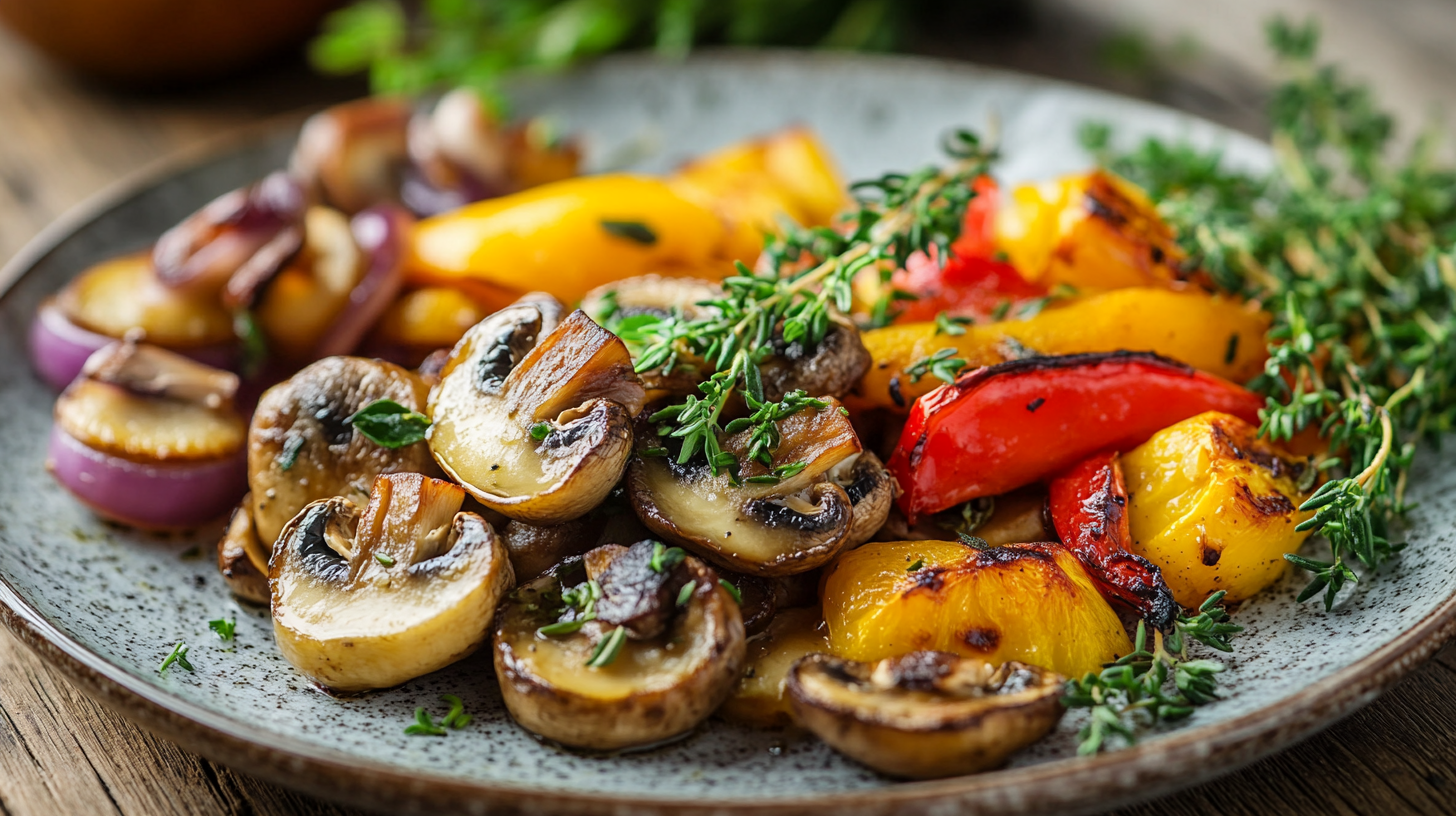
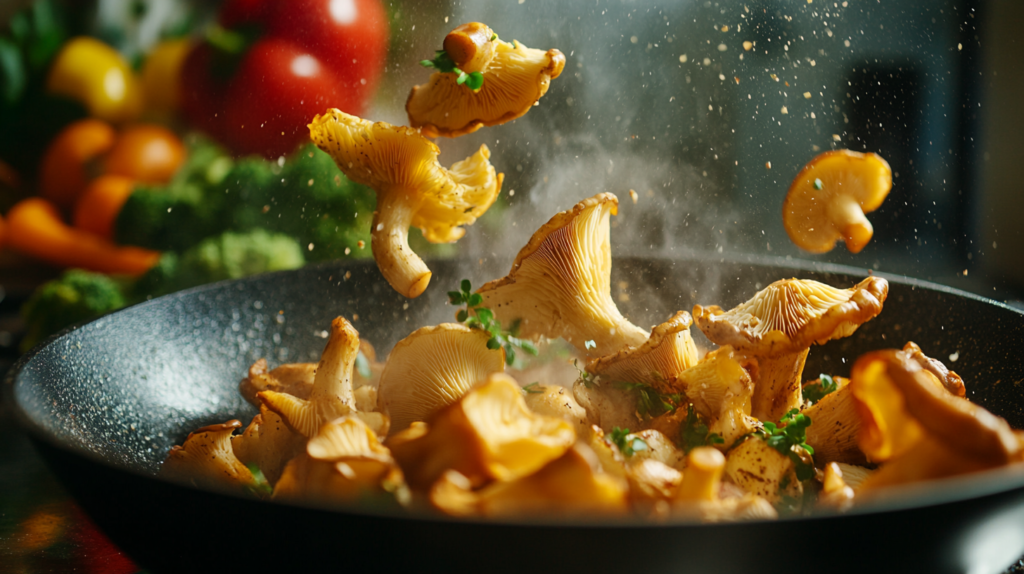
Adding colorful vegetables can enhance your dish. Try roasted Brussels sprouts, sautéed mushrooms, or grilled asparagus. Season these veggies with herbs and spices that match your deer roast. This will make your meal complete and tasty.

Delicious Side Dish Options

  • Roasted root vegetables, such as carrots and parsnips
  • Sautéed spinach with garlic and lemon
  • Grilled or roasted sweet potatoes

Adding a flavorful sauce to your deer roast is a great idea. Choose from red wine reduction, mushroom gravy, or horseradish cream sauce. These sauces bring out the flavors and add moisture, making your dish stand out.

Sauce Options

SauceIngredientsInstructions
Red Wine ReductionRed wine, beef broth, butterReduce red wine and beef broth on the stovetop, then whisk in butter
Mushroom GravyMushrooms, flour, beef brothSauté mushrooms in butter, then whisk in flour and beef broth
Horseradish Cream SauceHorseradish, sour cream, lemon juiceMix horseradish and sour cream, then whisk in lemon juice

Storing and Reheating Your Venison Roast

To keep your tender deer roast fresh and delicious, proper storage is key. Let it cool down to room temperature after cooking. Then, wrap it tightly in plastic wrap or aluminum foil.

You can store it in the fridge for up to 3 days. Or, freeze it for up to 2 months.

When reheating your venison roast, several methods can help. Here are some tips:

Storage Tips

  • Store the venison roast in a covered container to prevent drying out.
  • Keep the roast away from strong-smelling foods, as venison can absorb odors easily.
  • Label and date the stored venison roast to ensure you use the oldest one first.

Reheating Methods

To reheat your venison roast, you can use the oven, microwave, or stovetop. For easy venison recipes, try reheating the roast in the oven at 300°F (150°C) for about 20-25 minutes. Or until it reaches your desired temperature.

You can also reheat it in the microwave, covered with a microwave-safe lid. For 2-3 minutes or until heated through.

By following these storage and reheating tips, you can enjoy your tender deer roast for a longer period. It will maintain its delicious flavor and texture. Whether you’re looking for easy venison recipes or ways to store your venison roast, these tips will help you make the most of your culinary creation.

Conclusion: Mastering the Art of Deer Roast

Mastering deer roast is a rewarding journey. You’ve learned about venison cuts, seasoning, and cooking. Now, you can make a delicious deer roast that will wow everyone.

Wild game cooking lets you enjoy venison’s rich flavors and health benefits. With the right techniques, you can make venison tender and juicy. Try different marinades, rubs, and sides to create your own special deer roast.

Whether you’re an experienced chef or just starting, mastering deer roast is fulfilling. Enjoy the process, the smells, and the joy of serving a great meal. This deer roast recipe is just the beginning of your wild game cooking adventure.

FAQ

What is the best way to cook a deer roast?

You can cook a deer roast in a crockpot or in the oven. The best method depends on the venison cut and your taste.

How do I tenderize a deer roast?

Marinate the venison in a mix of flavors. Use acidic ingredients like wine, vinegar, or citrus juice.

What are the best seasonings to use for a deer roast?

Good seasonings include garlic, rosemary, thyme, black pepper, and juniper berries. You can make a dry rub with these spices.

How long should I cook a deer roast?

Cooking time varies by roast size and desired doneness. Roast in the oven for 20-25 minutes per pound. Or, slow cook for 6-8 hours.

What internal temperature should a deer roast reach?

For medium-rare, aim for 130-135°F. For medium, 140-145°F. For well-done, 160°F or higher.

What are some good side dishes to serve with deer roast?

Try roasted potatoes, sautéed mushrooms, or braised red cabbage. A fresh green salad or a flavorful sauce also works well.

How can I store and reheat leftover deer roast?

Store leftover deer roast in an airtight container in the fridge for 3-4 days. Reheat by slicing and warming in the oven, on the stovetop, or in the microwave.

Chipotle Queso Recipe: Creamy, Cheesy Dip to Satisfy Cravings

chipotle queso recipe

What makes a great chipotle queso recipe? Is it the perfect blend of creamy and cheesy, or the kick of spice that sets it apart? For many, the answer lies in a homemade chipotle queso that’s easy to make and satisfies cravings. We’re about to explore what makes it special and how to make your own at home.

Key Takeaways

  • Learn the secrets to a creamy, cheesy chipotle queso recipe
  • Discover how to make a homemade chipotle queso that’s easy and delicious
  • Find out what sets apart a great chipotle queso dip from a good one
  • Get tips on creating the perfect blend of flavors for your chipotle queso
  • Explore the world of easy chipotle queso dip and its many variations
  • Understand the importance of using high-quality ingredients in your chipotle queso recipe

The Story Behind Chipotle’s Famous Queso Blanco

Chipotle’s Queso Blanco is a favorite in Mexican-inspired food. It’s loved for its creamy texture and spicy kick. Many try to make this spicy queso blanco recipe at home. To understand why it’s so popular, we need to look at its history and what makes it special.

Chipotle’s Queso Recipe has evolved over time. The company has perfected it, making it a true taste of Mexico. They use top-notch ingredients and know-how of Mexican cooking. This creates a flavor that’s both familiar and exciting.

Evolution of Chipotle’s Queso Recipe

The story of Chipotle’s Queso Blanco started with a simple goal. They wanted a cheese dip that would go well with their burritos. After many tries, they hit the mark with a spicy queso blanco recipe that people loved. Now, it’s a key part of Chipotle’s menu, thanks to their focus on quality and traditional cooking.

Why This Copycat Version Works Better

The secret Chipotle Queso Blanco recipe is still a secret. But, the copycat version is a hit. It uses Monterey Jack and Pepper Jack cheese and a bit of spice. This mix of flavors and quality ingredients makes it a great choice for those who want to make Chipotle’s magic at home.

IngredientQuantity
Monterey Jack Cheese1 cup
Pepper Jack Cheese1/2 cup
Chipotle Peppers2-3

Essential Ingredients for Perfect Chipotle Queso

To make a delicious chipotle queso recipe, you need the right ingredients. The key to a great homemade chipotle queso is using high-quality cheese, spices, and peppers. Here are the essential ingredients you’ll need:

A good chipotle queso recipe starts with a blend of cheeses. You’ll need Monterey Jack, Cheddar, and Pepper Jack. These cheeses give a rich, creamy flavor that’s perfect for dipping. You’ll also need spices like cumin, paprika, and garlic powder to add depth and warmth.

For a smoky heat, you’ll need some chipotle peppers. You can use canned or fresh peppers, depending on your preference. You might also want to add diced onions, diced tomatoes, and a splash of heavy cream to your homemade chipotle queso.

Here are some key ingredients to keep in mind when making your chipotle queso recipe:

  • Monterey Jack cheese
  • Cheddar cheese
  • Pepper Jack cheese
  • Cumin
  • Paprika
  • Garlic powder
  • Chipotle peppers

By using these essential ingredients, you can create a delicious and authentic homemade chipotle queso. It’s perfect for snacking, entertaining, or just satisfying your cravings.

Kitchen Tools You’ll Need

To make an easy chipotle queso dip, you’ll need some essential kitchen tools. Having the right equipment will help you prepare a delicious homemade chipotle queso. It’s sure to please your family and friends.

When it comes to making a homemade chipotle queso, the right tools can make all the difference. Here are some of the key items you’ll need to get started:

Required Equipment

  • A medium saucepan for melting the cheese and cooking the queso
  • A hand blender or whisk for smoothing out the dip
  • A cutting board for chopping onions and peppers
  • A cheese grater for shredding the cheese

Optional but Helpful Tools

While not essential, some tools can make the process easier and more efficient. These include:

  • A slow cooker for keeping the queso warm and melted
  • A food processor for chopping and blending ingredients
  • A spatula for scraping the sides of the saucepan

Heat Source Considerations

When making a homemade chipotle queso, it’s essential to consider your heat source. You can use a stovetop, oven, or slow cooker to melt the cheese and cook the queso. Each method has its advantages, so choose the one that works best for you.

The Perfect Cheese Blend for Authentic Chipotle Queso Recipe

To make authentic chipotle queso, you need a mix of top-notch cheeses. These cheeses should melt well and give a creamy texture. A good mix includes Monterey Jack, Cheddar, and Colby. Together, they make a smooth, creamy sauce that’s key to the dish.

When picking cheeses for your chipotle queso, think about a few things:

  • Quality: Go for cheeses made from fresh milk with a rich taste.
  • Meltability: Pick cheeses that melt well for a smooth sauce.
  • Flavor: Choose cheeses that match the flavor you want for your queso.

A great chipotle queso recipe balances flavors well. The cheese mix is a big part of this. By blending different cheeses with other ingredients, you get a creamy sauce.

Other ingredients like chipotle peppers, garlic, and spices add smoky flavor. The secret to amazing chipotle queso is finding the right mix of flavors and textures. Use top-quality ingredients that work well together. With the right cheese mix and practice, you’ll make a delicious chipotle queso everyone will love.

Cheese TypePercentageFlavor Profile
Monterey Jack40%Mild, slightly sweet
Cheddar30%Sharp, rich
Colby30%Mild, slightly sweet

Preparing Your Chipotle Peppers and Seasonings

To make a true spicy queso blanco recipe, you must prepare your chipotle peppers and seasonings well. This step is key to getting the chipotle queso recipe‘s unique taste. When picking chipotle peppers, think about their heat and taste. You can pick from many peppers, like chipotle peppers in adobo sauce or dried ones.

Here are some tips for preparing your chipotle peppers and seasonings:

  • Choose the right peppers: Pick peppers that match your heat and taste preferences.
  • Adjust the spice level: For a milder taste, use fewer peppers or mix in some milder ones.
  • Create the signature flavor profile: Mix your chipotle peppers with garlic, cumin, and oregano for a deep flavor.

By following these steps, you’ll make a tasty and real spicy queso blanco recipe that everyone will love. The trick is to mix the heat and taste of the chipotle peppers with other ingredients in the chipotle queso recipe. With practice and trying different things, you’ll make a queso that’s both creamy and spicy.

Remember, the quality of your ingredients affects your queso’s taste. Use the best chipotle peppers and seasonings you can find. Don’t be shy to try different mixes to find the perfect taste for your spicy queso blanco recipe.

Step-by-Step Cooking Instructions

To make an easy chipotle queso dip, start by melting the cheese blend in a saucepan over medium heat. Add the chipotle peppers and stir until well combined. This homemade chipotle queso recipe is a crowd-pleaser, and with these simple steps, you’ll be enjoying it in no time.

Here’s a breakdown of the cooking process:

  • Melt the cheese blend in a saucepan over medium heat, stirring occasionally.
  • Add the chipotle peppers and stir until well combined.
  • Reduce heat to low and simmer for 5-7 minutes, or until the queso reaches your desired consistency.

For a smooth and creamy easy chipotle queso dip, make sure to stir constantly and adjust the heat as needed. This homemade chipotle queso recipe is perfect for parties, gatherings, or just a quick snack. With its rich, cheesy flavor and spicy kick, you’ll be making it again and again.

  1. Use high-quality cheese for the best flavor.
  2. Adjust the level of heat to your liking by adding more or fewer chipotle peppers.
  3. Experiment with different types of cheese and spices to create your own unique flavor profile.

By following these simple steps and tips, you’ll be enjoying a delicious and easy chipotle queso dip in no time. This homemade chipotle queso recipe is a game-changer for any cheese lover, and its creamy, spicy flavor is sure to become a favorite.

IngredientQuantity
Cheese blend2 cups
Chipotle peppers1/4 cup
Half-and-half1/2 cup

Achieving the Perfect Creamy Texture

To make a delicious creamy chipotle cheese sauce, getting the right texture is key. It might seem hard, but with some tips, you can nail the best chipotle queso recipe. A smooth, creamy sauce is essential for a great queso.

When making your sauce, watch the temperature and cooking time closely. If it’s too hot, it can get too thin and separate. If it’s not hot enough, it won’t melt right, leading to a lumpy texture.

Troubleshooting Common Issues

Common problems with creamy chipotle cheese sauce include it being too thin or separating. To fix these, try adjusting the temperature or adding more cheese. Always stir the sauce constantly to avoid burning or sticking to the pan.

Temperature Control Tips

To get the perfect creamy texture, controlling the sauce’s temperature is crucial. Here are some tips to help:

  • Use a thermometer to check the sauce’s temperature.
  • Stir the sauce constantly to prevent burning or sticking.
  • Adjust the heat as needed for a smooth, creamy texture.

By following these tips and using the best chipotle queso recipe, you can make a delicious, creamy sauce. Use high-quality ingredients and focus on temperature and cooking time for the perfect texture.

IngredientQuantity
Chipotle peppers2-3
Cheese1 cup
Cream1/2 cup

Serving Suggestions and Pairings

Enjoying your chipotle queso dip with real cheese is a blast. It’s great for snacking, parties, or as a side dish. Try it with tortilla chips, pita chips, or crispy plantain chips for the best taste.

Customize your chipotle queso dip with real cheese by adding different veggies. Carrots, cucumbers, or bell peppers work well. You can also top baked potatoes, nachos, or grilled meats with it. For something different, use it as a dip for fried pickles or green tomatoes.

Here are more ideas for serving your chipotle queso dip with real cheese:

  • Enjoy it with crackers or crostini for a quick snack
  • Top tacos or grilled chicken with it
  • Pair it with meats like chorizo or carnitas
  • Add it to mac and cheese or stuffed peppers

Homemade chipotle queso is a hit at home. It’s creamy, spicy, and delicious. So, get creative and find your own ways to enjoy this tasty dip.

Storage and Reheating Guidelines

To keep your best chipotle queso recipe fresh, follow storage and reheating tips. Let your easy chipotle queso dip cool down to room temperature. This step stops bacteria growth and keeps the queso creamy.

Use airtight containers like glass or plastic with tight lids for storage. Label them with the date and what’s inside. This way, you can track how long it’s been stored. Your best chipotle queso recipe can stay good for up to 3 days in the fridge.

Proper Storage Methods

  • Store in airtight containers
  • Label containers with date and contents
  • Keep refrigerated at a temperature of 40°F (4°C) or below

Best Reheating Practices

To reheat your easy chipotle queso dip, use the microwave or stovetop. Stir often to avoid burning. Adding a bit of milk or cream can help with the consistency.

By sticking to these storage and reheating tips, you can enjoy your best chipotle queso recipe longer. It stays rich and creamy. Serve it as a dip or a topping, and everyone will love it.

Recipe Variations and Customizations

Spicy queso blanco is a dish that invites creativity. You can tweak the authentic chipotle queso recipe to suit your taste. For example, you can change the heat level by adding more or fewer chipotle peppers.

Customizing the recipe is all about dietary needs. You can use gluten-free ingredients, make it lighter by using less cheese, or make it vegan. These changes let you enjoy the dish while following your dietary preferences.

Dietary Modifications

  • Gluten-free: Use gluten-free tortilla chips or substitute with gluten-free crackers.
  • Vegan: Replace cheese with vegan alternatives and use plant-based milk.
  • Low-carb: Serve the queso with low-carb vegetables like bell peppers or cucumbers.

Spice Level Alternatives

To change the spice level, you can add more or fewer peppers. Or, try different hot peppers. This way, you can make the dish as spicy or mild as you like.

Exploring these variations lets you make a spicy queso blanco recipe that’s just right for you. Whether you prefer it mild or very spicy, the authentic chipotle queso recipe can be adjusted to your liking.

IngredientModificationEffect on Flavor
Chipotle PeppersIncrease or decrease the number of peppersAdjusts the level of heat in the dish
CheeseUse vegan alternatives or reduce the amountChanges the creaminess and flavor profile

Pro Tips for Restaurant-Quality Results

To make the best chipotle queso, use top-notch ingredients, like real cheese. A dip made with real cheese tastes richer and more authentic than one with processed cheese.

For better queso, try mixing different cheeses. Use cheddar, Monterey Jack, and Pepper Jack for a unique taste. Also, roasting your own chipotle peppers brings a flavor depth that store-bought can’t match.

Here are some key takeaways to keep in mind:

  • Use a variety of cheeses for a complex flavor profile
  • Roast your own chipotle peppers for added depth of flavor
  • Don’t be afraid to experiment and adjust the level of heat to your liking

By following these tips and using the best chipotle queso recipe, you’ll make a delicious dip. It will impress your friends and family.

Remember, the secret to great queso is finding the right balance of flavors. With practice and patience, you’ll make a dip as good as your favorite restaurant’s.

Conclusion: Mastering Your Homemade Chipotle Queso

Learning to make the perfect chipotle queso recipe at home is a fun adventure. You’ve gone from understanding Chipotle’s queso blanco to finding the best cheese mix and cooking method. Now, you can make this creamy, cheesy dip in your kitchen.

Follow the easy steps and use the expert tips to get restaurant-quality results with your homemade chipotle queso.

Whether you’re throwing a party, looking for a cozy snack, or just want to enjoy Chipotle’s famous dish, this easy chipotle queso dip will impress. Serve it with tortilla chips, use it on Mexican dishes, or enjoy it alone. The options are endless when you know how to make homemade chipotle queso.

FAQ

What is the story behind Chipotle’s famous Queso Blanco?

Chipotle’s Queso Blanco has a rich history. The company keeps working to make it better. This recipe tries to bring the real taste and creamy feel that fans love.

What are the essential ingredients for the perfect Chipotle Queso?

To make Chipotle Queso, you need top-notch cheeses, chipotle peppers, and spices. These ingredients give it the unique flavor and smooth texture.

What kitchen tools are needed to make homemade Chipotle Queso?

You’ll need a saucepan, whisk, and cheese grater to make Chipotle Queso. You might also use a blender for extra creaminess.

How do I choose the right peppers and seasonings for the Chipotle Queso?

Pick the right chipotle peppers and adjust the spice to your taste. Mix the seasonings carefully to get the perfect flavor.

How do I achieve the perfect creamy texture for my Chipotle Queso?

Control the heat and avoid curdling to get the creamy texture. Use specific techniques to make it just right.

What are some serving suggestions and pairings for Chipotle Queso?

Enjoy Chipotle Queso with tortilla chips, veggies, or as a dish topping. Try different pairings to find your favorite ways to enjoy it.

How should I store and reheat leftover Chipotle Queso?

Store and reheat your Chipotle Queso correctly to keep it fresh and tasty. Follow the tips to maintain its quality.

Can I customize the Chipotle Queso recipe to suit my dietary needs or preferences?

Yes, you can modify the Chipotle Queso recipe to fit your diet or taste. It’s easy to adjust the spice or ingredients to suit your preferences.

What are some pro tips for achieving restaurant-quality results with homemade Chipotle Queso?

Use specific techniques and high-quality ingredients to make your Chipotle Queso as good as the restaurant version. It’s all about the details.

Flavorful Chicken and Shrimp Recipe Ideas

chicken and shrimp recipes

What makes chicken and shrimp recipes so irresistible? How can you create the best chicken and shrimp recipes to wow your family and friends? The mix of chicken and shrimp in dishes is perfect, offering endless possibilities for cooking. These recipes are simple or complex, fitting every taste and event, making them a favorite in many homes.

Whether you’re new to cooking or a seasoned chef, this guide has everything you need. It will help you make unforgettable meals, including the tastiest chicken and shrimp dishes. With so many recipes to try, you’ll always have something new for dinner.

Key Takeaways

  • Discover the secrets to creating the best chicken and shrimp recipes
  • Explore a variety of flavorful chicken and shrimp dishes to suit every taste and occasion
  • Learn how to combine chicken and shrimp in innovative and delicious ways
  • Get inspired by new and exciting chicken and shrimp recipe ideas
  • Find the perfect chicken and shrimp recipes for your next meal or special occasion

Introduction to Chicken and Shrimp Recipes

Combining chicken and shrimp in recipes is a smart move. It adds variety to your meals. These recipes are tasty, offer good textures, and are healthy. You can make them with simple ingredients and basic kitchen tools.

Understanding cooking methods is key to great chicken and shrimp dishes. Grilling, sautéing, or baking can highlight the flavors. Try different recipes to find your favorite.

Why This Combination Works So Well

Chicken and shrimp are a great pair because of their different textures and tastes. Chicken is lean, while shrimp is rich and buttery. This mix makes for a tasty and satisfying meal. You can get creative with many easy chicken and shrimp recipes.

Essential Kitchen Equipment

To start cooking chicken and shrimp, you need basic kitchen tools. A good skillet is crucial for sautéing and searing. A slow cooker is great for stews and soups. The right equipment makes cooking these recipes easy.

Basic Ingredients You’ll Need

For cooking chicken and shrimp, you’ll need some basic ingredients. You’ll need spices, herbs, and staples like olive oil, garlic, and lemon juice. With these, you can make many delicious meals. Experimenting with recipes helps you find your favorites.

Quick and Easy Surf and Turf Dishes

When it comes to quick chicken and shrimp recipes, the options are endless. Mixing meat with seafood is a perfect combination. For a quick and impressive meal, try homemade chicken and shrimp dishes that are easy to make.

Some ideas for quick and easy surf and turf dishes include:

  • Skillet dinners featuring chicken and shrimp cooked in a flavorful sauce
  • Oven-baked delights that combine chicken and shrimp with roasted vegetables
  • Stir-fry combinations that showcase the versatility of chicken and shrimp

These quick chicken and shrimp recipes are great for busy nights or special events. They use simple ingredients and easy cooking methods. This way, you can make homemade chicken and shrimp dishes that taste amazing and look impressive.

For example, try a chicken and shrimp stir-fry with your favorite veggies and sauces. This quick chicken and shrimp recipe is easy to adjust and can be ready in minutes.

By trying different ingredients and cooking ways, you can make many homemade chicken and shrimp dishes. Whether you want something classic or something new, quick chicken and shrimp recipes are a great starting point.

Classic One-Pan Meals

One-pan meals are perfect for cooking tasty chicken and shrimp recipes. They are quick, easy to clean up, and ready fast. These meals let you mix different flavors and ingredients in one dish.

Popular one-pan meals include skillet recipes, sheet pan dinners, and stir-fries. They’re great for weeknights or special events. For instance, a simple skillet recipe can have chicken, shrimp, and veggies all in one pan. It’s delicious and you can add your favorite ingredients.

Skillet Recipes

Skillet recipes are excellent for best chicken and shrimp recipes. They give a nice sear and can be finished with various sauces. You can make chicken and shrimp fajitas, stir-fry, or paella in a skillet.

Sheet Pan Dinners

Sheet pan dinners are another favorite for one-pan meals. You line a pan with foil or parchment, add ingredients, and bake. It’s perfect for big meals and easy to clean. Try chicken and shrimp with roasted veggies, tacos, or quinoa and broccoli.

Stir-Fry Combinations

Stir-fries are great for tasty chicken and shrimp recipes. They cook ingredients quickly and you can use your favorite sauces. Try chicken and shrimp with soy sauce and ginger, garlic and chili flakes, or lemon and herbs.

RecipeIngredientsCooking Time
Chicken and Shrimp FajitasChicken, shrimp, bell peppers, onions, tortillas20-25 minutes
Chicken and Shrimp Stir-FryChicken, shrimp, broccoli, soy sauce, ginger15-20 minutes
Chicken and Shrimp PaellaChicken, shrimp, sausage, rice, tomatoes30-40 minutes

Healthy Cooking Methods for Chicken and Shrimp

Cooking healthy meals doesn’t mean you have to lose flavor. When it comes to healthy chicken and shrimp recipes, there are many ways to keep the nutrients and taste. These methods make your meals both tasty and good for you.

Grilling, baking, poaching, and steaming are some of the best ways to cook chicken and shrimp. They use little fat and keep the protein and nutrients in. For instance, grilling adds a smoky taste without extra calories.

  • Choose lean cuts of chicken and remove the skin to reduce fat content
  • Opt for wild-caught shrimp when possible to avoid added preservatives
  • Marinate chicken and shrimp in herbs and spices to add flavor without added salt or sugar

Using these healthy cooking methods in your healthy chicken and shrimp recipes makes for delicious and nutritious meals. They’re great for any time you want to eat well.

Flavor-Packed Marinades and Seasonings

To make tasty chicken and shrimp meals, using good marinades and seasonings is key. These add to the natural taste of chicken and shrimp, making them great together. The right mix can really enhance your dishes.

Try Asian-inspired, Mediterranean, or Cajun and Creole flavors. These can add a special touch to your meals. For instance, soy sauce and ginger make a tasty Asian marinade. Or, herbs and lemon create a Mediterranean flavor.

Exploring Global Flavors

Here are some global flavors for tasty chicken and shrimp dishes:

  • Asian-inspired marinades: soy sauce, ginger, and garlic
  • Mediterranean blends: herbs, lemon, and olive oil
  • Cajun and Creole seasonings: paprika, cayenne pepper, and thyme

Feel free to mix these flavors to create your own unique dishes. Try different marinades and seasonings to find what you like best.

Creating Your Own Marinades

To make your own marinades, mix oils, acids, and spices. For example, olive oil, lemon juice, and herbs make a Mediterranean marinade. Add garlic, ginger, or paprika for a special flavor.

MarinadeIngredientsFlavor Profile
Asian-inspiredsoy sauce, ginger, garlicsavory, umami
Mediterraneanherbs, lemon, olive oilbright, citrusy
Cajun and Creolepaprika, cayenne pepper, thymespicy, smoky

By trying out different marinades and seasonings, you can make many tasty chicken and shrimp dishes. They’re sure to wow your family and friends.

Pasta and Rice-Based Dishes

Pasta and rice are great bases for easy chicken and shrimp recipes. They make filling meals when mixed with chicken and shrimp. Try a twist on spaghetti with shrimp and tomato sauce for a tasty homemade dish.

Popular dishes include chicken and shrimp fried rice, chicken fettuccine Alfredo with shrimp, and shrimp and chicken paella. These are perfect for any day or special event. You can use different pasta shapes and rice types to keep things interesting.

To add flavor, use different seasonings and spices like Italian seasoning or saffron. Adding steamed vegetables boosts nutrition and taste. Here are some ideas:

  • Chicken and shrimp carbonara with rice
  • Shrimp and chicken stir-fry with pasta
  • Chicken and shrimp jambalaya with rice

Follow these tips to make tasty chicken and shrimp recipes with pasta and rice. Whether you want something classic or adventurous, there’s a dish for you.

DishIngredientsCooking Time
Chicken and Shrimp FettuccineFettuccine, chicken, shrimp, parmesan cheese20-25 minutes
Shrimp and Chicken PaellaRice, chicken, shrimp, saffron, tomatoes30-35 minutes
Chicken and Shrimp Fried RiceRice, chicken, shrimp, soy sauce, vegetables15-20 minutes

International Chicken and Shrimp Recipes

Exploring the world of cuisine, we find that each culture has its unique twist on classic dishes. When it comes to tasty chicken and shrimp recipes, the options are endless. From the rich flavors of Italy to the bold spices of Spain and the aromatic herbs of Thailand, we’ll take you on a culinary journey to discover the best chicken and shrimp recipes from around the globe.

Let’s start with some popular international dishes:

  • Italian Favorites: Chicken Parmesan, Shrimp Scampi, and Chicken Fettuccine Alfredo
  • Spanish Paella Variations: Seafood Paella, Chicken and Sausage Paella, and Vegetable Paella
  • Thai-Inspired Dishes: Pad Thai, Tom Yum Soup, and Green Curry with Chicken and Shrimp

These dishes are not only delicious but also showcase the diversity of international cuisine. Whether you’re in the mood for something spicy, savory, or sweet, there’s a tasty chicken and shrimp recipe out there for you. So, let’s get cooking and explore the world of flavors with these best chicken and shrimp recipes!

RecipeIngredientsCooking Time
Chicken ParmesanChicken breast, tomato sauce, mozzarella cheese30 minutes
Shrimp ScampiShrimp, garlic, lemon juice, parsley15 minutes
Pad ThaiRice noodles, chicken, shrimp, tamarind sauce20 minutes

With these international chicken and shrimp recipes, you’ll be able to create a culinary journey in your own kitchen. So, go ahead and experiment with new flavors and ingredients to find your favorite tasty chicken and shrimp recipes!

Tips for Perfect Results Every Time

When cooking healthy chicken and shrimp recipes, details matter a lot. Focus on temperature, timing, and food safety. These tips will help you improve your cooking skills and avoid mistakes.

For quick chicken and shrimp recipes, keeping an eye on temperature is key. Cooking to the right temperature ensures safety and better taste. Here are some important temperature guidelines:

  • Chicken: 165°F (74°C)
  • Shrimp: 145°F (63°C)

Timing is also crucial. Cooking for the right time prevents overcooking or undercooking. For healthy chicken and shrimp recipes, cook until just done, then rest before serving.

By following these tips, you’ll make tasty and quick chicken and shrimp recipes. Always prioritize food safety and handle ingredients carefully for a great dining experience.

IngredientTemperatureTiming
Chicken165°F (74°C)15-20 minutes
Shrimp145°F (63°C)8-12 minutes

Conclusion: Mastering Your Chicken and Shrimp Cooking Journey

As we conclude our journey through chicken and shrimp recipes, we hope you’re excited to start your own. Learning to cook these proteins is a fun and rewarding journey. It takes experimentation, patience, and creativity.

The secret to making flavorful chicken and shrimp dishes is finding the right balance. It’s about using the right ingredients and cooking techniques. Plus, adding your passion to the kitchen makes all the difference.

Now, it’s time to be bold and try new things. Mix different flavors and let your imagination run wild. With chicken and shrimp recipes, the possibilities are endless. Each dish you make will deepen your love for cooking.

Enjoy the journey, taste the flavors, and feel the joy of creating meals that unite people. Happy cooking, and may your kitchen be filled with tasty surprises!

FAQ

What are some of the best chicken and shrimp recipe ideas?

Top chicken and shrimp recipes include tasty skillet dishes and easy one-pan meals. You can also try healthy grilled or baked options. Don’t forget international flavors like Italian, Spanish, and Thai.

What kitchen equipment is needed for cooking chicken and shrimp?

You’ll need a strong skillet, baking sheet, and cutting board. Sharp knives and measuring tools are also key. A grill, wok, or instant-read thermometer can be helpful too.

What are some basic ingredients for chicken and shrimp recipes?

Basic ingredients include chicken breasts or thighs and raw shrimp. You’ll also need olive oil, garlic, onions, and herbs. Broth, stock, rice, or pasta are common additions.

How can I make quick and easy chicken and shrimp dishes?

For fast meals, try one-pan skillet recipes or sheet pan dinners. Stir-fries are also quick and delicious. These methods save time without sacrificing taste.

What are some healthy cooking methods for chicken and shrimp?

Healthy methods include grilling, baking, poaching, and steaming. These keep nutrients high and add flavor.

What types of marinades and seasonings work well with chicken and shrimp?

Good marinades and seasonings include Asian blends with soy and ginger. Mediterranean herbs and lemon are also great. For spice, try Cajun or Creole spices.

Can I incorporate chicken and shrimp into pasta and rice dishes?

Yes! Chicken and shrimp are perfect with pasta and rice. Try spaghetti, risotto, or paella for tasty and filling meals.

What are some international chicken and shrimp recipes to try?

Try Italian, Spanish paella, and Thai dishes for a taste of the world. These recipes showcase the rich flavors of chicken and shrimp.

What tips can help me achieve perfect results when cooking chicken and shrimp?

For perfect dishes, control the cooking temperature and follow timing. Always handle and store food safely to ensure quality.

Indulge in the Best Cheesy Rice Recipe Today

cheesy rice recipe

What makes a cheesy rice recipe great? Is it the creamy texture, the taste, or how easy it is to make? One thing is sure – a cheesy rice recipe can make any meal better. This easy recipe will make your dish both comforting and satisfying.

Looking for a quick side or a main course? This cheesy rice recipe is perfect. It will become a favorite in your home.

Exploring cheesy rice, you’ll see its many benefits. It’s creamy, flavorful, and easy to make. This recipe is ideal for anyone wanting a tasty, simple dish. So, what makes this recipe special?

Key Takeaways

  • Easy to make and requires minimal ingredients
  • Perfect for a quick side dish or main course
  • Can be customized with your favorite cheese varieties
  • Great for meal prep and can be reheated easily
  • This cheesy rice recipe is a classic comfort food that is sure to become a staple in your household

Why This Cheesy Rice Recipe Will Become Your New Favorite

This homemade cheesy rice recipe is a game-changer. It’s delicious and easy to make. It’s perfect for any occasion, whether it’s a cozy night in or a big gathering.

It’s great for warming up on a cold day. The mix of cheesy goodness and fluffy rice is amazing. It’s also budget-friendly and uses common ingredients.

Perfect Comfort Food for Any Occasion

Looking for comfort food or something new? This delicious cheesy rice recipe is perfect. It’s quick and easy, great for busy people. You can have it ready in no time.

Budget-Friendly Meal Option

This recipe is tasty and won’t break the bank. It’s affordable and uses simple ingredients. It’s also a smart way to use up leftovers, saving money and reducing waste.

Quick and Easy Preparation

This recipe is a breeze to make. It’s fast and easy, perfect for anyone short on time. Busy professionals and parents will love it for its quick meal solution.

Essential Ingredients for Perfect Cheesy Rice

To make a tasty creamy cheesy rice dish, you need a few key ingredients. These include rice, cheese, and spices. The cheese you choose depends on your taste, but cheddar, mozzarella, and parmesan are popular.

For a great cheesy rice side dish, the quality of your ingredients matters. You can also add veggies, meats, or herbs for extra flavor. Here are the essential ingredients to start with:

  • Rice: Pick a high-quality rice that’s fresh and has a good texture.
  • Cheese: Choose a cheese that melts well and tastes rich and creamy.
  • Spices and seasonings: Add a pinch of salt, pepper, and other spices or seasonings you like for more flavor.

With these ingredients, you can make a delicious creamy cheesy rice dish. It’s perfect as a

A good cheesy rice recipe is all about balance and flavor. With the right ingredients and a bit of practice, you can create a dish that’s sure to please even the pickiest eaters.

Kitchen Tools and Equipment You’ll Need

To make a delicious flavorful cheesy rice or a cheesy rice casserole, you’ll need some basic kitchen tools and equipment. Having the right tools can make a big difference in the cooking process and the final result.

Basic Cooking Equipment

The essential tools you’ll need include a pot, a pan, and a cooking utensil such as a spoon or spatula. These tools will help you prepare and cook the ingredients for your cheesy rice dish.

Optional Tools for Enhanced Results

Optional tools that can enhance your cooking experience include a rice cooker or a slow cooker. These tools can make the cooking process easier and more convenient, allowing you to focus on other aspects of your meal preparation. Some other tools you might find useful are:

  • A measuring cup to ensure accurate ingredient measurements
  • A cheese grater to grate the cheese for your cheesy rice casserole
  • A serving spoon to serve your flavorful cheesy rice

Step-by-Step Cheesy Rice Recipe Instructions

To make a delicious quick cheesy rice, follow these simple steps. First, cook the rice as the package says. This is key to a perfect cheesy rice recipe. Next, melt the cheese and mix it with the cooked rice. You can use cheddar, mozzarella, or your favorite cheese mix.

Here’s a step-by-step guide to making the cheesy rice recipe:

  • Cook the rice according to the package instructions
  • Melt the cheese and add it to the cooked rice
  • Add any additional ingredients, such as vegetables or meats
  • Season with salt and pepper to taste

A quick cheesy rice recipe is great for any day or special event. You can add diced ham, cooked veggies, or paprika to make it your own. The secret to a great cheesy rice recipe is using quality ingredients and not overcooking the rice.

With these easy steps, you can make a tasty and satisfying cheesy rice recipe that everyone will love. So, try it out and enjoy your quick cheesy rice!

IngredientQuantity
Rice2 cups
Cheese1 cup
Vegetables (optional)1 cup

Selecting the Best Cheese Varieties

Choosing the right cheese is crucial for easy cheesy rice. You want cheeses that melt well and taste rich and creamy. Cheddar, mozzarella, and Monterey Jack are great options.

Think about the flavor you want. For a sharp taste, mix cheddar and Parmesan. For something milder, try mozzarella or Colby Jack. You can also add Parmesan or feta for extra flavor.

Melting Cheese Options

  • Cheddar: a popular choice for its sharp, tangy flavor
  • Mozzarella: a mild, melty cheese perfect for homemade cheesy rice
  • Monterey Jack: a semi-soft cheese with a mild, slightly sweet flavor

Flavor-Enhancing Cheese Combinations

Want to elevate your easy cheesy rice? Try these cheese mixes:

  • Cheddar and Parmesan: a sharp, tangy combination
  • Mozzarella and feta: a mild, salty combination
  • Colby Jack and cheddar: a mild, slightly sweet combination

Cheese Storage Tips

To keep your cheese fresh, store it right. Here’s how:

Cheese TypeStorage Method
CheddarWrap in plastic wrap or aluminum foil and store in the fridge
MozzarellaStore in the fridge, wrapped in plastic wrap or aluminum foil
Monterey JackWrap in plastic wrap or aluminum foil and store in the fridge

Common Mistakes to Avoid When Making Cheesy Rice

When making delicious cheesy rice, it’s easy to add too much cheese. Too much cheese can make the dish too rich and heavy. It’s important to find the right balance between cheese and other ingredients.

Another mistake is not cooking the rice right. This can make the rice undercooked or overcooked. This affects the dish’s texture and taste. Always follow the cooking instructions carefully and adjust the time if needed.

Some common mistakes to avoid when making cheesy rice include:

  • Using low-quality cheese that doesn’t melt well
  • Not adding enough seasonings to balance the flavor
  • Overcooking the rice, resulting in a mushy texture

To make the perfect delicious cheesy rice, be careful of these mistakes. Avoiding them will help you create a dish that’s creamy, cheesy, and well-balanced.

Delicious Variations of Classic Cheesy Rice

Cheesy rice is a versatile dish that can be modified to suit various tastes and preferences. It can elevate any meal. With a few simple tweaks, you can create unique variations that will impress your family and friends.

Some popular variations of cheesy rice include:

  • Mexican-Style Cheesy Rice: Add diced tomatoes, jalapenos, and cilantro to give your cheesy rice a spicy kick.
  • Mediterranean Twist: Mix in some Kalamata olives, artichoke hearts, and feta cheese for a salty, savory flavor.
  • Spicy Buffalo Version: Combine shredded cheddar cheese with buffalo sauce and crumbled blue cheese for a spicy, creamy cheesy rice side dish.

These variations can be served as a side dish or used as a base for other meals, such as stuffed peppers or cheesy rice bowls. With a little creativity, you can turn a simple cheesy rice recipe into a flavorful cheesy rice dish that will become a staple in your household.

Experiment with different ingredients and spices to create your own unique variations of cheesy rice. Whether you’re in the mood for something spicy, savory, or comforting, there’s a cheesy rice recipe out there for you.

VariationIngredientsFlavor Profile
Mexican-StyleDiced tomatoes, jalapenos, cilantroSpicy, fresh
Mediterranean TwistKalamata olives, artichoke hearts, feta cheeseSalty, savory
Spicy Buffalo VersionShredded cheddar cheese, buffalo sauce, crumbled blue cheeseSpicy, creamy

Perfect Pairings and Serving Suggestions

Serving cheesy rice casserole opens up a world of possibilities. It can be a side dish, part of a casserole, or even the main event. To enhance it, try adding fresh herbs or a sprinkle of parmesan cheese.

Quick cheesy rice pairs well with many foods. It’s great with grilled chicken, roasted veggies, or alongside a hearty stew. Here are some pairing ideas:

  • Grilled chicken or fish with a side of cheesy rice casserole
  • Roasted vegetables, such as broccoli or Brussels sprouts, with a side of quick cheesy rice
  • A hearty stew or soup with a side of cheesy rice casserole

To make your dish more appealing, add garnishes like chopped herbs or paprika. Serving it in a decorative dish can also elevate the presentation.

With these tips, you can create a dish that’s both delicious and attractive. Whether it’s a side, main course, or part of a casserole, this versatile dish will be a hit.

Storage and Reheating Tips for Cheesy Rice

Storing and reheating your cheesy rice recipe right is key. You can keep it in the fridge for up to three days or freeze it for later. This helps keep the taste and quality of your easy cheesy rice.

To reheat, you can use the microwave or oven. The microwave is quick and easy. Just put the rice in a safe dish, add a bit of water, and heat for 30-45 seconds. For even heating, try the oven. Put the rice in a safe dish, cover with foil, and bake at 350°F for 10-15 minutes.

  • Keep leftover cheesy rice in an airtight container to stay fresh.
  • Heat your cheesy rice to 165°F to make sure it’s safe to eat.
  • When reheating, add a bit of water or broth to keep the rice moist.

By following these tips, you can enjoy your easy cheesy rice for longer. It will still taste great and have the right texture.

Making Cheesy Rice Ahead of Time

Preparing homemade cheesy rice in advance can save you time. It’s a delicious meal ready whenever you want. With a few simple steps, you can keep its flavor and texture perfect.

Meal Prep Strategies

To prep your cheesy rice, cook the rice and cheese separately. Then mix them just before reheating. This keeps the rice from getting mushy. You can also store individual portions in airtight containers for up to 3 days.

Freezing Instructions

Freezing is another great way to prep cheesy rice. Cook the mixture, let it cool, and then freeze it. When you’re ready, thaw and reheat it. Here are some tips for freezing and reheating:

  • Use airtight containers to prevent freezer burn
  • Label and date the containers so you know how long they’ve been frozen
  • Reheat the rice to an internal temperature of 165°F to ensure food safety

By using these prep and freezing tips, you can enjoy your cheesy rice anytime. It’s perfect for a quick dinner or a satisfying lunch. Delicious cheesy rice is just minutes away.

Health Benefits and Nutritional Information

A creamy cheesy rice side dish can be a nutritious addition to your meals. It offers several health benefits when made with the right ingredients. For instance, a cheesy rice side dish rich in protein and fiber can help with weight management and improve digestion.

Some of the key nutritional benefits of a well-made creamy cheesy rice include:

  • High protein content from cheese and other ingredients
  • Complex carbohydrates from rice and vegetables
  • Essential vitamins and minerals like calcium and iron

To make the most of your cheesy rice side dish, choose wholesome ingredients. Balance it with other nutrient-dense foods.

By adding creamy cheesy rice to your diet, you get a delicious and nutritious meal. It supports your overall health and well-being. Always pick high-quality ingredients and cook your cheesy rice side dish with love and care.

Conclusion

We’ve reached the end of our journey into cheesy rice. We hope you now know how to make this tasty dish at home. It’s perfect for any meal, from a family dinner to a casual hangout with friends.

Choose from the classic cheesy rice casserole or try something new like Mexican or spicy buffalo versions. We’re sure you’ll find a recipe that you’ll love. Just pick the right cheese and follow the steps carefully.

So, what are you waiting for? Start exploring flavorful cheesy rice and see why it’s a favorite in many homes. It’s quick and easy to make, and it’s budget-friendly. Happy cooking, and enjoy your meal!

FAQ

What are the essential ingredients for making the perfect cheesy rice?

To make perfect cheesy rice, you need rice, cheese (like cheddar, mozzarella, or parmesan), and spices. You can also add veggies or meats for extra flavor.

What kitchen tools and equipment do I need to make the cheesy rice recipe?

You’ll need a pot, pan, and spoon or spatula for the recipe. Optional tools like a rice cooker or slow cooker can make cooking easier.

What are some common mistakes to avoid when making cheesy rice?

Avoid using too much cheese and not cooking the rice right. Also, don’t forget to add enough seasonings. Follow the recipe and adjust to taste.

Can I make variations of the classic cheesy rice recipe?

Yes, you can try different versions like Mexican, Mediterranean, or spicy Buffalo. Just add unique ingredients or spices to the basic recipe.

How can I store and reheat leftover cheesy rice?

Store leftover cheesy rice in the fridge or freezer. Reheat it right to keep it tasty and moist. Use proper storage and reheating methods.

Can I make cheesy rice ahead of time?

Yes, you can prep cheesy rice ahead of time. It’s great for busy nights or quick meals. Just freeze it for later.

What are the health benefits and nutritional information of the cheesy rice recipe?

Cheesy rice is not only tasty but also healthy. It’s a good source of protein, carbs, and vitamins. But, it’s high in calories and fat, so eat it in moderation.

Crumbl Cookie Recipe: Bake the Perfect Cookies at Home

crumbl cookie recipe

So, why do crumbl cookies have so many fans in the United States? It’s because of their special flavors and soft texture. Now, you can make these delicious cookies at home with the right ingredients and techniques. This article will show you how.

The crumbl cookie recipe has become a hit worldwide. By using the tips in this article, you can make cookies that will wow your loved ones. So, let’s start making crumbl cookies and uncover their secrets.

Key Takeaways

  • Learn the basics of the crumbl cookie recipe and its unique characteristics
  • Discover the essential ingredients and equipment needed to bake crumbl cookies at home
  • Master the techniques for achieving the perfect soft-baked texture and flavor combinations
  • Get tips on how to customize your crumbl cookie recipe with different flavors and toppings
  • Find out how to store and freshen your crumbl cookies to maintain their quality and texture
  • Explore the various crumbl cookie flavors and recipes that you can try at home

The Story Behind Crumbl Cookies’ Success

Crumbl cookies have become a global hit with their unique crumbl cookie flavors and fresh take on cookie shops. Starting small, they’ve grown into a national favorite. Fans rush to try their latest flavors.

So, what makes Crumbl cookies stand out? They use top-quality ingredients and mix flavors in new ways. Whether you want something classic or something bold, Crumbl has it all.

From Small Shop to National Sensation

Crumbl’s success comes from blending tradition with innovation. They offer a new crumbl cookie flavors every week. This keeps their menu exciting and quality high, pleasing their loyal fans.

What Makes Crumbl Cookies Special

Several things make Crumbl cookies a hit. These include:

  • Unique and delicious flavor combinations
  • High-quality ingredients
  • Innovative approach to the traditional cookie shop
  • Rotating selection of crumbl cookie flavors

The Weekly Flavor Rotation Concept

Crumbl’s weekly flavor change is a big reason for their success. It keeps their menu fresh and exciting. This encourages fans to keep coming back for more.

Essential Equipment for Baking Crumbl-Style Cookies

To make the perfect Crumbl cookie, you need the right tools. A digital scale helps with exact measurements. A stand mixer makes mixing easier. And a baking sheet with parchment paper ensures even baking. These tools help you make cookies that are both tasty and have the right texture, using top-notch crumbl cookie ingredients.

Here’s what you need to start:

  • Digital scale
  • Stand mixer
  • Baking sheet
  • Parchment paper
  • Measuring cups and spoons
  • Whisk
  • Rubber spatula

With the right gear and crumbl cookie ingredients, your cookies will be yummy and look great. Always choose fresh, quality ingredients for the best taste.

Investing in the right tools and crumbl cookie ingredients will help you bake amazing Crumbl-style cookies. With time and effort, you’ll get better at baking. Soon, you’ll be making delicious treats for your loved ones.

Must-Have Ingredients for the Perfect Crumbl Cookie Recipe

To make delicious Crumbl cookies, you need the right ingredients. A crumbl cookie tutorial will show you how. But first, you must know what to use. The basic ingredients are all-purpose flour, baking soda, salt, granulated sugar, brown sugar, and butter.

For special add-ins and toppings, you can get creative. Try chocolate chips, nuts, sprinkles, or candy pieces. Online tutorials or your own experiments can help you find unique flavors.

Base Cookie Ingredients

  • All-purpose flour
  • Baking soda
  • Salt
  • Granulated sugar
  • Brown sugar
  • Butter

Special Add-ins and Toppings

  • Chocolate chips
  • Nuts
  • Sprinkles
  • Candy pieces

To learn how to make crumbl cookies, quality matters. Fresh ingredients make a big difference. Always check expiration dates and store them well.

Ingredient Quality Tips

Choose fresh, high-quality ingredients for the best taste and texture. With the right stuff and practice, you’ll master Crumbl cookies. Follow a tutorial, and you’ll make treats that everyone will enjoy.

Mastering the Basic Crumbl Cookie Dough

To make the basic Crumbl cookie dough, you need the right ingredients and techniques. A good crumbl copycat recipe will help you get the perfect texture and flavor. Start by getting all the ingredients, like high-quality flour, sugar, and butter.

Here are some tips for making the basic Crumbl cookie dough:

  • Use room temperature ingredients for smooth dough.
  • Avoid overmixing to prevent tough cookies.
  • Use both white and brown sugar for a rich flavor.

By following these tips and a reliable crumbl copycat recipe, you’ll make delicious cookies. Stay tuned for the next section on mixing and shaping.

Step-by-Step Mixing and Shaping Technique

To make the perfect crumbl cookie, follow a specific mixing and shaping method. This method includes mixing ingredients in the right order, portioning the dough, and shaping the cookies into perfect circles. By mastering this technique, you can make delicious crumbl dessert ideas just like the originals.

The crumbl cookie recipe needs a certain mixing order. Start by creaming the butter and sugar together. Then, add the eggs and vanilla extract. Finally, mix in the flour, salt, and any extra ingredients. Don’t overmix the dough, as it can make the cookies tough.

Proper Mixing Order

  • Cream the butter and sugar
  • Add the eggs and vanilla extract
  • Gradually mix in the flour, salt, and additional ingredients

After mixing the dough, portion it out into individual cookies. Use a cookie scoop or spoon to make uniform balls of dough. Place these balls on a baking sheet lined with parchment paper, leaving space for them to spread while baking.

Cookie Portioning Guide

To get perfect circles, use a cookie scoop or spoon to portion the dough. You can also shape the cookies into uniform circles using a glass or cup.

Cookie SizePortion Size
Small1 tablespoon
Medium2 tablespoons
Large3 tablespoons

By following these steps and using the right crumbl dessert ideas, you’ll make delicious cookies that will impress everyone. Don’t forget to try different flavors and ingredients to create unique crumbl cookie recipe variations.

Baking Temperature and Timing Secrets

To get the perfect Crumbl cookies, mastering baking temperature and timing is key. The right mix of these can highlight the special qualities of crumbl cookie flavors. Baking at 375°F (190°C) for 10-12 minutes, or until they’re lightly golden, is a good starting point.

The baking time can change based on the crumbl cookie ingredients used. This includes the sugar type or add-ins like nuts or chocolate chips. To get the best results, watch your cookies closely and adjust the time if needed. Here are some tips:

  • Use a thermometer to ensure your oven is at the correct temperature.
  • Rotate your cookie sheet halfway through the baking time to promote even cooking.
  • Keep an eye on your cookies’ texture and color, and remove them from the oven when they’re lightly golden brown.

By following these tips and experimenting with different baking temperatures and times, you’ll be well on your way to creating delicious Crumbl cookies. Remember to always use high-quality crumbl cookie ingredients for the best flavor and texture.

Popular Crumbl Cookie Flavors to Try at Home

Exploring how to make crumbl cookies opens up a world of possibilities. You can mix and match ingredients to craft your own crumbl copycat recipe.

Let’s dive into some favorite Crumbl cookie flavors to try at home. These include:

  • Chocolate Chip: a classic favorite that combines the richness of chocolate with the sweetness of sugar
  • Pink Sugar: a sweet and tangy flavor that’s perfect for those who love a little extra sparkle in their cookies
  • Specialty Seasonal Variations: from pumpkin spice to peppermint, these limited-edition flavors are sure to add some excitement to your cookie-baking routine

By following these tips and experimenting with different flavors, you can create your own delicious crumbl copycat recipe. Enjoy the perfect cookies at home. Whether you’re a seasoned baker or just starting out, the key is to have fun and be creative.

Decorating Tips for Professional-Looking Results

To get a professional look on your Crumbl cookies, you need to learn decorating techniques. With the right tools and practice, you can make amazing crumbl dessert ideas. Start by getting a good set of piping bags and tips. These help you make detailed designs on your cookies.

A crumbl cookie tutorial is great for learning new techniques and getting ideas. You can find many tutorials online with step-by-step guides and tips. Some popular techniques include:

  • Using colored sugar for detailed designs and patterns
  • Adding sprinkles or nonpareils for a festive look
  • Creating fancy borders and edges with piping bags and tips

Always use top-quality ingredients and tools for the best results. With practice and patience, you can make Crumbl cookies that look like they were made by a pro.

By following these tips and practicing, you can make stunning crumbl dessert ideas that everyone will love. So, why not try decorating your own Crumbl cookies today? With a crumbl cookie tutorial and some practice, you can make your cookies look amazing.

Storage and Freshness Guidelines

To keep your crumbl cookie recipe fresh, follow these storage tips. Let your cookies cool on a wire rack for 10-15 minutes after baking. This helps keep their texture and freshness.

Use airtight containers to store your cookies. They can stay fresh at room temperature for up to 3 days. Or, freeze them for later. When freezing, put the cookies in a single layer in an airtight container or freezer bag to prevent sticking.

Proper Cooling Methods

Cooling your cookies right is key to keeping them fresh. Use a wire rack or a paper towel-lined plate to cool them. This absorbs moisture and prevents sogginess.

Storage Container Recommendations

Choose an airtight container with a tight-fitting lid for storage. This keeps air and moisture out, keeping your cookies fresh. Glass or plastic containers with airtight lids or freezer bags work well for longer storage.

Freezing Instructions

To freeze your cookies, lay them out in a single layer in an airtight container or freezer bag. Store them in the freezer for up to 2 months. To serve, thaw at room temperature or reheat in the microwave or oven.

Follow these guidelines to enjoy your crumbl cookies longer. Store them in a cool, dry place. Freeze them if you won’t eat them in a few days.

Storage MethodStorage Time
Airtight Container (Room Temperature)Up to 3 days
Airtight Container (Refrigerator)Up to 5 days
Freezer Bag (Freezer)Up to 2 months

Troubleshooting Common Cookie Problems

When baking crumbl cookies, knowing common problems is key. The right crumbl cookie ingredients are crucial. Understanding texture and size issues is important.

Learning how to make crumbl cookies goes beyond just a recipe. It’s about the science behind baking. Knowing what can go wrong helps prevent mistakes and ensures perfect cookies every time.

Texture Issues and Solutions

  • Overmixing: This can make cookies tough. Mix your crumbl cookie ingredients just until they come together.
  • Underbaking: This can make cookies too soft. Bake for the recommended time for the perfect texture.

Size and Shape Corrections

To get the right size and shape, scoop cookie dough into balls of the same size. This ensures even baking and uniform shapes.

Follow these tips and use the right crumbl cookie ingredients for perfect cookies. Always follow the recipe and troubleshoot any issues that come up.

Conclusion: Creating Your Own Crumbl Cookie Magic

Mastering Crumbl-style cookies at home is exciting and rewarding. You learn about key ingredients, techniques, and flavors. This lets you create amazing crumbl copycat recipes that match the bakery’s.

Feel free to try new crumbl dessert ideas and add your twist to classic flavors. Baking Crumbl cookies is all about making each batch your own. Try new ingredient combinations and enjoy the weekly flavor rotation.

Cookie perfection comes from paying attention to details, being patient, and learning from mistakes. With creativity and the right tools, you can make Crumbl cookies at home. Share your creations with family and friends.

So, heat up your oven, get your ingredients ready, and start baking. The world of crumbl cookie baking is full of possibilities. Enjoy the journey and the sweet rewards. Happy baking!

FAQ

What is the secret to making the perfect Crumbl cookie?

To make the perfect Crumbl cookie, use top-notch ingredients. Follow the right mixing and shaping steps. Also, control the baking temperature and time closely. This attention to detail is what makes Crumbl cookies so soft, thick, and chewy.

What are some of the most popular Crumbl cookie flavors?

Favorites include Chocolate Chip and Pink Sugar Cookie. Seasonal hits like Pumpkin Chocolate Chip and Peppermint Bark are also loved. Crumbl’s weekly flavor changes mean there’s always something new to try.

What equipment is needed to bake Crumbl-style cookies at home?

You’ll need a stand mixer, a big baking sheet, parchment paper, and a cookie scoop. Good baking sheets and pans help shape and texture your cookies just right.

How can I achieve the soft, thick, and chewy texture of Crumbl cookies?

The secret is in the mixing and baking. Mix the dough right, with the right ingredients. Baking at the correct temperature and time also matters. This combo gives you that signature Crumbl texture.

Can I freeze Crumbl cookies for later enjoyment?

Yes, you can freeze Crumbl cookies. Cool them down first, then store in an airtight container or bag. To enjoy, thaw at room temperature or warm in the oven for a few minutes.

How can I create my own unique Crumbl cookie flavors?

Baking Crumbl-style cookies at home lets you try new flavors. Start with the basic dough, then add your favorite mix-ins, toppings, and garnishes. The possibilities are endless for creating your own unique flavors.

Delicious Tahu Recipe: A Tasty Indonesian Favorite

tahu recipe​

What makes Indonesian tahu recipes so special? It’s the mix of simple ingredients and rich culture. Tahu, or tofu, is a big deal in Indonesian food and loved worldwide. Finding the right tahu recipe can be tough. This article will guide you through Indonesian tahu recipe and share a tasty tofu recipe to try at home.

Making a traditional Indonesian tahu recipe is easy and flavorful. It’s perfect for those wanting to try something new. The secret to a great tahu recipe is using top-notch ingredients and following simple steps. Whether you love Indonesian food or just want to try a new tofu recipe, this article is for you. Let’s explore the world of tahu and discover the deliciousness of this Indonesian favorite.

Key Takeaways

  • Indonesian tahu recipe is a staple in Indonesian cuisine
  • Tahu, or tofu, is a versatile ingredient with many health benefits
  • A traditional Indonesian tahu recipe is easy to make and full of flavor
  • High-quality ingredients are essential for a great tahu recipe
  • This article provides a simple and delicious Indonesian tahu recipe to try at home
  • Tahu recipe options are varied and can be adapted to suit different tastes
  • Trying a new tahu recipe can be a great way to explore Indonesian cuisine

Understanding Tahu: The Indonesian Tofu Staple

Tahu is a staple in Indonesian cuisine, loved for centuries. It’s a dish that brings joy. For those seeking a healthy tahu recipe, it’s packed with protein and low in calories, perfect for a balanced diet.

Tahu stands out with its soft texture and unique taste. It’s a favorite in many Indonesian dishes. There are many easy tahu recipe options, from simple stir-fries to complex curries. Vegetarians will find plenty of vegetarian tahu recipe choices, making it a great meat-free option.

  • High protein content
  • Low in calories
  • Rich in iron and other essential minerals
  • Versatile ingredient that can be used in a variety of dishes

Tahu is a delicious and nutritious ingredient. Its rich history and cultural significance make it a must-try. Whether you’re after a healthy tahu recipe, an easy tahu recipe, or a vegetarian tahu recipe, there’s something for everyone.

Tahu Nutrition FactsPer Serving
Calories80-100
Protein10-12g
Fat3-5g
Carbohydrates5-7g

Essential Ingredients for the Perfect Tahu Recipe

To make a tasty crispy tahu recipes, you need the right stuff. A simple tahu often uses soy sauce, garlic, and ginger. These add great flavor. Make sure to pick fresh, high-quality ingredients.

Here are some key ingredients for your tahu recipe:

  • Soy sauce: adds a salty, umami flavor
  • Garlic: provides a pungent, aromatic flavor
  • Ginger: adds a spicy, warming flavor
  • Tofu: the main ingredient in tahu recipe, available in various textures and firmness levels

For a crispy tahu recipe, add cornstarch or flour for crunch. Try different seasonings and spices to find your favorite mix for a simple tahu .

Using the right ingredients and following a tahu recipe will make a tasty dish. Whether you want a simple tahu recipe or a crispy tahu recipe, focus on quality ingredients and careful preparation.

IngredientQuantityPreparation
Soy sauce2 tablespoonsMix with garlic and ginger
Garlic1 cloveMince and mix with soy sauce and ginger
Ginger1 inchGrate and mix with soy sauce and garlic

Kitchen Tools and Equipment You’ll Need

To make a tasty tahu , you need the right tools and equipment. The right utensils and appliances make cooking easier and faster. Whether you’re looking for a healthy or vegetarian tahu , the right tools matter a lot.

A traditional Indonesian kitchen often has a wok and a steamer. These are key for cooking tahu because they distribute heat evenly and keep flavors intact. You can also try using an air fryer or an instant pot for a modern twist on tahu.

Traditional Indonesian Cooking Utensils

  • Wok: ideal for stir-frying and cooking tahu with various spices and ingredients
  • Steamer: perfect for steaming tahu and preserving its nutrients and flavor

Modern Kitchen Alternatives

  • Air fryer: great for making crispy tahu with minimal oil and effort
  • Instant pot: excellent for cooking tahu quickly and efficiently while retaining its texture and flavor

Using the right kitchen tools and equipment helps you make a delicious tahu recipe. Whether you love traditional Indonesian dishes or modern fusion, the right tools and techniques are key.

Preparing Your Tahu: Step-by-Step Guide

To make a tasty crispy tahu , follow a simple process. Begin by preparing your tahu as the simple tahu suggests. Cut it into shapes and sizes you like, then marinate it in a spice and herb mix.

It’s important to handle the tahu carefully to avoid it breaking. Use a light touch to press out extra liquid before marinating. This ensures the tahu soaks up flavors well and stays crispy.

Here are some tips for preparing your tahu:

  • Use a sharp knife to cut the tahu into desired shapes and sizes.
  • Marinate the tahu in a mixture of spices and herbs for at least 30 minutes.
  • Press the tahu gently to remove excess liquid before marinating it.

By following these steps, you can make a delicious and crispy tahu recipe that will wow everyone. Always handle the tahu gently and marinate it well to enhance flavors.

With these easy steps, you can enjoy a tasty simple tahu anytime. It’s perfect for a quick snack or a full meal, satisfying any craving.

Mastering the Basic Tahu Recipes

To make a tasty tahu recipe, you need to know the basics. Tahu, an Indonesian favorite, can be cooked in many ways. This makes it a great choice for a healthy, vegetarian meal. With a few simple steps, you can learn to make a delicious and nutritious dish.

When preparing tahu, cutting it right is key. Cutting it into small cubes or slices helps get the right texture. Also, marinating it with soy sauce and garlic adds flavor. Following the right cooking temperature ensures it turns out crispy and delicious.

Proper Cutting Techniques

Here are some tips for cutting tahu:

  • Cut the tahu into small cubes or slices to achieve the perfect texture
  • Use a sharp knife to prevent the tahu from breaking apart
  • Cut the tahu just before cooking to ensure freshness

Marination Methods

Marinating tahu adds flavor and depth. Soy sauce, garlic, and ginger are popular choices. Mixing these ingredients makes a delicious tahu recipe for any time.

Popular Tahu Cooking Variations

There are many ways to cook tahu. A classic indonesian tahu recipe uses stir-frying or deep-frying. This makes the tahu crispy on the outside and soft on the inside. You can also marinate the tahu in soy sauce, garlic, and ginger for extra flavor.

Here are some common ways to cook tahu:

  • Stir-frying: This is quick and easy. Heat oil in a wok or skillet, add veggies and seasonings, and stir-fry the tahu until it’s golden.
  • Deep-frying: This method gives a crispy outside and a soft inside. It’s perfect for a tasty indonesian tahu recipe.
  • Grilling: Grilling adds smoky flavor. Brush the tahu with oil and seasonings, then grill until it’s golden.

Don’t be afraid to try new things with your tahu recipe. Mixing up ingredients and cooking methods can lead to a unique and delicious indonesian tahu recipe.

Common Mistakes to Avoid When Cooking Tahu

When cooking tahu, several common mistakes can ruin the dish’s texture and flavor. To make a crispy tahu recipe, avoid these errors. Overcooking or undercooking can make the tahu soft or hard.

A simple tahu recipe improves with the right cooking time and temperature. Handle the tahu gently to avoid breaking. The right seasoning is also key for a great taste in your easy tahu recipes.

Other mistakes include wrong storage, which can spoil the tahu fast. Store it in the fridge at a steady temperature to keep it fresh longer. By avoiding these mistakes, you’ll make a tasty and crispy tahu recipe everyone will love.

Here are some tips to avoid common mistakes when cooking tahu:

  • Handle the tahu gently to prevent breaking or crumbling
  • Use the right amount of seasoning to enhance the flavor
  • Store the tahu in the refrigerator at a consistent temperature

Follow these tips and avoid common mistakes to make a delicious simple tahu recipes. Whether you’re after an easy tahu recipes or something more complex, success comes from paying attention to detail and being open to trying new things.

Serving Suggestions and Accompaniments

There are many ways to serve tahu. For a true Indonesian taste, pair it with steamed rice and stir-fried veggies. This combo is a favorite in Indonesia and goes well with tahu. For a healthier choice, try it with a mixed greens salad or a warm soup.

A healthy tahu recipes uses fresh, nutritious ingredients. Some great sides for tahu include:

  • Steamed rice
  • Stir-fried vegetables
  • Mixed greens salad
  • Warm soup

For a vegetarian tahu recipes, add roasted or grilled veggies. They add flavor, protein, and fiber. A well-made tahu recipes can make any meal better. These suggestions help you create a tasty, satisfying dish.

Here’s a simple table to help you plan your meal:

AccompanimentDescription
Steamed RiceA classic Indonesian side dish
Stir-fried VegetablesA healthy and flavorful option
Mixed Greens SaladA light and refreshing choice

Conclusion: Mastering Your Tahu Creation

We’ve explored the world of tahu, a beloved Indonesian tofu dish. We hope you now feel confident and skilled to make your own delicious tahu recipes. You’ve learned about tahu’s history and health benefits, and how to make easy tahu recipes that taste great.

With the right ingredients and techniques, you can make tahu that’s both tasty and textured just right. Don’t be afraid to try different marinades and cooking methods to create your own unique tahu dish.

Keep exploring tahu’s many uses and share your creations with others. This will inspire them to try this Indonesian favorite. Whether you stick to traditional recipes or add your own twist, your love for tahu will make every meal special.

FAQ

What is tahu?

Tahu, also known as tofu, is a key ingredient in Indonesian food. It’s made from soybeans that are coagulated and pressed into blocks.

How is tahu different from regular tofu?

Tahu is softer and more delicate than regular tofu. It’s often used in Indonesian dishes. Regular tofu is used in other cuisines.

What are the nutritional benefits of tahu?

Tahu is high in protein and low in calories. It’s a healthy choice for a balanced diet. It also has calcium, iron, and other important vitamins and minerals.

What are the essential ingredients needed to make the perfect tahu recipes?

To make a tasty tahu recipes, you need soy sauce, garlic, ginger, and chili peppers. These give tahu its great flavor.

What traditional Indonesian cooking utensils are used to make tahu?

To make tahu, Indonesians use a wok and a steamer. These tools help get the right texture and flavor.

What are some common mistakes to avoid when cooking tahu?

Avoid overcooking tahu to prevent it from becoming tough. Also, don’t forget to season it right. Storing tahu properly is key to keeping it fresh.

What are some traditional Indonesian side dishes that pair well with tahu?

Good side dishes for tahu include steamed rice, stir-fried veggies, and sambal (spicy chili sauce). These enhance tahu’s flavor and texture.

Simple & Tasty Lion’s Mane Mushroom Recipe

lion's mane recipe

Are you ready to unlock the secrets of a delicious lion’s mane mushroom recipe? Lion’s mane mushrooms have a unique flavor and texture. They are loved by chefs and home cooks alike. But what makes a lion’s mane recipe special, and how can you impress your friends and family with it? Let’s explore the world of lion’s mane mushroom recipes together.

Key Takeaways

  • Discover the unique flavor and texture of lion’s mane mushrooms
  • Learn how to create a simple and tasty lion’s mane recipe
  • Explore the various ways to cook lion’s mane mushrooms, from soups to stir-fries
  • Get tips on how to choose the freshest lion’s mane mushrooms for your recipe
  • Find out how to pair your lion’s mane dish with the perfect wine
  • Learn about the nutritional benefits of lion’s mane mushrooms and how to incorporate them into your diet

Introduction to Lion’s Mane Mushrooms

Lion’s mane mushrooms are a unique ingredient for tasty dishes. They have a rich, earthy flavor and a firm texture. This makes them a favorite for cooking.

Found in North America, Europe, and Asia, these mushrooms grow on trees like oak and beech. Their long, white spines look like a lion’s mane. This unique look adds to their appeal in recipes.

What Are Lion’s Mane Mushrooms?

Lion’s mane mushrooms are part of the Hericium genus and are edible. They have a long history in traditional medicine. They’re packed with protein, fiber, and antioxidants, making them a healthy choice.

Nutritional Benefits and Health Properties

Lion’s mane mushrooms offer more than just taste. They’re rich in vitamins and minerals like copper, selenium, and potassium. They also contain compounds like hericenones and erinacines. These have antioxidant and anti-inflammatory effects.

Where to Find Lion’s Mane Mushrooms

Lion’s mane mushrooms are found worldwide, including North America, Europe, and Asia. They grow on trees, especially oak and beech. With practice, you can forage for them and enjoy them in many dishes.

Essential Kitchen Tools for Preparing Lion’s Mane

To make your lion’s mane recipes, you need the right tools. A sharp knife is key for cutting the mushrooms right. A cutting board keeps your workspace clean and safe, making cooking easier.

A skillet or wok is vital for cooking lion’s mane mushrooms. These pans are great for stir-fries and soups. They help you sauté the mushrooms perfectly. You’ll also need a colander, strainer, and spatula for tasks like draining water and mixing ingredients.

  • A measuring cup, for accurately measuring out ingredients
  • A wooden spoon, for gently stirring and folding ingredients together
  • A kitchen scale, for weighing out ingredients with precision

With these tools, you can easily make delicious lion’s mane dishes at home. You’ll feel like you’re in a restaurant.

How to Clean and Prepare Lion’s Mane Mushrooms

To enjoy your lion’s mane mushrooms, especially in pasta, you must clean and prepare them right. This ensures they’re free from dirt and keeps their flavor and texture intact.

Cleaning lion’s mane mushrooms is a gentle task. First, brush off any dirt with a soft-bristled brush. Then, rinse them under cold water to get rid of any dirt left. This step is key to keeping your pasta’s taste clean.

Proper Cleaning Techniques

  • Gently brush off dirt with a soft-bristled brush
  • Rinse under cold running water

Basic Preparation Methods

Once clean, prepare your mushrooms for your recipe. For pasta, slice or chop them to fit the dish. The goal is to enhance the recipe without overwhelming it.

Storage Tips

To keep mushrooms fresh, store them in a cool, dry spot. Use a paper bag or a breathable container. This way, they’ll stay fresh for your pasta recipe, ensuring great taste and texture.

Basic Lion’s Mane Recipe for Beginners

Starting with lion’s mane mushrooms is easy. A simple soup recipe is a great way to begin. Slice the mushrooms thinly and heat butter or oil in a skillet over medium heat.

Cook the mushrooms until they’re tender and lightly browned. Season with salt and pepper. Serve with rice or noodles for a versatile meal. For a cozy dish, add the mushrooms to a soup with vegetables and broth.

Here are some tips for cooking lion’s mane mushrooms:

  • Choose fresh, high-quality mushrooms for the best taste.
  • Cook the mushrooms until they’re tender to avoid a rubbery texture.
  • Try different seasonings and ingredients to find your favorite flavors.

Lion’s mane soup recipes can be simple or complex. It’s perfect for beginners and experienced cooks. Its rich flavor and health benefits make it a great addition to any meal.

Mushroom VarietyPreparation MethodRecommended Dish
Lion’s ManeSautéingLion’s Mane Soup Recipe
Button MushroomsGrillingMushroom Burgers
PortobelloRoastingStuffed Mushrooms

Creating the Perfect Lion’s Mane Stir Fry

To make a delicious lion’s mane vegan recipe, start by picking colorful ingredients. Think bell peppers, carrots, and broccoli. For inspiration, check out Manorea Recipes, which has many tasty and easy recipes. Make sure to pick ingredients that cook evenly, so they’re all tender and lightly browned.

Ingredients Selection

For a vegan lion’s mane recipe, choose plant-based ingredients. Here are some good options:

  • Mushrooms (lion’s mane or other varieties)
  • Vegetables (bell peppers, carrots, broccoli, etc.)
  • Oil or non-stick cooking spray
  • Soy sauce or other vegan-friendly seasonings

Step-by-Step Cooking Process

To cook your stir-fry, heat a tablespoon of oil in a wok or large skillet over high heat. Add ingredients in order of cooking time, starting with the longest. Use gentle stirring motions to avoid burning or sticking.

Sauce Combinations

For flavor, use different sauces in your lion’s mane vegan recipe. Soy sauce, tamari, or homemade sauce combinations with garlic, ginger, and maple syrup work well. Try different sauces to find your favorite.

Delicious Lion’s Mane Pasta Dishes

Lion’s mane mushrooms add a rich, earthy flavor and a meaty texture to pasta dishes. Start by cooking the pasta as the package says. Then, top it with a sauce of sautéed mushrooms, garlic, and herbs.

For a lion’s mane stir fry recipe, cook the pasta and mushrooms together in a wok or large skillet. Season with a sauce of your choice. Some popular sauces include:

  • Carbonara sauce with sautéed mushrooms and garlic
  • Pesto sauce with lemon and herbs
  • Marinara sauce with a spicy kick

A

quote from a famous chef

can make the dish elegant. But, the secret to a great lion’s mane pasta dish is in the quality of ingredients and how they’re prepared. By using fresh, flavorful ingredients and following a simplelion’s mane stir fry recipe, you’ll impress your friends and family.

Pasta TypeSauce OptionToppings
SpaghettiCarbonaraSautéed mushrooms, garlic, and herbs
FettuccinePestoCherry tomatoes and lemon zest
LinguineMarinaraSpicy sausage and olives

Hearty Lion’s Mane Soup Variations

Lion’s mane mushroom cooking lets you make many tasty soups. A favorite is a creamy and comforting soup. Start by sautéing the mushrooms in butter or oil. Then, add veggies, broth, and cream.

Looking for ideas? Here are some tasty lion’s mane soup recipes:

  • Classic cream soup: puree cooked mushrooms and veggies in a blender. Stir in heavy cream and season with salt and pepper.
  • Asian-inspired clear soup: cook mushrooms and veggies in a light broth. Season with soy sauce and garnish with herbs.
  • Vegetable medley soup: mix colorful veggies like carrots, bell peppers, and zucchini. It’s a nutritious and filling meal.

These ideas can be tweaked to fit your taste. Try different ingredients and spices to make your own special soup.

With a bit of creativity, you can make many delicious lion’s mane soups. Whether you want something creamy or light, there’s a soup for every mood.

Soup VariationIngredientsSeasoning
Classic Cream SoupLion’s mane mushrooms, vegetables, broth, creamSalt, pepper
Asian-Inspired Clear SoupLion’s mane mushrooms, vegetables, light brothSoy sauce, chopped herbs
Vegetable Medley SoupLion’s mane mushrooms, colorful vegetables, brothSalt, pepper, herbs

Vegan Lion’s Mane Recipes and Substitutions

Lion’s mane mushrooms are perfect for vegan cooking because they don’t contain animal products. You can make a tasty lion’s mane pasta recipe by swapping out animal-based ingredients for vegan ones. Use vegan broth instead of chicken or beef broth, and choose vegan-friendly sauces over animal-based ones.

There are many vegan lion’s mane recipes to try, like stir-fries, pasta dishes, and soups. A warm lion’s mane soup recipe can be made by sautéing mushrooms with veggies and spices. Add some vegan-friendly seasonings like nutritional yeast or smoked paprika for extra taste.

  • Try different marinades and seasonings to find your favorite flavors
  • Be adventurous and mix up ingredients in your recipes
  • Use lion’s mane mushrooms as a meat substitute in dishes like lion’s mane pasta recipe or lion’s mane soup recipe

By experimenting with various recipes, you can make many tasty vegan dishes with lion’s mane mushrooms. Whether you want a comforting lion’s mane soup recipe or a zesty lion’s mane pasta recipe, there’s a world of possibilities.

RecipeIngredientsInstructions
Lion’s Mane PastaLion’s mane mushrooms, pasta, vegan broth, olive oilSauté lion’s mane mushrooms and combine with cooked pasta, vegan broth, and olive oil
Lion’s Mane SoupLion’s mane mushrooms, vegetables, vegan broth, spicesCombine sautéed lion’s mane mushrooms with vegetables, vegan broth, and spices, and simmer until the soup is hot and flavorful

Common Cooking Mistakes to Avoid

When making a lion’s mane vegan recipe or stir fry, knowing common mistakes is key. Temperature control is crucial. It affects the dish’s texture and taste.

To manage temperature, use a thermometer. Adjust the heat as you cook. Seasoning mistakes can also ruin a dish, especially with delicate mushrooms. Taste and adjust seasoning as you go.

Temperature Control Issues

Wrong temperatures can make mushrooms tough or mushy. Cook them at medium heat and stir often.

Seasoning Errors

Seasoning mistakes can be fixed with a balanced mix of herbs and spices. For a vegan dish, try thyme, rosemary, and garlic for flavor.

Texture Problems

Texture issues come from mushrooms not being cooked right. They should be tender and lightly browned.

Knowing these mistakes and how to avoid them helps. You’ll make a tasty lion’s mane vegan or stir fry dish. It will impress everyone.

Cooking MistakeSolution
Temperature Control IssuesUse a thermometer and adjust the heat as needed
Seasoning ErrorsTaste the dish as you go and adjust the seasoning accordingly
Texture ProblemsCook the mushrooms until they are tender and lightly browned

Wine Pairing Suggestions for Lion’s Mane Dishes

Pairing wine with lion’s mane mushroom recipe opens up a world of flavors. The right wine can make a lion’s mane recipe even more special. For a hearty lion’s mane mushroom recipe like a stew, try a full-bodied red like Cabernet Sauvignon or Syrah.

For lighter lion’s mane recipes, like a stir-fry or salad, a crisp white wine is perfect. Sauvignon Blanc or Pinot Grigio works well. The secret to great wine pairing is to match the wine with the dish’s flavors.

  • Earthier lion’s mane recipes go well with earthy wines like Pinot Noir or Beaujolais.
  • Richer lion’s mane mushroom recipes pair well with richer wines, such as Merlot or Malbec.
  • Lighter lion’s mane recipes pair well with lighter wines, such as Chardonnay or Riesling.

Finding the perfect wine for a lion’s mane recipe is all about personal taste. Feel free to try different wines to find your favorite match for your lion’s mane mushroom recipe.

WineLion’s Mane Recipe
Cabernet SauvignonHearty stew or rich sauce
Sauvignon BlancLight stir-fry or salad
Pinot NoirEarthier recipes with mushrooms and herbs

Seasonal Variations and Ingredient Substitutions

Lion’s mane mushroom dishes can be made for any season. This makes them great for cooking with lion’s mane mushrooms. You can mix in seasonal ingredients to make a variety of tasty dishes. For example, in spring and summer, add fresh herbs and veggies like asparagus and bell peppers for light dishes.

In fall and winter, use heartier items like root veggies and mushrooms for cozy meals. Some tasty seasonal dishes include:

  • Spring: lion’s mane mushroom and asparagus stir-fry, lion’s mane mushroom and bell pepper salad
  • Summer: lion’s mane mushroom and corn soup, lion’s mane mushroom and zucchini noodles
  • Fall: lion’s mane mushroom and butternut squash soup, lion’s mane mushroom and kale stew
  • Winter: lion’s mane mushroom and root vegetable stew, lion’s mane mushroom and barley soup

These seasonal dishes let you enjoy a variety of lion’s mane mushroom recipes. You can also adjust them to fit your taste and diet. By trying out different ingredients and spices, you can make unique and tasty dishes with lion’s mane mushrooms.

Conclusion: Mastering Lion’s Mane Mushroom Cooking

Cooking with lion’s mane mushrooms is a fun and rewarding journey. It may take some practice, but it’s worth it. You’ll love the unique texture and umami flavor in dishes like stir-fries, soups, and pasta.

Experimenting with different recipes and ingredients is key. Try vegan options or seasonal twists. Each new dish will help you grow and appreciate lion’s mane mushrooms more.

Keep exploring and improving your skills. Enjoy the process of becoming a lion’s mane cooking master. The endless possibilities and delicious rewards are waiting for you.

FAQ

What are lion’s mane mushrooms?

Lion’s mane mushrooms are a type of mushroom that looks like a lion’s mane. They have long, white spines and a rich flavor. Their firm texture makes them great in many dishes.

What are the nutritional benefits of lion’s mane mushrooms?

These mushrooms are full of protein, fiber, and antioxidants. They also have compounds that might help your brain and reduce inflammation.

Where can I find lion’s mane mushrooms?

You can find them on trees, especially oak and beech, in many places. They’re also sold at specialty stores, farmer’s markets, and online.

What essential kitchen tools do I need to prepare lion’s mane mushrooms?

You’ll need a sharp knife, cutting board, and skillet or wok. A colander, strainer, and spatula are also helpful for cleaning and cooking.

How do I clean and prepare lion’s mane mushrooms?

Gently brush off dirt, then rinse under cold water. Slice or chop them as needed. Store them in a paper bag or breathable container to keep them fresh.

What are some basic recipes for cooking lion’s mane mushrooms?

Start with sautéing them in butter or oil. Serve with rice or noodles. They’re also great in stir-fries, soups, and pasta.

How can I make a perfect lion’s mane stir-fry?

Choose colorful ingredients like bell peppers and carrots. Heat oil in a wok or skillet. Cook the ingredients until tender, then season with your favorite sauce.

Can I use lion’s mane mushrooms in pasta dishes?

Yes! They add a rich flavor and meaty texture to pasta. Top cooked pasta with a mushroom sauce or cook them together for a stir-fry.

What are some delicious lion’s mane soup variations?

They’re perfect for soups, adding texture and flavor. Try a cream soup or a clear soup with a light broth. You can also make a vegetable medley soup.

Are there any vegan recipes for lion’s mane mushrooms?

Yes, they’re great for vegan dishes. Use vegan broth and sauces. They can also replace meat in many recipes.

What are some common cooking mistakes to avoid when working with lion’s mane mushrooms?

Avoid temperature issues, seasoning errors, and texture problems. Monitor the temperature, taste as you go, and cook until tender.

What wines pair well with lion’s mane dishes?

Their earthy flavor pairs well with many wines. For hearty dishes, try a full-bodied red. For lighter dishes, a crisp white wine is better.

How can I make seasonal variations and substitutions with lion’s mane mushrooms?

Use seasonal ingredients in your recipes. In spring and summer, add fresh herbs and vegetables. In fall and winter, use root vegetables and other mushrooms. Try different substitutions for variety.

Broccoli Cauliflower Salad: A Tasty and Nutritious Recipe

broccoli cauliflower salad recipe​

What makes a broccoli cauliflower salad recipe special? How can you make a healthy broccoli cauliflower salad that’s both tasty and nutritious?

Imagine a dish that brings together broccoli and cauliflower’s unique flavors and textures. It’s all in one bowl.

A broccoli cauliflower salad recipe is great for a healthy meal. It combines broccoli, cauliflower, and other fresh ingredients. This salad is not only delicious but also full of vitamins, minerals, and antioxidants. It’s a fantastic choice for a healthy broccoli cauliflower salad.

Key Takeaways

  • A broccoli cauliflower salad recipe offers a unique blend of flavors and textures
  • This salad is packed with vitamins, minerals, and antioxidants
  • It’s an excellent choice for a healthy meal option
  • Broccoli and cauliflower are the main ingredients
  • This salad can be customized to suit your taste preferences
  • A healthy broccoli cauliflower salad is easy to make and requires minimal ingredients

The Perfect Blend of Flavors and Nutrition

The easy broccoli cauliflower salad is a great choice for a tasty and healthy meal. It’s a mix of flavors and nutrients, perfect for those who want a nutritious dish. The broccoli and cauliflower, along with other ingredients, create a refreshing and satisfying taste.

This salad’s success comes from its balanced flavors and textures. The broccoli and cauliflower’s crunch is matched by the creamy dressing. It’s a delightful mix that works well for lunch or dinner.

Why This Salad Stands Out

This salad is special because of its unique mix of ingredients and flavors. Fresh herbs and a tangy dressing add a bright taste. Plus, the broccoli and cauliflower make it a healthy choice.

Key Flavor Components

The salad’s main flavors come from:

  • Broccoli: adds a crunchy texture and fresh taste
  • Cauliflower: brings a delicate flavor and crunch
  • Dressing: combines everything with a creamy, tangy taste

Nutritional Highlights

This salad is not just tasty, but also full of nutrients. Broccoli and cauliflower are rich in vitamins and minerals. The dressing adds healthy fats. It’s a great choice for a healthy and delicious meal.

Essential Ingredients for Your Broccoli Cauliflower Salad Recipe

To make the best broccoli cauliflower salad, focus on key ingredients. A good vegetarian broccoli cauliflower salad recipe has fresh broccoli, cauliflower, and other ingredients. These add flavor and nutrition.

Choosing the freshest ingredients is crucial. Look for crisp, firm heads of broccoli and cauliflower. They should be free from wilting or browning. These veggies are the salad’s base, offering a tasty and healthy start.

Some must-have ingredients for this salad are:

  • Fresh broccoli florets
  • Cauliflower florets
  • Nuts or seeds for crunch
  • A tangy dressing to tie everything together

A well-made vegetarian broccoli cauliflower salad is a healthy, tasty meal. By picking the right ingredients and focusing on quality, you’ll make a salad that wows everyone.

Health Benefits of This Fresh Vegetable Combination

Mixing broccoli and cauliflower in a salad is great for your health. Making it at home lets you pick the ingredients and how much you eat. This salad is packed with vitamins, minerals, fiber, and protein, and it’s full of antioxidants.

Some of the notable health benefits include:

  • Boosting the immune system with its high vitamin C content
  • Supporting healthy digestion with its fiber content
  • Aiding in cancer prevention with its antioxidant properties

The crunchy texture of broccoli and cauliflower makes the salad fun to eat. This makes it easier to eat the veggies you need every day. By making it yourself, you get the most nutritional benefits.

Broccoli and cauliflower together in a salad are even better for you. They work together to make the salad more nutritious. This makes a crunchy broccoli cauliflower salad or a homemade broccoli cauliflower salad a great choice for a healthy diet.

NutrientBroccoliCauliflower
Vitamin C100% DV75% DV
Fiber5% DV10% DV
AntioxidantsHighHigh

Adding a crunchy broccoli cauliflower salad or a homemade broccoli cauliflower salad to your diet can greatly improve your health and well-being.

Step-by-Step Preparation Guide

To make a tasty simple broccoli cauliflower salad, start by washing and chopping the broccoli and cauliflower. Cut them into bite-sized pieces. This makes them mix well with other ingredients and gives your salad a uniform texture.

Then, mix your favorite dressing ingredients in a bowl. You can use mayonnaise, vinegar, and herbs. Adding grated cheese or nuts can also enhance the flavor of your simple broccoli cauliflower salad.

Here’s a basic outline to follow:

  • Chop the broccoli and cauliflower into bite-sized pieces
  • Prepare the dressing by combining your favorite ingredients
  • Mix the chopped vegetables with the dressing and add any desired toppings

After mixing all the ingredients, taste and adjust the seasoning if needed. You can serve your simple broccoli cauliflower salad right away or store it in the fridge for later. With these simple steps, you’ll have a delicious and healthy simple broccoli cauliflower salad ready to enjoy.

IngredientQuantity
Broccoli2 cups
Cauliflower1 cup
Mayonnaise1/2 cup

Making the Perfect Dressing

A delicious broccoli cauliflower salad recipe needs a tasty dressing. The dressing can make a big difference in a healthy broccoli cauliflower salad. Here are some options to consider:

Classic Creamy Dressing Option

A classic creamy dressing is a great choice for a broccoli cauliflower salad. It adds a rich and tangy flavor that complements the vegetables perfectly. You can make a classic creamy dressing with ingredients like mayonnaise, sour cream, and herbs.

Lighter Vinaigrette Alternative

If you prefer a lighter dressing, a vinaigrette is a great alternative. A vinaigrette is made with oil and acid, such as vinegar or lemon juice, and can be flavored with herbs and spices. This option is perfect for a healthy broccoli cauliflower salad, as it is low in calories and rich in flavor.

Dairy-Free Variations

For those with dietary restrictions, there are many dairy-free variations of dressings available. You can make a dairy-free creamy dressing with ingredients like vegan mayonnaise and non-dairy yogurt. Alternatively, you can opt for a vinaigrette made with oil and acid, which is naturally dairy-free.

When it comes to making the perfect dressing for your broccoli cauliflower salad recipe, the key is to experiment and find the combination that works best for you. With these options, you can create a delicious and healthy broccoli cauliflower salad that is sure to please.

Creative Recipe Variations and Add-ins

To make your easy broccoli cauliflower salad even better, try adding some creative touches. Nuts like almonds or walnuts add a nice crunch. Seeds such as pumpkin or sunflower seeds boost nutrition. Dried fruits like cranberries or cherries add a sweet touch to the savory broccoli and cauliflower.

A fresh broccoli cauliflower salad gets a boost with grilled chicken or salmon. These proteins add flavor and nutrition. For a veggie option, roasted tofu or tempeh works great.

  • Adding a citrus vinaigrette for a lighter dressing option
  • Incorporating different cheeses, such as feta or goat cheese, for a tangy flavor
  • Using roasted vegetables instead of raw for a deeper flavor profile

These changes keep your salad fresh and exciting. Don’t be afraid to try new combinations to find your favorite.

Storage Tips and Make-Ahead Options

To keep your broccoli cauliflower salad fresh, proper storage is key. Store it in an airtight container in the fridge for up to 3 days. For a vegetarian version, prepare ingredients separately and assemble just before serving.

Here are some tips for making ahead and storing your salad:

  • Prepare the broccoli and cauliflower up to a day in advance and store them in separate containers.
  • Make the dressing ahead of time and store it in an airtight container in the refrigerator.
  • Assemble the salad just before serving to ensure the best flavor and texture.

For more recipe ideas and storage tips, visit Manorea Recipes. They have a wide range of easy and delicious recipes, including the best broccoli cauliflower salad and vegetarian broccoli cauliflower salad recipe.

By following these storage tips and make-ahead options, you can enjoy your favorite salad all week long. Whether it’s a best broccoli cauliflower salad or a vegetarian broccoli cauliflower salad recipe.

Common Preparation Mistakes to Avoid

Making a crunchy broccoli cauliflower salad can be tricky. One big mistake is overcooking the veggies. This makes them soft and not tasty. To fix this, cook them until they’re tender but still crisp.

Another error is using too much dressing. This can make the salad soggy and too salty. For a great homemade salad, use a light, refreshing dressing. Here are some mistakes to steer clear of:

  • Overcooking the broccoli and cauliflower
  • Using too much dressing
  • Not chilling the salad long enough

To make the perfect salad, preparation is key. Avoid these mistakes to create a delicious, refreshing salad.

Conclusion

The broccoli cauliflower salad is a tasty and healthy addition to any meal. It has a great mix of flavors and lots of vitamins and minerals. Plus, it’s easy to make, making it a standout recipe.

Adding this salad to your meals will not only feed your body but also please your taste buds. Try different dressings and add-ins to find your favorite mix. Enjoy making a delicious and healthy meal.

FAQ

What is the main difference between broccoli and cauliflower in this salad?

Broccoli and cauliflower are both cruciferous veggies. Broccoli is packed with vitamins C, K, and folate. Cauliflower, on the other hand, is rich in vitamin C, fiber, and antioxidants. Combining both in the salad makes it nutritious and tasty.

Is this salad suitable for vegetarians and vegans?

Yes, this broccoli cauliflower salad is great for vegetarians and vegans. It’s made with fresh veggies and a simple dressing. It’s perfect for those on a plant-based diet.

How long does the broccoli cauliflower salad last in the refrigerator?

You can store this salad in the fridge for 4-5 days. Keep it in an airtight container. The veggies and dressing stay fresh, so you can enjoy it all week.

Can I make this salad in advance?

Absolutely! This salad is perfect for making ahead. Just prepare it, store it in the fridge, and it’s ready when you are. The flavors get better with time, making it a great choice for ahead-of-time prep.

What are some tasty add-ins I can include in the broccoli cauliflower salad?

You can add many tasty things to this salad. Try toasted nuts and seeds, dried cranberries or raisins, or chopped fresh herbs. You can also add cooked and cooled quinoa or chickpeas for extra protein.

How can I make the dressing for this salad lighter and healthier?

For a lighter dressing, use a vinaigrette instead of a creamy one. Mix olive oil, apple cider vinegar, Dijon mustard, and a bit of honey or maple syrup. This combo is flavorful and lower in calories.

Can I use frozen broccoli and cauliflower in this recipe?

You can use frozen broccoli and cauliflower if fresh isn’t available. Just thaw them completely and pat dry before adding to the salad. They’ll still be delicious.

Heavenly Hash Brownies: A Decadent Dessert Recipe

recipe for heavenly hash brownies

What makes the perfect recipe for heavenly hash brownies? Is it the rich, fudgy texture or the deep, chocolatey flavor? This easy hash brownie recipe has it all. You’ll create a decadent dessert perfect for any occasion.

Whether you’re new to baking or a pro, this recipe will be a hit. Let’s explore what makes these hash brownies so special.

Introduction to Heavenly Hash Brownies

We’ll guide you through making the perfect hash brownies. You’ll learn about the essential ingredients and how to mix them. This recipe is sure to impress and is the best out there.

Key Takeaways

  • Learn how to make a recipe for heavenly hash brownies that’s easy and delicious
  • Discover the secrets to creating a rich, fudgy texture in your hash brownies
  • Get the best hash brownie recipe that’s perfect for any occasion
  • Explore the essential ingredients and step-by-step mixing instructions
  • Find out how to make an easy hash brownie recipe that’s sure to become a favorite
  • Learn how to create a decadent dessert that’s perfect for any time of year

The Magic Behind Heavenly Hash Brownies

To make a truly decadent dessert, you need to know what makes it special. How to make hash brownies is all about using top-notch ingredients and a precise cooking method. This delicious hash brownie recipe shows how these elements come together for a rich, fudgy, and delicious treat.

Looking into the history of hash brownies shows they’ve been a favorite for years. Introduced in the early 20th century, they were a quick and easy dessert. Now, homemade hash brownies are a staple, loved by many.

What Makes Them “Heavenly”

The secret to heavenly hash brownies is the perfect mix of flavors and textures. A great delicious hash brownie recipe should be rich, chocolatey, fudgy, and crunchy. Use top-quality ingredients like dark chocolate and fresh nuts, and follow a precise cooking method.

History of Hash Brownies

Hash brownies have a long and varied history. From a simple dessert to a beloved treat, they’ve evolved a lot. Today, there are many variations, each with its own twist and flavor.

Why This Recipe Works

This homemade hash brownies recipe works because it balances chocolate richness with sugar sweetness. It results in a decadent, fudgy, and delicious dessert. It’s perfect for both seasoned bakers and beginners.

With these tips, you’ll be making your own delicious hash brownie recipe in no time. So, why not try it out? With a bit of practice and patience, you’ll be making heavenly hash brownies like a pro.

Essential Ingredients for Recipe for Heavenly Hash Brownies

To make heavenly hash brownies, you’ll need the right heavenly hash brownie ingredients. You’ll need all-purpose flour, unsalted butter, and granulated sugar. Also, brown sugar, eggs, vanilla extract, and semi-sweet chocolate chips are needed. These ingredients help create a rich, fudgy, and delicious dessert.

A step by step hash brownie tutorial can guide you. It shows how to mix these ingredients for the perfect flavor. By following a simple recipe and using quality ingredients, you’ll make a decadent dessert for any occasion.

  • High-quality chocolate for a rich, fudgy texture
  • Fresh eggs for moisture and flavor
  • Real sugar for a balanced sweetness

Using these ingredients and a step by step hash brownie tutorial, you can make a heavenly hash brownie. It’s sure to impress your friends and family.

Kitchen Equipment You’ll Need

To make the best hash brownie recipe, you need the right kitchen tools. Having the right equipment makes mixing and baking easier. For an easy recipe, you’ll need a 9×13-inch baking dish, a medium bowl, a whisk, a rubber spatula, and a measuring cup.

Visit Manorea Recipes for more kitchen essentials. A stand mixer or hand mixer can be very helpful for mixing. These tools save time and effort, letting you focus on other recipe parts. Also, a silicone spatula and measuring tools like a digital scale and spoons are useful.

  • 9×13-inch baking dish
  • Medium-sized bowl
  • Whisk
  • Rubber spatula
  • Measuring cup
  • Stand mixer (optional)
  • Hand mixer (optional)
  • Silicone spatula (optional)

With the right tools, you can make a delicious hash brownie recipe. Choose a recipe that fits your taste and skill level.

Preparing Your Baking Space

To make the best homemade hash brownies, you need to get your baking area ready. It’s more than just heating your oven to 350°F (180°C). Grease the baking dish with butter or spray to stop the brownies from sticking. A tidy baking area helps you focus on making a tasty recipe for heavenly hash brownies.

Here’s how to get your baking space ready:

  • Clear a flat surface for mixing and have all the ingredients within reach.
  • Preheat your oven to the correct temperature.
  • Grease the baking dish with butter or cooking spray.
  • Have all the necessary utensils and equipment ready.

By following these steps, you’re on your way to making homemade hash brownies that will wow everyone. Stay focused and enjoy the process. With a clean and organized space, you’ll love making a recipe for heavenly hash brownies from start to finish.

Step-by-Step Mixing Instructions

To make the perfect heavenly hash brownies, follow a step-by-step guide. This ensures your brownies are rich, fudgy, and full of flavor. Begin by mixing the dry ingredients like flour, sugar, and cocoa powder in a bowl. This step is key to evenly distributing the ingredients.

Next, whisk together the wet ingredients, such as eggs, vanilla extract, and melted butter in another bowl. Once the wet ingredients are well mixed, add them to the dry ingredients. Mix until just combined, avoiding overmixing to prevent tough brownies. The folding technique is also crucial for a smooth texture.

Combining Dry Ingredients

When mixing dry ingredients, sift them to remove lumps. This ensures the brownies are smooth. Use a step by step hash brownie tutorial to guide you. Feel free to try different ingredients and flavors.

Mixing Wet Ingredients

Mixing wet ingredients is also vital. Whisk them until smooth and well combined. This step helps create a rich, fudgy texture. By following these heavenly hash brownie tips, you’ll make delicious brownies that impress everyone.

Baking Temperature and Timing Guide

To get the perfect delicious hash brownie recipe, follow the right baking steps. Preheat your oven to 350°F (180°C). Bake the brownies for 25-30 minutes. They’re done when a toothpick in the center has a few moist crumbs.

When you’re learning how to make hash brownies, remember to rotate the dish halfway. This ensures even cooking. It makes your brownies rich, fudgy, and delicious hash brownie recipe that will wow everyone.

Here are some tips to keep in mind:

  • Use a high-quality oven thermometer for accurate temperature readings.
  • Avoid overmixing the batter to prevent dense brownies.
  • Watch the brownies closely while baking. Cooking time can vary with different ovens.

By following these tips and using the right baking temperature and timing, you’ll make a delicious hash brownie recipe perfect for any time. Whether you’re new to baking or experienced, learning how to make hash brownies is rewarding and fun.

Achieving the Perfect Texture

To make a dessert that’s truly divine, getting the texture right is key. A great hash brownie recipe should have a gooey center and a crunchy outside. To get this, avoid mixing the batter too much. This can make the brownies dense and hard.

Testing if the brownies are done is easy. Just stick a toothpick into the middle. If it comes out with a bit of moist crumb, they’re perfect. If not, bake for 5-10 more minutes and check again. This trick is vital to avoid overcooking.

Testing for Doneness

  • Insert a toothpick into the center of the brownies
  • Check for a few moist crumbs
  • Bake for an additional 5-10 minutes if necessary

Cooling methods are also important for the right texture. Letting the brownies cool in the pan or on a wire rack helps. These steps will help you make a delicious, textured dessert with the best hash brownie recipe.

Storage and Serving Suggestions

After baking and cooling your heavenly hash brownies, it’s key to store them right. Homemade treats are often more delicate than store-bought ones. Wrap them tightly in plastic wrap or aluminum foil to keep them fresh. You can also use an airtight container to lock in the flavors.

When you’re ready to serve, reheating can bring back their original texture and taste. You can microwave them for a few seconds or warm them in the oven at a low temperature. Here are some tips for reheating and serving:

  • Reheat brownies in the microwave for 10-15 seconds or in the oven at 250°F (120°C) for 5-7 minutes.
  • Cut brownies into squares or rectangles for a elegant presentation.
  • Consider serving with a scoop of ice cream or a drizzle of chocolate sauce to enhance the flavor.

By following these tips, you can enjoy your homemade hash brownies for longer. Impress your friends and family with your baking skills. Always handle the brownies gently and store them in a cool, dry place.

Storage MethodShelf Life
Airtight container5-7 days
Plastic wrap or aluminum foil3-5 days
Freezer2-3 months

Variations and Add-ins

Now that you’ve learned the basic recipe for heavenly hash brownies, it’s time to get creative. Try adding nuts like walnuts or pecans for a unique taste. You can also use different chocolates, like white or dark, to change the flavor.

A delicious hash brownie recipe can be made to your liking with a few simple changes. Here are some ideas:

  • Dried fruit, such as cranberries or cherries
  • Espresso powder for a mocha flavor
  • Sea salt for a touch of savory flavor

Remember, the secret to a truly heavenly hash brownie is to experiment and have fun. Don’t be afraid to try new things and adjust the recipe for heavenly hash brownies to fit your taste.

With these ideas, you can make a delicious hash brownie recipe that’s uniquely yours. So go ahead, get creative, and enjoy making your own special heavenly hash brownies!

VariationIngredientsInstructions
Nutty Hash Brownies1 cup chopped nutsFold nuts into batter before baking
Fruity Hash Brownies1 cup dried fruitFold fruit into batter before baking

Conclusion: Mastering Your Heavenly Hash Brownies

Creating the perfect heavenly hash brownies is a fun journey. It’s filled with rich flavors and decadent textures. By following the hash brownie tutorial in this article, you’re on your way to becoming a pro. Always use top-notch ingredients and follow the baking instructions carefully.

Don’t forget to try out different heavenly hash brownie tips to make them your own. With practice and patience, you’ll make brownies that wow everyone. So, start baking and let the smell of heavenly hash brownies fill your kitchen. Enjoy the chocolatey taste and celebrate your baking skills.

FAQ

What makes these hash brownies “heavenly”?

The secret to these heavenly hash brownies is top-notch ingredients and a special cooking method. The rich chocolate and fudgy texture make them a decadent treat.

What is the history of hash brownies?

Hash brownies have been around since the early 20th century. They were a quick and easy dessert to make. Over time, the recipe has changed, leading to many different versions.

What are the essential ingredients for making heavenly hash brownies?

To make these heavenly brownies, you need flour, unsalted butter, and sugars. Also, eggs, vanilla, and chocolate chips are key. These ingredients mix to create a perfect flavor.

What kitchen equipment do I need to make hash brownies?

You’ll need a 9×13-inch baking dish and a medium bowl. A whisk, spatula, and measuring cup are also necessary. Optional tools include a stand mixer and silicone spatula. A digital scale and spoons are helpful too.

How do I prepare my baking space for making hash brownies?

First, preheat your oven to 350°F (180°C). Grease the baking dish with butter or spray. Clear a space for mixing and have all ingredients ready.

How do I mix the ingredients for the hash brownies?

Start by mixing dry ingredients like flour, sugar, and cocoa in a bowl. Then, whisk wet ingredients like eggs, vanilla, and melted butter in another bowl. Combine the wet and dry ingredients, mixing until just combined. This folding technique ensures a smooth texture.

What is the baking temperature and timing for hash brownies?

Bake at 350°F (180°C) for 25-30 minutes. A toothpick should come out with a few moist crumbs. Rotate the dish halfway for even cooking.

How do I achieve the perfect texture for hash brownies?

Check for doneness with a toothpick. If it has a few moist crumbs, they’re done. If not, bake for 5-10 more minutes and check again. Cooling the brownies properly will prevent overcooking.

How should I store and serve the hash brownies?

Store the brownies in plastic wrap or foil to keep them fresh. To reheat, use the microwave or oven. Cutting them into squares or rectangles adds elegance to your dessert.

What variations and add-ins can I try for hash brownies?

Try adding nuts or dried fruit for a unique taste. You can also use different chocolates, like white or dark, for a distinct flavor.

Delicious Taco Soup Frios Recipe for Cozy Nights

taco soup frios recipe

What makes a perfect taco soup frios recipe for a cozy night in? It’s the mix of traditional Mexican flavors with a modern twist. Or maybe it’s the ease of making it, making it an easy taco soup recipe. Whatever it is, a warm bowl of authentic taco soup is great for a cold evening.

With the right ingredients and a simple recipe, you can make a delicious, healthy meal. It’s sure to become a favorite.

Key Takeaways

  • Learn how to make a delicious taco soup frios recipe for a cozy night in
  • Discover the secret to an easy taco soup recipe that’s authentic and healthy
  • Get tips on how to prepare a warm and comforting bowl of taco soup frios
  • Find out how to make a homemade taco soup that’s perfect for a chilly evening
  • Explore the world of traditional Mexican flavors with a modern twist
  • Enjoy a simple and easy-to-follow recipe for authentic taco soup

The Story Behind Taco Soup Frios

Taco soup frios comes from Mexico’s rich culinary history. It blends traditional tastes with new twists, making it a favorite. It’s great for those wanting a healthy taco soup recipe because it uses homemade taco soup ingredients that are good for you.

Looking for the best taco soup recipe? Focus on quality ingredients. Use lean proteins, fresh veggies, and whole grains. This way, you get a dish that tastes great and is good for you.

Mexican Culinary Heritage

Mexican food is known for its bold tastes and bright colors. Taco soup frios is no different. It’s made with ground beef, beans, and veggies in a spicy broth. For a healthy taco soup recipe, try using lean ground beef or chicken or turkey instead.

Modern Adaptations

Recently, taco soup frios has seen new ingredients added. Diced tomatoes, jalapenos, and cilantro are popular choices. You can also make your own homemade taco soup seasoning for a unique flavor.

Why This Recipe Works

This recipe is a hit because it mixes old Mexican flavors with new twists. It’s both familiar and exciting, with a rich taste that makes you want more. Whether you’re after a best taco soup recipe or a healthy taco soup recipe, this dish will hit the spot.

Taco soup frios is a dish with a rich history, bold flavors, and modern twists. By choosing quality ingredients and adding your own touches, you can make a healthy taco soup recipe that’s both tasty and healthy.

Essential Ingredients for Perfect Taco Soup Frios Recipe

To make a tasty taco soup frios recipe, you need some key ingredients. You’ll need Mexican spices, ground beef or chicken, and veggies like onions, garlic, and bell peppers. For an easy taco soup recipe, use pre-cooked beans, diced tomatoes, and frozen corn to save time.

A great spicy taco soup needs the right spices. Use chili powder, cumin, paprika, and cayenne pepper. You can adjust the heat by adding more or less spice. Also, add fresh cilantro, lime juice, and sour cream for freshness and creaminess.

  • 1 lb ground beef or chicken
  • 1 large onion, diced
  • 3 cloves of garlic, minced
  • 1 large bell pepper, diced
  • 2 cups of chicken broth
  • 1 can of diced tomatoes
  • 1 teaspoon of chili powder
  • 1/2 teaspoon of cumin
  • Salt and pepper to taste

With these ingredients, you’re ready to make a delicious taco soup frios recipe. It’s perfect for cozy nights. Whether you like it spicy taco soup or mild, use quality ingredients and adjust the seasoning to your liking.

IngredientQuantity
Ground beef or chicken1 lb
Onion1 large
Garlic3 cloves
Bell pepper1 large

Kitchen Equipment You’ll Need

To make the best taco soup, you’ll need some basic kitchen tools. You’ll need a large pot, a cutting board, and some utensils. For a low carb version, a slow cooker or Instant Pot can make cooking easier and faster.

Some key tools for taco soup include a can opener, a measuring cup, and a spoon. You might also use a food processor to quickly chop ingredients.

Basic Tools

  • Large pot
  • Cutting board
  • Utensils (spoon, can opener, etc.)

Optional Equipment

Using a slow cooker or Instant Pot can make cooking easier. These tools are great for making low carb taco soup.

Alternative Tools

If you don’t have certain tools, there are alternatives. For example, you can use a blender or knife instead of a food processor. Being creative and flexible is key to making a great taco soup.

Step-by-Step Taco Soup Frios Preparation

To make a delicious authentic taco soup, start by gathering ingredients. You’ll need ground beef, onions, garlic, and beans. Brown the ground beef in a large pot. Then, add diced onions and minced garlic. Cook until the onions are translucent, making a flavorful base.

Next, add the remaining ingredients. This includes beans, tomatoes, and spices. Stir well and bring to a boil. Then, reduce the heat and simmer for at least 30 minutes. This lets the flavors mix together.

For an easy taco soup recipe, use pre-cooked ground beef or taco seasoning. You can also add your own twist by adjusting spices and ingredients. Try adding diced bell peppers or using chicken or steak instead of beef.

Here are some key tips for making taco soup:

  • Use high-quality ingredients, including fresh spices and lean protein.
  • Don’t be afraid to experiment and try new things – it’s all part of the fun of cooking!
  • Consider making a large batch of soup and freezing it for later – it’s a great way to meal prep and save time during the week.

By following these steps and tips, you can make a delicious authentic taco soup. It’s perfect for any occasion. Whether you want a quick easy taco soup recipe or a healthier version, this dish will satisfy. So, get creative and enjoy making your own taco soup frios!

IngredientQuantity
Ground beef1 lb
Onions1 medium
Garlic3 cloves
Beans1 can
Tomatoes1 can

Mastering the Spice Blend

To make a tasty taco soup frios recipe, mastering the spice blend is key. It’s about mixing traditional spices just right for a balanced taste. For a spicy soup, add more chili peppers or use hot ones like habanero or ghost peppers.

Vegetarian taco soup recipes also need a great spice blend. Use cumin, coriander, and paprika to add depth and warmth. The goal is to balance the spices and adjust the heat to your taste.

Traditional Spice Combinations

Some classic spice mixes for taco soup frios include:

  • Cumin and chili powder for a smoky taste
  • Paprika and garlic powder for savory notes
  • Coriander and cayenne pepper for a spicy touch

Heat Level Adjustments

To change the heat of your taco soup frios, tweak the spicy ingredients. For a milder taste, use less chili peppers or skip the seeds and membranes. They pack most of the heat.

Regional Variations

Spice blends can vary by region. For instance, a spicy taco soup from the south might have more cayenne and smoked paprika. A vegetarian taco soup from the southwest could use more cumin and coriander.

SpiceQuantityFlavor Profile
Cumin1 teaspoonEarthy, warm
Chili powder1/2 teaspoonSmoky, spicy
Paprika1/2 teaspoonSweet, smoky

Serving Suggestions and Garnishes

Serving authentic taco soup can be a fun adventure. Try adding traditional Mexican toppings like diced onions, shredded cheese, and sour cream. For a fresh twist, add diced avocado or cilantro.

A homemade taco soup is a great base for your favorite toppings. Here are some ideas:

  • Diced tomatoes
  • Shredded lettuce
  • Diced bell peppers
  • Crispy tortilla strips

To make your best taco soup recipe stand out, add garnishes that match its flavors. Queso fresco or Greek yogurt add a tangy touch. Cilantro or scallions bring a fresh, herbaceous flavor.

“The key to a great taco soup is to use high-quality ingredients and to not be afraid to experiment with different toppings and garnishes.”

With these serving tips and garnish ideas, you can make a delicious, eye-catching bowl of authentic taco soup. It’s sure to delight even the most discerning palates.

Making Your Taco Soup Healthier

Enjoying a delicious and nutritious meal is easy with a healthy taco soup recipe. To make it even better, try using low-carb ingredients. You can swap out high-carb items for low-carb ones, like using bell peppers and onions instead of beans.

Another healthy choice is a vegetarian taco soup recipe. Using plant-based proteins like tofu or tempeh can lower fat and calories. Adding veggies like mushrooms, zucchini, and spinach boosts the meal’s nutrition.

Low-Carb Modifications

  • Use low-carb tortillas or substitute with lettuce wraps
  • Choose low-carb protein sources like chicken or fish
  • Add healthy fats like avocado or olive oil

Vegetarian Options

  • Use plant-based protein sources like tofu or tempeh
  • Add a variety of vegetables like mushrooms, zucchini, and spinach
  • Choose low-carb and low-sodium broth options

Calorie-Conscious Tips

To make your taco soup even healthier, try these tips: Use herbs and spices for flavor instead of salt and sugar. Choose low-fat dairy or alternatives. And, watch your portion sizes. With these tips and a healthy taco soup recipe, you’ll enjoy a delicious, nutritious meal anytime.

IngredientLow-Carb Alternative
BeansVegetables like bell peppers and onions
High-carb tortillasLow-carb tortillas or lettuce wraps

Storage and Reheating Tips

Storing and reheating your homemade taco soup right is key to keeping it fresh and tasty. Cool the soup to room temperature before putting it in the fridge or freezer. This step stops bacteria from growing and keeps the flavors strong.

To store your taco soup frios recipe, use airtight containers in the fridge for up to 3 days or freeze for up to 3 months. When reheating, make sure it reaches 165°F (74°C) to stay safe. You can reheat it on the stovetop, in the microwave, or in the oven.

  • Refrigerate: Cool the soup to room temperature, then refrigerate it in airtight containers for up to 3 days.
  • Freeze: Cool the soup to room temperature, then transfer it to airtight containers or freezer bags and store it in the freezer for up to 3 months.
  • Reheat: Reheat the soup to an internal temperature of 165°F (74°C) using your preferred method.

By following these tips, you can enjoy your homemade taco soup for longer. It’s perfect for a quick dinner or a meal to take to work.

Always check the soup for spoilage before eating it. If it smells bad, has a slimy texture, or shows mold, throw it away. With the right storage and reheating, your taco soup will stay delicious for a while.

Storage MethodShelf Life
RefrigerateUp to 3 days
FreezeUp to 3 months

Common Mistakes to Avoid

When making an easy taco soup, knowing common mistakes is key. Using top-notch ingredients and a reliable recipe is crucial. To get that spicy kick, add the right spices and seasonings.

To sidestep mistakes, brown the meat well and cook veggies until tender. This makes your taco soup rich and flavorful. Also, watch out for seasoning mistakes like too much salt or not enough spices. Taste as you go and adjust the seasoning.

Preparation Pitfalls

  • Not browning the meat properly
  • Not cooking the vegetables until they’re tender
  • Not using high-quality ingredients

Seasoning Errors

  • Adding too much salt
  • Not adding enough spices
  • Not tasting the soup as you go

Texture Problems

A common issue is taco soup being too thick or thin. To fix this, use the right amount of broth and adjust the seasoning. Follow these tips for a delicious, authentic taco soup.

MistakeSolution
Too thickAdd more broth
Too thinAdd more ingredients or reduce broth

Recipe Variations and Customizations

Looking to spice up your taco soup frios recipe? There are many ways to do it. You can make a vegetarian taco soup recipe by swapping out the meat for plant-based options. Try using beans, lentils, or roasted veggies to boost the protein and texture.

Want a low carb taco soup? Cut down on beans and add more veggies like bell peppers and onions. This is ideal for those on a low-carb diet. You can also tweak the recipe to your liking, like adding more spice or using chicken or steak instead of beef.

  • Adding different types of cheese, such as queso fresco or feta, for an extra burst of flavor
  • Using various types of peppers, such as jalapenos or habaneros, to adjust the level of heat
  • Experimenting with different seasonings, such as cumin or smoked paprika, to give the soup a unique flavor

Exploring these variations can lead to a tasty vegetarian taco soup recipe or low carb taco soup that you’ll love. The taco soup frios recipe is incredibly versatile. It can be tailored to fit any dietary need or preference, making it a fantastic choice for trying something new.

Conclusion

As we finish our journey through the taco soup frios recipe, it’s clear this dish is a true gem. It combines authentic taco soup traditions with modern twists. This creates a perfect blend of flavors that will make your taste buds happy.

Whether you want a easy taco soup or a more elaborate version, this recipe has you covered. It offers options for everyone, from low-carb to vegetarian. There’s something for everyone to enjoy.

The secret to making great taco soup frios is in the spices and the details. By following the simple steps and adding your own touches, you can make a dish that’s truly yours. It will show off your personal taste and cooking style.

So, what are you waiting for? Get your ingredients ready, turn on the stove, and let the taco soup frios recipe take you on a cozy journey. Enjoy!

FAQ

What is the taco soup frios recipe?

The taco soup frios recipe is a tasty dish that mixes Mexican flavors with a new twist. It’s simple to make and tastes like homemade, but is also healthy.

What are the key ingredients in this taco soup frios recipe?

You’ll need Mexican spices, fresh veggies, lean protein, and a tasty broth for the taco soup frios. It also has some modern touches to boost taste and health.

What kitchen equipment is needed to make this taco soup frios?

You’ll need a big pot, a knife, and a cutting board to make the taco soup frios. You can also use a slow cooker or Instant Pot to make it easier.

How do I prepare the taco soup frios step-by-step?

The guide shows you how to make the taco soup frios, from getting ready the ingredients to cooking it. It’s easy to follow and makes a delicious, authentic taco soup frios.

How can I customize the spice blend for the taco soup frios?

Getting the spice blend right is key. The guide teaches you about traditional spices, how to adjust the heat, and regional flavors. This helps you make the perfect spice mix.

What are some serving suggestions and garnishes for the taco soup frios?

The recipe has many serving ideas and garnishes to make your meal better. It includes both traditional Mexican toppings and new ideas. This guide helps you make your taco soup frios look and taste great.

How can I make the taco soup frios healthier?

The guide gives tips to make the taco soup frios healthier. You can choose low-carb, vegetarian, or calorie-smart options. This way, you can enjoy a healthy and tasty meal.

How should I store and reheat the taco soup frios?

The guide tells you how to store and reheat the taco soup frios. It covers freezing, refrigerating, and reheating. This keeps your soup fresh and flavorful.

What common mistakes should I avoid when making the taco soup frios?

The guide warns about common mistakes like prep errors, seasoning mistakes, and texture issues. Following these tips helps you make perfect taco soup frios every time.

Are there any recipe variations or customizations for the taco soup frios?

Yes, the guide has many variations and customizations for the taco soup frios. You can try vegetarian, spicy, or regional versions. This lets you make the recipe your own.