>
Edit Content

Food That’s Made from the Heart
We’re all about turning simple ingredients into magical moments. From kitchen newbies to seasoned chefs, our recipes are designed to keep things fun and easy! Let’s cook, laugh, and eat together. 🥰

Contact Us

Delicious Hershey’s Brownie Recipe – Moist & Fudgy

hershey brownie recipe

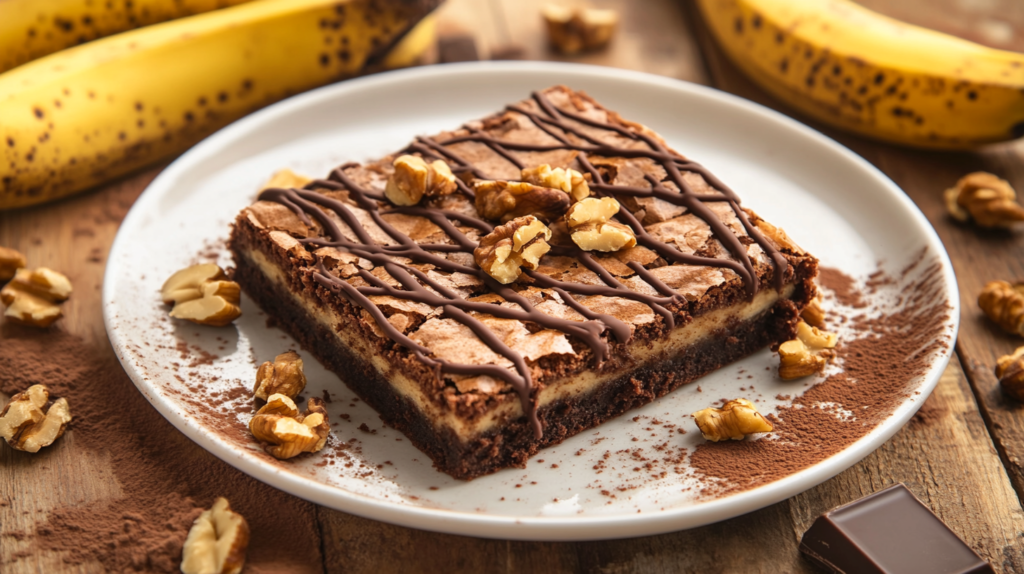
What makes a hershey brownie recipe truly delicious? How can you get that perfect, fudgy texture in your baking? These fudgy hershey brownies are rich, fudgy, and full of flavor. They’re easy to make and need just a few ingredients, making them great for both beginners and experienced bakers.

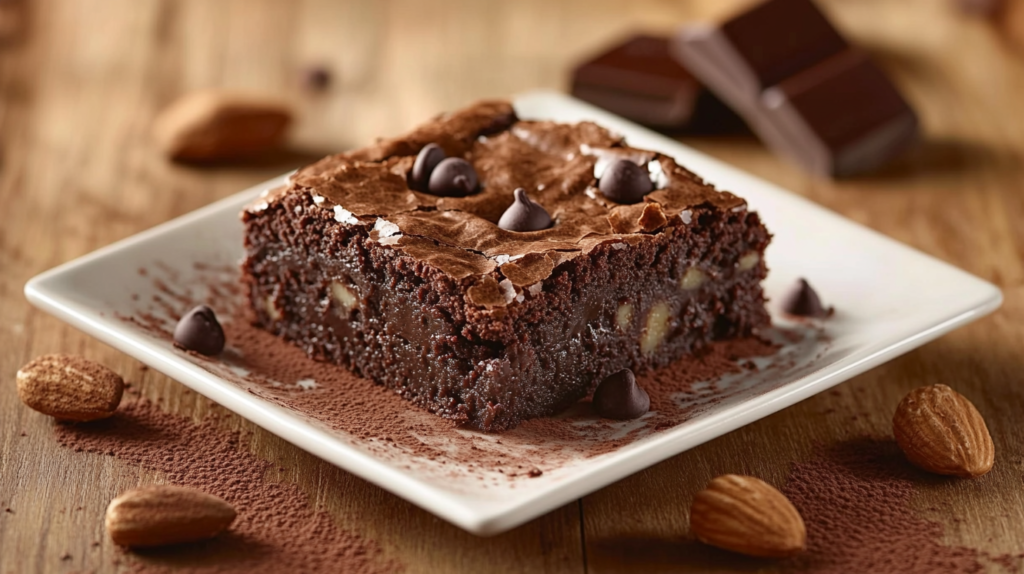
A delicious hershey brownie recipe is all about balance and simplicity. It lets the natural flavors of the ingredients shine. In this article, we’ll explore the secrets to making the perfect hershey brownie. We’ll focus on getting that perfect, fudgy texture.

Key Takeaways

  • Learn the secrets to making a delicious hershey brownie recipe
  • Discover the importance of using high-quality ingredients in your baking
  • Find out how to achieve that perfect, fudgy texture in your fudgy hershey brownies
  • Get tips and tricks for customizing your hershey brownie recipe to suit your tastes
  • Learn how to make a delicious hershey brownie recipe with minimal ingredients and effort

The Magic Behind Hershey’s Brownies

When it comes to hershey cocoa brownies, the quality of the ingredients is key. The rich, fudgy texture and deep flavor come from top-notch cocoa. For those wanting to make heavenly hash brownies at home, the right cocoa is crucial.

The story of Hershey’s cocoa is fascinating, dating back to the late 19th century. Today, Hershey’s is a well-known name, and their cocoa is a must-have in many American kitchens. Classic hershey brownies are a favorite, and it’s easy to see why – they’re simple to make and always a hit.

What Makes These Brownies Special

So, what makes homemade hershey brownies stand out? It’s the recipe’s simplicity and the quality of the ingredients. With just a few basic items, including Hershey’s cocoa, sugar, eggs, and flour, you can whip up delicious, fudgy brownies that impress everyone.

Why This Recipe Works

The secret to amazing hershey cocoa brownies is not overmixing the batter. Overmixing can make the brownies tough and dense, losing that special fudgy texture. By sticking to a simple recipe and using quality ingredients, you can make a batch of classic hershey brownies that everyone will love.

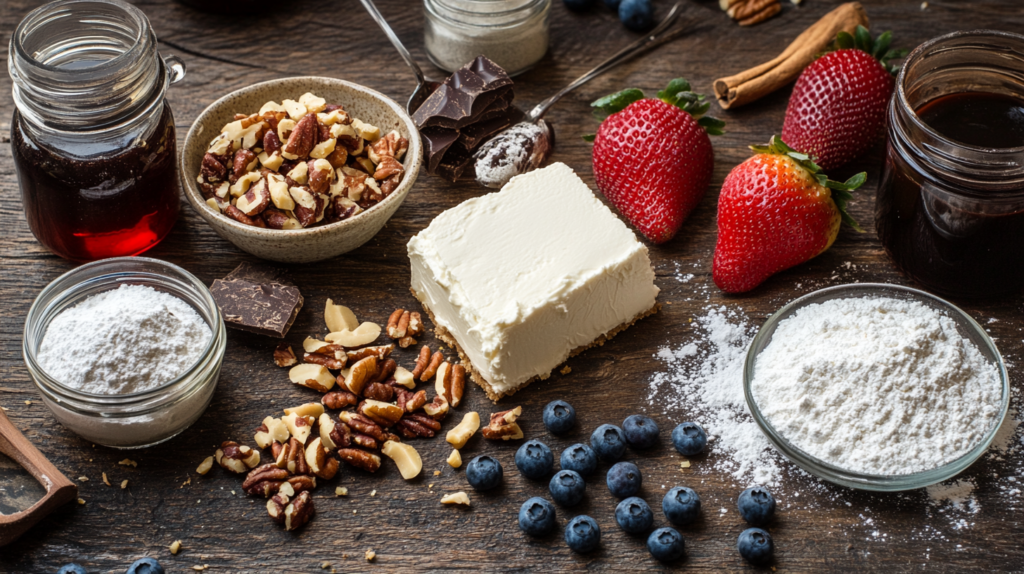
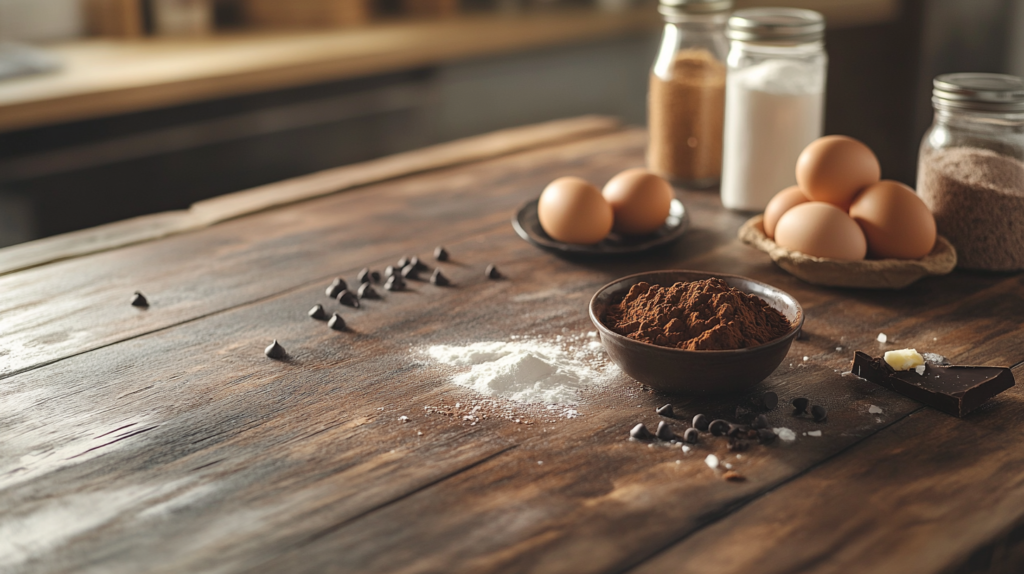
Essential Ingredients for Perfect Hershey Brownies

To make easy hershey brownies, you need a few key ingredients. These are the basics for a simple hershey brownie recipe. They make your brownies rich, fudgy, and tasty. The secret is using top-notch ingredients like Hershey’s cocoa, sugar, eggs, and flour.

Here are the must-haves:

  • Hershey’s cocoa
  • Sugar
  • Eggs
  • Flour
  • Butter or oil
  • Vanilla extract

These ingredients are simple to find and use. This makes it easy to whip up a batch of easy hershey brownies. By sticking to a simple hershey brownie recipe, you’ll get a treat that’s great for any time.

With these ingredients, you’re ready to make perfect Hershey brownies. Always choose high-quality ingredients and follow a simple hershey brownie recipe for the best results. Whether you’re an experienced baker or new to it, making easy hershey brownies is a fantastic way to create a yummy treat that everyone will love.

Required Kitchen Tools and Equipment

To make the perfect quick hershey brownies, you need the right tools. Having these essentials makes baking smooth and efficient. This lets you focus on making a delicious, fudgy brownie with the best hershey brownie recipe.

The right tools are key in baking. Here are the basic ones you’ll need to start:

  • 9×13 inch baking pan
  • Mixing bowls
  • Whisk
  • Measuring cups and spoons

There are also optional but helpful tools. They make baking easier and faster. These include:

  • Stand mixer
  • Hand mixer
  • Silicone spatula

With the right tools, making a delicious brownie is easy. Always use the best hershey brownie recipe and follow the instructions. This way, you’ll get the best results for your quick hershey brownies.

Classic Hershey Brownie Recipe Step-by-Step

To make tasty classic hershey brownies, start by preheating your oven to 350°F (180°C). While it heats up, get your ingredients ready. You’ll need sugar, eggs, and Hershey’s cocoa powder.

Mixing the ingredients in the right order is crucial for homemade hershey brownies. First, whisk together sugar, eggs, and vanilla extract. Then, in another bowl, mix flour, cocoa powder, and salt. Slowly add the dry ingredients to the wet ones, stirring until they’re just combined.

Here’s a step-by-step guide to making the brownies:

  • Prepare the ingredients and mix the batter
  • Pour the batter into a greased and floured baking dish
  • Bake the brownies for 25-30 minutes, or until a toothpick comes out with a few moist crumbs

After baking, take the brownies out of the oven. Let them cool completely in the pan. This step helps them set and makes cutting easier. With these steps, you can make delicious classic hershey brownies for any event.

Tips for Achieving the Perfect Texture

To make a delicious fudgy hershey brownie, focus on the texture. The right texture can make a huge difference. Here are some tips to help you achieve it.

Mixing Techniques

Mixing is key for the perfect texture. Overmixing makes brownies dense and tough. Undermixing makes them crumbly. Mix your ingredients in the right order and just until they’re combined.

Temperature Control

Temperature is also crucial. Make sure your ingredients are room temperature before mixing. Avoid overbaking. Bake at 350°F (180°C) for 25-30 minutes, or until a toothpick comes out with a few moist crumbs.

Checking for Doneness

Check your brownies often while they bake. They should be slightly firm and have moist crumbs on a toothpick. Follow these tips for a delicious, fudgy hershey brownie.

Tips for Achieving the Perfect TextureDescription
Mixing TechniquesMix ingredients in a specific order and just until they’re combined
Temperature ControlBake at 350°F (180°C) for 25-30 minutes, or until a toothpick comes out with a few moist crumbs
Checking for DonenessCheck brownies frequently during baking time and use a toothpick to test for doneness

Common Mistakes to Avoid

When making easy hershey brownies, it’s key to steer clear of common mistakes. Overmixing the batter can make your brownies dense and tough. To prevent this, mix the ingredients just until they’re combined, then stop.

Another mistake is baking the brownies too little or too much. Underbaked brownies are too gooey, while overbaked ones are dry. To get it right, use a toothpick to check if they’re done. If it comes out clean, they’re ready.

Here are some tips to help you avoid common mistakes when making simple hershey brownie recipe:

  • Use the right type of flour: All-purpose flour is best for brownies, as it provides the right amount of structure and texture.
  • Don’t overdo it with the sugar: Too much sugar can make the brownies overly sweet and dense.
  • Use high-quality chocolate: Hershey’s chocolate is a great choice for brownies, as it provides a rich and intense flavor.

By following these tips and avoiding common mistakes, you can create delicious and fudgy easy hershey brownies that are sure to impress. Remember to keep it simple and use a simple hershey brownie recipe to ensure the best results.

MistakeEffect on BrowniesTips to Avoid
OvermixingDense and tough browniesMix ingredients just until combined
UnderbakingToo fudgy and rawUse a toothpick to check for doneness
OverbakingDry and crumblyCheck brownies frequently during baking

Delicious Variations of the Classic Recipe

The classic Hershey brownie recipe is a canvas for creativity. You can add nuts, frosting, or mix-ins to make it your own. Let’s look at some popular ways to change the best Hershey brownie recipe to fit your taste.

Some ideas for variations include:

  • Nutty additions: walnuts, pecans, or hazelnuts add a rich flavor and texture
  • Frosting options: chocolate ganache, cream cheese frosting, or a simple powdered sugar glaze
  • Mix-in ideas: dried cranberries, chocolate chips, or coconut flakes add a fun surprise to each bite

By trying different combinations, you can make a unique Hershey brownie recipe. So, don’t be shy to experiment and find your favorite twist!

Here’s a simple table to get you started:

VariationIngredientsInstructions
Nutty Brownies1 cup chopped walnuts, 1/2 cup chocolate chipsFold nuts and chocolate chips into batter before baking
Frosted Brownies1 cup chocolate ganache, 1 tablespoon powdered sugarSpread ganache over cooled brownies and sprinkle with powdered sugar

Storage and Freshness Tips

To keep your homemade Hershey brownies fresh, proper storage is key. Whether you’ve made classic Hershey brownies or tried something new, the right storage keeps them tasty and moist.

There are a few ways to store your brownies. You can keep them at room temperature, in the fridge, or even freeze them. For storing at room temperature, use an airtight container. This keeps them fresh for up to 3 days.

Counter Storage

  • Place brownies in an airtight container
  • Keep them away from direct sunlight and heat sources
  • Store at room temperature for up to 3 days

Freezing Instructions

To freeze your brownies, wrap them tightly in plastic wrap or aluminum foil. Then, put them in a freezer-safe bag. Frozen brownies can last up to 2 months.

Reheating Methods

To reheat frozen brownies, thaw them at room temperature or in the microwave. You can also reheat them in the oven at 350°F for a few minutes. This brings back their fresh-baked taste and texture, making them taste like they were just baked.

Nutritional Information and Serving Sizes

Enjoying quick hershey brownies is fun, but knowing the nutritional info is key. A delicious hershey brownie recipe can be a tasty treat. Yet, it’s important to think about how it fits into your diet.

Here are some serving size options for your quick hershey brownies:

  • Small: 1-inch square, perfect for a guilt-free snack
  • Medium: 2-inch square, ideal for satisfying your sweet tooth
  • Large: 3-inch square, great for sharing with friends and family

Nutritional information for a delicious hershey brownie recipe is as follows:

NutrientPer Serving (1-inch square)
Calories120
Fat7g
Carbohydrates20g
Protein2g

Knowing the nutritional info and serving sizes of your quick hershey brownies helps. You can enjoy your delicious hershey brownie recipe while making smart diet choices.

Conclusion: Mastering Your Hershey Brownies

As we finish our guide to making the best Hershey’s brownie recipe, you’ll soon be making moist, fudgy Hershey brownies. With a bit of practice and focus, you’ll impress everyone with your brownies. This article has given you the tools to become a brownie expert.

Success comes from knowing how ingredients work together, using the right tools, and mixing and baking correctly. Each batch you make will help you get closer to the perfect brownie.

Don’t be shy to try new things and make your brownies unique. You can add nuts, gooey frosting, or different mix-ins. The world of brownie-making is full of possibilities. Keep trying, and you’ll create Hershey’s brownies that are all your own.

Happy baking, and enjoy the tasty results of your efforts!

FAQ

What is the secret to making the perfect Hershey’s brownies?

The secret to perfect Hershey’s brownies is using top-quality ingredients. High-quality Hershey’s cocoa, butter, and sugar are key. They help make a rich, fudgy, and delicious brownie that will wow everyone.

How can I achieve the perfect texture in my Hershey’s brownies?

For the perfect texture, focus on mixing techniques and temperature control. Don’t overmix the batter. Bake at the right temperature for the right time to get a moist, fudgy texture.

What are some common mistakes to avoid when making Hershey’s brownies?

Common mistakes include overmixing, underbaking, and using the wrong Hershey’s cocoa. Avoid these to ensure your brownies are perfect every time.

Can I make different variations of the classic Hershey’s brownie recipe?

Yes, you can try many variations. Add nuts, use different frostings, or mix in chocolate chips or peanut butter. It’s a great way to experiment and find your favorite.

How should I store my Hershey’s brownies to keep them fresh?

Store them in an airtight container at room temperature for up to 4 days. For longer storage, freeze them for up to 3 months. Reheat as needed.

What is the nutritional information for Hershey’s brownies?

Nutritional info varies by recipe and ingredients. Generally, they are high in calories and fat. Enjoy them in moderation as part of a balanced diet.

Homemade Sweet Potato Bread: A Tasty Treat

sweet potato bread

What makes sweet potato bread so special? Is it the unique flavor, the health benefits, or the ease of making it? Whatever the reason, homemade sweet potato bread is perfect for any occasion. Its natural sweetness and moist texture make it a favorite among many.

Whether you’re a seasoned baker or a beginner, making homemade sweet potato bread is easy. In this article, we’ll explore its history, health benefits, and a step-by-step recipe. Let’s start and discover the joy of homemade sweet potato bread.

Key Takeaways

  • Homemade sweet potato bread is a delicious and comforting treat
  • Sweet potato bread has numerous health benefits
  • Making homemade sweet potato bread is easier than you think
  • A sweet potato loaf can be made from scratch with simple ingredients
  • Homemade sweet potato bread is perfect for any occasion
  • Sweet potato bread can be made in a variety of flavors and textures

The Magic of Sweet Potato Bread

Sweet potato bread is a unique treat with a rich history. It brings people together, whether at family gatherings or community events. With an easy sweet potato bread recipe, you can make a delicious, healthy bread for any occasion.

This bread’s specialness comes from its history and cultural significance. It originated in traditional African American cuisine, where sweet potatoes were key. Today, it has evolved, influenced by many cultures, offering a variety of flavors and textures. For a delicious potato bread, mix sweet potatoes with spices and herbs.

What Makes Sweet Potato Bread Special

Sweet potato bread is not just tasty; it’s also a healthy sweet potato bread choice. Sweet potatoes are packed with vitamins, minerals, and antioxidants. They’re also high in fiber, which aids digestion. An easy potato bread recipe lets you make a healthy, delicious bread for a quick snack or as a side dish.

History and Origins

Sweet potato bread’s history goes back to early African American cuisine. Sweet potatoes were a mainstay in many African American homes, used in various dishes, including bread. Over time, it has evolved, influenced by different cultures, leading to diverse flavors and textures.

Cultural Significance

Sweet potato is more than just food; it’s culturally significant. In many African American communities, it’s a staple at family gatherings and community events. It represents tradition, culture, and community, often passed down through generations.

IngredientQuantity
Sweet potatoes2 large
Flour2 cups
Sugar1 cup
Spices1 teaspoon

Health Benefits of Sweet Potato Bread

Sweet potato bread is a tasty and healthy choice instead of regular bread. It’s made with moist sweet potato. This bread is full of vitamins A and C, potassium, and fiber. The best sweet potato bread recipe will make your taste buds happy and give you health perks.

Here are some key health benefits of sweet bread:

  • Rich in antioxidants and anti-inflammatory compounds
  • May help manage blood sugar levels
  • Supports digestive health
  • Can be made gluten-free for those with dietary restrictions

A gluten-free sweet potato bread recipe is perfect for a healthier bread option. It’s packed with nutrients and tastes great. Sweet potato bread is a smart pick for adding more whole foods to your diet.

Essential Ingredients for Perfect Sweet Potato Bread

To make a delicious sweet potato bread, you need the right ingredients. The type of sweet potatoes you choose affects the bread’s flavor and texture. Use high-quality sweet potatoes for the best taste and nutrition.

When picking sweet potatoes, look for firm ones with smooth skin. You can use orange or white sweet potatoes. For an easy recipe, canned sweet potatoes work too.

Choosing the Right Sweet Potatoes

Here are tips for picking the right sweet potatoes:

  • Look for sweet potatoes that are heavy for their size
  • Choose sweet potatoes with a smooth, firm skin
  • Avoid sweet potatoes with soft spots or bruises

Key Dry Ingredients

You’ll also need dry ingredients like flour, yeast, salt, and sugar. Use high-quality ingredients for the best flavor and texture.

IngredientQuantity
Flour2 cups
Yeast1 teaspoon
Salt1 teaspoon
Sugar1 tablespoon

Follow these tips and use the right ingredients for a delicious sweet potato bread. Whether you’re making homemade bread or following an easy recipe, these ingredients will help you get started.

Step-by-Step Sweet Potato Bread Recipe

To make a delicious potato bread, start by preparing the sweet potatoes. Bake or boil them until they’re soft. Then, mash them to get a smooth consistency. This step is key for a healthy potato bread that’s tasty and nutritious.

After preparing the sweet potatoes, mix the dough. Combine the mashed sweet potatoes with flour, sugar, and spices. Add yeast and water to make a sticky dough. It’s important not to overmix the dough. This can make the bread dense and heavy.

Here are the steps to follow:

  • Preheat your oven to 375°F (190°C)
  • Mix the dough and let it rise for 1 hour
  • Shape the dough into a loaf and bake for 40-50 minutes

By following these steps, you’ll make a delicious sweet potato bread. It’s great for sharing with friends and family. Keep an eye on the bread while it bakes. The cooking time can vary based on your oven.

Expert Tips for Baking Success

To make moist sweet potato, follow some key tips. Keeping your oven at the right temperature is crucial. This ensures your gluten-free sweet potato bread turns out right, not too dense.

Mixing techniques are also important. Don’t overmix or undermix. Mix just until the dough is shaggy. For more on mixing and temperature, check out a banana bread recipe.

Common Mistakes to Avoid

  • Overmixing the dough
  • Not using the right oven temperature
  • Not letting the bread cool completely before slicing

By avoiding these mistakes, you can make a tasty moist sweet potato bread. Whether you want a gluten-free sweet potato bread or an easy sweet potato bread recipe, practice makes perfect. Enjoy your baking journey!

Creative Variations of Sweet Potato Bread

Sweet potato bread is a canvas for your creativity. You can make it your own by adding different flavors. Try cinnamon and nutmeg, or chocolate chips and dried cranberries for a twist.

To elevate your homemade sweet potato bread, try new toppings and fillings. Here are some ideas:

  • Nuts, such as walnuts or pecans, for added crunch
  • Dried fruits, like cranberries or cherries, for a sweet and tangy flavor
  • Spices, such as nutmeg or cardamom, for a unique and aromatic flavor

With a bit of creativity, you can make your own sweet potato breads recipes. They’ll be delicious and look great. So, don’t be shy to try new things – your taste buds will love it!

Making delicious sweet potato bread is a fun way to show off your baking skills. It’s a great way to share your love of baking with others. So, why not start today and see what amazing creations you can make?

“The art of baking is all about experimentation and having fun, so don’t be afraid to try new things and make mistakes – they can often lead to the most delicious and unexpected results!”

Storage and Serving Suggestions

To keep your best sweet potato bread recipe fresh, proper storage is key. You can store it at room temperature for up to 3 days. Or, freeze it for up to 2 months. When freezing, wrap the bread tightly in plastic wrap or aluminum foil to keep it moist and flavorful.

There are many ways to enjoy your healthy sweet potato bread. Here are a few ideas:

  • Toast it and top with butter, jam, or honey
  • Use it to make sandwiches or toasties
  • Serve it as a side dish, accompanied by soups or stews

A moist sweet potato bread is great for any meal. You can also get creative, like making French toast or bread pudding. With these tips, you can enjoy your sweet potato, bread for days.

Storage MethodShelf Life
Room TemperatureUp to 3 days
RefrigeratorUp to 5 days
FreezerUp to 2 months

Troubleshooting Your Sweet Potato Bread

Even with the best recipe and techniques, things can go wrong when baking sweet’ potato bread. To ensure that your homemade sweet potato bread turns out perfect every time, it’s essential to identify and fix common mistakes. One of the most critical factors in achieving the perfect sweet, potato bread is using an easy sweet’ potato bread recipe and following it carefully.

Some common issues that can arise when baking sweet, potato bread include texture problems, such as a dense or dry crumb, and baking mistakes, like underbaking or overbaking. Flavor adjustments may also be necessary to achieve the perfect balance of sweet and savory flavors in your sweet’ potato bread.

Texture Issues

To resolve texture issues in your potato bread, consider the following tips:

  • Check the ratio of wet to dry ingredients in your easy sweet potato bread recipe
  • Avoid overmixing the batter, as this can lead to a dense crumb
  • Use the right type of sweet potatoes, as some varieties are better suited for baking than others

Baking Problems

Baking problems can be resolved by:

  • Monitoring the temperature and baking time to avoid underbaking or overbaking
  • Using a thermometer to ensure the internal temperature of the bread reaches a safe minimum

Flavor Adjustments

To make flavor adjustments to your potato bread, try:

  • Adding a pinch of salt to balance the sweetness
  • Using different spices, such as cinnamon or nutmeg, to add depth and warmth to the flavor

Conclusion

Exploring delicious sweet potato bread has shown us its true value. It’s a treat that can be enjoyed in many ways. Whether you want a best sweet potato bread recipe or a gluten-free sweet potato bread, this guide has you covered.

Learning about potato bread’s history, cultural importance, and health benefits is empowering. Now, you can bake with confidence and share this joy with your loved ones.

With practice, you’ll become a pro at making potato bread. You’ll impress everyone with your baking skills. So, try new things, mix up flavors, and let your creativity run wild.

Enjoy the homemade goodness of sweet potato bread. Savor every bite of this amazing treat.

FAQ

What makes sweet potato bread special?

Sweet, potato bread is a unique treat with a rich history. It’s made with sweet potatoes, adding natural sweetness and moisture. This bread is also nutritious, thanks to the sweet potatoes.

What are the health benefits of sweet. potato bread?

Sweet, potato bread is full of nutrients. Sweet potatoes are rich in vitamins A and C, potassium, and fiber. These help manage blood sugar, promote digestion, and boost the immune system.

What are the essential ingredients for making the perfect sweet potato bread?

To make perfect potato bread, you need quality sweet potatoes, flour, yeast, sugar, and butter or oil. Spices like cinnamon and nutmeg are also key. The right mix of these ingredients makes the bread delicious and moist.

How do I store and serve sweet, potato bread?

To keep your sweet, potato bread fresh, store it right. You can keep it at room temperature for 3 days or in the fridge for a week. Try toasting slices and topping them with butter, jam, or avocado for serving.

What are some common issues with baking sweet, potato bread, and how do I troubleshoot them?

Issues like texture problems and flavor adjustments can happen. To fix these, check your mixing, oven temperature, and ingredient amounts. Paying attention to these details ensures perfect sweet, potato bread every time.


Indulge in This Crack Breakfast Casserole

Crack Breakfast Casserole

What makes a breakfast dish unforgettable? Is it the flavors, the ease of making it, or the warmth it brings to start your day? The crack breakfast casserole is the answer. It’s a mix of ingredients that will make your taste buds happy and leave you craving more. It’s the top breakfast casserole recipe you should try.

The crack breakfast casserole is a must-try for a tasty and easy breakfast. It’s simple to make and great to share with others. So, why wait? Explore the best breakfast casserole recipe and find your new morning favorite.

Key Takeaways

  • Crack breakfast casserole is a mouth-watering combination of ingredients
  • It’s the best breakfast casserole recipe for a delicious morning meal
  • Easy to make and fun to share with family and friends
  • Perfect for anyone looking to start their day off right
  • Satisfies your cravings and leaves you wanting more
  • A must-try for anyone looking for a new breakfast dish

What Makes This Crack Breakfast Casserole So Irresistible

This easy breakfast casserole is unforgettable because of its flavors, textures, and ingredients. It has crispy hash browns, savory sausage, and cheese. It’s perfect for anyone who loves sweet or savory breakfasts.

Some key features that make this casserole stand out include:

  • The perfect balance of crunchy and soft textures, making each bite a pleasure to eat
  • A rich and savory flavor profile, thanks to the combination of sausage, cheese, and spices
  • The ease of preparation, making it an ideal option for busy mornings

This casserole is perfect for starting your day right. It’s delicious and easy to make. Just a few ingredients and basic cooking skills are needed. So, why not try it and see why it’s so irresistible?

This casserole is also highly customizable. You can add your favorite ingredients, like diced veggies or cooked meats. It’s great for families or groups with different tastes and dietary needs.

IngredientQuantity
Sausage1 pound
Cheese1 cup
Hash browns1 cup

Essential Ingredients for Your Breakfast Casserole

To make a tasty quick breakfast casserole, you’ll need some key ingredients. These will be the base of your dish, making it ideal for busy mornings. Start by gathering eggs, sausage, and cheese.

For extra flavor, add a bit of salt, black pepper, and paprika. Remember, the key to a great breakfast casserole is to use high-quality ingredients. Choose the best sausage and cheese you can find. Using pre-cooked sausage can save you time.

Base Ingredients

  • Eggs
  • Sausage
  • Cheese

Seasonings and Spices

  • Salt
  • Black pepper
  • Paprika

Optional Add-ins

  • Diced vegetables
  • Cooked bacon

With these ingredients, you can make a make-ahead breakfast casserole for any occasion. It’s perfect for a quick morning meal or a brunch dish.

Kitchen Tools You’ll Need

To make a tasty breakfast casserole with hash browns, you need the right tools. A large skillet is key for cooking the hash browns until they’re crispy. You’ll also need a mixing bowl and a 9×13 inch baking dish to put the casserole together.

You might also want some special tools. A cheese grater is great for shredding cheese. A spatula helps scrape the bowl sides, and a whisk is perfect for mixing eggs and other liquids.

Here’s what you’ll need to make a breakfast casserole with hash browns:

  • Large skillet
  • Mixing bowl
  • 9×13 inch baking dish
  • Cheese grater
  • Spatula
  • Whisk

With these tools, you’re ready to make a delicious breakfast casserole with hash browns. It’s sure to be a hit with everyone.

ToolDescription
Large SkilletFor cooking hash browns
Mixing BowlFor combining ingredients
9×13 inch Baking DishFor assembling the casserole

Preparing Your Crack Breakfast Casserole

To start, cook the sausage and hash browns. This step is key for a tasty and textured dish. Choose your favorite sausage, like pork or chorizo. Make sure to squeeze out moisture from the hash browns for a crispy outside and fluffy inside.

Next, layer the ingredients. Begin with hash browns, then sausage, cheese, and eggs. Keep layering until you’ve used everything, ending with cheese on top. This way, every bite is full of flavor and texture.

Want to prep ahead? Try an overnight breakfast casserole. Assemble it the night before and refrigerate. Bake it in the morning. Bake at 350°F for 35-40 minutes, until the cheese is bubbly.

Initial Preparation Steps

  • Cook the sausage and hash browns
  • Squeeze out excess moisture from the hash browns
  • Assemble the casserole using the layering technique

Layering Technique

The layering technique is key for a delicious casserole. It ensures each bite is full of flavor and texture.

Baking Instructions

Preheat your oven to 350°F. Bake for 35-40 minutes, until the cheese is bubbly. Or, make an overnight casserole by assembling and refrigerating overnight, then baking in the morning.

IngredientQuantity
Sausage1 pound
Hash browns2 cups
Cheese2 cups
Eggs6

Make-Ahead Tips and Tricks

To make a breakfast casserole everyone will love, you need some make-ahead tips. Start by preparing your ingredients, then assemble the casserole. You can refrigerate or freeze it for later. For more info on gluten-free breakfast casseroles, check out gluten-free breakfast casserole recipes websites.

Here are some tips for making ahead:

  • Prep the ingredients the night before, such as chopping vegetables and cooking meats.
  • Assemble the casserole and refrigerate it overnight, then bake it in the morning.
  • Freeze the casserole for up to a month and thaw it overnight in the refrigerator before baking.

By using these tips, you can make a tasty breakfast casserole for big gatherings or special events.

With these tips, you’ll have a stress-free morning. And you’ll enjoy a delicious breakfast casserole with your family and friends.

Customizing Your Breakfast Casserole

To make your crack breakfast casserole special, think about changing it up. You can use different ingredients and cooking ways. Start with the best breakfast casserole recipe and then add your own twist.

Try using different cheeses, meats, or veggies. You can also play with spices and seasonings for a unique taste. For a veggie option, swap sausage for tofu or tempeh. Meat fans can add bacon or ham.

For special diets, use gluten-free bread or dairy-free cheese. These changes make your casserole inclusive. With these options, you can make a dish that fits your taste and needs. It becomes the perfect breakfast for you and your family.

Serving Suggestions and Pairings

There are many ways to serve your easy breakfast casserole. Try it with fresh fruit like strawberries or blueberries. Or, add a green salad with a light vinaigrette dressing. For a fuller meal, pair it with coffee or juice.

A delicious breakfast casserole is great for any time. Whether it’s a weekend brunch or a weekday breakfast, here are some ideas:

  • Fresh fruit salad with whipped cream or yogurt
  • Green salad with a light vinaigrette dressing
  • Cup of coffee or a glass of juice
  • Toast or hash browns for a filling side dish

To make your casserole even more special, try adding garnishes or toppings. Here are some ideas:

GarnishDescription
Fresh herbsChopped fresh herbs like parsley or chives add a bright, fresh flavor
Shredded cheeseA sprinkle of shredded cheese adds a rich, creamy texture
Sliced meatsSliced meats like bacon or sausage add a savory, meaty flavor

With these ideas, you can make a delicious breakfast casserole for any occasion. It’s perfect for serving a crowd or a quick, easy breakfast. Your easy breakfast casserole is sure to be a hit.

Storage and Reheating Guidelines

To enjoy your quick breakfast casserole at any time, proper storage and reheating are key. A make-ahead breakfast casserole is perfect for busy mornings. But, it’s important to follow guidelines to keep it fresh and safe.

First, cool the casserole completely before refrigerating or freezing. This step prevents bacterial growth and keeps it fresh longer. For the fridge, store it in an airtight container for 3-4 days.

Refrigeration Tips

  • Store the casserole in a covered container to prevent drying out.
  • Keep the casserole away from strong-smelling foods, as it can absorb odors easily.
  • Label the container with the date and contents, so you can easily keep track of how long it’s been stored.

Freezing Instructions

To freeze your casserole, wrap it tightly in plastic wrap or aluminum foil. Then, put it in a freezer-safe bag. When you’re ready, thaw it overnight in the fridge and reheat in the oven or microwave.

Storage MethodStorage TimeReheating Method
Refrigeration3-4 daysOven or microwave
Freezing2-3 monthsOven or microwave

By following these guidelines, you can enjoy your quick breakfast casserole whenever you want. Whether it’s a make-ahead or a leftover, it’s always ready to go.

Common Mistakes to Avoid

When making a delicious breakfast casserole with hash browns, it’s key to avoid common mistakes. One big error is overcooking the hash browns. This makes them dry and not tasty. Cook them until they’re golden brown and still a bit tender.

Another mistake is using low-quality ingredients. This includes frozen hash browns or cheap cheese. These can ruin the flavor and texture of your casserole. Choose fresh, high-quality ingredients for the best taste.

Avoiding Common Errors

  • Not following the recipe instructions carefully
  • Using the wrong type of cheese or not enough cheese
  • Not layering the ingredients correctly

To make a great breakfast casserole with hash browns, avoid these mistakes. Always follow the recipe, use top-notch ingredients, and cook the hash browns right. With practice, you’ll make delicious casseroles like a pro!

Tips for the Perfect Texture

Creating an overnight breakfast casserole with the right texture is key. The right mix of ingredients and cooking methods can make a huge difference. Start by using the correct ratio of eggs to milk for a creamy, tender texture.

The cooking time and temperature are also crucial. Overcooking can make it dry and crumbly, while undercooking can make it soggy. Keep a close eye on your casserole to avoid these issues.

Getting the Right Consistency

For the perfect consistency, mix eggs, milk, and cheese. This combo creates a rich, creamy texture. Also, choose the right bread to affect the casserole’s texture.

Achieving Golden Brown Perfection

To elevate your casserole, use a broiler or toaster oven for a golden brown top. This adds a nice crunch and texture. Follow these tips to impress everyone with your overnight breakfast casserole.

Scaling the Recipe for Different Group Sizes

Creating a crowd-pleasing breakfast casserole for your guests is key. Whether it’s a small gathering or a big event, scaling the recipe is important. This ensures everyone gets a taste.

To scale the recipe, balance is crucial. For a delicious casserole, flavors and textures must be consistent. Here’s how to do it:

  • For a smaller casserole, cut the ingredients in half or a quarter, based on the number of guests.
  • For a bigger casserole, increase the ingredients by half or double, based on the number of guests.
  • Remember, cooking time changes with casserole size. Adjust the time accordingly.

By following these tips, you can make a breakfast casserole that everyone will love. With practice, you’ll impress your guests with a tasty dish.

Quality ingredients and attention to detail are the secrets to a great casserole. With creativity and a bit of experimentation, you can make a dish that wows everyone.

Casserole SizeIngredient QuantitiesCooking Time
SmallHalf or quarter of the original recipe20-25 minutes
MediumOriginal recipe30-35 minutes
LargeDouble the original recipe40-45 minutes

Conclusion: Creating Your Perfect Morning Masterpiece

You now have the knowledge to make your own crack breakfast casserole. This is a true morning masterpiece. By using the right ingredients and following the steps, you can make a breakfast casserole that will wow your loved ones.

For the best results, focus on the details. Make sure to layer the ingredients right and bake it until it’s golden. Try new flavors, use the make-ahead tips, and add your own twist. Soon, you’ll be making breakfasts that everyone will love.

So, why wait? Start making your perfect morning masterpiece today. Enjoy the journey, relish the tastes, and share the happiness of a tasty breakfast casserole. It’s sure to become a favorite in your home.

FAQ

What makes the Crack Breakfast Casserole so irresistible?

The Crack Breakfast Casserole is a mix of crispy hash browns, savory sausage, and melted cheese. It also has fluffy eggs, all baked to perfection. This mix of flavors and textures makes it a must-try breakfast.

What are the essential ingredients for the Crack Breakfast Casserole?

You’ll need eggs, sausage, cheese, and hash browns for the Crack Breakfast Casserole. Don’t forget seasonings like salt, pepper, and onion powder for extra flavor.

What kitchen tools do I need to make the Crack Breakfast Casserole?

You’ll need a large skillet, a mixing bowl, and a 9×13 inch baking dish. A food processor or shredder can also be helpful for the hash browns.

How do I prepare and assemble the Crack Breakfast Casserole?

Start by cooking the sausage and hash browns. Then, layer them in the baking dish with eggs and cheese. Follow the baking instructions carefully for the best results.

Can I make the Crack Breakfast Casserole ahead of time?

Yes, it’s a great make-ahead dish. Assemble it and refrigerate overnight. Bake it in the morning for a quick, delicious breakfast.

How can I customize the Crack Breakfast Casserole to my dietary needs?

You can customize it for different diets. Use tofu or tempeh for a vegetarian version. For dietary restrictions, try gluten-free bread and dairy-free cheese.

What are some common mistakes to avoid when making the Crack Breakfast Casserole?

Avoid overcooking the hash browns and using low-quality ingredients. Also, follow the recipe closely. These tips will help you make a perfect casserole every time.

How can I achieve the perfect texture for the Crack Breakfast Casserole?

For the perfect texture, use the right egg to milk ratio. Also, aim for a golden brown top by broiling or using a toaster oven for the last few minutes.

How can I scale the Crack Breakfast Casserole recipe for different group sizes?

Scaling the recipe is easy. Just adjust the ingredients for a smaller or larger casserole. This way, everyone gets a serving at your gatherings or events.

Banana Brownie Recipe: Decadent Treat for Chocoholics

banana brownie recipe

What makes the perfect banana brownie recipe? Is it the mix of ripe bananas and rich chocolate? Or is there something more? If you love chocolate and sweet treats, you’re in the right spot. We’ll dive into banana brownies and give you the ultimate guide to making the best one.

We’ll cover everything from easy banana brownie recipes to the more complex ones. You’ll learn how to make a decadent and delicious treat. Whether you want a simple dessert or a stunning cake, our guide has you covered. With our tips, you’ll create a moist and fudgy banana brownie that will satisfy your cravings.

Key Takeaways

  • Learn how to make the perfect banana brownie recipe
  • Discover the essential ingredients for a delicious banana brownie
  • Get tips on how to create a moist and fudgy texture
  • Find out how to customize your banana brownie with different add-ins
  • Learn how to store and serve your banana brownie for the best results
  • Get the best banana brownie recipe for a decadent treat

Why Banana Brownies Are the Ultimate Chocolate Dessert

Banana brownies are a game-changer for chocolate lovers. They offer a unique mix of flavors and textures. The addition of ripe bananas to rich, velvety chocolate makes a moist banana brownie that’s irresistible. Adding walnuts makes a banana brownie with walnuts even more decadent.

Banana brownies can also be a healthy banana brownie option. Using ripe bananas, which are full of potassium and fiber, and dark chocolate with antioxidants, makes a dessert that’s tasty and good for you. Here are some reasons why banana brownies are special:

  • Unique flavor combination: The mix of banana and chocolate offers a taste that’s both familiar and exciting.
  • Texture variety: Adding walnuts or other nuts gives a satisfying crunch to the soft, moist brownie.
  • Customization options: You can try different types of chocolate, nuts, or even fruit to make your perfect banana brownie.

If you love chocolate or want to try something new, banana brownies are a great choice. They have a rich flavor, satisfying texture, and health benefits. They’re sure to become a favorite.

Essential Ingredients for Perfect Banana Brownies

To make a delicious banana brownie, you’ll need a few key ingredients. These include ripe bananas, dark chocolate, sugar, eggs, flour, and walnuts (optional). You’ll also need baking powder, salt, and vanilla extract. Using high-quality ingredients is key to a perfect homemade banana brownie.

Here’s a list of the essential ingredients you’ll need:

  • Ripe bananas
  • Dark chocolate
  • Sugar
  • Eggs
  • Flour
  • Walnuts (optional)
  • Baking powder
  • Salt
  • Vanilla extract

Using ripe bananas is crucial for a delicious banana brownie. They add natural sweetness and moisture. Dark chocolate gives a rich, velvety texture. Sugar and eggs balance the flavor. A homemade banana brownie is perfect for satisfying your sweet tooth.

You can also try adding nuts or dried fruit for a unique flavor. Always use high-quality ingredients for a moist and delicious homemade banana brownie.

Kitchen Tools and Equipment Needed

To make a delicious banana brownie, you need the right tools. Having the right items ensures your brownie turns out great. A well-stocked kitchen is key for any baker.

You’ll need a mixing bowl, whisk, and rubber spatula. These help mix ingredients smoothly. Tools like a stand mixer, food processor, and pastry brush are nice but not essential. Measuring tools like a digital scale and measuring cups are crucial for getting the right amounts.

Essential Baking Tools

  • Mixing bowl
  • Whisk
  • Rubber spatula
  • Digital scale
  • Measuring cups

Optional but Helpful Tools

  • Stand mixer
  • Food processor
  • Pastry brush

With these tools, you’re ready to make a tasty banana brownie. Always use fresh, high-quality ingredients for the best taste. Whether you’re experienced or new to baking, the right tools make a big difference.

ToolDescription
Mixing BowlUsed for mixing and blending ingredients
WhiskUsed for whisking and beating ingredients
Rubber SpatulaUsed for scraping and folding ingredients

The Ultimate Banana Brownie Recipe

To make the best banana brownie, you need the right ingredients and a few simple steps. This recipe makes a rich, fudgy, and delicious treat. It’s perfect for any time. The secret is using top-notch chocolate and ripe bananas.

Here’s what you’ll need:

  • 3 ripe bananas, mashed
  • 1 and 1/2 sticks of unsalted butter
  • 2 cups of sugar
  • 4 large eggs
  • 1/2 cup of unsweetened cocoa powder
  • 1 teaspoon of vanilla extract
  • 1 and 1/4 cups of all-purpose flour
  • 1 teaspoon of salt
  • 1 cup of semi-sweet chocolate chips

Choosing the right chocolate is key. Go for high-quality chocolate with a high cocoa content for the best taste. You can also add nuts or other mix-ins for a unique twist. For a classic taste, stick with the basic ingredients and follow the instructions closely.

First, preheat your oven to 350°F (180°C). Grease an 8-inch square baking pan and set it aside. In a medium bowl, whisk together the flour, salt, and cocoa powder. Keep this aside and focus on mixing the wet ingredients. With these steps, you’re on your way to making the ultimate banana brownie.

IngredientQuantity
Unsalted butter1 and 1/2 sticks
Sugar2 cups
Eggs4 large
Vanilla extract1 teaspoon

Step-by-Step Mixing Instructions

To make an easy banana brownie, follow a step-by-step mixing process. This ensures all ingredients are well combined. Start by preparing your wet ingredients: ripe bananas, eggs, and sugar. Mash the bananas until smooth, then mix in the eggs and sugar.

Then, mix your dry ingredients: flour, cocoa powder, and walnuts (if using). Whisk these together until they’re evenly mixed. Now, add the dry ingredients to the wet ingredients. Mix until just combined, avoiding overmixing.

Proper Mixing Technique

A proper mixing technique is key to a moist banana brownie. Mix gently, folding the ingredients together. This helps keep the banana texture and makes the brownie easy to slice. Follow these steps for a delicious easy banana brownie.

Additional Tips

When making a moist banana brownie, use high-quality ingredients. Choose fresh bananas and real cocoa powder. Also, avoid overbaking to keep the brownie moist. By following these tips and mixing steps, you’ll make a delicious banana brownie for any occasion.

Baking Tips for Moist and Fudgy Results

To make a delicious banana brownie, follow some key baking tips. The baking temperature and time are crucial. They help your brownies be cooked just right, staying moist and fudgy.

Here are some tips to keep in mind:

  • Use the right pan size to ensure even cooking.
  • Check for doneness by inserting a toothpick into the center of the brownies.
  • Let the brownies cool completely in the pan before cutting into them.

A homemade banana brownie is a treat that’s easy to make and always a crowd-pleaser. By following these baking tips, you’ll be able to create a delicious and moist banana brownie that’s perfect for any occasion.

Remember, the key to a great banana brownie is to not overbake it. A fudgy texture is what makes it so delicious, so keep an eye on the baking time and temperature to ensure you get the perfect result.

Baking TipDescription
Temperature350°F (180°C)
Time25-30 minutes
Pan Size8-inch square pan

Common Mistakes to Avoid

Making a banana brownie recipe can be tricky. It’s important to know the common mistakes to avoid. This way, you can make a moist and tasty dessert that everyone will love.

Using the right ingredients and techniques is key. Make sure to measure everything correctly, control the oven temperature, and mix the batter well. If you don’t, your banana brownie might turn out too dense or dry.

Temperature Control Issues

Temperature is crucial when baking banana brownies. If your oven is too hot or cold, it can mess up the texture. Always check your oven temperature and adjust it if needed.

Ingredient Measurement Errors

Measuring ingredients accurately is vital. Too much or too little of anything can ruin the recipe. Use a digital scale or measuring cups to get it right.

Mixing Problems

Mixing the batter correctly is also important. Overmixing or undermixing can make the brownie dense or uneven. Mix just until the ingredients are combined, then stop.

By avoiding these mistakes, you can make a delicious banana brownie. Always use fresh ingredients and follow the recipe closely. With practice, you’ll make the best banana brownie recipe that everyone will enjoy.

Delicious Variations and Add-ins

Customizing banana brownies is fun. You can add your favorite ingredients to make them special. For instance, walnuts add a nice crunch and flavor.

Start with a chocolate banana brownie and get creative. Try nuts like pecans or hazelnuts for a unique taste. Or, mix it up with white or dark chocolate for a different twist.

Nut Options

  • Walnuts: add a rich, earthy flavor and a nice texture
  • Pecans: provide a smooth, buttery flavor and a delicate crunch
  • Hazelnuts: offer a distinct, nutty flavor and a satisfying crunch

Chocolate Variations

Changing up the chocolate can change the taste of your banana brownie. White chocolate makes it sweeter and creamier. Dark chocolate gives it a deeper, richer flavor. A dark chocolate banana brownie is perfect for those who love intense flavors.

Fruit Additions

Fresh or dried fruit can add a burst of flavor and texture. Try raspberries, blueberries, or cranberries. You can also use apples or apricots for a unique taste. A banana brownie with walnuts and dried cranberries is a sweet and tangy treat.

Storage and Serving Suggestions

To keep your moist banana brownie fresh, store it right. Place it in an airtight container at room temperature for up to 3 days. For longer freshness, refrigerate it for up to 5 days or freeze for up to 2 months.

Enjoy your healthy banana brownie as a dessert or snack. Serve it alone or with ice cream or whipped cream. For more ideas, check out banana bread recipes.

Here are some serving tips for your banana brownie:

  • Cut it into squares or rectangles for a neat and easy-to-serve dessert
  • Top it with fresh fruit, such as strawberries or blueberries, for added flavor and nutrition
  • Drizzle it with chocolate sauce or caramel for a decadent treat

“The key to a great banana brownie is to use ripe bananas and to not overmix the batter. This will ensure a moist and delicious dessert that everyone will love.”

Troubleshooting Your Banana Brownie Recipe

Even the best banana brownie recipes can face issues. We’ve got tips to help you solve common problems. Whether it’s texture, baking, or substituting ingredients, we’re here to help. Our aim is to help you fix your banana brownies and get the perfect result.

Texture Issues

Texture problems are common with banana brownies. If they’re too dense or dry, it’s a letdown. To fix this, try changing the sugar to flour ratio. Adding an extra egg or Greek yogurt can also help add moisture.

Baking Problems

Baking issues can be tough, especially for beginners. If your brownies aren’t baking evenly, try rotating the pan halfway through. Using a thermometer can also help ensure your oven is at the right temperature. Always follow the baking instructions carefully for an easy banana brownie.

Ingredient Substitution Guide

At times, you might need to swap out ingredients in your banana brownie recipe. Here’s a quick guide to help you:

  • Replace sugar with honey or maple syrup for a different flavor
  • Use almond flour instead of wheat flour for a gluten-free option
  • Swap chocolate chips with nuts or dried fruit for added texture

By using these troubleshooting tips, you can make a delicious banana brownie recipe. Always use fresh ingredients and follow the instructions carefully for the best results.

Pairing Suggestions and Serving Ideas

Serving a delicious banana brownie can be fun and creative. You can enjoy it alone or with other desserts for a special treat. It’s perfect for parties or special events and will surely wow your guests.

Here are some great ways to pair banana brownies:

  • Ice cream: Pair it with vanilla or chocolate ice cream for a rich treat.
  • Whipped cream: Add a dollop of whipped cream and cinnamon for a tasty dessert.
  • Fresh fruit: Serve it with strawberries or blueberries for a sweet and refreshing treat.

Banana brownies are great as a snack or dessert any time. Enjoy it with coffee or tea in the morning, or as a sweet end to dinner. No matter when, a homemade banana brownie is always a winner.

Here’s a simple table to help plan your dessert menu:

DessertPairing Suggestions
Banana BrownieIce cream, whipped cream, fresh fruit
Chocolate CakeVanilla ice cream, chocolate sauce, nuts

With these ideas, you can make a unique and delicious dessert. So, get creative and enjoy your homemade banana brownie!

Conclusion

Mastering banana brownies is easier than you think. This guide has given you all the tips and tricks you need. Now, you can make the most delicious banana brownie recipe that will wow everyone.

Whether you’re a pro in the kitchen or just starting out, this recipe will change the game. Enjoy the perfect mix of chocolate, banana, and fudgy texture in every bite. Try different variations to make it your own special treat.

So, what are you waiting for? Start by preheating your oven and getting your ingredients ready. Let’s dive into the amazing world of banana brownies. Enjoy the rich flavors and the joy of making others happy with your baking. Get ready to impress everyone with your amazing banana brownies!

FAQ

What makes banana brownies special?

Banana brownies mix the best of banana bread with the richness of brownies. Ripe bananas add moisture, sweetness, and nutrition. This makes them a decadent and unique treat.

What are the essential ingredients for banana brownies?

The key ingredients are ripe bananas, dark chocolate, sugar, eggs, flour, and walnuts (if you like them). You’ll also need baking powder, salt, and vanilla extract.

What kitchen tools and equipment are needed to make banana brownies?

You’ll need a mixing bowl, whisk, and rubber spatula. Also, a digital scale and measuring cups are essential. Optional tools include a stand mixer, food processor, and pastry brush.

How do I properly mix the ingredients for banana brownies?

Start by mixing the wet ingredients like bananas, eggs, and sugar. Then, mix the dry ingredients like flour, cocoa powder, and walnuts (if using). Use the right mixing technique to get a smooth batter.

What are some tips for baking moist and fudgy banana brownies?

For moist and fudgy brownies, use the right baking temperature and time. Check with a toothpick for doneness. Let them cool before serving.

What common mistakes should I avoid when making banana brownies?

Avoid temperature control issues, measurement errors, and mixing problems. Use the right temperature, measure ingredients accurately, and mix well for perfect brownies.

What are some delicious variations and add-ins for banana brownies?

Customize your brownies with nuts like walnuts or pecans. Try different chocolates or add fresh fruit like raspberries or blueberries.

How should I store and serve banana brownies?

Store them in an airtight container at room temperature for 3-4 days. Serve with ice cream, whipped cream, or fresh fruit for a stunning dessert.

What troubleshooting tips can I use if my banana brownies don’t turn out as expected?

If your brownies have texture or baking issues, check our troubleshooting guide. We offer tips to fix common problems and get perfect brownies every time.

Baked Ziti with Meat: A Hearty Italian Favorite

baked ziti with meat​

What makes baked ziti with meat so special, and how can you make it at home? This Italian classic is loved in many American homes. It’s easy to make and full of rich flavors. With a simple recipe, you can make a meal that everyone will love.

The best baked ziti combines meat and pasta for a delicious experience. It’s hard to resist.

Baked ziti with meat is perfect for a quick dinner or to impress guests. It has al dente pasta, savory meat sauce, and melted cheese. This mix of flavors is comforting and satisfying.

In this article, we’ll dive into baked ziti with meat. We’ll cover the key ingredients, a step-by-step guide, and tips for the perfect dish.

Key Takeaways

  • Learn how to create a delicious baked ziti with meat using an easy baked ziti recipe
  • Discover the essential ingredients and step-by-step guide to making the best baked ziti
  • Understand the importance of combining the richness of meat with the comfort of pasta
  • Explore the various options for meat and cheese to create a unique flavor profile
  • Get tips on how to prepare a perfect baked ziti with meat for your family and friends
  • Find out how to make ahead and store your baked ziti with meat for future meals

The Rich History of Baked Ziti

Baked ziti is a beloved dish in many Italian-American homes. It started in Italy, where pasta is a big part of the food scene. Over time, it changed based on what ingredients were available and what people liked.

When Italian immigrants came to America, baked ziti changed again. It got new flavors and became a hit. A classic homemade baked ziti often has baked ziti with ground beef, loved by many.

Origins in Italian Cuisine

In Italy, baked ziti was a filling meal. It had ground beef, tomatoes, and cheese. It was baked in a big dish, so all the flavors mixed well.

Evolution in American Kitchens

In America, baked ziti got even more popular. It started using local ingredients and tastes. Now, it’s a favorite, with cheesy baked ziti and ground beef being common.

Why It Became a Family Favorite

So, why do families love baked ziti? It’s easy to make and can be changed to fit everyone’s taste. Whether it’s homemade baked ziti or cheesy baked ziti, it’s a dish that’s here to stay.

IngredientQuantity
Ground Beef1 lb
Pasta1 lb
Tomato Sauce2 cups
Shredded Cheese1 cup

Essential Ingredients for Perfect Baked Ziti with Meat

To make a tasty baked ziti casserole, picking the right ingredients is key. Ziti pasta is the base, holding the meat sauce and melted cheese. Ground beef is common, but sausage works too.

The sauce is vital, with tomato sauce being the top choice. Mozzarella melts well, parmesan adds salt, and ricotta makes it creamy. Knowing each ingredient’s role makes your classic baked ziti both true and tasty. Here are some must-haves:

  • Ziti pasta
  • Ground beef or sausage
  • Tomato sauce
  • Mozzarella, parmesan, and ricotta cheese

Together, these ingredients make a hearty baked ziti casserole great for family meals. With the right mix and a bit of practice, you’ll make a dish everyone loves.

Choosing the Right Meat for Your Baked Ziti

Choosing the right meat is key to a delicious homemade baked ziti. Italian sausage adds a spicy kick, while ground beef brings a rich flavor. Both are great choices that complement the pasta and cheese.

Some like to mix ground beef and Italian sausage for a unique taste. This mix adds depth and excitement to the dish. It’s a great choice for those who love to try new things.

Ground Beef Options

Ground beef is a versatile and affordable choice for baked ziti. It can be seasoned with spices and herbs to make a flavorful sauce. Make sure to pick high-quality, lean ground beef for the best taste.

Italian Sausage Variations

Italian sausage is a favorite for baked ziti, adding a spicy kick. There are sweet and hot options available. Choose a sausage that complements the other ingredients and adds depth to the dish.

Combining Different Meats

Mixing meats like ground beef and Italian sausage creates a complex flavor. This mix adds excitement and makes the dish more interesting. It’s important to balance flavors and textures for a harmonious dish.

The Perfect Pasta: Tips for Cooking Ziti

To make the best baked ziti, cooking the ziti pasta just right is key. An easy baked ziti recipe needs al dente pasta, which is still a bit firm. This firmness is important because the pasta will cook a bit more when baked.

Timing is crucial when cooking ziti pasta. Use a timer and check the pasta’s texture often. Here are some tips to help you:

  • Cook the ziti pasta in a large pot of boiling, salted water.
  • Stir the pasta occasionally to prevent it from sticking together.
  • Check the pasta’s texture after the recommended cooking time, and then every minute thereafter until it’s al dente.

By following these tips, you’ll make a delicious easy baked ziti recipe. Remember, the secret to great baked ziti is in the details. Cooking the perfect ziti pasta is just the start. With practice and patience, you’ll be a pro at making the best baked ziti.

Creating the Ultimate Meat Sauce

To make a delicious baked ziti with meat, you need a rich and flavorful meat sauce. This sauce is the heart of the dish, adding depth and complexity. It’s made by browning the meat, adding onions and garlic, and simmering it to develop flavor.

The process of creating the ultimate meat sauce can be broken down into several components.

Building Flavor Layers

These include browning the meat, adding aromatics, and seasoning with herbs and spices.

Seasoning Secrets

Using the right blend of herbs and spices is crucial. It complements the meat and pasta without overpowering them.

Simmering Techniques

Simmering the sauce allows the flavors to meld together. This creates a velvety texture that coats the pasta perfectly. By following these steps, you can create a meat sauce that elevates your baked ziti with meat to the next level. It makes it a truly satisfying and delicious cheesy baked ziti.

  • Using high-quality ingredients, such as lean ground beef and fresh herbs
  • Browning the meat thoroughly to create a rich, caramelized crust
  • Simmering the sauce for at least an hour to develop its flavor and texture

By following these tips and techniques, you can create a delicious and satisfying meat sauce. It makes your baked ziti with meat truly unforgettable.

IngredientQuantity
Ground Beef1 lb
Onion1 medium
Garlic3 cloves
Herbs and Spices1 tsp

Cheese Selection and Layering Methods

Creating a tasty baked ziti casserole starts with the right cheese. Mozzarella, parmesan, and ricotta are key in a classic baked ziti. Each cheese plays a role in the dish.

Mozzarella is perfect for the top because it melts well and makes a golden crust. Parmesan adds a salty flavor that goes well with pasta and sauce. Ricotta, mixed with eggs and spices, adds creaminess.

Layering these cheeses with pasta and sauce is important. It makes sure every bite has a mix of flavors.

Here are some tips for choosing and layering cheese in your baked ziti casserole:

  • Mozzarella: use fresh, high-quality mozzarella for the best flavor and texture
  • Parmesan: sprinkle parmesan cheese throughout the dish for added depth of flavor
  • Ricotta: mix ricotta with eggs and seasonings to create a creamy, smooth layer

By following these tips and using mozzarella, parmesan, and ricotta, you can make a delicious

Step-by-Step Assembly Guide

To make a tasty easy baked ziti, you need to layer it right. Start with pasta, then meat sauce, and finish with cheese. This order helps mix flavors and textures well.

Begin with a thin meat sauce layer at the bottom. Then, add cooked ziti pasta. This keeps the pasta from sticking and spreads flavors evenly.

Layering the Ingredients

  • Cooked ziti pasta
  • Meat sauce made with ground beef
  • Ricotta cheese mixture
  • Mozzarella cheese for the top layer

Using quality ingredients like ground beef makes your baked ziti delicious. The secret to a great dish is in the layering. So, take your time and make sure each layer is even.

Final Touches

After assembling, add a mozzarella cheese layer on top. This will melt and brown, giving a crispy crust. With these steps, you’ll have a tasty baked ziti for any event.

LayerIngredients
BottomMeat sauce, cooked ziti pasta
MiddleMeat sauce, ricotta cheese mixture
TopMozzarella cheese

Baking Tips and Temperature Guidelines

To get the perfect baked ziti with meat, follow certain temperature and timing tips. Preheat your oven to about 350°F (175°C). This helps the cheese melt evenly and the pasta stay moist.

Here are some key tips to keep in mind:

  • Preheat the oven to 350°F (175°C) for a moderate baking temperature.
  • Bake for 25-40 minutes, depending on the size of the dish and oven efficiency.
  • Keep an eye on the dish towards the end of the baking time to ensure the top is golden brown and the cheese is melted and bubbly.

A perfectly baked cheesy baked ziti is a joy to see. With these tips, you’ll make a dish that everyone will love. Always check the ziti to avoid overcooking. Try different cheeses and meats to find your favorite mix.

By following these simple guidelines, you’ll make a delicious baked ziti with meat that will be a hit with your family. So, go ahead and bake. Enjoy the gooey, cheesy goodness of a perfectly cooked cheesy baked ziti!

Baking TimeDish SizeOven Temperature
25-30 minutesSmall350°F (175°C)
30-35 minutesMedium350°F (175°C)
35-40 minutesLarge350°F (175°C)

Make-Ahead and Storage Recommendations

Homemade baked ziti is great because you can prepare it ahead of time. It can be refrigerated overnight or frozen for later. This is perfect for busy families or anyone who wants a tasty meal without the rush.

To freeze, assemble the dish but don’t bake it yet. Wrap it in plastic wrap or foil and freeze. When you’re ready, thaw and bake it. You can also reheat it in the microwave or oven.

Freezing Instructions

  • Assemble the baked ziti casserole up to the point of baking
  • Wrap it tightly in plastic wrap or aluminum foil
  • Place it in the freezer for up to a couple of months

Reheating Methods

  • Reheat individual portions in the microwave
  • Reheat the entire dish in the oven

With these easy steps, you can enjoy homemade baked ziti whenever you like. It’s perfect for busy families or anyone who needs a quick, delicious meal.

Conclusion: Mastering Your Baked Ziti Creation

Making the perfect baked ziti is a journey that honors its rich history. It’s about understanding the key ingredients and mastering cooking techniques. It’s also about trying new flavor combinations. This way, anyone can become a baked ziti expert.

Whether you like a traditional baked ziti with sausage or something new, the most important thing is to be creative. Let your personal touch make your dish special.

As you get better at making baked ziti, remember the joy of sharing it with others. Invite family and friends over to enjoy the delicious smell and taste of your best baked ziti. Each bite will not only feed their bodies but also warm their hearts, creating memories that last a lifetime.

FAQ

What is the origin of baked ziti?

Baked ziti comes from Italy. It was a simple dish made with pasta, meat, and cheese. Italian immigrants brought it to the United States, where it became popular.

What are the essential ingredients for baked ziti with meat?

You’ll need ziti pasta, ground beef (or Italian sausage), tomato sauce, and ricotta cheese. Mozzarella and parmesan cheese are also key.

What type of meat is best for baked ziti?

Ground beef is a top choice for baked ziti. Italian sausage or a mix of both is also good. Pick a meat that tastes great with the other ingredients.

How do I cook the ziti pasta properly for baked ziti?

Cook the ziti pasta until it’s al dente. This way, it will soak up flavors during baking. Don’t overcook it to avoid a mushy texture.

How do I create a rich and flavorful meat sauce for baked ziti?

Start by browning the meat to get a nice crust. Add onions and garlic for flavor. Let the sauce simmer to thicken and blend the flavors.

What is the best way to layer the ingredients in baked ziti?

Begin with a thin meat sauce layer at the bottom. Add cooked ziti pasta, then alternate with meat sauce, ricotta, and mozzarella. Finish with mozzarella and parmesan on top.

What are the optimal baking temperature and time for baked ziti?

Bake at 350°F (175°C) for 25 to 40 minutes. The cheese should melt, bubble, and lightly brown.

Can baked ziti be made ahead of time?

Yes, you can assemble baked ziti ahead. Refrigerate or freeze it. Thaw in the fridge overnight and bake as usual.

Chicken Hashbrown Casserole: A Tasty Meal

chicken hashbrown casserole​

What makes chicken hashbrown casserole the ultimate comfort food? It’s the mix of juicy chicken, crispy hashbrowns, and melted cheese. This combo creates a flavor that’s hard to resist. It’s perfect for weeknight dinners or special events, thanks to its simplicity.

With a hashbrown casserole recipe, you can make a tasty meal with little effort. It’s great for busy families who need quick and delicious meals.

Key Takeaways

  • A chicken hashbrown casserole is a perfect comfort food for any occasion
  • This easy chicken casserole recipe is great for weeknight dinners or special gatherings
  • A hashbrown casserole recipe can be prepared with minimal effort
  • The combination of chicken, hashbrowns, and cheese creates a delicious flavor profile
  • This recipe is an excellent choice for busy families
  • You can customize the recipe to suit your taste preferences
  • A chicken hashbrown casserole is a budget-friendly meal option

Why This Chicken Hashbrown Casserole Will Become Your Family Favorite

This casserole is a mix of comfort and ease, perfect for busy families. It’s a quick and affordable dish that’s great for any meal. You can make it in one pot, saving time and money.

There are many reasons why your family will love this casserole. It’s easy to make and can be prepared ahead of time. Here are some key points:

  • Easy to prepare: The one-pot casserole recipe makes it simple to cook and clean up.
  • Affordable: The ingredients used in this chicken potato casserole are affordable and easily accessible.
  • Make-ahead benefits: The casserole can be prepared ahead of time, making it perfect for busy families.

This casserole is a fantastic choice for families looking for a convenient and affordable meal. The chicken hashbrown casserole is a one-pot wonder that will quickly become a family favorite.

With its perfect blend of comfort and convenience, this casserole is sure to be a hit with your family. So why not give it a try and make it a part of your meal prep routine?

Essential Ingredients for Your Casserole Success

To make a delicious homemade casserole, you need the right ingredients. A comfort food recipe like chicken hashbrown casserole needs simple, easy-to-find items. These include chicken, hashbrowns, cheese, and spices.

Choose high-quality, fresh ingredients for the best taste and texture. Freshly shredded cheese can really enhance your casserole’s flavor. Here are some key ingredients to include:

  • 1 pound of boneless, skinless chicken breast or thighs
  • 1 (32 oz) bag of frozen hashbrowns, thawed
  • 1 cup of shredded cheese, such as cheddar or mozzarella
  • 1/2 cup of milk or cream
  • Salt and pepper to taste

A well-made homemade casserole is a comfort food staple. By picking the right ingredients and following a simple recipe, you can make a delicious dish.

IngredientQuantity
Chicken1 pound
Hashbrowns1 (32 oz) bag
Cheese1 cup

With these essential ingredients, you can make a mouth-watering homemade casserole. It’s sure to become a family favorite. Remember to store your ingredients properly to keep them fresh and ensure the best results.

Kitchen Tools and Equipment You’ll Need

To make a tasty easy chicken casserole, you’ll need some basic kitchen tools. A large skillet is key for browning the chicken and cooking the hashbrowns. You’ll also need a baking dish to put everything together and bake it.

There are some optional tools that can help too. A food processor can shred the hashbrowns easily. A stand mixer can mix the casserole ingredients for you.

Here are the main tools and equipment you’ll need for a great hashbrown casserole recipe:

  • Large skillet
  • Baking dish
  • Food processor (optional)
  • Stand mixer (optional)

With these tools and equipment ready, you’re set to make a delicious easy chicken casserole. It’s sure to become a hit with your family.

ToolDescription
Large SkilletUsed for browning the chicken and cooking the hashbrowns
Baking DishUsed for assembling and baking the casserole
Food ProcessorOptional: used for shredding the hashbrowns
Stand MixerOptional: used for mixing the casserole ingredients

Step-by-Step Guide to the Perfect Chicken Hashbrown Casserole

To make a tasty chicken hashbrown casserole, first, preheat your oven to 375°F. While it heats up, cook the chicken and hashbrowns as your recipe says.

Then, combine the cooked chicken, hashbrowns, and other ingredients in a big mixing bowl. Mix well so everything is spread out evenly. Next, put the mix in a baking dish and add your favorite cheese and toppings.

For a great casserole, don’t overmix the ingredients. Also, cook it for the right time. You can also try new things like different cheeses or spices to make it even better.

Here’s how to make the perfect chicken hashbrown casserole:

  • Cook the chicken and hashbrowns as your recipe says
  • Mix the ingredients together in a big bowl
  • Put the mix in a baking dish and add cheese and toppings
  • Cook the casserole in the oven for the right amount of time

By following these steps and using a simple one-pot casserole recipe, you can make a delicious chicken hashbrown casserole. It’s sure to be a hit with your family and friends.

Always use fresh, high-quality ingredients for the best taste and texture. With a bit of practice and patience, you’ll get great at making a perfect chicken hashbrown casserole with your favorite recipe.

IngredientQuantity
Chicken1 pound
Hashbrowns2 cups
Cheese1 cup

Pro Tips for the Crispiest Hashbrowns

To get the crispiest hashbrowns, follow some expert tips. A great casserole starts with the right prep.

Preparation Techniques

Shredding and soaking potatoes are key steps. They help remove extra moisture for a crispier texture. Adding grated onion or garlic can also boost flavor.

Cooking Temperature Guidelines

Cooking hashbrowns at the right temperature is crucial. Use medium-high heat for a golden-brown and crispy texture. A thermometer can help you get the oil to the perfect temperature.

Moisture Control Methods

Keeping moisture in check is essential for crispy hashbrowns. Pat dry the potatoes with paper towels or add cornstarch to absorb moisture. These tips will help you make a delicious casserole with the crispiest hashbrowns.

Cheese Selection and Combinations

The right cheese can make a chicken potato casserole truly special. A good comfort food recipe needs a mix of cheeses for a creamy sauce. Cheddar, mozzarella, and parmesan are popular choices.

Each cheese brings something unique to the dish. Cheddar adds a sharp taste, while mozzarella makes it creamy. Parmesan brings a salty, nutty flavor that goes well with everything.

Combining these cheeses can create a memorable taste. Here are some tips for mixing them in your casserole:

  • Use a blend of cheddar and mozzarella for a creamy, tangy sauce
  • Add parmesan for a salty, nutty flavor
  • Experiment with different ratios of each cheese to find your perfect combination

It’s also key to think about how each cheese melts. Mixing cheeses with different melting points can make a smooth sauce. This is perfect for a comfort food like chicken potato casserole.

By choosing the right cheeses and mixing them well, you can make a delicious chicken potato casserole. It’s sure to be a hit with your family. So, don’t be shy to try different cheese combinations to make your dish stand out.

Making Your Casserole Ahead: Storage and Freezing Tips

Making a homemade casserole, like an easy chicken casserole, ahead of time is smart. It saves you time and effort on busy weeknights. To store it in the fridge, cool it down first. Then, cover it with plastic wrap or aluminum foil and keep it refrigerated for up to 3 days.

Refrigeration Guidelines

For longer storage, freezing is an option. Cool the casserole to room temperature. Then, wrap it tightly in plastic wrap or aluminum foil and put it in a freezer-safe bag. Frozen casseroles can last up to 3 months.

When you’re ready to eat it, thaw the casserole in the fridge overnight. Then, bake it in the oven at 350°F (180°C) for 25-30 minutes. It should be hot and bubbly by then.

Freezing Instructions

Using a rotisserie chicken makes your casserole prep easier. You can also chop veggies and cook chicken ahead of time. Store them in separate containers in the fridge until you’re ready to make the casserole.

Reheating Methods

Here are some tips for reheating your casserole:

  • Reheat the casserole in the oven for the best results.
  • Use a food thermometer to ensure the casserole reaches a safe internal temperature of 165°F (74°C).
  • Consider using a slow cooker to reheat the casserole, especially if you’re short on time.

By following these tips, you can enjoy your homemade casserole, like an easy chicken casserole, whenever you want. It will still taste great and be of high quality.

Delicious Variations to Try

The chicken hashbrown casserole is a canvas for creativity. You can add different ingredients to make it your own. Try adding diced bell peppers, onions, or mushrooms for extra flavor and texture.

Want to change things up? Use beef or turkey instead of chicken. This will alter the taste and nutritional value. Here are some tasty variations:

  • Add some heat with diced jalapenos or serrano peppers
  • Mix in some chopped fresh herbs like parsley or cilantro
  • Use different types of cheese, such as cheddar or mozzarella, to change the flavor profile

Remember, the secret to a great chicken hashbrown casserole is to have fun. Don’t hesitate to try new ingredients and combinations. With a bit of creativity, you can transform a simple recipe into a masterpiece.

Exploring these variations will give you a fresh take on chicken hashbrown casserole. So, get creative and make it your own!

VariationIngredientsDescription
Spicy Chicken Hashbrown CasseroleDiced jalapenos, chicken, hashbrowns, cheeseA spicy twist on the classic recipe
Vegetarian Hashbrown CasseroleMushrooms, bell peppers, onions, hashbrowns, cheeseA meatless version of the dish

Perfect Side Dishes to Serve With Your Casserole

When you serve a tasty one-pot casserole recipe, you want the right sides. A comfort food recipe like chicken hashbrown casserole goes well with simple, tasty sides. These sides should enhance the main dish without overpowering it.

Consider a fresh green salad, roasted veggies, or a warm loaf of bread. You might also like a side of sausage and potato casserole for a filling meal. For more ideas, check out this website for a similar comfort food recipe.

Here are some tips for choosing the right side dishes:

  • Keep it simple: Avoid complicated recipes that require a lot of time and effort.
  • Consider the flavors: Choose side dishes that complement the flavors in your casserole.
  • Think about texture: Mix different textures, such as crunchy and soft, to add depth to your meal.

By following these tips, you can make a meal that everyone will enjoy. So, get creative and find the perfect sides for your comfort food recipe!

Side DishDescription
Green SaladA fresh mix of greens, vegetables, and fruits
Roasted VegetablesA selection of roasted vegetables, such as broccoli, carrots, and bell peppers
Warm BreadA freshly baked loaf of bread, perfect for serving with your casserole

Common Troubleshooting Tips

When making an easy chicken casserole, you might run into some problems. Knowing how to fix these issues can make your dish perfect. A cheesy chicken casserole is loved by many, but it can be disappointing if it’s dry or soggy.

To prevent these problems, keep an eye on the cooking time and temperature. Here are some common issues and how to solve them:

  • Dry casserole: Check if the chicken is overcooked or if it’s been in the oven too long. To fix this, add a bit more cheese or cream to the mix.
  • Soggy casserole: This can happen if there’s too much moisture in the ingredients. Try to squeeze out extra liquid from the hashbrowns or use a slotted spoon to remove excess moisture.

By being aware of these potential problems, you can make a delicious and satisfying easy chicken casserole. Don’t forget to taste and adjust the seasoning to make sure your cheesy chicken casserole is flavorful and enjoyable.

With these tips, you’ll be on your way to making a mouth-watering easy chicken casserole. It’s perfect for a weeknight dinner or a special occasion. These tips will help you achieve perfection.

IssueSolution
Dry casseroleAdd more cheese or cream
Soggy casseroleRemove excess moisture from ingredients

Nutritional Information and Dietary Modifications

When we talk about a tasty chicken potato casserole, we must think about its nutrition. Making it at home lets us pick the ingredients for a healthier meal. A serving of this casserole has about 350-400 calories, with a good mix of protein, fat, and carbs.

To make it healthier, try using low-fat cheese and whole wheat hashbrowns. These changes can cut down calories and fat. Adding more veggies like bell peppers, onions, and mushrooms boosts fiber and nutrients.

Caloric Content

A serving of chicken potato casserole can have 300-500 calories, based on ingredients and size. Here’s a rough look at what’s in a homemade casserole:

  • Chicken breast: 140-160 calories
  • Hashbrowns: 100-120 calories
  • Cheese: 50-70 calories
  • Vegetables: 20-50 calories

Healthier Alternatives

Want a healthier chicken potato casserole? Try these tips:

  1. Go for leaner proteins like chicken breast or turkey
  2. Opt for low-fat cheese or use less of it
  3. Add more veggies and fiber-rich foods

With a few tweaks, you can enjoy a tasty, nutritious casserole that fits your diet.

IngredientCaloriesFatCarbohydratesProtein
Chicken breast140-1603-4g0g25-30g
Hashbrowns100-1202-3g20-25g2-3g
Cheese50-704-6g1-2g6-8g

Conclusion

The chicken hashbrown casserole is a true culinary gem. It’s a mix of comfort, convenience, and amazing flavor. The creamy textures and crunchy hashbrowns make it a favorite in any home.

This dish is perfect for any occasion. Whether it’s for a family meal or to impress guests, it’s versatile. Try different cheeses, proteins, and veggies to make it your own. With the tips here, you’ll make a top-notch chicken hashbrown casserole easily.

So, get ready to make this chicken hashbrown casserole. Use your favorite ingredients and enjoy the comforting taste. Share your creations with loved ones. Bon appétit!

FAQ

What are the key ingredients in a chicken hashbrown casserole?

The main ingredients are shredded chicken, hashbrowns, and cheese. You’ll also need seasonings like salt, pepper, and onion powder.

How do I make the hashbrowns crispy in the casserole?

To make hashbrowns crispy, shred the potatoes and rinse them well. Pat them dry before adding them. Cooking them at a high temperature helps too.

Can I make the casserole ahead of time?

Yes, you can prepare the casserole ahead. Assemble it, cover it, and refrigerate for up to 3 days. Or, bake it and freeze for up to 3 months.

Can I use different types of cheese in the casserole?

Absolutely! Try cheddar, mozzarella, or a mix of cheeses. Find the flavor you like best.

What are some tasty variations I can try with this recipe?

Add diced bell peppers, onions, or mushrooms. You can also use ground beef or turkey instead of chicken.

How can I make this casserole healthier?

Use low-fat cheese and whole wheat or cauliflower hashbrowns. Add more veggies. Reduce cheese and cream of mushroom soup for fewer calories.

How do I store and reheat leftovers?

Store leftovers in an airtight container in the fridge for 3-4 days. Reheat at 350°F (175°C) for 15-20 minutes. Or, reheat in the microwave.

Irresistible Mango Cheesecake: A Creamy, Tropical Delight

mango cheesecake recipe​

What makes a mango cheesecake recipe unforgettable? Is it the creamy cheesecake and sweet mango mix? Or is there more to this tropical treat? Let’s explore the secrets of mango cheesecakes. For a tasty and simple mango cheesecake recipe, check out mango cheesecake recipe sites for ideas.

The mango cheesecake is loved for its unique taste and smooth texture. Whether you’re new to baking or a pro, making a great mango cheesecake is easy. We’ll share tips, tricks, and recipes to help you make a delicious mango cheesecake, including an easy one.

Introduction to Mango Cheesecakes

Let’s dive into mango cheesecakes and learn about the key ingredients, tools, and techniques. We’ll cover everything from the crust to serving. So, let’s start this culinary adventure and find out how to make the perfect mango cheesecake.

Key Takeaways

  • Learn the basics of a mango cheesecake recipe and how to create a delicious and easy mango cheesecake recipe
  • Discover the essential ingredients and kitchen tools required for making a mango cheesecake
  • Understand the importance of texture and flavor in a mango cheesecake
  • Get tips and tricks for baking and serving the perfect mango cheesecake
  • Explore variations of the mango cheesecake recipe to suit your taste preferences
  • Find inspiration for your next dessert creation with our easy mango cheesecake recipe

Discovering the Magic of Mango Cheesecake

Mango cheesecakes have been a favorite in desserts for years. Their appeal comes from the mix of flavors and textures. Making a homemade mango cheesecake lets you pick the best ingredients. This way, your dessert is tasty, fresh, and healthy.

To get the best mango cheesecake recipe, using fresh ingredients and the right methods is key. Making a homemade mango cheesecake offers several benefits:

  • Control over the quality of ingredients
  • Customization of flavors and textures
  • Freshness and healthiness of the dessert

With the right recipe and techniques, your mango cheesecake can be as good as those in top restaurants. A well-made homemade mango cheesecake can wow your family and friends.

Following a trusted best mango cheesecake recipe and using top-notch ingredients will make a delicious dessert. It’s perfect for any event. Whether you’re experienced or new to baking, making a homemade mango cheesecake is fun and rewarding.

Essential Ingredients for the Perfect Mango Cheesecake Recipe

To make a tasty mango cheesecake, you need the right ingredients. When looking at mango dessert ideas, it’s easy to feel overwhelmed. But for a tropical cheesecake, focus on balancing flavors and textures. A good cheesecake starts with a crunchy, flavorful crust.

For the crust, mix graham cracker crumbs, sugar, and melted butter. The filling is where the magic is, with cream cheese, sugar, eggs, and vanilla. Add fresh mango puree for the mango flavor. The mango topping adds color and flavor, so choose the right mangoes and preparation method.

Crust Components

  • Graham cracker crumbs
  • Sugar
  • Melted butter

Filling Ingredients

  • Cream cheese
  • Sugar
  • Eggs
  • Vanilla extract
  • Fresh mango puree

Mango Topping Requirements

To make a stunning mango topping, use ripe mangoes, sugar, and lime juice. This adds freshness to your tropical cheesecake. With these ingredients, you’ll make a delicious mango cheesecake perfect for any occasion.

By following these guidelines and using the right ingredients, you’ll make a mouth-watering mango cheesecake. It’s perfect for dinner parties or special treats with family and friends. This tropical cheesecake recipe is sure to impress.

IngredientQuantity
Graham cracker crumbs1 1/2 cups
Sugar1/2 cup
Melted butter1/4 cup
Cream cheese16 ounces
Fresh mango puree1 cup

Kitchen Tools and Equipment Needed

To make a tasty fruit cheesecake, like a no bake mango cheesecake, you need the right tools. The right tools can really improve your cheesecake’s quality. You’ll need different tools for mixing, baking, and cooling.

You’ll need basic tools like mixing bowls, utensils, and a measuring cup. For a no bake mango cheesecake, a food processor or blender is key for pureeing mango and mixing the filling. Also, a springform pan is essential for baking and cooling the cheesecake.

Here are some of the key tools and equipment you’ll need:

  • Mixing bowls
  • Utensils (e.g., spatula, whisk)
  • Measuring cup
  • Food processor or blender
  • Springform pan

Getting the right equipment is important for a smooth, creamy mango cheesecake. With the right tools, you can make a delicious fruit cheesecake for any event.

Having the right kitchen tools and equipment lets you make many cheesecakes, including a no bake mango cheesecake. With practice and patience, you can become a great cheesecake maker. You’ll impress your friends and family with your creations.

ToolDescription
Mixing BowlsStainless steel or glass bowls for mixing ingredients
UtensilsSpatula, whisk, and other tools for mixing and blending
Measuring CupAccurate measurement of ingredients
Food Processor or BlenderPureeing mango and mixing filling ingredients
Springform PanBaking and cooling the cheesecake

Preparing Your Mango Cheesecake Base

To make a tasty creamy mango dessert, start with a solid base. The cheesecake base is key, offering a crunchy texture and a flavorful start. It’s crucial for your sweet mango treats.

When making your mango cheesecake base, follow a few important steps.

Creating the Perfect Crust

First, mix the perfect crust. Use graham cracker crumbs, sugar, and melted butter. This combo creates a crunchy, flavorful base.

Mixing the Cream Cheese Filling

Next, mix the cream cheese filling. Beat together cream cheese, sugar, eggs, and vanilla extract. This makes a smooth, creamy mix.

Incorporating Fresh Mango Puree

Finally, add fresh mango puree to the filling. It brings flavor and moisture. Choose the right mangoes and prepare them correctly.

By following these steps, you’ll make a delicious mango cheesecake base. Use quality ingredients and avoid overmixing. This keeps the cheesecake creamy and light.

IngredientQuantity
Graham cracker crumbs1 1/2 cups
Sugar1/4 cup
Melted butter1/4 cup

Baking and Setting Techniques

To make a perfect mango cheesecake, you need to get good at baking and setting. It’s key to bake the cheesecake at the right temperature and for the right time. If you don’t, it might end up too hard or too soft.

When making an easy mango cheesecake, cooling and setting are very important. They help stop the cheesecake from cracking and make it smooth. Letting it cool slowly and set well will give you a dessert that looks and tastes great.

Here are some tips for baking and setting your mango cheesecake:

  • Use a water bath to keep the temperature steady and stop cracking.
  • Avoid mixing the batter too much, as it can make the cheesecake dense.
  • Don’t open the oven door while it’s baking, or it might sink or crack.

By following these tips and using the right techniques, you can make a beautiful and tasty mango cheesecake. It doesn’t matter if you’re using a simple or complex recipe. The secret to success is in how you bake and set it.

With practice and patience, you’ll get better at baking and setting the perfect mango cheesecake. So, go ahead and try it out. You’ll be rewarded with delicious results!

TechniqueImportanceTips
BakingHighUse a water bath, avoid overmixing
SettingHighAllow to cool slowly, avoid opening oven door

Creating the Tropical Mango Topping

To make a stunning homemade mango cheesecake, the tropical mango topping is key. It’s the final touch that makes the cheesecake stand out. When picking mangoes, choose sweet and creamy types like Alphonso or Ataulfo.

Here are some tips for preparing the mango topping:

  • Choose ripe but firm mangoes for the best flavor and texture.
  • Peel and dice the mango into small pieces for even distribution.
  • Mix the mango with a hint of sugar and lime juice to enhance the flavor.

Adding decorative touches can elevate your mango cheesecake. Try topping it with fresh fruit, nuts, or coconut flakes. For a pro look, arrange mango slices in a pattern or around the edges.

By following these tips and using the best mango cheesecake recipe, you’ll make a topping that’s both tasty and beautiful. Your homemade mango cheesecake will be a hit at any event, with the fresh mango topping being the highlight.

Mango VarietyFlavor ProfileTexture
AlphonsoSweet and creamyButtery and smooth
AtaulfoSweet and tangyFirm and juicy

Storage and Serving Suggestions

After making your tropical cheesecake, it’s key to store and serve it right. This keeps its texture and taste great. For mango desserts, keep your cheesecake in an airtight container in the fridge for up to 5 days. Before serving, let it come to room temperature for the best taste and feel.

Here are some extra tips for storing and serving:

  • Freeze the cheesecake for up to 2 months, wrapped well in plastic or foil.
  • Thaw it in the fridge overnight before you serve it.
  • Top it with fresh mango, whipped cream, or caramel sauce when you serve it.

For more mango dessert ideas and tropical cheesecake recipes, check out mango dessert recipes. These tips will help you enjoy your mango cheesecake for days.

By using these tips, you’ll make a beautiful and tasty tropical cheesecake. It’s great for any event. So, be creative with your mango desserts and enjoy making something special.

Storage MethodShelf Life
RefrigeratorUp to 5 days
FreezerUp to 2 months

Delicious Variations to Try

Mango cheesecake offers endless possibilities. You can mix in different fruits like strawberries or blueberries. Or, try a no bake mango cheesecake for a cool treat on hot days.

Consider adding caramel sauce or nuts for extra flavor. Or, use almond or soy milk for a non-dairy version. You can also add lemon or orange for a unique twist.

Here are some ideas for delicious variations to try:

  • No bake mango cheesecake with a graham cracker crust
  • Delicious fruit cheesecake with a mixed berry topping
  • Mango cheesecake with a caramel drizzle and chopped nuts

Remember, the key to a great mango cheesecake is quality ingredients. Don’t be afraid to experiment and try new things. With practice, you can make a unique mango cheesecake for any occasion.

Conclusion: Mastering Your Mango Cheesecake Creation

Making the perfect mango cheesecake recipe takes hard work, focus, and a love for baking. But the joy it brings is priceless. By following this guide, you’ll become a pro at making mango cheesecakes. You’ll impress everyone with your tasty treats.

Quality ingredients, careful steps, and a spirit to try new things are key. Feel free to add your own twist to the recipe. With each try, you’ll learn more and find your own special touch.

Enjoy the journey of making your easy mango cheesecake recipe better. Love the praise and feel proud of your creations. Soon, your mango cheesecake will be the star of every gathering. Happy baking!

FAQ

What are the key ingredients needed to make a mango cheesecake?

To make a mango cheesecake, you’ll need cream cheese, sugar, eggs, and heavy cream. Fresh mangoes are also crucial. The crust is often made from graham crackers or digestive biscuits. You might also add mango puree or slices on top.

Is it possible to make a no-bake mango cheesecake?

Yes, you can make a no-bake mango cheesecake. Use a graham cracker or cookie crust. Then, chill a no-bake cream cheese filling until it sets, skipping the oven.

What are some tips for selecting the best mangoes for a mango cheesecake?

Choose mangoes that are ripe, juicy, and bright orange-yellow. Steer clear of firm or blemished mangoes. They won’t be as sweet or tender for your cheesecake.

How can I ensure my mango cheesecake has a creamy and smooth texture?

For a creamy texture, use top-quality cream cheese. Make sure all ingredients are at room temperature. Beat the filling well to add air. Chill the cheesecake before serving for the best texture.

What are some creative ways to decorate a mango cheesecake?

Decorate your mango cheesecake with fresh mango slices or a mango glaze. You can also sprinkle toasted coconut or chopped nuts. Try making patterns with mango slices for a unique look.

How should I store a mango cheesecake to keep it fresh?

Store your mango cheesecake in the fridge, covered. Eat it within 3-5 days. Don’t leave it out too long, as it can spoil. For longer storage, freeze it for up to 2 months.

Can I make a mango cheesecake ahead of time?

Absolutely, you can make a mango cheesecake ahead. Bake and chill it up to 3 days before. Or, prepare the crust and filling separately and assemble it the day of. This is a great way to save time.

The Ultimate Cheesecake Ball Recipe You Need to Try

cheesecake ball recipe

What makes a cheesecake ball recipe special? Is it the creamy texture, the rich flavor, or how easy it is to make? This article will show you how to make the perfect cheesecake ball. It’s easy to make and perfect for any event. Try this recipe and enjoy a world of delicious flavors.

A cheesecake ball recipe is a must-try for anyone who loves cheesecake. This no-bake recipe lets you enjoy creamy and rich flavors without baking. It’s great for beginners and experienced bakers, and it’s sure to be a favorite.

Introduction to Cheesecake Balls

Looking for a dessert for a party or a special treat at home? This cheesecake ball recipe is perfect. It’s easy to follow and has simple ingredients. You can make delicious cheesecake balls that will impress everyone.

Key Takeaways

  • Learn how to make a delicious and easy cheesecake ball recipe
  • Discover the secret to creating creamy and rich no bake cheesecake balls
  • Find out how to customize your cheesecake ball recipe with different flavors and ingredients
  • Get tips for serving and presenting your cheesecake balls
  • Understand the importance of using high-quality ingredients in your cheesecake ball recipe
  • Learn how to store and make ahead your cheesecake balls for convenience

What Makes Cheesecake Balls So Special

Cheesecake balls are a unique dessert that combines the richness of cheesecake with the convenience of a bite-sized ball. They have a creamy cheesecake filling and a crunchy exterior. This makes them a must-try for any cheesecake lover. You can also customize them with your favorite flavors, like a cream cheese ball recipe or chocolate cheesecake balls.

Some reasons why cheesecake balls are a favorite include:

  • Easy to make: Cheesecake balls are simple to prepare, needing just a few ingredients and little cooking time.
  • Customizable: You can customize them with various flavors, making them perfect for parties and gatherings.
  • Portable: They are bite-sized, making them easy to grab and go, ideal for snacking on the run.

Aside from their convenience and customizability, cheesecake balls offer a way to enjoy cheesecake’s rich flavor without baking a full cheesecake. With a cream cheese ball recipe or chocolate cheesecake balls, you can make a delicious and unique dessert. It’s sure to impress your friends and family.

Essential Ingredients for the Perfect Cheesecake Ball Recipe

To make delicious mini cheesecake balls, you’ll need a few key ingredients. You’ll need cream cheese, sugar, eggs, and vanilla extract. These are the basics for a classic cheesecake ball recipe. It’s important to use high-quality ingredients when learning how to make cheesecake balls.

Choosing the right cream cheese is crucial. Look for a brand that’s smooth and creamy. This ensures your mini cheesecake balls will have a uniform texture. You can also add chocolate chips or nuts for a unique taste and texture.

When coating your cheesecake balls, you have many options. You can use melted chocolate, chopped nuts, or sprinkles. These coatings add flavor and make your mini cheesecake balls look great. They’re perfect for parties or special events. By following these tips and using the right ingredients, you’ll make delicious cheesecake balls that will impress everyone.

Core Ingredients

  • Cream cheese
  • Sugar
  • Eggs
  • Vanilla extract

Optional Add-ins

  • Chocolate chips
  • Nuts
  • Fruit

Coating Options

  • Melted chocolate
  • Chopped nuts
  • Sprinkles

Kitchen Tools You’ll Need

To make the perfect cheesecake ball recipe, you need the right tools. A cheesecake truffle recipe needs precision and detail. The right tools will make your cheesecake balls smooth and creamy.

Some key tools include:

  • Mixing bowls
  • Measuring cups and spoons
  • An electric mixer
  • A baking sheet lined with parchment paper
  • A cookie scoop or small ice cream scoop

These tools help you mix, shape, and bake your cheesecake balls. A cheesecake truffle recipe can be tricky. But with the right tools, you’ll get a delicious and professional-looking result.

Investing in these tools will help you make a tasty cheesecake truffle recipe. Always use high-quality ingredients and follow the recipe carefully. This will ensure the best results.

Step-by-Step Cheesecake Ball Instructions

To make a tasty cheesecake ball, follow a few steps. Start by mixing cream cheese, sugar, and vanilla extract. This recipe is easy, making it great for beginners.

Next, shape the mix into balls. You can use a cookie scoop or your hands. Put the balls on a baking sheet covered with parchment paper. Chill them in the fridge for at least 30 minutes to set.

Chilling Process

Chilling the balls is key. It makes them firm and easier to coat. You can chill them in the fridge for 30 minutes or in the freezer for 10-15 minutes.

Final Coating

Finally, coat the balls with your favorite topping. You can use melted chocolate, chopped nuts, or sprinkles. This recipe lets you get creative, making it perfect for any event.

By following these steps, you’ll make a delicious cheesecake ball. It’s creamy, sweet, and sure to delight everyone. It’s a must-try for any cheesecake fan.

Tips for Getting the Perfect Texture

When making no bake cheesecake balls, getting the right texture is key. To make sure they’re creamy and smooth, follow some important tips. Using the right cream cheese in your cheesecake ball recipe is crucial.

Here are some tips to help you get the perfect texture:

  • Use a high-quality cream cheese that is soft and creamy.
  • Don’t overmix the cheesecake mixture, as this can lead to a dense and tough texture.
  • Chill the cheesecake balls for the right amount of time to allow them to set properly.

By following these tips, you’ll make no bake cheesecake balls that are delicious and have the perfect texture. Try different cheesecake ball recipe variations to find your favorite.

With a bit of practice and patience, you’ll master making cheesecake ball recipe that will wow your friends and family. So, go ahead and try it out. Don’t be afraid to experiment with different flavors and textures to make your perfect no bake cheesecake balls.

Delicious Flavor Variations

There are endless possibilities with cheesecake balls. You can make many flavors with a basic recipe. Whether you want something classic or unique, there’s a recipe for you. You can use different flavor extracts like vanilla or almond.

Adding mix-ins like chocolate chips or nuts can also enhance the flavor. For example, a vanilla bean cheesecake ball is a timeless favorite. It combines creamy cheesecake with sweet vanilla bean.

For a fruity twist, try strawberry, raspberry, or lemon flavors. Add a few drops of fruit extract to your cheesecake ball mixture. Mix in dried fruit or fruit zest for extra flavor and texture. With so many options, you’re sure to find the perfect cheesecake ball recipe. So, why not try making different flavors today?

Classic Vanilla Bean

  • 1 teaspoon vanilla extract
  • 1/2 teaspoon vanilla bean seeds
  • 1 cup powdered sugar

Chocolate Lovers’ Dream

  • 1 cup melted chocolate
  • 1/2 cup chocolate shavings
  • 1 teaspoon cocoa powder

Fruit-Infused Options

  • 1/4 cup dried fruit
  • 1 tablespoon fruit extract
  • 1/4 cup fruit zest

Storage and Make-Ahead Tips

After making your mini cheesecake balls, it’s key to store them right. This keeps their texture and taste great. Store them in an airtight container in the fridge for up to 5 days. You can also freeze them for later.

To freeze, place the balls on a baking sheet lined with parchment paper. Put them in the freezer until solid. Then, move them to a freezer-safe bag or container.

When you’re ready to serve, thaw frozen balls in the fridge overnight or at room temperature for a few hours. For extra flavor, try coatings like melted chocolate or chopped nuts. You can also mix up flavors like vanilla or strawberry for unique cheesecake balls.

  • Keep cheesecake balls away from direct sunlight and heat sources.
  • Store them in a cool, dry place, like the refrigerator or freezer.
  • Use airtight containers to prevent moisture and other flavors from affecting the cheesecake balls.

By following these tips, you can enjoy your mini cheesecake balls for days. You’ll become a pro at making perfect cheesecake balls for any event.

Common Mistakes to Avoid

When making a cheesecake truffle recipe, it’s key to know common mistakes. These can mess up the texture and taste of your sweet cheesecake balls. To get your cheesecake balls just right, steer clear of temperature issues, texture problems, and coating challenges.

Getting the right texture is all about the temperature during chilling. If it’s too warm, your cheesecake will be soft and fragile. But if it’s too cold, it’ll be dense and hard. Keep an eye on the temperature to get a smooth and creamy cheesecake truffle recipe.

Temperature Issues

To dodge temperature problems, chill the mix at the correct temperature for the right time. This ensures your sweet cheesecake balls have a consistent texture.

Texture Problems

Texture issues can pop up if you mix too much or too little. Mix the ingredients just until they blend, then stop. This way, you’ll get a cheesecake truffle recipe that’s smooth and creamy.

Coating Challenges

Coating problems can happen if the cheesecake balls aren’t coated evenly or if the coating is too thick. Use a thin layer of coating and coat the balls evenly. This will give you a beautiful and tasty sweet cheesecake ball recipe.

Serving Suggestions and Presentation Ideas

Now that you’ve made your tasty cheesecake balls, it’s time to think about how to serve and present them. Serving cheesecake balls can be simple or fancy. You can place them on a platter or create a stunning dessert display.

Here are some ideas to make your cheesecake balls look amazing:

  • Serve them on a platter or tiered server to add visual appeal
  • Create a dessert bar with different toppings and sauces
  • Use them as a topping for ice cream or yogurt
  • Package them in cellophane bags or containers for a cute and easy gift

With these ideas, you can make a stunning dessert display. It will impress your friends and family. Remember, have fun and be creative with your cheesecake ball recipe and presentation!

By following these tips and using your easy cheesecake ball recipe, you can create a beautiful and delicious dessert. It’s sure to be a hit.

Serving IdeaPresentation Tip
PlatterArrange cheesecake balls in a pattern or shape
Dessert BarOffer a variety of toppings and sauces
GiftPackage in cellophane bags or containers

Nutritional Information and Portion Control

Enjoying no bake cheesecake balls means knowing about nutrition and portion sizes. Each cheesecake ball has about 100 to 200 calories, based on the ingredients. It’s important to understand these numbers to make good choices.

Here are some key nutritional facts to consider:

  • Average calorie count per no bake cheesecake ball: 120-150 calories
  • Fat content: 8-10g per serving
  • Carbohydrates: 15-20g per serving
  • Protein: 2-3g per serving

To make your cheesecake balls healthier, use low-fat cream cheese and less sugar. Try new flavors and ingredients for a tasty twist.

Being aware of nutrition and portion sizes lets you enjoy cheesecake balls guilt-free. They’re perfect for a sweet treat or a healthier dessert option.

NutrientPer Serving
Calories120-150
Fat8-10g
Carbohydrates15-20g
Protein2-3g

Expert Tips for Professional-Looking Results

To make your cheesecake balls stand out, remember to use top-notch ingredients. Fresh cream cheese and real vanilla extract will elevate the taste and texture. For a special touch, try a cheesecake truffle recipe for bite-sized treats that look and taste amazing.

How you present your cheesecake balls is crucial for a professional look. You can coat them with melted chocolate or chopped nuts for a decorative flair. For a sweet and elegant finish, coat them in powdered sugar. For more expert tips, check out this website.

Here are some extra tips for a pro look:

  • Try different flavors like strawberry or lemon for unique cheesecake balls.
  • Play with various coatings, such as melted chocolate or chopped nuts, for a decorative touch.
  • Use a cheesecake truffle recipe for bite-sized treats that are both tasty and visually appealing.

By using these expert tips and quality ingredients, you can make cheesecake balls that are not just delicious but also look stunning. With a bit of practice and patience, you’ll impress everyone with your professional-looking creations.

Cheesecake Ball RecipeIngredientsInstructions
Sweet Cheesecake Ball RecipeCream cheese, sugar, eggs, vanilla extractMix ingredients, shape into balls, chill, and coat
Cheesecake Truffle RecipeCream cheese, sugar, eggs, vanilla extract, melted chocolateMix ingredients, shape into balls, chill, and coat with melted chocolate

Conclusion: Creating Your Perfect Cheesecake Ball

You now have everything you need to make the perfect cheesecake ball. It will impress your family and friends. With the right ingredients and techniques, you can make delicious treats that look great and taste amazing.

Choose from classic vanilla, rich chocolate, or fruit-infused flavors. The options are endless. Make sure to control the temperature and texture for perfect results every time.

So, what are you waiting for? Start gathering your ingredients and get cooking. With this guide, you’ll soon be enjoying your homemade cheesecake balls. Get ready to create your own masterpiece!

FAQ

What makes cheesecake balls so special?

Cheesecake balls are a unique treat that combines creamy cheesecake with a crunchy bite. They’re special because of their creamy filling, crunchy outside, and the chance to add your favorite flavors.

What are the essential ingredients for the perfect cheesecake ball recipe?

For the best cheesecake balls, you need cream cheese, powdered sugar, vanilla extract, and graham cracker crumbs. You can also add chocolate chips, nuts, or fruit for different tastes.

What kitchen tools do I need to make cheesecake balls?

You’ll need a mixing bowl, a hand mixer or stand mixer, a baking sheet, and a small scoop or spoon to shape the balls.

How do I make the perfect cheesecake ball?

To make perfect cheesecake balls, mix the cream cheese and powdered sugar until smooth. Scoop out the mixture, roll it into balls, and chill them. Then, coat them in graham cracker crumbs, chocolate, or nuts.

How do I get the perfect texture for my cheesecake balls?

For the right texture, use full-fat cream cheese and chill the balls well. Chilling helps them keep their shape and become creamy and smooth.

What are some delicious flavor variations I can try?

Try vanilla bean, chocolate lovers’ dream, or fruit-infused options like strawberry or lemon. You can customize the flavors to your liking.

How should I store and make ahead my cheesecake balls?

Store them in the fridge in an airtight container for up to 5 days. Freeze them for up to 2 months. Thaw in the fridge overnight before serving.

What are some common mistakes to avoid when making cheesecake balls?

Avoid overheating the mixture, overmixing or undermixing, and not chilling the balls before coating. These mistakes can ruin the texture and appearance.

How should I serve and present my cheesecake balls?

Serve them on a platter, skewer them on toothpicks, or add them to a dessert display. Make them look appealing and inviting.

What is the nutritional information and portion control for cheesecake balls?

Cheesecake balls are high in calories and fat. Be mindful of portion sizes. Use low-fat cream cheese or make mini balls to reduce calories and fat.

What expert tips can I use to achieve professional-looking results?

Use high-quality ingredients, chill the balls well before coating, and get creative with toppings like chocolate drizzle, crushed nuts, or edible flowers.

Healthy Cheesecake – A Guilt-Free Treat

healthy cheesecake recipe​

Can you have cheesecake without feeling guilty? Now, with health-conscious eating on the rise, it’s possible. You can enjoy your favorite desserts, like a healthy cheesecake, without sacrificing taste or nutrition. A guilt-free cheesecake is real, and we’re here to share our secrets with you.

Whether you love making homemade cheesecake or want a healthier option, we’ve got you covered. We’re excited to help you enjoy a delicious and nutritious treat.

Key Takeaways

  • Indulge in a guilt-free cheesecake with our healthy cheesecake recipe
  • Discover the secret to a delicious and nutritious homemade cheesecake
  • Learn how to make a healthy cheesecake that’s perfect for any occasion
  • Get tips on essential ingredients for a healthy cheesecake recipe
  • Find out how to create a stunning and delicious cheesecake that’s sure to impress
  • Explore the world of guilt-free cheesecake and healthy dessert options

Why Choose a Healthy Cheesecake Alternative

Thinking of a delicious cheesecake is common when craving something sweet. But, traditional cheesecakes are high in calories and sugar. This makes them less ideal for those wanting to eat healthier. A low calorie cheesecake alternative is a guilt-free treat that’s just as tasty.

Creating a healthy cheesecake alternative is easy. Just make a few tweaks to the traditional recipe. Use modified ingredients and a clever easy cheesecake recipe. This way, you get a dessert that’s both tasty and nutritious. Choosing a healthy cheesecake alternative offers several benefits:

  • Reduced calorie count
  • Lower sugar content
  • Increased nutrient density

Moreover, a healthy cheesecake alternative lets you enjoy your cravings without guilt. With a bit of creativity and experimentation, you can make a delicious cheesecake that’s both healthy and fulfilling.

By making a few simple swaps and using a clever easy cheesecake recipe, you can enjoy a guilt-free low calorie cheesecake. It’s perfect for satisfying your sweet tooth. So, why not try it and see the benefits for yourself?

Traditional CheesecakeHealthy Cheesecake Alternative
High in calories and sugarLower in calories and sugar
Often made with refined ingredientsMade with modified, nutrient-dense ingredients
Can be detrimental to overall healthCan be a part of a healthy, balanced diet

Essential Ingredients for Your Healthy Cheesecake

To make a tasty and healthy healthy cheesecake recipe, choose the right ingredients. A homemade cheesecake lets you control what goes in. This way, you can make a lightened-up cheesecake for any event.

Here are the key ingredients you’ll need:

  • Graham cracker crumbs made from whole wheat or almond flour
  • Low-fat cream cheese and Greek yogurt for the filling
  • Fresh fruit like berries or citrus for flavor and nutrition
  • Natural sweeteners like honey or maple syrup to cut down on refined sugar
  • Large eggs and egg whites for moisture and structure

Using these ingredients, you can craft a healthy cheesecake recipe that’s both tasty and good for you. Pick top-quality ingredients and stick to a reliable homemade cheesecake recipe. This way, you can enjoy a lightened-up cheesecake that meets your dietary needs and satisfies your sweet tooth.

The Perfect Healthy Cheesecake Base

Making a delicious cheesecake begins with a solid base. For a no-bake cheesecake, the base is key to keeping the filling together. A great base can greatly improve the texture and taste of your cheesecake.

There are many options for the perfect base. Nut-based crusts are a favorite, offering a crunchy texture and a nutty taste. Some top choices include:

  • Almond crust: made with ground almonds and a touch of sugar
  • Walnut crust: made with ground walnuts and a hint of cinnamon
  • Pecan crust: made with ground pecans and a drizzle of maple syrup

Gluten-free bases are also great for those with dietary needs. These can be made with gluten-free flours like almond or coconut flour. With a bit of creativity, you can make a stunning no-bake cheesecake for any event.

Getting the base right is crucial for a perfect cheesecake. This means pressing the mixture into the pan, chilling it, and baking it lightly. By doing these steps, you’ll create a beautiful and tasty cheesecake that will wow your guests.

Base OptionIngredientsTaste and Texture
Nut-based crustGround nuts, sugar, spicesCrunchy, nutty, sweet
Gluten-free alternativeGluten-free flours, sugar, spicesLight, airy, slightly sweet

Creating the Perfect Creamy Filling

To make a delicious and healthy cheesecake, the filling is key. A healthy cheesecake recipe needs a creamy filling made with the right ingredients. Choose a low-fat, low-calorie cream cheese for your homemade cheesecake.

A skinny cheesecake filling uses cream cheese, Greek yogurt, and honey. These ingredients make the filling creamy and add sweetness and tanginess. Make sure to mix well to avoid a lumpy filling.

Here are some tips for a perfect creamy filling:

  • Use a high-quality cream cheese that is low in fat and calories
  • Combine cream cheese with Greek yogurt and honey for a creamy and smooth texture
  • Mix the ingredients properly to avoid lumps and overmixing
  • Add a touch of vanilla extract for extra flavor

Follow these tips to make a delicious and healthy cheesecake filling. Choose the right ingredients and mix them well for a creamy texture.

With practice and patience, you can make a stunning and delicious homemade cheesecake. Whether it’s a skinny cheesecake or a traditional one, the secret is using quality ingredients and mixing them right.

IngredientQuantityBenefits
Cream Cheese16 ozProvides a creamy texture and tangy flavor
Greek Yogurt1 cupAdds natural sweetness and a smooth texture
Honey1 tbspProvides natural sweetness and a touch of flavor

Step-by-Step Healthy Cheesecake Recipe

To make a tasty cheesecake, follow a simple recipe. You’ll need the right ingredients and tools. Start by preheating your oven to 350°F (180°C) and getting your ingredients ready.

Here’s a list of tools you’ll need:

  • Mixing bowl
  • Measuring cups
  • Electric mixer
  • Springform pan

Now, let’s get to mixing. In a big mixing bowl, mix your cream cheese, sugar, and eggs until smooth. Add vanilla extract and mix again. Pour the mix into your springform pan and smooth the top.

For baking, put your cheesecake in the oven at 350°F (180°C). Bake for 45-50 minutes. The edges should be set, and the center a bit jiggly. Let it cool completely before serving. These steps will help you make a delicious, lightened-up cheesecake that will wow your loved ones.

IngredientQuantity
Cream cheese16 oz
Sugar1 cup
Eggs4
Vanilla extract1 tsp

By following this easy cheesecake recipe, you can enjoy a delicious, guilt-free dessert. Use high-quality ingredients and avoid overmixing. With these tips, you’ll make a stunning, delicious cheesecake for any occasion.

Nutritional Information and Benefits

A healthy cheesecake recipe is packed with nutritional benefits. It’s a guilt-free dessert choice. Using wholesome ingredients, a homemade cheesecake satisfies your sweet tooth and nourishes your body.

Some key nutritional benefits of a healthy cheesecake include:

  • High protein content from ingredients like Greek yogurt and cottage cheese
  • Rich in fiber from whole grain crusts and fruit toppings
  • Lower calorie count compared to traditional cheesecakes

When making a healthy cheesecake, consider dietary needs. Use gluten-free ingredients or natural sweeteners instead of sugar. This way, you can make a delicious and nutritious dessert for everyone.

A well-made healthy cheesecake recipe is great for any meal plan. It balances nutrients and flavor. With the right ingredients and creativity, you can enjoy a guilt-free cheesecake that’s both tasty and healthy.

Storage and Serving Suggestions

After making your healthy cheesecake recipe, it’s time to think about storage and serving. Store it in an airtight container in the fridge for up to 5 days. For longer storage, freeze it for up to 2 months. When you’re ready, thaw it overnight in the fridge.

For a delicious cheesecake experience, consider these serving suggestions:

  • Slice your cheesecake into thin pieces for easier serving and eating.
  • Top your cheesecake with fresh fruit, like strawberries or blueberries, for extra flavor and nutrition.
  • Enjoy your cheesecake with a cup of coffee or tea for a cozy dessert moment.

For more ideas on enjoying your easy cheesecake recipe, check out cheesecake recipes online. You can also get creative with toppings and flavors.

Storage MethodShelf Life
RefrigeratorUp to 5 days
FreezerUp to 2 months

Troubleshooting Common Issues

When making a healthy cheesecake, you might run into some problems. These can happen whether you’re using a recipe or making it from scratch. We’ve gathered some common issues and how to fix them.

A healthy cheesecake can be tricky with texture and setting. If it’s too dense or not set right, it might be from overmixing or wrong baking times. For a skinny cheesecake, using the right ingredients and following the recipe is key.

  • Texture problems: Check your ingredient ratios and mixing times.
  • Setting issues: Ensure your cheesecake is baked for the correct amount of time and has cooled properly.
  • Flavor adjustments: Don’t be afraid to experiment with different flavor combinations to find the one that works best for you.

By following these tips and using a reliable healthy cheesecake recipe, you’ll make a delicious and stunning homemade cheesecake. It’s perfect for any occasion.

Conclusion: Embracing Healthier Dessert Choices

Making a healthy cheesecake is a great way to enjoy sweet treats without feeling guilty. By using good ingredients and making smart swaps, you can have a creamy cheesecake that’s also good for you. The guilt-free cheesecake recipe in this article is a tasty and healthy cheesecake option for any time.

If you want to eat well, manage a diet, or just try healthier desserts, this guilt-free cheesecake is a great pick. Choosing healthy cheesecake recipes lets you enjoy your favorite desserts while taking care of your health. So, why not try this delicious cheesecake and enjoy a dessert that’s both yummy and good for you?

FAQ

What makes this cheesecake a healthier option?

This cheesecake is healthier because it uses special ingredients. These ingredients cut down on calories and fat. So, it’s a treat you can feel less guilty about.

What are the essential ingredients in a healthy cheesecake?

A healthy cheesecake needs Greek yogurt, low-fat cream cheese, and sweeteners like honey or maple syrup. It also has a crust made from nuts or gluten-free options.

How do I create the perfect creamy filling?

For a creamy filling, mix the ingredients well. Make sure it’s smooth and without lumps. Blending and keeping the right temperature are crucial.

Can I freeze a healthy cheesecake?

Yes, you can freeze a healthy cheesecake. Just wrap it tightly and keep it in the freezer for 2-3 months.

What are some common issues I might encounter when making a healthy cheesecake?

Issues like texture problems, setting issues, and flavor changes can happen. Our troubleshooting guide can help solve these problems.

What are the health benefits of choosing a healthy cheesecake?

Choosing a healthy cheesecake means less calories and fat. It also includes good stuff like Greek yogurt and nuts.

How long does it take to prepare and bake a healthy cheesecake?

It takes about 30 minutes to get everything ready and mix the filling. Baking it takes 45-60 minutes.

Lumi Dessert Cafe: Indulge in Our Delectable Creations

lumi dessert cafe​

What makes a dessert cafe special? It’s the variety of sweet treats, the cozy atmosphere, and the exceptional service. At Lumi Dessert Cafe, we believe it’s all these things together that make the ultimate dessert experience. If you’re looking for a dessert cafe near you, Lumi Dessert Cafe is the place to go.

We aim to create a warm and inviting space for you to enjoy the best desserts. From classic cakes and pastries to innovative treats, we have it all. Our friendly staff will help you find the perfect treat, whether you’re in the mood for something traditional or adventurous.

Key Takeaways

  • Discover a wide variety of sweet treats at Lumi Dessert Cafe
  • Enjoy a cozy atmosphere and exceptional service
  • Find the best dessert cafe near me, Lumi Dessert Cafe
  • Indulge in classic cakes and pastries or innovative desserts
  • Experience the ultimate dessert haven at Lumi Dessert Cafe, the best dessert cafe

Welcome to Lumi Dessert Cafe: A Sweet Haven in [Location]

At Lumi Dessert Cafe, we’re all about being part of the community. We offer a wide range of tasty desserts for everyone. Our dessert cafe menu has classics and new creations, from cakes and pastries to ice cream and chocolate. This makes us a top choice for dessert cafe in [location].

If you’re watching your sugar intake, check out low-sugar dessert recipes. Our Lumi cafe desserts use only the freshest ingredients. This ensures every dessert is not just tasty but also a feast for the eyes.

Some of our standout desserts are:

  • Cakes: Moist and flavorful, available in various sizes and flavors.
  • Pastries: Flaky, buttery, and filled with sweet or savory ingredients.
  • Ice Cream: Creamy and rich, offered in a range of unique flavors.

Whether you’re a local or just passing through, we welcome you to Lumi Dessert Cafe. Come and try our dessert cafe menu. Let us add a touch of sweetness to your day with our Lumi cafe desserts. We aim to be your go-to dessert cafe in [location].

Our Signature Dessert Collection

At Lumi Dessert Cafe, our dessert collection is the heart of our cafe. We make our desserts with love, using fresh ingredients and traditional methods. Our visitors enjoy a variety of artisanal cakes, seasonal treats, and options for different diets.

Some of the highlights of our collection include:

  • Artisanal cakes made with high-quality ingredients and crafted with precision
  • Seasonal specialties that reflect the flavors and ingredients of each season
  • Dietary-friendly options, such as gluten-free, vegan, and sugar-free desserts

A review of Lumi Dessert Cafe wouldn’t be complete without talking about our commitment to quality. Whether you’re in the mood for something classic or something new, we have it all. Our wide range of options means you’ll find the perfect dessert to satisfy your sweet tooth.

At Lumi Dessert Cafe, we’re proud to offer a unique and delicious dessert experience. Come visit us today and see what our signature desserts have to offer.

Dessert TypeDescriptionPrice
Artisanal CakeMoist and delicious, made with high-quality ingredients$6.99
Seasonal SpecialtyReflects the flavors and ingredients of each season$7.99
Dietary-Friendly OptionGluten-free, vegan, or sugar-free dessert options$5.99

The Lumi Dessert Cafe Experience

At lumi dessert cafe, we aim to give you an amazing experience. We’re known as the top dessert cafe around. Our team is friendly and ready to help you pick the perfect treat. Our cozy spot feels like home.

Looking for a quick dessert or a special treat? Come see what makes us different. We’re the perfect spot if you’re searching for a dessert cafe near you. Our place has comfy sofas and cozy tables for a relaxing dessert time.

Here’s why we’re the best:

  • A wide variety of delicious desserts to choose from
  • A cozy and inviting atmosphere
  • Friendly and knowledgeable staff
  • Comfortable seating options

At lumi dessert cafe, we’re all about giving you a great time. We’re the top choice for a fantastic dessert cafe near you. Try our tasty treats and see why we’re the best in the area.

Crafting Perfect Moments: Our Dessert Philosophy

At Lumi Dessert Cafe, we see every dessert as a chance to make a perfect moment. Our menu is filled with unique desserts to remember. We’re a top dessert cafe in [location], using only the freshest ingredients.

Our dessert-making follows three main principles:

  • Premium Ingredients: We pick the best ingredients, often from local suppliers, for a delightful taste.
  • Artisanal Techniques: Our expert pastry chefs use old-school methods to highlight each ingredient’s flavor and texture.
  • Innovation in Every Bite: We’re always trying new flavors and ingredients to surprise and thrill our customers.

Looking for a classic treat or something new? Our menu has it all. As a top dessert cafe in [location], we aim to give you a memorable experience. Our commitment to fresh ingredients and innovation makes our desserts a must-try.

Beverage Menu: Perfect Pairings

At Lumi Dessert Cafe, we know every dessert needs the right drink. Our menu has many choices to match our tasty desserts. Our baristas are ready to help you pick the best drink for your dessert.

Our specials include unique pairings like coffee with chocolate cake or tea with a fruity tart. We also have juices and smoothies for a lighter choice. Our menu has something for everyone, whether you like classic or new flavors.

A review of Lumi Dessert Cafe praises our cozy vibe and friendly staff. Our drinks are made to make your visit better. Come see us and find the perfect drink for your dessert.

Some of our favorite drinks include:

  • Artisanal coffee blends
  • Specialty teas and infusions
  • Fresh juices and smoothies
  • Rich and creamy hot chocolates

At Lumi Dessert Cafe, we aim to give you the best experience. Our drinks are just part of what we offer. Visit us and see what else we have to offer.

Special Events and Catering Services

At lumi dessert cafe, we make every event special. Whether it’s a birthday party or a corporate event, we’re here for you. Our team provides top-notch service and tasty treats to make your event unforgettable.

We offer custom cake orders, private events, and corporate catering. Our custom cakes are perfect for birthdays, weddings, and more. We work with you to create a cake that matches your theme and style.

Custom Cake Orders

Our custom cakes are made with the finest ingredients and love. We have many flavors and designs to choose from. Our team will help you create a unique cake.

Private Events

Our private events team helps plan your perfect celebration. We offer venue rental, catering, and decoration. We’ll take care of all the details so you can enjoy your day.

Corporate Catering

Our corporate catering is great for impressing clients or employees. We offer delicious desserts and exceptional service. Whether it’s a meeting or party, we have the perfect treats.

At lumi dessert cafe, we aim to provide the best dessert experience. Whether you need a dessert cafe for an event or just a treat, we’re your go-to. Contact us today to learn more about our services.

ServiceDescription
Custom Cake OrdersUnique and delicious cakes for special occasions
Private EventsVenue rental, catering, and decoration for private celebrations
Corporate CateringDelicious desserts and exceptional service for business events

Location and Hours

Lumi Dessert Cafe is in the heart of [location]. It’s easy to find and enjoy our dessert cafe menu. We’re a top spot for anyone craving a sweet treat.

Choosing the perfect dessert can be tough. That’s why we have a variety of lumi cafe desserts. From classic to unique, we have something for everyone.

Finding Us

We’re in the heart of [location], close to public transport.

Operating Hours

We’re open every day, with longer hours on weekends and holidays.

Parking Information

We have many parking options to make your visit easy.

Looking for a quick treat or a special occasion? Come visit us today and try our delicious desserts!

Customer Rewards Program

At Lumi Dessert Cafe, we really appreciate our loyal customers. Our rewards program is a way to say thank you for their support. It offers special benefits and rewards to our regular visitors.

By joining, you get discounts, free desserts, and other perks. It makes your visit even more enjoyable. We’re known for our great rewards program, which is why many people love us.

As a member, you’ll hear about new menu items and special deals first. You’ll also earn points for every purchase. These points can be used for free treats and more. Our program is easy to use and offers real benefits, making us a top choice.

Some of the benefits of our customer rewards program include:

  • Exclusive discounts and promotions
  • Free desserts and drinks on special occasions
  • Early access to new menu items and limited-time offers
  • Earn points for every purchase and redeem for rewards

Joining our rewards program means you’re part of a community that loves desserts. You’ll enjoy our best offerings, from classics to new creations. So, why not sign up today and start earning rewards at Lumi Dessert Cafe?

Conclusion: Your Sweet Journey Awaits at Lumi Dessert Cafe

At Lumi Dessert Cafe, we aim to give every customer a top-notch experience. Our love for making delicious desserts shines in every bite. We use only the freshest, highest-quality ingredients.

Looking for a quick sweet treat or something special for a celebration? Come join us on a sweet adventure. We can’t wait to share it with you.

Our menu boasts artisanal cakes and seasonal treats, plus options for everyone. Our talented pastry chefs use new techniques to make desserts that look great and taste amazing.

For us, it’s not just about desserts. It’s about making unforgettable moments and memories. So, whether you live nearby or are just visiting, come see why we’re the top dessert cafe around. Your sweet journey is waiting!

FAQ

What kinds of desserts does Lumi Dessert Cafe offer?

Lumi Dessert Cafe has a wide variety of desserts. You can find artisanal cakes, pastries, and seasonal treats. We also have options for those with dietary restrictions. Our desserts are made with top-quality ingredients and crafted with care.

What is the atmosphere like at Lumi Dessert Cafe?

Our cafe is cozy and welcoming, making you feel at home. We have different seating options. You can choose from comfy sofas or cozy tables, perfect for enjoying your dessert.

Does Lumi Dessert Cafe offer any special events or catering services?

Yes, we offer special events and catering services. This includes custom cakes, private events, and corporate catering. Our team is ready to help plan your perfect event.

What kind of beverages does Lumi Dessert Cafe serve?

We serve a variety of beverages. You can enjoy artisanal coffee, tea, specialty drinks, and juices. Our baristas are here to help you find the perfect drink to go with your dessert.

Does Lumi Dessert Cafe have a customer rewards program?

Yes, we have a rewards program for our loyal customers. You can get discounts, free desserts, and special perks. It’s our way of saying thank you for choosing us.

Where is Lumi Dessert Cafe located and what are the operating hours?

Lumi Dessert Cafe is in the heart of [location]. We’re open every day, with longer hours on weekends and holidays. We also have parking options to make your visit easy.