>
Edit Content

Food That’s Made from the Heart
We’re all about turning simple ingredients into magical moments. From kitchen newbies to seasoned chefs, our recipes are designed to keep things fun and easy! Let’s cook, laugh, and eat together. 🥰

Contact Us

Pillsbury Chicken Pot Pie: Easy Comfort Food Recipe

pillsbury chicken pot pie

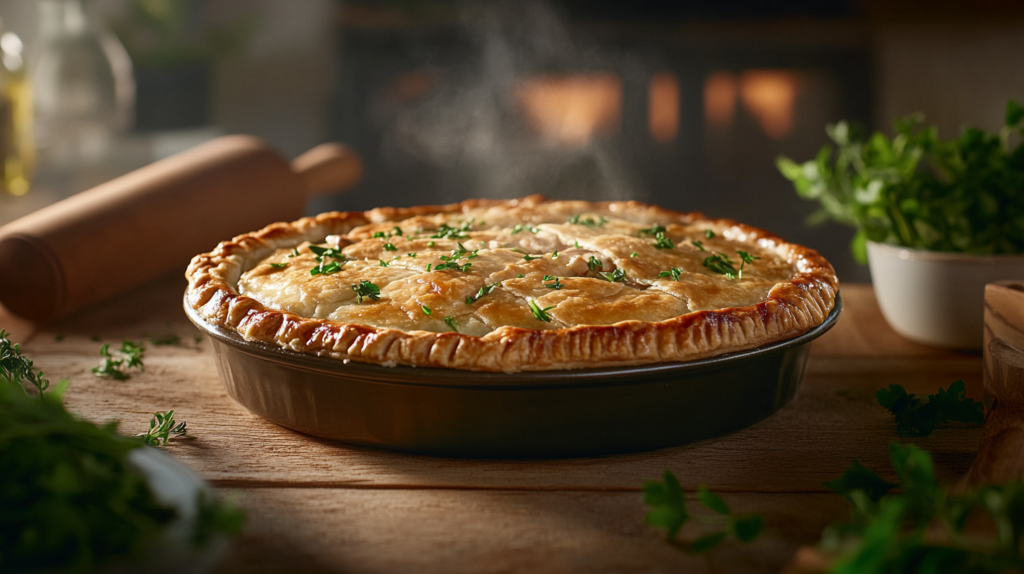
When you crave a warm, hearty meal, Pillsbury chicken pot pie is perfect. It’s a classic dish loved by many for generations. It combines tender chicken, fresh veggies, and creamy sauce in a flaky Pillsbury crust.

So, why is this simple pot pie so beloved? What makes it a staple on dinner tables everywhere?

Key Takeaways

  • Pillsbury chicken pot pie is a classic comfort food that has been a dinner table favorite for generations
  • The dish features a combination of tender chicken, fresh vegetables, and a creamy sauce, all baked in a flaky Pillsbury crust
  • Pillsbury chicken pot pie is easy to prepare, making it a great option for busy weeknight meals or weekend gatherings
  • The recipe can be customized with a variety of vegetables and seasonings to suit individual tastes
  • Pillsbury chicken pot pie is a versatile dish that can be enjoyed year-round as a satisfying and comforting meal

Is there something special about the Pillsbury crust or the way the ingredients come together? Let’s explore the secrets behind this beloved recipe.

What Makes Pillsbury Chicken Pot Pie a Classic Comfort Dish

Pillsbury’s chicken pot pie is a favorite in many American homes. It’s a nostalgic recipe and a hearty meal that many love. It’s also a convenient dinner for families who are always on the go.

The dish brings back happy memories for many. Its savory flavors and flaky crust remind people of their childhood. This makes it a comforting choice for those looking for a taste of home.

The mix of tender chicken, veggies, and a golden crust makes it a satisfying hearty meal. The filling and crust together offer a delightful mix of flavors and textures. This is why Pillsbury chicken pot pie is a true comfort food.

Another big plus is how easy it is to make. As a convenient dinner, it requires little prep. This makes it perfect for families who are short on time. It’s a homemade meal that’s quick to make.

“Pillsbury chicken pot pie is the ultimate comfort food – it’s like a hug in a pie crust.”

In summary, Pillsbury chicken pot pie is a classic comfort dish. It brings back memories, offers a hearty meal, and is easy to make. Its lasting popularity shows its timeless appeal in American cuisine.

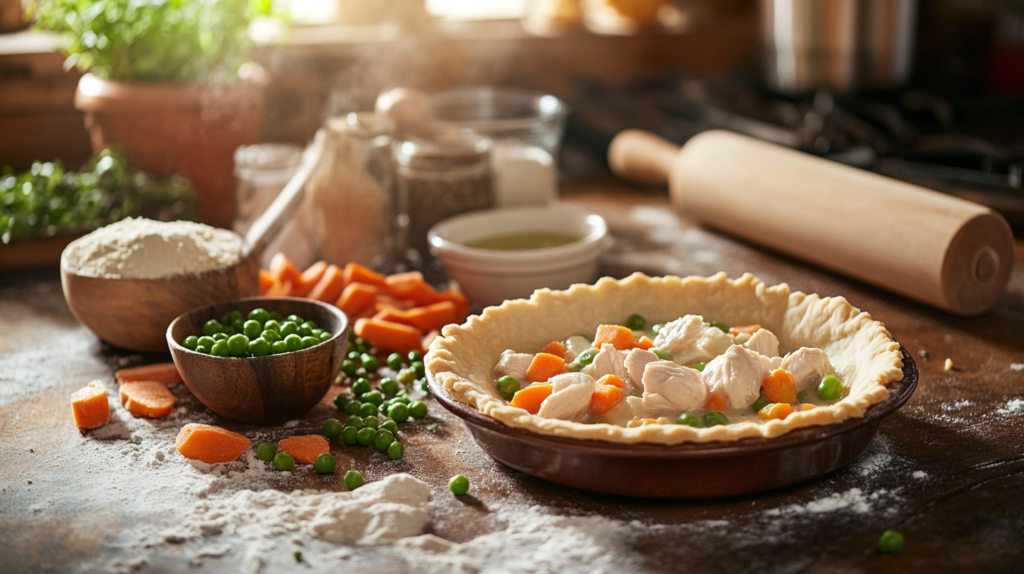
Essential Ingredients for Your Perfect Pot Pie

Making a tasty Pillsbury chicken pot pie begins with picking the right parts. You’ll need the flaky Pillsbury pie crust, a juicy rotisserie chicken, and colorful frozen vegetables. Each piece is crucial for a perfect comfort food dish.

Selecting the Right Pillsbury Crust

The Pillsbury pie crust is key to a great pot pie. You can choose from their classic refrigerated crust or the easy pre-rolled options. Make sure to handle the dough carefully to keep it tender and flaky.

Choosing Quality Chicken and Vegetables

For the filling, use tender rotisserie chicken or cooked chicken breasts. Add a mix of frozen vegetables like carrots, peas, and celery. This makes the pot pie both nourishing and colorful.

Kitchen Tools You’ll Need

  • A large baking dish or pie plate to assemble the pot pie
  • A sharp knife for dicing the vegetables and shredding the chicken
  • A rolling pin to ensure an even Pillsbury pie crust
  • A fork or crimping tool to create a decorative edge on the crust
  • An oven-safe baking dish or casserole for baking the pot pie

With these key ingredients and tools, you’re ready to make a comforting Pillsbury chicken pot pie. It’s sure to please the whole family.

Step-by-Step Instructions for Pillsbury Chicken Pot Pie

Making a tasty Pillsbury chicken pot pie is simple. Just follow a few easy steps to create a dish that’s both comforting and flavorful. Here’s how to make the perfect pot pie recipe.

  1. Preheat your oven to 400°F (200°C).
  2. Unroll the Pillsbury pie crust and press it into a 9-inch pie dish, ensuring it covers the bottom and sides.
  3. In a large skillet, sauté diced chicken breast until cooked through. Transfer the cooked chicken to a mixing bowl.
  4. Add frozen mixed vegetables (such as peas, carrots, and corn) to the skillet and cook until tender, about 5 minutes.
  5. In a separate saucepan, melt butter over medium heat. Whisk in all-purpose flour to create a roux. Gradually stir in chicken broth and milk, cooking until the mixture thickens, approximately 5-7 minutes.
  6. Pour the thickened sauce into the mixing bowl with the cooked chicken and vegetables. Stir to combine.
  7. Spoon the chicken and vegetable filling into the prepared pie crust.
  8. Unroll the second Pillsbury pie crust and place it over the filling. Crimp the edges of the top and bottom crusts together to seal.
  9. Cut a few slits in the top crust to allow steam to escape during baking.
  10. Bake the pot pie for 30-35 minutes, or until the crust is golden brown and the filling is bubbling.
  11. Allow the pot pie to cool for 10-15 minutes before serving.

By following these cooking instructions, you’ll have a delicious Pillsbury chicken pot pie ready to enjoy. The flaky crust and savory filling make for the ultimate baking time comfort food experience.

IngredientQuantity
Pillsbury Pie Crust2 sheets
Boneless, Skinless Chicken Breast2 cups, diced
Frozen Mixed Vegetables2 cups
Butter3 tbsp
All-Purpose Flour3 tbsp
Chicken Broth1 cup
Milk1 cup

Follow these step-by-step instructions, and you’ll have a delicious Pillsbury chicken pot pie that will warm your heart and satisfy your cravings for comforting homemade cuisine.

Tips for Creating the Perfect Flaky Crust

For a perfect Pillsbury Chicken Pot Pie, it’s all about temperature, sealing, and finishing touches. Follow these expert tips to make your homemade pot pie amazing.

Temperature Control Secrets

Start with the right oven temperature, around 400°F. This helps the crust rise and get a light texture. Don’t open the oven door too often to keep the temperature steady.

Proper Sealing Techniques

Sealing the crust is key to keeping flavors in and preventing leaks. Use a fork to crimp the edges tightly. Brushing the edges with an egg wash before baking will give you a golden-brown crust.

Achieving the Golden-Brown Finish

For a beautiful, flaky pie crust look, watch the crust closely in the last minutes of baking. If it’s getting too dark, cover it with foil. For more color, brush it with more egg wash.

Mastering these techniques will help you make a Pillsbury Chicken Pot Pie with a crust that’s both delicious and looks great.

Customizing Your Filling: Vegetables and Seasonings

Make your Pillsbury Chicken Pot Pie even better with a filling that you love. You can try different vegetable mixes and herbs and spices to enhance the overall flavor.

Think about your favorite veggies. Carrots, peas, potatoes, and onions are common, but you can use other fresh veggies too. Try adding diced zucchini, bell peppers, or mushrooms for a different taste and color.

There are many herbs and spices you can use. Rosemary, thyme, and sage are great with chicken and veggies. For something bolder, try cumin, paprika, or a little cayenne pepper. Fresh herbs like parsley or chives add a bright taste to the filling.

Vegetable CombinationsRecommended Herbs and Spices
Carrots, peas, potatoes Bell peppers, onions, mushrooms Broccoli, cauliflower, zucchiniRosemary, thyme, sage Garlic powder, onion powder, black pepper Cumin, paprika, cayenne pepper

The best part of this dish is making it your own. Try different vegetable mixes and herb and spice combinations. This way, you can create a Pillsbury Chicken Pot Pie that’s truly special to your family.

Time-Saving Preparation Hacks

Making a tasty Pillsbury chicken pot pie doesn’t have to take a lot of time. With some smart tricks, you can save time and enjoy this classic dish often. We’ll show you how to prep ahead, freeze, and store it perfectly.

Make-Ahead Options

One great way to make pot pie prep easier is to use make-ahead methods. You can put everything together and store it in the fridge or freezer until baking time. This way, you can start your meal prep early and have a delicious, freezer-friendly dinner ready when you need it.

Freezing and Storage Tips

  • Prepare the filling and Pillsbury crust as directed, then assemble the pot pie in a freezer-safe dish.
  • Tightly wrap the unbaked pot pie in plastic wrap or aluminum foil, then freeze for up to 3 months.
  • When ready to bake, remove the pot pie from the freezer and let it thaw in the refrigerator overnight.
  • Bake the pot pie according to the recipe instructions, adding a few extra minutes to the baking time to account for the frozen state.
  • Leftover baked pot pie can be stored in the refrigerator for up to 4 days and reheated in the oven or microwave.

By using these meal prep and leftovers tips, you can enjoy Pillsbury chicken pot pie any day of the week. It’s easy and delicious.

Common Mistakes to Avoid When Making Pot Pie

Making a Pillsbury chicken pot pie can be fun, but it has its challenges. As a seasoned copywriter, I’ve found a few common mistakes to watch out for. These can help you make a great pot pie.

A soggy crust is a common problem. It can come from too much filling, filling that leaks, or not sealing the edges well. To fix this, leave enough space for the filling. Also, crimp or fold the dough to seal it tightly.

Another issue is an undercooked filling. This might happen if the pie isn’t baked long enough or at the right temperature. To solve this, follow the recipe closely. Use a food thermometer to check the filling’s temperature.

  • Troubleshoot soggy crusts by properly sealing the edges and controlling the filling amount.
  • Prevent undercooked fillings by following baking time and temperature guidelines.
  • Utilize a food thermometer to ensure the filling reaches the proper internal temperature.

By avoiding these common troubleshooting mistakes, you can make a tasty Pillsbury chicken pot pie. It will be a hit with your family and friends.

Serving Suggestions and Side Dishes

Pillsbury Chicken Pot Pie is a delightful comfort food dish. It’s best served with side dishes and drinks that complement it. These tips will make your meal more enjoyable, whether it’s the main course or part of a bigger meal.

Perfect Pairing Ideas

To make your Pillsbury Chicken Pot Pie even better, try pairing it with a refreshing side salad or a light, crisp beverage. A simple green salad with tangy vinaigrette is a great contrast to the pot pie’s richness. For drinks, a chilled white wine or a refreshing iced tea pairs perfectly.

Presentation Tips

  • Slice the pot pie and arrange the pieces artfully on a serving plate or platter. Show off the flaky crust and creamy filling.
  • Garnish with fresh herbs like parsley or thyme for color and aroma.
  • Try different plating techniques for a beautiful presentation. Drizzle the plate with balsamic reduction or arrange the salad creatively.

By choosing the right side dishes and drinks, and presenting them well, you can turn Pillsbury Chicken Pot Pie into a memorable meal.

Nutritional Information and Portion Size

Understanding the nutritional facts and serving sizes of Pillsbury Chicken Pot Pie is key. It helps you make smart choices for your diet. Let’s explore the important details to enjoy this comfort food while staying healthy.

Calorie Count and Macronutrients

A single serving of Pillsbury Chicken Pot Pie has about 360 calories. Most of these calories come from carbs and fat. It has 24 grams of total fat, 38 grams of carbohydrates, and 16 grams of protein. Remember, these numbers can change based on the recipe or brand you pick.

Portion Sizes

The recommended serving size is one-sixth of the total pie, or about 240 grams. Eating more than this can lead to too many calories and nutrients. So, it’s important to watch your portion sizes.

Dietary Considerations

  • The pie has a lot of sodium, with 730 milligrams per serving. This is something to think about if you’re watching your sodium intake.
  • It’s not good for those on a gluten-free or dairy-free diet because it has wheat flour and dairy.
  • Vegetarians and vegans might want to look for recipes without chicken and use plant-based fillings instead.

Knowing the calorie count, serving size, and dietary considerations of Pillsbury Chicken Pot Pie helps you make better choices. Enjoy this comforting dish in moderation as part of a balanced diet.

Variations on the Classic Recipe

The traditional Pillsbury Chicken Pot Pie is a favorite comfort food. But, there are many variations for different tastes and needs. These changes make pot pie enjoyable for more people.

Gluten-Free Alternatives

For those on gluten-free diets, you can swap the Pillsbury crust. Use flours like rice, almond, or coconut to make a gluten-free crust. This way, you get a flaky, golden crust without gluten.

Vegetarian Options

Vegetarians can still enjoy pot pie. Just replace the chicken with a plant-based filling. Try a mix of sautéed veggies, tofu, or mushrooms. These vegetarian options are tasty and fit many dietary restrictions.

Dietary RestrictionRecommended Substitution
Gluten-FreeGluten-Free Flour Blend
VegetarianPlant-Based Filling (Sautéed Vegetables, Tofu, Mushrooms)

Exploring these variations lets you enjoy Pillsbury Chicken Pot Pie your way. With a bit of creativity and quality ingredients, you can make pot pie fit your lifestyle.

Conclusion

Pillsbury’s chicken pot pie is a favorite in many American homes. It’s a comforting and tasty homemade dinner that families love. This recipe combines Pillsbury’s flaky crust with tender chicken and fresh veggies.

In this article, we covered the key ingredients and how to make the perfect pie. You learned how to pick the right crust and get that golden-brown finish. Now, you can make delicious Pillsbury chicken pot pie at home.

Looking for a satisfying dinner or a dish to impress? Pillsbury’s chicken pot pie is an easy and delicious choice. Try it out and add your own twist to make it a family favorite for years.

FAQ

What makes Pillsbury Chicken Pot Pie a classic comfort dish?

Pillsbury Chicken Pot Pie is loved for its nostalgic feel. It combines tender chicken, veggies, and creamy sauce in a flaky crust. It’s a hearty meal that’s great for families.

What are the essential ingredients for making the perfect Pillsbury Chicken Pot Pie?

For a tasty Pillsbury Chicken Pot Pie, you need the right crust, quality chicken, and fresh or frozen veggies. Don’t forget a creamy sauce and essential tools like a baking dish and rolling pin.

What are some tips for creating a perfectly flaky crust?

To get a flaky crust, control the temperature and seal it well. Use an egg wash for a golden crust. Keep the oven at the right temperature, crimp the edges, and brush with egg wash.

How can I customize the pot pie filling with different vegetables and seasonings?

Customize the filling with various veggies like carrots, peas, and potatoes. Add herbs and spices like thyme and rosemary for extra flavor.

What are some time-saving preparation hacks for Pillsbury Chicken Pot Pie?

Save time by making the filling ahead and freezing it. Freeze the assembled pie for a quick dinner. Proper storage and reheating keep your leftovers fresh.

What are some common mistakes to avoid when making Pillsbury Chicken Pot Pie?

Avoid soggy crusts and undercooked fillings. Use the right oven temperature and seal the crust well. Monitor the baking closely for a perfect pie.

What are some serving suggestions and side dish pairings for Pillsbury Chicken Pot Pie?

Serve with a green salad, steamed veggies, or mashed potatoes. Add parsley or sauce for a nice touch.

What are the nutritional details and portion sizes for Pillsbury Chicken Pot Pie?

Pillsbury Chicken Pot Pie is a comforting meal. Be mindful of portion sizes and nutritional info. Check the label or consult a nutritionist for details.

Are there any variations on the classic Pillsbury Chicken Pot Pie recipe?

Yes, try gluten-free crusts or vegetarian versions. Use plant-based proteins and adjust the filling for a veggie option.

Delicious Apple Cinnamon Rice Cakes | Perfect Snacks

apple cinnamon rice cakes

Rice cakes are now a top pick for healthy snacks. But why are apple cinnamon rice cakes so loved? They offer a sweet and crispy mix that’s both tasty and good for you.

Rice cakes are a hit in health-focused homes. They’re low in calories and gluten-free, making them a great snack. But what makes apple cinnamon rice cakes so special?

Key Takeaways

  • Discover the perfect blend of sweet and crispy flavors in apple cinnamon rice cakes
  • Explore the rise of rice cakes as a popular and healthy snack option
  • Understand the nutritional benefits of this gluten-free treat
  • Learn how to make delicious apple cinnamon rice cakes at home
  • Uncover creative topping ideas to elevate your snacking experience

Introduction to Healthy Rice Cake Snacking

In the world of nutritious snacks, rice cakes are gaining popularity. They are a favorite among those who want to eat well without feeling guilty. As dietary trends change, more people are turning to rice cakes for weight management.

The Rise of Rice Cakes as Healthy Snacks

Rice cakes are known for being low in calories and versatile. They have simple ingredients and a light texture. This makes them perfect for a crunchy snack without the extra calories or unhealthy fats.

As more people look for nutritious snacks, the rice cake industry has grown. Now, you can find rice cakes in many flavors, from savory to sweet. This variety meets the needs of many different tastes.

Understanding the Appeal of Sweet Rice Cakes

Recently, sweet rice cakes like apple cinnamon have become very popular. They offer a tasty way to enjoy a snack that’s still good for you. These sweet rice cakes satisfy sweet cravings without ruining your weight management plans.

“Rice cakes have become a go-to snack for those seeking a healthier alternative to traditional sweets and chips.”

Apple Cinnamon Rice Cakes: A Perfect Blend of Flavors

Apple and cinnamon in rice cakes is a snack dream come true. This flavor profile mixes sweet and spicy perfectly. It’s made with natural ingredients for a great taste satisfaction.

The rice cake’s crisp texture is ideal for cinnamon and apple flavors. Apples add natural sweetness, while cinnamon brings a warm spice. Together, they make a snack that’s both tasty and healthy.

“The apple-cinnamon flavor in these rice cakes is simply divine. It’s like taking a bite of a freshly baked apple pie, but with a healthier twist.”

These rice cakes stand out because of their top-notch, natural ingredients. The apples are picked for their perfect balance of tart and sweet. The cinnamon is of the finest quality, adding a rich flavor to the snack.

Looking for a snack to boost your energy or a healthy option before working out? These flavor-packed apple cinnamon rice cakes are great. Their natural ingredients and taste satisfaction make them a guilt-free treat.

Nutritional Benefits of Rice Cakes with Apple and Cinnamon

Apple cinnamon rice cakes are a tasty and healthy snack. They satisfy your sweet tooth and give you important nutrients. These treats are good for your overall health.

Calorie Content and Dietary Fiber

Apple cinnamon rice cakes have few calories. A single rice cake has about 35-45 calories. They are perfect for low-calorie snacks. They also have dietary fiber, which helps you feel full and aids digestion.

Vitamins and Minerals

These rice cakes are full of essential nutrients. Apples in them give vitamins C, K, and potassium. Cinnamon adds antioxidants and may have health benefits.

Gluten-Free Benefits

Apple cinnamon rice cakes are great for those who can’t eat gluten. They are naturally gluten-free. This makes them safe for people with gluten sensitivities or celiac disease.

Apple cinnamon rice cakes are a nutritious snack. They are low-calorie, high in dietary fiber, and gluten-free. They are a healthy choice for anyone looking for a tasty snack.

Simple Ingredients for Wholesome Snacking

In the world of clean eating, people love natural flavors and ingredient transparency more than ever. Apple cinnamon rice cakes are a great choice for a healthy snack. They have a simple list of ingredients that fit well with the idea of mindful eating.

These rice cakes are made with whole grain brown rice and a bit of sweetness from real apples. Cinnamon adds a nice flavor and warmth. They are made without artificial stuff, showing the beauty of clean eating and ingredient transparency.

IngredientPurpose
Brown RiceWhole grain source of complex carbohydrates and dietary fiber
Apple PiecesNatural sweetener and source of vitamins and antioxidants
CinnamonWarming spice that adds depth of flavor and aroma
SaltEnhances the overall flavor profile

The makers of these rice cakes use simple, natural ingredients. This creates a snack that tastes good and is good for you. It’s a guilt-free treat for those who care about their health.

Making Apple Cinnamon Rice Cakes at Home

Making apple cinnamon rice cakes at home is a fun way to add a personal touch to your kitchen. With a few simple DIY recipes and some kitchen hacks, you can make these tasty treats yourself.

Required Kitchen Tools

To make these wholesome homemade snacks, you’ll need a few essential kitchen tools:

  • Mixing bowl
  • Baking sheet
  • Parchment paper
  • Measuring cups and spoons
  • Spatula

Step-by-Step Instructions

Follow these easy steps to create your own delicious apple cinnamon rice cakes:

  1. Preheat your oven to 375°F (190°C).
  2. In a mixing bowl, combine 2 cups of cooked brown rice, 1 grated apple, 1 teaspoon of ground cinnamon, 2 tablespoons of honey, and a pinch of salt.
  3. Mix the ingredients together until well combined.
  4. Line a baking sheet with parchment paper and scoop the rice cake mixture onto the sheet, forming small patties.
  5. Bake the rice cakes for 20-25 minutes, or until they’re golden brown and crispy.
  6. Allow the rice cakes to cool before serving or storing.

Storage Tips

To keep your homemade snacks fresh and flavorful, store the cooled rice cakes in an airtight container at room temperature for up to 3 days. For longer-term storage, you can freeze the rice cakes for up to 2 months.

Enjoy your homemade apple cinnamon rice cakes as a delightful and nutritious DIY recipe. It’s easy to add to your healthy snacking routine.

Creative Topping Ideas for Rice Cakes

Enjoying apple cinnamon rice cakes can be even better with the right toppings. Discover a wide range of snack variations, healthy toppings, and flavor combinations to make this treat even more special.

Try a classic mix with honey and cinnamon on your rice cakes. The cinnamon’s warmth matches the honey’s sweetness, creating a perfect flavor balance.

For a richer treat, add peanut butter or almond butter. Their nutty taste goes well with apple and cinnamon, making for a tasty and protein-rich snack.

  • Fresh berries like blueberries, raspberries, or strawberries add a fruity burst and color to your rice cakes.
  • Crumbled feta or goat cheese bring a tangy and savory contrast to the sweet apple-cinnamon mix.
  • Sliced avocado or chopped nuts like almonds or walnuts add a creamy and crunchy texture.

Maple syrup or unsweetened coconut flakes can add a unique twist. Their subtle sweetness and tropical flavors offer a new take on apple-cinnamon.

Rice cakes are incredibly versatile. By trying different toppings, you can make a snack that’s just right for you. It’s all about finding what you like and what fits your diet.

Best Times to Enjoy Apple Cinnamon Rice Cakes

Apple cinnamon rice cakes are not just tasty, but also super versatile for snacking. They’re great for a pre-workout energy boost or an afternoon pick-me-up. These treats help manage hunger and keep your energy up.

Pre-workout Energy Boost

Starting your workout with an apple cinnamon rice cake is a smart move. The rice cakes’ complex carbs give you steady energy. The apples’ natural sugars and cinnamon’s warmth add an extra kick to your workout. Plus, they’re easy to digest, perfect for a pre-workout snack.

Afternoon Snack Options

When the afternoon slump hits, an apple cinnamon rice cake can save the day. The fiber and complex carbs in these snacks keep you full and satisfied. They also curb unhealthy snacking cravings with their natural sweetness.

Adding apple cinnamon rice cakes to your snacking routine is a smart choice. They help manage hunger, boost energy, and support your health. Whether for fueling your workout or a quick, healthy snack, these snacks are a must-have.

Comparing Store-Bought vs. Homemade Options

Choosing between store-bought and homemade apple cinnamon rice cakes can be hard. Both have their own benefits. It depends on what you value most.

Product Comparison: Store-bought rice cakes are easy to find and grab. They come in different sizes. But, making your own rice cakes lets you control what goes into them.

Cost-Effectiveness

Cost can vary between the two. Store-bought might seem cheaper at first. But, making your own can save money in the long run.

Convenience

Store-bought rice cakes are great for busy people. They’re quick to prepare. Homemade rice cakes take more time but offer a personal touch.

FeatureStore-BoughtHomemade
ConvenienceHighModerate
Cost-EffectivenessModerateHigh
Ingredient ControlLowHigh
Flavor CustomizationLimitedExtensive

Choosing between store-bought and homemade rice cakes depends on your needs. Whether you want convenience, cost savings, or to customize your snack, both options have their perks.

Health-Conscious Snacking Tips and Alternatives

Adding apple cinnamon rice cakes to your balanced diet is a smart move. It helps you enjoy snacks without harming your health. Here are some tips and alternatives to make your snacking better.

Embrace Portion Control

Be careful with rice cakes and portion control. Eat only what you need to avoid too much. Try them with fresh fruits, veggies, or a bit of nut butter for a healthier snack.

Incorporate Variety

While apple cinnamon rice cakes are tasty, mix up your snacks. Try Greek yogurt, hummus with veggies, or mixed nuts. This keeps your diet interesting and your body happy.

SnackCalorie ContentNutritional Benefits
Apple Cinnamon Rice Cakes70-80 calories per cakeHigh in fiber, gluten-free, low in fat
Greek Yogurt with Berries150-200 caloriesProtein-rich, high in calcium, packed with antioxidants
Hummus with Carrot Sticks120-150 caloriesHigh in fiber, vitamins, and healthy fats
Mixed Nuts (1 oz)160-200 caloriesHigh in healthy fats, protein, and minerals

Healthy snacking means a balanced diet, portion control, and snack variety. Follow these tips to enjoy tasty, nutritious snacks that boost your health.

Conclusion

Apple cinnamon rice cakes are a tasty and healthy snack. They mix the goodness of rice with the sweet taste of apples and the warmth of cinnamon. They’re great for anyone looking for a healthy snack or practicing mindful eating.

These rice cakes are full of fiber, vitamins, and minerals. They’re a better choice than many other snacks. Enjoying them can make your snacking time both tasty and healthy. So, add them to your kitchen for a snack that’s both delicious and nutritious.

Starting a healthy lifestyle is a journey, and every small choice matters. Apple cinnamon rice cakes are a simple way to make your snacking better. Enjoy the taste, take care of your body, and start a healthier snacking path.

FAQ

What are the key health benefits of Apple Cinnamon Rice Cakes?

Apple Cinnamon Rice Cakes are a healthy snack. They are low in calories and high in fiber. They are also gluten-free, making them good for a balanced diet.

They give you important vitamins and minerals. These help keep you healthy overall.

How do the flavors of Apple and Cinnamon complement each other in these rice cakes?

The mix of apples and cinnamon is tasty. Apples add sweetness, while cinnamon adds a warm spice. Together, they make a treat that’s both tasty and guilt-free.

What are the simple and natural ingredients used in these rice cakes?

These rice cakes use simple, natural ingredients. They include brown rice, real apples, cinnamon, and a bit of honey. This makes them a clean, healthy snack option.

Can I make Apple Cinnamon Rice Cakes at home?

Yes, making Apple Cinnamon Rice Cakes at home is easy. You just need basic tools and a few simple steps. It’s a fun way to make a healthy snack for your family.

When are the best times to enjoy Apple Cinnamon Rice Cakes?

Apple Cinnamon Rice Cakes are great any time of day. They’re perfect for a pre-workout snack, giving you energy. They’re also great in the afternoon to keep hunger away.

How do homemade Apple Cinnamon Rice Cakes compare to store-bought options?

Homemade and store-bought rice cakes have their own perks. Homemade lets you control ingredients and flavor. Store-bought is convenient. Choose based on what you prefer and your schedule.

Creamy Lemon Chicken Parmesan Recipe Under 30 Minutes

Creamy Lemon Chicken Parmesan

Ever dreamed of a quick, tasty Italian dish that wows everyone? Look no further than the Creamy Lemon Chicken Parmesan recipe. It’s a mix of classic chicken parmesan with a zesty lemon cream sauce, ready in under 30 minutes. Ready to discover the secret to this easy and delicious weeknight meal?

Key Takeaways

  • Creamy Lemon Chicken Parmesan is a quick and delicious Italian dish that can be prepared in under 30 minutes.
  • The recipe features tender chicken cooked in a rich and creamy lemon parmesan sauce, providing a unique twist on traditional chicken parmesan.
  • The dish is perfect for busy weeknight dinners, allowing you to impress your family and friends with minimal effort.
  • The recipe uses simple, high-quality ingredients like chicken breasts, olive oil, garlic, heavy cream, lemon juice, and parmesan cheese.
  • This recipe offers a light and flavorful Italian meal option that is sure to become a new family favorite.

Why This Quick Creamy Lemon Chicken Parmesan Will Become Your Favorite

Meet the Creamy Lemon Chicken Parmesan, a dish that’s healthy and time-saving. It’s sure to become a hit with your family. This recipe combines rich, creamy flavors with zesty lemon, all in a quick and easy way.

Health Benefits of This Light Italian Dish

This healthy chicken recipe is packed with lean protein and a hint of lemon. It’s a nutritious choice for busy nights. The creamy sauce is made with simple, wholesome ingredients, so you can enjoy a tasty Italian meal without feeling guilty.

Perfect for Busy Weeknight Dinners

Finding time-saving meals that taste great can be tough. But, the Creamy Lemon Chicken Parmesan makes it easy. It’s ready in under 30 minutes and leaves little cleanup, making it ideal for those crazy weeknights.

“This Creamy Lemon Chicken Parmesan has become a staple in our household. It’s the perfect balance of indulgence and nutrition, and it’s so easy to make – a total game-changer for our busy family!”

– Sarah, Busy Mom

Essential Ingredients for the Perfect Creamy Sauce

To make the creamy lemon sauce for Chicken Parmesan, you need top-notch ingredients. Each part is important for the right taste.

Start with a lot of parmesan cheese. This cheese makes the sauce creamy and adds a rich flavor. It also pairs well with the lemon’s tanginess. Don’t forget to use fresh lemons for that zesty kick that makes the dish pop.

IngredientQuantityPurpose
Parmesan cheese, freshly grated1/2 cupAdds creaminess and depth of flavor
Lemon juice, freshly squeezed1/4 cupProvides the signature tangy, zesty notes
Heavy cream1 cupGives the sauce its rich, velvety texture
Garlic, minced2 clovesAdds aromatic complexity to the sauce
Fresh herbs (e.g., parsley, basil, thyme)1/4 cup, choppedEnhances the overall flavor profile

Adding heavy cream makes the sauce smooth and creamy. Then, minced garlic and chopped herbs like parsley or basil add depth and complexity.

With these key ingredients, you can make a creamy lemon sauce that will take your Chicken Parmesan to the next level.

Kitchen Tools and Equipment You’ll Need

To make the perfect creamy lemon chicken Parmesan, you’ll need some key tools. These kitchen essentials make cooking easier and prep faster.

Essential Kitchen Tools

  • A sharp chef’s knife for slicing and dicing ingredients
  • A sturdy cutting board to prep your vegetables and chicken
  • A large skillet or sauté pan for pan-frying the chicken
  • A whisk for blending the creamy sauce ingredients
  • A set of measuring cups and spoons for accurate ingredient measurements
  • A sieve or fine-mesh strainer for draining the cooked chicken

Optional Cooking Gadgets

These cooking gadgets can make cooking more fun and efficient:

  1. A meat tenderizer for pounding the chicken cutlets to an even thickness
  2. A citrus juicer for easily extracting fresh lemon juice
  3. A food processor or blender for quickly making the creamy sauce
  4. A digital kitchen scale for precisely measuring ingredients

With the right time-saving kitchen tools, you can make this dish in under 30 minutes. It’s great for busy weeknights.

Preparing Your Chicken Cutlets for Maximum Tenderness

Getting your chicken just right is key for a tasty Creamy Lemon Chicken Parmesan. To make sure your chicken cutlets are tender and cook evenly, here are some tips.

First, butterflying your chicken breasts makes a big difference. This means slicing the breasts in half horizontally, making two thin cutlets. It helps the chicken cook faster and soak up more flavor.

Then, think about pounding the chicken cutlets to make them even softer. Place the cutlets between plastic wrap or parchment paper. Use a meat mallet or rolling pin to pound them until they’re the same thickness. This breaks down the meat, making it tender and juicy.

  1. Butterfly the chicken breasts to create thin, even cutlets.
  2. Pound the chicken cutlets to further tenderize the meat.
  3. Season the chicken with a blend of salt, pepper, and any desired herbs or spices for maximum even cooking and flavor.

By using these simple steps, you’ll get the tender and tasty chicken needed for Creamy Lemon Chicken Parmesan.

“The key to tender, juicy chicken is all in the preparation. Butterflying and pounding the cutlets ensures even cooking and maximum flavor.”

Step-by-Step Guide to Creamy Lemon Chicken Parmesan

Making the perfect chicken parmesan recipe is simpler than you think. With the right cooking techniques and a homemade lemon cream sauce, you can make a tasty chicken parmesan in under 30 minutes. Let’s go through the steps.

Breading Technique Tips

To get a crispy and golden-brown coating, start with a good breading. Set up a station with three dishes: flour, eggs, and breadcrumbs mixed with Parmesan. Coat the chicken in flour, then eggs, and lastly the breadcrumb mix, pressing gently to stick.

Proper Pan-Frying Method

After breading, it’s time to fry the chicken. Heat a lot of olive oil in a big skillet over medium-high. Fry the chicken for 3-4 minutes on each side until it’s golden and crispy. Make sure not to overcrowd the pan to avoid steaming.

Sauce Creation Process

While frying the chicken, start making the lemon cream sauce. In a saucepan, melt butter and make a roux with flour. Then, add heavy cream and lemon juice, stirring until it thickens. Season with salt, pepper, and garlic powder for extra flavor.

By following these steps, you’ll make a delicious creamy lemon chicken parmesan that will wow everyone. Enjoy!

Secret Tips for the Perfect Crispy Coating

Getting a crispy, golden-brown coating on your crispy chicken is key to a memorable dish. It might seem easy, but a few breading secrets and texture tips can make your chicken Parmesan stand out.

The secret to a crunchy exterior is in the breading process. Make sure your chicken cutlets are dry before you coat them in flour, eggs, and breadcrumbs. This makes the breading stick well to the meat, keeping juices in and texture perfect.

  1. Start by seasoning the chicken with salt and pepper, then coat it in flour, making sure to cover every part.
  2. Next, dip the floured chicken in a beaten egg mixture, letting any extra drip off.
  3. Finally, coat the chicken in a mix of panko breadcrumbs and Parmesan cheese, pressing gently to help the breading stick.

The secret to a truly crispy chicken exterior is the oil temperature and cooking time. Heat your oil to 350°F to 375°F before adding the breaded chicken. This will make the breading sizzle and crisp up, giving a nice contrast to the juicy meat inside.

“The key to a perfect crispy coating is all in the details. From the proper breading technique to the precise oil temperature, every step is crucial for achieving that irresistible crunch.”

By using these breading secrets and texture tips, you’ll make the ultimate crispy chicken Parmesan. Your family and friends will love it.

Making the Signature Lemon Cream Sauce

Creating the perfect creamy lemon sauce is key to making Chicken Parmesan even better. By balancing flavors and getting the sauce just right, you’ll get a mix of tangy, rich, and savory tastes. Your taste buds will love it.

Achieving the Right Consistency

The secret to a smooth creamy sauce is in the technique. Start by simmering heavy cream until it thickens a bit. Then, whisk in freshly grated parmesan cheese. This makes a creamy base that coats the chicken well.

To improve the sauce consistency, add lemon juice slowly while whisking. The lemon’s acidity balances the cream and cheese, making a perfect mix.

Balancing Flavors

Getting the flavor balance right is key for a great lemon cream sauce. Begin by zesting a fresh lemon for a bright citrus smell. Then, add lemon juice slowly, tasting as you go, to find the right tanginess.

Feel free to adjust the parmesan, lemon, and seasonings until you get the flavor profile you want. Aim for a sauce that’s creamy but also bright and refreshing. Each ingredient should add to the flavor mix.

With a bit of practice and focus, you’ll make a creamy sauce that takes your Chicken Parmesan to the next level. Enjoy every bite and the mix of flavors that makes this dish so appealing.

Best Side Dishes to Serve With

Choosing the right side dishes can make your meal complete. To go with your creamy lemon chicken parmesan, try these pasta pairings, vegetable sides, and complementary flavors. They will make your meal even better.

Spaghetti or penne pasta is a great choice. The creamy lemon sauce goes well with the pasta’s heartiness. This mix of textures and tastes is perfect.

For something lighter, think about a vegetable side. Roasted Brussels sprouts, sautéed asparagus, or a green salad are all good options. They add a nice crunch and freshness to your meal.

Side DishComplementary Flavors
Garlic Parmesan Roasted BroccoliThe savory, nutty flavors of the broccoli and Parmesan cheese complement the creamy lemon sauce.
Lemon-Herb Roasted PotatoesThe bright lemon and fresh herbs echo the citrus notes in the chicken dish.
Spinach Salad with Balsamic VinaigretteThe tangy, slightly sweet vinaigrette offsets the richness of the chicken parmesan.

Remember, the goal is to pick sides that enhance the flavors and textures of your creamy lemon chicken parmesan. This way, you’ll have a meal that’s both harmonious and satisfying.

Storage and Reheating Instructions

Enjoying a delicious Creamy Lemon Chicken Parmesan doesn’t have to end when the last bite is gone. You can enjoy leftovers for days with the right storage and reheating. Let’s explore how to keep this Italian dish crispy and flavorful.

Maintaining Crispiness When Reheating

To keep your Creamy Lemon Chicken Parmesan crispy, use the oven. Preheat it to 400°F (200°C). Place the leftover chicken on a baking sheet. Reheat for 10-15 minutes, flipping once, until the breading is hot and crispy again. The microwave can make the coating soggy, so avoid it.

Freezing Guidelines

  • Allow the Creamy Lemon Chicken Parmesan to cool completely before freezing.
  • Wrap individual portions tightly in foil or plastic wrap, or place them in airtight containers.
  • Frozen leftovers can be stored for up to 3 months.
  • When ready to enjoy, thaw the chicken in the refrigerator overnight before reheating in the oven.

By following these simple leftovers storage and reheating tips, you can enjoy the flavors of your Creamy Lemon Chicken Parmesan for a long time. Meal prep has never been easier!

Common Mistakes to Avoid

Making the perfect creamy lemon chicken Parmesan might seem easy, but even pros can make mistakes. Knowing these common errors helps you fix them and get great results every time.

  1. Overcooked or dry chicken: Chicken breasts can get tough and dry if cooked too long. Use a meat thermometer to check if it’s at 165°F. Also, don’t overcrowd the pan while cooking.
  2. Lumpy or separated sauce: A smooth sauce is crucial for the creamy texture. Constantly whisk the sauce while it simmers to avoid lumps or separation.
  3. Soggy breading: Bad breading can make the chicken coating soggy. Use the breading technique tips in Section 6 for a crispy exterior.
  4. Imbalanced flavors: Getting the right mix of lemon, Parmesan, and cream is key. Taste the sauce and adjust the seasoning to get the flavor just right.

Avoiding these common mistakes and following the steps will help you make a delicious creamy lemon chicken Parmesan at home. With a bit of practice, it’ll become a favorite in your household.

Wine Pairing Suggestions

Pairing wine with creamy lemon chicken parmesan is exciting. You’ll want to try Italian wines that match its rich, tangy flavors. There are many options, from crisp whites to bold reds, that can make this meal even better.

For a light contrast, try a dry Pinot Grigio or a lively Sauvignon Blanc. These white wines are light and citrusy. They balance the creaminess and add a refreshing touch to the lemon flavors.

For a bolder pairing, Italian reds are great. A smooth Chianti Classico or a full-bodied Montepulciano d’Abruzzo can highlight the chicken’s savory taste. Their tannins and acidity also cut through the creamy sauce.

For a special treat, pair it with Prosecco, Italy’s famous sparkling wine. Its bubbles and fruity notes offer a delightful contrast to the dish’s richness.

“The right wine can transform a good meal into an extraordinary one.”

Choosing the right Italian wine is key. Look for one that complements the flavors and adds acidity. Try different wines to find the perfect match for your creamy lemon chicken parmesan.

Conclusion

This Creamy Lemon Chicken Parmesan recipe is a quick and tasty delight for weeknights. It’s filled with savory Italian flavors and a creamy sauce. It’s perfect for families who love a good meal that’s easy to make.

Looking for quick dinner ideas, Italian-inspired recipes, or family-friendly meals? This dish is your answer. It has crispy chicken, tangy lemon, and a rich sauce. It’s a hit with everyone in the family.

Give this recipe a try and add your own twist. You can use different herbs, spices, or even extra Parmesan cheese. This dish is great because you can make it your own. So, get ready to cook and enjoy this Creamy Lemon Chicken Parmesan – a winner for any weeknight!

FAQ

What makes this creamy lemon chicken parmesan dish so special?

This recipe adds a zesty lemon cream sauce to traditional chicken parmesan. It’s a tasty, quick Italian dish perfect for busy nights.

What are the health benefits of this chicken parmesan recipe?

It uses lean protein, fresh citrus, and less frying. This makes it a healthy, light Italian dish to enjoy without guilt.

What are the essential ingredients for the creamy lemon sauce?

The sauce needs high-quality parmesan cheese, fresh lemon juice and zest, heavy cream, and herbs like basil or parsley.

What kitchen tools and equipment are needed for this recipe?

You’ll need basic cooking tools like a skillet and tongs. A meat mallet or rolling pin helps tenderize the chicken. A zester or microplane is great for lemon zest.

How should the chicken cutlets be prepared for maximum tenderness?

Butterflying or pounding the chicken to an even thickness is key. Proper seasoning also ensures even cooking and tenderness.

What are the steps for breading and pan-frying the chicken?

First, dredge the chicken in flour, then in beaten eggs, and finally in breadcrumbs. Control the oil temperature and cooking time for a crispy crust.

What tips can ensure a perfectly crispy coating on the chicken?

Focus on the breading technique and use the right oil temperature. Cook until golden-brown for that crispy coating.

How do you achieve the right consistency and balance of flavors in the lemon cream sauce?

Slowly add the cream and adjust the lemon juice and zest. Simmer until it’s creamy and velvety for a balanced sauce.

What are some tasty side dish options to serve with the creamy lemon chicken parmesan?

Try pasta, roasted vegetables, or fresh salads. They all complement the creamy lemon chicken parmesan’s flavors.

How should the leftover creamy lemon chicken parmesan be stored and reheated?

Store the chicken and sauce separately to keep it crispy. Reheat the chicken in the oven. Freezing is also an option, with thawing guidelines.

What are some common mistakes to avoid when making this recipe?

Avoid overcrowding the pan and using low-quality ingredients. Proper seasoning is also crucial for a great dish.

What wine pairings would complement the flavors of the creamy lemon chicken parmesan?

White wines like Pinot Grigio or Sauvignon Blanc pair well. Light-bodied reds, such as Chianti or Montepulciano, also complement the dish’s flavors.

Easy Homemade Apple Streusel Pie | Classic Fall Dessert

Apple Streusel Pie

As the leaves turn and the air gets crisp, there’s nothing like a homemade apple streusel pie to welcome autumn. This classic dessert has tender, spiced apples in a flaky, buttery crust. It’s topped with a crumbly streusel topping. But what makes this fall treat so special?

Key Takeaways

  • Discover the rich history and cultural significance of the apple streusel pie
  • Learn the secrets to creating the perfect flaky pie crust and apple filling
  • Uncover the tricks to mastering the delectable streusel topping
  • Explore baking tips and techniques for a truly impressive homemade pie
  • Get storage and serving suggestions to enjoy this fall favorite all season long

The History and Charm of Apple Streusel Pie

The tasty apple streusel pie comes from German baking traditions. Streusel, a mix of butter, flour, and sugar, is a key part of German sweets. German immigrants brought this idea to the United States, making it a part of the American dessert tradition.

The apple pie has a rich history in America. Introduced in the 17th century, it became a symbol of national pride. Adding a streusel topping made of butter and cinnamon to the pie made it even more popular.

Origins of Streusel Topping

Streusel comes from the German word “to strew,” meaning a crumbly topping. This topping, made of butter, flour, and sugar, has been loved in Germany for ages. German immigrants brought this topping to the United States, where it became a favorite in American desserts.

Why This Dessert Became an American Classic

  • The mix of flaky crust, sweet apples, and crunchy streusel is a hit with Americans.
  • Apple streusel pie is great because you can try different spices and toppings, making it a favorite.
  • The apple pie origins and its link to American pride and family gatherings have made it a beloved American dessert tradition.

Essential Ingredients for the Perfect Pie

Making a delicious apple streusel pie begins with the right pie ingredients and baking essentials. The flaky crust, the tasty filling, and the crunchy topping all matter. Each part is key to the pie’s flavor and texture.

The heart of this dessert is quality apples. Choose a mix of tart and sweet apples, like Granny Smith and Honeycrisp. Butter is also crucial. It makes the crust flaky and the filling creamy.

Adding a bit of cinnamon and other spices can make the apple filling even better. Brown sugar, flour, and a little salt are needed for the streusel topping. They give the pie a crunchy texture.

IngredientPurpose
ApplesThe star of the show, providing the delicious filling
ButterAdds richness and flakiness to the crust and filling
CinnamonEnhances the warm, comforting flavor of the apples
Brown sugarSweetens the streusel topping and balances the tart apples
FlourProvides structure and thickens the filling
SaltBalances the sweetness and brings out the flavors

With these pie ingredients and baking essentials, you’re ready to make a homemade apple streusel pie. It will taste amazing and make your kitchen smell like fall.

Making the Ultimate Flaky Pie Crust

Making a flaky, buttery pie crust is key for a great dessert. The secret is in how you handle the ingredients. To get the perfect flaky pie crust, keep the butter and other ingredients cold.

Cold Butter Technique

Cold butter is essential for a flaky crust. Cube the butter and freeze it for at least 30 minutes before making the dough. This keeps the butter pieces separate, making the crust flaky when baked. Don’t overwork the dough, as it can make the crust tough.

Rolling and Shaping Tips

  • Roll the dough on a lightly floured surface, using gentle strokes from the center outward.
  • Lift and rotate the dough occasionally to prevent sticking and ensure an even thickness.
  • Carefully transfer the dough to the pie plate, gently pressing it into the corners and edges.
  • Trim the excess dough, leaving a 1-inch overhang, and crimp the edges for a decorative finish.

Pre-baking Guidelines

To get a perfectly baked pie crust, try blind baking the dough before adding the filling. Blind baking means baking the crust without filling to avoid a soggy bottom. Use parchment paper or foil, add pie weights or dried beans, and bake at 400°F (200°C) for 15-20 minutes. The edges should just start to turn golden.

“The secret to a flaky pie crust is in the handling of the dough. Keep everything cold, and don’t overwork the butter.”

Mastering pastry techniques for the crust will help you make the ultimate apple streusel pie. It will impress your family and friends.

Apple Selection and Preparation Guide

Choosing the right apples is key to a perfect apple streusel pie. The best apples are firm, sweet, and tart. They add a great texture to the filling. Granny Smith, Honeycrisp, and Braeburn are top picks for this dessert.

Granny Smith apples are popular for their tart taste and firm texture. They balance the pie’s sweetness well. Honeycrisp apples mix sweetness with crunch, making them a great choice. Braeburn apples have a complex flavor and keep their shape while baking.

Proper preparation of the apples is crucial for the pie’s texture. Peel, core, and slice them thinly. This ensures even cooking and a cohesive filling.

Slice the apples to about 1/4 to 1/2 inch thick. This thickness helps them soften and blend into the filling without becoming mushy. With the right apples and preparation, you’ll make a delicious homemade apple streusel pie.

Creating the Perfect Apple Streusel Pie Filling

Making the perfect apple pie filling is key to a great apple streusel pie. It’s all about finding the right mix of flavors and textures. Let’s look at what makes a memorable apple pie filling.

Spice Blend Measurements

The spice blend adds a warm, autumnal taste to the filling. You’ll need ground cinnamon, nutmeg, and allspice. For a 9-inch pie, use about 1 teaspoon of cinnamon, 1/4 teaspoon of nutmeg, and 1/8 teaspoon of allspice. Feel free to adjust these amounts to your liking.

Sweetness Balance Tips

The apples’ natural sweetness should be balanced by added sweeteners. You can mix white sugar and brown sugar, or even add honey or maple syrup. Start with 1/2 cup of white sugar and 1/4 cup of brown sugar. Then, adjust to your taste.

Thickening Methods

To get the right consistency, you need to thicken the filling. Cornstarch or all-purpose flour work well, starting with 2-3 tablespoons for a 9-inch pie. For a smoother filling, try instant tapioca or a bit of apple cider or lemon juice.

“The secret to a remarkable apple pie filling is in the balance of flavors and textures. With the right spice blend, sweetener options, and thickening techniques, you can create a filling that will have your guests raving.”

Mastering the Streusel Topping

Getting the perfect streusel topping is key to a great apple streusel pie. This topping adds a nice texture and flavor that goes well with the apples. Let’s explore how to make the best streusel topping recipe.

The base of a great streusel topping is flour, brown sugar, and butter. The right mix is 1 part flour, 1 part brown sugar, and 1/2 part cold, cubed butter. This mix makes a crunchy topping that turns golden brown when baked.

  1. In a bowl, mix 1 cup all-purpose flour, 1 cup brown sugar, and 1/2 cup cold, cubed unsalted butter.
  2. Use your fingers to mix until it looks like coarse crumbs. Be gentle to avoid overworking.
  3. For extra crunch, add 1/2 cup chopped walnuts or pecans, or 1/4 cup old-fashioned oats.

The secret to a perfect crumb topping is the right mix of ingredients. Brown sugar adds sweetness, flour gives structure, and butter holds it all together. This makes a streusel topping that elevates your apple pie to new levels.

IngredientAmount
All-purpose flour1 cup
Brown sugar1 cup
Cold, unsalted butter1/2 cup, cubed
Chopped walnuts or pecans (optional)1/2 cup
Old-fashioned oats (optional)1/4 cup

With this streusel topping recipe, you can make an amazing apple streusel pie. It will impress your family and friends. Get ready to bake and enjoy the fruits of your labor.

Baking Techniques and Temperature Tips

Baking the perfect Apple Streusel Pie needs focus and some key techniques. We’ll look at the best oven temperature and baking time. Also, we’ll talk about how to keep the crust safe and ensure your pie is cooked just right.

Crust Protection Methods

To stop the crust from getting too dark, try using a foil tent while baking. Make a loose tent by folding aluminum foil over the pie’s edges. This lets the filling cook evenly while keeping the crust safe.

Doneness Indicators

Figuring out when your Apple Streusel Pie is done can be hard. But, there are signs to look for. The crust should be golden, and the filling should bubble and thicken. Shake the pie gently to check if the center is set and not wet or jiggly.

For oven temperature and baking time, aim for 375°F (190°C). Bake for 45-55 minutes, or until the crust is golden and the filling bubbles. Watch the pie closely in the last 10-15 minutes to avoid over-browning.

By using these pie baking tips, you’ll make an Apple Streusel Pie that’s perfect for any classic fall dessert table.

Storage and Serving Suggestions

Keeping your apple streusel pie fresh is important. Cover it loosely with foil or plastic wrap and store at room temperature for up to 2 days. For longer storage, refrigerate it for up to 4 days.

To reheat leftover pie, preheat your oven to 325°F (165°C). Place the pie on a baking sheet. Warm it for 10-15 minutes until the crust is crisp and the filling is hot. This brings back the pie’s amazing aroma and taste.

Serving Apple Pie a la Mode

No apple pie is complete without vanilla ice cream. The ice cream’s coolness contrasts well with the warm, spiced apples and buttery crust. For extra indulgence, add whipped cream or caramel sauce on top.

The best serving temperature for apple streusel pie is warm, around 80-90°F (27-32°C). This temperature makes the flavors blend well and the texture perfect in every bite.

Storage MethodDuration
Room TemperatureUp to 2 days
RefrigeratedUp to 4 days

“The aroma of a freshly baked apple pie is one of the most inviting and comforting scents in the world.”

Conclusion

Our journey through homemade apple streusel pie has ended, but the joy remains. This classic fall dessert is a true delight for the senses. It has a flaky, buttery crust, a spiced apple filling, and a crunchy streusel topping.

Whether you’re a seasoned baker or new to the kitchen, we hope you feel empowered. Try different apple varieties and spice blends. Find the sweetness that you love. Homemade baking is about making it your own and sharing with loved ones.

So, get ready to bake your own apple streusel pie. It’s a great way to welcome fall baking and make memories with family and friends. Happy baking!

FAQ

What is the history and charm of Apple Streusel Pie?

The streusel topping comes from German baking. It combines a flaky crust, tender apples, and a crispy topping. This mix has made Apple Streusel Pie a beloved American classic.

It’s a symbol of cozy, homemade desserts. Its popularity grew as people loved its comforting taste.

What are the essential ingredients for the perfect Apple Streusel Pie?

For the crust, filling, and topping, you need fresh apples, butter, flour, sugar, and spices. Using top-quality ingredients is key for the best taste and texture.

How do I make a flaky pie crust?

To make a flaky crust, cut cold butter into flour. Roll and shape it right. Pre-baking the crust is also important for a flaky pie.

What are the best apples for Apple Streusel Pie?

Granny Smith, Honeycrisp, and Braeburn apples are great for baking. Make sure to peel, core, and slice them well for the pie filling.

How do I make the perfect apple pie filling?

For the perfect filling, balance spices, sweeteners, and thickeners. Try different spice mixes and adjust sweetness. Choose the right thickener for a flavorful filling.

How do I make the perfect streusel topping?

For a great streusel topping, mix flour, sugar, and butter well. You can add nuts or oats for extra texture and taste.

What are the best baking techniques for Apple Streusel Pie?

For the best results, use the right oven temperature and baking time. Protect the crust from burning. Check for doneness to know when it’s ready.

How should I store and serve Apple Streusel Pie?

Keep the pie at room temperature for 2 days or in the fridge for 4 days. Reheat before serving. Serve warm, with vanilla ice cream or whipped cream for a treat.

Easy Banana Bread Recipe with 2 Bananas

banana bred

Have you ever wondered how to create a delightfully moist and flavorful homemade banana bread using just 2 bananas? This quick and easy recipe is the answer! Discover the secret to whipping up a fluffy, irresistible loaf that will have your family and friends raving. Get ready to fill your kitchen with the heavenly aroma of freshly baked homemade banana bread.

Key Takeaways

  • This quick banana bread recipe requires just 2 medium ripe bananas
  • The moist banana bread has a light texture and big banana flavor
  • It’s a relatively low-fat and low-sugar option that keeps well for several days
  • The recipe can be easily frozen for up to 2 months
  • The preparation time is just 10 minutes, making it a hassle-free baking experience

Why This 2-Banana Bread Recipe Works

This easy banana bread recipe is perfect for when you have just a couple of ripe bananas on hand. While a typical banana bread calls for 3-4 large bananas, this recipe is specially designed to deliver moist and flavorful results with only 2 very ripe bananas.

Perfect for Limited Ingredients

By substituting some of the missing banana moisture with milk, this recipe ensures the bread doesn’t turn out dry or dense. The addition of just the right amount of brown sugar also helps compensate for the lower banana content, resulting in a consistently moist and tender crumb.

Quick Preparation Time

One of the best things about this quick baking banana bread is how quickly it comes together. The entire preparation and cleanup process takes around 10 minutes, excluding the baking time. This makes it an ideal choice for busy weekdays or when you need a last-minute baked treat.

Consistently Moist Results

Unlike mini-sized banana breads that can often turn out too dense or crusty, this recipe yields a normal-sized loaf with the perfect balance of moisture and texture. The use of melted butter, along with the precise measurement of dry and wet ingredients, ensures moist banana bread every time.

“This 2-banana bread recipe is a lifesaver when you have limited ingredients on hand but still crave that delicious, homemade banana bread flavor.”

Essential Ingredients for Perfect Banana Bread

Crafting the ultimate banana bread requires a careful selection of key ingredients. At the heart of this delectable treat are ripe bananas, the star of the show. You’ll need about 3 medium bananas, or roughly 1 1/2 cups of mashed banana goodness. Pair these with essential baking essentials like all-purpose flour, baking soda, baking powder, and salt to create the perfect canvas for your banana bread.

To add richness and moisture, you’ll want to incorporate melted butter, room temperature eggs, and a touch of vanilla extract. The sugar content is flexible, allowing you to adjust the sweetness level to your preference, using a combination of light brown sugar and white granulated sugar for a delightful flavor profile.

For an extra boost of flavor, consider adding a sprinkle of ground cinnamon or a handful of toasted, chopped walnuts. These optional ingredients can elevate your banana bread to new heights of deliciousness.

With the right balance of banana bread ingredients, you’ll be well on your way to baking a moist, flavorful loaf that will have your family and friends reaching for seconds.

Remember, the key to a perfect banana bread is using ripe, flavorful bananas and ensuring all your ingredients are at room temperature for optimal blending and rising. Follow this essential ingredient list, and you’re well on your way to baking a banana bread that will have everyone raving.

Step-by-Step Banana Bread Recipe with 2 Bananas

Crafting the perfect banana bread doesn’t have to be a daunting task, especially when you have the right method. This easy-to-follow recipe using just 2 bananas will guide you through the process, ensuring moist and flavorful results every time.

Preparing Your Bananas

Begin by preheating your oven to 350°F (175°C). The key to this recipe is using 2 very ripe bananas, which will provide the necessary moisture and natural sweetness. Mash the bananas thoroughly using a fork or potato masher until they reach a smooth, lump-free consistency.

Mixing the Wet Ingredients

In a large mixing bowl, combine the mashed bananas with 8 tablespoons (115g) of melted and cooled butter. Whisk in 3/4 cup (150g) of light brown sugar, 2 large eggs at room temperature, and 2 teaspoons of vanilla extract. Blend these wet ingredients until well-incorporated.

Combining Dry Ingredients

In a separate bowl, whisk together 1 1/2 cups (195g) of all-purpose flour, 1 teaspoon of baking soda, 1/2 teaspoon of baking powder, and 1/2 teaspoon of salt. Gradually add the dry ingredients to the wet mixture, gently folding until just combined, being careful not to overmix.

Pour the banana bread batter into a greased and floured 8×4-inch loaf pan. Bake for 55 to 65 minutes, or until a toothpick inserted into the center comes out clean. Allow the banana bread to cool in the pan for 10 minutes before transferring it to a wire rack to cool completely.

With this straightforward banana bread method, you’ll have a moist and flavorful loaf in no time, despite using just 2 bananas. The combination of baking steps and mixing ingredients ensures a delightful result that’s sure to satisfy your cravings.

Tips for Making Moist Banana Bread

Baking the perfect moist banana bread can be an art, but with a few simple tips, you can achieve consistently delightful results. The key lies in selecting the right ingredients and techniques to ensure your banana bread is soft, tender, and bursting with flavor.

First and foremost, use very ripe bananas for maximum moisture and sweetness. The riper the bananas, the more natural sugars they’ll contribute, resulting in a moist and flavorful bread. Don’t be afraid to use bananas with plenty of brown speckles or even a few soft spots – they’ll provide the best texture and taste.

Secondly, be mindful of your mixing technique. Overmixing the batter can lead to a tough, dense crumb, so gently fold the ingredients together until just combined. The addition of milk or yogurt can also help maintain moisture by providing a tender, moist crumb.

  • Avoid overbaking by checking the bread early and using the toothpick test for doneness. A toothpick inserted into the center should come out clean when the bread is ready.
  • Consider substituting some of the butter with mashed ripe bananas or unsweetened applesauce to reduce fat and calories while still preserving moisture.
  • Experiment with different flours, such as whole wheat or gluten-free blends, to add additional nutrients and texture without compromising the moist, tender crumb.

By following these simple tips, you’ll be well on your way to baking the most delectable, moist banana bread that’s sure to impress family and friends. Enjoy the comforting aroma and satisfying texture of this homemade treat.

“The secret to moist banana bread is in the ripeness of the bananas and the gentle handling of the batter.”

Baking Temperature and Timing Guide

Achieving the perfect texture and doneness for your banana bread is crucial. Here’s a comprehensive guide to help you nail the baking temperature and timing for delightfully moist and flavorful results.

Proper Pan Selection

The type of baking pan you choose can significantly impact the outcome of your banana bread. For best results, opt for an 8×4-inch loaf pan. This pan size will ensure your banana bread bakes evenly and maintains a moist, tender crumb.

Testing for Doneness

To check if your banana bread is fully baked, insert a toothpick or skewer into the center of the loaf. If it comes out clean, with no wet batter clinging to it, your banana bread is ready. Keep in mind that the toothpick may have a few moist crumbs attached, which is perfectly normal.

Cooling Process

Once your banana bread has finished baking, it’s essential to allow it to cool properly. Leave the bread in the pan for 10 minutes before transferring it to a wire rack. This cooling process helps the bread finish setting and prevents it from becoming overly dense or gummy.

Pan SizeBaking TimeOven Temperature
8×4-inch loaf pan60-65 minutes325°F
8.5×4.5-inch loaf pan47-57 minutes325°F
9×5-inch loaf pan45-55 minutes325°F

Remember, the baking time may vary slightly depending on your oven and the doneness of your bananas. Always use the toothpick test to ensure your banana bread is perfectly baked.

By following these guidelines, you’ll be able to create a beautifully baked and perfectly cooled banana bread every time.

Recipe Variations and Add-ins

Elevating the classic banana bread recipe is a breeze with a variety of add-ins and customizations. From chocolate chips to chopped nuts, these simple variations can transform your banana bread into a truly personalized treat.

Start by incorporating 1 cup of your favorite mix-ins, such as semisweet chocolate chips, toasted walnuts, or plump raisins. For a richer flavor, try swapping the granulated sugar with brown sugar. You can also experiment with other tasty additions like pineapple tidbits, peanut butter chips, or a blend of cranberries and pecans.

If you’re feeling adventurous, consider baking banana bread muffins instead of a traditional loaf. This versatile recipe also lends itself well to a chocolate-banana version, where you can fold in cocoa powder or melted chocolate for a decadent twist.

VariationIngredientsResult
Dairy-FreeSubstitute butter with 1 cup neutral oilMoist, dairy-free loaf
Gluten-FreeUse King Arthur’s measure-for-measure GF flourSlightly denser loaf with less rise
Deep Rich FlavorSwap sugar with brown sugar, add bourbon or whiskeyEnhanced depth of flavor
Winter VibeUse dark brown sugar, add cinnamon, top with cinnamon sugarCozy, seasonal twist
Multi-GrainReplace 1 cup all-purpose flour with whole wheat flour, add flax seedsHeartier, more nutritious loaf
Vegan/EgglessSubstitute butter with oil, eggs with a mixture of applesauce, flax seed, and waterMoist, eggless loaf with less rise

With so many banana bread variations and add-ins to choose from, the possibilities for customizing your banana bread are endless. Experiment and find the perfect combination to satisfy your cravings and personal preferences.

Storage Tips and Shelf Life

Properly stored, your delicious homemade banana bread can maintain its freshness and flavor for several days. When kept at room temperature, banana bread typically lasts 2 to 3 days before it starts to dry out or stale. To extend its shelf life, you can refrigerate the bread for up to a week.

Room Temperature Storage

For the best texture and taste, store your banana bread at room temperature. Make sure it has cooled completely before wrapping it tightly in plastic or placing it in an airtight container. This will help retain the bread’s moisture and prevent it from drying out. Homemade banana bread can stay fresh on the counter for 2 to 3 days when stored properly.

Freezing Instructions

If you want to enjoy your banana bread for longer, freezing is the way to go. Wrap the cooled loaf tightly in plastic wrap or aluminum foil, then place it in a freezer-safe bag or airtight container. Frozen banana bread can last up to 3 months in the freezer. When ready to serve, thaw the bread at room temperature, which takes about 1-2 hours for a few slices or 3-4 hours for a whole loaf.

Slicing the banana bread before freezing can make it easier to thaw and serve individual portions. You can also toast frozen slices directly in the toaster for a quick and convenient snack.

No matter how you choose to store your banana bread, be sure to keep an eye out for signs of spoilage, such as mold, off-flavors, or a sour smell. If the bread shows any of these signs, it’s best to discard it to avoid any food safety concerns.

Common Baking Mistakes to Avoid

Baking banana bread may seem like a straightforward task, but even the slightest misstep can derail the process and lead to disappointing results. As an experienced copywriting journalist, I’m here to share some common baking mistakes you should steer clear of to achieve the perfect, moist, and flavorful banana bread every time.

  1. Using Underripe Bananas: Overripe bananas (spotted to black) provide more moisture, sweetness, and flavor to your banana bread. Avoid using underripe, bright-yellow bananas as they can result in a dry, flavorless loaf.
  2. Overmixing the Batter: Excessive mixing can develop too much gluten in the batter, leading to a tough, chewy texture instead of the desired soft and delicate crumb. Be gentle when combining the wet and dry ingredients.
  3. Incorrect Oven Temperature: Ensuring the oven is preheated to the right temperature is crucial for even baking. A temperature that’s too low can result in an undercooked, gummy center, while too high can cause the exterior to brown too quickly before the interior is done.
  4. Removing the Bread Too Soon: Resist the temptation to take the banana bread out of the pan right after baking. Allowing it to cool completely on a wire rack will prevent the bottom from becoming soggy.

To avoid these common banana bread troubleshooting issues and achieve the perfect baking errors free loaf, make sure your ingredients are at room temperature, don’t substitute baking soda for baking powder, and keep the oven door closed during baking to maintain the temperature. With these tips in mind, you’ll be well on your way to perfect banana bread every time.

“The key to a moist and flavorful banana bread is not just in the recipe, but in avoiding common baking mistakes that can ruin the final product.”

Nutritional Information and Benefits

While the aroma and taste of freshly baked banana bread can be irresistible, it’s important to consider the nutritional profile of this delectable treat. A typical 3.5-ounce (100-gram) slice of store-bought banana bread contains approximately 421 calories, 15.8 grams of fat, 68.4 grams of carbohydrates, and 5.3 grams of protein.

However, this recipe for 2-Banana Bread aims to be a healthier alternative. By using only two ripe bananas, the calorie and carbohydrate content is reduced compared to traditional recipes. Additionally, the use of whole wheat pastry flour, almond flour, and healthier fats like olive oil can enhance the nutritional value of this banana bread.

Nutritional InformationPer Slice (4 oz/115g)
Calories254
Carbohydrates38g
Protein4g
Fat10g
Fiber3g
Potassium320mg (8% DV)
Vitamin B60.4mg (14% DV)

Bananas, the star ingredient in this recipe, are a rich source of potassium and vitamin B6, providing 8% and 14% of the Daily Value (DV) respectively in a 4-ounce (115-gram) serving. Additionally, this recipe is relatively low in added sugar compared to many traditional banana bread recipes, making it a healthier choice.

To further enhance the nutritional profile, this recipe can be made with whole wheat flour or by reducing the sugar content. With the right ingredients and modifications, banana bread can be a delicious and nutritious treat that provides various health benefits.

Conclusion

This 2-banana bread recipe offers a quick and easy solution for using up those ripe bananas on your counter. With its moist texture, rich banana flavor, and versatile nature, it’s the perfect homemade quick bread for breakfast, snacks, or dessert. The simplicity of the recipe and consistent results make it suitable for bakers of all skill levels, from novice to experienced. Whether you enjoy it as-is or with your favorite add-ins, this easy banana bread is sure to become a new staple in your baking repertoire.

The 2-banana variation provides a great alternative to traditional 3-banana recipes, allowing you to utilize fewer ingredients while still achieving the same delightful outcome. With its balanced sweetness, the right amount of cinnamon, and the option to incorporate yogurt or sour cream, this recipe delivers a moist and flavorful homemade quick bread that’s perfect for any occasion.

So, whether you’re looking for an easy way to use up ripe bananas or simply craving a comforting and satisfying homemade treat, this 2-banana bread recipe is the answer. Give it a try and enjoy the delicious results!

FAQ

What makes this 2-banana bread recipe special?

This recipe uses only 2 bananas and regular pantry items to create a flavorful, moist banana bread. It’s quick to prepare, filling your house with wonderful baking smells. The bread has a light texture and color but is big on banana flavor. It’s relatively low in fat and sugar, keeps well for several days, and can be frozen for later.

Why is this recipe ideal for when you have only 2 ripe bananas?

This recipe replaces the missing banana with milk, adding necessary moisture without overwhelming the banana taste. The recipe takes about 10 minutes to prepare and clean up, excluding baking time. It produces a normal-sized loaf rather than a mini-sized one, avoiding issues with too much crust or density.

What are the key ingredients in this banana bread recipe?

Key ingredients include 2 very ripe bananas (about 1 cup mashed), butter, white sugar, eggs, all-purpose flour, baking powder, baking soda, and salt. Room temperature ingredients work best. The recipe is flexible with sugar amounts, allowing for adjustments based on sweetness preference. Milk is used to compensate for the reduced number of bananas.

How do you prepare the banana bread batter?

Start by preheating the oven to 350°F (175°C). Mash the bananas and mix with melted butter. Add sugar, beaten eggs, and vanilla extract. In a separate bowl, whisk together flour, baking soda, baking powder, and salt. Gradually combine wet and dry ingredients. Pour the batter into a prepared 8×4-inch loaf pan and bake for 55-65 minutes.

What tips can help ensure a moist banana bread?

To ensure moist banana bread, use very ripe bananas for maximum flavor and moisture. Don’t overmix the batter as this can lead to tough bread. The addition of milk or yogurt helps maintain moisture. Avoid overbaking by checking the bread early and using the toothpick test for doneness.

What are the recommended baking time and temperature?

Bake at 325°F for 60-65 minutes in an 8×4-inch pan. Adjust time for different pan sizes: 47-57 minutes for 8.5×4.5-inch, 45-55 minutes for 9×5-inch. Test doneness with a toothpick or skewer. Cool in the pan for 10 minutes before transferring to a wire rack for complete cooling, which may take 1-2 hours.

Can I add any extra ingredients to the banana bread?

Enhance the recipe by adding 1 cup of chocolate chips, chopped nuts, or raisins. Try using brown sugar for a richer flavor. Some variations include adding pineapple tidbits, peanut butter chips, or a combination of cranberries and pecans. You can also make muffins instead of a loaf or create a chocolate banana bread version.

How long does banana bread last, and how can I store it?

Properly wrapped, banana bread keeps at room temperature for 4 days. For longer storage, refrigerate for up to 5 days or freeze. When freezing, wrap the bread tightly in plastic wrap and place in a freezer bag. It can be frozen for up to 2 months. Thaw at room temperature before serving.

What are some common mistakes to avoid when making banana bread?

Common mistakes include using underripe bananas, overmixing the batter, incorrect oven temperature, and removing the bread from the pan too soon. Ensure ingredients are at room temperature before starting. Don’t substitute baking soda for baking powder. Avoid opening the oven door frequently during baking as it can cause uneven cooking.

What are the nutritional benefits of this banana bread recipe?

A typical slice contains about 254 calories, 38g carbohydrates, 4g protein, and 10g fat. Bananas provide potassium, vitamin B6, and fiber. This recipe is relatively low in added sugar compared to many traditional recipes. The bread can be made healthier by using whole wheat flour or reducing sugar content.