>
Edit Content

Food That’s Made from the Heart
We’re all about turning simple ingredients into magical moments. From kitchen newbies to seasoned chefs, our recipes are designed to keep things fun and easy! Let’s cook, laugh, and eat together. 🥰

Contact Us

Peach Cobbler Recipe with Cake Mix – Easy & Delicious!

peach cobbler recipe with cake mix

What makes a Peach Cobbler Recipe with Cake Mix special? Using a cake mix can make it easier without losing flavor. This mix of old and new creates a simple yet impressive dessert. It’s perfect for both new and seasoned bakers who want a quick, tasty treat.

A peach cobbler with cake mix is easy to make and offers a fresh twist. It combines the ease of a cake mix with peaches’ natural sweetness. Try this innovative recipe and find a new favorite!

Key Takeaways

  • Using a cake mix can simplify the peach cobbler recipe without sacrificing flavor
  • This easy dessert is perfect for both novice and experienced bakers
  • Cake mix cobbler offers a unique twist on the traditional peach cobbler recipe
  • Natural sweetness of peaches combines perfectly with the simplicity of a cake mix
  • This recipe is ideal for those looking for a quick and delicious treat
  • The cake mix cobbler is a great way to enjoy the classic comfort of peach cobbler with minimal effort

The History and Appeal of Peach Cobbler

Peach cobbler is a classic dessert with a long history. It started in Europe, where fruit was topped with pastry or biscuits. Today, using cake mix benefits makes it easier to bake.

This dessert is loved for its simplicity and quick preparation. It’s a favorite in many American homes. Served warm with vanilla ice cream, it’s a perfect treat.

Origins of Cobbler Desserts

Cobbler desserts have been around since the early American colonies. They were made with fresh fruit, sugar, and pastry. Over time, the recipe changed, and so did the crust.

Why Cake Mix Makes It Better

Using cake mix benefits has changed peach cobbler making. Now, you can make a delicious cobbler quickly. The cake mix adds a moist, fluffy crust that pairs well with peaches.

Traditional vs. Quick Method

Both traditional and quick peach cobbler recipes are popular. The quick method uses cake mix benefits for a faster recipe. Here’s how they compare:

MethodIngredientsPrep Time
TraditionalFresh peaches, sugar, flour, butter30 minutes
QuickCake mix, canned peaches, sugar, butter15 minutes

In conclusion, peach cobbler’s history and appeal come from its long tradition and the ease of using cake mix benefits in quick dessert recipes.

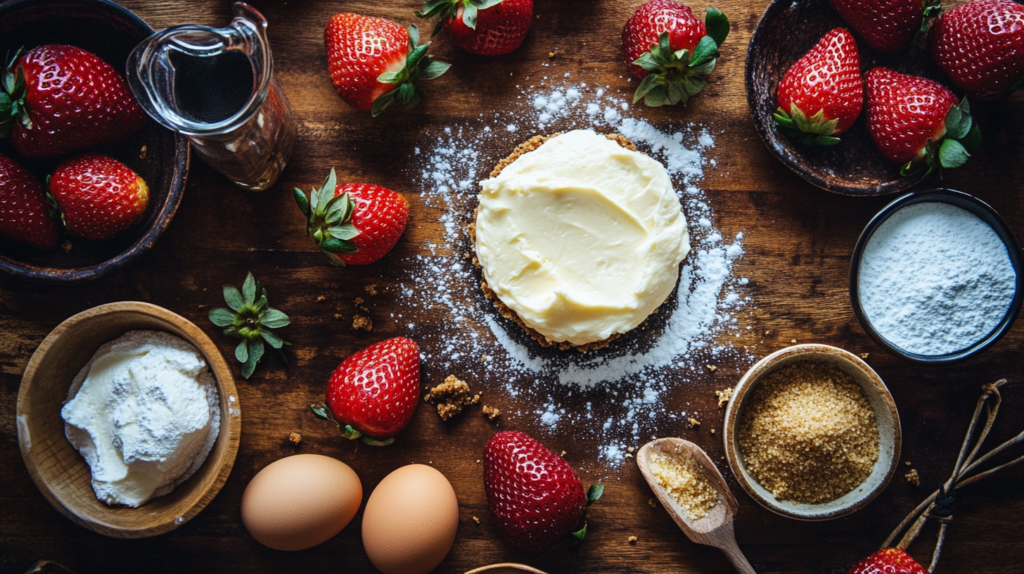
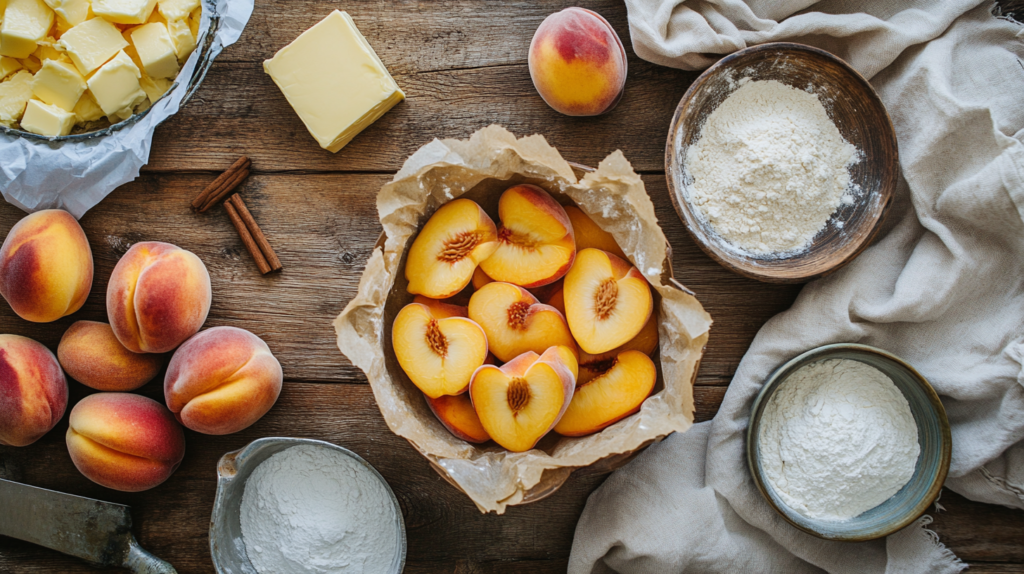
Essential Ingredients for Your Peach Cobbler

To make a delicious peach cobbler, you’ll need the right peach cobbler ingredients. High-quality ingredients are key, including fresh peaches, sugar, and a cake mix for desserts. You can use fresh peaches, frozen, or canned, depending on what you prefer.

Here are the basic ingredients you’ll need:

  • 2 cups of fresh or frozen peaches, sliced
  • 1 package of cake mix, designed for desserts like peach cobbler
  • 1/4 cup of granulated sugar
  • 1/4 cup of all-purpose flour
  • 1/2 teaspoon of cinnamon
  • 1/4 teaspoon of nutmeg
  • 1/4 teaspoon of salt
  • 1/2 cup of unsalted butter, melted

Using a cake mix makes making a peach cobbler easier. It saves you from measuring out flour, sugar, and spices. Just pick a cake mix made for cake mix desserts like peach cobbler.

With these ingredients, you’re ready to make a tasty peach cobbler. It’s perfect for any event. The secret is using high-quality ingredients and a simple recipe, no matter the type of peach you choose.

IngredientQuantity
Peaches2 cups
Cake mix1 package
Sugar1/4 cup
Flour1/4 cup

Kitchen Tools and Equipment Needed

To make a tasty peach cobbler with cake mix, you’ll need some basic kitchen essentials. These baking tools will help you prepare and bake your cobbler perfectly. A baking dish is essential, as it’s where you’ll bake your cobbler in the oven.

Here are some basic utensils you’ll need:

  • Measuring cups and spoons
  • Mixing bowls
  • Whisk
  • Rubber spatula
  • Baking dish

These tools will make measuring, mixing, and baking your cobbler easy. You might also want a stand mixer or food processor to simplify the process.

Basic Utensils Required

You’ll also need a few basic kitchen essentials like an oven and stove. They’re crucial for baking and cooking your cobbler right.

Optional Equipment for Better Results

Optional tools like a pastry brush or silicone mat can improve your results. They help create a golden crust and prevent sticking to the baking dish.

Choosing and Preparing Your Peaches

Choosing the right peaches is key to a great peach cobbler. You can pick between fresh peaches or canned ones. Each has its own benefits, depending on what you like and when peaches are in season.

Fresh peaches are perfect when they’re in season. They taste sweet and tender. But, they take more time to prepare since you have to peel, slice, and remove the pits. Canned peaches, on the other hand, save you time. They’re already peeled and sliced, ready to go.

Fresh vs. Canned Peaches

Here are some things to think about when choosing between fresh and canned peaches:

  • Fresh peaches give a brighter flavor and texture. But, they can be messy and take longer to prepare.
  • Canned peaches are easy to use. They might not taste as sweet or flavorful as fresh ones.

Proper Peach Preparation Techniques

To make the most of your peaches, whether they’re fresh or canned, proper preparation is key. For fresh peaches, wash them well, then peel and slice them into thin wedges. Take out the pits and any extra juice to avoid a soggy cobbler. If you’re using canned peaches, just drain the liquid and rinse them with water to get rid of excess syrup.

By following these steps and picking the right peaches, you’ll make a delicious cobbler. It’s sure to impress your loved ones.

Step-by-Step Peach Cobbler Recipe with Cake Mix

To make an easy peach cobbler, start by preheating your oven to 375°F. Next, mix the cake mix dessert recipe according to the instructions on the box. But add a twist by incorporating fresh peaches into the batter. This will give your cobbler a unique flavor and texture.

Here’s a list of baking instructions to follow:

  • Mix the cake mix with 1 cup of milk and 1/2 cup of melted butter.
  • Add 1 cup of sliced peaches to the mixture and stir well.
  • Pour the mixture into a 9×13 inch baking dish and top with additional sliced peaches.

As you follow these baking instructions, remember to keep an eye on your cobbler while it’s in the oven. The easy peach cobbler should be golden brown on top and bubbly around the edges. With these simple steps, you’ll have a delicious cake mix dessert recipe that’s perfect for any occasion.

By following these steps and using a cake mix dessert recipe, you’ll be able to create a mouth-watering peach cobbler. It’s sure to impress your friends and family. So go ahead, give it a try, and enjoy the warm, fuzzy feeling of baking something truly special.

Tips for the Perfect Cobbler Texture

Getting the perfect cobbler texture can be tricky. But with the right baking tips, you can make a delicious dessert. The secret is to get the fruit filling and cake topping just right. Use the right amount of sugar and flour in the filling, and don’t overmix the batter.

For a golden crust, brush the cobbler’s top with milk or beaten egg before baking. This will make the crust brown and crispy. Here are more tips for the perfect cobbler texture:

  • Use the right type of flour: All-purpose flour is best for cobbler, as it provides a tender and flaky texture.
  • Don’t overbake: Take the cobbler out of the oven when it’s still slightly tender in the center. Overbaking can make the filling too dry and the crust too hard.
  • Let it rest: Let the cobbler rest for at least 30 minutes before serving. This will allow the filling to set and the crust to cool down.

By following these tips and using the right baking techniques, you can create a delicious cobbler. Remember, practice makes perfect. So, don’t get discouraged if your first attempt doesn’t turn out exactly as you hoped. Keep trying, and you’ll soon be a cobbler-baking pro!

Baking TipsBenefits
Use the right amount of sugarBalances the flavor of the filling
Don’t overmix the batterPrevents a tough and dense crust
Brush the top with milk or eggGives the crust a golden brown color

Delicious Variations to Try

Exploring peach cobbler variations opens up a world of possibilities. You can mix in different fruits like blueberries, strawberries, or raspberries. This creates unique fruit cobbler recipes. For a twist, add a pinch of cinnamon or nutmeg for extra flavor.

Some dessert twists include a crunchy topping. Try chopped nuts or oatmeal. Or, use brown sugar or honey instead of regular sugar. You can even use almond or soy milk for a non-dairy version.

  • Blueberry peach cobbler: Add fresh or frozen blueberries to the peach filling for a sweet and tangy flavor combination.
  • Peach cobbler with pecans: Add chopped pecans to the topping for a crunchy texture and nutty flavor.
  • Strawberry peach cobbler: Use a combination of fresh strawberries and peaches for a sweet and fruity flavor.

The secret to great fruit cobbler recipes is to have fun and experiment. Don’t be afraid to try new things and make it your own!

Serving Suggestions and Pairings

Presenting your peach cobbler well is key. A well-presented dessert can make any occasion special. Try adding some creative dessert pairings to enhance your cobbler.

Enjoying peach cobbler with ice cream is a classic choice. Vanilla, caramel, or butter pecan ice cream works great. You can also add fresh fruit, nuts, or candy for a unique taste.

For a stunning cobbler presentation, use garnishes. Fresh fruit like peaches or blueberries add color and flavor. A sprinkle of powdered sugar or caramel sauce can also elevate your cobbler.

Best Ice Cream Combinations

  • Vanilla ice cream with caramel sauce
  • Caramel ice cream with fresh peaches
  • Butter pecan ice cream with powdered sugar

Garnishing Ideas

  • Fresh fruit, such as peaches or blueberries
  • Powdered sugar
  • Caramel sauce
  • Chopped nuts, such as pecans or walnuts
Dessert PairingIce Cream ToppingGarnish
Peach CobblerVanilla Ice CreamFresh Peaches
Peach CobblerCaramel Ice CreamPowdered Sugar

Storage and Reheating Guidelines

To keep your peach cobbler fresh, proper storage is key. You can store leftover cobbler in several ways. For a short time, keep it at room temperature for up to two days. For longer storage, refrigerate or freeze it.

Refrigerate the cobbler in an airtight container for up to five days. Freeze it by wrapping it tightly in plastic or foil for up to three months. To reheat, use the oven or microwave.

Preheat your oven to 350°F (180°C) for 15-20 minutes. This will warm the cobbler and make the fruit tender. You can also reheat in the microwave. Place it in a dish and heat for 30-60 seconds.

Always check the cobbler’s temperature to ensure it’s hot. By following these steps, you can enjoy your cobbler for days.

Proper Storage Methods

  • Short-term storage: room temperature for up to two days
  • Long-term storage: refrigerate or freeze the cobbler

Reheating Instructions

  • Oven: preheat to 350°F (180°C) and bake for 15-20 minutes
  • Microwave: heat for 30-60 seconds, or until the cobbler is warm and the fruit is tender

Seasonal Adaptations for Your Cobbler

To enjoy your favorite cobbler all year, try seasonal desserts with fruit substitutions. This makes a year-round cobbler that’s always fresh.

Here are some fruit substitutions for different seasons:

  • Summer: Peaches, blueberries, or raspberries
  • Autumn: Apples, pears, or cranberries
  • Winter: Quince, persimmons, or citrus fruits
  • Spring: Strawberries, rhubarb, or apricots

By using these seasonal desserts, you can try new flavors and ingredients. This keeps your cobbler exciting and tasty all year. You can make a classic peach cobbler or try something new like strawberry rhubarb.

Remember, the secret to a great year-round cobbler is to be creative and have fun. Don’t hesitate to experiment with different fruit substitutions and flavors. This will make your cobbler truly special.

With a bit of experimentation, you can enjoy your favorite cobbler in any season. This makes it a true year-round cobbler that’s always a pleasure to eat.

SeasonFruit SubstitutionsFlavor Combinations
SummerPeaches, blueberries, raspberriesVanilla, cinnamon, nutmeg
AutumnApples, pears, cranberriesCinnamon, nutmeg, allspice
WinterQuince, persimmons, citrus fruitsOrange, lemon, ginger
SpringStrawberries, rhubarb, apricotsVanilla, strawberry, balsamic glaze

Nutritional Information and Dietary Considerations

It’s key to think about the calories in your peach cobbler. A classic recipe can have 300 to 500 calories per serving. But, you can make healthier versions that fit different diets.

If you follow a gluten-free or vegan diet, there are options. You can swap all-purpose flour for almond or coconut flour. Also, use non-dairy milk instead of regular milk. These changes make a tasty, healthy dessert for your needs.

  • Caloric content: Be mindful of the calorie count in your peach cobbler, especially if you’re watching your weight.
  • Dietary restrictions: Consider using alternative ingredients to accommodate gluten-free, vegan, or other dietary needs.
  • Nutrient balance: Aim for a balance of nutrients, including protein, healthy fats, and complex carbohydrates, to create a satisfying and nutritious dessert.

Caloric Content

The calories in your peach cobbler depend on the ingredients. A traditional recipe can have 300 to 500 calories per serving. But, you can make a version with fewer calories that’s still sweet.

Dietary Modifications

To fit different diets, try these changes:

  • Gluten-free: Swap all-purpose flour for almond or coconut flour.
  • Vegan: Use non-dairy milk and a vegan-friendly sweetener.

Conclusion

As we wrap up our exploration of easy peach cobbler, we hope you’re excited to give it a try. Whether you stick to the classic recipe or try new twists, the most important thing is to have fun. Enjoy every step of the way.

Making a peach cobbler with cake mix is a great way to satisfy your sweet cravings. The mix of juicy peaches and a soft, buttery crust is truly special. It’s a treat that will impress anyone.

So, put on your apron and get ready to bake. With the right ingredients, you’ll create a peach cobbler that everyone will love. Enjoy the homemade taste and share your creations with others. Happy baking!

FAQ

What is the origin of cobbler desserts?

Cobbler desserts come from early American cooking. They were a simple way to use seasonal fruits. The dish evolved from English puddings and pies, adapting to colonial ingredients and baking.

Why does using cake mix make peach cobbler better?

Cake mix adds moisture and richness to peach cobbler. It’s a quick and easy way to prepare the dish. The mix eliminates the need for measuring and combining many ingredients.

What’s the difference between traditional and quick peach cobbler methods?

Traditional peach cobbler uses homemade biscuit or pie dough. The quick method uses cake mix. Cake mix is faster but may lack the authentic flavor and texture of homemade.

What are the essential ingredients for peach cobbler with cake mix?

You’ll need canned or fresh peaches, yellow cake mix, butter or margarine, and optional spices like cinnamon. Vanilla extract or lemon juice can also be added.

What basic kitchen tools are needed to make peach cobbler?

You’ll need a baking dish, mixing bowl, spoon or whisk, and a paring knife. A stand or hand mixer is best for blending the cake mix topping.

How do I choose and prepare the peaches for my cobbler?

Choose ripe, juicy peaches with a bright color. Canned peaches are easy, but fresh peaches need peeling and slicing. Add sugar or lemon juice to enhance flavor.

How do I get the perfect cobbler texture?

Ensure the fruit filling isn’t too watery and the cake topping is light and golden. Adjust liquid, thicken the filling, and watch the baking time for the perfect texture.

What are some tasty variations to try with peach cobbler?

Try apple-peach, blueberry-peach, or mixed berry cobbler. Experiment with spices, liqueurs, or streusel toppings for a unique twist.

What are the best ways to serve and pair peach cobbler?

Serve warm with vanilla ice cream for the best taste. Top with whipped cream, caramel or chocolate sauce, or chopped nuts for a special touch.

How should I store and reheat leftover peach cobbler?

Store in an airtight container in the fridge for up to 4 days. Reheat in the microwave or oven until warm. You can also freeze and thaw when ready.

How can I adapt the peach cobbler recipe for different seasons?

Peach cobbler can be enjoyed all year. Use apples, berries, or pumpkin in different seasons to celebrate the flavors of the moment.

What are the nutritional considerations for peach cobbler?

Peach cobbler is rich, but you can make it healthier. Use low-fat or sugar-free cake mix, reduce butter, and add more fresh fruit for a lighter version.

Creamy Caesar Pasta Salad : A Crowd-Pleasing Dish

caesar pasta salad

What makes a caesar pasta salad so loved by everyone? Is it the creamy texture, the mix of flavors, or something else? This salad is a hit at any event, loved by many. Its creamy goodness makes it a favorite at gatherings.

A creamy caesar pasta salad is perfect for those who want a dish that’s easy yet impressive. Its rich sauce is why it’s a crowd-pleaser. But what makes a great caesar pasta salad stand out? Let’s dive into what makes it so appealing.

Key Takeaways

  • A caesar pasta salad is a versatile dish that is perfect for various occasions
  • The creamy texture and blend of flavors make it a crowd-pleasing dish
  • A caesar pasta salad is easy to make and impressive to serve
  • The rich and creamy sauce is a key component of the dish
  • Caesar pasta salad is a great option for those looking for a delicious and easy-to-make meal
  • Creamy pasta salad is a staple at many gatherings and is loved by many

Why Caesar Pasta Salad Is Your Next Favorite Dish

Looking for your favorite pasta salad? Caesar pasta salad is the answer. It mixes the classic Caesar salad flavors with pasta’s comforting texture. It’s perfect for any meal.

Caesar pasta salad is loved for its versatility. It’s great for summer picnics or cozy dinners. You can make it fast, saving time without losing flavor.

  • Combines fresh romaine lettuce and creamy Caesar dressing with al dente pasta.
  • Adaptable to various dietary preferences by adding proteins like grilled chicken or shrimp.
  • Ideal for potlucks, family gatherings, and everyday meals.

The caesar salad benefits go beyond its tasty flavor. It’s full of nutrients from greens and protein. It’s a balanced meal that’s both filling and healthy.

BenefitDescription
Nutritional ValueRich in vitamins from fresh vegetables and protein from added meats.
VersatilitySuitable for various occasions and adaptable to different dietary needs.
Ease of PreparationQuick to assemble with readily available ingredients.
Flavor ProfileCombines creamy, tangy, and savory tastes that please diverse palates.

Essential Ingredients for the Perfect Caesar Pasta Salad

Making a great Caesar pasta salad begins with picking the right pasta salad components. The pasta shape you choose greatly affects the salad’s texture and taste.

Choosing the Right Pasta

Go for shapes like fusilli or penne. They keep the dressing inside, making each bite full of flavor.

Caesar Dressing Components

A classic Caesar dressing has garlic, anchovies, egg yolks, lemon juice, Dijon mustard, olive oil, and Parmesan cheese. These caesar salad ingredients mix to give a rich, tangy taste.

Fresh Ingredients and Toppings

Fresh romaine lettuce adds a nice crunch. Homemade croutons add a fun texture. Top it with more Parmesan shavings and grilled chicken for extra protein.

Step-by-Step Preparation Guide

Ready to make a tasty Caesar pasta salad? Follow these simple steps to create your own pasta salad recipe.

  1. Cook the Pasta: Boil a large pot of salted water. Add your pasta and cook until it’s al dente. Then, drain and rinse it with cold water to cool.
  2. Prepare the Dressing: In a bowl, mix mayonnaise, Parmesan cheese, garlic, anchovy paste, lemon juice, Dijon mustard, and Worcestershire sauce. Whisk until it’s smooth.
  3. Mix the Salad: In a big bowl, put the cooled pasta, romaine lettuce, cherry tomatoes, and cucumbers. Pour the Caesar dressing over it.
  4. Toss and Combine: Gently toss everything together. Make sure the pasta and veggies are well coated with the dressing.
  5. Add Toppings: Sprinkle more Parmesan cheese and croutons on top for extra flavor and crunch.
  6. Chill and Serve: Chill the salad for 30 minutes to let the flavors mix. Serve it cold and enjoy your homemade Caesar pasta salad!
IngredientAmount
Pasta (e.g., fusilli or penne)12 ounces
Romaine Lettuce, chopped4 cups
Cherry Tomatoes, halved1 cup
Cucumbers, sliced1 cup
Mayonnaise1/2 cup
Parmesan Cheese, grated1/3 cup
Garlic, minced2 cloves
Anchovy Paste1 teaspoon
Lemon Juice2 tablespoons
Dijon Mustard1 teaspoon
Worcestershire Sauce1/2 teaspoon
Croutons1 cup

Making the Homemade Caesar Dressing

Creating your own homemade caesar dressing takes your salad to the next level. It tastes fresher and you can make it just how you like it.

Traditional vs Modern Methods

There are two ways to make a caesar dressing recipe: traditional and modern. Traditional methods use raw egg yolks and anchovies for a rich taste. Modern methods use mayonnaise or Greek yogurt for a safer, quicker option.

AspectTraditional MethodModern Method
IngredientsRaw egg yolks, anchovies, garlicMayonnaise or Greek yogurt
FlavorRich and authenticCreamy and milder
Preparation TimeLonger, requires careful mixingFaster, more convenient

Balancing Flavors

To get the perfect caesar dressing recipe, mix tangy, savory, and creamy elements well. Adjust lemon juice, garlic, and Parmesan cheese to your taste.

Storage Tips for the Dressing

Keep your homemade dressing in an airtight container in the fridge. It lasts up to a week. Always stir it well before using, as ingredients can separate.

Creative Variations of Caesar Pasta Salad

Discover new pasta salad variations that add a fun twist to Caesar salad. You can add more protein or unique flavors. These caesar salad twists will make your taste buds happy.

  • Grilled Chicken: Add juicy grilled chicken strips for a hearty option.
  • Roasted Vegetables: Incorporate roasted bell peppers, zucchini, or cherry tomatoes for added texture and flavor.
  • Avocado Slices: Creamy avocado can enhance the dish’s richness.
  • Crunchy Toppings: Sprinkle toasted nuts or crispy bacon bits for extra crunch.
  • Seafood Options: Shrimp or salmon can provide a delightful seafood twist.

Feel free to mix and match these ideas to create your perfect pasta salad variations. Trying different ingredients makes the dish more fun. It also meets different dietary needs. These caesar salad twists are sure to impress at any gathering.

Tips for Making Your Salad Ahead of Time

Preparing a make-ahead pasta salad can save you time and ensure you have a delicious meal ready when needed. Follow these salad prep tips to keep your salad fresh and tasty.

Storage Guidelines

Store your make-ahead pasta salad in an airtight container. This prevents unwanted odors from seeping in and keeps the salad fresh. Keep it refrigerated until you’re ready to serve.

Maintaining Freshness

To maintain freshness, add delicate ingredients like lettuce or tomatoes just before serving. This prevents them from becoming soggy and preserves the vibrant flavors of your salad prep.

Rehydrating Tips

If your salad has been stored for a while, you might need to rehydrate it. Add a splash of dressing or a drizzle of olive oil and gently toss the salad to revive its texture and taste.

ComponentStorage DurationBest Practices
Pasta3-5 daysCook al dente and toss with a little oil to prevent sticking.
Dressing5-7 daysStore separately until ready to serve to keep pasta from becoming soggy.
Vegetables2-3 daysAdd just before serving to maintain crunch and freshness.

Nutritional Benefits and Dietary Modifications

A healthy pasta salad is tasty and good for you, perfect for any meal. Knowing about caesar salad nutrition lets you pick healthier options without losing flavor.

Here are some easy ways to make your Caesar pasta salad healthier:

  • Choose Whole Grain Pasta: Whole grain pasta adds more fiber, helping with digestion and keeping you full.
  • Add More Vegetables: Add colorful veggies like bell peppers, cherry tomatoes, and cucumbers for extra vitamins and minerals.
  • Use Lean Proteins: Adding grilled chicken or chickpeas increases protein, making the salad more filling.
  • Lighten the Dressing: Use Greek yogurt instead of mayonnaise to cut calories and boost protein.
ModificationBenefits
Whole Grain PastaIncreases fiber and sustains energy levels
Fresh VegetablesProvides essential vitamins and antioxidants
Lean ProteinsEnhances muscle maintenance and satiety
Greek Yogurt DressingReduces calories and adds protein

Serving Suggestions and Presentation Ideas

A beautiful pasta salad presentation can make your dish shine. It will impress your guests. Here are some creative ways to serve Caesar pasta salad that are both tasty and visually appealing.

Perfect Pairings

Pair your Caesar pasta salad with dishes that complement it:

  • Grilled Chicken: Adds protein and a smoky flavor.
  • Fresh Bread: Perfect for soaking up the dressing.
  • Roasted Vegetables: Brings color and additional nutrients.

Garnishing Tips

Garnishes can make your salad stand out:

  • Parmesan Shavings: Adds a rich, savory touch.
  • Croutons: Provide a crunchy texture contrast.
  • Fresh Herbs: Sprinkle basil or parsley for a pop of color.

Troubleshooting Common Issues

Even the best recipes can run into problems. Don’t worry if you face some pasta salad issues while making your Caesar pasta salad. Here’s how to solve them easily.

Texture Problems

One common issue is overcooked pasta, making your salad mushy. To avoid this, cook the pasta al dente. Then, rinse it under cold water to stop the cooking. Soggy lettuce is another problem. Add the lettuce just before serving to keep it crisp and fresh.

Flavor Balance Solutions

Sometimes, the flavors might not mix well. If your Caesar dressing is too strong, mix it with a bit of plain yogurt or more olive oil. For a bland salad, add extra Parmesan cheese or a squeeze of lemon juice. These simple fixes can make your salad balanced and delicious.

Party Planning and Scaling Tips

Hosting a big event? A large batch pasta salad is perfect for feeding many without stress. Here are tips to make your caesar salad for crowds a success:

  • Scale Ingredients Carefully: Multiply each ingredient by the number of servings you need. This ensures consistency in flavor and texture.
  • Use Large Mixing Bowls: Big bowls make it easier to combine ingredients evenly without spilling.
  • Prep Ahead: Chop vegetables and prepare dressing in advance to save time on the day of the event.
  • Keep It Fresh: Store the salad covered in the refrigerator until serving to maintain freshness and flavor.

Managing preparation time is key. Start by assembling the pasta and adding the dressing gradually to achieve the perfect blend. To keep your caesar salad for crowds fresh, use ice-filled trays to keep it chilled, especially outdoors.

Conclusion: Mastering Your Caesar Pasta Salad

Perfecting Caesar pasta salad opens up a world of delicious possibilities. With the right ingredients and techniques, you can create a dish that stands out at any gathering.

Pasta salad mastery means understanding how to balance flavors and textures. Experiment with different toppings and dressings to make the salad uniquely yours.

This versatile dish is not only tasty but also adaptable to various dietary needs. Whether you’re serving a family dinner or hosting a party, Caesar pasta salad is sure to please everyone.

Feel confident in your ability to prepare a creamy and satisfying salad. Share your culinary creation and enjoy the compliments from your guests.

Embrace the simplicity and elegance of Caesar pasta salad, and make it a staple in your recipe collection. Happy cooking!

FAQ

Can I make my Caesar pasta salad gluten-free?

Absolutely! Use rice pasta or quinoa pasta for a gluten-free Caesar salad. Also, make sure the dressing is gluten-free.

What are the best pasta shapes to use for Caesar pasta salad?

The right pasta shape makes a big difference. Try rotini, penne, or farfalle. Their shapes catch the dressing well.

Can I add proteins like chicken or shrimp to my Caesar pasta salad?

Yes! Adding grilled chicken, shrimp, or tofu makes it more filling. It’s perfect for a full meal.

How long can I store Caesar pasta salad in the refrigerator?

Store it in an airtight container for 3-4 days. Keep the dressing separate and mix it in just before serving.

What are some vegan substitutes for the traditional Caesar dressing?

For a vegan version, use nutritional yeast for Parmesan. Try aquafaba or vegan mayo for eggs. Use capers instead of anchovies for a tasty vegan Caesar dressing.

How can I prevent the pasta from getting soggy in my Caesar pasta salad?

Cook pasta al dente and rinse it cold. This stops it from getting soggy. Add dressing just before serving or store it separately.

Are there low-carb or keto-friendly options for Caesar pasta salad?

Yes! Use zucchini noodles or shirataki noodles for a low-carb version. Pair them with a creamy, low-carb Caesar dressing.

What can I use to garnish my Caesar pasta salad for an extra touch?

Add a touch with freshly grated Parmesan, crispy bacon bits, cherry tomatoes, or a sprinkle of black pepper.

How do I ensure the flavors in my Caesar pasta salad are well-balanced?

Taste your dressing before mixing it. Adjust with more lemon juice, garlic, or Parmesan as needed.

Delicious 3 Ingredient Biscuits: A Must-Try

3 ingredient biscuits recipe

What makes a perfect biscuit? Is it the complex ingredients or the simple recipe? Easy 3 Ingredient Biscuits recipes focus on simplicity. With just three ingredients, you can make a delicious treat for any time.

Imagine making a batch of biscuits quickly with an easy recipe. It’s not just a dream. We’re about to share how to make the tastiest 3 ingredient biscuits you’ve ever had.

Key Takeaways

  • Simple biscuit making requires just three ingredients
  • An easy biscuit recipe can be prepared in no time
  • 3 ingredient biscuits are perfect for any occasion
  • Simple biscuit making techniques are easy to learn
  • Easy biscuit recipe is great for beginners and experienced bakers alike
  • 3 ingredient biscuits are a delicious and easy treat to make

Why These 3 Ingredient Biscuits Will Change Your Baking Game

Simplicity is key in baking. With just three ingredients, you can make delicious homemade biscuits for any event. These simple ingredients make your biscuits more flavorful and tender.

These biscuits are easy to make. Whether you’re new to baking or experienced, you’ll love how simple they are to prepare. Enjoy the joy of baking with minimal effort.

The Magic of Simple Ingredients

Simple ingredients can greatly improve your biscuits. Using just three ingredients lets you focus on the quality of each. This way, you can enjoy the unique taste of each ingredient in your biscuit.

The Ease of Preparation

These biscuits are a breeze to make. You can quickly bake a batch, even on busy days. Here’s why they’re so easy to prepare:

  • Less time spent in the kitchen
  • Minimal effort required
  • Perfect for busy days or quick treats

Essential Ingredients for Perfect Biscuits

For perfect biscuits, you need three key ingredients: self-rising flour, cold butter, and buttermilk. These ingredients make your biscuits tender, flaky, and delicious. With some simple tips, your biscuits will always turn out great.

High-quality ingredients are vital for the best biscuits. Self-rising flour is the base, cold butter adds flakiness, and buttermilk makes them light. Mixing these in the right way lets you try different biscuit flavors.

Self-Rising Flour: The Magic Base

Self-rising flour is a special type of flour that already has baking powder and salt. It makes biscuit recipes easy. Choose high-quality self-rising flour for light and fluffy biscuits.

Cold Butter: The Secret to Flakiness

Cold butter is key for flaky biscuits. Cold butter creates layers that melt and separate in the oven. This makes your biscuits tender and flaky.

Buttermilk: The Tender Touch

Buttermilk adds a tangy flavor and tenderness to biscuits. Its acidity helps with texture. You can also use buttermilk to make sweet or savory biscuits.

By following these tips and using the right ingredients, you can make delicious biscuits. Whether you’re new to baking or experienced, you’ll love making and eating homemade biscuits.

IngredientQuantityPurpose
Self-rising flour2 cupsProvides the base for the biscuits
Cold butter1/2 cupAdds flakiness and tenderness
Buttermilk3/4 cupAdds tenderness and flavor

Kitchen Tools You’ll Need

To make delicious biscuits, you’ll need the right kitchen tools. Having the necessary baking essentials is key. This ensures your biscuits are light and flaky. Here are some must-have tools:

A good set of kitchen tools is crucial for biscuit-making. You’ll need a large mixing bowl, a measuring cup, and a whisk. A baking sheet lined with parchment paper is also essential for baking.

Some other necessary baking essentials include:

  • Mixing bowls
  • Measuring cups
  • Whisk
  • Baking sheets
  • Parchment paper
  • Cutting tools, such as a biscuit cutter or a glass

With these kitchen tools and baking essentials, you’re ready to make delicious biscuits. Always use high-quality tools for the best results.

ToolDescription
Mixing bowlsUsed to mix the ingredients
Measuring cupsUsed to measure the ingredients
WhiskUsed to mix the ingredients
Baking sheetsUsed to bake the biscuits

The Ultimate 3 Ingredient Biscuits Recipe

To make the perfect 3 ingredient biscuits, you need just a few simple steps. This recipe is easy for anyone, whether you’re a beginner or a seasoned baker. You’ll need self-rising flour, cold butter, and buttermilk to create delicious, flaky biscuits.

Mixing the Dough

Begin by mixing the dough in a large bowl. Combine the self-rising flour and cold butter until it looks like coarse crumbs. Next, add the buttermilk and mix until the dough forms a shaggy mass.

Shaping Your Biscuits

Turn the dough onto a floured surface and knead it a bit until it comes together. Use a biscuit cutter or a glass to cut out the biscuits. Gather the scraps and re-roll the dough as needed.

Baking Instructions

Place the biscuits on a baking sheet lined with parchment paper. Bake in a preheated oven at 425°F (220°C) for 12-15 minutes, or until they’re golden brown. Let the biscuits cool on a wire rack for a few minutes before serving.

IngredientQuantityPurpose
Self-rising flour2 cupsProvides the base for the biscuits
Cold butter1/2 cupAdds flakiness and tenderness
Buttermilk3/4 cupAdds tenderness and flavor

Common Mistakes to Avoid

When baking biscuits, common baking mistakes can happen. These mistakes can affect the biscuits’ texture and taste. To make sure your biscuits are light, flaky, and tasty, know these mistakes and how to avoid them. One big mistake is overmixing the dough, which makes biscuits tough. Mix the ingredients just until they form a shaggy mass, then stop.

Another mistake is baking at the wrong temperature. If the oven is too hot, biscuits can burn before they’re fully cooked inside. If it’s too cool, they won’t rise right. To fix this, preheat your oven correctly and use a thermometer for accuracy.

Here are some tips to avoid common mistakes and get better at biscuit troubleshooting:

  • Use high-quality ingredients, like fresh flour and real butter
  • Don’t overwork the dough, as this can lead to tough biscuits
  • Use the right amount of liquid, as too much or too little can affect the texture of the biscuits
  • Don’t open the oven door too often, as this can cause the biscuits to sink or not rise properly

By following these tips and watching out for common mistakes, you can get better at making biscuits. Whether you’re new or experienced, biscuit troubleshooting is key. With practice and patience, you can make perfect biscuits for any event.

MistakeSolution
Overmixing the doughMix ingredients just until they come together in a shaggy mass
Baking at the wrong temperaturePreheat oven to the correct temperature and use a thermometer
Using low-quality ingredientsUse high-quality ingredients, including fresh flour and real butter

Temperature Secrets for Perfect Biscuits

Temperature control is key when baking biscuits. The right temperature ensures they are light and flaky. Keeping the temperature just right is crucial for great biscuits.

Cold Ingredients Matter

Cold ingredients, like cold butter, are important for flaky biscuits. Cold ingredients prevent butter from melting into the flour. This keeps biscuits tender and layered.

Optimal Oven Settings

The best oven temperature for biscuits is between 400°F and 425°F. This range helps biscuits bake evenly and get a golden crust. Adjusting your oven to this temperature ensures perfect biscuits.

Cooling Guidelines

Proper cooling is vital after baking. Cooling biscuits on a wire rack prevents them from getting soggy. This step keeps your biscuits fresh and flavorful.

Serving Suggestions and Pairings

There are countless ways to serve biscuits. They can enhance any meal, from breakfast to dinner. Here are some serving suggestions to help you get started:

  • Breakfast: Try biscuits with scrambled eggs, bacon, and cheese for a hearty start to the day.
  • Lunch: Biscuits go great with soups like tomato soup or creamy broth for a cozy meal.
  • Dinner: Pair biscuits with roasted meats and steamed veggies for a filling dinner.

Biscuits also pair well with sweet and savory spreads. Here are some tasty biscuit pairings to try:

  • Strawberry jam and butter: A classic combo that’s both sweet and satisfying.
  • Cheddar cheese and chives: Great for a snack or light meal, it’s a savory delight.
  • Honey and almond butter: Perfect for breakfast or brunch, it’s a sweet and nutty treat.

By exploring these serving suggestions and biscuit pairings, you can make a variety of delicious meals and snacks. Biscuits are versatile, fitting well with many ingredients. They can make any meal both tasty and satisfying, whether you prefer something sweet or savory.

PairingDescription
Strawberry jam and butterA classic combination that is sweet and satisfying.
Cheddar cheese and chivesA savory combination that is perfect for a snack or light meal.
Honey and almond butterA sweet and nutty combination that is perfect for a breakfast or brunch.

Storage and Reheating Tips

To keep your biscuits fresh, use the right storage methods. Proper storage keeps the texture and flavor of your biscuits. Whether on the counter or in the freezer, follow these tips for reheating.

Counter Storage Methods

For short-term storage, keep biscuits in an airtight container on the counter. They stay fresh for up to 2 days. Store them in a cool, dry place, away from sunlight.

Freezing Instructions

To freeze biscuits, place them in a single layer on a baking sheet. Freeze until solid, then store in an airtight container or freezer bag. To reheat, thaw at room temperature or in the oven or microwave.

Reheating Guidelines

To reheat biscuits, use the oven or microwave. For the oven, preheat to 350°F (180°C) and bake for 5-7 minutes. For the microwave, wrap in a damp paper towel and heat for 20-30 seconds. These tips help you enjoy biscuits longer and keep them delicious.

Troubleshooting Your Biscuits

When baking biscuits, biscuit problems can be a real challenge. But, with the right baking solutions, you can fix these issues and get perfect biscuits. If your biscuits are too dense or too crumbly, try changing the flour to liquid ratio in your recipe. Also, check if your oven is at the right temperature.

Another common problem is biscuits that don’t rise well. This might be because your baking powder is old or your oven temperature is off. To solve this, use fresh baking powder and get an oven thermometer for accurate temperature checks. By tackling these biscuit problems, you can find the perfect baking solutions for delicious, flaky biscuits.

  • Check the expiration date of your ingredients to ensure they are fresh.
  • Use the right type of flour, as different types can affect the texture of your biscuits.
  • Don’t overmix the dough, as this can lead to tough biscuits.
ProblemSolution
Dense biscuitsAdjust the ratio of flour to liquid in your recipe
Biscuits that don’t riseUse fresh baking powder and check oven temperature

Delicious Variations to Try

Biscuit variations are endless. With a few tweaks, you can make many delicious biscuits. They can be savory or sweet, perfect for any occasion.

Trying different biscuit variations lets you explore new flavors. You can stick to classics or try something new. This way, you can find new favorites and grow your baking skills.

Herb-Infused Options

Herb-infused biscuits add fresh flavors. Add chopped rosemary or thyme for a savory treat. You can also use parsley, basil, or dill for unique tastes.

Sweet Alternatives

Sweet biscuits are great for a dessert craving. Add sugar, honey, or fruit to the dough for a sweet treat. Try different sugars for unique flavors.

Cheese Variations

Cheese biscuits add flavor and nutrition. Grate cheddar, parmesan, or feta into the dough for a savory biscuit. Experiment with goat cheese or blue cheese for more flavors.

VariationDescription
Herb-InfusedAdding fresh herbs like rosemary or thyme to the biscuit dough
Sweet AlternativesAdding sugar, honey, or fruit to the biscuit dough
Cheese VariationsAdding grated cheese like cheddar, parmesan, or feta to the biscuit dough

Exploring biscuit variations can make baking exciting. Whether you prefer classic or adventurous, there’s something for everyone. So, why not start baking and try some new biscuit recipes today?

Health and Dietary Considerations

When making biscuits, health considerations and dietary restrictions are key. Many people have special dietary needs, like gluten-free or low-fat. These needs are important to remember when baking biscuits.

To meet these needs, bakers can use different ingredients. For example, gluten-free flours or low-fat butter substitutes. Biscuits can also be made with healthier options, like whole wheat flour or nuts. This makes them more nutritious.

Here are some tips for making biscuits for different dietary restrictions:

  • Use gluten-free flours, like almond or coconut flour, for those with gluten intolerance.
  • Replace low-fat ingredients, such as skim milk or low-fat butter, for a healthier choice.
  • Add nuts or seeds, like walnuts or chia seeds, for extra nutrition and flavor.

By thinking about health considerations and dietary restrictions, bakers can make tasty biscuits for everyone.

Dietary RestrictionAlternative Ingredient
Gluten-freeGluten-free flours, such as almond or coconut flour
Low-fatLow-fat butter substitutes or skim milk
VeganPlant-based milk alternatives, like almond or soy milk

Conclusion: Master the Art of Simple Biscuit Making

Anyone can learn to make simple biscuits with the right techniques and ingredients. Follow the tips in this article to make delicious, flaky biscuits. Keep your ingredients cold, handle the dough gently, and bake at the right temperature.

Try new ingredients and flavors as you get better at biscuit making. You can add sweet treats like strawberry jam or savory delights like cheddar cheese. With practice, you’ll make tender, golden-brown biscuits easily. So, start baking and enjoy making something special.

Whether you’re new to baking or experienced, making simple biscuits is fun. Try it out! With these tips and a bit of practice, you’ll soon be making tasty biscuits. Happy baking!

FAQ

What are the basic ingredients needed for a simple biscuit recipe?

For a simple biscuit recipe, you need self-rising flour, cold butter, and buttermilk. These are key for a tasty and flaky biscuit.

How do I achieve the perfect texture for my biscuits?

To get the perfect biscuit texture, use cold ingredients. Handle the dough gently. Bake at the right temperature. This ensures a light and flaky biscuit.

What are some common mistakes to avoid when making biscuits?

Avoid overmixing the dough and using warm ingredients. Also, don’t bake at the wrong temperature. These mistakes can make biscuits dense or tough.

Can I use different types of flour for my biscuit recipe?

Yes, you can try different flours like all-purpose or gluten-free. But remember, different flours can change the biscuit’s texture and taste.

How do I store and reheat my biscuits to maintain their freshness?

Cool biscuits completely before storing. Use an airtight container at room temperature or freeze them. Reheat in the oven or microwave to warm them up.

Can I add different flavors or ingredients to my biscuit recipe?

Yes, you can add herbs, cheese, or jam to your biscuit recipe. This lets you create unique and tasty biscuit variations.

Are biscuits a healthy food option?

Biscuits can be healthy if made with whole ingredients and little sugar. Just be mindful of ingredients and portion sizes for a balanced diet.

Can I make biscuits ahead of time and freeze them for later use?

Yes, you can freeze biscuits after they cool. Then, thaw and reheat them when you’re ready to serve.

How to Make Sweet Candied Pineapple at Home

Candied Pineapple

Make your desserts and snacks even better with homemade candied pineapple. This tropical treat is a mix of tangy and sweet, perfect for adding a special touch to your dishes. Ever wondered why candied pineapple is so loved and how to make it at home? Get ready to learn how to make the best crystallized pineapple that will make your taste buds happy.

Want to turn fresh pineapple into a sweet, crunchy snack you can enjoy all year? Find out how to bring out the amazing flavors of sweet pineapple treats and take your cooking to the next level.

Key Takeaways

  • Discover the secrets to creating delectable homemade candied pineapple
  • Learn the versatility of candied pineapple as a snack and dessert ingredient
  • Understand the traditional uses and historical significance of fruit preservation
  • Gain insight into the essential ingredients and preparation techniques for perfect candied pineapple
  • Explore creative ways to incorporate this sweet treat into your culinary repertoire

Understanding Candied Pineapple and Its Origins

The world of candied pineapple is rich in history. It comes from culinary traditions worldwide. This treat, loved by many, shows how cultures preserve fruit flavors.

Traditional Uses in Different Cuisines

Candied pineapple is a key part of many cuisines. It’s used in both sweet and savory dishes. This fruit’s versatility is a sign of its lasting popularity.

Historical Significance of Fruit Preservation

Preserving fruits like pineapple has a long history. Since the 16th century, Europeans were fascinated by the pineapple. They developed ways to preserve it, making it available all year.

This preservation helped connect cultures. The pineapple became a symbol of global food sharing.

CuisineTraditional Use of Candied Pineapple
CaribbeanIncorporated into savory dishes, cakes, and as a garnish
JapaneseUsed in traditional confections and as a decorative element
EuropeanServed as a delicacy and used in pastries and preserves

“The pineapple, once a symbol of luxury and exclusivity, has now become a beloved ingredient that transcends cultural boundaries, uniting culinary traditions around the world.”

Essential Ingredients for Perfect Candied Pineapple

Making candied pineapple at home needs a few key ingredients. At the center is the fresh pineapple, picked for its ripeness and taste. A sugar syrup is also crucial, adding just the right sweetness.

The main ingredients for candied pineapple are:

  • Fresh, ripe pineapple
  • Granulated sugar
  • Water
  • Optional ingredients:
    • Lemon juice or lime juice
    • Cinnamon sticks
    • Vanilla extract

The sugar syrup is key, as it turns the pineapple into a sweet, crunchy treat. By tweaking the sugar and water mix, you can get the sweetness just right.

IngredientPurpose
Fresh PineappleProvides the base flavor and texture
Granulated SugarCreates the sweet sugar syrup
WaterHelps dissolve the sugar and form the syrup
Lemon/Lime JuiceAdds a subtle tartness to balance the sweetness
Cinnamon SticksInfuses the sugar syrup with warm, aromatic notes
Vanilla ExtractEnhances the overall flavor profile

With these candied pineapple ingredients ready, you’re set to make a tasty batch of homemade candied pineapple. It will surely please your taste buds and satisfy your sweet cravings.

Selecting and Preparing Fresh Pineapple

Choosing the right pineapple is crucial for making perfect candied pineapple. Look for a ripe pineapple that’s sweet and juicy. Here are some tips to help you pick and prepare the fruit.

Choosing the Right Ripeness

The best pineapple for candying is slightly ripe. It should have a golden-yellow color and feel slightly soft when pressed. Avoid pineapples that are too green or hard. They won’t be sweet enough. But, a pineapple that’s too ripe can become mushy when candied.

Proper Cutting Techniques

After picking the perfect pineapple, it’s time to cut it. Remove the crown and stem first. Then, cut the pineapple into rings or wedges that are the same size. This ensures even cooking and texture.

Size and Shape Considerations

Make sure your pineapple pieces are about 1/2 inch thick. This thickness helps them soak up the syrup well. But, don’t cut them too thin. They might become too soft and fragile.

Pineapple Cutting GuidelinesRecommended Size
Thickness1/2 inch
Length2-3 inches
Width1-2 inches

By following these tips, you’ll make candied pineapple that’s both delicious and impressive.

Required Kitchen Tools and Equipment

Making delicious candied pineapple at home needs a few key tools and equipment. You’ll need a candy thermometer and a heavy-bottomed pot. These items help get the perfect texture and a shiny coating.

Here are the must-have tools for making candied pineapple:

  • Candy Thermometer: This tool is key for checking the sugar syrup’s temperature. It makes sure it’s at the right point for crystallization.
  • Heavy-Bottomed Pot: A strong, heavy pot is important. It spreads heat evenly and prevents burning during the long simmer.
  • Drying Rack: A wire drying rack or a baking sheet with parchment paper is great. It lets the candied pineapple dry and get its shiny coating.
  • Knife and Cutting Board: A sharp knife and a solid cutting board are needed. They help you cut the pineapple into the right shapes and sizes.
  • Spoon and Spatula: A strong spoon and a flexible spatula are useful. They help you gently move and coat the pineapple pieces.

With these tools, you’re ready to make tasty homemade candied pineapple. It will make your taste buds happy and impress your friends.

ToolPurpose
Candy ThermometerMonitors the temperature of the sugar syrup during the candying process
Heavy-Bottomed PotEvenly distributes heat and prevents scorching during the simmering process
Drying RackProvides a surface for the candied pineapple pieces to dry and develop a crystalline coating
Knife and Cutting BoardUsed to slice the fresh pineapple into the desired shapes and sizes
Spoon and SpatulaHelp gently turn and coat the pineapple pieces during the candying process

Step-by-Step Candied Pineapple Process

Making candied pineapple at home is a fun and rewarding task. It needs patience and careful attention to detail. The secret to a perfect crystal coating is in the sugar syrup and cooking method.

Creating the Sugar Syrup

Start by making a simple sugar syrup. Mix equal parts white sugar and water in a saucepan. Heat it until it boils gently. Stir often until the sugar dissolves, making a clear syrup. You can adjust the sugar and water ratio to your taste.

Cooking Time and Temperature

  1. Add fresh pineapple slices to the simmering syrup, making sure they’re covered.
  2. Keep the heat low to avoid boiling too hard.
  3. Cook the pineapple, turning it now and then, until it’s clear and the syrup thickens. This can take 45 minutes to an hour.

Visual Cues for Doneness

  • Watch for a shiny, candied look and a slightly sticky feel on the pineapple.
  • The syrup should darken and become thick, sticking to the back of a spoon.
  • The pineapple will shrink and become firmer as it cooks, showing it’s done right.

By following these steps and watching for the right signs, you can make delicious candied pineapple. It will amaze your taste buds and impress your friends and family.

Tips for Achieving the Perfect Crystal Coating

Making the perfect crystal coating on homemade candied pineapple is an art. It’s all about finding the right balance of sugar crystallization. This creates a surface that’s not only beautiful but also tantalizing to the senses. Here are some expert tips to help you get that pineapple just right:

  1. Evenly Distribute the Sugar – Coat each piece of pineapple with sugar syrup evenly. This ensures a uniform layer that crystallizes well. Gently tossing the fruit in the syrup helps achieve this.
  2. Control the Cooking Temperature – Keep the cooking temperature steady and moderate. This lets the sugar crystallize slowly on the pineapple’s surface. Avoid sudden temperature changes, as they can mess up the process.
  3. Patience is a Virtue – Give the sugar enough time to fully crystallize. Don’t rush it. The perfect candied pineapple texture takes time to develop.

By following these simple yet crucial tips, you’ll be on your way to making a delicious, crystal-kissed candied pineapple. It will delight your senses and impress your guests.

“The secret to perfect candied fruit lies in the patience and attention to detail during the crystallization process.”

Proper Storage Methods and Shelf Life

Keeping your homemade candied pineapple fresh is key. The right storage can make it last for weeks. Here’s how to keep it sweet and chewy.

Container Selection

Keeping candied pineapple fresh means keeping air out. The best containers are airtight, like:

  • Resealable plastic bags or containers
  • Glass jars with tight-fitting lids
  • Airtight tin or metal containers

Don’t use open bowls or containers. They let air in, shortening your candied fruit’s life.

Environmental Factors

Storage environment is also crucial for shelf life of candied pineapple. For the best preserving of candied fruit, follow these tips:

  1. Keep it in a cool, dry spot, away from sunlight or heat. Heat and humidity can make the sugar sticky or dissolve.
  2. Keep the temperature steady, between 50°F and 70°F (10°C and 21°C). Temperature changes can cause moisture and spoilage.
  3. Don’t put it in the fridge. The cool, moist air can make the sugar crystallize or get soggy.

By storing it right, your sweet, chewy candied pineapple can last 4-6 weeks.

Creative Ways to Use Candied Pineapple

Candied pineapple is a delightful ingredient that can elevate many dishes. It’s not just for snacking. This sweet treat can be used in both savory and sweet dishes. Let’s explore some creative ways to enjoy candied pineapple.

One classic use is as a garnish for desserts. Its vibrant color and chewy texture add beauty to *cakes*, *pies*, and *tarts*. Try topping a rich chocolate cake with candied pineapple pieces or decorating a creamy cheesecake with it.

Candied pineapple is also great in *fruit cakes* and *fruitcake bars*. It provides a sweet contrast to other dried fruits and nuts. This makes for a well-rounded and satisfying treat.

For a unique twist, add candied pineapple to your favorite *cocktail recipes*. It adds a tropical flair to *rum-based drinks* or sweetness to a *whiskey sour*. Grilling or sautéing the pineapple before candying gives a caramelized flavor, perfect for *tiki-inspired beverages*.

Candied pineapple can also shine in savory dishes. Chop it up and mix it into *salsa* or *relish*. Serve it with *grilled meats* or *fish*. Its sweetness balances out the heat in *spicy dishes* or adds a delightful contrast to *salty snacks* like *charcuterie boards*.

The possibilities are endless with candied pineapple. Whether you’re looking to impress with a *unique dessert garnish* or *add a touch of tropical flair to a savory meal*, this versatile ingredient will delight your taste buds.

Troubleshooting Common Issues

Making candied pineapple at home can be fun, but it comes with its own set of challenges. You might face texture problems or struggle to stop sugar from crystallizing. But don’t worry, these common issues have simple solutions.

Texture Problems

If your candied pineapple is too soft or chewy, there are a few fixes. Make sure you use the right pineapple and cut it into thin, even slices. This ensures it cooks right and gets the right texture.

Also, watch the cooking time and temperature. Cooking it too long in the sugar syrup can make it mushy.

Sugar Crystallization Issues

One big problem with candied pineapple is sugar crystals. To avoid this, keep the syrup’s sugar and water balance right. Don’t overcook the syrup, and store the pineapple in a cool, dry place.

Humidity can also cause sugar crystals, so keep the environment dry. By following these tips, you’ll get perfect candied pineapple every time.

Health Considerations and Dietary Information

Understanding the health aspects of candied pineapple is key. Candied pineapple nutrition is important, especially for those with dietary restrictions. This sweet treat can affect health in different ways.

The main thing to think about is the sugar content. Candied pineapple is cooked in sugar syrup, making it very sweet. This is a big deal for people with diabetes or those watching their sugar intake. It’s best to eat it in small amounts and as part of a healthy diet.

NutrientCandied Pineapple (100g)Fresh Pineapple (100g)
Calories30050
Total Carbohydrates75g13g
Sugars70g9.8g
Dietary Fiber1g1.4g

For those with dietary restrictions, candied pineapple might not be the best choice. But, there are ways to enjoy its taste without harming your health. Look into sugar-free or low-sugar options.

Deciding to eat candied pineapple should be based on your health and what you like to eat. Knowing about the sugar content helps you make better choices. This way, you can enjoy its sweetness while staying healthy.

Variations and Flavor Enhancements

There are many ways to make candied pineapple more exciting. You can add spices or try different sweeteners. This makes it a fun treat to customize.

Spice Additions

Want a twist on classic candied pineapple? Try adding warm spices. Cinnamon, ginger, or chili powder can add a unique flavor. This mix of sweet and spicy is amazing.

Alternative Sweeteners

Don’t just use sugar for candying pineapple. Try natural sweeteners like honey, maple syrup, or coconut sugar. They give a richer sweetness that goes well with pineapple.

SweetenerFlavor ProfileUnique Characteristics
HoneyFloral, slightly earthyAdds a rich, velvety texture
Maple SyrupCaramelized, slightly nuttyEnhances the natural sweetness of the pineapple
Coconut SugarCaramel-like, slightly molasses-yProvides a deeper, richer sweetness

Using natural sweeteners can create a new taste of candied pineapple. It’s a tasty change from the usual sugar version.

“The beauty of candied pineapple is that it’s a blank canvas, waiting to be transformed by your culinary creativity.”

Conclusion

The art of making homemade candied pineapple opens a world of sweet, tangy delights. We’ve learned about its origins and uses. This journey celebrates the joy of preserving pineapple.

Choosing the right pineapple and following the steps, we’ve got all we need to make candied pineapple at home. You can enjoy these treats as snacks, add them to baked goods, or use them in various dishes. The options are endless.

Keep exploring candying pineapple and try new flavors and methods. Enjoy making homemade candied pineapple. It will inspire you to try more recipes with nature’s best ingredients.

FAQ

What is the best way to select a ripe pineapple for making candied pineapple?

Choose a pineapple that’s heavy for its size and has a golden-yellow color. It should also have fresh green leaves. Avoid pineapples that are too soft or have brown spots.

How do I properly prepare the pineapple before starting the candying process?

First, remove the crown and stem. Cut the pineapple lengthwise into slices or wedges. Make sure they are the same thickness for even cooking. Remove the core, as it can get tough when candied.

What type of sugar is best for making candied pineapple?

Use granulated white sugar or cane sugar for the best sugar syrup. You can also try honey or maple syrup for different flavors.

How can I ensure the sugar coating on my candied pineapple is perfectly crystallized?

Cook the pineapple in the sugar syrup until it reaches 230°F (110°C). Gently shaking or stirring the pineapple can help with even crystallization.

What is the best way to store my homemade candied pineapple?

Store it in an airtight container at room temperature. Keep it away from moisture to prevent the sugar from getting sticky. It can last 2-3 weeks this way.

Can I use candied pineapple in other recipes, or is it only for snacking?

Candied pineapple is very versatile! Use it as a topping for cakes, tarts, and ice cream. You can also add it to trail mixes, granola, or even savory dishes like stir-fries or salads.

What are some common issues I might encounter when making candied pineapple, and how can I troubleshoot them?

Issues like soft or chewy pineapple, or a sticky sugar coating can happen. To fix these, cook the pineapple at the right temperature and let it dry properly. Store it in a dry, well-ventilated place.

AmyLu Chicken Burgers: Delicious & Easy Dinner Choice

amylu chicken burgers

Finding a healthy dinner in today’s fast world can be tough . But, there’s a solution that’s both tasty and easy. Say hello to AmyLu Chicken Burgers – a game-changer for dinner time. Ever wondered what makes these chicken burgers stand out?

Key Takeaways

  • AmyLu Chicken Burgers are made with premium, all-natural ingredients for a healthier alternative to traditional beef burgers.
  • Their unique flavor profile and seasoning make them a mouthwatering dinner choice.
  • Convenience is key, as AmyLu Chicken Burgers can be quickly and easily prepared at home.
  • These burgers offer a range of nutritional benefits, making them a smart choice for health-conscious consumers.
  • With various retail and online purchasing options, AmyLu Chicken Burgers are widely accessible.

What Makes AmyLu Chicken Burgers Special

AmyLu Chicken Burgers stand out because of their top-notch ingredients. They use high-quality chicken for a tasty and lean protein option. The mix of herbs and spices adds a unique flavor profile to each burger, making every bite special.

Premium Quality Ingredients

AmyLu Chicken Burgers are made with great care. The chicken comes from trusted sources, ensuring top quality. Each burger highlights the lean protein with careful preparation.

Healthier Alternative to Traditional Burgers

AmyLu Chicken Burgers are a healthier choice than beef burgers. They have high-quality chicken as the main ingredient. This makes them lower in fat and calories, perfect for those watching their diet.

Flavor Profile and Seasoning

The secret to AmyLu Chicken Burgers’ amazing taste is their special seasoning blend. This mix of herbs and spices gives each bite a delicious flavor. It makes these burgers stand out from others.

“AmyLu Chicken Burgers have become a staple in our household. The perfect balance of juicy, tender chicken and delicious seasonings makes them a family favorite.”

Nutritional Benefits of AmyLu Chicken Burgers

AmyLu Chicken Burgers are a tasty and healthy choice for dinner. They have a lot of protein and are low-fat. This makes them great for those who care about their health.

These burgers are packed with 24 grams of protein. Protein is key for building muscles and keeping you full. It’s also important for your body’s repair and growth.

Compared to beef burgers, AmyLu Chicken Burgers have less fat. They have only 8 grams of total fat, with just 2 grams of saturated fat. This is good for those watching their fat intake.

“The nutritional profile of AmyLu Chicken Burgers makes them an excellent choice for health-conscious consumers who want to enjoy the taste of a burger without sacrificing their dietary goals.”

AmyLu Chicken Burgers also have vitamins and minerals like iron, calcium, and B vitamins. These nutrients add to the burger’s nutritional value.

Choosing AmyLu Chicken Burgers means you can enjoy a tasty burger while focusing on your health. They offer a lot of protein, are low-fat, and are full of nutrients. They’re a smart choice for dinner for the whole family.

Quick Guide to Preparing AmyLu Chicken Burgers

Making delicious AmyLu Chicken Burgers is easy with our guide. You can grill or oven-bake them. We’ll show you how to cook them perfectly.

Thawing Instructions

Thaw the frozen AmyLu Chicken Burgers in the fridge overnight for the best taste. You can also thaw them at room temperature for 30-60 minutes. This depends on the burger size.

Cooking Methods and Times

  • Grilling: Heat your grill to medium-high. Cook the patties for 4-6 minutes on each side. Make sure they reach 165°F inside.
  • Oven-Baking: Set your oven to 400°F. Put the oven-baked patties on a baking sheet. Cook for 18-22 minutes, flipping halfway. They should also reach 165°F inside.

Temperature Guidelines

It’s important to cook your AmyLu Chicken Burgers to at least 165°F. Use a meat thermometer to check the temperature. This keeps your food safe and prevents illness.

“Perfectly cooked AmyLu Chicken Burgers are juicy, flavorful, and a healthier choice than beef burgers.”

Creative Serving Suggestions and Toppings

Make your AmyLu Chicken Burger even better with tasty toppings and sides. Turn your meal into a work of art with these ideas.

Start by making a burger that you love. Add classic toppings like ketchup, mustard, and mayonnaise. Or try something new with pickles, jalapeños, or avocado. For a healthier option, add lettuce, tomatoes, and onions.

Mouthwatering Burger Toppings

  • Caramelized onions
  • Crispy bacon
  • Sautéed mushrooms
  • Melted cheese (cheddar, Swiss, or pepper jack)
  • Tangy barbecue sauce
  • Zesty Sriracha or hot sauce

Nutritious Sides to Complement Your Meal

  1. Fresh green salad with balsamic vinaigrette
  2. Roasted sweet potato wedges
  3. Grilled asparagus spears
  4. Steamed broccoli with lemon and garlic
  5. Quinoa or brown rice pilaf
Burger ToppingHealthy Side DishMeal Idea
Avocado, tomato, and onionRoasted sweet potato wedgesAmyLu Chicken Burger with avocado, tomato, and onion, served with roasted sweet potato wedges
Sautéed mushrooms and Swiss cheeseGrilled asparagusAmyLu Chicken Burger with sautéed mushrooms and Swiss cheese, accompanied by grilled asparagus
Crispy bacon and barbecue sauceFresh green salad with balsamic vinaigretteAmyLu Chicken Burger with crispy bacon and barbecue sauce, paired with a fresh green salad and balsamic vinaigrette

Try these creative ideas to make your AmyLu Chicken Burger a hit. It will be both delicious and healthy, satisfying your taste buds and filling you up.

Where to Buy AmyLu Chicken Burgers

Finding AmyLu Chicken Burgers is now easier than before. They are available in many grocery stores and online. This makes it simple for health-conscious people to buy this premium protein.

Retail Locations

AmyLu Chicken Burgers are in the freezer section of top grocery stores in the U.S. You can find them at:

  • Whole Foods Market
  • Albertsons
  • Kroger
  • Walmart
  • Target
  • Costco (in select locations)

Online Shopping Options

Online shoppers can also buy AmyLu Chicken Burgers. They are available on:

  1. Amazon
  2. Thrive Market
  3. Instacart
  4. Walmart.com
  5. Target.com

Price Comparison Guide

Prices for AmyLu Chicken Burgers vary by retailer and quantity. Here’s a guide to help you choose:

RetailerPrice per 4-packPrice per 8-packPrice per 12-pack
Whole Foods Market$9.99$17.99$25.99
Albertsons$8.99$16.49$23.99
Walmart$7.99$14.99$21.99
Amazon$9.49$17.49$24.99

By comparing these prices, you can find the best deal. Whether shopping in stores or online.

Storage Tips and Shelf Life

Keeping your AmyLu Chicken Burgers fresh is key for a great meal. Here are some tips on freezer storage, expiration date, and food safety to help you.

Freezer Storage

For the longest shelf life, freeze your AmyLu Chicken Burgers. They stay good for up to 6 months in the freezer. Wrap them tightly in plastic or foil to keep flavor and quality.

Expiration Dates

Your AmyLu Chicken Burgers stay safe and tasty for 6 months in the freezer. Always check the expiration date before eating. This ensures you get the best taste and quality.

Food Safety

Thaw your burgers in the fridge before cooking. This stops harmful bacteria from growing. Cook them to 165°F to kill any germs.

Follow these easy tips to enjoy AmyLu Chicken Burgers for months. They’re made with top ingredients and are healthier, so you can serve them with confidence.

Popular AmyLu Chicken Burger Varieties

At AmyLu, we’re proud to offer a wide range of tasty chicken burger flavors. Our menu has something for everyone, from classic favorites to new seasonal options.

Classic Chicken Burger

Our AmyLu Classic Chicken Burger is a beloved choice. It has a juicy chicken patty on a toasted bun. It’s great with many toppings and sauces, making it a favorite for a complete meal.

Specialty Flavors

AmyLu also has unique chicken burger flavors to try. You can enjoy the zesty Southwest Chicken Burger or the savory Teriyaki Chicken Burger. Our seasonal varieties will surely excite your taste buds.

Limited Edition Options

For those who love trying new things, we have limited edition burgers. These bestsellers come with unique ingredients and bold flavors. They’re inspired by global cuisines and seasonal trends, offering new taste adventures.

Burger VarietyFlavor ProfileAvailability
Classic Chicken BurgerJuicy, seasoned chicken pattyYear-round
Southwest Chicken BurgerZesty, Southwestern-inspired seasoningSeasonal
Teriyaki Chicken BurgerSweet and savory teriyaki glazeSeasonal
Sriracha Honey Chicken BurgerSpicy and sweet flavor combinationLimited Edition

Customer Reviews and Ratings

AmyLu Chicken Burgers have won over many health-conscious food lovers. They love the high-quality ingredients and amazing taste. These patties have become a favorite for many.

People say AmyLu Chicken Burgers are juicy and perfectly seasoned. They love how these burgers are filling but not too heavy. Customers also say they’re great for many cooking methods and pair well with different foods.

Review SourceAverage RatingKey Highlights
AmyLu Website4.8/5– Juicy and flavorful
– Healthier alternative to beef
– Easy to prepare
Grocery Store Site4.6/5– Great for family meals
– Versatile for various recipes
– Exceeded expectations in taste tests
Online Review Platform4.7/5– Excellent value for the price
– Convenient for busy weeknights
– Consistent quality across batches

“The AmyLu Chicken Burgers are a game-changer! They’re so much more flavorful and satisfying than the typical frozen patties. I’ll never go back to regular burgers after trying these.”

Many people love AmyLu Chicken Burgers. They say they’re healthier and taste better than regular burgers. This makes AmyLu a top choice for those looking for a tasty, healthier option.

Conclusion

AmyLu Chicken Burgers are a tasty and easy dinner choice. They are made with fresh, top-quality ingredients. This makes them a healthier choice than regular beef burgers.

These burgers taste great and can be served in many ways. They are perfect for any meal plan.

If you want to eat healthier or just need a quick, tasty meal, AmyLu Chicken Burgers are great. They have lean protein and less fat. This makes them a good choice for those who care about their health.

With so many varieties and easy to find, these burgers are a must-try. They offer a delicious and nutritious dinner option.

Make AmyLu Chicken Burgers your go-to dinner choice. Enjoy their convenience, taste, and health benefits. Add them to your meal planning for a wonderful dining experience.

FAQ

What are the key features ?

AmyLu Chicken Burgers are made with top-notch, all-natural ingredients. They offer a healthier choice compared to beef burgers. These burgers are lean, juicy, and packed with flavor, making them a great meal option.

What makes a better choice than regular burgers?

AmyLu Chicken Burgers are leaner and lower in fat than beef burgers. They have a better nutritional profile. This makes them a tasty and healthy meal choice for those looking for a nutritious option.

How do I prepare AmyLu Chicken Burgers?

Preparing AmyLu Chicken Burgers is simple. Just thaw the patties and grill, bake, or pan-fry them. Follow the cooking times and temperatures for a quick and delicious meal.

What are some creative ways to serve AmyLu Chicken Burgers?

You can serve AmyLu Chicken Burgers in many ways. Try them on a bed of greens, in a lettuce wrap, or with roasted veggies or a fresh salad. This lets you customize your meal to your liking.

Where can I purchase AmyLu Chicken Burgers?

You can find AmyLu Chicken Burgers at major grocery stores and online. Look for them in the frozen food section or on the brand’s website. Buying in bulk can also save you money.

How long do AmyLu Chicken Burgers last in the freezer?

AmyLu Chicken Burgers can stay fresh for up to 6 months in the freezer. Just make sure to store them correctly to keep them safe and tasty.

What are the different varieties Burgers ?

AmyLu offers many chicken burger options. You can choose from their classic flavor or try specialty and limited-edition varieties. There’s something for everyone, from traditional to unique flavors.

What do customers say about AmyLu Chicken Burgers?

Customers love AmyLu Chicken Burgers. They praise the burgers’ taste, texture, and quality. People also appreciate the brand’s focus on using natural ingredients and offering a healthier option.

New Orleans Shrimp and Grits Recipe | Southern Comfort

new orleans shrimp and grits recipe

Imagine a dish that takes you to New Orleans’ heart, where Creole flavors meet Southern comfort. New Orleans Shrimp and Grits Recipe and grits is a beloved dish that shows the city’s vibrant culture and hospitality. But have you ever thought about how this classic dish went from simple to fine dining across the nation?

Key Takeaways

  • Discover the rich history of shrimp and grits in New Orleans’ culinary landscape, from its modest origins to its rise as a celebrated fine-dining dish.
  • Explore the Creole influences that have shaped the modern recipes and techniques used in crafting this iconic Southern dish.
  • Learn the essential ingredients and preparation methods for creating an authentic New Orleans-style shrimp and grits dish, including selecting the perfect Gulf shrimp and mastering the art of creamy Southern-style grits.

So, what’s the secret to this quintessential Southern comfort food? Join us as we explore the story of New Orleans shrimp and grits. We’ll uncover the traditions, techniques, and flavors that make it a true culinary masterpiece.

The Rich History of Shrimp and Grits in New Orleans Cuisine

Shrimp and grits has a rich history in New Orleans. It started as a simple breakfast for fishermen. Now, it’s a celebrated dish in Low Country cuisine and Creole fusion.

From Humble Beginnings to Fine Dining

Shrimp and grits comes from the Carolinas and Georgia. It was a common breakfast for fishermen. When it reached New Orleans, Creole and Cajun flavors changed it.

Now, it’s a refined dish in top restaurants. It’s a key part of New Orleans cuisine. It shows the city’s rich culture and creativity.

The Creole Influence on Modern Recipes

The Creole tradition has shaped shrimp and grits in New Orleans. Chefs add Creole spices and bold flavors. This makes the dish unique and delicious.

With andouille sausage and Cajun seasoning, it’s become a favorite. It’s a key part of the city’s culinary scene.

Essential Ingredients for Authentic New Orleans Shrimp and Grits

Making the perfect New Orleans shrimp and grits needs the right ingredients. You’ll need Gulf shrimp for their sweet taste and firm texture. Also, stone-ground grits are key for their creamy, authentic feel.

The Gulf shrimp are the heart of this dish. Choose medium-sized ones for the best taste and texture. For the grits, go for stone-ground grits from heirloom corn. They’re creamier and more authentic than regular grits.

Andouille sausage adds depth and spice to the dish. Its smoky, spicy flavor pairs well with the shrimp and grits. Don’t forget to sprinkle Creole seasoning on top. It brings the whole dish together with a New Orleans twist.

Using the best Gulf shrimp, stone-ground grits, Andouille sausage, and Creole seasoning will make your dish taste like New Orleans. This recipe celebrates the region’s rich food culture and its beloved flavors.

Selecting and Preparing the Perfect Gulf Shrimp

Creating the ultimate New Orleans shrimp and grits starts with fresh, high-quality gulf shrimp. Every step, from size and texture to cleaning and seasoning, is crucial. It unlocks the true flavors of this Southern recipe.

Size and Quality Guidelines

The size of the shrimp greatly affects the dish. Choose fresh seafood in the 16/20 or 21/25 count per pound range. These medium-sized shrimp offer the perfect balance of tenderness and chewiness. Avoid smaller sizes that get lost in the grits, or larger ones that overpower the flavors.

Quality and freshness are also key. Look for shrimp that are firm, slightly translucent, and have a vibrant, ocean-fresh aroma. Stay away from mushy, discolored, or strongly fishy-smelling shrimp, as they’re likely past their prime.

Cleaning and Deveining Tips

Before seasoning and cooking, clean and devein the shrimp. This step improves texture and removes grit or impurities. Use a sharp knife to make a shallow incision down the back of each shrimp. Then, gently remove the dark vein with the knife tip.

  • Rinse the shrimp under cold running water to remove debris.
  • Pat the shrimp dry with paper towels for better searing and caramelizing.

Seasoning Techniques

After cleaning and prepping, add Creole and Cajun flavors to the shrimp. A mix of Cajun seasoning, garlic, and black pepper enhances the shrimp‘s natural sweetness. Toss the shrimp in the seasoning just before cooking for the best flavor.

“The secret to the best shrimp and grits is in the shrimp. Fresh, perfectly cooked gulf shrimp are the foundation for this dish.”

Follow these tips for selecting, preparing, and seasoning the shrimp. You’ll be on your way to a truly authentic New Orleans shrimp and grits experience.

Mastering Creamy Southern-Style Grits

In Southern cuisine, stone-ground grits are a true comfort food. They’ve been loved in New Orleans for many years. Learning to make creamy, slow-cooking cheese grits is a big step for chefs.

The secret to great Southern-style grits is slow cooking. Unlike quick grits, stone-ground ones need careful cooking. This brings out their full flavor and smooth texture.

  1. Start with high-quality stone-ground grits, preferably from a local mill or specialty purveyor.
  2. Gradually whisk the grits into a simmering mixture of milk, broth, and butter, stirring constantly to prevent lumps.
  3. Maintain a gentle simmer, allowing the grits to cook low and slow for 30-45 minutes, until they reach your desired creaminess.
  4. Finish with a generous helping of shredded cheese grits, such as cheddar or Parmesan, to enhance the rich, savory flavors.

Getting it right takes patience and focus. By using the slow-cooking method, you’ll get stone-ground grits that are truly Southern. They’re comforting, creamy, and delicious.

“Grits are the foundation of Southern cuisine, and the perfect bowl is a true art form. With a little time and care, you can elevate this humble dish to new heights of flavor and texture.”

New Orleans Shrimp and Grits Recipe

Making the perfect New Orleans-style shrimp and grits is a true art. It mixes rich Southern flavors with classic cooking methods. You’ll need the right tools and a clear guide to make it in your kitchen.

Kitchen Equipment Needed

Here are the essential tools for this recipe:

  • A cast-iron skillet for searing the shrimp
  • A Dutch oven or heavy-bottomed saucepan for cooking the grits
  • A sharp chef’s knife for prepping the ingredients
  • A wooden spoon for stirring and incorporating the flavors

Step-by-Step Cooking Instructions

Here’s how to make authentic New Orleans-style shrimp and grits:

  1. In the cast-iron skillet, sauté the shrimp over medium-high heat until they’re just cooked through, about 3-4 minutes per side. Remove the shrimp from the pan and set aside.
  2. In the Dutch oven, bring the water or chicken stock for the grits to a boil. Slowly whisk in the grits, reduce the heat to low, and simmer, stirring frequently, until the grits are creamy and tender, about 20-25 minutes.
  3. Stir in the butter, cheese, and seasonings until the cheese is melted and the grits are smooth and creamy.
  4. Gently fold the sautéed shrimp back into the creamy grits, taking care not to overcook the shrimp.

Timing and Temperature Guidelines

For the best results, follow these timing and temperature guidelines:

StepTimeTemperature
Sauté the shrimp3-4 minutes per sideMedium-high heat
Cook the grits20-25 minutesLow heat

The key to perfect shrimp and grits is timing and detail. Use the right tools and follow these guidelines to bring New Orleans flavors to your kitchen.

Secret Seasonings and Spice Combinations

Discover the secrets of authentic New Orleans flavor through spice blending. The Creole cuisine of the Big Easy is famous for its bold, complex tastes. These come from a mix of herbs, garlic, and specialty spices.

The Creole spice blend is at the heart of many classic New Orleans dishes. It combines paprika, cayenne, black pepper, garlic powder, onion powder, and oregano. This blend is fiery and fragrant, bringing together diverse culinary influences.

But there’s more to it. Chefs in New Orleans use various spice combinations to make their shrimp and grits recipes stand out. A bit of hot sauce adds a tantalizing kick. Meanwhile, fresh herbs brighten the dish and highlight the sweetness of Gulf shrimp.

To truly capture New Orleans’ essence, try layering these flavor enhancers. Mix the Creole spice blend with Cajun seasoning or smoked paprika. The options are endless, and the results are always tasty.

Spice BlendKey IngredientsFlavor Impact
Creole Spice BlendPaprika, cayenne, black pepper, garlic powder, onion powder, oreganoBold, fiery, and fragrant
Cajun SeasoningPaprika, garlic powder, onion powder, black pepper, cayenne, thyme, oreganoSpicy, earthy, and complex
Smoked PaprikaPaprika, garlic, herbsSmoky, sweet, and savory

By trying out these secret spice combinations, you can bring out the true essence of New Orleans cuisine. Your shrimp and grits dishes will be full of flavor.

Creating the Perfect Creole Sauce

Making a true Creole sauce is like a dance of flavors. It starts with a roux, a mix of flour and fat. This gives the sauce its smooth texture and deep taste.

Building Layers of Flavor

The key to a great Creole sauce is layering flavors. Start by cooking the Trinity mix – onions, bell peppers, and celery – in butter and oil. This creates a base full of aroma.

Then, add Worcestershire sauce for a savory taste. Next, add tomatoes for sweetness and color. Finish by deglazing the pan with wine or broth. This step captures all the flavors from the bottom of the pan.

Traditional Sauce Techniques

  • Creating a Creole sauce takes patience. Let it simmer slowly, stirring now and then, until it thickens and flavors blend.
  • For extra richness, add a bit of heavy cream or dairy-based roux towards the end. This makes the sauce creamy and balances the tomatoes’ acidity.
  • Finally, add fresh herbs like parsley or green onions. They brighten the sauce’s flavor.

By following these traditional steps, you’ll make a Creole sauce that truly captures New Orleans’ spirit.

IngredientPurpose
RouxProvides the base and thickening agent for the sauce
Trinity Mix (Onions, Bell Peppers, Celery)Establishes the aromatic foundation of the sauce
Worcestershire SauceAdds a savory, umami flavor profile
TomatoesContribute sweetness and color to the sauce
Wine or BrothUsed to deglaze the pan and capture flavorful browned bits
Heavy Cream or Dairy-based RouxProvides a velvety, rich mouthfeel to the sauce
Fresh HerbsBrighten and balance the overall flavor profile

Serving Suggestions and Garnishing Tips

Make your New Orleans shrimp and grits stand out with creative presentation and garnishes. Show off the dish’s rich flavors and colors by arranging it beautifully. This will make your guests eager to try it.

Begin with creamy, buttery grits as the base. Place sautéed shrimp on top, letting the Creole sauce flow over the sides. Add crispy bacon or andouille sausage for extra flavor and crunch.

Top your shrimp and grits with fresh herbs like parsley, green onions, or chives. These herbs not only look great but also add a fresh taste that balances the dish’s richness.

Pair your shrimp and grits with tasty side dishes that highlight New Orleans flavors. Try sautéed okra, roasted sweet potato wedges, or a zesty Creole dressing salad. These sides will enhance your dish and show off Southern hospitality.

Presentation IdeasGarnish SuggestionsComplementary Side Dishes
Arrange grits as a base Nestle shrimp on top Drizzle Creole sauce artfullyChopped parsley Green onions Chives Crispy bacon crumbles Sautéed andouille sausageSautéed okra Roasted sweet potato wedges Green salad with Creole dressing

By focusing on presentation and garnishes, you can take your New Orleans shrimp and grits to the next level. It will show off the dish’s vibrant flavors and Southern hospitality, making it a true culinary gem.

Wine Pairing and Beverage Recommendations

Enhancing the taste of New Orleans’ shrimp and grits needs careful drink choices. Experts recommend white wines and Southern cocktails to make the meal better.

White Wine Selections

The flavors of shrimp and grits need a wine that’s both crisp and fruity. Sauvignon Blanc and Chardonnay are great picks. They match the dish’s creamy feel and spicy kick.

  • Sauvignon Blanc: Its zesty, herbaceous notes and refreshing acidity provide a delightful contrast to the dish’s bold flavors.
  • Chardonnay: A well-balanced Chardonnay with hints of citrus and vanilla can beautifully round out the dish, creating a harmonious pairing.

Cocktail Pairings

For a true Southern taste, try classic Southern cocktails with shrimp and grits. These drinks add a rich, indulgent touch to the meal.

  1. Mint Julep: The refreshing mix of bourbon, mint, and simple syrup goes well with the dish’s creamy texture and Cajun spices.
  2. Sazerac: This iconic New Orleans cocktail, made with rye whiskey, Peychaud’s Bitters, and a touch of absinthe, can be a sophisticated companion to the shrimp and grits.

“The right beverage pairing can elevate the dining experience, perfectly balancing the bold flavors of shrimp and grits.”

Conclusion

New Orleans shrimp and grits is a beloved dish in Southern cuisine. It comes from the rich Creole traditions of the area. This comforting meal has grown from simple beginnings to a favorite in both fancy restaurants and home kitchens.

By learning the key ingredients and methods, you can make this dish in your kitchen. Choosing the right Gulf shrimp and making creamy grits are crucial. Each part of the recipe adds to a memorable dining experience.

If you love New Orleans cuisine or are trying it for the first time, we hope this guide has sparked your interest. So, get your ingredients ready, turn on the stove, and enjoy the warm taste of New Orleans shrimp and grits. It’s a true Southern comfort food.

FAQ

What makes New Orleans shrimp and grits so unique?

New Orleans shrimp and grits is a dish loved by many. It mixes the bold tastes of Creole cooking with the warm feel of Southern food. The mix of fresh Gulf shrimp, Creole spices, and creamy grits makes it a true New Orleans classic.

How did shrimp and grits become a signature dish in New Orleans?

Shrimp and grits has a rich history in New Orleans. It started as a simple breakfast for fishermen and grew into a fancy restaurant dish. The city’s Creole influence added bold flavors, making it a staple in New Orleans.

What are the essential ingredients for authentic New Orleans shrimp and grits?

To make real New Orleans shrimp and grits, choose your ingredients carefully. Use fresh Gulf shrimp and stone-ground grits. Andouille sausage and Creole seasoning are also key for the dish’s unique taste.

How do I choose and prepare the perfect shrimp for this dish?

Choosing the right shrimp is key for New Orleans shrimp and grits. Look for fresh, wild-caught Gulf shrimp. Clean and season them well with Creole spices for the best flavor.

What’s the secret to making creamy, flavorful Southern-style grits?

For creamy, flavorful grits, start with quality stone-ground grits. Cook them slowly with milk, broth, and butter. Stir often and add cheese at the end for extra richness.

How can I recreate the authentic flavors of New Orleans in my shrimp and grits?

To get the true New Orleans taste in your shrimp and grits, use the right spices and cooking methods. Use a good Creole seasoning mix and add ingredients like Worcestershire sauce and hot sauce. This will bring out the bold flavors of New Orleans.

What are some creative ways to serve and garnish shrimp and grits?

Shrimp and grits can be served in many creative ways. Try plating it family-style or individually for a fancy look. Add garnishes like green onions, bacon, cheese, or Creole sauce for extra flavor and style.

What are the best wine and cocktail pairings for New Orleans shrimp and grits?

For drinks with New Orleans shrimp and grits, choose something that complements its rich flavors. A crisp Sauvignon Blanc or buttery Chardonnay works well for wine. For cocktails, a Sazerac or Mint Julep adds a refreshing contrast to the dish’s bold spices.

Delicious Hawaiian Pineapple Cake Recipe From Paradise

Hawaiian pineapple cake

Imagine sinking your fork into a moist, tropical delight that takes you straight to Hawaii’s lush islands. This authentic Hawaiian pineapple cake recipe is a true culinary gem. It combines the sweet, tangy flavors of fresh pineapple with a creamy, indulgent frosting. It’s a dessert that captures the essence of island life, where the sun-kissed flavors of the tropics are celebrated in every bite.

But what’s the secret to this irresistible cake? And how does it reflect Hawaii’s rich cultural heritage? Discover the answers as we explore the captivating history and time-honored traditions that have shaped this beloved island treat.

Key Takeaways

  • Explore the authentic Hawaiian pineapple cake recipe, a delightful fusion of tropical flavors
  • Discover the cultural significance and history behind this beloved island dessert
  • Learn the essential ingredients and techniques for crafting the perfect pineapple cake
  • Uncover tips and tricks for selecting and preparing fresh pineapples for maximum flavor
  • Gain insights into creating the perfect tropical frosting and decorative touches

So, are you ready to embark on a flavorful journey to the heart of Hawaii and uncover the secrets of the irresistible Hawaiian pineapple cake? Let’s dive in and savor the essence of this island paradise, one delicious bite at a time.

The History Behind Traditional Hawaiian Pineapple Cake

The story of Hawaiian pineapple cake goes back to the rich Hawaiian food history. It’s tied to the island’s long tradition of pineapple cultivation. Over time, it became a key part of luau celebrations and Hawaiian food.

Origins in Hawaiian Culture

Pineapple has been a key ingredient in Hawaiian food for centuries. The islands’ perfect climate made it easy to grow. The first Hawaiians used pineapple in their recipes and celebrations.

Evolution of the Recipe Through Generations

As pineapple farming grew in Hawaii, the cake recipe changed. Each generation added their own twist. This made the cake a cherished part of Hawaiian food heritage.

Cultural Significance in Luaus

The Hawaiian pineapple cake is a big part of luau traditions. It shows the islands’ rich culture and natural wealth. At these festive events, the cake is a sweet end, showing Hawaiian hospitality and joy.

“The pineapple cake is more than just a dessert; it’s a symbol of the Hawaiian way of life, celebrating the island’s abundance and the community’s enduring traditions.”

Essential Ingredients for the Perfect Tropical Cake

To make a true Hawaiian pineapple cake, you need the right ingredients. The fresh pineapple is key, adding sweetness and a juicy feel. It’s paired with cake flour, which makes the cake light and fluffy.

The coconut milk brings a creamy, tropical taste. It’s like a trip to Hawaii’s sunny beaches. And don’t forget the vanilla extract. It balances the flavors and adds a warm, comforting touch.

IngredientPurpose
Fresh pineappleProvides sweetness and juicy texture
Cake flourCreates a light and airy crumb
Coconut milkLends a creamy, tropical flavor
Vanilla extractBalances the flavors and adds depth

With these ingredients and the right techniques, you’ll make a tropical pineapple cake that feels like Hawaii.

Kitchen Tools and Equipment You’ll Need

To make a tasty Hawaiian pineapple cake, you need the right tools. From cake pans to mixing tools, the right baking equipment is key. Let’s look at the kitchen gadgets you’ll need for this tropical treat.

Baking Pans and Measurements

The base of any cake is the baking pan. For this Hawaiian pineapple cake, use a round, deep-dish pan, 8 or 9 inches wide. A springform pan is also good, as it makes the cake easy to remove. Always grease the pans well to avoid sticking.

Mixing Equipment Essentials

  • A stand mixer or hand mixer to blend the cake batter
  • A large mixing bowl to hold all the ingredients
  • Measuring cups and spoons for accurate measurements

Additional Helpful Tools

  1. A sharp knife or pineapple corer for the fresh fruit
  2. A smooth spatula for frosting and decorating
  3. Parchment paper or a silicone baking mat for lining pans
  4. A wire cooling rack for cooling the cake before frosting

With these baking equipment and kitchen gadgets, you’re ready to make a stunning Hawaiian pineapple cake. It’s perfect for any tropical paradise.

How to Select and Prepare Fresh Pineapples

Choosing the perfect ripe pineapple is key for a real Hawaiian pineapple cake. Here are some tips to pick the freshest, tastiest fruit for your baking.

Identifying Ripe Pineapples

Look for a pineapple with a golden-yellow color and a sweet smell. Gently squeeze it – it should feel slightly soft but not too soft. Stay away from pineapples with green or brown spots, as they’re overripe or bruised.

Cutting Techniques for Pineapple Coring

  • Start by removing the green crown and bottom of the pineapple.
  • Slice the fruit into rings or wedges, depending on your needs.
  • Use a sharp knife or pineapple corer to remove the tough core from each slice or wedge.

Proper pineapple coring makes your cake layers smooth and without stringy bits. With a bit of practice, you’ll be a pro at slicing and dicing like a Hawaiian pastry chef.

“The key to a perfect Hawaiian pineapple cake is using fresh, ripe fruit. Take the time to select and prepare your pineapples with care.”

By following these simple tips, you’ll make a truly authentic and tasty Hawaiian pineapple cake. Enjoy the sweet tropical flavors of this island paradise in every bite!

Step-by-Step Hawaiian Pineapple Cake Instructions

Baking a moist and flavorful Hawaiian pineapple cake is a delightful journey. Let’s dive into the step-by-step instructions to create this tropical delight.

Preparing the Batter

Start by preheating your oven to 350°F (175°C). Grease and flour a 9-inch round baking pan. In a large mixing bowl, combine the cake flour, baking powder, and salt. Whisk together to ensure even distribution of the baking techniques.

In a separate bowl, cream together the softened butter and granulated sugar until light and fluffy. Beat in the eggs, one at a time, followed by the vanilla extract. Gradually add the dry ingredients to the wet ingredients, alternating with the pineapple juice, until a smooth and creamy moist cake recipe is formed.

Baking Temperature and Timing

Carefully pour the batter into the prepared baking pan, smoothing the top with a spatula. Bake the cake for 30-35 minutes, or until a toothpick inserted into the center comes out clean. Keep a close eye on the cake baking tips to ensure the perfect texture.

Cooling and Setting Tips

  1. Allow the cake to cool in the pan for 10-15 minutes before inverting it onto a wire rack.
  2. Let the cake cool completely before frosting, ensuring a smooth and even surface.
  3. For best results, wrap the cooled cake in plastic wrap and refrigerate for at least 2 hours, or up to 24 hours, before serving.

By following these step-by-step instructions, you’ll be well on your way to creating a moist cake recipe that captures the essence of the Hawaiian Islands. Enjoy the juicy pineapple flavors and the perfectly balanced cake baking tips in every bite!

Creating the Perfect Tropical Frosting

To take your Hawaiian pineapple cake to the next level, you need the right frosting. Choose from a classic cream cheese frosting, a vibrant pineapple buttercream, or a light whipped topping. The right frosting can turn your cake into a tropical dream.

Cream Cheese Frosting

A cream cheese frosting is a rich and indulgent choice. Mix softened cream cheese, butter, powdered sugar, and vanilla extract. This frosting is creamy and tangy, perfect with the pineapple cake.

Pineapple Buttercream

Make a pineapple buttercream to capture Hawaii’s essence. Mix fresh pineapple puree, softened butter, powdered sugar, and lemon juice. This frosting is vibrant and tropical, taking your taste buds to the islands.

Whipped Topping

For a lighter option, try a whipped topping. Use heavy cream, powdered sugar, and vanilla extract. Add some pineapple puree for extra tropical flavor.

Frosting TypeIngredientsTextureFlavor Profile
Cream Cheese FrostingCream cheese, butter, powdered sugar, vanillaRich and creamyTangy and indulgent
Pineapple ButtercreamButter, powdered sugar, pineapple puree, lemon juiceSmooth and spreadableVibrant and tropical
Whipped ToppingHeavy cream, powdered sugar, vanilla, pineapple pureeLight and airyCreamy and refreshing

Choosing the right frosting is key. Find the perfect balance of flavors and textures for your pineapple cake. Try different combinations to find your tropical paradise in every bite.

Decorating Your Hawaiian Pineapple Cake

Making your homemade Hawaiian pineapple cake look good is as key as its taste. You can use many ways to make your cake look like a culinary masterpiece. From old-school garnishes to new tropical designs, there’s a lot you can do.

Traditional Garnishing Methods

Use classic garnishes to honor Hawaii’s rich culture. Top your cake with fresh pineapple rings, colorful edible flowers, and green tropical leaves. This will give your cake a real island feel.

Modern Tropical Touches

For a fresh look, try cake decorating ideas with tropical garnishes like mango, papaya, or kiwi. Place them in a cool pattern or let them spill over the cake’s sides. It will look amazing and grab everyone’s attention.

Special Occasion Decorations

For a luau or Hawaiian party, decorate your cake with themed items. Use bright flowers, colorful ribbons, and custom toppers. This will make your cake a hit and a great centerpiece for your party.

Decorating your Hawaiian pineapple cake is all about using bright colors and flavors of the tropics. With some creativity and care, you can make your cake a beautiful piece that shows off Hawaii’s spirit.

Storage Tips and Shelf Life

Storing your Hawaiian pineapple cake right is crucial for keeping it fresh and tasty. Whether you’re eating it now or saving it for later, these tips will help. Your cake will stay moist and full of flavor.

Refrigeration for Optimal Freshness

To keep your cake fresh, store it in the fridge. Use an airtight container or wrap it in plastic wrap to avoid drying. The fridge’s cool air will keep the cake moist and prevent the pineapple from going bad.

Freezing for Long-Term Enjoyment

Freezing is great for keeping your cake longer. Wrap it in plastic or foil, then put it in a freezer-safe container. Frozen, your cake can last up to 3 months. Just thaw it in the fridge before you eat it for the best taste and texture.

Storage MethodShelf Life
Room Temperature2-3 days
Refrigerator5-7 days
FreezerUp to 3 months

With these easy storage tips, you can enjoy your Hawaiian pineapple cake for a long time. Remember, keeping it in the fridge and taking care of its freshness is key to enjoying it at its best.

Common Mistakes to Avoid

Baking the perfect Hawaiian pineapple cake is a fun journey. But, it comes with its own set of challenges. Knowing common baking errors and troubleshooting tips can help you avoid cake fails. Let’s look at some common issues and how to fix them.

One big mistake is over-mixing the batter. This can make your cake tough and dry. Mix the ingredients just until they’re combined. Overmixing can also make the pineapple release too much liquid, causing a soggy cake.

Not draining the canned pineapple well is another common problem. This extra liquid can mess up your cake’s balance. Make sure to drain and dry the pineapple chunks well before adding them.

  • Avoid overmixing the batter to prevent a tough, dry texture.
  • Thoroughly drain and pat dry the canned pineapple to prevent excess moisture.
  • Check your oven temperature to ensure even baking and prevent burning.
  • Allow the cake to cool completely before frosting to prevent the frosting from melting.

Finally, watch your oven temperature and baking time closely. A too-hot oven can dry out your cake, while a too-cool oven can make it gooey. Stick to the recipe and use an oven thermometer for the best results.

By avoiding these common baking errors and using good troubleshooting methods, you’ll make a delicious Hawaiian pineapple cake. It’ll be as good as any from the Pacific.

Serving Suggestions and Pairings

Serving the Hawaiian pineapple cake with the right accompaniments can make it even more special. There are many traditional options and drinks that can enhance the tropical flavors. This will make your meal unforgettable.

Traditional Hawaiian Accompaniments

For a true Hawaiian experience, pair the cake with classic island dishes. Here are some great choices:

  • Loco Moco – A hearty meal of white rice, a hamburger patty, a fried egg, and savory gravy
  • Poi – A traditional Hawaiian staple made from the taro plant, with a creamy, starch-like texture
  • Haupia – A rich, coconut-based pudding that complements the pineapple cake’s sweetness

Beverage Pairings

Pairing the Hawaiian pineapple cake with the right drinks can really bring out its tropical flavors. Here are some excellent options:

  1. Pineapple Juice – The natural sweetness of pineapple juice perfectly complements the cake’s pineapple-forward flavor profile.
  2. Coconut Water – The light, hydrating properties of coconut water provide a refreshing contrast to the cake’s richness.
  3. Hawaiian Macadamia Nut Coffee – The nutty, slightly sweet notes of this specialty coffee pair beautifully with the cake’s dessert pairings.

By choosing these traditional Hawaiian accompaniments and tropical drink pairings, you can take your taste buds on a trip to the Pacific. It will make your dining experience even more enjoyable.

Recipe Variations and Modifications

The Hawaiian pineapple cake is more than just one recipe. It offers many tasty variations for different diets. You can find gluten-free, vegan, and low-sugar options. Each one brings its own unique twist to the classic.

Gluten-Free Pineapple Cake

For those who can’t eat gluten, making a gluten-free Hawaiian pineapple cake is easy. Just swap the regular flour for a gluten-free blend. This keeps the cake moist and tropical, but safe for gluten-free diets.

Vegan Pineapple Cake

Pineapple is a great choice for vegan baking. Use flax or chia “eggs” instead of real eggs. Choose dairy-free milk and butter substitutes for a cake that’s as tasty as the original.

Low-Sugar Pineappple Cake

Want a cake that’s good for you? Try a low-sugar version. Cut down on granulated sugar and add honey or maple syrup. Top it with a sugar-free frosting for an extra health boost.

VariationKey IngredientsNotable Benefits
Gluten-Free Pineapple CakeGluten-free flour blend, flax or chia “eggs”Accommodates those with gluten sensitivities
Vegan Pineapple CakeDairy-free milk, vegan butter, flax or chia “eggs”Suitable for plant-based diets
Low-Sugar Pineapple CakeReduced granulated sugar, natural sweetenersOffers a healthier, lower-calorie alternative

These variations on the Hawaiian pineapple cake cater to many tastes and needs. They’re perfect for those with dietary restrictions or just looking to try something new.

Conclusion

The Hawaiian pineapple cake is a delightful treat that brings the islands to life. It’s rich in cultural heritage and full of mouthwatering flavors. This recipe is a true delight for the senses.

Whether you’re hosting a luau or just want a taste of paradise, making this cake is rewarding. Follow the step-by-step guide and use the tips and tricks shared. You’ll enjoy the sweet pineapple, moist cake, and creamy frosting.

Don’t be shy to try this Hawaiian dessert recipe. Dive into the vibrant culture and enjoy baking. Share this delicious pineapple cake with your loved ones. Let the flavors of Hawaii inspire your cooking.

FAQ

What are the key ingredients for an authentic Hawaiian pineapple cake?

To make a true Hawaiian pineapple cake, you need fresh pineapple, cake flour, and coconut milk. Also, vanilla extract and tropical elements are key to get that island taste.

What kind of baking equipment is needed to make the perfect Hawaiian pineapple cake?

You’ll need basic baking pans and tools for measuring. A stand mixer or electric hand mixer is also important. Don’t forget a pineapple corer and cake decorating supplies.

How do I choose and prepare the fresh pineapple for the cake?

Choose a pineapple that’s golden-yellow, fragrant, and slightly soft. Cut it into cubes, remove the core, and add it to the batter. This will give your cake the best flavor and texture.

What are some common mistakes to avoid when making Hawaiian pineapple cake?

Avoid overbaking the cake and using canned pineapple instead of fresh. Also, make sure to store the cake properly to keep it fresh.

How can I decorate the Hawaiian pineapple cake to make it extra special?

Decorate with fresh pineapple slices, edible flowers, and tropical leaves for a traditional look. For something modern, try a creamy pineapple buttercream or whipped topping.

What are some tasty serving suggestions and pairings for the Hawaiian pineapple cake?

Serve the cake with coconut-based dishes, tropical fruits, and Hawaiian coffee. These pairings bring out the cake’s tropical flavors.

Are there any recipe variations or modifications for dietary restrictions?

Yes, you can make gluten-free, vegan, or low-sugar versions of the cake. This way, everyone can enjoy the tropical flavors, no matter their dietary needs.

Creamy Marry Me Chicken Pasta: The Ultimate Date Night

marry me chicken pasta

Imagine a cozy evening with candlelight and a meal that sets the mood for romance. Marry Me Chicken Pasta is the perfect dish for a date night. It’s creamy, indulgent, and shows love and devotion through food.

What makes this dish so irresistible? Why is it a favorite for couples wanting a memorable dinner at home? Explore the world of Marry Me Chicken Pasta and find out what makes it special for date nights.

Key Takeaways

  • Marry Me Chicken Pasta is a romantic and indulgent dish perfect for date nights.
  • The creamy texture and flavorful ingredients create an irresistible dining experience.
  • This dish has become a popular choice for couples seeking to elevate their at-home dining experience.
  • Preparing Marry Me Chicken Pasta can be a fun and rewarding culinary adventure for couples.
  • Mastering the recipe can impress your partner and strengthen your emotional connection.

What Makes Marry Me Chicken Pasta So Special

The story of Marry Me Chicken, also known as Engagement Chicken, is filled with love and chance. It became famous in the early 2000s after Glamour magazine shared it. This dish was said to make people propose.

It started as a simple yet tasty chicken recipe. It has won the hearts and taste buds of many.

The Origins of this Romantic Dish

Marry Me Chicken comes from Chicken Florentine, a beloved Italian-American dish. It’s creamy, cheesy, and served with pasta. It’s a top pick for couples wanting to wow their partners.

Over time, it got even better. Sun-dried tomatoes, garlic, and a hint of sherry or white wine were added. This made the dish uniquely special.

Why It’s Perfect for Date Night

Marry Me Chicken Pasta is perfect for a romantic date night. It’s rich, creamy, and comforting. It’s ideal for a cozy, intimate evening.

It’s great for anniversaries, first dates, or just a night in. Its history and flavors make it unforgettable. It’s the perfect choice for a history of marry me chicken and romantic meal ideas.

Essential Ingredients for the Perfect Creamy Sauce

Making the ultimate creamy sauce for your Marry Me Chicken Pasta is about finding the right mix of flavors and textures. The main ingredients are sun-dried tomatoes, heavy cream, and parmesan cheese.

Sun-dried tomatoes bring a rich, savory-sweet taste that goes well with the sauce’s richness. Their chewy texture contrasts nicely with the smooth cream. Heavy cream is key, making the sauce silky and blending all the ingredients together.

Parmesan cheese adds a salty, nutty flavor and melts well into the sauce. A bit of garlic and fresh herbs like basil or oregano add to the taste, making the pasta dish hard to resist.

For the best taste, use top-quality ingredients. Look for sun-dried tomatoes that are plump, heavy cream with at least 36% butterfat, and parmesan cheese that’s freshly grated. These will make your Marry Me Chicken Pasta even more delicious.

“The secret to a truly exceptional Marry Me Chicken Pasta lies in the quality of its ingredients. Investing in the best sun-dried tomatoes, heavy cream, and parmesan cheese will pay off in every bite.” – Chef Marinara

Kitchen Tools and Equipment You’ll Need

To make a delicious batch of Marry Me Chicken Pasta, you’ll need some key tools and equipment. We’ll cover the must-haves and some optional gadgets that can help. This will make your cooking experience for this romantic dish even better.

Must-Have Cookware

  • A large, deep skillet or sauté pan to sear the chicken and build the creamy sauce
  • A sturdy pasta pot to cook the noodles to al dente perfection
  • A sharp chef’s knife for efficient chicken and herb prep
  • A wooden spoon or spatula to stir and mix the ingredients
  • A cutting board to safely slice and dice your kitchen essentials

Optional but Helpful Tools

While the must-have cookware is essential, some extra tools can enhance your Marry Me Chicken Pasta experience:

  1. A garlic press to easily mince those fragrant cloves
  2. A zester to add a bright, citrusy note to the sauce
  3. A set of measuring cups and spoons for precise ingredient proportions
  4. A blender or immersion blender to create a silky smooth sauce texture
  5. A meat tenderizer to ensure your chicken is tender and juicy
Essential CookwareOptional Tools
Large skilletGarlic press
Pasta potZester
Chef’s knifeMeasuring cups/spoons
Wooden spoon/spatulaBlender/immersion blender
Cutting boardMeat tenderizer

With these kitchen essentials and cooking utensils, you’ll be ready to make a restaurant-quality Marry Me Chicken Pasta at home.

Step-by-Step Recipe Instructions

Preparing the perfect creamy marry me chicken pasta is a delightful journey. Let’s follow the steps to make this dish that will surely impress your date.

  1. Start by seasoning the chicken breasts with salt, pepper, and herbs or spices. Heat a large skillet over medium-high heat. Sear the chicken until it’s golden brown on both sides, about 3-4 minutes per side.
  2. After the chicken is cooked, remove it from the skillet and set it aside. In the same skillet, add the chopped onions and garlic. Sauté them until they’re fragrant and translucent.
  3. Next, deglaze the skillet with a splash of white wine or chicken broth. This will scrape up browned bits from the bottom of the pan. It adds depth to the creamy pasta recipe.
  4. Stir in the heavy cream, Parmesan cheese, and a pinch of nutmeg. Let the sauce simmer gently, stirring occasionally, until it thickens.
  5. Add the cooked and drained pasta to the creamy sauce. Toss it to coat evenly. Slice the seared chicken breasts and gently fold them into the pasta.
  6. Serve the how to make marry me chicken pasta hot. Garnish with fresh chopped parsley or basil, if you like. Enjoy this romantic and indulgent dish with your special someone.

“This creamy pasta recipe is the perfect way to say ‘I love you’ without saying a word. The rich, flavorful sauce and tender chicken make it a dream for date nights.”

Pro Tips for Making Restaurant-Quality Marry Me Chicken Pasta

Making your Marry Me Chicken Pasta as good as a restaurant’s is simple. Just use a few cooking tips and culinary techniques. You’ll wow your date with a dish that’s as tasty as the best Italian places.

Sauce Consistency Tips

For a smooth sauce, mix cream and cheese slowly over low heat. Stir gently to avoid lumps. Add Parmesan bit by bit, stirring well after each addition. This way, your sauce will be rich and cling to the pasta perfectly.

Pasta Cooking Techniques

For al dente pasta, watch it closely as it cooks. Taste it a few minutes before it’s done. When it’s still firm but tender, drain it and mix it with the sauce. This method keeps the pasta chewy and delicious.

Chicken Preparation Secrets

  • Brine the chicken in saltwater for 30 minutes to an hour before cooking. This keeps it juicy and flavorful.
  • Sear the chicken in a hot pan to get a golden crust. Then, finish it in the oven. This method gives you a crispy outside and a tender inside.
  • Let the chicken rest for 5-10 minutes before slicing. This helps the juices stay inside, making it moist and flavorful.

With these cooking tips and culinary techniques, you’ll make a Marry Me Chicken Pasta that’s sure to impress. It’ll get a five-star review for sure.

Wine Pairing Suggestions for Your Romantic Dinner

To make your Marry Me Chicken Pasta special, pick the right wine. Whether you like bold reds or crisp whites, there are great choices. They’ll match the creamy, tasty sauce of this dish perfectly.

Red wine lovers might enjoy a medium-bodied Pinot Noir or a fruity Merlot. These wines have soft tannins and earthy notes. They blend well with the chicken and pasta’s rich flavors. A Cabernet Sauvignon is also good, offering a fuller taste that contrasts the creaminess.

White wine fans might prefer a zesty Sauvignon Blanc or a crisp Pinot Grigio. These wines are light and refreshing. They cut through the dish’s richness, leaving your palate clean and ready for more.

Wine RecommendationReason for Pairing
Pinot NoirThe earthy, subtle notes complement the savory flavors of the dish.
MerlotThe fruity profile and soft tannins balance the creamy sauce.
Sauvignon BlancThe high acidity helps to cut through the richness of the pasta.
Pinot GrigioThe crisp, refreshing notes provide a pleasant contrast to the creamy texture.

Choose a wine that complements your Marry Me Chicken Pasta. The right wine makes your dinner date night unforgettable. It’s all about finding that perfect match.

“The true alchemy of a perfect wine pairing lies in the balance it strikes with the food, creating a harmonious symphony of flavors.”

Serving and Presentation Ideas

When serving Creamy Marry Me Chicken Pasta, think about how to make it special. A romantic table setting and creative garnishes can make a big difference. Let’s look at some ways to present this tasty pasta.

Garnishing Tips

A good garnish can turn a dish into a masterpiece. Try adding fresh parsley or basil on top for color and flavor. For more elegance, use thinly sliced cherry tomatoes or slivers of parmesan cheese.

Table Setting Suggestions

Make your table setting romantic. Use crisp, white linen napkins and matching placemats for a clean look. Add soft, ambient lighting with candlesticks or a dimmer-controlled chandelier for mood. Complete the look with delicate, floral arrangements or a single, long-stemmed rose.

“The way to a man’s heart is through his stomach, and the way to a woman’s heart is through her eyes.” – Unknown

Focus on food presentation and romantic table setting to make your Creamy Marry Me Chicken Pasta unforgettable. It will be a memorable dining experience for your special someone.

Make-Ahead and Storage Instructions

Preparing parts of the Creamy Marry Me Chicken Pasta ahead of time can change your meal prep game. This tasty pasta recipe is perfect for make-ahead meals. It lets you enjoy its flavors with little effort.

Meal Prep for Busy Weeknights

To save time, cook the chicken and make the creamy sauce early. Cooked chicken can be stored in the fridge for up to 3 days. The sauce can be made ahead and kept in the fridge for up to 5 days.

When you’re ready, just reheat the sauce. Then, mix it with fresh pasta and the pre-cooked chicken.

Storing Leftovers

  • Leftover Creamy Marry Me Chicken Pasta can be stored in an airtight container in the refrigerator for up to 4 days.
  • For longer-term storage, the dish can be frozen for up to 3 months. Be sure to let it cool completely before transferring to a freezer-safe container.
  • When reheating leftovers, either in the microwave or on the stovetop, add a splash of milk or cream to help restore the creamy texture of the sauce.
Storage MethodRefrigeratorFreezer
Cooked Chicken3 days3 months
Creamy Sauce5 days3 months
Assembled Dish4 days3 months

Using these meal prep and leftovers storage tips, you can enjoy Creamy Marry Me Chicken Pasta more than once. It’s a great choice for your date night and beyond.

Common Mistakes to Avoid

Making the perfect Creamy Marry Me Chicken Pasta is rewarding but comes with challenges. We’ve listed common mistakes to help you avoid them. This way, you can have a smooth recipe troubleshooting process.

Sauce Troubleshooting

One big issue is a sauce that separates or gets too thick or thin. Watch your heat and cooking time closely. Don’t let the sauce boil too fast, as it can curdle.

Also, don’t overcook the sauce. It can turn into a gloopy mess.

Timing and Temperature Tips

  • Watch the cooking time for chicken and pasta closely. Overcooked chicken is dry, and undercooked pasta spoils the dish.
  • Use a meat thermometer to check the chicken’s internal temperature. It should be 165°F (74°C).
  • Follow the pasta’s cooking time on the package. Save some starchy water to help the sauce stick.

By avoiding these common mistakes, you’ll make a Creamy Marry Me Chicken Pasta that will wow your date. It’s sure to make them fall in love with your cooking.

Variations and Dietary Modifications

Marry Me Chicken Pasta is a delightful dish that can be easily adapted to cater to various dietary preferences and needs. Whether you’re looking for a gluten-free option or seeking a vegetarian alternative, this versatile recipe offers plenty of possibilities to satisfy every palate.

Gluten-Free Pasta Swap

For those following a gluten-free diet, swapping in gluten-free pasta is a simple solution. Opt for high-quality gluten-free pasta made from ingredients like rice, quinoa, or corn. These alternatives offer a similar texture and flavor to traditional wheat pasta, ensuring your Marry Me Chicken dish remains just as satisfying.

Vegetarian Chicken Alternatives

To create a vegetarian-friendly version of this dish, you can replace the chicken with plant-based protein sources. Sautéed mushrooms, firm tofu, or even cauliflower florets can make excellent substitutes, providing a meaty texture and savory flavor profile that pairs beautifully with the creamy sauce.

Dairy-Free Sauce Substitutions

If you’re avoiding dairy, the creamy sauce can be easily adapted using plant-based milk alternatives. Unsweetened almond milk, cashew milk, or oat milk can seamlessly replace the traditional dairy components, resulting in a dairy-free version of the Marry Me Chicken Pasta that is just as rich and indulgent.

By exploring these variations and modifications, you can enjoy the delicious flavors of Marry Me Chicken Pasta while catering to your specific dietary needs or preferences. Whether you opt for gluten-free pasta, vegetarian chicken, or a dairy-free sauce, the end result will be a meal that is sure to impress and satisfy your taste buds.

Conclusion

Creamy Marry Me Chicken Pasta is perfect for a romantic dinner or any special occasion. It’s a dish that will impress and delight your loved one. From its tasty origins to the easy recipe, it’s sure to wow.

With the right ingredients and expert tips, you can make this meal at home. It’s great for anniversaries, Valentine’s Day, or a memorable date night. This pasta will make your evening filled with love and laughter.

So, invite your loved one to cook with you. Put on your apron and enjoy making this dish together. Cooking together can bring you closer. And, who knows, it might just spark something special.

FAQ

What is Marry Me Chicken Pasta?

Marry Me Chicken Pasta is a tasty dish that’s great for romantic nights. It’s creamy and comforting, perfect for making a special moment with your partner.

What makes Marry Me Chicken Pasta so special?

This pasta is loved for its creamy texture and rich flavors. It’s made with tender chicken, sun-dried tomatoes, and a creamy parmesan sauce. It’s also linked to proposals, making it ideal for a memorable date.

What are the essential ingredients for the perfect creamy sauce?

The sauce needs heavy cream, parmesan cheese, sun-dried tomatoes, garlic, and herbs. The cream makes it smooth, while the parmesan adds flavor. Sun-dried tomatoes add sweetness, and garlic and herbs complete the taste.

What kitchen tools and equipment are needed to make Marry Me Chicken Pasta?

You’ll need a big skillet for cooking and a pot for boiling pasta. Also, a cutting board, knife, measuring tools, and a spoon or spatula are essential. Optional tools include a garlic press, box grater, and pasta strainer.

What are the step-by-step instructions for making Marry Me Chicken Pasta?

Here’s how to make it: 1. Season and cook the chicken in a skillet. 2. Remove the chicken and sauté the sun-dried tomatoes and garlic. 3. Add the heavy cream and parmesan cheese, simmering to make the sauce. 4. Return the chicken to the sauce and simmer. 5. Cook the pasta as directed. 6. Toss the pasta with the chicken and sauce. 7. Serve hot, garnished with herbs or parmesan.

What are some pro tips for making restaurant-quality Marry Me Chicken Pasta?

For a top-notch dish, follow these tips: – Simmer the cream and cheese slowly for a smooth sauce. – Cook pasta al dente for a better texture. – Pound the chicken to even thickness and sear it to keep juices in. – Add white wine or chicken broth to the sauce for extra flavor.

Strawberry Crunch Cheesecake Recipe: The Ultimate Dessert Everyone Loves

Strawberry Crunch Cheesecake

Imagine a dessert that combines creamy cheesecake with crunchy streusel topping. It’s all topped with fresh, juicy strawberries. This Homemade Strawberry Crunch Cheesecake is a hit that will have everyone talking. Let’s explore what makes it so special.

Key Takeaways

  • Discover the perfect blend of creamy cheesecake and crunchy topping
  • Learn how to create a show-stopping dessert with fresh strawberries
  • Enjoy the convenience of a make-ahead recipe for hassle-free entertaining
  • Master the art of creating a homemade strawberry crunch cheesecake
  • Explore variations and substitutions to customize the recipe to your taste

Why This Strawberry Crunch Cheesecake Will Become Your Favorite Dessert

Try the amazing texture blend of this strawberry crunch cheesecake. It has a buttery graham cracker crust, creamy cheesecake, and a crunchy topping. Together, they create a mix of flavors and textures that you’ll love.

The Perfect Blend of Textures

This impressive dessert mixes smooth cheesecake with crunchy topping. The graham cracker crust is solid, and the strawberry sauce adds a sweet touch. Each bite is a fun mix of textures that excites your taste buds.

A Show-Stopping Presentation

Make your dessert stand out with this strawberry crunch cheesecake. Its bright red strawberries and golden topping look amazing. Plus, it’s a make-ahead recipe, so you can prepare it early and serve it easily, perfect for any event.

Make-Ahead Convenience

This favorite dessert is great because it’s easy to prepare ahead of time. You can make the cheesecake up to 3 days before. Just add the strawberry sauce and topping before serving, and your guests will love it.

“This strawberry crunch cheesecake is a true crowd-pleaser. The combination of creamy, tangy cheesecake and the crunchy, sweet topping is simply divine.”

Essential Ingredients for Your Strawberry Delight

Making the perfect cheesecake ingredients is key to a delicious strawberry crunch cheesecake. The crust, made from buttery graham crackers, and the creamy cream cheese filling are crucial. Each part adds to the dessert’s flavor. Let’s explore the must-have ingredients for this strawberry treat.

The Crust

  • Graham crackers, crushed into fine crumbs
  • Unsalted butter, melted
  • Granulated sugar

The Filling

  • Cream cheese, softened to room temperature
  • Fresh strawberries, hulled and diced
  • Granulated sugar
  • Eggs, at room temperature
  • Sour cream
  • Vanilla extract

The Topping

  • Fresh strawberries, sliced or halved
  • Whipped cream (optional)

Choosing the best ingredients is crucial. Use top-quality cream cheese and fresh strawberries for the best taste. Make sure the graham crackers are fresh and the butter is unsalted. With these ingredients, you’ll make a cheesecake ingredients masterpiece that will impress everyone.

Kitchen Tools and Equipment You’ll Need

To bake the perfect strawberry crunch cheesecake, you need the right tools and equipment. Some items are essential, while others make the process easier. Let’s look at the must-have baking tools, optional but helpful equipment, and essential measuring tools for this delightful dessert.

Must-Have Baking Tools

  • Springform pan: This adjustable pan with removable sides is perfect for baking cheesecakes, ensuring easy release and clean presentation.
  • Electric mixer: An electric hand mixer or stand mixer will simplify the process of beating the cream cheese and achieving the desired smooth and creamy texture.
  • Spatula: A flexible silicone or rubber spatula is essential for scraping down the sides of the mixing bowl and ensuring all ingredients are thoroughly incorporated.

Optional but Helpful Equipment

  1. Food processor: This versatile appliance can be used to create the perfect crust and crumb topping for your cheesecake.
  2. Parchment paper: Lining the springform pan with parchment paper can make it easier to remove the cheesecake after baking.
  3. Baking sheet: Having a large baking sheet on hand can be helpful for creating a water bath to prevent cracking during the baking process.

Measuring Tools

ToolPurpose
Measuring cupsEssential for accurately measuring the dry ingredients, such as flour, sugar, and graham cracker crumbs.
Measuring spoonsPrecise measurements of spices, baking soda, and other small-quantity ingredients.
Digital scaleProvides the most accurate measurements, especially for delicate ingredients like cream cheese.

With the right baking tools, electric mixer, and measuring cups, you’ll be ready to make this delicious strawberry crunch cheesecake. You’ll have the confidence and success you need.

Creating the Perfect Crunch Topping

Getting the perfect crunchy topping is key to making your strawberry cheesecake stand out. The golden brown crumbs and strawberry cookie crumbs add a nice crunch to the creamy cheesecake. This mix creates a perfect balance that everyone will love.

To make the crunchy topping, start by getting your ingredients ready. You’ll need panko breadcrumbs, crushed strawberry cookie crumbs, and a bit of brown sugar for that caramelized taste. Melted butter is used to hold the mixture together, keeping it crunchy even after baking.

  1. In a mixing bowl, combine the panko breadcrumbs, crushed strawberry cookie crumbs, and brown sugar.
  2. Melt the butter in a saucepan over medium heat, then pour it over the crumb mixture and stir until well combined.
  3. Spread the crumb topping evenly over the cheesecake batter just before baking, ensuring it covers the entire surface.
  4. Bake the cheesecake as directed, allowing the topping to turn a beautiful golden brown and achieve a delightful crunch.

The creamy cheesecake and the crunchy topping together make a dessert that will amaze your guests. You can try different cookie crumb flavors, like graham cracker or Oreo, to find your favorite mix of sweetness and crunch.

IngredientQuantity
Panko breadcrumbs1 cup
Crushed strawberry cookie crumbs1/2 cup
Brown sugar2 tablespoons
Unsalted butter, melted4 tablespoons

“The crunchy topping is the star of the show, elevating the cheesecake to new levels of indulgence.”

Making the Creamy Cheesecake Base

Creating the perfect creamy cheesecake base is key to a great strawberry crunch cheesecake. With a few simple steps, you can get a silky-smooth texture that’s a joy to eat.

Proper Mixing Techniques

To get a smooth texture, mix the ingredients carefully. Start by letting the cream cheese warm up to room temperature. This makes it easier to mix.

Use a hand mixer or stand mixer with the paddle attachment to blend the cream cheese until it’s smooth and lump-free. Then, add the sugar, eggs, and other wet ingredients slowly. Mix on low speed to avoid air bubbles. Stop mixing as soon as everything is well combined to avoid a dense cheesecake.

Temperature Guidelines

Temperature is important for a perfect cheesecake base. Bake at 325°F (165°C) to prevent cracking and ensure a smooth, creamy texture. Let the cheesecake cool slowly in the oven and then on the counter before refrigerating.

Preventing Common Mistakes

  • Avoid overbeating the batter, as this can incorporate too much air and lead to cracking or a dense texture.
  • Ensure all ingredients are at room temperature to promote even mixing and prevent lumps.
  • Don’t open the oven door during baking, as this can cause the cheesecake to sink or crack.
  • Resist the temptation to overbake the cheesecake, as this can result in a dry, crumbly texture.

By following these baking tips, you’ll make a creamy cheesecake base. This will be the perfect start for your strawberry crunch cheesecake.

Fresh Strawberry Sauce Preparation

Make your homemade strawberry crunch cheesecake even better with a fresh strawberry sauce. This topping adds a vibrant, flavorful touch to the cheesecake. Making this sauce is easy and rewarding, taking your dessert to the next level.

To make the sauce, you need fresh strawberries, sugar, lemon juice, and cornstarch. Start by washing and hulling the strawberries, then chop them into small pieces. This keeps the sauce juicy and full of fruit texture.

  1. In a medium saucepan, mix the chopped strawberries, sugar, and lemon juice. Heat it gently over medium, stirring now and then, until the sugar dissolves and the strawberries release their juice.
  2. In a small bowl, mix a teaspoon of cornstarch with a tablespoon of water to make a slurry. Slowly add the slurry to the strawberry mix, stirring until it thickens to your liking.
  3. Take the pan off the heat and let the sauce cool down. Once it’s room temperature, put it in an airtight container in the fridge until you’re ready to use it.

The fresh strawberry sauce is great over the cheesecake, as a dipping sauce, or mixed into the filling. Its bright red color and sweet-tart taste make your cheesecake stand out.

For the best strawberry sauce, use the freshest, ripest berries. Adjust the sugar and lemon juice to taste, aiming for the perfect sweetness and tanginess. With this homemade topping, your strawberry crunch cheesecake will be a hit with your family.

Assembly Tips and Techniques

Making a stunning cheesecake is both an art and a science. Mastering the art of layering dessert and using creative cake decoration can turn a simple cheesecake into a showstopper. It will amaze your guests.

Layering Method

The secret to a beautiful cheesecake is in how you layer it. Start with the crust at the bottom of your pan. Press it down to make a solid base. Then, add the cheesecake batter and smooth it out.

If you have strawberry sauce, pour it over the batter. This will create a beautiful swirl or layer effect.

Decorative Finishing Touches

After baking and cooling, it’s time for the final touches. Pipe a border of whipped cream around the edge for a professional look. Use a star tip for a fancy edge.

Place fresh strawberries or other fruits on top for color and appeal. For extra elegance, dust with powdered sugar or drizzle with fruit glaze.

The key to a stunning cheesecake is in the details. Focus on layering and cake decoration to make a simple dessert into a masterpiece. It will impress your guests.

Storage and Serving Recommendations

To keep your homemade Strawberry Crunch Cheesecake fresh, proper cheesecake storage is key. After it cools down, cover it tightly with plastic wrap or aluminum foil. Then, refrigerate it for up to 5 days. For longer storage, freeze it for up to 2 months.

When serving, the serving temperature is important. Let the chilled cheesecake sit at room temperature for about 30 minutes before cutting. This step makes the flavors pop and the texture silky.

Storage MethodShelf Life
RefrigeratedUp to 5 days
FrozenUp to 2 months

For dessert preservation, use a sharp, clean knife. Dip the knife in warm water and clean it between cuts. Serve the cheesecake chilled. Top it with fresh strawberries, homemade sauce, and powdered sugar for a stunning presentation.

“The perfect cheesecake is all about the perfect balance of flavors and textures – creamy, sweet, and with just the right amount of crunch.”

Troubleshooting Common Issues

Baking cheesecake can be fun, but sometimes, things don’t go as planned. Don’t worry! We’ve got solutions for common cheesecake problems.

Texture Problems

A grainy or dense cheesecake might be due to overbeating the batter. Mix the ingredients gently to get a smooth texture. Also, make sure your cream cheese and dairy are at room temperature. Cold ingredients can make the batter lumpy.

Baking Challenges

Cracks on your cheesecake can be a bummer. To avoid them, tap the pan gently to release air bubbles before baking. And don’t open the oven door while it’s baking. If cracks do happen, cover them with strawberry sauce or whipped cream.

Uneven baking is another issue. To bake evenly, wrap the springform pan with a damp baking strip or foil. This keeps the edges from getting too brown while the center cooks properly.

Troubleshooting IssuePossible CausesSolutions
Grainy or dense textureOverbeating the batterGently mix the ingredients and avoid overmixing
Cracks on the surfaceAir bubbles, opening the oven doorTap the pan to release air bubbles, avoid opening the oven door
Uneven bakingInconsistent oven temperatureWrap the springform pan with a damp baking strip or aluminum foil

By fixing these common cheesecake troubleshooting and baking issues, your homemade strawberry crunch cheesecake will always be perfect. A few tweaks can make your cheesecake a hit with everyone.

Variations and Substitutions

Want to add a special touch to the classic Strawberry Crunch Cheesecake? Discover a range of cheesecake variations, dietary alternatives, and flavor twists to make your dessert stand out. Whether you’re after a rich treat or a healthier choice, this section has everything you need.

Flavor Twists

Explore new flavors by swapping strawberries for your favorite fruits. Try blueberry, raspberry, or peach to excite your taste buds. The world of cheesecake variations is vast and exciting.

Dietary Alternatives

  • Gluten-Free: Use gluten-free cookies or almond flour instead of graham crackers for a tasty dietary alternative.
  • Low-Sugar: Cut down sugar by using low-calorie sweeteners or mixing fresh fruit with natural sweeteners.
  • Vegan: Try plant-based cheesecake variations with dairy-free cream cheese and vegan fruit compote.

Seasonal Twists

Use seasonal flavor twists to match the seasons. Try pumpkin in fall, cranberries in winter, or mangoes in summer for a refreshing cheesecake variation.

“The beauty of this recipe lies in its versatility. I’ve tried many flavor twists and dietary alternatives, and they all hit the spot with my family and friends.”

Let your creativity shine and follow your taste buds on a journey. The Strawberry Crunch Cheesecake is a great base for your cheesecake variations, dietary alternatives, and flavor twists. Enjoy a dessert that meets your taste and dietary needs.

Conclusion

Creating the perfect Strawberry Crunch Cheesecake is within reach. It’s a rewarding baking journey. You’ll learn to make the crunchy topping and the creamy layers.

Success comes from focusing on the details and following the guidelines. Enjoy the process of making this dessert.

This recipe is perfect for both experienced and new bakers. It will delight your taste buds and impress your friends. The mix of a buttery crust, smooth cheesecake, and strawberry delight is amazing.

Make this dessert and enjoy the feeling of making something special. It’s a great way to show off your baking skills.

Keep having fun in the kitchen, trying new things, and don’t be afraid to ask for help. Sharing this Strawberry Crunch Cheesecake with others is a joy. Bon appétit!

FAQ

What makes this Strawberry Crunch Cheesecake so special?

This Strawberry Crunch Cheesecake is a standout dessert. It has a creamy cheesecake base and a crunchy topping. The mix of textures and tastes, along with its stunning look, makes it a hit with dessert fans.

What are the key ingredients needed for this recipe?

You’ll need fresh strawberries, cream cheese, graham crackers, sugar, and eggs. Using top-quality ingredients is key for the best taste and texture.

What kitchen tools and equipment are required?

You’ll need a springform pan, electric mixer, and measuring tools. A food processor and offset spatula are nice to have but not essential.

How do I create the perfect crunchy topping?

Mix graham cracker crumbs, butter, and brown sugar for the topping. Bake it until it’s golden and crispy for that perfect crunch.

What are the best techniques for making the creamy cheesecake base?

Use the right mixing methods and follow temperature tips. Avoid overbeating to keep the cheesecake smooth and creamy.

How do I assemble and decorate the Strawberry Crunch Cheesecake?

Layer the crust, cheesecake batter, and crunchy topping to assemble. Add fresh strawberry slices or strawberry sauce for a beautiful finish.

How should I store and serve the cheesecake?

Keep the cheesecake in the fridge and serve it cool, not cold. This ensures the best flavor and texture. Always follow proper storage and serving tips to keep it fresh.

What are some common issues I might encounter, and how can I troubleshoot them?

Issues like cracks, uneven baking, or texture problems can happen. Try adjusting the baking temperature or using a water bath. There are many troubleshooting tips to help.

Can I make variations or substitutions to the recipe?

Yes, you can try different flavors like using other fruits or adding chocolate. You can also make dietary changes, like using gluten-free graham crackers or reducing sugar.

Strawberry Crunch Cheesecake Recipe – Easy & Delicious

Strawberry Crunch Cheesecake

Imagine enjoying a dessert that’s both creamy and crunchy. Welcome to Strawberry Crunch Cheesecake, a treat that will make your taste buds dance. But what makes this dessert so special?

Key Takeaways

  • Discover the secret to the perfect balance of creamy and crunchy textures in this Strawberry Crunch Cheesecake recipe.
  • Learn how to create a homemade cheesecake with a fresh strawberry layer that will impress your guests.
  • Explore the essential ingredients and step-by-step preparation guide to ensure your Strawberry Crunch Cheesecake turns out flawless every time.
  • Uncover the best storage and serving tips to maintain the optimal texture and flavor of your delectable creation.
  • Discover how to customize this recipe to suit your personal preferences and dietary needs.

A Sweet Introduction to Strawberry Crunch Cheesecake

Strawberry Crunch Cheesecake is a favorite for its tasty flavor profile and unique texture. It started in the mid-20th century. Bakers mixed classic cheesecake with fresh strawberries and a crunchy topping.

This cheesecake stands out because of its creamy filling and crunchy streusel topping. The strawberry layer brings a sweet burst that matches the cheesecake’s creaminess. It’s a hit at special occasions and family events.

“Strawberry Crunch Cheesecake is the ultimate fusion of classic flavors, creating a dessert that is both indulgent and refreshing. It’s a true crowd-pleaser that never fails to delight.”

Looking for a dessert for a party or just a sweet craving? Strawberry Crunch Cheesecake is ideal. Its mix of textures and flavors is unforgettable.

Essential Ingredients for the Perfect Strawberry Crunch Cheesecake

Making a delicious Strawberry Crunch Cheesecake needs top-notch ingredients. You’ll need a graham cracker crust, a creamy cheese filling, and fresh strawberries. Each part is crucial for the right mix of tastes and textures.

Crust and Crunch Topping Components

The base of this dessert is a graham cracker crust. It’s made from crushed graham crackers, melted butter, and a bit of sugar. This creates a crunchy base that goes well with the creamy cheese inside.

The crunchy topping adds a nice contrast. It’s a mix of graham cracker crumbs, chopped fresh strawberries, and sugar. This topping makes the cheesecake even more enjoyable.

Cheesecake Filling Ingredients

The secret to a creamy cheesecake is using the best cream cheese. Mix it with sugar, eggs, and vanilla extract. This makes a rich, creamy base for the strawberry Jell-O layer.

Fresh Strawberry Layer Requirements

  • Freshly sliced or chopped fresh strawberries for a burst of juicy, natural sweetness.
  • Strawberry Jell-O mix to create a vibrant, gelatinous layer that complements the creamy cheesecake.
  • A touch of sugar to enhance the natural flavor of the fresh strawberries.

Choosing and mixing these key ingredients will help you make a Strawberry Crunch Cheesecake. It will look great and taste amazing, with a perfect mix of flavors and textures.

Kitchen Tools and Equipment Needed

To make the tasty Strawberry Crunch Cheesecake, you need some key kitchen tools. This guide will show you what you need for a smooth baking process. You’ll end up with a dessert that’s sure to impress.

The springform pan is at the heart of this recipe. It has removable sides, making it great for a uniform cheesecake. If you don’t have one, a 9-inch cake pan works too. Just be careful when taking the cake out.

To get the crunchy topping, you’ll need an electric mixer or a food processor. These tools mix the graham cracker crumbs, butter, and sugar perfectly.

For the cheesecake filling, a hand mixer or a stand mixer with a paddle is best. They make whipping the cream cheese and other ingredients smooth and easy.

Lastly, baking sheets are useful for chilling the cheesecake and toasting the topping.

With these tools, you’re ready to make a Strawberry Crunch Cheesecake that will wow everyone.

“The right tools can make all the difference in the kitchen, especially when it comes to creating a dessert as delightful as Strawberry Crunch Cheesecake.”

Step-by-Step Preparation Guide

Baking the perfect Strawberry Crunch Cheesecake needs a careful approach. Let’s go through the steps to make a dessert that’s both delicious and beautiful.

Creating the Signature Crunch Layer

Begin by making the crunchy topping. Mix graham cracker crumbs, butter, and a bit of sugar in a bowl. Use your fingers to make it like coarse sand. Spread it evenly in your springform pan, pressing hard to make a solid base.

Mixing the Creamy Filling

In a big bowl, mix cream cheese, sugar, and vanilla until smooth. Add eggs one at a time, blending well after each. Pour this batter over the crust, making sure it’s even.

Assembly Instructions

To bake perfectly, wrap your pan in heavy-duty foil. This keeps water out. Put the pan in a bigger dish and add hot water. This water bath cooks the cheesecake gently and prevents it from cracking.

Bake until the center is almost set, about 55-65 minutes. Let it cool completely before removing the ring. Chill it for at least 4 hours, or overnight, to set right.

By following these steps and focusing on the cheesecake’s assembly, you’re on your way to a rich and stunning Strawberry Crunch Cheesecake.

Tips for Achieving the Perfect Texture

Making a creamy and smooth Strawberry Crunch Cheesecake is all about balance. Use these expert tips to get the perfect creamy consistency, crack prevention, and even baking. Your dessert will be a true showstopper.

  1. Slowly mix in the cream cheese: This avoids air pockets that can cause cracks and uneven texture.
  2. Chill the crust before baking: Chilling the crust in the fridge for at least 30 minutes helps it keep its shape and prevents shrinkage.
  3. Bake at the right temperature: Use the recommended oven temperature for a smooth top and even baking.
  4. Use a water bath: Baking in a water bath keeps the cheesecake moist, preventing cracks and ensuring a creamy texture.
  5. Let it cool slowly: After baking, turn off the oven and let the cheesecake cool slowly with the door ajar for an hour. This helps prevent cracking.
Texture IssueSolution
Cracks on the surfaceBake in a water bath and allow to cool slowly in the oven
Grainy or lumpy textureEnsure all ingredients are at room temperature and mix thoroughly
Dry or dense cheesecakeAvoid overbaking and use the right ratio of cream cheese to other ingredients

Follow these tips to make a Strawberry Crunch Cheesecake with a creamy, crack-free texture and a smooth, evenly-baked top.

Storage and Serving Recommendations

Enjoying a delicious Strawberry Crunch Cheesecake doesn’t stop after the last bite. It’s important to store and serve it right to keep its flavor and texture perfect. Whether you want to eat it now or later, these tips will help your cheesecake stay a treat to enjoy.

Proper Refrigeration Methods

Storing your cheesecake in the fridge is key to keeping it fresh. Wrap the unsliced cake tightly with plastic wrap or foil, or use an airtight container. This keeps it moist and creamy. For the best taste, store it for up to 5 days in the fridge.

Serving Temperature Guidelines

Serving your Strawberry Crunch Cheesecake at the right temperature is crucial. Take it out of the fridge about 30 minutes before you plan to eat it. This lets it cool down a bit but stay nice and smooth. It makes every bite a delight.

Freezing Instructions

  • To keep your cheesecake longer, freeze it for up to 2 months. Wrap it tightly in plastic or foil, then put it in a container or bag.
  • When you’re ready to eat it, thaw the freezer-friendly dessert in the fridge overnight. Then, warm it up a bit before serving.

By following these tips, you can enjoy your Strawberry Crunch Cheesecake even after it’s been baked. It will stay a delicious treat for a long time.

Recipe Variations and Substitutions

The classic Strawberry Crunch Cheesecake recipe can be adapted for different diets and tastes. You can find dairy-free options, a gluten-free crust, or low-sugar alternatives. This dessert is perfect for anyone with a sweet tooth.

Dairy-Free Cheesecake

For a dairy-free version, use a dairy-free cream cheese alternative instead of traditional cream cheese. Choose brands that use almond or coconut milk. They offer a creamy texture without dairy.

Gluten-Free Crust

Try a gluten-free cookie or nut-based crust for a gluten-free twist. Use crushed gluten-free cookies, ground almonds, or gluten-free flours. They make a tasty base for the strawberry filling.

Low-Sugar Options

To cut down on sugar, use low-sugar or sugar-free alternatives in the cheesecake and strawberry layers. Honey, maple syrup, or stevia are great natural sweeteners. They add sweetness without too much sugar.

Customize the Strawberry Crunch Cheesecake to fit your dietary needs or preferences. With a bit of creativity, you can enjoy this dessert while staying true to your health goals.

Common Troubleshooting Tips

Making the perfect Strawberry Crunch Cheesecake is rewarding but can be tricky. This section offers tips to fix common problems. You’ll learn how to prevent cracks, fix texture issues, and more.

Preventing Cracks and Splits

Cracks and splits in cheesecakes are frustrating. To avoid them, follow these steps:

  • Gradually add eggs one at a time, gently incorporating each into the batter to prevent air pockets.
  • Use a water bath (also known as a bain-marie) when baking to regulate the temperature and humidity.
  • Resist the temptation to open the oven door during baking, as sudden temperature changes can cause cracking.
  • Allow the cheesecake to cool slowly in the oven with the door slightly ajar before transferring to the refrigerator.

Texture Problems and Solutions

Fixing texture issues in your Strawberry Crunch Cheesecake is easy. Try these tips:

  1. For a dense, creamy texture, be sure not to overmix the batter, which can introduce too much air.
  2. If the cheesecake is too soft or runny, increase the baking time and make sure to chill it thoroughly before serving.
  3. If the texture is grainy or lumpy, check that your cream cheese and other ingredients are at room temperature before mixing.

Timing and Temperature Issues

Timing and temperature are key for a great Strawberry Crunch Cheesecake. Here are some tips:

  • Use an oven thermometer to ensure your oven is accurately maintaining the correct temperature.
  • Bake the cheesecake at a lower temperature, around 325°F, to prevent the edges from overcooking while the center is still undercooked.
  • Allow the cheesecake to cool completely before attempting to remove it from the springform pan to prevent cracking or falling apart.

By using these cheesecake troubleshooting tips, you can fix baking errors and texture fixes. This will help you make the perfect Strawberry Crunch Cheesecake every time.

Nutritional Information and Serving Size

Enjoying a Strawberry Crunch Cheesecake is a treat. But, it’s key to watch the calories, macronutrients, and portion size. This way, you can enjoy it without hurting your diet.

Each slice of this cheesecake has about 450 calories. The size of your slice can change the calorie count a bit. It has a good mix of carbs, fats, and proteins, making it a decent dessert choice.

NutrientAmount per Serving
Calories450 calories
Total Fat25 g
Saturated Fat15 g
Carbohydrates50 g
Sugars35 g
Protein8 g

It’s best to eat just one serving, which is 1/8 of the cheesecake. Eating more can lead to too many calories and mess up your diet.

Enjoying this cheesecake in moderation is okay. Knowing the calorie count, macronutrients, and portion control helps. This way, you can enjoy the Strawberry Crunch Cheesecake while keeping your diet balanced.

Decoration and Presentation Ideas

Make your Strawberry Crunch Cheesecake stand out with creative garnishes and thoughtful plating. These steps can turn your dessert into a showstopper, great for any occasion.

Begin by arranging fresh strawberry slices around the cheesecake. Their bright red color will catch the eye and contrast beautifully with the creamy inside. Add a few whole strawberries on top for extra elegance.

Enhance the cheesecake with a light sprinkle of crunch topping. This adds texture and interest to the look and feel of your dessert.

Drizzle strawberry sauce or coulis over the top for a stunning effect. It not only boosts the flavor but also gives a glossy finish.

Garnishing TechniquePlating SuggestionVisual Appeal
Arrange fresh strawberry slices around the perimeterPlace whole strawberries on top of the cakeVibrant red hue and contrast with creamy filling
Sprinkle reserved crunch topping over the surfaceDrizzle strawberry sauce or coulis over the topAdds texture and a glossy, decadent finish

Using these garnishing techniques and plating suggestions can make your Strawberry Crunch Cheesecake a masterpiece. It will impress your guests and delight their senses.

Conclusion

Starting your dessert journey, the Strawberry Crunch Cheesecake stands out. It combines a smooth filling, crunchy topping, and fresh strawberries. This recipe is a true sign of your baking skills.

Whether you’re experienced or new to baking, this dessert is perfect for you. It lets you try different flavors and styles. This way, you can make each cheesecake special and yours alone.

When you share your Strawberry Crunch Cheesecake, you’ll get lots of praise. It’s a great feeling to know you made something amazing. With this recipe, you’re on your way to becoming a baking star.

FAQ

What is the key to achieving the perfect texture for the Strawberry Crunch Cheesecake?

To get the perfect texture, use a water bath while baking. This prevents cracking. Also, cool the cheesecake slowly for a creamy, smooth finish.

Can I make the Strawberry Crunch Cheesecake ahead of time?

Yes, you can make it ahead. Refrigerate it for at least 4 hours or up to 5 days. Freezing is also an option for up to 2 months.

What is the purpose of the Jell-O layer in the Strawberry Crunch Cheesecake?

The Jell-O layer boosts the strawberry flavor. It adds a fresh, fruity contrast to the cheesecake. It also helps set the top layer.

Can I use a different type of fruit besides strawberries?

Absolutely! You can use raspberries, blueberries, or a mix of berries. Choose fresh, ripe fruit that goes well with the cheesecake.

How do I prevent cracks in the Strawberry Crunch Cheesecake?

Use a water bath to prevent cracks. This keeps the heat steady and prevents drying. Don’t overbake and cool it slowly before refrigerating.

Can I make a dairy-free or gluten-free version of the Strawberry Crunch Cheesecake?

Yes, you can make it dairy-free or gluten-free. Use non-dairy cream cheese and milk for dairy-free. Swap the crust for gluten-free options. Adjust baking times and techniques as needed.

What is the best way to serve the Strawberry Crunch Cheesecake?

Serve it chilled from the fridge. Top with fresh strawberries, powdered sugar, or strawberry sauce. Add whipped cream or vanilla ice cream for extra indulgence.