>
Edit Content

Food That’s Made from the Heart
We’re all about turning simple ingredients into magical moments. From kitchen newbies to seasoned chefs, our recipes are designed to keep things fun and easy! Let’s cook, laugh, and eat together. 🥰

Contact Us

Tasty Chicken Pita Recipe Sandwich: Quick and Flavorful

chicken pita recipe

What makes a delicious chicken pita recipe quick and flavorful? It’s the mix of Mediterranean spices, tender chicken, and crunchy veggies in warm pita bread. This recipe is a hit for healthy meals that are easy to take on the go or enjoy at home. Its rich flavors and nutritious ingredients make it a favorite in the United States.

A delicious chicken pita is more than a meal; it’s an experience. It combines fresh veggies, savory chicken, and warm pita bread. Whether you’re a foodie or just looking for something new, this recipe will impress you. So, what makes this recipe so special?

Key Takeaways

  • Quick and easy to prepare, perfect for busy days
  • Packed with flavor from Mediterranean spices and herbs
  • Customizable with your favorite vegetables and sauces
  • Healthy and nutritious, making it a great option for a guilt-free meal
  • Perfect for on-the-go or as a relaxing dinner at home
  • Can be made with a variety of chicken pita recipe variations
  • Delicious chicken pita is a great way to experience the flavors of the Mediterranean

Why You’ll Love This Chicken Pita Recipe

This simple chicken pita recipe is perfect for busy people. It’s quick, healthy, and delicious. It combines lean protein, veggies, and whole grains for a nutritious meal. Check out manorearecipes.com for more tasty and easy recipes.

The recipe has many benefits. Here are a few:

  • Time-saving: It’s ready in no time, ideal for busy weeknights.
  • Nutritional benefits: It offers a mix of protein, fiber, and vitamins.
  • Customization options: You can add your favorite toppings or sauces.

This chicken pita recipe is a fantastic choice for a quick, healthy meal. It’s easy to make and you can customize it to your liking. It’s perfect for anyone seeking a flavorful and convenient meal.

Essential Ingredients for the Perfect Chicken Pita

To make a delicious homemade chicken pita, you’ll need some key ingredients. You’ll need chicken, pita bread, veggies, and seasonings. For a Mediterranean twist, use high-quality chicken breast or thighs. Marinate them in olive oil, lemon juice, and herbs like oregano and thyme.

Choose soft and fluffy pita bread that can hold all the fillings. You can go for whole wheat or white pita. Don’t forget to toast the pita bread before filling it. This adds a crispy texture and smoky flavor.

Here’s a list of ingredients for a basic homemade chicken pita:

  • 1 pound boneless, skinless chicken breast or thighs
  • 4-6 pita breads
  • 1/4 cup olive oil
  • 2 cloves garlic, minced
  • 1 teaspoon dried oregano
  • Salt and pepper to taste
  • Optional: lettuce, tomatoes, cucumbers, red onions, feta cheese

Customize your Mediterranean chicken pita with your favorite toppings and sauces. Try hummus, tzatziki sauce, and tabbouleh. With these ingredients, you’ll make a delicious homemade chicken pita perfect for lunch or dinner.

IngredientQuantityOptional
Chicken breast or thighs1 poundNo
Pita bread4-6No
Olive oil1/4 cupNo
Garlic2 clovesNo
LettuceYes
TomatoesYes

Kitchen Tools and Equipment Needed

To make an easy chicken pita wrap, you’ll need some basic kitchen tools and equipment. You probably already have most of these essentials in your kitchen. The right tools are key to preparing and assembling the ingredients.

A good chef’s knife, cutting board, and measuring cups are must-haves for any kitchen. For this recipe, you’ll also need a large bowl, a whisk, and a spatula. These tools will help you prepare the chicken filling and assemble the pita wraps with ease.

Must-Have Utensils

  • Chef’s knife
  • Cutting board
  • Measuring cups
  • Large bowl
  • Whisk
  • Spatula

Optional Kitchen Gadgets

While not necessary, some kitchen gadgets can make the process of making an easy chicken pita wrap even easier. A food processor can help with chopping vegetables, and a grill or grill pan can add a nice char to the chicken.

With these tools and equipment, you’ll be well on your way to making delicious and easy chicken pita wraps at home. Remember, the key to a great chicken pita is using fresh ingredients and having the right tools to prepare and assemble them.

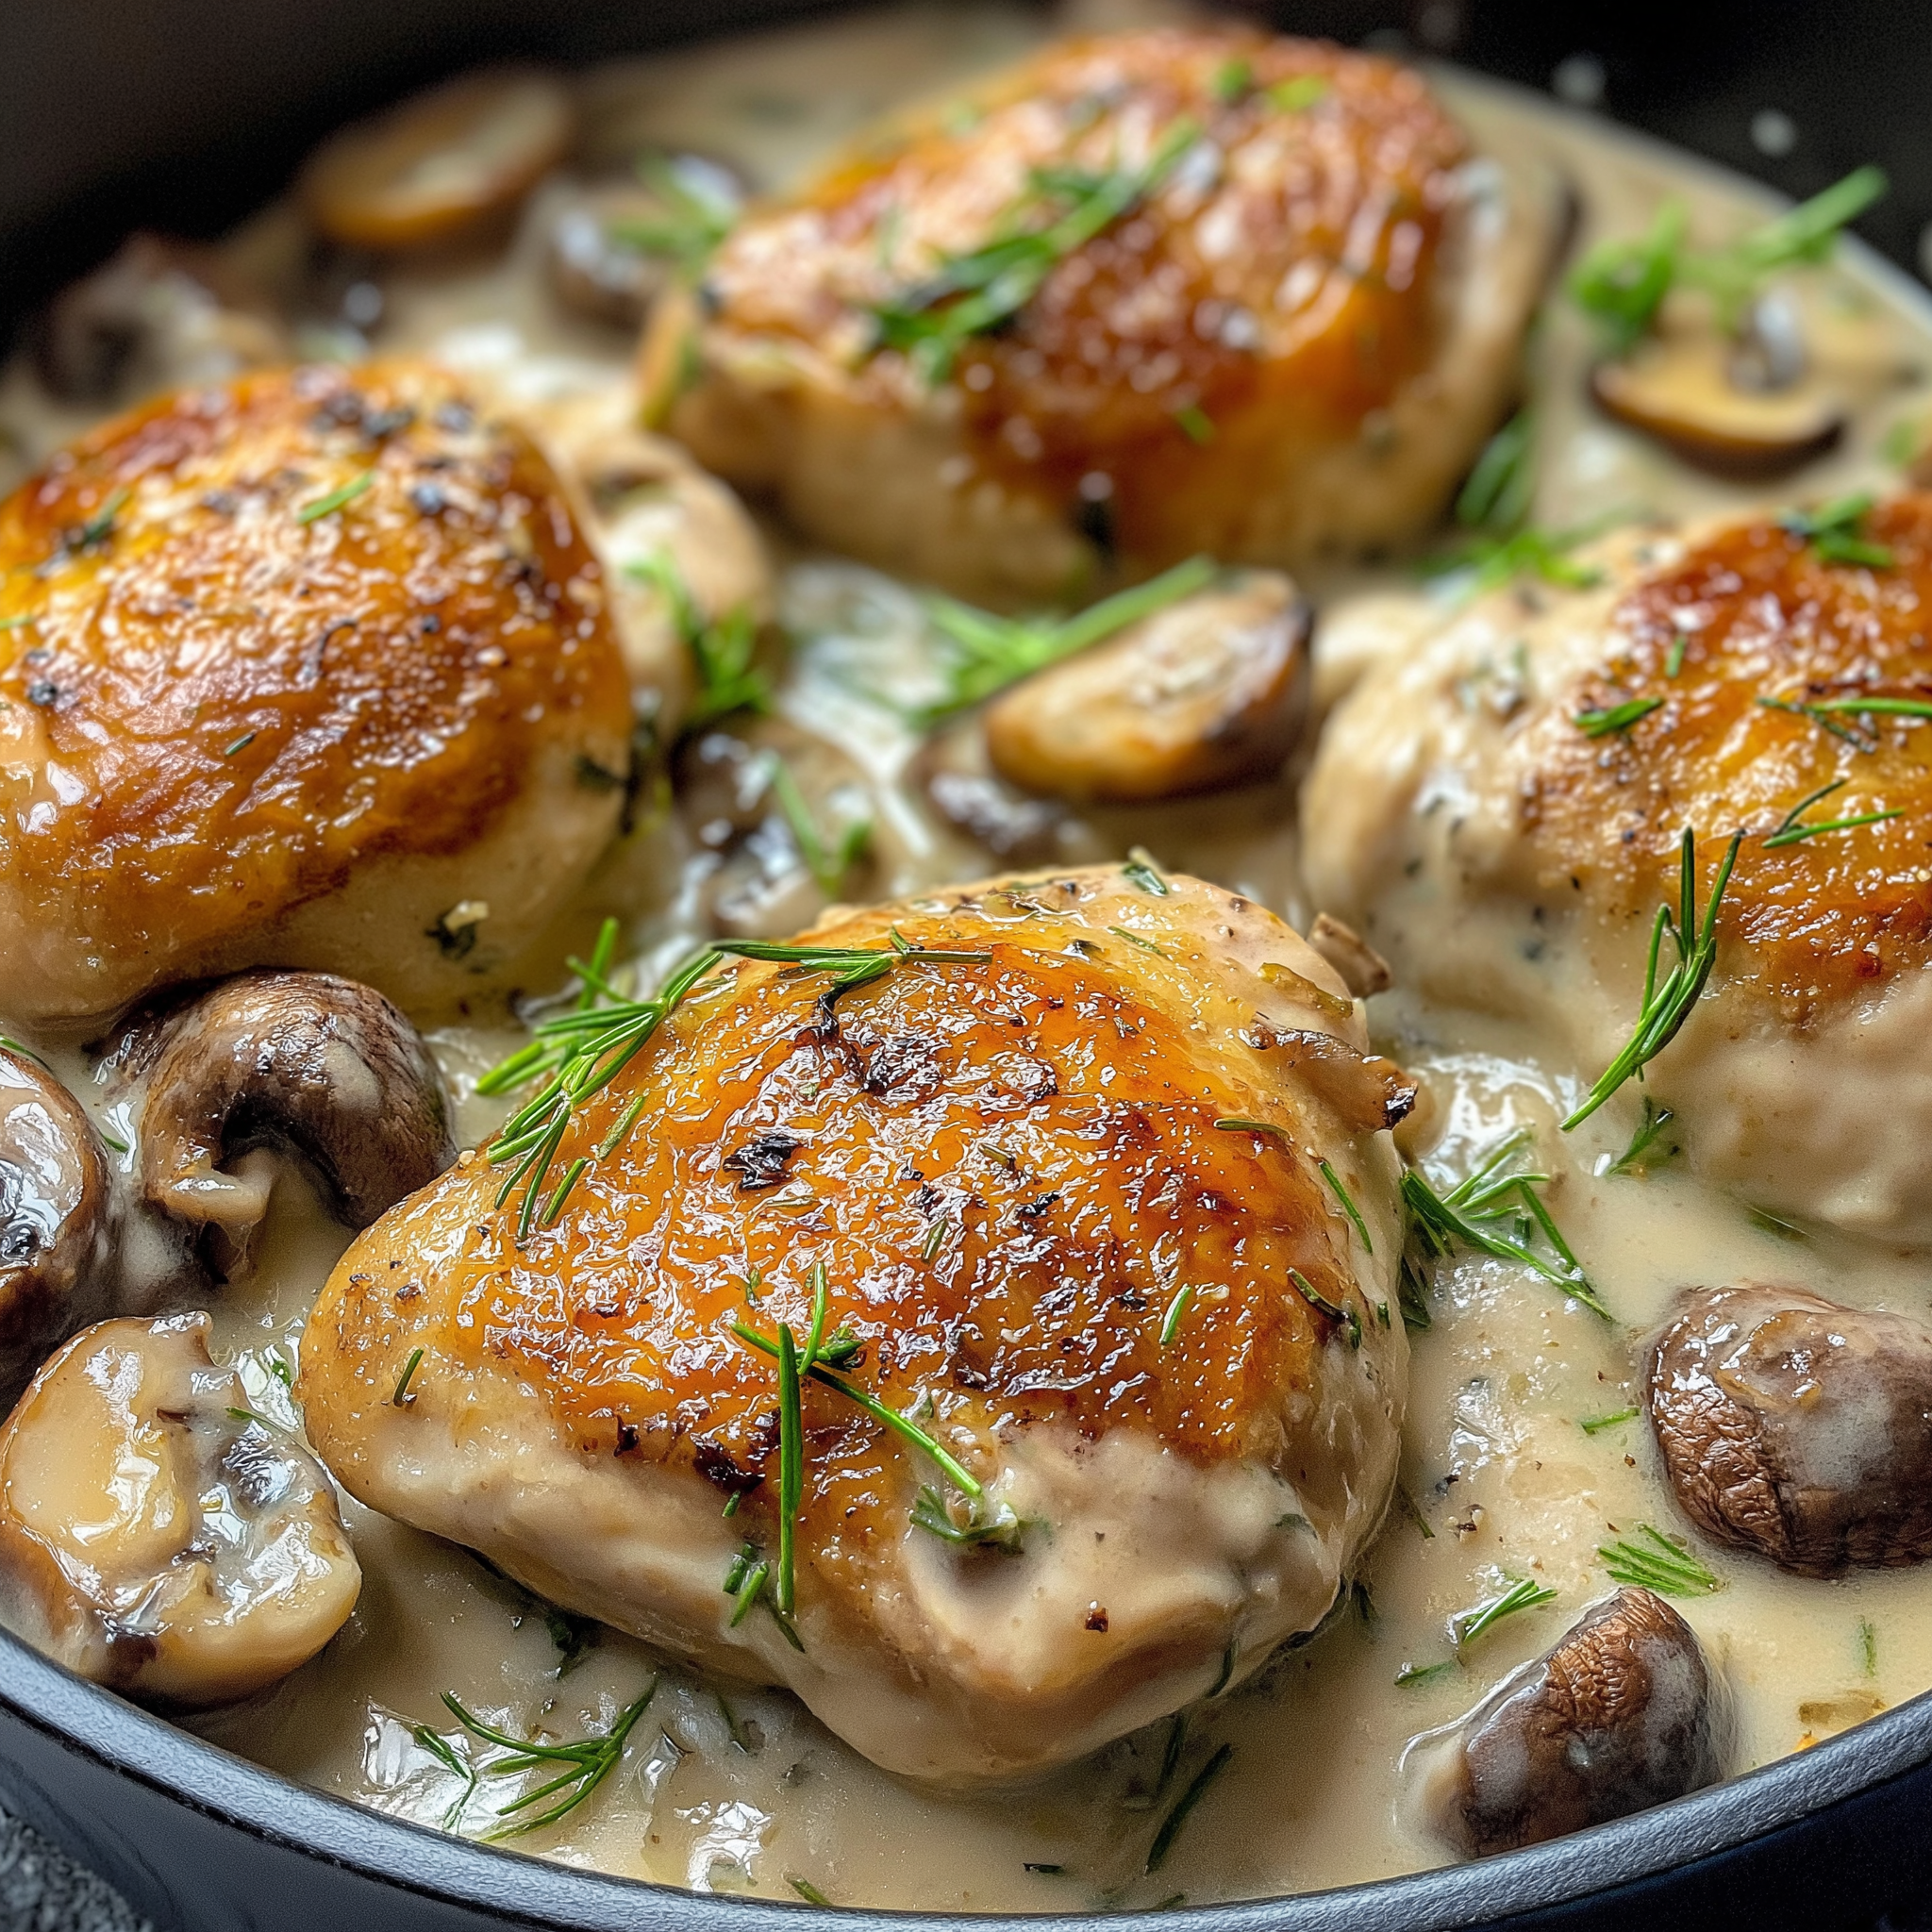
Preparing Your Chicken Filling

To make a tasty chicken pita, you need to prepare the chicken filling well. Start by marinating the chicken to boost its flavor and texture. You can use olive oil, lemon juice, and herbs like thyme and rosemary for a unique taste.

There are several ways to cook your chicken. You can grill, bake, or pan-fry it. Grilling gives a smoky taste, baking is healthier, and pan-frying is quick but use less oil to avoid greasiness.

Marination Techniques

  • Use a mix of acid, such as lemon juice or vinegar, to break down the proteins and add flavor
  • Add aromatics like garlic and onions to the marinade for extra depth of flavor
  • Let the chicken marinate for at least 30 minutes to allow the flavors to penetrate

Cooking Methods

Cooking your chicken to the right temperature is key for safety. Use a thermometer to check the internal temperature, which should be at least 165°F (74°C). You can also use a flavorful chicken pita recipe to add some excitement to your meal.

Seasoning Tips

Seasoning your chicken is the final step in preparing your flavorful chicken pita filling. Use spices and herbs like paprika, cumin, and coriander to add flavor and depth. Don’t be afraid to experiment and find the perfect combination of seasonings to suit your taste.

MarinadeCooking MethodSeasoning
Olive oil, lemon juice, and herbsGrilling, baking, or pan-fryingPaprika, cumin, and coriander

Fresh Vegetables and Toppings

To make a tasty healthy chicken pita, you need fresh veggies and toppings. Tomatoes, cucumbers, and lettuce are great choices. They add flavor, texture, and nutrients.

Choosing the right toppings for your healthy chicken pita is fun. Here are some favorites:

  • Crunchy bell peppers
  • Sliced red onions
  • Fresh parsley
  • Tangy pickles

These toppings bring flavor and freshness to your healthy chicken pita. They make it a fulfilling meal.

Want to try something new? Add unique ingredients to your healthy chicken pita. Ideas include:

  1. Roasted vegetables, like eggplant or zucchini
  2. Spicy peppers, like jalapenos or banana peppers
  3. Fresh herbs, like dill or mint

With these ingredients and your favorite healthy chicken pita filling, you’ll have a meal that’s both delicious and healthy.

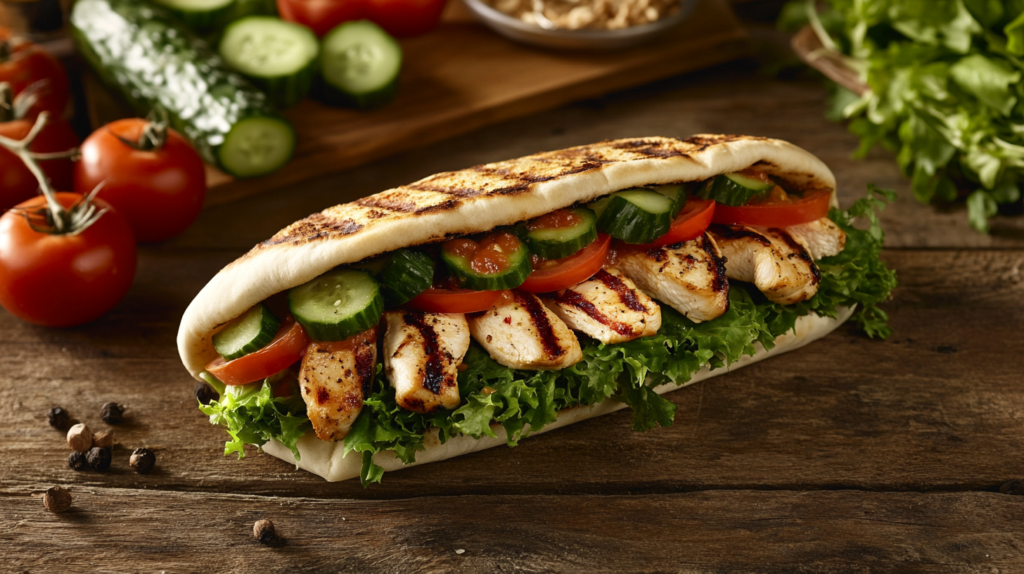
Assembling Your Mediterranean Chicken Pita

To make a tasty mediterranean chicken pita, start with the chicken at the bottom of the pita. Then, add fresh veggies like tomatoes, cucumbers, and onions. This creates a great base for your homemade pita.

After that, add a dollop of tzatziki or hummus sauce. This adds a creamy and tangy taste. Don’t forget to sprinkle some crumbled feta cheese on top for extra flavor.

Layering Order

Here’s a suggested layering order for your mediterranean chicken pita:

  • Chicken
  • Vegetables (tomatoes, cucumbers, onions)
  • Sauce (tzatziki or hummus)
  • Cheese (feta or goat cheese)

Sauce Applications

When adding sauce, start with a small amount and adjust to taste. You can also try different sauce combinations to find your favorite.

Presentation Tips

To make your homemade chicken pita look good, add fresh herbs like parsley or cilantro on top. Serving it with mixed greens or a simple salad makes it a complete meal.

Sauce and Dressing Options

When it comes to a delicious chicken pita, the sauce and dressing are key. Tzatziki, a yogurt-based sauce with cucumber and garlic, is a traditional Mediterranean choice. Hummus, made from chickpeas, tahini, and lemon juice, is also popular.

Other options to enhance flavor include:

  • Garlic mayo for a rich and creamy taste
  • Harissa for a spicy kick
  • Lebanese tahini sauce for a nutty flavor

Try different combinations of sauces and dressings to add more flavor to your chicken pita. You can also explore brands like Sabra for hummus or Ken’s for garlic mayo.

Remember, the key to a great chicken pita is finding the perfect balance of flavors. With these options, you can make a delicious chicken pita that you’ll love.

Storage and Make-Ahead Tips

Enjoying a quick chicken pita is easier when you store leftovers or prepare parts ahead. This makes meal prep simpler and more convenient. The right storage and reheating methods keep your chicken pita sandwich tasty and fresh.

To store your quick chicken pita, consider these tips:

  • Refrigerate cooked chicken and vegetables separately to prevent moisture from building up and making the pita bread soggy.
  • Use airtight containers to keep ingredients fresh and prevent contamination.
  • Label and date containers so you can easily keep track of how long they’ve been stored.

Refrigeration Guidelines

For the best freshness, store your quick chicken pita ingredients in the fridge at 40°F (4°C) or below. Cooked chicken stays good in the fridge for up to 3 days.

Reheating Instructions

To reheat your quick chicken pita, just microwave the chicken and veggies for 20-30 seconds until warm. You can also warm the pita bread by wrapping it in a damp paper towel and microwaving for 10-15 seconds.

By using these storage and make-ahead tips, you can enjoy a tasty quick chicken pita anytime. You won’t have to worry about losing flavor or quality.

IngredientStorage MethodShelf Life
Cooked ChickenRefrigerate3 days
VegetablesRefrigerate5 days
Pita BreadRoom Temperature2 days

Healthy Variations and Substitutions

Creating a healthy chicken pita is easy. Use whole wheat pita bread and fill it with veggies. You can also add grilled chicken, avocado, and feta cheese for extra flavor.

For those with dietary needs, there are many options. Try gluten-free pita for a gluten-free version. Or, use hummus or falafel for a vegetarian choice. Here are some veggie alternatives:

  • Roasted eggplant
  • Grilled zucchini
  • Sautéed spinach

These ingredients can make your chicken pita healthier and tastier. By trying different ingredients, you can make a meal that’s both healthy and delicious.

Experimenting with ingredients can lead to a tasty and nutritious chicken pita. Whether you prefer a simple version or something more unique, there are many choices available.

IngredientHealth Benefit
Grilled chicken breastHigh in protein, low in fat
AvocadoRich in healthy fats, fiber, and vitamins
Feta cheeseGood source of calcium, protein, and probiotics

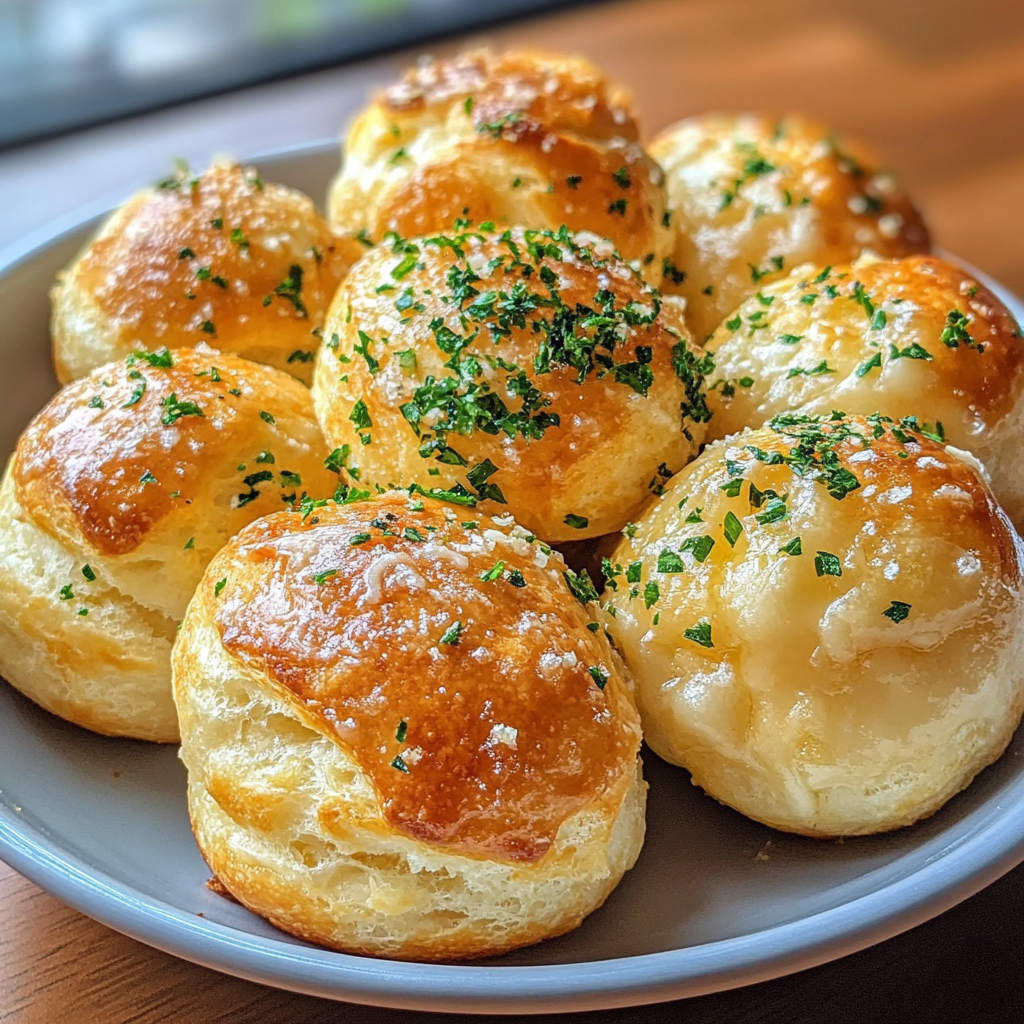
Serving Suggestions and Side Dishes

There are many ways to serve your easy chicken pita wrap. It’s great for a quick lunch or dinner. You can also serve it at parties or gatherings. For a full meal, try adding Mediterranean-inspired sides like a Greek salad or roasted veggies.

A fresh side dish that goes well is a simple green salad. It has mixed greens, cherry tomatoes, and a citrus vinaigrette. You can add crumbled feta cheese or sliced olives for more taste.

  • Sliced cucumbers and carrots with hummus
  • Grilled or roasted vegetables, such as zucchini, bell peppers, or eggplant
  • A side of quinoa or brown rice for a filling and nutritious meal

For a bigger meal, try warm sides like roasted sweet potatoes or hearty lentil soup. Your easy chicken pita wrap will be a hit. With these suggestions, you’ll have a complete and tasty meal.

Conclusion

This chicken pita recipe is a real treat. It has tender chicken, fresh veggies, and soft pita bread. Plus, it’s easy to make, perfect for a quick meal.

It’s great for any occasion, whether you’re hosting a party or just want a meal everyone will enjoy. This flavorful chicken pita is sure to wow your guests.

Now that you know how to make this, try adding your own twist. Get creative with toppings and flavors. Enjoy making it your own!

FAQ

What makes this chicken pita recipe so special?

This chicken pita recipe is special because it’s quick and delicious. It has tender chicken, fresh veggies, and warm pita bread. It’s a tasty and healthy meal you can make at home.

What are the main ingredients I’ll need?

You’ll need chicken breasts, pita bread, tomatoes, cucumbers, lettuce, and Mediterranean seasonings. Don’t forget garlic, lemon, and tzatziki sauce.

Is this recipe good for meal prep?

Yes, it’s perfect for meal prep. Prepare the chicken and veggies ahead. Then, just assemble the pitas when you’re ready. We’ll give tips on storing and reheating.

Can I customize the recipe to my dietary needs?

Yes, you can customize it. We’ll suggest gluten-free pita and veggie options. It’s great for many dietary needs.

What are some tasty sauce and dressing options to pair with the chicken pita?

Try tzatziki, hummus, balsamic vinaigrette, or creamy feta dressing. They all complement the chicken pita’s flavors.

How can I elevate the presentation of my homemade chicken pitas?

Arrange the fillings neatly and drizzle sauces. Add parsley or a lemon wedge. Serve with a side salad or roasted veggies for a complete meal.

Crave-Worthy Canes Chicken Recipe: A Must-Try

canes chicken recipe

What makes the canes chicken recipe so irresistible? Is it the secret ingredients or the special cooking technique? This dish has a crispy exterior and juicy interior, winning many hearts. Now, it’s time to bring it into your kitchen.

The canes chicken recipe is a game-changer for fried chicken lovers. You can make it at home with simple ingredients and expert tips. It suits both spicy and milder tastes. So, what are the key elements that make this recipe special, and how can you recreate it?

Key Takeaways

  • Learn the secrets behind the canes chicken recipe and how to make it at home
  • Discover the essential ingredients and cooking techniques required for the best canes chicken recipe
  • Understand what sets this recipe apart from other fried chicken dishes
  • Get tips on how to customize the recipe to suit your taste preferences
  • Find out how to achieve the perfect balance of crispy exterior and juicy interior
  • Learn how to make the canes chicken recipe a regular part of your meal rotation

The Story Behind Raising Cane’s Famous Chicken

Raising Cane’s is known for its authentic canes chicken that tastes great and fills you up. Its success comes from serving top-notch chicken finger meals. To see why Raising Cane’s stands out, let’s look at its history and what makes it successful.

The secret to Raising Cane’s success is its commitment to quality. They use fresh, never frozen chicken. This focus on quality has earned them a loyal customer base. For those wanting to make creamy garlic chicken with mushrooms, Raising Cane’s is a great example. They show how important it is to use the best ingredients for a great meal.

Origins of the Restaurant Chain

Raising Cane’s started with a simple goal: to serve the best chicken finger meals. This focus on quality has driven their growth and popularity. Fans of authentic canes chicken can see the hard work and dedication in every meal.

What Makes Canes Chicken Special

So, what makes Raising Cane’s different from other fast-food places? It’s their commitment to fresh ingredients and a secret popular canes chicken recipe. This recipe has helped them build a loyal fan base and become a fast-food leader.

Essential Ingredients for Perfect Canes Chicken Recipe

To make delicious homemade canes chicken, you’ll need a few key ingredients. These include fresh chicken fingers, a special blend of herbs and spices, and a secret sauce. This sauce makes copycat canes chicken stand out from other recipes.

Here are the essential ingredients you’ll need:

  • Fresh chicken fingers
  • All-purpose flour
  • Paprika
  • Garlic powder
  • Salt
  • Pepper
  • Eggs

Choosing high-quality ingredients is crucial for your homemade canes chicken recipe. It ensures your dish is flavorful and tender. For instance, using fresh chicken fingers greatly improves the taste and texture of your copycat canes chicken.

By following this recipe and using the right ingredients, you’ll create a mouth-watering copycat canes chicken dish. It’s sure to please even the pickiest eaters. So, give it a try and enjoy the delicious taste of homemade canes chicken in your own home.

Kitchen Tools and Equipment You’ll Need

To make an easy canes chicken recipe, you need the right tools and equipment. This ensures your chicken turns out delicious and crispy. Before cooking, gather all the necessary items.

A well-stocked kitchen makes cooking easier and more fun. For an easy canes chicken recipe, you’ll need a large bowl for marinating, a whisk for mixing, and a thermometer for oil temperature.

Must-Have Utensils

  • Large bowl for marinating
  • Whisk for mixing
  • Thermometer for oil temperature control
  • Deep frying pan or a deep fryer

Optional but Helpful Tools

Some optional tools can make cooking easier and more efficient. These include a food processor for chopping, a silicone spatula for scraping, and a wire rack for draining oil from the chicken.

With the right tools, you’re ready to make a delicious easy canes chicken recipe. Always follow food safety guidelines and cooking techniques for a tasty and safe dish.

ToolDescription
Marinating bowlLarge bowl for marinating chicken
WhiskMixing utensil for combining ingredients
ThermometerTool for ensuring correct oil temperature

Preparing Your Chicken the Canes Way

To get the taste and texture of authentic canes chicken, start with the right chicken cuts. Use fresh, never frozen chicken breast or tenderloins. Remove any excess fat or cartilage for even cooking and tenderness.

Then, clean and dry the chicken with paper towels. This removes moisture, helping the marinade and breading stick. Your chicken is now ready for marinating, a key step for that canes chicken recipe flavor.

Here are some tips for preparing your chicken:

  • Always handle chicken safely to avoid cross-contamination.
  • Use a meat thermometer to ensure the chicken is cooked to a safe internal temperature.
  • Don’t overcrowd the chicken when cooking, as this can lead to uneven cooking and a less authentic canes chicken experience.

By following these steps and using the right ingredients, you’ll make a delicious authentic canes chicken dish. It will impress even the pickiest eaters. Stay tuned for the next section on the perfect marinade for your canes chicken recipe.

The Perfect Marinade Technique

To make delicious canes chicken, mastering the marinade is key. A good marinade can greatly enhance flavor and tenderness. It’s a crucial step in preparing canes-style chicken, tenderizing the meat and adding flavor.

For your marinade, mix buttermilk, hot sauce, and spices for a unique taste. Finding the right flavor balance is important. Feel free to experiment and adjust the ingredients to your liking.

Marinade Ingredients

  • 1 cup buttermilk
  • 1 tablespoon hot sauce
  • 1 teaspoon garlic powder
  • 1 teaspoon onion powder
  • Salt and pepper to taste

Timing and Temperature Tips

Marinate your chicken for at least 2 hours or overnight for best flavor. Keep it refrigerated at 40°F (4°C) or below. This prevents bacterial growth and ensures safety.

Storage Guidelines

After marinating, store the chicken safely. Use a covered container and keep it refrigerated at 40°F (4°C) or below. You can also freeze it for later. By following these tips and using a tasty marinade, you’ll make mouth-watering canes-style chicken.

Marinade TimeTemperatureStorage
2 hours40°F (4°C)Refrigerated
Overnight40°F (4°C)Refrigerated

Mastering the Signature Breading Process

To get the best canes chicken recipe, mastering the breading is key. It involves several steps that need focus and practice. First, coat the chicken in flour evenly. Then, dip it in eggs and buttermilk, and finally, in breadcrumbs.

It’s important to handle the chicken gently. Pressing too hard can make the breading heavy and dense. For a copycat canes chicken recipe, the breading must be just right.

  • Use the right type of flour: All-purpose flour or cornstarch work well for a light and crispy coating.
  • Don’t overbread: Too much breading can make the chicken heavy and greasy.
  • Use the right temperature: Make sure the oil is at the right temperature (around 350°F) for frying the breaded chicken.

By following these tips and practicing the breading, you’ll make a best canes chicken recipe that will wow everyone. Remember to fry the chicken gently and at the right temperature for a crispy, delicious coating.

IngredientQuantity
Flour1 cup
Eggs2
Breadcrumbs1 cup

Deep Frying Secrets for Golden Perfection

To make perfect homemade canes chicken, mastering deep frying is key. This method needs focus and practice to get it right. Deep frying is crucial in an easy canes chicken recipe.

For great deep frying, check out Manorearecipes for tips. Keeping the oil temperature right is essential. It should be between 350°F and 375°F. Too hot oil burns the outside before the inside cooks, while too cold oil makes it greasy.

Oil Temperature Control

Keeping the oil at the right temperature is vital for a golden-brown outside. Use a thermometer to check the temperature often. This helps keep it steady.

Batch Sizing Tips

Batch sizing is also important. Cooking too much chicken at once lowers the oil temperature. Cook in batches to keep the temperature up and ensure even cooking.

By using these deep frying tips and a good recipe, you’ll make delicious homemade canes chicken. With practice, you’ll become a pro at deep frying. Your homemade canes chicken will be a hit at any event.

Deep Frying TipsBenefits
Maintain correct oil temperatureEnsures even cooking and prevents burning
Cook in batchesPrevents overcrowding and maintains oil temperature
Use a thermometerHelps monitor and adjust oil temperature

Creating Canes-Style Dipping Sauce

To make your canes chicken even better, a special dipping sauce is key. This sauce brings out the authentic canes chicken taste. You’ll need mayonnaise, ketchup, garlic powder, onion powder, and paprika. Just mix these in a bowl until it’s smooth.

Getting the sauce right is all about balance. It should be tangy but not too strong, creamy but not too thick. Adjust the mayonnaise and ketchup to your liking. Feel free to add more garlic or onion powder for a bolder taste.

Here are some ways to make your sauce your own:

  • Add a pinch of cayenne pepper for an extra kick
  • Mix in some chopped fresh herbs, like parsley or dill
  • Use Greek yogurt instead of mayonnaise for a lighter version

This sauce will make your canes chicken even more enjoyable. It’s all about finding the right balance, and this sauce does just that.

So, give it a try and see why everyone loves canes chicken. With this sauce, your meal will be even more delicious.

Common Mistakes to Avoid

When you’re making the best canes chicken recipe at home, it’s easy to forget important steps. To help you make the perfect easy canes chicken recipe, we’ve listed common mistakes to avoid. Knowing these mistakes can help you improve your chicken-making skills.

Temperature control is key when making great chicken. Incorrect temperature can make your chicken undercooked or overcooked. To avoid this, use a good thermometer and follow the recommended temperature guidelines.

Temperature Issues

To avoid temperature problems, follow these tips:

  • Use a thermometer to ensure the oil reaches the correct temperature
  • Don’t overcrowd the pot, as this can lower the temperature
  • Adjust the heat as needed to maintain a consistent temperature

Seasoning Errors

Seasoning is crucial in making the best canes chicken recipe. Insufficient seasoning can make the chicken taste bland. Overseasoning can be too much. To get it right, follow the recommended seasoning guidelines and taste as you go.

Breading Problems

Breading can also go wrong. Incorrect breading can make the coating soggy or uneven. To avoid this, follow the recommended breading procedure and use the right type of breadcrumbs.

By knowing these common mistakes, you can make a delicious and authentic easy canes chicken recipe. Stay vigilant and adjust your technique as needed to get the perfect result.

MistakeSolution
Temperature issuesUse a thermometer and follow temperature guidelines
Seasoning errorsFollow recommended seasoning guidelines and taste as you go
Breading problemsFollow recommended breading procedure and use the right type of breadcrumbs

Serving Suggestions and Sides

When serving your tasty canes chicken, think about different options to match its flavors. A classic choice is to pair it with sides like crispy fries, coleslaw, or a fresh salad. These options bring out the best in your meal.

For something new, try sides like roasted veggies, baked beans, or garlic bread. These choices add variety and enhance the chicken’s taste. Here are some ideas to start with:

  • Roasted sweet potato fries for a sweet and savory twist
  • Grilled or sautéed vegetables, such as broccoli or carrots, for a healthy and flavorful option
  • A side of creamy mashed potatoes or mac and cheese for a comforting classic

Make sure your meal looks good too. Mix colors and textures to make it stand out. With a bit of creativity, you’ll impress everyone with your canes chicken dish.

Side DishDescription
ColeslawA creamy, tangy slaw made with shredded cabbage and mayonnaise
Garlic BreadA crispy, buttery bread infused with the flavor of garlic
Roasted VegetablesA selection of roasted vegetables, such as broccoli or carrots, seasoned with herbs and spices

Storage and Reheating Tips

When you make homemade canes chicken, it’s key to store and reheat it right. This keeps it crispy and flavorful. Store it in an airtight container in the fridge or freezer.

To reheat, you can use the oven or microwave. Here are some tips:

  • Reheat the chicken in the oven at 350°F (180°C) for 10-15 minutes.
  • Use the microwave-safe container and heat for 30-45 seconds or until the chicken is warm and crispy.

When reheating, check the chicken’s temperature. It should be at least 165°F (74°C) to be safe. You can also use leftover chicken in salads or wraps.

By following these tips, you can enjoy your homemade canes chicken for longer. It will still taste great and be crispy.

Storage MethodReheating MethodTemperature
RefrigerateOven350°F (180°C)
FreezeMicrowave30-45 seconds

Conclusion

Discovering the secret to Cane’s famous chicken is easy. It’s all about the right marinade, breading, and frying. This article has shown you how to make Cane’s-style chicken at home.

Whether it’s for a family dinner or a cozy meal, this recipe will wow everyone. The spices, crispy outside, and tender meat bring Cane’s to your kitchen.

So, start cooking! Get your ingredients ready and heat up the fryer. Enjoy the amazing taste of Cane’s chicken in your own kitchen. Bon appétit!

FAQ

What are the key ingredients in the Canes chicken recipe?

To make Canes chicken, you need chicken, like tenderloins or breasts. You also need a special marinade, seasoned flour for breading, and good vegetable oil for frying. The marinade has buttermilk, spices, and seasonings to flavor the chicken.

How do I achieve the signature Canes chicken texture?

For the Canes chicken texture, focus on the breading. First, dredge the chicken in seasoned flour. Then, dip it in an egg wash. Finally, coat it in flour again for a crispy exterior.

What’s the secret to the Canes chicken marinade?

The marinade is key to Canes chicken. It’s a mix of buttermilk, spices, and seasonings. This marinade tenderizes the chicken and adds bold flavors. Letting the chicken marinate for the right time is important for flavor.

How do I get the oil temperature right for deep frying?

For crispy Canes chicken, keep the oil at 350-375°F. Use a thermometer to check the oil temperature. This ensures the chicken cooks evenly and stays crispy.

What are some common mistakes to avoid when making Canes chicken at home?

Avoid these mistakes: – Don’t let the oil temperature change too much. – Don’t overcrowd the pan. – Use the right spices and season the flour well. – Make sure the breading is even and thick.

What are some tasty sides that pair well with Canes chicken?

Try crispy french fries, coleslaw, Texas toast, and Canes’ dipping sauce with Canes chicken. For something different, serve it with mac and cheese, mashed potatoes, or a garden salad.

Can I store and reheat leftover Canes chicken?

Yes, you can store and reheat leftover Canes chicken. Cool it down, then put it in an airtight container in the fridge for 3-4 days. Reheat it in a 400°F oven for 10-15 minutes until it’s hot and crispy again.

Delicious Mexican Chicken Soup Recipe

mexican chicken soup recipe

What makes a mexican chicken soup recipe truly authentic? Is it the blend of spices, the tender chicken, or the rich flavors that warm the heart? Whatever the answer, one thing is certain – a delicious mexican chicken soup recipe has the power to bring people together. It’s a staple in many households, loved for its ease of preparation.

A great mexican chicken soup recipe is more than just a meal. It’s an experience that combines the bold flavors of mexico with the comfort of a warm, homemade soup. So, what sets an authentic mexican chicken soup apart from the rest? Let’s dive in and explore the world of mexican chicken soup recipe and discover the secrets to making a truly delicious and authentic mexican chicken soup.

Key Takeaways

  • Learn the basics of a delicious mexican chicken soup recipe
  • Discover the importance of authentic ingredients in mexican chicken soup
  • Understand the role of spices and seasonings in mexican chicken soup
  • Get tips on how to make a rich and flavorful broth for your mexican chicken soup
  • Explore the various regional variations of mexican chicken soup recipe
  • Find out how to make an authentic mexican chicken soup that’s easy to prepare and fun to eat

The Rich Heritage of Mexican Chicken Soup

Mexican chicken soup has a long history, dating back centuries. It’s a key part of Mexican cuisine, starting with the Aztecs. Over time, different regions in Mexico have made their own versions.

Traditional ingredients like chicken, veggies, and spices are key. These have been passed down through generations. Each family adds their own twist, making the soup both nourishing and tasty.

Origins in Mexican Culture

In Mexico, this soup is served at special times like weddings and holidays. It’s also a common meal for everyday comfort. The soup is made with chicken, onions, garlic, and spices in a flavorful broth.

Traditional Family Recipe Evolution

Over the years, families have made their own versions of the soup. Some add rice or beans, while others use different spices. This has led to many unique flavors and recipes.

Regional Variations Across Mexico

Across Mexico, different regions have their own soup styles. In the north, it might include beef or pork. In the south, it could have chicken or seafood. This variety makes each region’s soup special.

RegionIngredientsFlavor Profile
Northern MexicoBeef, pork, onions, garlicRich, savory
Southern MexicoChicken, seafood, spicesLight, refreshing
Central MexicoChicken, vegetables, spicesHearty, comforting

Essential Ingredients for the Perfect Mexican Chicken Soup

To make a tasty homemade mexican chicken soup, you need fresh, top-notch ingredients. The soup’s flavor comes from tender chicken, spices, and veggies. Each ingredient adds something special to the best mexican chicken soup.

A great mexican chicken soup has these key parts:

  • Fresh chicken breast or thighs
  • Aromatic onions, garlic, and spices
  • Colorful veggies like carrots, celery, and potatoes
  • Rich chicken broth
  • Fresh cilantro and lime juice for extra flavor

Using these ingredients and focusing on quality will help you make a delicious homemade mexican chicken soup. It’s perfect for a cozy meal or a dish to share with others. This best mexican chicken soup is sure to impress.

Preparing Your Authentic Mexican Chicken Soup Recipe

To make a delicious and easy mexican chicken soup, start with the right ingredients and techniques. We’ll show you how to prepare your homemade mexican chicken soup. This includes chicken preparation, adding vegetables, and seasonings.

Chicken Preparation Techniques

For chicken preparation, a few key techniques are important. Choose fresh and high-quality chicken. You can use boneless or bone-in chicken, based on your preference. Season the chicken with spices like cumin, chili powder, and paprika.

Creating the Perfect Broth

A good broth is key to a great easy mexican chicken soup. Use chicken stock, onion, garlic, and spices to make a rich broth. Add diced vegetables like carrots and celery for more depth.

Here are some tips for creating the perfect broth:

  • Use high-quality chicken stock as the base
  • Add aromatics, such as onion and garlic, for extra flavor
  • Simmer the broth for at least 30 minutes to allow the flavors to meld together

Adding Vegetables and Seasonings

Once your broth is ready, add vegetables and seasonings. Diced tomatoes, shredded lettuce, and sliced avocado are popular choices. Add heat with diced jalapenos or serrano peppers.

Remember, using fresh and high-quality ingredients is key. With these tips, you’ll make a delicious and authentic easy mexican chicken soup. It’s sure to please even the pickiest eaters.

IngredientQuantity
Chicken breast or thighs1 pound
Chicken stock4 cups
Diced onion1 medium
Garlic3 cloves

Mastering the Spice Balance

To make a tasty spicy mexican chicken soup recipe, balancing spices is key. Understanding Mexican spices and how they mix is crucial. Common spices include cumin, chili powder, and oregano.

Adjusting spice levels is important. Some like it mild, others spicy. Start with a little spice and add more as needed. This way, you get the perfect flavor in your spicy mexican chicken soup recipe.

Here are some tips for mastering the spice balance:

  • Start with a small amount of spice and adjust to taste
  • Use a variety of spices to add depth and complexity to the soup
  • Consider the type of chili peppers used, as they can greatly impact the heat level

By following these tips and trying different spice mixes, you can make a spicy mexican chicken soup recipe that you’ll love. The secret is to taste and adjust as you go. This ensures your soup is both flavorful and enjoyable.

SpiceFlavor ProfileHeat Level
CuminEarthly, warmMild
Chili PowderSmoky, spicyMedium
OreganoPungent, earthyMild

Traditional Garnishes and Toppings

Adding the right garnishes and toppings can elevate authentic Mexican chicken soup. Fresh herbs like cilantro, parsley, or epazote add a burst of flavor. These herbs are key in traditional Mexican chicken soup recipes, enhancing the dish’s depth.

For extra texture, try adding crispy tortilla strips, diced onions, or sliced radishes. Serving it with warm tortillas, fresh lime wedges, and sour cream makes it even better. This way, everyone can customize their bowl.

Fresh Herb Options

  • Cilantro: a classic herb used in many Mexican dishes
  • Parsley: adds a fresh, green flavor to the soup
  • Epazote: a traditional Mexican herb with a unique flavor

Authentic Serving Suggestions

To serve your authentic Mexican chicken soup like a pro, garnish it with queso fresco, cilantro, and radish slices. Serve it with Mexican rice, beans, or roasted vegetables for a complete meal. These traditional garnishes and toppings will make your soup a hit with everyone.

Texture Enhancing Elements

Popular texture-enhancing elements include crispy tortilla strips, diced onions, and radishes. Adding diced bell peppers or chopped chilies can also add a kick. Combining these with the right garnishes and toppings will make your Mexican chicken soup unforgettable.

GarnishDescription
CilantroFresh, green flavor
ParsleyMild, fresh flavor
EpazoteUnique, slightly bitter flavor

Making Your Soup Spicier or Milder

The heat level in a spicy mexican chicken soup recipe is up to you. Some like it just a little spicy, while others want it very hot. You can use different peppers like jalapenos, habaneros, or Anaheim peppers to change the heat.

The kind and amount of pepper you use can really change your soup’s taste and heat. Jalapenos are milder than habaneros, and Anaheim peppers have a sweet, smoky taste. By trying out different peppers and amounts, you can make your soup just right for you.

Adjusting Heat Levels

To make your soup hotter, add more peppers or use hotter ones. For a milder soup, use fewer peppers or add milder ingredients. Here are some tips to adjust your soup’s heat:

  • Use jalapenos or Anaheim peppers for a milder flavor
  • Add habaneros or ghost peppers for an extreme heat boost
  • Adjust the amount of pepper used to suit your taste preferences

Pepper Varieties and Their Impact

Here is a table summarizing some common pepper varieties and their heat levels:

Pepper VarietyHeat Level
JalapenoMild to medium
Anaheim PepperMild to medium
HabaneroExtremely hot
Ghost PepperExtremely hot

Knowing about different peppers and their heat can help you make a spicy mexican chicken soup that you’ll love. Whether you prefer it mild or very spicy, the right peppers can make your soup exciting and flavorful.

Time-Saving Tips and Meal Prep Strategies

Busy home cooks often find it hard to make a tasty quick mexican chicken soup. But, with some smart tips and prep strategies, you can enjoy it even on busy weeknights. Try using a slow cooker to make your mexican chicken soup. This way, you can cook while you’re away.

For a slow cooker mexican chicken soup, brown the chicken and onions first. Then, add them to the slow cooker. Use chicken broth and diced tomatoes for extra flavor. You can also prep the ingredients early and keep them in the fridge or freezer until cooking time.

  • Use pre-cut veggies like onions and bell peppers to save prep time.
  • Cook chicken and rice ahead and store them in separate containers for easy reheating.
  • Make a big batch of quick mexican chicken soup and freeze it for later.

By using these tips and a slow cooker, you can make a delicious slow cooker mexican chicken soup with little effort and time.

Common Mistakes to Avoid When Making Mexican Chicken Soup

Making the best Mexican chicken soup requires avoiding common mistakes. These mistakes can ruin the flavor and texture of your dish. Understanding these pitfalls is key to creating a delicious homemade Mexican chicken soup.

Don’t overseason the soup. This can overwhelm the other flavors. Instead, taste and adjust the seasoning as you go. Add more salt, pepper, or spices to get the perfect balance. This will make your homemade Mexican chicken soup truly exceptional.

Seasoning Pitfalls

  • Using low-quality spices or herbs can affect the flavor of the soup
  • Not tasting and adjusting the seasoning as you cook
  • Adding too much salt or pepper, which can overpower the other flavors

Texture is also important. Avoid overcooking the chicken or vegetables. This makes them tough and unappetizing. Cook them until they’re tender and juicy, then add them to the soup.

Texture Problems and Solutions

ProblemSolution
Overcooked chickenCook the chicken until it’s tender, then remove it from the heat
Undercooked vegetablesCook the vegetables until they’re tender, then add them to the soup

By avoiding these common mistakes and following these tips, you can create a delicious homemade Mexican chicken soup. It’s perfect for any occasion or a weeknight dinner. These tips will help you succeed.

Conclusion: Enjoying Your Homemade Mexican Soup

Now that you’ve learned to make authentic Mexican chicken soup, it’s time to enjoy it. This dish is not just delicious but also celebrates Mexican culture. It’s perfect for sharing with family or friends, bringing everyone closer together.

To fully enjoy your homemade Mexican chicken soup, take your time. Let the flavors of spices, chicken, and veggies take you to Mexico’s lively streets. Try different toppings and adjust the spice to your liking.

Cooking is more than just making food; it’s about the journey. Enjoy the traditional methods, the smells, and the pride of making a dish that honors Mexico’s culinary traditions. Sharing this soup with loved ones creates lasting memories and strengthens our connections through food.

FAQ

What is the origin of Mexican chicken soup?

Mexican chicken soup comes from deep roots in Mexican culture. It has been passed down through generations. This dish is a key part of Mexican cuisine, showing the country’s diverse flavors.

What are the essential ingredients for authentic Mexican chicken soup?

The key to great Mexican chicken soup is using top-quality chicken and a rich broth. Add fresh veggies like onions, garlic, and tomatoes. Don’t forget the authentic Mexican spices and herbs.

How do I prepare the perfect Mexican chicken soup at home?

To make authentic Mexican chicken soup, start with the chicken. Then, make a flavorful broth. Add the right veggies and spices. A step-by-step guide will help you get it just right.

Can I adjust the spice level of my Mexican chicken soup?

Yes, you can adjust the spice to your liking. Mexican cuisine loves balanced spices. By choosing the right peppers, you can make your soup just spicy enough.

What are some traditional garnishes and toppings for Mexican chicken soup?

Traditional toppings include fresh cilantro, lime wedges, and diced avocado. You can also add crumbled queso fresco and crispy tortilla strips. These toppings enhance flavor and add texture.

How can I save time when making Mexican chicken soup?

To save time, use pre-cooked chicken or a rotisserie chicken. Slow cookers are also great for letting flavors meld. These tips make it easier to enjoy this dish often.

What are some common mistakes to avoid when making Mexican chicken soup?

Avoid seasoning mistakes, texture issues, and temperature problems. Learning from these common errors will help you make perfect Mexican chicken soup every time.

Tasty Pinoy Chicken Dishes You’ll Love

chicken recipe pinoy

What makes a chicken recipe pinoy unforgettable? It’s the mix of aromatic spices, tangy citrus, and savory sauces. These flavors come from Spanish, Chinese, and Malay cultures. With a delicious pinoy chicken recipe, you can enjoy the bold flavors of the Philippines at home.

Pinoy chicken dishes are loved worldwide, from Manila’s streets to American kitchens. Filipino cuisine’s variety of flavors and cooking methods show the country’s rich culture. Whether you like spicy or mild, there’s a chicken recipe pinoy for everyone.

Key Takeaways

  • Pinoy chicken dishes offer a unique blend of flavors and cooking methods
  • A delicious pinoy chicken recipe can be made with a variety of ingredients and spices
  • Filipino cuisine is shaped by Spanish, Chinese, and Malay influences
  • Chicken recipe pinoy can range from spicy to mild flavors
  • Pinoy chicken dishes are perfect for food lovers looking to try new flavors
  • Filipino chicken recipes are easy to make and require minimal ingredients
  • A chicken recipe pinoy is a great way to experience the flavors of the Philippines

Introduction to Filipino Chicken Cuisine

Filipino food is known for its bold flavors and rich history. Chicken is a key ingredient in many Filipino dishes. It’s a favorite at celebrations and everyday meals.

Chicken is often cooked in a special way called adobo. This method uses vinegar, soy sauce, and spices. It makes the chicken taste savory and slightly sweet.

The Role of Chicken in Filipino Culture

Chicken is very important in Filipino culture. It’s a big part of special occasions and family gatherings. Chicken dishes are a sign of hospitality and community.

Essential Filipino Cooking Techniques

Filipino cooking uses aromatics, spices, and acidic ingredients. These give dishes a unique flavor. By using these techniques, cooks can make delicious Filipino chicken dishes.

Must-Have Ingredients for Pinoy Chicken Dishes

To make authentic Filipino chicken, you need certain ingredients. These include:

  • Calamansi, a type of Filipino lime
  • Coconut milk, which adds richness and creaminess to dishes
  • Local spices, such as black pepper and salt
  • Vinegar and soy sauce, which are used in adobo-style cooking

Using these ingredients in traditional Filipino chicken recipes makes delicious and authentic dishes. These dishes show off the unique flavors and techniques of Filipino cuisine.

Classic Chicken Adobo: The National Dish of the Philippines

Chicken Adobo is a popular filipino chicken recipe loved by many. It’s seen as the national dish of the Philippines. Its taste, made from vinegar, soy sauce, and garlic, is both tangy and savory.

A classic pinoy chicken adobo recipe uses marinated chicken. It’s cooked with vinegar, soy sauce, garlic, and bay leaves. The vinegar makes the chicken tender and flavorful. Some recipes add coconut milk or chili peppers for a twist.

Here are some tips for making the perfect classic pinoy chicken adobo:

  • Use a mix of vinegar and soy sauce for flavor
  • Marinate the chicken for at least 30 minutes
  • Add fresh garlic and bay leaves for aroma

Chicken Adobo is a global symbol of Filipino cuisine. It’s a must-try for food lovers or anyone looking to explore new flavors.

IngredientQuantity
Chicken1 lb
Vinegar1/2 cup
Soy sauce1/4 cup
Garlic3 cloves
Bay leaves2 leaves

Mouth-Watering Chicken Recipe Pinoy Style Favorites

Chicken dishes are a big deal in Filipino cuisine. Tinola, a ginger chicken soup, is a top pick. It’s great for cold days or when you’re not feeling well. This easy filipino chicken dish combines chicken, ginger, and veggies for a tasty meal.

Chicken Afritada is another hit, a tomato-based stew with veggies. It’s a classic chicken recipe pinoy. It’s perfect for family dinners because it’s easy to make and feeds many. For something different, try Pinoy Style Fried Chicken. It has a special marinade and coating.

These dishes show the variety of flavors and cooking methods in Filipino cuisine. They cater to different tastes and preferences. Whether you want something warm or crispy, there’s a chicken recipe pinoy for you. With these easy filipino chicken dish options, you can enjoy the rich flavors of the Philippines at home.

Savory Filipino Chicken Stews and Soups

Philippine cuisine has many tasty chicken stews and soups. Chicken Sopas is a creamy macaroni soup loved by many. It’s comforting and flavorful, often served with steamed veggies or bread.

Chicken Mami is another favorite, similar to Chinese wonton soup. It has tender chicken, fresh veggies, and a rich broth. Try it with patis and calamansi for extra flavor.

Chicken Caldereta is a hearty stew. It’s made with chicken, liver spread, and veggies like bell peppers and potatoes. The sauce is rich and flavorful, with garlic, onion, and bay leaves. For a guide, visit Manora Recipes.

These Filipino chicken dishes are not only tasty but also easy to make. They can be adjusted to fit different tastes and ingredients. Whether you prefer Chicken Sopas or Chicken Caldereta, there’s something for everyone. So, why not try these dishes and enjoy the rich flavors of Filipino cuisine?

Grilled Filipino Chicken Specialties

Grilling is a big deal in Filipino food, especially with chicken. Chicken Inasal from the Visayas is a hit at any party. It’s known for its special marinade and bright yellow color.

To make the best chicken, marinate it well. Use spices, vinegar, and citrus. The longer it marinates, the tastier it gets. Here’s how to grill Filipino-style chicken:

  • Use spices like garlic, ginger, and black pepper for a tasty marinade.
  • Marinate the chicken for at least 30 minutes for deep flavors.
  • Grill over medium heat, turning often to avoid burning.

BBQ Chicken Skewers are great for outdoor events. They’re sweet, savory, and easy to make in big batches. Try Grilled Chicken with Calamansi for a citrusy twist.

These grilled chicken dishes are not only tasty but also simple to make. With a few ingredients and basic grilling, you’ll wow your guests. So, why not try them out and enjoy the best of Filipino chicken?

DishMarinadeGrilling Time
Chicken InasalSpices, vinegar, citrus20-25 minutes
BBQ Chicken SkewersSweet and savory sauce15-20 minutes
Grilled Chicken with CalamansiCitrus, garlic, ginger20-25 minutes

Quick and Easy Filipino Chicken Recipes for Busy Cooks

For those with busy lives, making a tasty easy filipino chicken dish might seem hard. But, with a few tricks, you can make authentic Pinoy flavors even on busy weeknights. Try a quick version of a classic chicken recipe pinoy like Quick Chicken Adobo or Express Chicken Sinigang.

These recipes take 30 minutes or less, ideal for those with little time. Use pre-cut veggies or pre-cooked chicken to save time. Also, swap complex spices for simpler ones. This way, you can make a delicious easy filipino chicken dish without losing flavor.

Some top chicken recipe pinoy picks for busy folks include:

  • Quick Chicken Adobo: a simplified take on the classic Filipino dish, using pre-cut ingredients and quick cooking
  • Express Chicken Sinigang: a quicker, easier version of the traditional Filipino sour soup, with pre-cooked chicken and a simple spice mix
  • Shortcut Chicken Tocino: a faster, easier version of the classic Filipino cured chicken dish, with pre-cut ingredients and quick marinating

Trying these quick and easy filipino chicken dish recipes lets you enjoy Filipino flavors without losing convenience. Whether you’re a busy pro or an active parent, these recipes will be a kitchen favorite. So, why not give them a shot and taste the deliciousness of chicken recipe pinoy style cooking yourself?

Regional Filipino Chicken Specialties

Exploring the Philippines, we find many traditional chicken recipes. Each region has its own twist on these dishes. From spicy Bicol dishes to flavorful Mindanao specialties, there’s something for everyone.

Bicol Express Chicken is a must-try. It’s a spicy coconut dish from Bicol. Its bold flavors and spicy kick make it a hit with locals and visitors.

Regional Chicken Dishes

  • Bicol Express Chicken: a spicy coconut-based dish from the Bicol region
  • Chicken Binakol: a traditional Ilonggo-style chicken dish cooked in coconut water
  • Chicken Pyanggang: a Mindanao specialty featuring blackened coconut chicken

These dishes show off local culture and resources. They highlight the diversity and richness of Filipino cuisine. Trying these recipes lets food lovers experience unique flavors and cooking methods.

Whether you like spicy or mild flavors, there’s a Filipino chicken recipe for you. The Philippines is a food lover’s dream. It offers many delicious and authentic traditional Filipino chicken recipes.

RegionChicken DishDescription
BicolBicol Express ChickenSpicy coconut-based dish
Western VisayasChicken BinakolChicken cooked in coconut water
MindanaoChicken PyanggangBlackened coconut chicken

Modern Fusion Filipino Chicken Dishes

Explore the exciting world of chicken recipe pinoy with a modern twist. Filipino food is known for its bold flavors and hearty dishes. Modern fusion takes it even further, blending international flavors with Filipino ones for a unique taste.

Popular dishes include Adobo Chicken Tacos, Sisig Chicken Pizza, and Tinola-inspired Chicken Risotto. These recipes show how Filipino flavors can mix with other cuisines. For a healthier choice, try air-fryer Chicken Tocino or cauliflower rice Chicken Arroz Caldo, which are lighter versions of classic dishes.

Be creative with Filipino ingredients and cooking methods in your kitchen. Experiment with different flavors and ingredients to make your own chicken recipe pinoy. Modern fusion offers endless possibilities, letting you enjoy delicious pinoy chicken recipe with a fresh twist.

  • Adobo Chicken Tacos: a fusion of Filipino adobo and Mexican tacos
  • Sisig Chicken Pizza: a mix of Filipino sisig and Italian pizza
  • Tinola-inspired Chicken Risotto: a creamy and flavorful Italian-Filipino dish

Discover the exciting world of modern fusion Filipino chicken dishes. Experience the bold flavors and creativity of chicken recipe pinoy with a modern twist. Enjoy exploring the endless possibilities of delicious pinoy chicken recipe and create your own unique dishes in the kitchen.

Essential Tips for Cooking Filipino Chicken Dishes

To make the best pinoy chicken recipe, you need to know the basics of Filipino cooking. It’s important to use the right ingredients, which can be tricky in American kitchens. For an easy filipino chicken dish, you can swap hard-to-find ingredients with ones that are easy to get. For example, lemon juice can replace calamansi, and apple cider vinegar can stand in for Filipino cane vinegar.

For more tips on ingredients and cooking, check out Manorea Recipes. When cooking Filipino chicken, avoid common mistakes. Don’t overcook the chicken or mess up the marinade flavors. Here are some tips to help you:

  • Use fresh and high-quality ingredients
  • Marinate the chicken for at least 30 minutes to allow the flavors to penetrate
  • Cook the chicken until it’s tender and juicy, but not overcooked

By following these tips and using the right ingredients, you can make a delicious and authentic best pinoy chicken recipe. It will surely impress your family and friends. Always store and reheat your dishes right to keep them safe and tasty.

Health Benefits of Filipino Chicken Recipes

A tasty pinoy chicken dish is not just yummy, but also good for you. Many traditional filipino chicken recipe use ginger, garlic, and turmeric. These ingredients help fight inflammation and lower the risk of heart disease and diabetes.

Popular Filipino chicken dishes like Tinola are boiled, which cuts down on fat. Grilled dishes, like Inasal, use little oil and are low in calories. Adding these to your meals lets you enjoy Filipino flavors while staying healthy.

Here are some tips for healthier Filipino chicken recipes:

  • Choose leaner chicken cuts like breast or tenderloin to cut down on fat
  • Add more veggies to stews and soups for fiber and nutrients
  • Prefer baking or grilling over frying to save calories

By following these tips, you can make a tasty pinoy chicken dish that’s both tasty and healthy. Whether it’s a classic traditional filipino chicken recipe or a new dish, focus on making healthy choices.

Conclusion: Bringing Filipino Flavors to Your Kitchen

We’ve explored the world of popular Filipino chicken recipes together. We hope you’re excited to try out Chicken Adobo, Tinola, and Chicken Afritada. These dishes are not just tasty but also carry deep Filipino culture and tradition.

Cooking these Filipino chicken dishes is an adventure. It takes practice, but the joy is worth it. Try new ingredients and techniques to make Pinoy cuisine your own. Let your taste buds lead the way.

Whether you’re a pro in the kitchen or just starting, we invite you to try these dishes. Share your cooking stories and recipes with others. Let’s celebrate the bold flavors of the Philippines together. Let’s keep exploring and enjoying the rich world of chicken recipe pinoy.

FAQ

What are the essential ingredients for cooking authentic Filipino chicken dishes?

Key ingredients for Pinoy chicken recipes include soy sauce, vinegar, garlic, onions, ginger, coconut milk, and calamansi. These help create the unique flavors of Filipino cuisine, like the tangy-salty-sweet mix in Chicken Adobo.

How can I adapt Filipino chicken recipes for American kitchens?

If you can’t find certain Filipino ingredients, use substitutes. Try lemon or lime juice for calamansi, apple cider vinegar for Filipino cane vinegar, and coconut milk or cream of coconut for fresh coconut.

What are some of the most popular Filipino chicken dishes?

Beloved Filipino chicken recipes include Chicken Adobo, Tinola (ginger chicken soup), Chicken Afritada, and Pinoy-style Fried Chicken. These dishes highlight the variety of flavors and cooking methods in traditional Filipino cuisine.

How can I make healthier versions of classic Filipino chicken recipes?

For healthier Pinoy chicken dishes, use lean chicken cuts and add more vegetables. Choose grilling or baking over frying. Also, reduce oil, sodium, and sugars to make your favorite Filipino chicken recipes more nutritious.

What are some unique regional Filipino chicken specialties I should try?

Explore regional Filipino chicken specialties like Bicol Express Chicken from Bicol, Ilonggo-style Chicken Binakol from Western Visayas, and Mindanao’s Chicken Pyanggang (blackened coconut chicken).

How can I store and reheat leftover Filipino chicken dishes?

Store leftover Filipino chicken dishes in airtight containers in the fridge for 3-4 days. Reheat using the microwave, stovetop, or oven, ensuring the chicken is hot. Avoid reheating chicken dishes more than once for food safety.

What are some common cooking mistakes to avoid when making Filipino chicken recipes?

Common mistakes include overcooking chicken in adobo, not balancing flavors in marinades, and not browning chicken for Pinoy-style Fried Chicken. Follow recipe instructions and adjust seasoning as needed to avoid these mistakes.

Delicious Beef Sausage Recipes for Any Meal

beef sausage recipes

Why are beef sausage recipes so popular in American homes? Is it because they’re easy to make, versatile, or full of tasty flavors? Whatever the reason, beef sausage recipes can make any meal better, from breakfast to dinner and even snacks. With so many recipes out there, you can try something new every time.

Beef sausage recipes can spice up your meals, whether you’re craving something hearty or something light. They offer endless possibilities. So, what are the top beef sausage recipes to try at home?

Key Takeaways

  • Beef sausage recipes are versatile and can be used for any meal
  • Delicious beef sausage recipes can be easy to prepare and require minimal ingredients
  • Beef sausage recipes can be customized to suit different tastes and dietary preferences
  • Beef sausage is a great way to add flavor and excitement to your meals
  • There are many different types of beef sausage recipes to try, from classic dishes to international-inspired recipes
  • Beef sausage recipes can be a great way to get creative in the kitchen and try new things

Understanding Different Types of Beef Sausages

When cooking with beef sausage, knowing the different types is key. Each type has its own flavor and use. Making homemade beef sausage is a fun and rewarding experience.

Popular beef sausages include bratwurst, Italian sausage, and chorizo. Each has a unique taste and texture. For example, bratwurst is great in German dishes, while Italian sausage is perfect for pasta and pizzas.

Choosing the right sausage can greatly impact your dish’s flavor and quality. By knowing the different types, you can make a variety of tasty beef sausage meals. Whether making your own or using store-bought, experimenting with different sausages is essential.

Fresh Beef Sausages vs Cured Options

Fresh beef sausages are made with raw meat and cooked soon after. They are softer and have a milder flavor. Cured sausages, on the other hand, are preserved with salt and have a firmer texture and stronger flavor.

Popular Beef Sausage Varieties

  • Bratwurst: a traditional German sausage made with pork and beef
  • Italian sausage: a spicy sausage made with pork and beef
  • Chorizo: a spicy Spanish sausage made with pork and beef

Choosing the Right Sausage for Your Recipe

When picking a sausage, think about the flavor and texture you want. Fresh sausages offer a mild taste and soft texture. Cured sausages have a stronger flavor and firmer texture.

Essential Cooking Methods for Beef Sausage

There are many ways to cook beef sausage for the best taste and texture. Grilling is a top choice, as it brings a smoky flavor. To grill, preheat the grill to medium-high, place sausages on it, and cook for 5-7 minutes on each side.

Pan-frying is another favorite for its crispy outside and even heat. To pan-fry, heat a skillet over medium-high, add oil, and cook the sausages for 5-7 minutes on each side.

Baking is a healthier option that’s easy and clean. Preheat the oven to 400°F, place sausages on a baking sheet, and bake for 15-20 minutes.

Boiling is quick and keeps the sausage’s flavors. Place sausages in boiling salted water, then reduce heat to medium-low. Simmer for 10-15 minutes until cooked.

Classic Beef Sausage Recipes for Breakfast

Starting your day with a tasty breakfast can really boost your mood. That’s why we’ve gathered some classic beef sausage recipes for you. These dishes, from scrambles to hashes, are sure to become favorites in your home. Beef sausage offers endless possibilities, and we’re excited to share some of our top picks with you.

Beef sausage is incredibly versatile. It can be used in many dishes, from simple breakfast skillets to complex casseroles. Whether you’re craving something classic or something new, we’ve got you covered. Here are a few ideas to get you started:

  • Hearty breakfast scramble with eggs, vegetables, and beef sausage
  • Sausage and potato hash with crispy onions and bell peppers
  • Morning casserole delights with beef sausage, eggs, and cheese

These beef sausage recipes are not only tasty but also quick and perfect for busy mornings. So why not try them out and start your day with a delicious beef sausage dish?

RecipeIngredientsPrep Time
Hearty Breakfast ScrambleEggs, beef sausage, vegetables15 minutes
Sausage and Potato HashBeef sausage, potatoes, onions, bell peppers20 minutes
Morning Casserole DelightsBeef sausage, eggs, cheese, bread30 minutes

Quick and Easy Beef Sausage Lunch Ideas

Lunchtime is a great chance to get creative with easy beef sausage recipes. You can whip up delicious dishes in no time, perfect for busy days or relaxed weekends. Try making sausage sandwiches with your favorite toppings and condiments.

For a quicker option, make sausage wraps. Cook the sausage, add cheese, lettuce, and tomatoes, then wrap it in a tortilla. Easy beef sausage recipes like these can be ready in under 30 minutes, making them ideal for a fast, tasty lunch.

Here are some other quick and easy beef sausage lunch recipes:

  • Sausage and cheese quesadillas
  • Beef sausage and vegetable skewers
  • Sausage and potato salad

These recipes are simple to make and can be tailored to your liking. With a bit of creativity, you can transform delicious beef sausage recipes into various tasty lunches.

Meal prepping with beef sausages is a smart way to save time during the week. Cook a batch of sausages on the weekend, then use them in different recipes all week. This keeps you organized and ensures a healthy, tasty lunch every day.

RecipePrep TimeCook Time
Sausage Sandwiches10 minutes10 minutes
Sausage Wraps5 minutes5 minutes
Sausage and Cheese Quesadillas10 minutes10 minutes

Savory Dinner Recipes with Beef Sausage

Flavorful beef sausage meals can change your dinner game. With the best beef sausage recipes, you can make hearty, satisfying dishes for any occasion. You can try one-pot pasta dishes or grilled sausage platters, and more.

Some popular dinner ideas include:

  • One-pot pasta dishes with sausage, vegetables, and sauce
  • Grilled sausage platters with peppers, onions, and potatoes
  • Comfort food classics like sausage and peppers or sausage-stuffed vegetables

These meals are not just tasty but also easy to make. You can customize them to fit your taste. Whether you want something classic or adventurous, there’s a recipe for you.

For a quick dinner, try a one-pot pasta dish with beef sausage, tomatoes, and herbs. This recipe shows how simple yet flavorful the best beef sausage recipes can be.

With these recipes, you can enjoy delicious beef sausage meals any night. So, why not get creative and cook up some tasty beef sausage dishes tonight?

RecipeIngredientsCooking Time
One-pot pasta dishBeef sausage, pasta, tomatoes, herbs30 minutes
Grilled sausage platterBeef sausage, peppers, onions, potatoes20 minutes
Sausage and peppersBeef sausage, peppers, onions, tomatoes25 minutes

Creative Ways to Incorporate Beef Sausage in Appetizers

Gourmet beef sausage ideas can make your party unforgettable. Beef sausage comes in many flavors and textures. It’s perfect for making unique and tasty appetizers.

Some great ideas include sausage-stuffed mushrooms, mini sausage rolls, and sausage-wrapped dates. These are easy to make and can be tailored to your liking. For a bigger appetizer, try a sausage and cheese platter with crackers and dips.

For a fun appetizer, try dips and spreads with beef sausage. Here are a few ideas:

  • Sausage and pepper dip
  • Beef sausage and cheese fondue
  • Sausage and spinach dip

These dips are great with crackers, chips, or veggies. With a bit of creativity, you can make delicious beef sausage recipes into amazing appetizers. They’ll impress your guests and make them want more.

Appetizer IdeaIngredientsDifficulty Level
Sausage-Stuffed MushroomsBeef sausage, mushrooms, cheese, breadcrumbsEasy
Mini Sausage RollsBeef sausage, puff pastry, egg, cheeseMedium
Sausage and Cheese PlatterBeef sausage, cheese, crackers, garnishesEasy

Seasonal Beef Sausage Dishes

Beef sausage recipes are great for any season. They can be used in summer grills with bell peppers and onions. Or in hearty fall stews with root vegetables. For a tasty summer dish, try grilling beef sausages with fresh salads and corn on the cob.

In winter, beef sausage recipes make comforting dishes. Try beef sausage and potato stew or beef sausage and white bean soup. These are perfect for cold nights and use seasonal ingredients. Some popular dishes include:

  • Summer: grilled beef sausages with peaches and arugula
  • Fall: beef sausage and apple stew
  • Winter: beef sausage and kale soup
  • Spring: beef sausage and asparagus skillet

For more inspiration, check out this image of a delicious beef sausage dish:

Using seasonal ingredients in your beef sausage recipes makes delicious dishes for any time. Whether it’s a quick summer grill or a hearty winter stew, beef sausage adds flavor and excitement to your meals.

Seasonal cooking is all about embracing the freshest ingredients and creating dishes that are tailored to the time of year. With beef sausage recipes, you can do just that and enjoy a world of flavor and variety in your cooking.

International-Inspired Beef Sausage Recipes

Beef sausage is great for many dishes, from comfort food to international cuisine. It’s perfect for savory beef sausage dishes. We’ll look at some recipes from around the world that use beef sausage.

Beef sausage can make many gourmet beef sausage ideas. You can try something spicy or rich and savory. There’s a recipe for every taste.

Italian Favorites

Italian food is known for its bold flavors. Beef sausage is a key ingredient in many Italian dishes. You can make sausage and pepper skewers, sausage-topped pizzas, or sausage-stuffed cannelloni.

German Classics

German sausages are famous for their heartiness. Beef sausage is a big part of German cooking. Try making currywurst, sausage with sauerkraut, or sausage-filled strudel.

Mexican Fusion

Mexican food is known for its bold flavors. Beef sausage adds a great twist to many Mexican dishes. You can make sausage tacos, sausage enchiladas, or sausage-filled quesadillas.

These are just a few examples of savory beef sausage dishes from around the world. With a bit of creativity, you can make your own gourmet beef sausage ideas. They’re sure to wow your guests.

Tips for Perfecting Your Beef Sausage Dishes

To make the best beef sausage recipes, knowing about temperature and seasoning is key. When cooking homemade beef sausage, make sure it’s fully cooked but not dry. Cook the sausages at medium-high heat, turning them often for even browning.

For those wanting to make their own beef sausage, Manorearecipes is a great resource. It offers many recipes and tips to help you make tasty beef sausage dishes. Try adding garlic, onion, and paprika for a rich, savory flavor.

  • Use a meat thermometer to ensure the sausages are cooked to a safe internal temperature
  • Don’t overcrowd the pan, as this can cause the sausages to steam instead of brown
  • Experiment with different seasoning blends to find the one that works best for you

By following these tips and practicing, you’ll make delicious homemade beef sausage dishes. With patience and a bit of experimentation, you’ll impress everyone with your best beef sausage recipes.

Storing and Preserving Beef Sausage

To keep your homemade beef sausage fresh, proper storage is key. Store beef sausage recipes in a sealed container in the fridge. Keep it at 40°F (4°C) or below. Freezing is also a good option for longer storage.

Here are some tips for storing and preserving beef sausages:

  • Store beef sausages in airtight containers or zip-top bags to prevent moisture and other flavors from affecting the sausages.
  • Label and date the containers or bags so you can easily keep track of how long they’ve been stored.
  • When freezing, consider portioning out individual servings to make it easier to thaw only what you need.

When you’re ready to use your frozen beef sausages, thaw them overnight in the fridge. Or thaw them quickly by submerging them in cold water. Always check the sausages for any signs of spoilage before consuming them, such as off smells or slimy texture.

By following these simple storage and preservation tips, you can enjoy your favorite beef sausage recipes whenever you want. And keep your homemade beef sausage fresh for a longer period.

Storage MethodStorage TimeTemperature
Refrigerator1-2 weeks40°F (4°C) or below
Freezer2-3 months0°F (-18°C) or below

Conclusion: Mastering the Art of Cooking with Beef Sausage

Beef sausages open up a world of flavors in your kitchen. They can make any meal, from breakfast to dinner, special. By learning about different sausages and how to cook them, you’re ready to make amazing dishes.

Experimenting with beef sausages is key to getting better. Try new flavors, cooking ways, and ingredients. With creativity and this guide, you’ll soon love cooking with beef sausages. Start your cooking journey and share your best sausage recipes. Happy cooking!

FAQ

What are the different types of beef sausages available?

There are many types of beef sausages. You can find fresh sausages, cured and smoked ones like bratwurst and Italian sausage. There are also specialty sausages like chorizo. Each type has its own taste and is perfect for different recipes and cooking ways.

How do I choose the right beef sausage for my recipe?

Think about the flavors and cooking method you want for your dish. Fresh sausages are great for breakfast scrambles or one-pot pasta. Cured sausages like bratwurst or chorizo are better for grilling or roasting. Choose a sausage that matches your dish’s flavor.

What are some essential cooking methods for beef sausages?

You can grill, pan-fry, bake, or boil beef sausages. Grilling gives a smoky flavor, while pan-frying makes them crispy. Baking is easy, and boiling is good for simmering in sauces. Try different methods to see what you like best.

Can I make my own homemade beef sausages?

Yes, you can make your own beef sausages! It’s a fun project that lets you control the flavors. It takes some extra steps, but the taste is worth it for homemade sausages.

How should I store and preserve beef sausages?

Keep uncooked sausages in the fridge for 3-5 days for best freshness. You can freeze them for months. Wrap them tightly in plastic or foil and label them. Thaw frozen sausages in the fridge before cooking.

Delicious Beef Heart Recipe – Tender & Flavorful

beef heart recipe

What makes a great beef heart recipe? It’s all about the right mix of ingredients and cooking methods. These steps bring out the best in beef heart, a key part of many organ meat dishes. For a creamy twist, try a creamy garlic chicken with mushrooms recipe. It highlights the richness of a well-made sauce.

Key Takeaways

  • Beef heart is a nutritious and flavorful cut of meat that can be used in a variety of organ meat recipes.
  • A good beef heart recipe requires the right combination of ingredients and cooking techniques.
  • Beef heart can be cooked to be tender and flavorful, making it a great addition to many meals.
  • Organ meat recipes, including those featuring beef heart, offer a range of health benefits due to their high nutritional value.
  • With the right recipe, beef heart can be a delicious and exciting addition to your culinary repertoire.

Understanding Beef Heart: A Nutritional Powerhouse

Beef heart is a nutrient-rich organ meat that offers a wealth of health benefits. It’s an excellent addition to a balanced diet. Many people don’t know about the nutritional powerhouse of beef heart dishes. It’s packed with vitamins, minerals, and proteins, making it a great source of essential nutrients.

Adding offal recipes to your diet can greatly improve your health and wellbeing. Beef heart is especially good for you because it’s rich in iron, zinc, and potassium. It’s a great choice for boosting your nutrient intake.

Key Nutrients in Beef Heart

  • Vitamin B12
  • Folate
  • Iron
  • Zinc
  • Potassium

Health Benefits of Organ Meats

Organ meats, like beef heart, have many health benefits. They can help lower the risk of heart disease and improve brain function. With its rich nutrient profile, beef heart is a great addition to a healthy diet.

Why Choose Beef Heart

Beef heart is a versatile and flavorful ingredient for offal recipes. It can be used in hearty stews or flavorful stir-fries. Its health benefits and rich nutrient profile make it a great choice for improving your health and wellbeing.

NutrientBeef HeartOther Cuts of Beef
Vitamin B12HighLow
IronHighMedium
ZincHighLow

Selecting the Perfect Beef Heart

Choosing the right beef heart is key when learning to prepare it. Look for one that’s fresh, has a good color, and the right texture. A deep red color and firm texture are what you want. Avoid soft or slimy textures, as they might mean it’s spoiled.

For high-quality beef hearts, visit a local butcher or specialty market. These places often get their products from trusted suppliers. You can also find them online, but make sure to buy from a reputable seller. Opting for organic or grass-fed beef hearts is a good choice, as they are often better in quality and nutrition.

When picking a beef heart, consider these factors:

  • Color: A deep red color is ideal
  • Texture: Firm and smooth, not soft or slimy
  • Freshness: Look for a fresh smell and no signs of spoilage
  • Sourcing: Choose a reputable supplier or opt for organic or grass-fed

By carefully choosing your beef heart, you’re on your way to making delicious and healthy dishes. With practice and patience, you’ll soon enjoy tender and flavorful beef heart dishes.

Essential Tools and Ingredients for Your Beef Heart Recipe

To make a tasty beef heart recipe, you need the right tools and ingredients. Cooking beef heart needs special tools to make it tender and flavorful. A sharp knife and cutting board are key for slicing the beef heart thinly.

A large skillet or Dutch oven is best for cooking beef heart. These pans spread heat evenly, preventing the beef heart from getting tough. You’ll also need olive oil, garlic, and onions for flavor. These ingredients enhance the beef heart’s natural taste.

Kitchen Equipment Needed

  • Sharp knife
  • Cutting board
  • Large skillet or Dutch oven
  • Colander
  • Measuring cups and spoons

Basic Ingredients List

  • Olive oil
  • Garlic
  • Onions
  • Salt and pepper
  • Beef broth

Optional Seasonings and Marinades

For extra flavor, try different seasonings and marinades with beef heart. Soy sauce, Worcestershire sauce, and Italian seasoning are popular choices. You can also marinate it in olive oil, lemon juice, and herbs like thyme and rosemary. Trying new seasonings and marinades can make your beef heart recipe unique.

SeasoningDescription
Soy sauceAdds a savory, umami flavor
Worcestershire sauceEnhances the beef flavor and adds a tangy taste
Italian seasoningBlends herbs like basil, oregano, and thyme for a Mediterranean flavor

Preparing Your Beef Heart for Cooking

To get the best out of your beef heart recipe, proper preparation is crucial. This means cleaning and trimming the heart to remove fat, sinew, or unwanted parts. This step improves the texture and taste of your dish. For top beef heart cooking tips, understanding the prep process is key.

Begin by rinsing the beef heart under cold water and drying it with paper towels. Then, cut away any fat, sinew, or connective tissue. This ensures even cooking and prevents toughness. Use a sharp knife to trim the heart, removing any unwanted parts.

After trimming, slice or cube the beef heart based on your cooking method. For grilling or pan-frying, thin strips are best. For slow cooking, cubing works better. These beef heart cooking tips help you make a delicious, tender dish.

Additional tips for preparing your beef heart include:

  • Using a meat mallet to pound the heart for even thickness
  • Marinating the heart in your favorite seasonings and sauces for flavor
  • Cooking the heart to the recommended internal temperature for safety

By following these steps and tips, you’re on your way to a tasty beef heart dish. Always handle the heart safely and cook it to the right temperature for a healthy, delicious meal.

Classic Beef Heart Recipe for Beginners

Cooking beef heart can be a breeze with the right recipe. Marination is key to tenderizing the meat and adding flavor. A good marinade makes all the difference in the final dish.

A basic recipe starts with marinating the heart in olive oil, garlic, and herbs. The marinating time varies from a few hours to overnight. This depends on how tender and flavorful you want the dish to be.

Marination Process

The marination step is vital in cooking beef heart. It involves mixing the heart with a blend of ingredients and letting it sit. This process breaks down the meat’s connective tissues, making it tender and flavorful.

Cooking Instructions

After marinating, it’s time to cook the heart. Grilling or pan-frying are common methods. The goal is to cook it to the right temperature for safety and taste.

For perfect results, use a meat thermometer to check the heart’s temperature. Avoid overcooking. A good recipe will guide you on cooking times and temperatures.

Temperature Guidelines

When cooking beef heart, following temperature guidelines is crucial for safety. The heart should reach an internal temperature of at least 160°F (71°C). A reliable recipe will help you achieve the perfect temperature and time for cooking.

Alternative Cooking Methods

Beef heart dishes can be made in many ways, offering different flavors and textures. It’s a versatile ingredient for those exploring exotic meat recipes. You can grill, braise, stir-fry, or slow-cook it, among other methods.

Some popular ways to cook beef heart include:

  • Grilling: Slice the beef heart into thin strips and grill until medium-rare, serving with a side of roasted vegetables.
  • Braising: Cook the beef heart in liquid, such as stock or wine, on low heat for several hours, resulting in a tender and flavorful dish.
  • Stir-frying: Slice the beef heart into thin strips and stir-fry with your favorite vegetables and seasonings, serving over rice or noodles.
  • Slow-cooking: Cook the beef heart in a slow cooker with your favorite seasonings and vegetables, resulting in a hearty and comforting meal.

These methods can make unique and tasty beef heart dishes. Beef heart is perfect for experimenting in the kitchen. It has a rich flavor and tender texture.

Beef heart is great for both seasoned chefs and newcomers. It can be used in simple snacks or elaborate meals. So, why not try some new exotic meat recipes today?

Cooking MethodDescription
GrillingGrill beef heart until medium-rare, serving with roasted vegetables.
BraisingCook beef heart in liquid on low heat for several hours, resulting in a tender and flavorful dish.
Stir-fryingStir-fry beef heart with vegetables and seasonings, serving over rice or noodles.
Slow-cookingCook beef heart in a slow cooker with seasonings and vegetables, resulting in a hearty and comforting meal.

Tips for Achieving Maximum Tenderness

When cooking beef heart, tenderness is key for a great meal. To get it right, follow some expert beef heart cooking tips. Preparing the heart correctly is the first step to tenderness and flavor.

Marination is crucial. It breaks down meat tissues, making it tender and easy to chew. Use acidic ingredients like vinegar or lemon juice. Enzymes like papain or bromelain also help tenderize the meat.

Marination Secrets

Choosing the right marinade ingredients is important. A good mix includes acids, oils, and spices. Marinate the heart for at least 2 hours, but overnight is best.

Cutting Techniques

Proper cutting is also key for tenderness. Cut the heart against the grain. This direction reduces chewiness and makes it tender.

Cooking Duration Guidelines

Cooking time is vital for tenderness. Cook until it reaches 160°F. Avoid overcooking to prevent toughness. Follow how to prepare beef heart guidelines carefully.

Serving Suggestions and Pairings

Beef heart dishes offer endless serving options. Pair it with side dishes that enhance its rich flavor. Roasted vegetables like Brussels sprouts or carrots are great, adding a nice texture contrast.

For a unique twist, try quinoa salad or grilled asparagus as side dishes. These add excitement and balance the bold beef heart flavor. Explore more exotic meat recipes featuring beef heart for more ideas.

  • Cabernet Sauvignon: a full-bodied red wine that pairs well with the rich flavor of beef heart
  • Pinot Noir: a light-bodied red wine that adds a nice touch of elegance to the meal
  • Chardonnay: a buttery and oaky white wine that complements the tender texture of beef heart

Experiment with different side dishes and wine pairings. This will help you create a unique and delicious meal. It showcases the versatility of beef heart dishes and exotic meat recipes.

Side DishWine Pairing
Roasted VegetablesCabernet Sauvignon
Quinoa SaladPinot Noir
Grilled AsparagusChardonnay

Storage and Leftovers Guide

Storing raw beef heart right is key to keeping it fresh and safe. Wrap it tightly in plastic or foil and put it in the fridge’s coldest spot. Make sure it’s at 40°F (4°C) or colder.

For freezing, use airtight bags or packaging. Remove air before sealing to keep it fresh longer.

Cooked beef heart can stay in the fridge for 3 to 4 days. Keep it in a covered container at 40°F (4°C) or colder. Reheat it to 165°F (74°C) to stay safe. You can add it to salads, sandwiches, or soups.

Here are some tips for storing and reheating beef heart:

  • Store raw beef heart in the coldest part of the fridge.
  • Freeze beef heart in airtight packaging or freezer bags.
  • Reheat cooked beef heart to an internal temperature of 165°F (74°C).
  • Use leftover cooked beef heart in creative dishes like salads, sandwiches, and soups.

Follow these tips to enjoy your beef heart recipe safely and well. Whether it’s your first time cooking or you’re looking for new ideas, these suggestions will help.

Storage MethodTemperatureShelf Life
Refrigeration40°F (4°C) or below3 to 4 days
Freezing0°F (-18°C) or below8 to 12 months

Troubleshooting Common Cooking Issues

When cooking beef heart, you might face some challenges. We’ve got some tips to help you out. One common problem is when the beef heart turns tough or dry. This usually happens if it’s overcooked or not marinated enough. Try adjusting your cooking time and marination to fix this.

Flavor issues can also pop up, making the dish too strong or bland. Fixing this is easy by tweaking the seasonings and spices. For a milder taste, use less garlic or onion. For a bolder flavor, add more herbs and spices. These simple steps can make your dish delicious and flavorful.

Temperature mistakes can also happen, leading to undercooked or overcooked beef heart. To avoid this, use a meat thermometer. The beef heart should be at least 160°F (71°C) when cooked. By following these tips, you can enjoy a tender and tasty meal.

  • Use a marinade with acidic ingredients like vinegar or lemon juice to tenderize the beef heart.
  • Avoid overcooking the beef heart to prevent it from becoming tough and dry.
  • Let the beef heart rest for a few minutes before slicing and serving. This helps the juices redistribute.

By following these tips, you can overcome common cooking problems. Always use fresh, high-quality ingredients and take your time to prepare the beef heart. With practice and patience, you’ll master cooking beef heart in no time.

Common IssueSolution
Tough or dry beef heartAdjust cooking time and marination process
Too strong or bland flavorAdjust amount of seasonings and spices
Undercooked or overcooked beef heartUse a meat thermometer to check internal temperature

Conclusion: Mastering the Art of Cooking Beef Heart

Beef heart is a versatile and nutritious organ meat that’s great to cook. It’s packed with health benefits and can be made tender and flavorful. This makes it a fantastic addition to your cooking skills.

To cook beef heart well, start with the right selection and preparation. Try different marinades and cooking methods to find what you like best. Soon, you’ll be making delicious beef heart dishes that everyone will love.

Don’t be afraid to try new things with beef heart. It’s a great way to make your meals healthier and more exciting. Your taste buds and body will love the change. Happy cooking!

FAQ

What makes beef heart such a nutritional powerhouse?

Beef heart is full of nutrients like protein, iron, and vitamin B12. It also has coenzyme Q10. It’s a great source of protein and has minerals like zinc and selenium. Adding beef heart to your meals can really boost your nutrition.

How do I select the best quality beef heart?

Look for a deep red color and firm texture when buying beef heart. It should not have any discoloration or too much fat. Buying from a trusted butcher or specialty store ensures freshness. Opt for organic or grass-fed for the best nutrition.

What equipment and ingredients do I need for cooking beef heart?

You’ll need a sharp knife, cutting board, and a cooking pot like a skillet or Dutch oven. The main ingredients are the beef heart, garlic, onions, herbs, and acids like wine or vinegar. You can also try marinades and rubs to add flavor.

How do I properly prepare beef heart for cooking?

Start by removing excess fat, sinew, or connective tissue. Cut the heart into small pieces or cubes for even cooking. Proper preparation is crucial for the best taste and texture.

What is the best way to cook beef heart for maximum tenderness?

Marinate the beef heart in vinegar or wine to tenderize it. Slow-cooking methods like braising or slow-roasting also work well. These methods break down tough fibers, making the meat tender and flavorful.

Can I use different cooking methods for beef heart beyond the classic recipe?

Yes! Beef heart can be grilled, stir-fried, or slow-cooked in many cuisines. Try different marinades, seasonings, and cooking techniques to find new ways to enjoy this nutritious meat.

How do I store raw and cooked beef heart, and what are some ideas for using up leftovers?

Raw beef heart should be refrigerated for 3-4 days or frozen for months. Cooked heart can be refrigerated for 3-4 days or frozen for longer. Use leftovers in soups, stews, or as a protein-rich addition to salads, sandwiches, or omelets.

What are some common issues I may encounter when cooking beef heart, and how can I troubleshoot them?

Issues like toughness, dryness, or strong flavor can happen. To fix these, adjust cooking times, try different marinades, or add more seasonings. With some trial and error, you’ll soon cook delicious and tender beef heart.

The Best Cheesecake Cookies Recipe You’ll Ever Try

cheesecake cookies recipe

What makes the perfect cheesecake cookies recipe? It’s about blending cheesecake’s richness with cookies’ crunch. The best cheesecake cookies mix flavors and textures just right. Finding the right recipe can change your baking game.

Looking for the perfect cheesecake cookies recipe is exciting. It’s a chance to try new things and show off your baking skills. By mixing different ingredients and techniques, you can make a dessert that’s truly special. So, how do you make the best cheesecake cookies you’ve ever had?

Key Takeaways

  • Combining the richness of cheesecake with the crunch of cookies creates a unique dessert experience
  • Finding the right cheesecake cookies recipe can be a game-changer for baking enthusiasts
  • Experimenting with different ingredients and techniques can help you create a unique and delicious dessert
  • The best cheesecake cookies require a delicate balance of flavors and textures
  • Using high-quality ingredients and following a trusted cheesecake cookies recipe is essential for success
  • Practicing and refining your baking skills can help you create the perfect cheesecake cookies

Why These Cheesecake Cookies Will Become Your New Favorite Dessert

Imagine a dessert that’s both rich like cheesecake and easy to eat like a cookie. This treat will make your sweet tooth happy and keep you coming back for more. Delicious cheesecake cookies are a kitchen game-changer for anyone looking to try something new.

The mix of creamy cheesecake and crunchy cookie is perfect. Homemade cheesecake cookies let you add your favorite flavors and mix-ins. This means you can make them just the way you like them.

The Perfect Blend of Two Classic Desserts

Cheesecake cookies have a special texture that stands out. They have a crunchy outside and a creamy inside. Whether you love cheesecake or cookies, these treats will be a hit.

What Makes These Cookies Special

Cheesecake cookies are super versatile. You can enjoy them alone or with toppings like fruit, nuts, or chocolate chips. With homemade cookies, you can be creative and make them your own.

A Brief History of Cheesecake Cookies

Cheesecake cookies have a long history that started with the early days of cheesecake. As cheesecake became more popular, bakers started making cookies that combined the best of both. Now, we have a cookie that’s both unique and irresistible.

Essential Ingredients for Perfect Cheesecake Cookies

To make delicious easy cheesecake cookies, you’ll need a few key ingredients. These will mix together to create a perfect taste and texture. Here’s what you’ll need:

A top-notch cream cheese is vital for simple cheesecake cookies. Choose a brand that’s both tangy and creamy. You’ll also need granulated sugar, brown sugar, and eggs for sweetness and moisture.

You’ll also need all-purpose flour, baking powder, and salt for the cookies to rise and have structure. A teaspoon of vanilla extract adds a special flavor. Here’s a list of what you’ll need:

  • Cream cheese
  • Granulated sugar
  • Brown sugar
  • Eggs
  • All-purpose flour
  • Baking powder
  • Salt
  • Vanilla extract

Make sure to pick high-quality ingredients for the best results. With these, you can make tasty easy cheesecake cookies for any event.

Using these ingredients, you can make simple cheesecake cookies that are both yummy and easy to make. Always choose the best ingredients for the best taste.

IngredientQuantity
Cream cheese8 ounces
Granulated sugar1 cup
Brown sugar1/2 cup
Eggs2
All-purpose flour2 cups
Baking powder1 teaspoon
Salt1/2 teaspoon
Vanilla extract1 teaspoon

Kitchen Tools and Equipment You’ll Need

To make delicious homemade cheesecake cookies, you’ll need the right tools. Having the right tools makes the process easier. This lets you focus on making the perfect quick cheesecake cookies.

When baking, precision is key. To get light and fluffy cookies, you’ll need some essential tools. You’ll need a mixing bowl, whisk, and rubber spatula.

Must-Have Baking Tools

  • Mixing bowl
  • Whisk
  • Rubber spatula

There are also optional tools that can help. A stand mixer and a cookie scoop can make things easier.

Measuring Tools for Precision

Measuring tools are crucial for perfect cookies. You’ll need a digital scale and measuring cups. These tools help you measure ingredients accurately. This ensures your cookies are delicious and consistent.

Step-by-Step Cheesecake Cookies Recipe

To make delicious cheesecake cookies, start by preheating your oven to 375°F (190°C). Prepare a baking sheet with parchment paper. In a large bowl, whisk together 2 1/4 cups of all-purpose flour, 1 tsp of baking powder, and 1 tsp of salt.

In another bowl, mix 1 cup of unsalted butter, softened, with 3/4 cup of granulated sugar and 1 cup of brown sugar. Beat in 2 large eggs and 1 tsp of vanilla extract. Gradually add the dry ingredients to the wet ingredients and mix until a dough forms. For a simple dessert like cheesecake cookies, it’s essential to have the right ingredients and tools.

Now, let’s look at the steps to make these cookies:

  1. Scoop tablespoon-sized balls of dough onto the prepared baking sheet, leaving about 2 inches of space between each cookie.
  2. Bake for 12-15 minutes or until the edges are lightly golden.
  3. Allow the cookies to cool on the baking sheet for 5 minutes before transferring them to a wire rack to cool completely.

With this easy cheesecake cookies recipe, you’ll be enjoying delicious treats in no time. Remember to store your cookies in an airtight container at room temperature for up to 5 days. You can also freeze them for up to 2 months. Experiment with different flavors and ingredients to create your unique cheesecake cookies recipe.

Tips for Getting the Perfect Cookie Texture

To get the perfect texture for your cheesecake cookies, focus on a few key things. The temperature of your ingredients and oven is very important. Using room temperature ingredients helps make your cookies light and fluffy.

How you mix your ingredients also matters a lot. Mixing too much can make cookies tough, while not enough can make them dense. To fix this, mix your ingredients using both creaming and folding techniques.

  • Use a mix of white and brown sugar for a rich, caramel flavor
  • Add a bit of salt to balance sweetness and enhance taste
  • Don’t overbake – take them out when they’re lightly golden and still soft

By following these tips and using the right mixing methods, you can make delicious cheesecake cookies. They’ll impress everyone. Don’t be afraid to try different ingredients and techniques to find what works best for you.

IngredientTemperatureMixing Technique
ButterRoom temperatureCreaming
SugarRoom temperatureCreaming
EggsRoom temperatureFolding

Creative Variations to Try

Gourmet cheesecake cookies offer endless possibilities. Try adding strawberry or blueberry to the batter for unique flavors. You can also experiment with goat cheese or feta for a distinct taste.

Here are some creative ideas:

  • Adding chopped nuts, like walnuts or pecans, for added texture
  • Using different types of sugar, like brown sugar or turbinado sugar, for a richer flavor
  • Incorporating dried fruit, like cranberries or cherries, for a sweet and tangy taste

For a unique dessert, try adding caramel or chocolate on top. Or use a cookie stamp for fun designs. The key is to experiment and have fun.

To elevate your cheesecake cookies, use high-quality ingredients. Pay attention to the dough’s texture and consistency. With creativity and practice, you’ll impress your friends and family.

VariationIngredientsDescription
Strawberry Cheesecake CookiesStrawberry jam, fresh strawberriesSweet and tangy cookies with a strawberry twist
Blueberry Cheesecake CookiesBlueberry jam, fresh blueberriesMouthwatering cookies with a blueberry flavor

Common Mistakes to Avoid When Making Cheesecake Cookies

Making simple cheesecake cookies can be exciting. But, there are mistakes that can spoil the fun. Knowing these mistakes helps you make the best homemade cheesecake cookies.

Start by choosing quality ingredients and using the right techniques. Bad ingredients or wrong methods can mess up your cookies. For example, old baking powder can change their texture.

Ingredient-Related Mistakes

  • Using low-quality cream cheese
  • Incorrect measurement of sugar
  • Not using room temperature ingredients

By avoiding these mistakes, you can make amazing homemade cheesecake cookies. Remember, it takes practice to get it right. Don’t worry if your first batch isn’t perfect.

Technique-Related Mistakes

How you make your homemade cheesecake cookies matters a lot. Overmixing or not chilling the dough can cause problems. This can make your cookies spread too much or lose their shape.

Storage and Shelf Life

To keep your cheesecake cookies fresh, proper storage is key. Whether you’re making simple or complex cookies, it’s important. This helps keep their texture and taste.

There are a few ways to store cheesecake cookies. You can keep them at room temperature, in the fridge, or freeze them. Each method has its own tips to keep your cookies fresh and tasty.

Room Temperature Storage

Storing cookies at room temperature is good for a day or two. Just put them in an airtight container. Keep them away from sunlight and moisture.

Refrigeration Guidelines

For longer storage, the fridge is a better choice. Put the cookies in an airtight container. Store them in the fridge for up to 5 days.

Freezing Instructions

Freezing is great for longer storage. Place cookies in a single layer in an airtight container or freezer bag. Store them in the freezer for up to 2 months. To enjoy, thaw at room temperature or reheat in the oven.

Following these storage tips helps you enjoy your cheesecake cookies longer. Whether you’re making simple or complex cookies, proper storage is crucial. It keeps them fresh and flavorful.

Serving Suggestions and Pairings

There are many ways to serve delicious cheesecake cookies. You can enjoy them alone or with drinks and snacks. A cold glass of milk or a hot coffee is a great choice.

For a richer treat, pair your cookies with ice cream or whipped cream. You can also make your dish look better with colorful plates and garnishes. Some good pairings include:

  • Fresh fruit, such as strawberries or blueberries
  • Chocolate sauce or caramel drizzle
  • Chopped nuts or sprinkles for added texture and flavor

Serve your mouthwatering cheesecake cookies at a special event. They’re perfect for birthdays or holidays. You can also give them as a beautiful gift in decorative tins or jars.

With these ideas, you can enjoy your delicious cheesecake cookies in new ways. So, be creative and savor the creamy taste of these mouthwatering cheesecake cookies.

Pairing OptionDescription
MilkA classic combination that is both simple and delicious
CoffeeA perfect pairing for a morning or afternoon treat
Ice CreamA decadent treat that is sure to satisfy your sweet tooth

Nutritional Information and Dietary Considerations

Enjoying a classic cheesecake cookies recipe means knowing the nutritional facts. Making these cookies at home can be a healthier choice. But, it’s important to understand the calorie count and macronutrients.

Caloric Content

A single serving of cheesecake cookies has 150 to 250 calories. This depends on the ingredients and how big the cookies are. Here’s a quick look at the nutritional values:

  • Calories: 200 per serving
  • Fat: 10g
  • Carbohydrates: 25g
  • Protein: 5g

Dietary Modifications

For those with dietary needs, you can tweak a classic cheesecake cookies recipe. Here are some ideas:

  • Use gluten-free flours for gluten intolerance
  • Try vegan alternatives to dairy
  • Use sugar-free sweeteners for dietary restrictions

Allergen Information

Knowing about common allergens in your cheesecake cookies is key. These include nuts, dairy, and eggs. If you plan to share, label the cookies with ingredient info for safety.

By paying attention to nutrition and dietary needs, you can enjoy your favorite cheesecake cookies. This way, you can keep your diet balanced.

NutrientAmount per serving
Calories200
Fat10g
Carbohydrates25g
Protein5g

Troubleshooting Guide for Perfect Results

When making best cheesecake cookies, you might run into some problems. We’ve created a detailed guide to help you fix common issues. Whether it’s texture, flavor, or looks, we’ve got solutions for you.

Some common problems include overmixing, underbaking, or using poor ingredients. To avoid these, stick to the recipe and use fresh, quality ingredients. If you face an issue, don’t worry. We have simple fixes to help you.

  • Cookies are too dense: Try adding a little more leavening agent or using a combination of white and brown sugar.
  • Cookies are too crispy: Check your oven temperature and baking time to ensure you’re not overbaking.
  • Cookies lack flavor: Experiment with different flavor combinations, such as adding vanilla or nuts, to give your cookies an extra boost.

By following these tips and troubleshooting common issues, you’ll be well on your way to making the best cheesecake cookies and quick cheesecake cookies that are sure to impress your friends and family.

“The key to making perfect cheesecake cookies is to be patient and not overmix the dough. With a little practice and patience, you’ll be making delicious cookies like a pro!”

Conclusion: Master Your Cheesecake Cookies Today

Congratulations! You’ve mastered baking gourmet cheesecake cookies. This simple yet tasty recipe will wow everyone. Remember, perfecting simple cheesecake cookies takes detail and practice.

Feel free to try new things and add your own twist. You can stick to classic flavors or mix things up. Being creative in the kitchen is fun and rewarding.

So, get your oven ready and start baking. You’ll make the most delicious cheesecake cookies ever. With practice and this guide, you’ll become a pro. Enjoy every step and every bite!

FAQ

What makes these cheesecake cookies so special?

These cheesecake cookies are a unique treat. They mix the creamy taste of cheesecake with the texture of a cookie. This creates a gourmet cookie that’s sure to be a hit.

What are the essential ingredients for perfect cheesecake cookies?

To make great cheesecake cookies, you need cream cheese, sugar, eggs, vanilla, and flour. Getting the right mix of these is key for the perfect taste and texture.

What kitchen tools and equipment do I need to make these cookies?

You’ll need a mixing bowl, a mixer, baking sheets, and parchment paper. Also, have measuring cups and spoons ready for accurate measurements.

Can I make any variations to the basic cheesecake cookie recipe?

Yes! You can try adding chocolate chips, fruit preserves, or a streusel topping. This makes the recipe very versatile for different flavors and toppings.

How should I store cheesecake cookies to keep them fresh?

Store them in an airtight container at room temperature for up to 5 days. For longer storage, refrigerate for up to 1 week or freeze for 3 months.

What are some common mistakes to avoid when making cheesecake cookies?

Avoid overmixing, overbaking, and using poor-quality cream cheese. Focus on using the right ingredients and baking techniques to get it right.

How can I troubleshoot issues with the texture of my cheesecake cookies?

If cookies are too soft or hard, adjust baking time and temperature. Undercooked cookies need more baking, while overbaked ones might do better with a lower temperature. Mixing well also affects texture.

3 Ingredient Sugar Cookies: Quick & Easy Recipe

3 ingredient sugar cookie recipe

Imagine making delicious sugar cookies with just 3 ingredients. It sounds too good to be true, but it’s real. Our 3 ingredient sugar cookie recipe is perfect for both new and seasoned bakers. It’s a quick and easy way to satisfy your sweet cravings.

Our recipe is easy to follow and takes little time. With just a few ingredients, you can make a batch of tasty cookies. They’re great for snacking or sharing with loved ones. Plus, you can customize them to your liking.

Key Takeaways

  • Our 3 ingredient sugar cookie recipe is easy to make and requires minimal ingredients
  • The recipe is perfect for novice and experienced bakers alike
  • Our quick sugar cookie recipe is versatile and can be customized to suit your tastes
  • The recipe is great for those short on time
  • Our 3 ingredient sugar cookie recipe is perfect for snacking or sharing with friends and family
  • The recipe offers a simple and delicious solution for satisfying your sweet tooth

The Magic of Simple Sugar Cookie Baking

Simplicity can be powerful in baking. An easy sugar cookie recipe can be just as tasty as a complex one. Using fewer ingredients can lead to better results. This is because each ingredient can shine without being overwhelmed.

A simple sugar cookie recipe is not just easy. It’s also based on the science of ingredients. The right mix can create a perfect balance of flavors and textures. For example, just three ingredients can make a cookie that’s both crispy and chewy.

Why Less Ingredients Mean Better Results

Using fewer ingredients makes baking quicker. With a simple recipe, you can whip up cookies fast. This is great for those short on time or new to baking. It lets you focus on technique for perfect cookies every time.

The Science Behind 3-Ingredient Cookies

The science of 3-ingredient cookies is interesting. These cookies are tasty and look good. The trick is to pick ingredients that complement each other well. With practice, you can make a simple sugar cookie recipe that wows everyone.

  • Easy to make: With just a few ingredients, you can quickly mix together the dough and have a batch of cookies ready in no time.
  • Efficient: Using fewer ingredients means less waste and less cleanup.
  • Delicious: A simple sugar cookie recipe can result in a cookie that is both crispy and chewy, with a perfect balance of flavors and textures.

In summary, a simple sugar cookie recipe is a great starting point for baking. By using fewer ingredients and focusing on technique, you can make a delicious cookie that impresses everyone.

Essential Ingredients for Your 3 Ingredient Sugar Cookie Recipe

To make a delicious minimal ingredient sugar cookie, you only need three key ingredients. These are vital for a great basic sugar cookie recipe. Using top-quality ingredients will greatly improve your cookies.

The three ingredients you’ll need are:

  • Butter: This adds flavor and tenderness to your cookies.
  • Sugar: This provides sweetness and helps to balance out the flavor of the butter.
  • Flour: This gives structure and texture to your cookies.

For the best taste, use real butter. Choose unbleached, all-purpose flour for a soft texture. You can pick between granulated or brown sugar, based on your taste.

With these three simple ingredients, you can make a tasty and classic basic sugar cookie recipe. It’s perfect for any event. Whether you’re an experienced baker or new to it, this minimal ingredient sugar cookie recipe is a great starting point.

IngredientQuantityImportance
Butter1 cupEssential for flavor and texture
Sugar1 cupProvides sweetness and balance
Flour2 cupsGives structure and texture

Kitchen Tools You’ll Need

To make a tasty homemade sugar cookie, you don’t need fancy tools. A simple recipe can be done with basic kitchen items you probably have.

Having the right tools is key for baking. For sugar cookies, you’ll need a mixing bowl, whisk, and baking sheet. These tools help you mix, measure, and bake your cookies just right.

Basic Equipment Requirements

A beginner sugar cookie recipe needs some basic tools, including:

  • Mixing bowl
  • Whisk
  • Baking sheet
  • Measuring cups and spoons

These tools will help you start making your homemade sugar cookie recipe.

Optional Tools for Enhanced Results

While not essential, some optional tools can improve your baking. These include:

  • Stand mixer
  • Silicone baking mats
  • Cookie cutters

These tools make mixing, baking, and shaping cookies easier and more precise.

Measuring Tools Guide

Getting the right measurements is key for a homemade sugar cookie recipe. Use measuring cups and spoons to measure ingredients accurately. This ensures your cookies have the perfect flavor and texture.

Preparation Steps Before Baking

To make a no-fail sugar cookie recipe, follow some key steps before baking. These steps will help you get an easy sugar cookie recipe that always turns out right.

Here are some important preparation steps to follow:

  • Preheat your oven to the correct temperature for even baking.
  • Prepare your baking sheets with parchment paper or a silicone mat.
  • Organize your workspace by gathering all the necessary ingredients and tools.

By following these simple steps, you’ll be on your way to making delicious and stress-free no-fail sugar cookie recipe. Remember, a well-prepared workspace and a properly preheated oven are key for an easy sugar cookie recipe that yields perfect results.

With these preparation steps in place, you can mix and bake your sugar cookies with confidence. You’ll know you’ve set yourself up for success with a no-fail sugar cookie recipe.

Step-by-Step Mixing Process

To make a tasty 3 ingredient sugar cookie recipe, follow a simple mixing process. This process combines ingredients in the right order for the perfect dough.

Begin by whisking sugar and butter until they’re light and fluffy. Next, add the egg and mix until it’s well combined. It’s important not to overmix the dough for a successful simple sugar cookie recipe.

Proper Ingredient Combination Order

The order of combining ingredients is key. Start with sugar and butter, then add the egg. This order helps make a smooth and creamy dough.

Achieving the Perfect Dough Consistency

The ideal dough for a 3 ingredient sugar cookie recipe is smooth and pliable. If it’s too sticky, add a bit more sugar. If it’s too dry, add a bit more egg.

Troubleshooting Common Mixing Issues

Common mixing problems include overmixing, which makes cookies tough. To avoid this, mix ingredients just until they form a ball. Undermixing can cause cookies to spread too much during baking.

By following these steps and tips, you can make a delicious 3 ingredient sugar cookie recipe. Remember to keep it simple and don’t overcomplicate the process.

IngredientQuantity
Sugar1 cup
Butter1/2 cup
Egg1

Shaping and Decorating Your Cookies

Making a homemade sugar cookie recipe is just the beginning. Shaping and decorating your cookies lets you show off your creativity. You can start by dropping spoonfuls of dough onto a baking sheet. Or, you can get creative with rolled and cut shapes.

A homemade sugar cookie recipe can be shaped into many forms, from simple circles to detailed designs. Use a cookie cutter for fun shapes or a knife for intricate designs. You can even make a basic sugar cookie recipe into a 3D shape, like a castle or animal.

Decorating your cookies is just as fun as baking them. Use frosting, sprinkles, and other toppings to add color and personality. For a homemade sugar cookie recipe, try a simple powdered sugar frosting or a royal icing for more detail. Popular decorating techniques include:

  • Using a piping bag for intricate designs
  • Adding sprinkles or other toppings before baking
  • Creating a marbled effect with different colors of frosting

With practice and patience, you can make beautiful and tasty cookies for any event. Whether it’s a basic sugar cookie recipe or a more elaborate homemade sugar cookie recipe, the most important thing is to have fun. So, don’t be afraid to try new things and enjoy decorating your cookies!

Baking Temperature and Timing Guide

To get perfect cookies, knowing about baking temperature and timing is key. A good sugar cookie recipe needs the right temperature to get chewy centers and crispy edges.

For baking, preheat your oven to 375°F (190°C). But, your oven’s type and how well it’s calibrated might change this. Always use an oven thermometer for the best results.

Oven Preparation Tips

Preheat your oven for 15-20 minutes before baking. This ensures it’s at a steady temperature for even cooking. Also, using a baking stone or sheet pan helps cookies bake evenly and prevents them from spreading too much.

Visual Cues for Perfect Doneness

It’s important to check if your cookies are done to avoid overbaking. Look for a light golden brown color around the edges and a firm center. You can also press on the cookie’s edge gently; if it springs back, it’s done. Quick sugar cookie recipes usually bake in 8-12 minutes, depending on their size.

By following these tips and using a reliable recipe, you’ll make delicious cookies every time. Enjoy sharing them with your loved ones.

Baking TimeCookie SizeTemperature
8-10 minutesSmall375°F (190°C)
10-12 minutesMedium375°F (190°C)
12-15 minutesLarge375°F (190°C)

Storage and Freshness Tips

To keep your minimal ingredient sugar cookies fresh, proper storage is key. These cookies, made with a simple recipe, have a shorter shelf life. This is because they lack preservatives, keeping their natural taste and texture but making them more prone to staleness.

For short-term storage, place cookies in an airtight container at room temperature. This keeps them fresh for up to 3 days. It’s crucial to avoid direct sunlight and moisture to prevent softening and texture loss.

Short-term Storage Methods

  • Store cookies in an airtight container at room temperature
  • Keep cookies away from direct sunlight and moisture
  • Use a paper towel to absorb any moisture in the container

Freezing Instructions

To extend their freshness, freeze your cookies. Place them in a single layer on a baking sheet and freeze. Then, transfer them to an airtight container or freezer bag. To enjoy, thaw at room temperature or reheat in the oven.

Follow these tips to enjoy your minimal ingredient sugar cookies longer. Always use an easy sugar cookie recipe for the best taste. Experiment with storage methods to find what works best for you.

Recipe Variations and Modifications

To make your 3 ingredient sugar cookie recipe even better, try adding a pinch of salt or a teaspoon of vanilla extract. You can also use different types of sugar, like brown sugar or turbinado sugar, for a unique taste.

A simple sugar cookie recipe is perfect for getting creative. Add chopped nuts, dried fruit, or candy pieces for a fun twist. For a fancy look, use a cookie stamp or small cookie cutter to make intricate designs.

Here are some ideas for variations:

  • Adding a teaspoon of cinnamon or nutmeg for a warm, spicy flavor
  • Using lemon or orange zest to create a bright, citrusy taste
  • Adding some chocolate chips or chocolate shavings for a decadent treat

The secret to a great 3 ingredient sugar cookie recipe is to keep it simple and have fun. Don’t be afraid to try new things. You might just create a delicious masterpiece!

Serving Suggestions and Pairings

There are many ways to serve your homemade sugar cookies. Whether you’re new to baking or have lots of experience, you can make your cookies even better. A warm cup of coffee or tea pairs well with a fresh cookie. For a richer treat, try hot chocolate with your cookies.

For special events, put your cookies in a pretty tin or jar. Fill it with different flavors and decorations. This makes a lovely gift. You can also add nuts or dried fruit to your cookies for a unique taste.

Beverage Pairing Ideas

  • Coffee: a classic pairing that is simple yet effective
  • Hot chocolate: add a richness and decadence to your cookie experience
  • Tea: a soothing and calming pairing that is perfect for a relaxing afternoon

Presentation Tips for Special Occasions

To make your cookies stand out, add some decorations. Use colored sugar or sprinkles to match the occasion. Or, make a cookie bouquet with fresh flowers or greenery. Your cookies will surely impress.

With these ideas, you can enjoy your sugar cookies in new ways. So, be creative and make your cookies shine!

OccasionCookie FlavorBeverage Pairing
BirthdaysSugar cookie with sprinklesHot chocolate
HolidaysGingerbread cookieCoffee
Everyday treatClassic sugar cookieTea

Conclusion

We’ve explored a simple 3-ingredient quick sugar cookie recipe. We hope you’re excited to bake these treats. This recipe is perfect for both experienced bakers and beginners.

With just a few pantry staples, you can make lots of these tasty cookies. Enjoy baking and get creative with your cookies. They’re great for any occasion, bringing joy to everyone who tries them.

Now, it’s time to bake! Get your oven ready and your ingredients in order. Let’s make some delicious quick and easy sugar cookies together.

FAQ

What are the three main ingredients in this sugar cookie recipe?

The main ingredients are flour, sugar, and butter.

How simple is this sugar cookie recipe?

This recipe is very simple. It’s great for beginners who want to make tasty cookies easily.

What type of equipment do I need to make these cookies?

You’ll need a baking sheet, mixing bowl, and basic tools like a spoon and measuring cups. No special equipment is needed.

Can I customize the flavor of these sugar cookies?

Yes, you can add different flavors. Try vanilla extract, lemon zest, or other mix-ins for unique tastes.

How long do these sugar cookies stay fresh?

Stored properly, these cookies stay fresh for up to a week. You can also freeze the dough or cookies for longer.

Are there any tips for achieving the perfect baked cookie texture?

Yes, focus on oven temperature and baking time. This will help you get soft, chewy cookies with a crisp edge.

Delicious Chicken Bone Broth Recipe – Easy & Nutritious

chicken bone broth recipe​

Why is chicken bone broth so popular in health-conscious homes? It’s simple and packed with health benefits. Making your own bone broth is easy and offers great rewards. It’s a tasty way to boost your meals with extra nutrition.

Chicken bone broth can transform your health. What are the main advantages of making it yourself? Let’s explore the key points.

Introduction to Chicken Bone Broth

A chicken bone broth recipe is a fantastic way to make a tasty, healthy broth at home. With the right ingredients and patience, you can craft a broth perfect for soups, stews, or as a drink.

Key Takeaways

  • Chicken bone broth is easy to make at home
  • A homemade bone broth is a nutritious addition to various diets
  • Chicken bone broth recipe offers numerous health benefits
  • A nutritious broth like chicken bone broth can be used in a variety of dishes
  • Making chicken bone broth at home is a cost-effective option
  • Chicken bone broth is a great way to add flavor to your meals

The Health Benefits of Homemade Chicken Bone Broth

Homemade chicken bone broth is packed with nutrients. It offers many health benefits, from its rich nutritional value to its immune support. Adding it to your diet can boost your overall health and wellness.

The nutritional value of chicken bone broth is impressive. It has minerals like calcium, magnesium, and phosphorus. These minerals are key for strong bones, healthy muscles, and a strong immune system. It also has amino acids like glycine, proline, and glutamine, which are good for gut health.

Some of the key advantages of consuming homemade chicken bone broth include:

  • Improved immune support, which can help to prevent illnesses and reduce the severity of symptoms
  • Enhanced gut health, which can lead to improved digestion and reduced inflammation
  • Increased joint health, which can reduce the risk of degenerative diseases like arthritis

Understanding the benefits of homemade chicken bone broth helps you make better diet choices. With its rich nutrients and immune support, it’s a great addition to a healthy lifestyle.

Essential Ingredients for Perfect Chicken Bone Broth

To make a delicious and nutritious chicken bone broth, it’s crucial to use the right bone broth ingredients. The foundation of a great broth is quality chicken bones. You can find these at your local butcher or grocery store. Choose bones that are fresh, meaty, and have a good mix of marrow and cartilage.

In addition to quality chicken bones, vegetables for broth are key. They enhance the flavor and nutritional value. Carrots, celery, and onions are essential. These vegetables add flavor and provide important vitamins and minerals.

Here are some key bone broth ingredients to include in your recipe:

  • Quality chicken bones
  • Vegetables for broth, such as carrots, celery, and onions
  • Herbs and spices, like bay leaves and black pepper
bone broth ingredients

By using these essential bone broth ingredients, you’ll create a delicious and nutritious chicken bone broth. It’s perfect for sipping on its own or as a base for soups and stews.

Required Kitchen Equipment and Tools

To make tasty and healthy chicken bone broth, you need the right tools. A big stockpot is key for brewing the broth. It holds a lot of liquid and ingredients. You can also use a slow cooker for cooking the broth slowly.

You’ll also need containers to store the broth after it cools. Glass containers are a good choice because they’re safe and work for both hot and cold storage. Look for containers that are easy to use and clean.

  • Glass jars with lids
  • Plastic containers with tight-fitting lids
  • Stainless steel containers with lids
Container TypeSizeMaterial
Glass Jar1-2 quartsGlass
Plastic Container2-4 quartsPlastic
Stainless Steel Container1-3 quartsStainless Steel

Step-by-Step Chicken Bone Broth Recipe

To make delicious and nutritious chicken bone broth, follow a structured recipe. This includes preparing ingredients, cooking them, and knowing the simmering time.

Start by preparing your ingredients. This includes chicken bones, vegetables, and herbs. Choose fresh, organic ingredients for the best taste and nutrition. Once ready, move on to cooking.

Preparing Your Ingredients

Wash and chop vegetables like carrots, celery, and onions. Prepare herbs like parsley and thyme. Make sure your chicken bones are clean and ready.

Cooking Process Instructions

Put all ingredients in a large pot and add water. The simmering time is key for flavor and nutrition. Simmer for at least 12 hours to get all nutrients from the bones.

Straining and Finishing Steps

Strain the broth after simmering to remove solids. Use a fine-mesh sieve or cheesecloth. Add salt and pepper to enhance the flavor.

Here is a summary of the bone broth recipe in a table format:

StepDescriptionTime
Preparing IngredientsWash and chop vegetables, prepare herbs, and clean chicken bones30 minutes
Cooking ProcessSimmer the broth for 12 hours12 hours
Straining and FinishingStrain the broth and add finishing touches30 minutes

Tips for Maximum Flavor and Nutrition

To get the most out of your chicken bone broth, consider these bone broth tips. Roasting your bones before cooking can make your broth taste better and look more vibrant. Adding a splash of acid, like apple cider vinegar, helps pull more minerals from the bones. This makes your broth even more nutritious.

Here are some additional tips to keep in mind:

  • Use a variety of vegetables, such as carrots and celery, to add depth to your broth
  • Skim off any impurities that rise to the surface during cooking
  • Let your broth cool before refrigerating or freezing to prevent contamination

By following these tips, you can make a delicious and nutritious chicken bone broth. It’s great for sipping on its own or as a base for soups and stews. Always focus on enhancing flavor and maximizing nutrients when making your broth. With a bit of practice and patience, you’ll become a pro at making bone broth that’s both tasty and healthy.

TipsBenefits
Roasting bonesEnhanced flavor and color
Adding acidMaximizing nutrients
Simmering timeMaximum nutrient extraction

Common Mistakes to Avoid When Making Bone Broth

Making bone broth can be tricky. One big mistake is overcooking it. This can make the broth less nutritious and less tasty.

To prevent overcooking broth, keep an eye on the cooking time and temperature. Aim for 12-24 hours of simmering, not boiling.

Temperature Control Issues

Keeping the right temperature is key. Boiling instead of simmering can reduce nutrients and flavor.

Ingredient Selection Errors

Choosing low-quality ingredients is another mistake. It’s important to use top-notch bones and veggies for a healthy and tasty broth.

By steering clear of these errors, you can make a delicious and healthy bone broth. It’s great for soups, stews, or as a drink on its own.

MistakeEffect on Broth
OvercookingLoss of nutrients and flavor
Low-quality ingredientsLess nutritious and flavorful broth
Temperature control issuesLoss of nutrients and flavor

Storage and Preservation Methods

Storing bone broth right is key to keeping its nutrients and taste. Refrigeration is a common way to keep it fresh for days. But, freezing is better for longer storage. It keeps the broth’s nutrients and flavor for later use.

Freezing broth requires using airtight containers to avoid freezer burn. The shelf life varies by storage method and conditions. Frozen broth can last months, while refrigerated broth lasts a week. Always store in airtight containers at 0°F (-18°C) or below for the longest life.

  • Using airtight containers to prevent contamination and spoilage
  • Labeling and dating containers for easy identification
  • Storing containers in the coldest part of the freezer or refrigerator

Follow these tips to enjoy your bone broth longer. This way, you keep its nutritional value and taste.

Creative Ways to Use Your Bone Broth

Now that you have homemade bone broth, the fun begins. You can use it in soups or mix it into your favorite dishes. It’s a versatile and tasty addition to any meal.

One favorite use is as a soup base. It brings flavor and nutrition to your meals. You can also use it to braise meats or cook grains. For a warm drink, try adding herbs and spices to your bone broth.

Soup Base Applications

Using bone broth as a soup base is a smart choice. It adds flavor and nutrition to your meals. Just add your favorite veggies, meats, and spices for a delicious soup.

Cooking with Bone Broth

Cooking with bone broth is a great way to enhance your dishes. Here are some ideas:

  • Braising meats, such as pot roast or short ribs
  • Cooking grains, such as rice or quinoa
  • Adding it to your favorite stews or soups

Drinking Suggestions

Bone broth drinks are perfect for a cold day. Season it with garlic or ginger for extra flavor.

Conclusion: Mastering Your Homemade Bone Broth Journey

Starting your homemade bone broth journey is exciting. It’s a journey of learning and enjoying. Enjoy the rich flavors and health benefits of your bone broth.

Bone broth boosts your immune system and supports your joints and gut. Use the essential steps and tips to make sure your bone broth is always delicious and nutritious.

Make bone broth a part of your daily life. Drink it or use it in recipes. With each batch, you’ll get better at making bone broth. It will nourish your body and soul.

FAQ

What are the key health benefits of homemade chicken bone broth?

Homemade chicken bone broth is full of vitamins, minerals, and amino acids. It boosts your immune system, improves gut health, and strengthens your bones and joints.

What ingredients do I need to make the best chicken bone broth?

To make great chicken bone broth, you need quality chicken bones. Add vegetables like onions, carrots, and celery. Don’t forget herbs and spices like garlic, peppercorns, and bay leaves.

What equipment is required to make homemade chicken bone broth?

You’ll need a big stock pot or slow cooker, a strainer, and containers for storage. Optional tools include a pressure cooker or Instant Pot.

How long should I simmer the chicken bone broth?

Simmer the broth for 8-24 hours for the best flavor and nutrients. This long time lets the bones release their goodness.

How should I store and preserve my homemade chicken bone broth?

Store it in the fridge for up to 5 days or freeze for months. Divide it into portions for easy use.

What are some creative ways to use my chicken bone broth?

Chicken bone broth is very versatile. Use it in soups and stews, cook grains and legumes, or drink it warm.

Delicious Fresh Apple Cake Recipe – Quick & Easy

fresh apple cake recipe

What makes a fresh apple cake recipe special? It’s the mix of tender apples, sweet spices, and a hint of cinnamon. Or is it how easy it is to make? Our easy apple cake recipe is perfect for anyone wanting to impress with a homemade treat. It’s simple to follow, making it great for both new and seasoned bakers.

We aim to give you a recipe that’s tasty and easy to prepare. You can use ingredients you likely have on hand. Whether you need a quick dessert for a dinner party or a special treat for your family, our apple cake is ideal.

Key Takeaways

  • Easy to make and requires minimal ingredients
  • Perfect for any occasion, whether it’s a dinner party or a family gathering
  • Our fresh apple cake recipe is a great choice for beginners and experienced bakers alike
  • Can be customized with your favorite spices and toppings
  • Is a delicious and satisfying dessert that’s sure to impress
  • Can be made in under an hour, making it a quick and easy option

Why This Fresh Apple Cake Will Become Your Go-To Dessert

This fresh apple cake recipe is a game-changer for anyone looking for a delicious and easy-to-make dessert. It’s perfect for any season, whether you’re hosting a summer barbecue or a winter holiday party. Plus, it’s an affordable dessert option that won’t break the bank.

The ingredients used in this recipe are budget-friendly and easily accessible. This makes it a quick apple cake solution for any occasion. The preparation methods are also time-saving, allowing you to whip up a mouth-watering cake in no time. Whether you’re a beginner baker or a seasoned pro, this recipe is sure to become a favorite.

Perfect for Every Season

This fresh apple cake is perfect for every season, with its moist texture and flavorful blend of apples and spices. It’s a great way to enjoy the flavors of fall, even in the middle of summer. And with its affordable ingredients, you can make it a year-round apple cake treat without worrying about the cost.

Budget-Friendly Ingredients

The ingredients used in this recipe are not only delicious, but also budget-friendly. You can make a quick apple cake without breaking the bank, making it a great option for anyone looking for an affordable dessert. Here are some of the key ingredients:

  • Apples
  • Flour
  • Sugar
  • Eggs
  • Spices

Time-Saving Preparation Methods

The preparation methods used in this recipe are designed to be time-saving, making it easy to whip up a delicious cake in no time. With its simple instructions and quick preparation time, you can have a fresh apple cake ready in just a few hours. Here’s a breakdown of the preparation time:

StepTime
Preparation30 minutes
Baking45 minutes
Cooling30 minutes

With its perfect blend of flavor, affordability, and ease of preparation, this fresh apple cake recipe is sure to become your go-to dessert for any occasion. Whether you’re looking for a year-round apple cake or a quick apple cake solution, this recipe has got you covered.

Essential Ingredients for Your Fresh Apple Cake Recipe

To make a delicious fresh apple cake, you’ll need the right apple cake ingredients. These include fresh apples, sugar, flour, and spices. The quality of your baking essentials greatly impacts the final result. So, choose the best ingredients you can find.

Here are the essential ingredients you’ll need:

  • 2-3 fresh apples, peeled and chopped
  • 1 cup sugar
  • 2 cups flour
  • 1 teaspoon cinnamon
  • 1/2 teaspoon nutmeg

Having the right baking essentials on hand makes the process easier. Make sure to stock up on apple cake ingredients like flour, sugar, and spices. This way, you can whip up a cake whenever you want.

With these ingredients, you’ll be well on your way to creating a moist and delicious fresh apple cake. Remember to use the best fresh apples you can find for the best flavor.

IngredientQuantity
Flour2 cups
Sugar1 cup
Apples2-3

Best Apple Varieties for Baking

Choosing the right apple varieties is key for a great baking apple cake. There are many apples to pick from, but you need a mix of sweet and tart. This mix creates a perfect balance of flavors.

Sweet apples like Honeycrisp, Fuji, and Gala add natural sweetness. Their tender texture is perfect for cakes. Tart apples, such as Granny Smith, Braeburn, and McIntosh, bring a nice acidity and depth to the taste.

Sweet Apple Options

  • Honeycrisp: known for its exceptional sweetness and crunchy texture
  • Fuji: sweet and juicy, with a hint of tartness
  • Gala: sweet and aromatic, with a hint of vanilla flavor

Tart Apple Choices

  • Granny Smith: tart and crunchy, with a hint of green apple flavor
  • Braeburn: tart and sweet, with a firm texture
  • McIntosh: tart and tender, with a soft texture

Mixing Apple Types for Better Flavor

Mixing different apples can make your cake taste amazing. Try combining sweet and tart apples for a balanced flavor. For example, Honeycrisp and Granny Smith apples together make a sweet and tangy mix.

Apple VarietySweetness LevelTexture
HoneycrispVery SweetCrunchy
Granny SmithTartCrunchy
FujiSweetJuicy

Kitchen Tools You’ll Need

To make the perfect fresh apple cake, you’ll need the right baking tools. A cake pan is key for the right size and shape. You can pick from materials like aluminum or non-stick, based on what you like. You’ll also need mixing bowls to mix the ingredients.

Here are some other essential kitchen tools you’ll need:

  • A whisk to mix the batter
  • A rubber spatula to scrape the sides of the bowl
  • A measuring cup to measure the ingredients accurately

Having the right baking tools can greatly affect your cake’s outcome. If you don’t have a cake pan, you can use a springform pan or a muffin tin. Just remember to adjust the baking time. Mixing bowls are also great for many tasks, like mixing and serving.

With these essential kitchen tools, you’re ready to make a delicious fresh apple cake. Choose the right baking tools for the job. And don’t be afraid to get creative with your cake pan and mixing bowls.

Step-by-Step Fresh Apple Cake Instructions

To make a delicious and moist apple cake, follow these key apple cake recipe steps. Start by getting your ingredients ready. This includes fresh apples, sugar, eggs, and flour. This first step is important for the right cake batter texture.

Then, follow the baking instructions for the best taste and texture. Preheat your oven as suggested. Mix the batter carefully to prevent overmixing. The right mix of ingredients and baking instructions will give you a tasty apple cake.

Preparing Your Ingredients

  • Peel and chop the apples into small pieces
  • Measure the sugar, eggs, and flour accurately
  • Mix the wet and dry ingredients separately before combining

Mixing the Batter

Mix the wet and dry ingredients gently, avoiding overmixing the cake batter. This keeps the cake moist and fluffy. By following these apple cake recipe steps and baking instructions, you’ll make a delicious apple cake for any event.

Moisture Tips for Perfect Texture

To get a moist apple cake, balance your ingredients and baking time. The right cake texture comes from simple baking tips. The key is the wet to dry ingredient ratio. The right sugar, eggs, and butter amounts keep the cake moist and tender.

Baking time and temperature are also crucial. Overbaking makes the cake dry. So, watch the cake closely while it bakes. Here are some tips for the perfect cake texture:

  • Choose the right apples, as some are moister than others.
  • Avoid overmixing the batter to prevent a dense cake.
  • Use sugar and honey together for extra moisture.

By following these tips, you’ll make a deliciously moist apple cake. Remember, it takes practice to get it right. Don’t worry if your first cake isn’t perfect. With time, you’ll master baking moist apple cakes.

A moist apple cake is a delight to eat, and with the right baking tips, you can create a cake that’s sure to impress your friends and family.

Delicious Topping Options

Apple cake toppings offer endless possibilities. To elevate your fresh apple cake, try various topping combinations. A classic cream cheese frosting is a favorite, complementing the apples’ sweetness. A caramel drizzle adds a rich, velvety texture.

For a lighter touch, powdered sugar is a great choice. It adds sweetness without overpowering other flavors. You can also try chopped nuts, dried fruit, or a sprinkle of cinnamon. The goal is to find the perfect mix for you.

  • Classic cream cheese frosting: a timeless favorite that pairs perfectly with apple cake
  • Caramel drizzle: adds a rich, velvety texture and a deep, caramel flavor
  • Simple powdered sugar finish: a light and easy way to add a touch of sweetness

Exploring different toppings can lead to the perfect match for your taste. Whether you love cream cheese frosting, caramel drizzle, or something else, there’s something for everyone. So, don’t hesitate to experiment and discover your new favorite topping.

Storage and Freshness Guide

To keep your fresh apple cake at its best, proper storage is key. When you store apple cake right, you can enjoy it longer while keeping it fresh. Whether you’re eating it soon or saving it for later, we’ve got tips for you.

For short-term storage, keep the cake at room temperature, away from sunlight. This is best if you’ll eat it in two to three days. For up to five days, refrigerate it. Just wrap it tightly in plastic or foil and put it in the fridge.

For long-term storage, freezing cake is a good choice. Wrap it in plastic or foil and put it in a freezer-safe bag. When you’re ready, thaw it at room temperature or reheat it in the oven.

  • Always check the cake for any signs of spoilage before consuming it.
  • Keep the cake away from strong-smelling foods, as it can absorb odors easily.
  • Consider labeling and dating the cake when you store it, so you can keep track of how long it’s been stored.

By following these storage tips, you can enjoy your fresh apple cake while keeping it fresh. Whether you store it at room temperature, in the fridge, or in the freezer, it will stay delicious and fresh longer.

Storage MethodStorage TimeNotes
Room Temperature2-3 daysAway from direct sunlight
Refrigeration5 daysWrap tightly in plastic wrap or aluminum foil
FreezingUp to 3 monthsWrap tightly in plastic wrap or aluminum foil and place in a freezer-safe bag

Troubleshooting Common Baking Issues

When baking a fresh apple cake, common baking problems can pop up. These might include uneven baking, too much moisture, or dryness. But, with the right baking solutions, you can fix your cake and do better next time. Cake troubleshooting is key for any baker, and it’s simpler than you might think.

To solve baking problems, finding the main cause is key. Here are some common issues and how to fix them:

  • Uneven baking: Make sure your oven is at the right temperature and your cake is in the middle of the rack.
  • Too much moisture: Use less liquid or add more flour to balance it out.
  • Dryness: Add more liquid or a moistener like sour cream or yogurt.

By using these baking solutions and practicing cake troubleshooting, you’ll get better at baking. You’ll make delicious fresh apple cakes every time. Remember, baking problems are chances to learn and get better, so don’t worry if things don’t go right at first.

“The most important thing in baking is to have fun and experiment with new recipes and techniques. Don’t be afraid to try new things and make mistakes – they’re an essential part of the learning process.”

Common Baking ProblemsSolutions
Uneven bakingCheck oven temperature and cake placement
Excessive moistureReduce liquid ingredients or add more flour
DrynessIncrease liquid ingredients or add a moistening agent

Seasonal Variations and Adjustments

As seasons change, so do our baking habits. Adapting your fresh apple cake recipe to the season can greatly improve it. Whether you’re making a summer apple cake or perfecting winter baking, knowing how to adjust is crucial.

In summer, the heat can alter your cake’s texture. To avoid overcooking, lower the oven temperature by 25 degrees Fahrenheit. For a summer apple cake, mix sweet and tart apples for balanced flavors. Honeycrisp and Golden Delicious are great choices.

Summer Baking Modifications

  • Reduce oven temperature by 25 degrees Fahrenheit
  • Use a combination of sweet and tart apples
  • Don’t overmix the batter to prevent a dense cake

In winter, the cold can make your cake denser and drier. To fix this, add an extra tablespoon of liquid and bake 5-10 minutes less. For winter, add spices like cinnamon and nutmeg to warm up your cake.

Winter Weather Considerations

SeasonTemperature AdjustmentApple Variety
Summer-25°FHoneycrisp, Golden Delicious
WinterNoneGranny Smith, Fuji

Serving Suggestions and Pairings

When it’s time to serve apple cake, how you present it matters a lot. A well-presented apple cake presentation can make the dessert look more appealing. Try adding a scoop of vanilla ice cream or a dollop of whipped cream to enhance the flavors.

Think about what flavors go well with apple cake for dessert pairings. A warm cup of coffee or tea can balance the cake’s sweetness. For a cold drink, milk or sparkling cider works well too.

  • Family dinner: Serve the apple cake with a scoop of vanilla ice cream and a drizzle of caramel sauce.
  • Formal gathering: Present the apple cake on a decorative platter, garnished with fresh flowers or a sprinkle of powdered sugar.
  • Casual brunch: Serve the apple cake with a side of fresh fruit or a green salad for a lighter option.

Remember, the key to a great apple cake presentation is to have fun and be creative. Try different toppings and pairings to find your favorite way to serve apple cake.

Conclusion

This homemade apple cake is a true delight. It’s simple to make and full of fresh flavors. It’s perfect for impressing guests or enjoying on a cozy afternoon.

With its moist crumb and the scent of baked apples, it’s a hit. It’s sure to become a baking success in your home.

So, what are you waiting for? Get your ingredients ready and preheat your oven. Let’s make this delicious fresh apple cake.

Enjoy the joy of homemade baking. Savor the sweet flavors that will fill your kitchen. Get ready to make memories and start new family traditions with this amazing recipe.

FAQ

What makes this fresh apple cake recipe so special?

This fresh apple cake recipe is a true delight! It’s packed with sweet and tart apples, warm spices, and a moist crumb. The recipe is simple and uses easy-to-find ingredients, making it perfect for any occasion.

Can I make this apple cake year-round?

Absolutely! This fresh apple cake is great all year. You can enjoy it in any season by choosing the right apples. Sweet or tart, the choice is yours.

What are the essential ingredients for this fresh apple cake?

The key ingredients are all-purpose flour, granulated sugar, baking soda, and ground cinnamon. You’ll also need salt, vegetable oil, eggs, and fresh apples. These ingredients come together to make a delicious, moist cake.

How do I choose the best apples for baking?

Choosing the right apples is crucial. Use a mix of sweet and tart apples for the best flavor. Honeycrisp, Gala, Granny Smith, and Fuji are great options. Mixing them adds depth to your cake.

What kitchen tools do I need to make this fresh apple cake?

You’ll need a mixing bowl, whisk, spatula, 9-inch cake pan, and cooling rack. If you don’t have a cake pan, a 9-inch square dish works too. Having the right tools makes baking easier.

Can you provide step-by-step instructions for making the fresh apple cake?

Absolutely! First, peel, core, and chop the apples. Then, mix the dry ingredients in one bowl and the wet ingredients in another. Combine them, then add the chopped apples. Pour into a prepared pan and bake until a toothpick comes out clean. Let it cool before serving.

How can I ensure my fresh apple cake has the perfect moist texture?

For a moist cake, use the right apple-to-batter ratio. Don’t overbake, as this can dry out the cake. Store it properly to keep it moist.

What are some delicious topping options for the fresh apple cake?

You can top the cake with a creamy cream cheese frosting or a decadent caramel sauce. Powdered sugar is also a great option to highlight the apple flavor.

How should I store the fresh apple cake to keep it fresh?

Store the cake at room temperature, covered, for up to 3-4 days. For longer storage, refrigerate it for up to 1 week. Freeze it for months to keep it fresh.

What are some common baking issues I should be aware of when making this fresh apple cake?

Common issues include uneven baking, too much moisture, or dryness. Evenly distribute the batter and adjust baking times and temperatures as needed. Pay attention to the cake’s doneness to avoid these problems.