>
Edit Content

Food That’s Made from the Heart
We’re all about turning simple ingredients into magical moments. From kitchen newbies to seasoned chefs, our recipes are designed to keep things fun and easy! Let’s cook, laugh, and eat together. 🥰

Contact Us

Creamy Garlic Parmesan Chicken Pasta Recipe

Creamy Garlic Parmesan Chicken

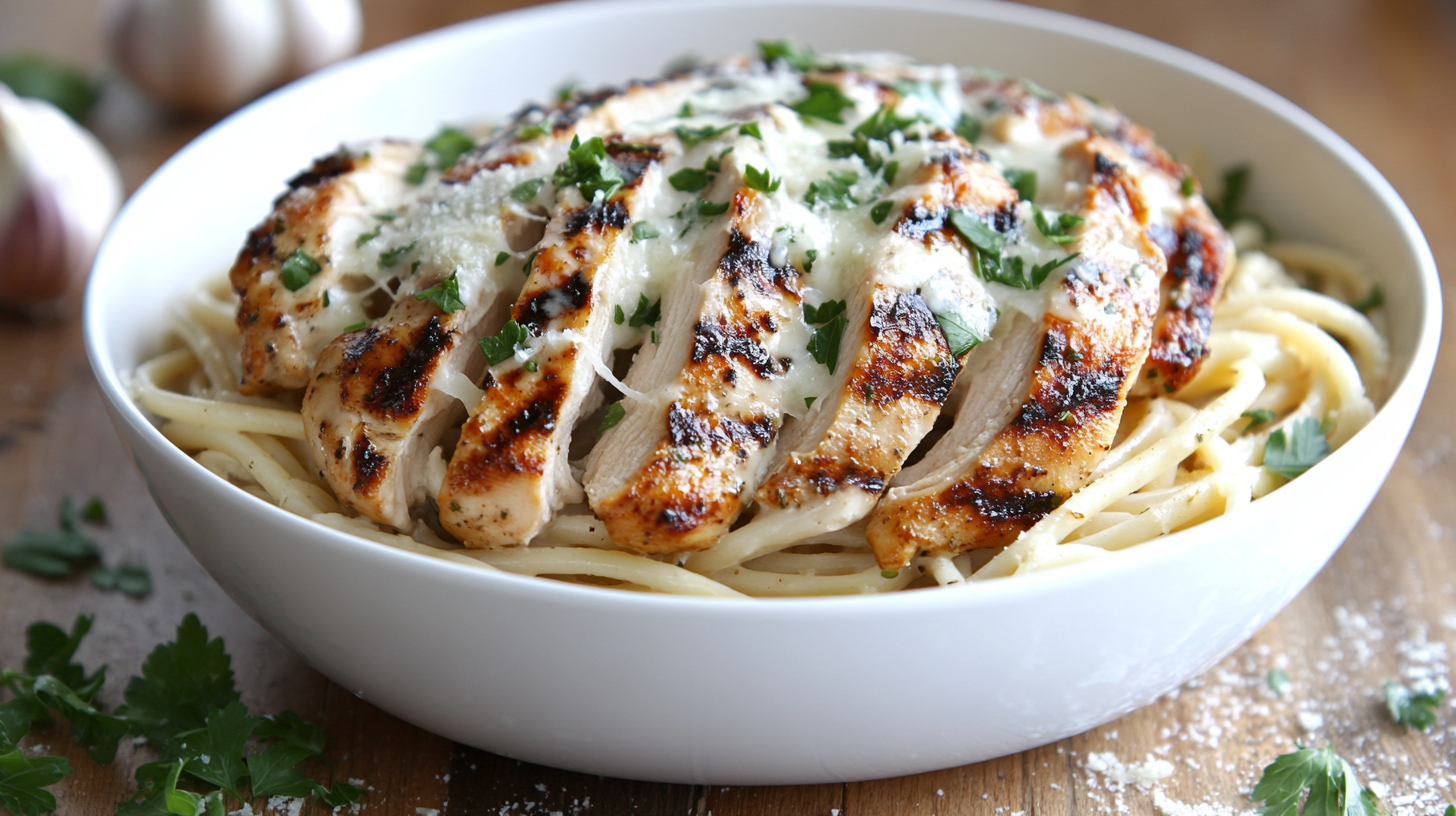
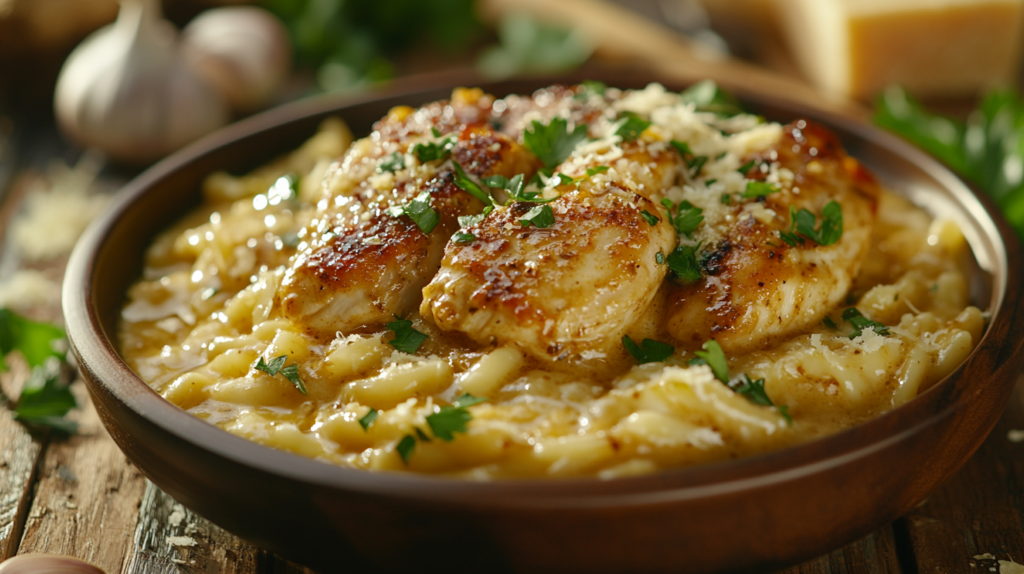
Get ready to enjoy a creamy and flavourful dish that feels like a trip to Italy. This Creamy Garlic Parmesan Chicken Pasta is perfect for those who love a comforting, easy meal. It’s packed with tender chicken, al dente pasta, and a creamy sauce with garlic and Parmesan.

Creamy Garlic Parmesan Chicken

What makes this dish special? It’s all about the right mix of ingredients and cooking techniques. These create a perfect balance of flavors and textures. Learn how to make this weeknight dinner a hit in your kitchen.

Key Takeaways

  • Creamy, flavor-packed Creamy Garlic Parmesan Chicken Pasta recipe
  • Tender chicken, al dente pasta, and a silky creamy sauce
  • Irresistible blend of garlic and Parmesan flavors
  • Easy to make at home with restaurant-quality results
  • Perfect for weeknight dinners or special occasions

The Perfect Blend of Creamy Comfort and Italian Flavors

The history of creamy pasta dishes goes back to Italy’s rich culinary traditions. Alfredo sauce, a creamy, buttery sauce, was born in the early 20th century. It came from Italian-American cuisine, shaped by immigrants who brought their recipes to the U.S.

They adapted these recipes using local ingredients and tastes. This led to the evolution of creamy pasta dishes we love today.

History of Creamy Pasta Dishes

Alfredo sauce was first made in Rome in the early 1900s. Alfredo di Lelio, a restaurateur, created it for his pregnant wife to help her regain her appetite. The sauce, made with butter, Parmesan cheese, and heavy cream, became a classic in Italian-American cuisine.

It’s known for its rich, velvety texture and indulgent flavors. These qualities have made creamy pasta dishes a favorite in many kitchens.

Why This Recipe Stands Out

This garlic parmesan chicken pasta recipe adds a new twist to traditional creamy pasta. It combines Parmesan cheese, garlic, and tender chicken. This mix creates a perfect balance of creamy comfort and Italian elegance.

It’s a standout dish that shows how creamy pasta has evolved in Italian-American cuisine.

“This recipe captures the essence of Italian-American cuisine, seamlessly combining the comforting creaminess of a classic pasta dish with the savory, flavorful profile of garlic and Parmesan.”

Essential Ingredients for Your Garlic Parmesan Chicken Pasta

Making the perfect Garlic Parmesan Chicken Pasta begins with picking the right ingredients. You need fresh, aromatic garlic and the famous Parmigiano-Reggiano cheese. Each part is key to a great meal.

The dish centers around tender boneless chicken breasts. They soak up flavors well, making them perfect for this creamy pasta. Choose a long, thin pasta like spaghetti or linguine for the sauce.

Seasonings like fresh garlic, Italian herbs, and Parmigiano-Reggiano cheese are crucial. The cheese’s nutty and salty taste adds depth to the sauce.

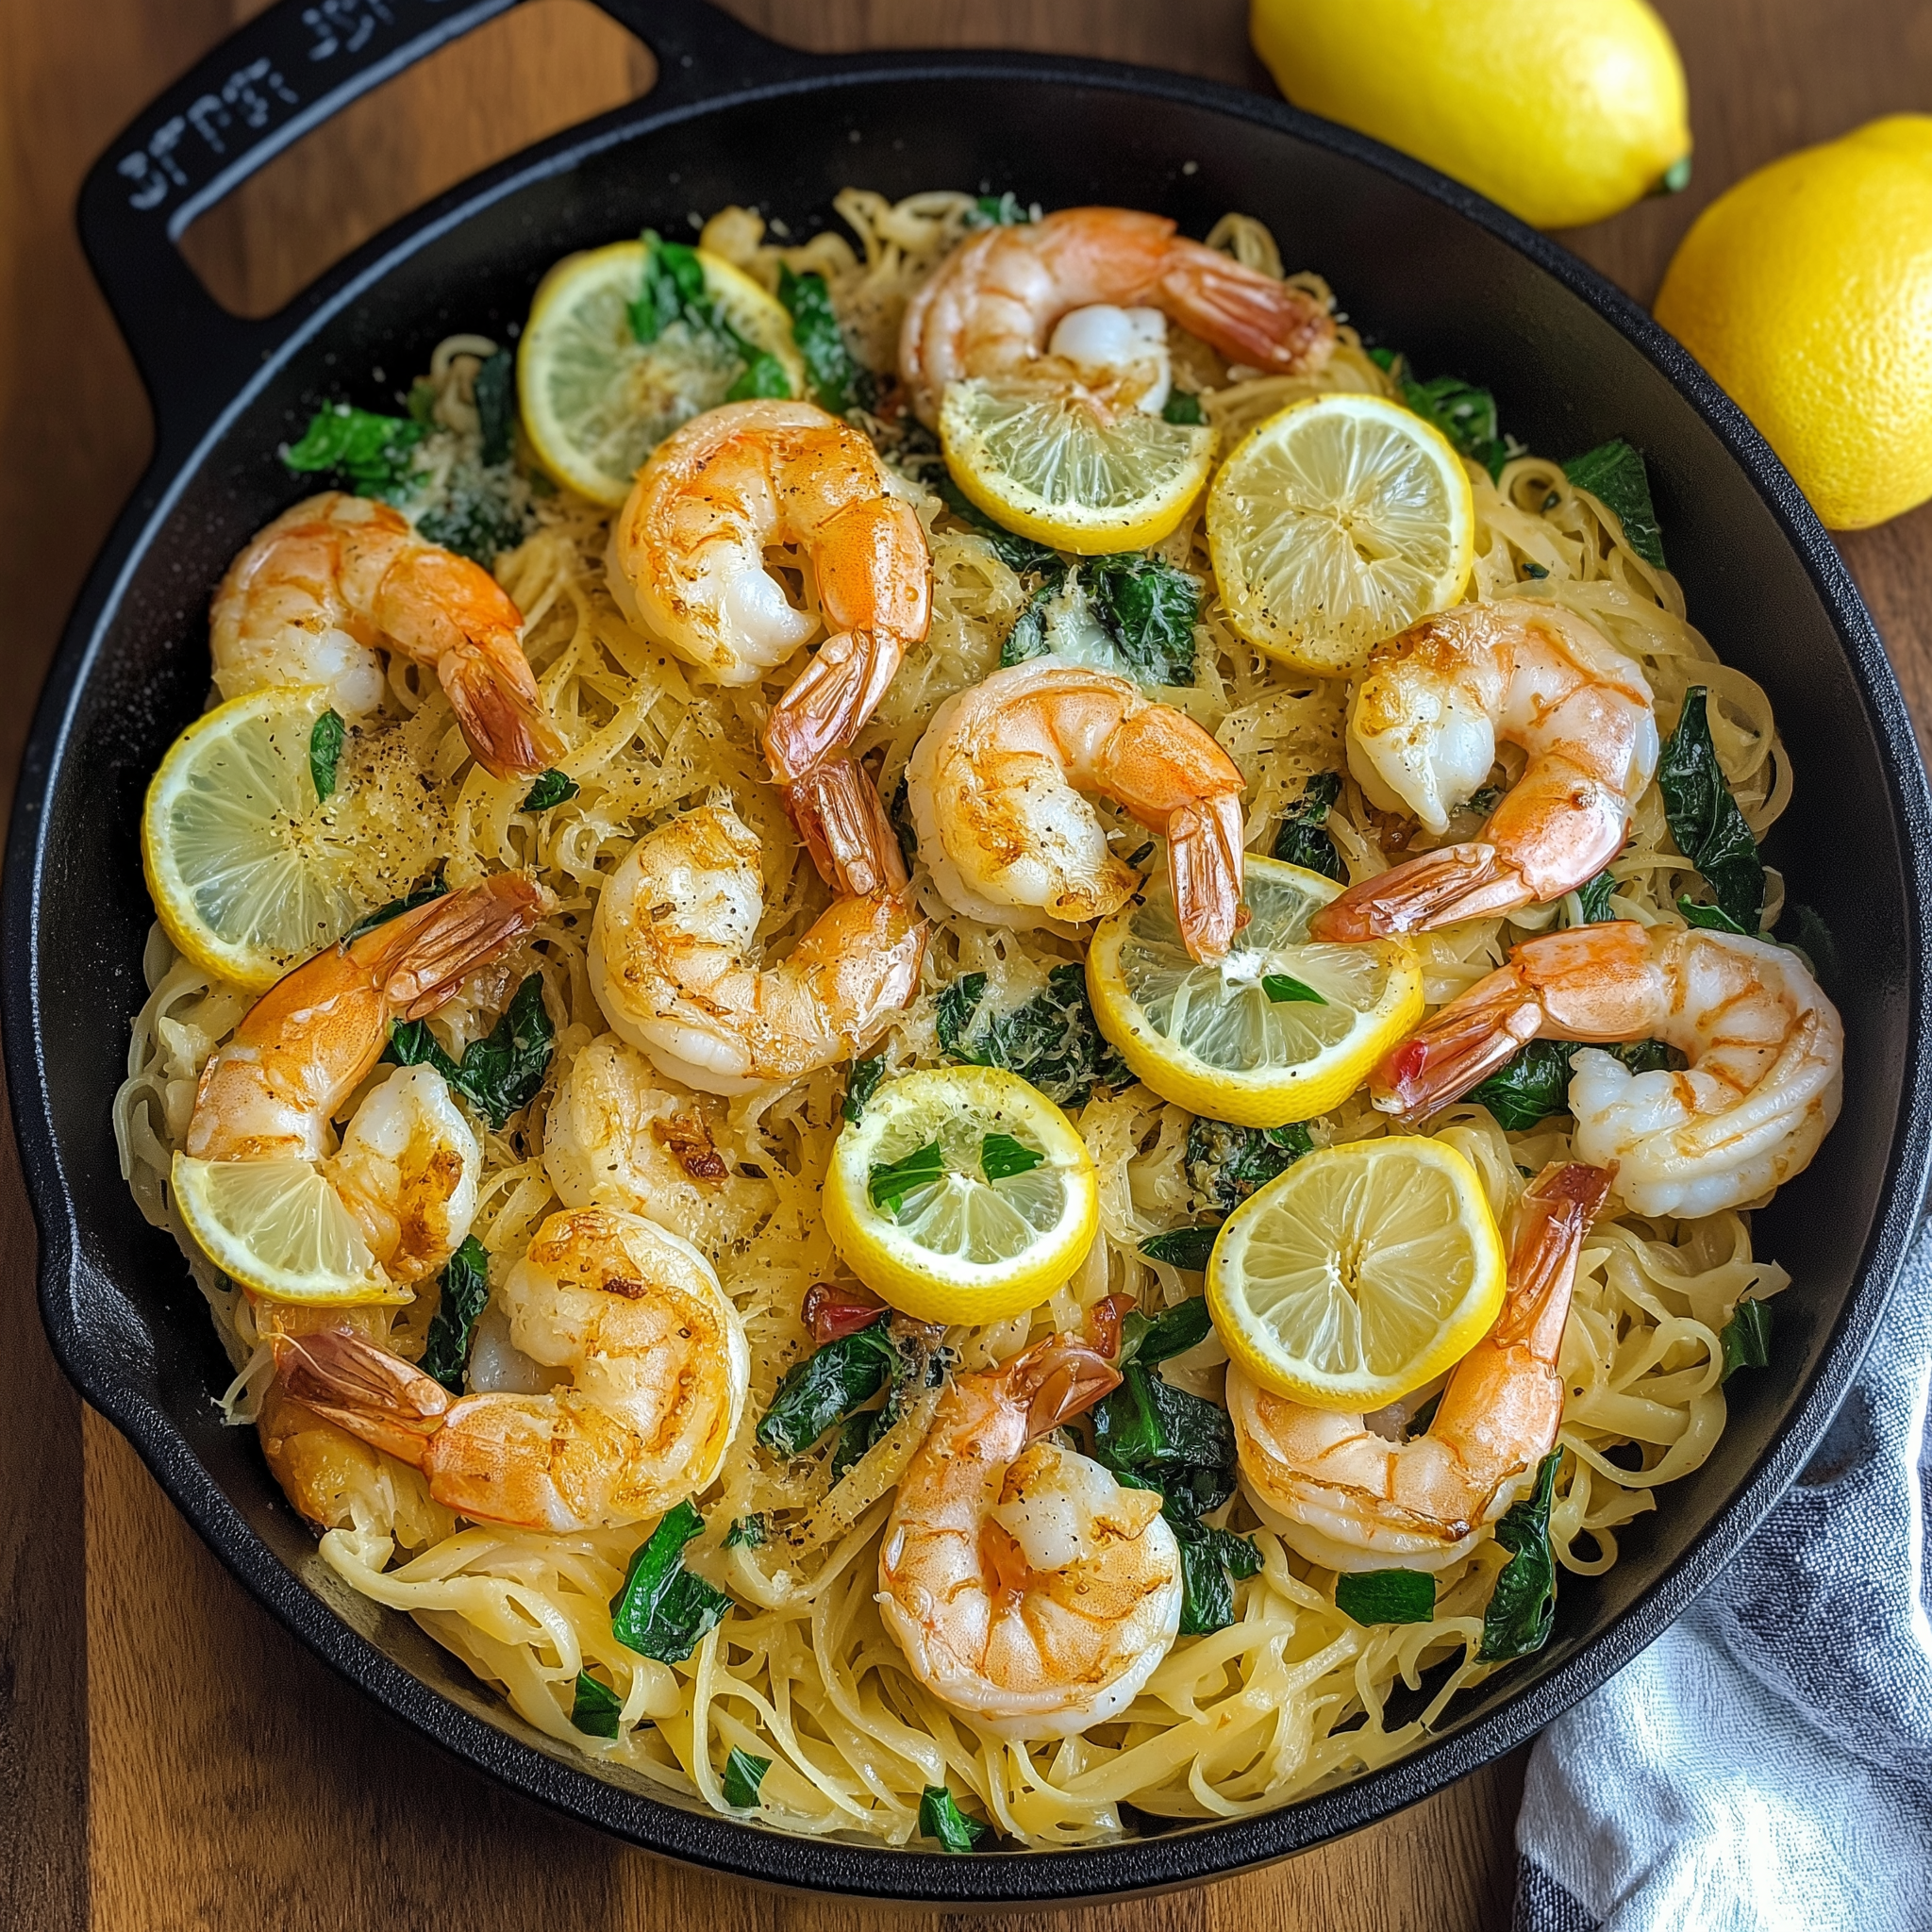
Don’t forget heavy cream or half-and-half, chicken broth, and a bit of lemon juice. These ingredients balance the dish’s richness. With them, you’ll make a Garlic Parmesan Chicken Pasta that will wow your guests.

“The secret to a truly memorable Garlic Parmesan Chicken Pasta lies in the quality of its ingredients. Never settle for anything less than the best.”

Having all the right ingredients ready will help you make this amazing dish. Enjoy a mix of fresh garlic, Parmigiano-Reggiano, tender boneless chicken, and quality pasta.

Kitchen Tools and Equipment Needed

To make the perfect Creamy Garlic Parmesan Chicken Pasta, you need some key tools. A large skillet is essential for searing the chicken. You also need a pasta pot to cook the noodles. Having the right tools makes a big difference in the taste and look of your dish.

Must-Have Utensils

  • A large skillet or sauté pan for searing the chicken and preparing the creamy garlic Parmesan sauce
  • A sturdy garlic press for mincing the fresh garlic cloves that add so much flavor
  • A set of sharp knives for dicing the chicken, onions, and any other vegetables
  • A wooden spoon or high-heat spatula for stirring and scraping the bottom of the pan

Optional but Helpful Tools

Some extra kitchen gadgets can make cooking easier and more fun:

  • A food processor or blender for quickly pureeing the sauce ingredients
  • A microplane or zester for finely grating the Parmesan cheese
  • A meat tenderizer for pounding the chicken breasts to an even thickness

Pasta Cooking Equipment

No Creamy Garlic Parmesan Chicken Pasta is complete without the right pasta. You’ll need:

  1. A large pasta pot for boiling the noodles
  2. A colander or strainer to drain the cooked pasta
  3. A set of tongs or a pasta fork to transfer the noodles from the pot to the sauce

With these essential kitchen gadgets and tools, you’re ready to make a delicious Creamy Garlic Parmesan Chicken Pasta at home.

Preparing the Chicken: Tips for Perfect Tenderness

Creating a delicious Creamy Garlic Parmesan Chicken Pasta starts with the chicken. To make sure it’s tender and juicy, follow these tips:

  1. Proper Chicken Breast Preparation: Cut the chicken breasts into small pieces or thin strips. This helps them cook evenly. It’s a key step for chicken breast preparation.
  2. Seasoning Techniques: Season the chicken with salt, pepper, and other spices or herbs. This adds a lot of flavor and makes the dish better.
  3. Even Cooking Method: Cook the seasoned chicken in a hot skillet until it’s golden and cooked through. This even cooking method keeps the chicken juicy and prevents it from drying out.

By following these steps, you’ll get chicken that’s perfect for the creamy pasta dish. The tender chicken and rich sauce make for a fantastic meal.

TipBenefit
Cut chicken into bite-sized piecesEnsures even cooking throughout
Generously season with salt, pepper, and spicesAdds flavor and enhances the overall dish
Sear the chicken in a hot panLocks in natural juices and prevents drying

“The secret to juicy, flavorful chicken in this pasta dish lies in the preparation. Follow these simple steps, and you’ll achieve restaurant-quality results at home.”

Creating the Signature Garlic Parmesan Sauce

Making the perfect garlic parmesan sauce is crucial for this creamy chicken pasta dish. It starts with a roux base, which gives the sauce its rich, velvety texture. By reducing heavy cream, we get the right consistency, blending the flavors together.

Sauce Base Preparation

We start by making a classic roux. We melt butter in a saucepan and mix in an equal amount of flour. This mixture turns golden-brown, becoming the base of our sauce. The roux thickens the sauce, giving it structure.

Achieving the Perfect Consistency

With the roux ready, we slowly add heavy cream. This slow simmer is key for a velvety texture. As the cream reduces, the sauce thickens, coating the pasta perfectly.

Seasoning Guidelines

  • Infuse the sauce with the rich, aromatic flavor of garlic by sautéing minced garlic in the butter before making the roux.
  • Grate in a generous amount of Parmesan cheese, allowing it to melt seamlessly into the sauce, contributing its signature salty, nutty notes.
  • Season with a blend of freshly cracked black pepper, salt, and a touch of dried herbs, such as basil or oregano, to balance the flavors.

By following these steps, you’ll make a garlic parmesan sauce that’s perfect for this dish. It will elevate the meal with its creamy, flavorful goodness.

Step-by-Step Cooking Instructions

Cooking the perfect garlic parmesan chicken pasta is a delightful dance of flavors and textures. Let’s dive into the step-by-step process to create this irresistible dish.

First, bring a large pot of salted water to a boil. Add the pasta and cook it according to the package instructions until it reaches the desired al dente texture. This pasta cooking time is crucial for achieving the perfect bite.

While the pasta is cooking, prepare the chicken. Sear the seasoned chicken breasts in a skillet until they’re golden brown and cooked through. Once the chicken is done, let it rest for a few minutes before slicing it into bite-sized pieces.

Now, it’s time to create the signature garlic parmesan sauce. In a separate pan, melt the butter and sauté the minced garlic until fragrant. Gradually whisk in the cream, chicken broth, and grated parmesan cheese, allowing the sauce to thicken to your desired consistency. Season the sauce with salt, pepper, and any additional herbs or spices to your liking.

Once the pasta is cooked and drained, combine the pasta, chicken, and the creamy garlic parmesan sauce. Toss everything together until the ingredients are evenly distributed and the pasta is well coated with the delectable sauce.

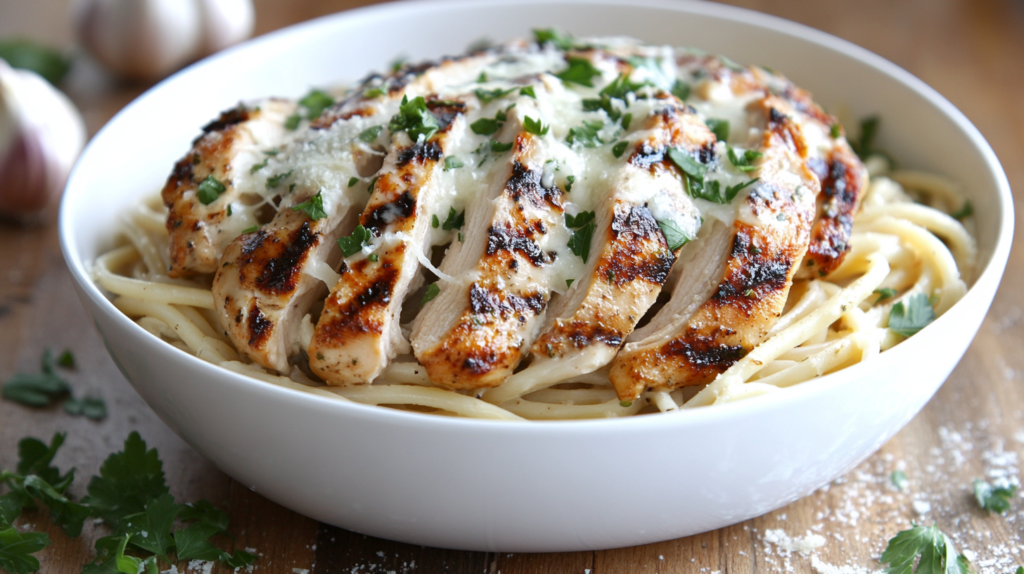
Serve the creamy garlic parmesan chicken pasta hot, garnished with freshly chopped parsley or basil, and enjoy this masterful fusion of flavors.

“The true beauty of this dish lies in the perfect balance of flavors and textures – the tender chicken, the al dente pasta, and the velvety, savory sauce.”

Variations and Substitutions

The creamy garlic parmesan chicken pasta is a classic. But, you can make it your own by changing it to fit your diet or taste. We have tips for making it gluten-free, dairy-free, or vegetarian.

Dietary Modifications

If you’re gluten-free, just use gluten-free pasta instead. There are many brands that make gluten-free pasta that tastes just as good.

For a dairy-free version, use a creamy cheese substitute or a sauce made from cashews. This will keep the dish rich and tasty.

Want a vegetarian adaptation? Skip the chicken and add mushrooms, roasted veggies, or tofu or chickpeas instead.

Ingredient Alternatives

IngredientAlternative
Parmesan CheeseNutritional Yeast, Vegan Parmesan
Heavy CreamCoconut Cream, Cashew Cream
ChickenTofu, Chickpeas, Sautéed Mushrooms

With these easy swaps, you can enjoy a comforting pasta dish that fits your needs or taste.

Wine Pairing and Serving Suggestions

For a better creamy garlic parmesan chicken pasta experience, the right wine is key. White wines, like Chardonnay or Pinot Grigio, pair well with this dish. They match the creamy sauce and garlic chicken perfectly.

Adding a side salad can make your meal even better. Try a salad with fresh greens, cherry tomatoes, and a light vinaigrette. It contrasts nicely with the creamy pasta. For garnishes, a bit of Parmesan cheese and fresh parsley can add flavor and look.

Wine PairingSide Salad RecommendationsGarnish Ideas
ChardonnayMixed greens with cherry tomatoes and balsamic vinaigretteFreshly grated Parmesan cheese, chopped fresh parsley
Pinot GrigioArugula salad with lemon dressingShredded basil leaves, crumbled feta cheese

Choosing the right wine, side dish, and garnishes can make your meal special. It will impress your guests and please your taste buds.

Storage and Reheating Guidelines

Enjoying your creamy garlic parmesan chicken pasta leftovers is easy. Just follow the right storage and reheating tips. These will keep the dish’s flavors and textures perfect.

Proper Leftover Storage

For great leftovers storage, move the pasta and sauce to an airtight container right after cooking. This keeps moisture in and pasta from drying out. Keep leftovers in the fridge for 3-4 days for the best taste.

Reheating with Ease

Ready to enjoy your pasta reheating tips? Here are simple ways to bring back the creamy texture:

  1. Microwave in short 30-second bursts, stirring often, until hot.
  2. Reheat gently on the stovetop over low heat, adding milk or cream for creaminess.
  3. For a crispy twist, spread pasta in a dish, top with more parmesan, and bake at 375°F until golden.

Meal prep ideas with Leftover Pasta

Leftover creamy garlic parmesan chicken pasta is great for meal prep. Mix it with roasted veggies for a quick dinner or use it in a pasta bake. It’s a versatile dish that’s always a hit!

“Proper storage and reheating techniques are key to ensuring your leftover creamy garlic parmesan chicken pasta tastes just as delicious as the day it was made.”

Expert Tips for Restaurant-Quality Results

Making creamy garlic Parmesan chicken pasta at home is a delicate task. But with expert tips, you can get the flavors and texture of a chef’s dish. We’ll share insider knowledge to improve your pasta-making skills.

Common Mistakes to Avoid

One key step is using the right amount of pasta water. Not salting the water enough can make the pasta taste bland. Also, overcooking the pasta makes it mushy and unappealing.

Professional Chef Secrets

For sauce emulsification, chefs have special techniques. They add cheese slowly to get a smooth, clingy sauce. Using pasta cooking water also helps in flavor balancing and blending the sauce.

Common MistakeProfessional Solution
Unsalted pasta waterGenerously season the cooking water
Overcooked pastaCook pasta al dente for the perfect texture
Clumpy, unemulsified sauceSlowly incorporate cheese and use starchy pasta water

Follow these expert tips to make a top-notch creamy garlic Parmesan chicken pasta. It will wow your family and friends.

Conclusion

The Creamy Garlic Parmesan Chicken Pasta is a tasty homemade Italian dish. It’s perfect for family meals because it’s comforting and delicious. The creamy sauce, tender chicken, and parmesan flavor make it a hit at home.

This recipe is great for any occasion, whether it’s a cozy dinner or a big gathering. It’s easy to make and can please many different tastes. With a few simple steps and some expert tips, you can make it just like a restaurant.

Try making this Creamy Garlic Parmesan Chicken Pasta for yourself. Enjoy the comforting flavors and share it with your loved ones. You can also try different versions to make it your own. The world of comfort food is full of possibilities.

FAQ

What is the origin of creamy pasta dishes?

Creamy pasta dishes started in Italy. They began with simple sauces and grew into the creamy Alfredo sauce we know today. This sauce became popular in American-Italian restaurants.

What makes this creamy garlic parmesan chicken pasta recipe stand out?

This recipe is special because it balances rich flavors with tender chicken. Fresh garlic, high-quality Parmigiano-Reggiano cheese, and a well-made sauce make it stand out. It tastes like a restaurant dish.

What are the essential ingredients for this dish?

You need fresh garlic, real Parmigiano-Reggiano cheese, good pasta, and tender chicken breasts. Using top-quality ingredients is key for the best taste and texture.

What kitchen tools and equipment are needed?

You’ll need a big skillet for the sauce, a pasta pot, and a garlic press. A whisk, spatula, and cheese grater are also helpful. They help with the sauce’s consistency and look.

How should the chicken be prepared for this recipe?

Preparing the chicken right is important for tenderness. Cut it evenly, season it well, and cook it gently. This makes sure the chicken goes well with the creamy sauce.

How is the signature garlic parmesan sauce created?

First, make a roux-based sauce. Then, reduce the cream to the right consistency. Add fresh garlic and season with salt and pepper. This creates the unique flavor.

What are some variations and substitutions for this recipe?

You can make the dish fit different diets. Use gluten-free pasta for a gluten-free version or non-dairy milk and cheese for a dairy-free option. For a vegetarian version, skip the chicken and focus on the sauce.

What are the best wine pairings and serving suggestions?

A crisp white wine like Chardonnay or Pinot Grigio goes well with this dish. Serve it with a fresh salad and garnish with parsley or Parmigiano-Reggiano. This makes the meal better.

How should the leftovers be stored and reheated?

Store leftovers in an airtight container in the fridge for 3-4 days. Reheat gently to avoid the sauce separating or the pasta getting mushy.

What are some expert tips for achieving restaurant-quality results?

For top results, use pasta water to emulsify the sauce. Pay attention to sauce consistency and balance the flavors. This will give you a creamy, garlicky, and cheesy taste.

Delicious Grilled Cheese Burrito: The Ultimate Comfort Food Mashup

grilled cheese burrito

What makes a grilled cheese burrito so irresistible? It’s the perfect mix of a gooey grilled cheese and a filling burrito. This dish is customizable, making it a favorite for many. It’s a delicious blend of flavors and textures that’s hard to resist.

The grilled cheese burrito is a dream for comfort food lovers. It combines the classic grilled cheese with the excitement of a burrito. So, how can you make your own perfect grilled cheese burrito at home?

Key Takeaways

  • The grilled cheese burrito is a unique fusion of two comfort foods: the grilled cheese sandwich and the burrito.
  • This delicious burrito can be customized to suit any taste, with a wide range of fillings and cheese combinations.
  • The grilled cheese burrito is a perfect blend of flavors and textures, making it a meal that’s hard to resist.
  • Comfort food lovers will adore the grilled cheese burrito, with its classic comfort and exciting possibilities.
  • The grilled cheese burrito is a dish that can be easily made at home, with a few simple ingredients and some creativity.
  • This ultimate comfort food mashup is sure to become a favorite, with its perfect blend of flavors and textures.

What Makes the Grilled Cheese Burrito Special

The grilled cheese burrito is a unique dish that has won the hearts of many. It’s a gourmet burrito that mixes flavors and textures in a perfect way. It started with chefs and home cooks trying out new things, and now it’s a big hit in food trends.

This dish is special because it’s both familiar and exciting. It has melted cheese, savory fillings, and a crispy tortilla. It’s a cheesy burrito that you can’t help but love. It’s perfect for those who love classic foods or want to try something new.

The Perfect Marriage of Two Comfort Foods

The grilled cheese burrito combines two favorite comfort foods. The cheese is creamy, and the tortilla is crunchy. The fillings add more flavor and excitement.

Origins of This Innovative Creation

Fusion dishes have led to the grilled cheese burrito. Chefs and home cooks mixed different cuisines to create something new. This gourmet burrito shows how creativity can make a dish truly special.

Essential Ingredients for the Perfect Grilled Cheese Burrito

To make a tasty grilled cheese burrito, you need a few key items. You’ll need a large flour tortilla, various cheeses, and your favorite fillings. The quality of your cheese is very important for a great burrito. Try different cheeses and fillings to find your favorite.

Some must-have ingredients for burritos include:

  • Large flour tortilla
  • Variety of cheeses, such as cheddar, mozzarella, and Monterey Jack
  • Fillings like beans, meats, and vegetables

The cheesy goodness in a grilled cheese burrito comes from the melted cheese mix. You can pick one cheese or mix different ones for the perfect taste. Popular mixes are cheddar and mozzarella or Monterey Jack and pepper jack.

For fillings, you have endless choices. You can use beans, ground beef, or chicken, or try veggies, salsa, and sour cream. The goal is to mix flavors and textures that go well with the cheese.

Using top-quality ingredients and trying new mixes can make a grilled cheese burrito amazing. Whether you love traditional burritos or like to try new ones, the secret is in the ingredients and how they’re put together.

IngredientDescription
Flour TortillaLarge, flexible tortilla made from flour
Cheddar CheeseSharp, melted cheese with a rich flavor
Monterey Jack CheeseMild, creamy cheese with a smooth texture

Step-by-Step Guide to Creating Your Grilled Cheese Burrito

To make a tasty grilled cheese burrito, start by getting everything ready. Gather all the ingredients and tools you need. This makes cooking easier and more fun. A great grilled cheese burrito comes from the right mix of ingredients and cooking skills.

Choosing the right cheese is key. Each cheese melts differently and tastes unique. Try cheddar, mozzarella, or Monterey Jack to find your favorite mix.

Perfecting the Grilling Technique

Getting the grilling just right is important. You want a crispy outside and a gooey inside. You can use a pan, grill, or press to cook your burrito. Here are some tips to help:

  • Preheat your cooking surface to the right temperature
  • Use a small amount of oil or butter to prevent sticking
  • Cook the burrito for 2-3 minutes on each side, or until it’s golden brown and crispy

By following these steps and tips, you can make a delicious grilled cheese burrito. Don’t be afraid to try new things. Experiment with ingredients and techniques to find your favorite grilled cheese fusion.

Cheese TypeMelting PointFlavor
Cheddar150-160°FSharp, tangy
Mozzarella120-130°FMild, creamy
Monterey Jack140-150°FMild, slightly sweet

The Art of Tortilla Selection and Preparation

Choosing the right tortilla is key to a great burrito. You need a large, soft tortilla to hold everything inside. It should also taste good with the cheese and other fillings.

There are many tortillas to pick from, like flour, corn, and whole wheat. Each has its own taste and feel. For example, flour tortillas are soft and good at keeping fillings inside.

To make the tortilla ready, warm it up. Wrap it in a damp paper towel and microwave for a bit. This makes it easier to fold and adds to the burrito’s cheesy goodness.

When picking a tortilla, think about a few things:

  • Size: It should be big enough for all the fillings.
  • Texture: It should be soft and foldable.
  • Flavor: It should match the cheese and other ingredients.

By choosing and preparing the right tortilla, you make a delicious burrito. It will have the perfect mix of flavors and textures, showing off the cheesy goodness.

Cheese Combinations That Will Blow Your Mind

A gourmet burrito needs the right cheese to stand out. The perfect mix of cheeses can make a big difference. You can choose from classic blends or try something new.

Some top cheese mixes for a cheesy burrito are:

  • Cheddar and mozzarella for a creamy, melty blend
  • Pepper jack and colby for a spicy kick
  • Feta and parmesan for a tangy, savory flavor

These are just a few ideas. You can also try artisanal cheeses like goat cheese or gouda for something different.

If you’re looking for dairy-free options, there are great choices out there. They mimic the taste and melt of real cheese. With a bit of trial and error, you’ll find the perfect cheese mix for your gourmet burrito.

Adding Extra Fillings for Maximum Flavor

Burrito recipes offer endless possibilities. A grilled cheese burrito can become even more delicious with extra fillings. You can choose from classic options like beans, rice, and meats, or try something new like roasted veggies, salsa, and guacamole. The goal is to mix flavors and textures well.

Some favorite fillings for burritos include:

  • Seasoned ground beef or chicken
  • Sauteed onions and bell peppers
  • Black beans, cooked with garlic and cumin
  • Roasted vegetables, such as zucchini and eggplant
  • Salsa, guacamole, or sour cream for added creaminess

A grilled cheese burrito can be tailored to your liking. Adding extra fillings makes it a unique and tasty dish. So, feel free to experiment with different ingredients to find your favorite mix.

With a bit of creativity, a simple grilled cheese burrito can become a flavorful meal. Whether you prefer something classic or adventurous, the grilled cheese burrito can meet your cravings. So, be creative and enjoy your delicious burrito recipes!

FillingDescription
BeansBlack beans, cooked with garlic and cumin
MeatSeasoned ground beef or chicken
VegetablesRoasted vegetables, such as zucchini and eggplant

Tips for Achieving the Perfect Crispy Exterior

To get a crispy exterior on your grilled cheese fusion, mastering temperature control is key. The best grilling temperature is between 325°F to 375°F. This ensures a perfectly toasted tortilla and melted cheese.

Timing your flip is crucial. Wait until the tortilla is golden brown and the cheese is melted. This makes sure both sides are crispy and evenly cooked. Here are some tips to keep in mind:

  • Use a thermometer to ensure the grill is at the right temperature
  • Don’t press down on the burrito while it’s grilling, as this can squeeze out the cheese and make the tortilla dense
  • Flip the burrito gently to avoid breaking the tortilla or losing any fillings

Getting that golden-brown perfection takes patience and practice. With these tips and a bit of experience, you can make a grilled cheese burrito with a crispy exterior and a gooey, cheesy interior. It’s sure to satisfy your cravings for a delicious burrito.

Tips for Achieving Crispy ExteriorDescription
Temperature ControlUse a thermometer to ensure the grill is at the right temperature
Timing Your FlipWait until the tortilla is golden brown and the cheese is melted
Practice Makes PerfectDon’t be discouraged if it takes a few tries to get it just right

Serving Suggestions and Pairings

To enjoy your gourmet burrito fully, try it with dips and sides. A green salad or tortilla chips with fresh salsa can be a nice contrast. This adds a refreshing touch to the rich, cheesy filling.

For dips, salsa, guacamole, or sour cream can enhance your burrito’s flavor. Experiment with different combinations to find what you like best. Here are some popular choices:

  • Salsa and sour cream for a spicy, tangy flavor
  • Guacamole and salsa for a creamy, spicy mix
  • Sour cream and diced tomatoes for a fresh, creamy taste

Drinks like a cold beer or wine can also complement your burrito. For something non-alcoholic, try a refreshing agua fresca. The goal is to find drinks that boost your burrito’s flavors without overwhelming them.

By choosing the right dips and sides, you can make your meal even better. Enjoy the cheesy goodness of this comfort food mashup to the fullest.

DipSideBeverage
SalsaGreen saladCold beer
GuacamoleTortilla chipsAgua fresca
Sour creamMexican street cornGlass of wine

Common Mistakes to Avoid When Making Your Burrito

Making a tasty grilled cheese burrito can be tricky. Here are some tips to help you avoid common mistakes:

Don’t overfill your burrito. This makes it hard to fold and can be messy. Also, using low-quality cheese or not enough of it can make your burrito taste bland and not creamy.

Other mistakes to watch out for include:

  • Not preparing the tortilla correctly, making it brittle and prone to tearing
  • Not cooking the burrito at the right temperature or for the right amount of time, resulting in an undercooked or burnt burrito

Knowing these common mistakes can help you make a better grilled cheese burrito. Your burrito will be delicious and cheesy.

Conclusion: Elevating Your Comfort Food Game

The grilled cheese burrito is a delicious mix that can make your comfort food better. It’s special because of its unique qualities, the right ingredients, and how it’s made. Whether you love comfort food or want to try something new, this delicious burrito is a tasty meal option you should try.

This dish offers endless ways to customize it and has a great mix of flavors and textures. It’s perfect for satisfying any craving and making you want more. So, why not try making this innovative dish? Your taste buds will thank you!

FAQ

What is a grilled cheese burrito?

A grilled cheese burrito is a mix of a grilled cheese sandwich and a burrito. It has the cheesy goodness of a grilled cheese and the fillings of a burrito. This makes for a tasty and filling meal.

What makes the grilled cheese burrito special?

The grilled cheese burrito is special because of its mix of flavors and textures. It’s a meal that’s both familiar and exciting. You can customize it to fit your taste.

What are the essential ingredients for making a grilled cheese burrito?

To make a grilled cheese burrito, you need a large flour tortilla, melted cheeses like cheddar and mozzarella, and fillings like beans and meats. The quality of the cheese is key for a gooey filling.

How do I create the perfect grilled cheese burrito?

To make the perfect grilled cheese burrito, start by preparing your workspace. Choose the right cheese and master the grilling technique. Make sure the tortilla is warm and the cheese is melted just right.

What are the best cheese combinations for a grilled cheese burrito?

There are many cheese combinations for a grilled cheese burrito. Classic choices like cheddar and mozzarella are comforting. Artisanal cheeses add sophistication. For dairy-free options, plant-based cheeses are a great choice.

What types of fillings can I add to a grilled cheese burrito?

While cheese is the main attraction, fillings can enhance the dish. Choose from beans, rice, meats, or try roasted vegetables and salsa. The goal is to mix flavors and textures well.

How can I achieve the perfect crispy exterior on my grilled cheese burrito?

To get a crispy exterior, control the temperature and timing. Use the right cooking surface. This way, you’ll have a crunchy outside and a cheesy inside.

What are some recommended pairings and serving suggestions for a grilled cheese burrito?

Pair your grilled cheese burrito with dips like salsa or guacamole. Side dishes like a green salad or Mexican street corn are great. For drinks, try a cold beer or a refreshing agua fresca.

What are common mistakes to avoid when making a grilled cheese burrito?

Avoid overfilling the burrito and using low-quality cheese. Make sure the tortilla is ready and cook at the right temperature. These tips will help you make a better burrito.

Best Chicken Roulade: Elevate Your Dining Experience

chicken roulade

What makes a gourmet chicken dish unforgettable? Is it the tender chicken, the rich flavors, or the elegant presentation? Chicken roulade, a classic French technique, answers this question. This easy recipe is perfect for any special occasion. It impresses with its rolled chicken breast and various fillings.

Key Takeaways

  • Chicken roulade is a gourmet chicken dish that can elevate your dining experience
  • This easy chicken roulade recipe is perfect for special occasions
  • Chicken roulade consists of a rolled chicken breast with various fillings
  • The dish offers a rich flavor profile and elegant presentation
  • Chicken roulade is a classic French culinary technique
  • It’s a great option for dinner parties or romantic evenings
  • With the right ingredients and techniques, anyone can master chicken roulade

Understanding Chicken Roulade: A French Culinary Classic

Chicken roulade has been a favorite for centuries. It’s a french-inspired chicken dish that combines flavors and textures in a unique way. This stuffed chicken roll is made by filling a chicken breast with various ingredients.

This delicious chicken entree is great for special events. It impresses everyone with its presentation. To make it, start with a boneless chicken breast. Then, fill it with your favorite ingredients and roll it tightly.

Popular fillings include mushrooms, spinach, and cheese. These can be mixed in different ways for a unique taste. To make a great chicken roulade, use top-quality ingredients and cook it to 165°F. This way, you’ll create a dish that will wow your guests.

Origins and History

Chicken roulade comes from France, where it was a dish for special times. The name “roulade” means “to roll” in French. Over the years, it has evolved with new fillings and cooking styles, but its core remains the same.

Why Chicken Roulade is a Gourmet Choice

Chicken roulade is a gourmet choice because of its unique flavors and textures. It’s also very flexible, making it perfect for any occasion. You can experiment with different fillings and cooking methods, making it a versatile dish.

Essential Ingredients for the Perfect Chicken Roulade

To make a tasty chicken roulade, a gourmet chicken dish that wows, start with the right stuff. You’ll need a boneless, skinless chicken breast. This is your canvas for creativity. Choose fresh, high-quality breasts for the best taste and texture in your baked chicken recipe.

Don’t forget herbs and spices to season the chicken and add flavor to your chicken roulade. Thyme, rosemary, or sage are great for a classic taste. Also, have salt, pepper, and olive oil ready to tie everything together.

  • Fresh herbs, such as parsley or dill
  • Spices, like paprika or garlic powder
  • Vegetables, such as spinach or mushrooms
  • Cheese, like feta or goat cheese, for extra flavor

These ingredients will help you make a rich, satisfying gourmet chicken dish that will impress. By mixing them thoughtfully, you can create a baked chicken recipe that tastes great and looks good too.

A good chicken roulade is all about balance and harmony, so don’t be afraid to experiment and find the perfect combination of ingredients to suit your taste.

IngredientQuantityNotes
Chicken breast4-6 breastsFresh, boneless, and skinless
Herbs and spicesVarying amountsChoose your favorites to add flavor
Pantry staplesVarying amountsSalt, pepper, olive oil, etc.

Kitchen Tools and Equipment You’ll Need

To make a tasty rolled chicken breast, you’ll need some key kitchen tools. The right tools make preparing an elegant dish easier and more fun. For an easy chicken roulade recipe, the right gear is crucial.

You’ll need a sharp knife, a cutting board, and a rolling pin. These help you prepare and roll the chicken breast smoothly. Also, a baking sheet is key for cooking the chicken to perfection.

Here are more tools and equipment that can help with a chicken roulade:

  • A meat mallet for pounding the chicken breast
  • A pastry brush for applying egg wash or melted butter
  • A wire rack for cooling the cooked chicken breast

With these tools and equipment, you’re ready to make a delicious and elegant dish. It’s sure to impress your family and friends.

ToolDescription
Sharp knifeFor cutting and trimming the chicken breast
Rolling pinFor rolling the chicken breast to the desired thickness
Baking sheetFor cooking the rolled chicken breast to perfection

Preparing Your Chicken Breast for Rolling

To make a tasty chicken roulade, you need to prepare the chicken breast first. This means butterflying the chicken, cutting it in half and opening it like a book. This makes the surface even and flat, which is key for a gourmet chicken dish like chicken roulade.

When you’re getting your chicken ready, be gentle to avoid any tears. Place the chicken on a flat surface and find the thickest part. Then, use a sharp knife to cut through the breast, but not all the way. This creates a flap that you can open up, making the breast flat.

Here are some tips for preparing your chicken breast:

  • Use a meat mallet to gently pound the breast and make it even thinner
  • Make sure the surface is dry and free of any excess moisture
  • Use a sharp knife to prevent any tears or damage to the breast

By following these steps and tips, you’ll get a beautifully prepared chicken breast. It’s ready to be filled and rolled into a delicious stuffed chicken roll. Remember, the success of a chicken roulade depends on the preparation. So, take your time and be careful with each step.

Mastering the Art of Chicken Roulade Stuffing

To make a tasty chicken dish, focus on the stuffing. It’s key to a great chicken roulade. Stuffing adds flavor, texture, and moisture to the chicken.

Classic stuffings include herbs like thyme and rosemary, with garlic and lemon zest. These flavors match the chicken’s richness. For a twist, try adding dried cranberries or cherries. They bring a sweet and tangy taste.

Classic Stuffing Combinations

  • Fresh herbs like parsley, basil, or dill
  • Spices like paprika, cumin, or coriander
  • Citrus zest, like lemon or orange

Evenly spreading the stuffing is important. Use a gentle motion to fill the chicken breast cavity. This way, you’ll make a dish that wows your guests.

Step-by-Step Rolling and Tying Technique

To make a beautiful rolled chicken breast, follow a few easy steps. Begin by placing the chicken breast flat, with the thinnest side up. This makes rolling easier.

Then, put your filling in the middle of the chicken, leaving a little space around the edges. You can use herbs, cheese, or veggies for a tasty filling.

Now, roll the chicken roulade. Fold the thinnest side over the filling, then roll it away from you. Press gently to keep the filling in and the roll tight.

After rolling, tie the chicken with kitchen twine. This keeps it in shape while cooking and makes slicing easier. With these steps, you’ll have a delicious, impressive dish to share.

Here are some tips for rolling and tying your chicken roulade:

  • Make sure the filling is spread out evenly for a consistent roll.
  • Roll the chicken gently to avoid too much pressure.
  • Choose good-quality kitchen twine for a secure tie.

Cooking Methods and Temperature Guide

To cook a chicken roulade perfectly, knowing your cooking methods and temperatures is key. This gourmet dish needs careful attention to ensure it’s safe to eat. Whether baking in the oven or searing in a pan, keeping the temperature steady is crucial.

There are several ways to cook a stuffed chicken roll, but baking and pan-searing are the favorites. For oven baking, set your oven to 375°F (190°C). Cook the chicken for 25-30 minutes, or until it hits 165°F (74°C) inside.

Oven-Baking Instructions

  • Preheat oven to 375°F (190°C)
  • Cook for 25-30 minutes or until internal temperature reaches 165°F (74°C)
  • Let it rest for 10-15 minutes before slicing

Pan-Searing Tips

Pan-searing is another excellent method for cooking a chicken roulade. Heat a skillet over medium-high and add a bit of oil. Cook the chicken for 5-7 minutes on each side, until it’s 165°F (74°C) inside.

Internal Temperature Guidelines

Cooking MethodInternal Temperature
Oven-Baking165°F (74°C)
Pan-Searing165°F (74°C)

By sticking to these cooking methods and temperature guidelines, you’ll make a delicious and safe chicken roulade. This gourmet dish is perfect for impressing your guests at any dinner party or special event. It’s all about cooking it to perfection.

Sauce Pairings and Accompaniments

A delicious chicken entree like chicken roulade needs a good sauce or side dish. For a French-inspired chicken dish, the right sauce can make the flavors pop. A creamy sauce is great with baked chicken to balance its dryness.

Some popular sauce options for chicken roulade include:

  • Mushroom gravy: a classic combination that pairs well with the earthy flavors of the chicken
  • Lemon butter: a bright and citrusy sauce that adds a nice contrast to the richness of the chicken
  • Béarnaise: a creamy and indulgent sauce that complements the tender chicken perfectly

Also, serve your chicken roulade with roasted veggies or mashed potatoes. These sides soak up the sauce’s juices and flavors. This makes every bite a joy to eat.

Looking for a classic French dish or a modern twist on baked chicken? The right sauce and sides can change everything. Try different combinations to find the perfect match for your chicken roulade. Enjoy the tasty results.

Presentation and Plating Tips

To make your chicken roulade stand out, focus on presentation. This dish is elegant and deserves to be shown off. Add fresh herbs like thyme or rosemary for a burst of color.

Think about creating a balanced look on the plate. Use roasted veggies, quinoa, or a side salad for interest. For a simple touch, serve it with a light bechamel or rich demiglace sauce.

Here are some ideas to enhance your chicken roulade:

  • Fresh herbs, such as parsley or chives
  • Roasted vegetables, like asparagus or Brussels sprouts
  • Sauces, such as bechamel, demiglace, or a light cream sauce

For an extra wow factor, add microgreens or truffle oil. With a bit of creativity, your dish will impress everyone. It will be a hit at any gathering.

GarnishSauceSide Dish
Fresh herbsBechamelRoasted vegetables
MicrogreensDemiglaceQuinoa
ParsleyLight cream sauceSide salad

Troubleshooting Common Chicken Roulade Challenges

Preparing a chicken roulade is a task that needs care and patience. One big problem is when the stuffed chicken roll falls apart while cooking. To avoid this, roll the chicken breast tightly and tie it with kitchen twine.

Keeping the chicken moist is also key. Avoid overcooking, as it can make the chicken dry. Use a meat thermometer to check the chicken’s internal temperature. It should reach 165°F (74°C) for safety.

Fixing Stuffing Issues

Stuffing problems can happen with chicken roulade. To solve this, spread the stuffing evenly in the chicken breast. Handle the chicken gently and make sure the stuffing isn’t too thick.

Here are some more tips for fixing common chicken roulade problems:

  • Choose high-quality ingredients for better taste and texture.
  • Avoid overstuffing the chicken to prevent it from falling apart.
  • Use a tasty sauce to add moisture and flavor.

By using these tips, you can make a delicious chicken roulade. It’s a gourmet dish that will impress your guests.

ChallengeSolution
UnravelingRoll the chicken tightly and secure with kitchen twine
DrynessDon’t overcook the chicken, use a meat thermometer
Stuffing issuesDistribute the stuffing evenly, use a gentle touch

Conclusion: Mastering Your Chicken Roulade Journey

Creating the perfect chicken roulade is a fun journey. It mixes French flair with cozy home cooking. With a bit of patience and practice, you can wow your friends with its tasty flavors and beautiful look.

To get good at chicken roulade, start with the right chicken prep. Then, roll and tie the breast well. Finally, cook it just right. Try out different fillings and sauces to make your own special chicken roulade.

Keep enjoying your chicken roulade adventures. Each try will make you more confident and skilled in the kitchen. So, start cooking, be creative, and enjoy the yummy results of your efforts. Bon appétit!

FAQ

What is chicken roulade?

Chicken roulade is a French dish. It’s a rolled chicken breast filled with herbs, spices, and veggies.

What makes chicken roulade a gourmet choice?

It’s a gourmet dish because of its unique flavors and textures. It has a rich history in France and is perfect for special occasions.

What are the essential ingredients for making chicken roulade?

You need a boneless, skinless chicken breast and fillings like herbs and veggies. Don’t forget salt, pepper, and olive oil.

What kitchen tools and equipment are needed for making chicken roulade?

You’ll need a sharp knife, cutting board, and rolling pin. A baking sheet is also essential. Optional tools include a meat mallet and kitchen twine.

How do you prepare the chicken breast for rolling?

First, butterfly the chicken breast. This means cutting it in half and opening it like a book. It makes sure it’s even and flat.

What are some classic and modern stuffing combinations for chicken roulade?

Classic fillings include herbs, cheese, and veggies. Modern options might be sun-dried tomatoes, pesto, or fruit.

How do you roll and tie a chicken roulade?

Spread the stuffing on the chicken, then roll it up tightly. Use kitchen twine or toothpicks to secure it.

What are the best cooking methods for chicken roulade?

You can bake or pan-sear it. Just make sure the chicken is cooked to a safe temperature.

What sauces and accompaniments pair well with chicken roulade?

Try French sauces like béchamel or mushroom sauce. Modern options include lemon-garlic butter or red wine reduction. Roasted veggies or mashed potatoes are great sides.

How can you prevent common challenges when making chicken roulade?

Use twine or toothpicks to keep it rolled. Baste it while cooking to keep it moist. Make sure the stuffing is evenly spread.

Delicious Chicken Yellow Rice Recipe

chicken yellow rice recipe

What makes chicken yellow rice so delicious? Is it the spices, the chicken, or the rice? The truth is, it’s a mix of all these. A flavorful chicken yellow rice dish can make any meal special. We’ll look into chicken yellow rice, its history, health benefits, and how to make it perfectly.

A delicious chicken yellow rice is more than food; it’s an experience. Its rich flavors and aroma make it a favorite in many cuisines. Whether for a quick dinner or a special meal, it always impresses. So, what makes a chicken yellow rice recipe stand out? Let’s explore.

Key Takeaways

  • Learn the history and origins of chicken yellow rice
  • Discover the health benefits of a chicken yellow rice recipe
  • Get a step-by-step guide on how to make delicious chicken yellow rice
  • Explore different variations of chicken yellow rice recipes
  • Find out how to make a flavorful chicken yellow rice dish with ease
  • Get tips on how to serve and pair chicken yellow rice with other dishes

Introduction to Chicken Yellow Rice

Chicken yellow rice is a dish loved around the world for its unique taste and smell. It’s a key dish in many cuisines, especially in the Caribbean and Latin America. To make it, you need chicken, rice, and spices to create a tasty meal.

The story of chicken yellow rice is interesting, with roots from different cultures. It’s been a favorite in many meals because it’s easy to make and tastes great. To make it well, use the best ingredients and a reliable recipe.

History and Origins

The recipe for chicken yellow rice comes from the Caribbean and Latin America. It was made as a filling and tasty meal. Over time, it has changed, but the main ingredients and cooking ways have stayed the same.

Why This Recipe Works

The mix of chicken, rice, and spices in chicken yellow rice makes it both healthy and tasty. It’s full of protein, fiber, and vitamins. This makes it a good choice for a balanced meal.

Health Benefits

Chicken yellow rice is not just delicious but also good for you. It’s packed with nutrients like protein, fiber, and vitamins. By making it with fresh ingredients, you can enjoy a healthy and tasty meal anytime.

Essential Ingredients for Perfect Chicken Yellow Rice

To make a delicious homemade chicken yellow rice, you need a few key ingredients. The quality of these ingredients greatly affects the dish’s flavor and texture. Choose fresh and high-quality options for the best results.

A best chicken yellow rice recipe includes chicken, rice, spices, and herbs. Pick boneless, skinless chicken breast or thighs based on your taste. Use uncooked white or brown rice for the best texture. Spices and herbs like saffron, turmeric, and parsley add depth and aroma.

Here are the essential ingredients for an easy chicken yellow rice recipe:

  • 1 cup uncooked rice
  • 1 pound boneless, skinless chicken breast or thighs
  • 2 teaspoons saffron threads
  • 1 teaspoon turmeric powder
  • 1 teaspoon dried parsley
  • Salt and pepper to taste

With these ingredients and a simple recipe, you can make a delicious homemade chicken yellow rice. It’s perfect for any occasion.

Kitchen Equipment You’ll Need

To make a tasty classic chicken yellow rice dish, you need some key kitchen tools. The right equipment ensures your traditional chicken yellow rice turns out just right.

For cooking chicken yellow rice recipe, the right tools are crucial. Here’s what you’ll need to start:

  • Large pot with a heavy bottom for even heat distribution
  • Strainer for rinsing rice and vegetables
  • Cutting board for chopping onions, garlic, and other ingredients

You might also want to use optional tools like a rice cooker or slow cooker. These can make cooking easier and faster.

With the right kitchen tools, you’re ready to make a delicious classic chicken yellow rice dish. It’s sure to be a hit with everyone. With practice, you’ll soon be an expert at making traditional chicken yellow rice.

EquipmentDescription
Large PotFor cooking chicken and rice
StrainerFor rinsing rice and vegetables
Cutting BoardFor chopping ingredients

How to Make Classic Chicken Yellow Rice

To make delicious chicken yellow rice, start by preparing the chicken. Marinate it in your favorite spices for a rich flavor. Remember, the key to easy chicken yellow rice is in the preparation of the ingredients.

After preparing the chicken, cook the rice. This is a simple process that requires basic cooking skills. Use spices and herbs like saffron, turmeric, or paprika to give the rice a yellow color and unique taste.

Preparing the Chicken

Preparing the chicken is the first step. You can use boneless, skinless chicken breast or thighs. Marinate it in olive oil, garlic, and your favorite spices for a rich flavor.

Cooking the Rice

Cooking the rice is the next step. Use a large pot and add spices and herbs for a unique flavor. You can use chicken broth or water to cook the rice.

Combining Components

Once the chicken and rice are cooked, combine them. Add the cooked chicken to the rice and stir in herbs and spices. Serve hot, garnished with chopped scallions or parsley.

By following these steps, you can make easy chicken yellow rice. It’s perfect for any occasion. Its rich flavor and aromatic spices will impress your family and friends.

Secret Tips for Extra Flavorful Results

To get the best chicken yellow rice, use high-quality ingredients. Fresh veggies and aromatic spices are key. They make your chicken yellow rice truly flavorful.

Marinate the chicken in herbs and spices for at least 30 minutes. Sauté onions and garlic before adding the rice. Use chicken broth instead of water for a richer taste. These small changes can greatly improve your dish’s flavor and aroma.

  • Marinate the chicken in a mixture of herbs and spices for at least 30 minutes
  • Sauté the onions and garlic before adding the rice for added flavor
  • Use chicken broth instead of water for a richer, more savory flavor

By following these tips, you’ll make a delicious chicken yellow rice. It’s perfect for any occasion. This recipe will quickly become a favorite in your home.

With these tips, you’re on your way to making the best chicken yellow rice. Try them out and enjoy the tasty results!

Common Mistakes to Avoid

When making a tasty chicken yellow rice recipe, knowing common mistakes is key. To get it right, focus on texture, seasoning, and keeping the right temperature. A traditional recipe needs careful attention to get the flavor and texture just right.

Some common problems include rice texture issues. The rice might be too mushy or not cooked enough. To fix this, adjust the cooking time and liquid based on the rice type. Another issue is seasoning balance. If the flavors are off, it can make the dish too salty or bland. To avoid this, taste and adjust the seasoning as you go.

  • Use the right type of rice for the traditional chicken yellow rice recipe.
  • Adjust the cooking time and liquid ratio accordingly.
  • Taste and adjust the seasoning throughout the cooking process.

By avoiding these common mistakes, you can make a delicious and authentic chicken yellow rice dish. It’s sure to be a hit with everyone.

Regional Variations of Chicken Yellow Rice Recipe

Chicken yellow rice is a dish that can be made in many ways. It can be changed to fit different tastes and styles. The use of local ingredients and spices makes each version special.

By adding regional flavors and ingredients, you can make a flavorful chicken yellow rice. For example, in the Caribbean, coconut milk and jerk seasoning give it a unique taste. In the Mediterranean, olives, feta cheese, and sun-dried tomatoes add a savory flavor.

Caribbean Style

In the Caribbean, the chicken yellow rice recipe is influenced by African and Spanish cuisines. It’s cooked with coconut milk, jerk seasoning, and scotch bonnet peppers. This makes it spicy and aromatic.

Mediterranean Version

In the Mediterranean, the chicken yellow rice recipe is flavored with lemon juice, garlic, and oregano. It’s cooked with olive oil and served with tangy tzatziki sauce.

Asian Fusion Approach

In Asia, the chicken yellow rice recipe is mixed with local spices and ingredients. In Thailand, it’s made with coconut milk, fish sauce, and chili peppers. In India, it’s cooked with cumin, coriander, and turmeric.

These regional versions of the chicken yellow rice recipe offer a variety of flavors. They cater to different tastes, making a delicious chicken yellow rice dish that’s both unique and flavorful.

Regional VariationIngredientsFlavor Profile
CaribbeanCoconut milk, jerk seasoning, scotch bonnet peppersSpicy and aromatic
MediterraneanLemon juice, garlic, oreganoSavory and tangy
Asian FusionCoconut milk, fish sauce, chili peppersUnique and flavorful

Make-Ahead and Storage Guidelines

Homemade chicken yellow rice is great because you can make it ahead and store it. This makes it perfect for busy families. To keep your chicken yellow rice fresh, follow some important storage tips.

You can prep the ingredients early and store them in the fridge. Then, just mix them together when you’re ready to cook. This is ideal for meal prep or big gatherings.

To freeze chicken yellow rice, cool it down first. Then, put it in an airtight container or freezer bag. To reheat, thaw it in the fridge overnight and then warm it up in the microwave or on the stovetop. Freezing is great for saving leftovers.

Here are some storage tips for chicken yellow rice: * Cool the rice to room temperature before refrigerating or freezing to prevent bacterial growth * Use airtight containers to prevent moisture and other flavors from affecting the rice * Label and date the containers so you can easily keep track of how long they’ve been stored * Reheat the rice to an internal temperature of 165°F to ensure food safety

Perfect Side Dishes and Pairings

Serving a delicious chicken yellow rice recipe is more fun with the right sides. Adding flavors and textures that match can make your meal better. It’s all about finding the perfect pairings for your traditional chicken yellow rice.

Knowing how to make chicken yellow rice is just the start. The real magic happens when you pair it with the right sides. Here are some ideas to get you started:

  • Steamed vegetables: Light and easy, they offer a nice contrast to the rich chicken yellow rice recipe.
  • Roasted vegetables: Roasting adds a deeper flavor, try it with Brussels sprouts, sweet potatoes, or cauliflower.
  • Salads: A simple green salad or a grain salad can refresh your taste buds after the warm traditional chicken yellow rice.

For sauces, a classic choice is always a winner. Try BBQ sauce or creamy tzatziki sauce with your chicken yellow rice. They add a tangy or creamy touch.

Pairing your chicken yellow rice recipe with these sides and sauces makes a complete meal. It’s sure to please everyone. So, get creative and find your favorite ways to enjoy your chicken yellow rice!

Side DishPairing Suggestions
Steamed VegetablesLight and easy to prepare, pairs well with traditional chicken yellow rice
Roasted VegetablesRobust flavor, pairs well with chicken yellow rice recipe
SaladsRefreshing contrast to warm chicken yellow rice

Dietary Modifications and Substitutions

For those with special dietary needs, Manorea Recipes has got you covered. They offer flavorful chicken yellow rice recipes that can be made gluten-free and low-sodium. This makes the dish available to more people.

Want a delicious chicken yellow rice recipe? Just swap out gluten-containing ingredients for gluten-free ones. This keeps the dish flavorful and tasty for those who can’t eat gluten.

Gluten-Free Options

To make homemade chicken yellow rice gluten-free, use gluten-free spices and seasonings. This small change can greatly improve the dish’s taste and texture.

Low-Sodium Variations

For a low-sodium delicious chicken yellow rice, cut down on salt or use a low-sodium version instead. This tweak makes the dish healthier and more balanced.

With these dietary changes, everyone can enjoy a flavorful chicken yellow rice dish. It meets their specific needs and tastes, making mealtime better for all.

Dietary ModificationSubstitutionResult
Gluten-FreeGluten-free spices and seasoningsFlavorful and enjoyable dish
Low-SodiumReduced salt or low-sodium alternativeHealthier and more balanced meal option

Conclusion: Mastering Your Chicken Yellow Rice

Mastering the perfect chicken yellow rice recipe is a journey. It involves trying new things and improving your skills. This guide will help you make a dish that tastes amazing. The best recipe is the one that you love and makes you happy.

Feel free to add your own twist to the recipe. Try new spices, add special ingredients, or explore different versions. This dish is all about being flexible and making it your own.

With time and effort, you’ll get better at making chicken yellow rice. It will always be moist and full of flavor. Enjoy the process, try new things, and make this dish for anyone. Your homemade chicken yellow rice will always be a favorite.

FAQ

What is chicken yellow rice?

Chicken yellow rice is a tasty one-pot dish. It mixes tender chicken with spices and rice. This dish comes from the Caribbean and Latin America.

What are the main ingredients in chicken yellow rice?

Chicken, rice, and spices like saffron or turmeric are key. Onions, garlic, and spices like cumin and oregano are also important.

How do you make chicken yellow rice?

First, prepare the chicken. Then, cook the rice. Finally, mix everything together and simmer until it’s done.

What are some tips for making the best chicken yellow rice?

Use top-notch spices and marinate the chicken. Add fresh herbs or lemon juice for extra flavor. Cooking the rice right and keeping the temperature steady are crucial.

Can chicken yellow rice be made ahead of time?

Yes, you can make it ahead and store it. It keeps in the fridge for 4 days or in the freezer for months. Just reheat it when you’re ready.

What are some good side dishes to serve with chicken yellow rice?

It goes well with roasted veggies, salads, plantains, and black beans. Try it with chimichurri or mango salsa too.

Can chicken yellow rice be made gluten-free or low-sodium?

Yes, you can make it gluten-free or low-sodium. Use gluten-free rice and replace soy sauce with gluten-free options. For low-sodium, use less salt and low-sodium broth.

Easy Homemade BBQ Burger Recipe – Backyard Barbecue

bbq burger recipe

What makes a perfect bbq burger recipe? Can you really make an amazing homemade bbq burger in your backyard? A great homemade bbq burger is more than just meat. It’s an experience that brings people together.

With a simple bbq burger recipe, you can make a delicious meal. This meal will impress your friends and family.

Making a homemade bbq burger is easier than you think. With the right techniques, you can make a juicy and flavorful patty every time. In this guide, we’ll show you how to make a mouthwatering homemade bbq burger. This will elevate your grilling game.

Key Takeaways

  • Learn how to create a simple and delicious bbq burger recipe
  • Discover the secrets to making a perfect homemade bbq burger
  • Get tips on how to choose the right ingredients for your bbq burger recipe
  • Find out how to cook a homemade bbq burger to perfection
  • Explore different toppings and sides to complement your homemade bbq burger
  • Master the art of grilling and take your backyard barbecue to the next level

The Art of the Perfect BBQ Burger

Making the perfect BBQ burger starts with a homemade patty. A classic bbq burger recipe is key. It uses fresh meat, seasonings, and a bit of creativity.

Homemade burgers let you control the flavor and texture. You can choose from many recipes, from classic to adventurous. This way, your burgers are not just tasty but also made with the best ingredients.

Why Homemade Burgers Beat Store-Bought

Store-bought burgers can’t match the taste of homemade ones. A homemade patty lets you pick the freshest ingredients and add your own twist. Homemade burgers offer several advantages:

  • Freshness and quality of ingredients
  • Customization options
  • Cost-effectiveness

Essential Burger-Making Principles

To make the perfect BBQ burger, follow some key principles. Use top-notch ingredients, handle the meat carefully, and cook it right. These steps ensure your burger is not only delicious but also safe to eat.

What Makes a BBQ Burger Special

A BBQ burger is more than just a meal; it’s an experience. The smoky flavor, sweet bun, and savory patty come together for a unique taste. By using a classic recipe and following simple principles, you can impress everyone with your BBQ burger.

With practice and patience, you can master the grill and make unforgettable BBQ burgers. So, why choose a store-bought burger when you can make your own masterpiece?

Essential Ingredients for Your BBQ Burger Recipe

To make a juicy bbq burger, start with the right ingredients. A classic recipe includes high-quality ground meat, fresh lettuce, juicy tomatoes, creamy mayonnaise, and melted cheese. Choose ingredients that match the flavor you want. Beef is traditional, but try turkey or chicken for something different.

Some key ingredients to have are:

  • Fresh lettuce and tomatoes for added crunch and flavor
  • Cheese, such as cheddar or American, for melted goodness
  • Mayonnaise or ketchup for a creamy, tangy sauce
  • Pickles or onions for a burst of acidity and flavor

For the patty, look for a bbq burger recipe that mixes meats for great flavor. A juicy burger is all about balance. So, feel free to mix and match ingredients. This way, you’ll create the perfect bbq burger recipe.

By using quality ingredients and a good bbq burger recipe, you’ll make a delicious burger. It will impress everyone. So, experiment and find the best mix of ingredients for your bbq burger recipe.

Choosing the Right Meat Blend

Creating a juicy bbq burger starts with the meat. A homemade bbq burger needs the right mix of flavor and texture. This mix comes from choosing the perfect meat blend.

The fat content of the meat is key. More fat means a tastier and juicier burger. Aim for a 20:80 or 30:70 fat-to-meat ratio. This keeps the burger moist and flavorful without being too greasy.

Best Fat-to-Meat Ratios

Chuck, brisket, and short rib are great for burgers. Mixing these cuts in different ways creates unique flavors. For example, 50% chuck, 25% brisket, and 25% short rib makes a rich, beefy taste.

Premium Meat Cuts to Consider

For a high-end burger, try grass-fed or wagyu beef. They offer complex flavors and tender textures. Always follow food safety rules when handling ground meat.

Ground Meat Handling Tips

  • Handle the meat gently to avoid compacting it
  • Keep the meat refrigerated at a temperature below 40°F
  • Use a meat thermometer to ensure the burger is cooked to a safe internal temperature

By choosing the right meat blend and following these tips, you’ll make a delicious homemade bbq burger. It will surely impress your friends and family.

Required Grilling Equipment and Tools

To make the perfect bbq burger recipe, you need the right tools. A good grill is key for a great grilled bbq burger. You can pick from gas, charcoal, or electric grills, each with its own benefits and drawbacks.

Some must-have tools for grilling are:

  • Spatulas for flipping and handling burgers
  • Thermometers to check the internal temperature
  • Burger presses for even patties
  • Tongs for turning and serving

There are also optional tools to make grilling better. These include:

  • Grill mats for easy cleanup
  • Meat claws for shredding and handling big meat cuts
  • Grill-top woks for stir-frying veggies and sides

When picking your grilling gear, think about your grill size, burger type, and what you like. With the right tools, you’ll make tasty grilled bbq burger dishes that will wow everyone.

EquipmentDescriptionPrice Range
Gas GrillPerfect for large gatherings and quick cooking$200-$1,000
Charcoal GrillGreat for smoky flavor and traditional grilling experience$100-$500
Electric GrillConvenient and easy to use, perfect for small spaces$50-$200

Preparing Your Signature BBQ Burger Patties

To make a tasty homemade bbq burger, you need to prepare your patties carefully. Start with the right seasoning. Try different flavors to find your unique taste. Use salt, pepper, and paprika for a smoky flavor.

Make sure your patties are the same size for even cooking. You can use a patty maker or shape them by hand. Handle the meat gently to keep it juicy and full of flavor.

Seasoning Techniques

  • Use a mix of salt, pepper, and paprika for a smoky flavor
  • Experiment with different herbs and spices to create your signature taste
  • Don’t over-season, as this can make your burger taste bitter

Shaping Perfect Patties

To shape perfect patties, make sure they are evenly sized and handle the meat gently. You can use a patty maker or do it by hand. The key is to avoid compacting the meat too much, which can make your homemade bbq burger dense and dry.

Pre-Grilling Storage Tips

Once you’ve prepared your patties, store them in the refrigerator until you’re ready to grill. Cover them with plastic wrap or aluminum foil to keep them fresh. Follow these tips to make a delicious easy bbq burger recipe that everyone will enjoy.

TipsDescription
SeasoningUse a mix of salt, pepper, and paprika for a smoky flavor
ShapingHandle the meat gently to avoid compacting it too much
StorageStore patties in the refrigerator until you’re ready to grill

Mastering the Grill Temperature

To get a perfectly cooked grilled bbq burger, mastering the grill temperature is key. This is a crucial part of grilling that greatly affects your bbq burger recipe. It doesn’t matter if you’re using a gas, charcoal, or electric grill. Knowing how to control the temperature is essential.

Grilling involves two types of heat: direct and indirect. Direct heat is best for searing the burger. Indirect heat is better for cooking it through. To avoid flare-ups and keep the temperature steady, it’s important to know how to adjust the grill’s vents and heat sources. For instance, on a charcoal grill, you can change the vents to control airflow and temperature.

  • Preheat the grill to the desired temperature before adding the burger
  • Use a thermometer to monitor the temperature and make adjustments as needed
  • Keep the grill clean and well-maintained to ensure even heat distribution

By following these tips and practicing your grilling skills, you’ll get a perfectly cookedgrilled bbq burgerevery time. Yourbbq burger recipewill be a hit with family and friends.

Step-by-Step BBQ Burger Recipe

To make the best bbq burger, follow a simple recipe. This guide will help you make a tasty burger.

Before starting, know the prep time and yields. You’ll spend about 30 minutes preparing and cooking. You’ll get 4-6 burgers, depending on patty size.

Preparation Time and Yields

Great bbq burgers start with good prep. Handle the meat gently and avoid overmixing. This keeps the patty tender and juicy.

Cooking Instructions

Heat your grill to medium-high. Clean and oil the grates to prevent sticking. Cook the patties for 4-5 minutes on each side, until they’re done to your liking.

Timing and Flipping Techniques

Use a thermometer to check the burger’s internal temperature. For medium-rare, aim for 130-135°F. For medium, it’s 140-145°F. Don’t press down on the burgers while they cook, as it can dry them out.

By following this recipe and using the best ingredients, you’ll make a delicious burger. It’s sure to impress your friends and family.

Creating the Ultimate BBQ Burger Sauce

A classic bbq burger isn’t complete without a tasty sauce. This sauce brings all the burger flavors together. It adds a tangy and sweet taste. Start with a basic recipe and then try different variations.

A basic bbq burger sauce recipe has ketchup, brown sugar, apple cider vinegar, and spices. You can find many recipes online. Or, visit websites with recipes for ideas. To make it unique, add smoked paprika or chipotle peppers for a smoky taste.

Signature Variations

Some popular bbq burger sauce variations include:

  • Sweet and spicy: add more brown sugar and hot sauce to the classic recipe
  • Smoky: add smoked paprika or chipotle peppers to the classic recipe
  • Tangy: add more apple cider vinegar to the classic recipe

The secret to the ultimate bbq burger sauce is to experiment. Find the flavor you love the most. Don’t hesitate to try new ingredients and mixtures for your signature sauce.

Building Your Burger: Assembly Guide

Making the perfect bbq burger is an art. It needs detail and creativity. With endless bbq burger toppings, some methods ensure a great juicy bbq burger experience.

Start by toasting your bun lightly. You can grill it or use a toaster. This prevents sogginess and adds texture. Then, add your favorite sauce, like ketchup or a special bbq burger sauce.

Now, it’s time for bbq burger toppings. Here are some essentials:

  • Lettuce and tomato for a fresh crunch
  • Cheese, like cheddar or American, for extra flavor
  • Bacon or caramelized onions for sweetness and savory
  • Pickles or jalapenos for tangy and spicy

A great juicy bbq burger balances flavors. Feel free to mix toppings to find your favorite.

Follow these steps and get creative. You’ll make the ultimate bbq burger. Enjoy your delicious juicy bbq burger!

ToppingDescription
Lettuce and TomatoFresh and crunchy texture
CheeseExtra burst of flavor
Bacon or Caramelized OnionsSweet and savory twist
Pickles or JalapenosTangy and spicy kick

Best Toppings and Sides for BBQ Burgers

Creating the perfect BBQ burger is all about the toppings and sides. The right bbq burger toppings can turn a good burger into an amazing one. Start with classics like lettuce, tomato, cheese, and onions. These add freshness, flavor, and texture.

For a gourmet twist, try caramelized onions, mushrooms, and bacon. They bring a rich, savory taste. And remember, the best bbq burger recipe is all about the toppings and sides.

Traditional Toppings

  • Lettuce
  • Tomato
  • Cheese
  • Onions

Gourmet Additions

  • Caramelized onions
  • Mushrooms
  • Bacon

There are many toppings and sides to choose from. The key is to find the perfect mix for your burger. Whether you like classic combos or trying new things, there’s a best bbq burger recipe for you. So, don’t be afraid to experiment and try new flavors. Your taste buds will love it!

Conclusion: Mastering Your Backyard BBQ Burger Experience

Making the perfect homemade BBQ burger is an art. It gets better with practice and trying new things. By following the key steps we’ve talked about, you’ll make burgers that everyone will love.

The secret to great BBQ burgers is using top-notch meat, seasoning it right, and getting the grill just right. With a bit of patience and lots of passion, you’ll make burgers that everyone wants more of.

So, light up the grill, pick your favorite toppings and sides, and get ready to make your BBQ burger recipe even better. Share your successes with others who love grilling. Let’s all enjoy the fun of making homemade BBQ burgers together!

FAQ

What makes a homemade BBQ burger so special?

Homemade BBQ burgers taste better and are made with care. You can pick the ingredients and flavors. This way, you get a burger that’s just right for you.

What are the essential ingredients for a delicious BBQ burger?

For a tasty BBQ burger, you need good ground beef, buns, and seasonings. Don’t forget a special BBQ sauce. You can also add cheese, bacon, and more to make it even better.

What are the best grilling techniques for BBQ burgers?

To grill great BBQ burgers, control the grill temperature. Use direct and indirect heat and manage flare-ups. Knowing your grill type helps too.

How do I create the ultimate BBQ burger sauce?

Begin with a basic BBQ sauce recipe. Then, add your own twist with honey, vinegar, or spices. This makes your sauce unique and enhances your burgers.

What are some of the best toppings and sides for a BBQ burger?

Classic toppings like cheese and bacon are always a winner. For something fancy, try avocado or a fried egg. Serve with fries, coleslaw, or baked beans for a full BBQ experience.

Delicious Homemade Vanilla Cookies – Easy Recipe

vanilla cookie recipe

What makes a perfect vanilla cookie recipe? Is it the simple ingredients, the easy prep, or the taste? Homemade cookies, especially vanilla ones, can be a real game-changer. They impress everyone and are fun to make.

A top vanilla cookie recipe should be simple and need few ingredients. Quality ingredients and a straightforward process are key. With practice, you can make delicious cookies that everyone loves. So, what makes a great vanilla cookie recipe, and how can you make it your own? Let’s explore the world of homemade cookies and easy recipes.

Key Takeaways

  • A great vanilla cookie recipe should be easy to make and require minimal ingredients
  • High-quality ingredients are essential for a perfect easy cookie recipe
  • Homemade cookies can be a fun and rewarding experience
  • A simple and reliable vanilla cookie recipe is key to creating delicious treats
  • With a little practice and patience, you can create a batch of delicious homemade cookies
  • Vanilla cookie recipe can be customized to suit your taste preferences
  • Easy cookie recipe can be a great way to spend quality time with family and friends

Why These Vanilla Cookies Will Become Your Family Favorite

The smell of best vanilla cookies baking is amazing. It brings families together, creating lasting memories. These cookies are loved for their perfect taste and texture.

Enjoying vanilla cookie benefits is a special experience. It’s a way to spend quality time with loved ones. Biting into a warm cookie feels like coming home.

Here’s why these best vanilla cookies are so special:

  • Simple yet delicious ingredients
  • Easy to make and customize
  • Perfect for any occasion, from holidays to everyday snacks

Adding vanilla cookie benefits to your baking can change your life. Try these family favorite cookies and see the difference for yourself.

Essential Ingredients for Perfect Vanilla Cookies

To make delicious vanilla cookies, it’s crucial to use the right vanilla cookie ingredients. The quality of these ingredients can significantly impact the taste and texture of the cookies. When it comes to vanilla, there are several options available, including extract, beans, and paste. Each of these options can affect the flavor of the cookies in a unique way.

Using high-quality baking essentials is also vital for achieving the perfect texture and flavor. This includes quality baking ingredients such as flour, sugar, and butter. The type of flour used, for example, can affect the structure of the cookies, with all-purpose flour being a popular choice for its versatility.

Here are some key considerations when selecting vanilla cookie ingredients:

  • Choose high-quality vanilla extract or beans for the best flavor
  • Select the right type of flour for the desired texture
  • Use quality baking ingredients such as real butter and pure sugar

By using the right baking essentials and vanilla cookie ingredients, you can create delicious and flavorful cookies that are sure to please. Remember to always choose quality baking ingredients for the best results.

IngredientDescription
Vanilla ExtractA high-quality extract that adds flavor to the cookies
All-Purpose FlourA versatile flour that provides structure to the cookies
Unsalted ButterA high-quality butter that adds flavor and texture to the cookies

Kitchen Tools You’ll Need

To make delicious vanilla cookies, you’ll need some essential baking tools. These tools help you get the perfect texture and flavor. You’ll need a mixing bowl, whisk, rubber spatula, and a baking sheet.

Here are some of the key tools you’ll need:

  • Mixing bowl
  • Whisk
  • Rubber spatula
  • Baking sheet
  • Measuring cups and spoons

Theseessential kitchen gadgets help you measure, mix, and bake your cookies. If you’re missing some tools, don’t worry. You can find alternatives or substitutes.

For example, a fork can replace a whisk. And you can use a cake pan or muffin tin if you don’t have a baking sheet. Being creative and resourceful with your baking tools is key.

With the right cookie-making equipment and essential kitchen gadgets, you can make amazing vanilla cookies. These will impress your family and friends. So, get creative and try different tools and techniques to find what works best for you.

The Ultimate Vanilla Cookie Recipe

To make delicious vanilla cookies, start by preheating your oven to 375°F (190°C). Prepare your baking sheets with parchment paper. The whole process, from making the dough to baking, takes about 20-25 minutes. You’ll get 12-15 cookies per batch.

When preparing the cookie dough, mixing the ingredients right is key. In a large bowl, whisk together the dry ingredients. Then, cream the butter and sugar in another bowl. Slowly add the dry ingredients to the wet ingredients, mixing until a dough forms.

Preparation Time and Yield

The preparation time for this recipe is about 10 minutes. Baking takes around 10-12 minutes. You can adjust the recipe to make more or fewer cookies, based on your needs.

Mixing the Dough

Mixing the dough is a critical step. Make sure to cream the butter and sugar until they’re light and fluffy. Then, add the dry ingredients gradually. The dough should be smooth and even.

Shaping and Baking Instructions

To shape the cookies, scoop tablespoon-sized balls of dough onto the prepared baking sheets. Leave about 2 inches of space between each cookie. Bake for 10-12 minutes, or until the edges are lightly golden brown. Follow these baking instructions for perfect results.

Pro Tips for Soft and Chewy Texture

To get the perfect soft cookies, you need to know the science behind cookie texture. The secret is in the right mix of ingredients and controlling the temperature. Follow these tips to make soft cookies that everyone will love.

Temperature control is key. Make sure your oven is at the correct temperature. An oven thermometer can help you get consistent results. Also, chilling the dough stops cookies from spreading too much. This ensures they stay chewy.

Temperature Control Secrets

Temperature is crucial for the perfect soft and chewy texture. It keeps cookies from getting too hard or too soft. The type of sugar used also matters. Brown sugar, for example, adds more moisture, making cookies chewier.

Moisture Balance Tips

Getting the right moisture balance is essential for soft and chewy cookies. The dough’s moisture affects the cookies’ texture. Eggs and butter are key to keeping the dough moist. Adjusting their amounts helps achieve the perfect texture. Follow these tips to make delicious soft cookies for any occasion.

Common Baking Mistakes to Avoid

When baking vanilla cookies, it’s easy to make cookie baking errors. These mistakes can change the texture and taste of your cookies. We’ve listed common mistakes to help you troubleshoot cookies and solve baking problem solutions.

Some common mistakes include overmixing the dough, which can make cookies tough. Also, not leaving enough space between cookies on the baking sheet can cause them to spread too much. Knowing these cookie baking errors helps you avoid them and get perfect cookies.

Here are some tips to help you avoid common baking mistakes:

  • Use the right type of flour and leavening agents to ensure that your cookies have the right texture.
  • Don’t overbake your cookies – take them out of the oven when they’re lightly golden brown.
  • Let your cookies cool on the baking sheet for a few minutes before transferring them to a wire rack to cool completely.

By following these tips and being mindful of potential cookie baking errors, you can ensure that your vanilla cookies turn out delicious and perfect every time. Always troubleshoot cookies and find baking problem solutions to get the best results.

MistakeSolution
Overmixing the doughMix the dough just until the ingredients are combined, then stop mixing.
Not leaving enough space between cookiesLeave at least 2 inches of space between each cookie on the baking sheet.

Creative Vanilla Cookie Variations

Vanilla cookies are a classic favorite. But why not try some creative cookie variations? You can change your basic vanilla cookie recipe into many flavored vanilla cookies. Just add different ingredients like chocolate chips, nuts, or fruit zest.

Decorated cookies offer endless possibilities. Use icing, sprinkles, and other decorations to make your cookies stand out. Try using colored sugar or edible markers for a personal touch. With a bit of creativity, your vanilla cookies can become beautiful decorated treats for any occasion.

Flavor Add-ins

  • Chocolate chips: Add a handful of dark or milk chocolate chips to your dough for a delicious twist.
  • Nuts: Walnuts, almonds, or pecans add a nice texture and flavor to your cookies.
  • Fruit zest: Incorporate the zest of oranges, lemons, or limes to give your cookies a burst of citrus flavor.

Decorating Ideas

Get creative with your cookie decorating. Use royal icing for intricate designs or sprinkle colored sugar on top. Try using cookie cutters in various shapes to make your cookies more interesting.

Holiday Special Touches

Make your vanilla cookies extra special for holidays. Add seasonal flavors like cinnamon or nutmeg for a warm winter taste. Use holiday-themed cookie cutters to create fun shapes.

Storage and Freshness Guidelines

To keep cookies fresh, it’s key to know the best storage practices. Storing cookies right can make them last longer. Use airtight containers to keep them fresh when stored at room temperature.

Store cookies in a cool, dry spot, away from sunlight. This keeps them fresh and prevents staleness. Freezing cookies is also a great way to keep them fresh for longer.

Counter Storage Methods

Use an airtight, moisture-proof container for counter storage. This keeps cookies fresh and prevents odors or flavors from other foods. You can also use wax paper or parchment paper to keep cookies from sticking together.

Freezing Instructions

To freeze cookies, place them on a baking sheet and freeze. Then, move them to an airtight container or freezer bag. To enjoy frozen cookies, thaw at room temperature or reheat in the oven.

Follow these easy storage and freezing tips to keep your vanilla cookies fresh. Always store cookies in a cool, dry place. Freezing is a great option for longer storage. With the right storage, your homemade vanilla cookies will stay delicious for weeks.

Nutritional Information and Dietary Modifications

Looking at cookie nutrition facts is key to our health. Vanilla cookies have sugar, butter, eggs, and flour. These can be a problem for those with dietary restrictions. But, making a few changes can make healthier cookie alternatives for everyone.

For those with gluten issues, try almond or coconut flour instead. Using honey or maple syrup can cut down sugar. Vegans can use flaxseed or chia seeds and plant-based milk.

  • Use gluten-free flour for gluten-free cookies
  • Replace traditional sugar with natural sweeteners
  • Choose plant-based milk and egg substitutes for vegan cookies
  • Opt for low-sugar or sugar-free options for health-conscious individuals

By looking at cookie nutrition facts and making small changes, you can make healthy cookie alternatives. These are great for anyone, no matter their dietary restrictions. So, start baking and enjoy the perfect sweet treat for you!

IngredientTraditionalModified
FlourWheat flourGluten-free flour
SugarRefined sugarNatural sweeteners
MilkDairy milkPlant-based milk

Conclusion: Mastering Your Vanilla Cookie Recipe

Baking the perfect vanilla cookies is within reach with the right skills and practice. Every batch you make is a chance to improve your baking confidence and cookie mastery. Don’t worry if your first batch isn’t perfect – just keep trying and enjoying the process.

The real joy of baking homemade cookies is the journey, not just the end result. Cherish the small victories, enjoy the smell of fresh cookies, and share them with your loved ones. With each batch you make, you’ll get better and appreciate the art of baking more.

So, get your oven ready, collect your ingredients, and start baking some irresistible vanilla cookies. The more you bake, the better you’ll get. And you’ll feel more confident in your baking abilities.

FAQ

What are the key ingredients needed to make the perfect vanilla cookies?

To make delicious vanilla cookies, you need a few key ingredients. High-quality vanilla extract or a vanilla bean is a must. You’ll also need all-purpose flour, butter, and sugar (both white and brown).

Baking powder and eggs are also important. They help the cookies turn out right.

How do I achieve the perfect soft and chewy texture in my vanilla cookies?

For soft and chewy cookies, control the baking temperature. Keep the dough’s moisture just right. Chilling the dough before baking helps too.

Adjusting the ingredients can also make a big difference. This way, you get the perfect cookie texture.

Can I customize the basic vanilla cookie recipe to create different flavors?

Yes, you can! The vanilla cookie recipe is a great starting point. Add chocolate chips, nuts, or dried fruit for new flavors.

You can also try different extracts and spices. This lets you create unique tastes.

How should I store homemade vanilla cookies to keep them fresh?

To keep cookies fresh, store them in an airtight container at room temperature. This helps them stay soft and tasty.

If you want to keep them longer, freeze the dough or baked cookies. They can last up to 3 months in the freezer.

Are there any healthy or dietary-friendly modifications I can make to the vanilla cookie recipe?

Yes, you can make healthier vanilla cookies. Try using whole wheat flour instead of all-purpose flour.

Reduce the sugar or use less of it. You can also substitute vegan ingredients. This makes the cookies better for you.

​Irresistible Mounds Cake Recipe​: Coconut Delight

mounds cake recipe​

What makes a mounds cake recipe​​ unforgettable? It’s the mix of chocolate and coconut’s richness with coconut’s flaky texture. This balance creates a chocolate coconut cake that’s irresistible. With this recipe, you can make a decadent dessert that will wow everyone.

Exploring coconut and chocolate together reveals their magic. The mounds cake recipe​ is a lesson in mixing textures and tastes. It results in a dessert that’s hard to resist. So, what are the secrets behind this beloved coconut cake recipe?

Key Takeaways

  • Learn the basics of the mounds cake recipe​ and its components
  • Discover the importance of balancing flavors and textures in a chocolate coconut cake
  • Explore the world of coconut cake and its various variations
  • Get tips on creating a decadent and irresistible mounds cake recipe
  • Understand the role of coconut cake in the world of desserts
  • Find inspiration for your next baking project with the mounds cake recipe

The Magic Behind Mounds Cake Recipe​

The Mounds candy bar has a rich mounds candy bar history, dating back to the 1950s. Its unique chocolate coconut combination has won over many, leading to the creation of Mounds cake. This cake is a moist, decadent treat that brings together chocolate’s richness and coconut’s flakiness.

At the heart of the Mounds cake are its key flavor components: chocolate and coconut. The chocolate coconut combination is a perfect match, offering a delightful contrast of textures and flavors. The cake’s mounds cake flavors are enhanced by high-quality ingredients, making it unforgettable.

  • Its unique blend of flavors, which sets it apart from other desserts
  • Its moist and fluffy texture, making it a delight to eat
  • Its versatility, allowing it to be served at various occasions, from casual gatherings to special events

The mounds candy bar history has shaped the cake’s flavor profile, with the chocolate coconut combination at its core. As we explore mounds cake recipe​ further, we’ll look at ways to boost its mounds cake recipe​ flavors and make it a standout dessert.

Essential Ingredients for Your Mounds Cake Recipe​

To make a real Mounds cake, you need the right mounds cake ingredients. It’s important to use top-notch chocolate cake ingredients and coconut cake ingredients. High-quality dark chocolate and fresh coconut flakes are key.

Here’s what you’ll need:

  • 1 1/2 cups all-purpose flour
  • 1 cup granulated sugar
  • 1/2 cup unsweetened cocoa powder
  • 1 teaspoon baking powder
  • 1/2 teaspoon salt
  • 1 cup unsweetened coconut milk
  • 1/2 cup shredded coconut
  • 1/4 cup dark chocolate chips

For the coconut cake ingredients, pick a fresh coconut. This will make your cake taste better. For chocolate cake ingredients, choose dark chocolate with lots of cocoa. It makes your cake taste richer.

You’ll also need basic things like eggs, butter, and vanilla extract. With these mounds cake ingredients, you’re all set to bake a tasty Mounds cake.

IngredientQuantity
Flour1 1/2 cups
Sugar1 cup
Cocoa powder1/2 cup
Coconut milk1 cup
Shredded coconut1/2 cup

Kitchen Tools and Equipment Needed

To bake a cake successfully, you need the right tools and equipment. For cake baking equipment, you’ll need mixing bowls, measuring cups, and a good oven. The right baking tools can greatly improve your cake’s quality.

There are also optional tools that can make baking easier. These include a stand mixer, food processor, or pastry brush. While not essential, they can help with texture and appearance.

Basic Baking Tools

  • Mixing bowls
  • Measuring cups
  • Oven
  • Whisk
  • Rubber spatula

Optional Special Equipment

  • Stand mixer
  • Food processor
  • Pastry brush

Preparation Setup Tips

To bake well, set up your kitchen right. Clear a space, preheat your oven, and have everything ready. These tips will help you make a tasty Mounds cake.

ToolDescription
Mixing BowlsStainless steel or glass bowls for mixing ingredients
Measuring CupsAccurate measurements for ingredients
OvenReliable oven for consistent baking results

Preparing the Perfect Chocolate Base

To make a tasty Mounds cake, you need a moist and rich chocolate base. The secret is in the cake batter technique. A good method makes your cake moist and full of flavor. It’s important to mix the ingredients correctly and avoid overmixing to prevent a dense cake.

A moist chocolate cake is key for a great Mounds cake. Use top-notch ingredients like dark chocolate and unsweetened cocoa powder. The flour you choose also impacts the cake’s texture. The right mix of ingredients and techniques will make your chocolate base perfect for your Mounds cake.

  • Use room temperature ingredients for better mixing.
  • Avoid overmixing to prevent a dense cake.
  • Choose the right flour, like all-purpose or cake flour.
  • Don’t overbake to keep your cake moist.

By following these tips and mastering the cake batter technique, you’ll create a delicious and moist chocolate base. This will be perfect for your Mounds cake.

IngredientQuantity
Dark chocolate1 cup
Unsweetened cocoa powder1/2 cup
All-purpose flour2 cups

Creating the Coconut Filling Layer

To make a delicious mounds cake, the coconut filling layer is key. It’s a sweet and creamy contrast to the chocolate base. The secret is finding the right balance of flavors and textures.

The coconut mixture is made with shredded coconut, sweetened condensed milk, and vanilla extract. The best mix is 1 part sweetened condensed milk to 2 parts shredded coconut. This mix makes the filling creamy and sweet, but not too strong.

Coconut Mixture Ratios

  • 1 part sweetened condensed milk
  • 2 parts shredded coconut
  • 1/4 teaspoon vanilla extract

When mixing the coconut mixture, focus on the texture. It should be smooth and creamy, without lumps. Make sure to mix well and adjust the milk to coconut ratio as needed.

Texture Tips

To avoid mistakes, don’t overmix the coconut mixture. This can make it dense and chunky. Also, be careful not to add too much sweetened condensed milk. This can make it too sweet.

Coconut Mixture RatioTextureTaste
1:2Smooth and creamySweet and creamy
1:1Dense and chunkyToo sweet and overpowering

By following these tips and using the right coconut mixture ratios, you can make a delicious coconut filling layer. This layer will add a sweet and creamy contrast to your mounds cake, making it a true delight.

Dark Chocolate Ganache Topping

To finish the mounds cake recipe​, a rich dark chocolate ganache topping is key. This chocolate ganache adds a velvety texture and deep flavor. It’s all about using high-quality dark chocolate and getting the right consistency.

When making the ganache, heating the cream to the right temperature is crucial. Pour it over the chocolate for a smooth and glossy cake topping. Letting it cool to room temperature is important for it to set right.

Here are some tips for working with mounds cake frosting:

  • Use a high-quality dark chocolate with a high cocoa content for the best flavor.
  • Heat the cream to the correct temperature to avoid burning the chocolate.
  • Let the ganache cool to room temperature before using it to frost the cake.

By following these tips and using the right ingredients, you can make a delicious dark chocolate ganache topping. This chocolate ganache adds a luxurious touch to the coconut delight of the mounds cake recipe​.

IngredientQuantity
Dark Chocolate1 cup
Heavy Cream1 cup
Unsalted Butter2 tablespoons

Assembly and Decoration Techniques

Now that you have everything ready, it’s time to make your mounds cake recipe​ come to life. The cake assembly is key, as it lays the groundwork for a beautiful mounds cake presentation. Begin by placing the chocolate base on a plate or cake stand. Then, add a layer of coconut filling, and top it off with dark chocolate ganache.

To give your cake decoration a personal touch, think about using fresh coconut flakes, chopped nuts, or edible flowers. You can also try out various mounds cake presentation styles. For example, go for a rustic, ombre look or a sleek, modern design.

Layer Building Steps

  • Place the chocolate base on a serving plate or cake stand
  • Add a layer of coconut filling, making sure to leave a small border around the edges
  • Top with the dark chocolate ganache, smoothing out any air pockets or imperfections

Presentation Ideas

Get creative with your cake decoration by trying out different presentation ideas, such as:

  1. Using a turntable to showcase your cake from all angles
  2. Adding a sprinkle of edible glitter or dust for extra sparkle
  3. Creating a themed cake topper, such as a miniature coconut tree or a chocolate seashell

Storage and Serving Suggestions

Keeping your mounds cake fresh is key. The right storage and serving can make a big difference. Store your cake in an airtight container at room temperature.

For up to 3 days, keep it at room temperature. For longer storage, refrigerate or freeze it. Refrigeration can last up to 5 days, and freezing up to 2 months.

Temperature Guidelines

Follow temperature guidelines to keep your cake fresh and safe. Bring it to room temperature before serving. This enhances flavors and textures.

Shelf Life Information

Maximize your cake’s shelf life by avoiding sunlight and moisture. Use cake storage containers or keepers for freshness. These tips help you enjoy your cake longer.

For serving, use a cake stand or pedestal to show off your cake. Add fresh fruits or nuts for color and texture. Proper storage and serving impress guests and keep your cake fresh.

Recipe Variations and Substitutions

Exploring mounds cake variations opens up a world of possibilities. You can try different ingredients to create new flavors. For example, use white chocolate or dark chocolate instead of traditional chocolate. You can also add nuts like almonds or walnuts for extra texture and taste.

If you follow a special diet, there are many alternatives. You can use gluten-free flour or vegan chocolate to make your cake fit your needs. Some tasty variations include:

  • Coconut lime mounds cake: Add lime zest and juice to the coconut filling for a zesty twist.
  • Espresso mounds cake: Mix a shot of espresso into the chocolate base for a mocha flavor.
  • Raspberry mounds cake: Add fresh raspberries to the coconut filling for a fruity and sweet treat.

These variations and substitutions let you make a dessert that’s just right for you. Feel free to try new things and share your favorite mounds cake recipe​ with us!

Troubleshooting Common Issues

When making a mounds cake recipe​​, bakers might run into problems. Cake troubleshooting helps solve these issues. One common problem is cake texture issues. These can happen if the ingredients are not mixed right or if the recipe is not followed.

To fix this, it’s important to stick to the recipe. Make sure all ingredients are mixed well together.

Bakers might also face baking problems like uneven cooking or undercooked layers. To solve this, keep an eye on the cake while it’s baking. Adjust the time as needed. Here are some common problems and how to fix them:

  • Crumbly texture: Check ingredient ratios and mixing time
  • Uneven cooking: Adjust baking time and temperature
  • Undercooked layers: Increase baking time or use a water bath

Knowing these issues and how to prevent them can help bakers make a perfect Mounds cake.

IssueCauseSolution
Crumbly textureIncorrect ingredient ratiosCheck recipe and adjust ratios
Uneven cookingIncorrect baking time or temperatureAdjust baking time and temperature

Conclusion

This journey through the mounds cake recipe​ shows us a true celebration of chocolate and coconut. By mastering the chocolate base, coconut filling, and dark chocolate ganache, you’re ready to bake with success.

Whether you’re experienced or new to baking, this recipe is a fun challenge. It will impress your loved ones. From the first bite, you’ll enjoy a world of rich chocolate and toasted coconut.

Now, it’s time to start baking. Get your ingredients ready and preheat your oven. Let’s dive into this sweet adventure together. Enjoy the process, follow the tips, and make a homemade mounds cake recipe​ that will delight everyone. Success and chocolate coconut joy are waiting for you!

FAQ

What is the origin of the mounds cake recipe​ candy bar?

The Mounds candy bar was introduced in 1920 by Peter Paul Manufacturing Company. It has a coconut center coated in dark chocolate. This inspired the mounds cake recipe.

What makes this mounds cake recipe​​ special?

This recipe captures the Mounds candy bar’s flavors. It layers a moist chocolate cake with coconut filling and dark chocolate ganache. The mix of chocolate and coconut is irresistible.

What are the key flavor components in this mounds cake recipe​?

The cake’s deliciousness comes from high-quality chocolate and sweet coconut. The balance of these flavors is key to the authentic Mounds taste.

What tools and equipment are needed to make this mounds cake recipe​​?

You’ll need mixing bowls, a mixer, cake pans, and a spatula. Optional tools include a food processor for coconut and a double boiler for chocolate.

How do I ensure the chocolate base for the mounds cake recipe​ is moist and flavorful?

For a moist base, follow the mixing techniques closely. Use high-quality cocoa powder and melted chocolate for flavor.

What is the best way to achieve the perfect coconut filling layer?

For a great coconut filling, balance the ingredients and texture. Aim for a smooth consistency. Avoid over-mixing and use the right coconut-to-milk ratio.

How do I make the dark chocolate ganache topping?

To make the ganache, use high-quality chocolate and heavy cream. Use a double boiler and cool it to the right consistency for the perfect texture.

How do I assemble and decorate the mounds cake recipe​?

Assemble the cake by layering chocolate cake, coconut filling, and chocolate ganache. Decorate with techniques like smoothing the ganache and adding toasted coconut flakes.

How should I store the mounds cake recipe​, and how long will it keep?

Store the cake in the fridge, covered tightly. This way, it will stay fresh for up to 5 days.

Can I make any variations or substitutions to the mounds cake recipe​?

Yes! Try different chocolates or add flavors like caramel or espresso. For dietary needs, use gluten-free flour or dairy-free chocolate.

What are some common issues I might encounter when making the mounds cake recipe​, and how can I fix them?

Issues like dry cake or problems with the coconut or ganache can happen. We have quick fixes and tips to help you make the perfect Mounds cake.

Best Disney’s Chocolate Chip Cookie Recipe (Metric)

disney chocolate chip cookie recipe metric measurements

Disney’s Disney Chocolate Chip Cookie Recipe Metric Measurements are loved by many. Can you make them at home with the official Disney recipe? The secret is in the right mix of ingredients and using metric measurements. We’re excited to guide you through making these famous cookies at home.

With this recipe, you’ll make treats that wow your loved ones. Plus, you’ll enjoy the ease of using metric measurements.

Key Takeaways

  • Learn the official Disney cookie recipe using metric measurements for accurate results
  • Discover the importance of using metric measurements in baking chocolate chip cookies
  • Get tips on how to recreate the magic of Disney’s famous cookies at home
  • Understand the role of ingredient quality in creating the perfect Disney cookie
  • Find out how to make delicious Disney chocolate chip cookies that are sure to impress
  • Explore the benefits of using metric measurements in your baking, including increased precision and ease of use

The Magic Behind Disney’s Famous Chocolate Chip Cookies

Disney parks cookies have been a favorite for decades. Their sweet smell and taste bring joy to all ages. Now, Disney has shared the official recipe with the world.

The history of these cookies is rich. They’ve been a part of the Disney experience since the parks opened. The secret recipe has been perfected over the years. It’s the mix of quality ingredients and a special cooking method that makes these cookies unique.

History of Disney Parks’ Cookies

The story of Disney’s cookies started with Walt Disney himself. He would often taste new treats in the kitchens. The cookies quickly became a hit, but the recipe was kept secret.

Why This Recipe Became a Fan Favorite

So, why are these cookies so loved? It’s the mix of high-quality ingredients and a special cooking method. The result is a cookie that’s crispy yet chewy, with a sweet and savory flavor.

The Decision to Share the Official Recipe

Disney has decided to share the official recipe after years of secrecy. This move aims to bring a bit of Disney magic into homes. Now, fans can make these delicious cookies in their own kitchens.

IngredientQuantity
Butter1 cup
Sugar3/4 cup
Eggs2
Flour2 1/4 cups
Chocolate Chips2 cups

Essential Kitchen Tools for Perfect Disney Cookies

To make Disney’s chocolate chip cookies at home, you need the right baking tools and kitchen equipment. A kitchen scale is key for precise measurements. This ensures your cookies are just right. You’ll also need mixing bowls, baking sheets, and cooling racks for the job.

Here’s a list of the top tools you’ll need:

  • Mixing bowls
  • Baking sheets
  • Cooling racks
  • Kitchen scale
  • Measuring cups and spoons

These tools help you get the perfect texture and taste in your Disney cookies. Qualitybaking toolsandkitchen equipment are crucial for great baking.

As you prepare your tools, get ready for a fun and rewarding time. With the right cookie-making essentials, you’ll make delicious Disney cookies. They’ll impress your family and friends.

ToolDescription
Kitchen scaleFor accurate metric measurements
Mixing bowlsFor mixing and whipping ingredients
Baking sheetsFor baking cookies to perfection

With these essential kitchen equipment and baking tools, you can make delicious Disney cookies. Happy baking!

Complete Disney Chocolate Chip Cookie Recipe Metric Measurements

To make perfect Disney-style cookies, using precise metric measurements is key. Dry ingredients should be in grams, and liquids in milliliters. Getting these measurements right is crucial for the best results.

Understanding temperature conversion is also important. For these cookies, the ideal baking temperature is 180°C or 350°F. This ensures the cookies turn out right, just like in Disney parks.

Ingredient List in Grams

  • 250g all-purpose flour
  • 100g granulated sugar
  • 50g brown sugar
  • 120g unsalted butter, at room temperature
  • 2 large eggs
  • 1 teaspoon vanilla extract
  • 250g semi-sweet chocolate chips

Temperature Conversions

Knowing the right temperature is key. The ideal baking temperature is 180°C or 350°F. This is what makes your cookies perfect.

Volume Measurements in Milliliters

For liquids like milk or water, use milliliters for accuracy. For example, 120ml of milk is needed for the right consistency.

IngredientGramsMilliliters
All-purpose flour250g
Granulated sugar100g
Unsalted butter120g
Milk120ml

Understanding Ingredient Quality and Selection

To make Disney’s cookies, you need quality baking ingredients. The right chocolate selection is key for flavor and texture. Choose chocolate wisely, as it changes the cookie’s taste.

Getting the butter temperature right is crucial. It ensures your cookies have the perfect texture. Also, sugar types like brown or white sugar impact flavor and moisture.

Choosing the Right Chocolate

For chocolate selection, you can pick from milk, dark, or a mix. Think about the flavor you want and pick accordingly.

Butter Temperature Guidelines

Make sure your butter temperature is room temperature. This makes your dough smooth and creamy.

Sugar Types and Their Effects

Various sugar types change your cookies’ texture and taste. Brown sugar adds depth, while white sugar makes them crisper. Try different sugars to find your favorite.

By using quality baking ingredients, you’ll make amazing Disney-inspired cookies. Focus on the right chocolate selection, butter temperature, and sugar types for success.

Step-by-Step Mixing Instructions

To get the perfect cookie dough, follow a specific cookie dough mixing process. Start by creaming butter and sugar until it’s light and fluffy. Then, add eggs one at a time, making sure each is fully mixed before adding the next.

After that, mix in the dry ingredients like flour and salt. You can also add chocolate chips or nuts. Be careful not to overmix, as it can make the cookies tough. The goal is to have a smooth, cohesive dough preparation that’s still a bit textured.

  • Use room temperature ingredients for the best results
  • Don’t overmix the dough, as this can lead to tough cookies
  • Use a combination of white and brown sugar for a richer flavor

By following these steps and using the right baking techniques, you’ll make delicious, chewy cookies. Remember to mix the dough preparation gently. And don’t be afraid to get creative with your ingredients and add-ins.

Critical Baking Temperature and Timing

To make perfect Disney-style cookies, knowing the right baking temperature and cookie baking time is key. The oven temperature must be just right. If it’s too high or too low, your cookies won’t turn out right.

For the best results, bake at about 180°C. This temperature cooks the cookies gently. It keeps their texture and shape perfect. The baking time varies, but usually, it’s between 10-12 minutes, depending on the cookie size.

Optimal Oven Settings

Here are some tips for the perfect oven settings:

  • Invest in an oven thermometer to ensure accurate temperature readings
  • Preheat your oven for at least 15-20 minutes before baking
  • Use the middle rack of your oven for even cooking

Visual Cues for Perfect Doneness

Watch for these signs to know if your cookies are done:

  • Light golden brown color around the edges
  • Soft and slightly firm texture in the center
  • No visible raw dough or undercooked areas

By following these tips and keeping an eye on your baking temperature and cookie baking time, you’ll make delicious Disney-style cookies. They’re sure to wow everyone.

Oven Temperature (°C)Cookie Baking Time (minutes)Visual Cues
18010-12Light golden brown, soft and slightly firm texture

Common Recipe Troubleshooting Tips

When baking Disney’s famous chocolate chip cookies, you might run into some problems. Cookie troubleshooting is key to getting the right texture and taste. Issues like flat cookies or too crispy edges are common.

To fix these problems, knowing about cookie storage and handling is crucial. The right storage keeps your cookies fresh and tasty. Here are some helpful tips:

By following these tips and being aware of common cookie troubleshooting issues, you can make perfect Disney cookies every time. Always check your cookies’ texture and adjust your baking as needed. With the right cookie storage and handling, you’ll enjoy delicious Disney cookies soon.

Disney Parks Professional Baker Secrets

To get cookie perfection, Disney Parks bakers share their professional baking tips. They say it’s all about the details. This includes the quality of ingredients and the way you mix and bake. By using these Disney baker secrets, you can make cookies just like Disney’s.

They use high-quality chocolate and control the temperature carefully. They also have a special mixing technique for the perfect texture. The right sugar and ingredient ratio are key for that Disney taste. By using these professional baking tips, you’ll get closer to cookie perfection.

Here are some more tips from Disney Parks bakers:

  • Use a mix of white and brown sugar for a deeper flavor
  • Don’t overmix the dough to avoid tough cookies
  • Choose a high-quality vanilla extract for better flavor

By following these Disney baker secrets and professional baking tips, you’ll impress everyone. These tips are great for both experienced and new bakers. They help you make cookies that are truly special.

With these expert tips and practice, you’ll bake like a Disney pro soon. Try it out and see the difference. With professional baking tips and Disney baker secrets, your cookies will be magical.

TipsBenefits
Use high-quality chocolateRicher flavor and better texture
Precise temperature controlEnsures cookies are baked to perfection
Specific mixing techniqueHelps to achieve the perfect texture

Recipe Variations and Adaptations

Once you get the hang of the Disney chocolate chip cookie recipe, you might want to try out different cookie recipe variations. These can match your taste or dietary needs. If you live in a high-altitude area or follow a specific diet, there are ways to tweak the recipe for the best results.

For example, high-altitude baking needs some adjustments to make the cookies light and fluffy. You might need to use less leavening agents or add more liquid. For dietary adaptations like gluten-free or vegan, you can swap out certain ingredients or use different flours.

Some favorite cookie recipe variations include adding nuts, dried fruits, or spices. You can also play with different sugars or chocolate chips to change the taste. When baking at high altitudes, it’s key to know how the air pressure changes the cooking process and adjust accordingly.

By exploring these dietary adaptations and cookie recipe variations, you can make a special and tasty version of the classic Disney chocolate chip cookie. Always follow safe baking practices and start with small batches to get the best results.

“The art of baking is all about experimentation and adaptation. Don’t be afraid to try new ingredients and techniques to create your perfect cookie.”

  • Experiment with different ingredients and flavor combinations
  • Understand the effects of high-altitude baking on your cookies
  • Make dietary adaptations to suit your needs, such as gluten-free or vegan options

Serving Suggestions and Presentation

When serving Disney’s famous chocolate chip cookies, how you present them matters a lot. A good cookie presentation can make the experience even more special. Use disney-themed desserts like Mickey Mouse-shaped cookie cutters or Disney-themed plates and cups to add fun to your presentation.

To make your cookies even better, try pairing them with different milks. You can offer cold glass of milk, chocolate milk, or strawberry milk. This can enhance the taste of the cookies. Here are some tips for a magical cookie presentation:

  • Use colorful plates and cups to brighten up your presentation.
  • Consider a cookie stand or tower to display your cookies and make them easy to grab.
  • Add Disney-themed decorations like balloons, streamers, or a Disney-themed banner to create a festive vibe.

By following these tips, you can create a magical cookie presentation for your Disney-themed party or gathering. So, get creative and have fun with your disney-themed desserts and milk and cookie pairings!

Storage and Freshness Guidelines

To keep your Disney cookies fresh, follow proper cookie storage techniques. Store them in a cool, dry place, away from sunlight. For up to 3 days, keep them in an airtight container at room temperature.

For longer storage, freeze the cookies. This is great for long-term cookie preservation. Place them in a single layer in an airtight container or freezer bag. Store in the freezer for up to 2 months.

Here are some additional tips for storing your Disney cookies:

  • Store cookies in an airtight container to maintain freshness
  • Keep cookies away from strong-smelling foods, as they can absorb odors easily
  • Consider freezing cookies for long-term preservation

By following these storage guidelines, you can enjoy your Disney cookies for a longer period. This way, you keep them fresh and of high quality.

Conclusion: Creating Disney Magic in Your Kitchen

As we wrap up our journey with Disney’s famous chocolate chip cookie recipe, it’s clear these treats are loved by fans everywhere. Now, you can make these magical cookies in your own kitchen. This brings a piece of Disney magic right to you.

Making these Disney cookies is more than just following a recipe. It’s a chance to make memories and share Disney’s joy with your family. Whether for a family event or a Disney-themed party, these cookies will bring everyone into the Disney world.

So, let your Disney magic shine in your kitchen. With what you’ve learned, you can make amazing Disney cookies. Your guests will be amazed by your baking skills. Enjoy the magic, have fun, and let these cookies fill your kitchen with Disney’s sweetness.

FAQ

What makes Disney’s chocolate chip cookies so special?

Disney’s chocolate chip cookies are a fan favorite. They have a perfect mix of crispy edges and soft centers. The cookies also have high-quality chocolate chips for a rich taste.

Why has Disney decided to share the official recipe now?

Disney is sharing their famous cookie recipe because fans have been asking for it. They want to let people enjoy these treats at home. By giving out the exact recipe, Disney aims to bring the magic of their parks to kitchens everywhere.

What key ingredients and equipment are needed to make Disney’s cookies?

To make Disney’s cookies, you need quality ingredients like flour, sugar, butter, eggs, and chocolate chips. You’ll also need a kitchen scale, mixing bowls, a mixer, baking sheets, and an oven.

How do I ensure my cookies turn out just like Disney’s?

To get Disney-style cookies, focus on the ingredients and baking method. Use the right chocolate and keep the butter at the right temperature. Follow the mixing and baking steps carefully to get the signature taste and texture.

What if I encounter any issues with the recipe or baking process?

Don’t worry about problems like flat cookies or dough that’s too dry. We have tips and solutions for these issues. We also have advice on how to keep your cookies fresh.

Are there any variations or adaptations I can make to the recipe?

Yes, you can make changes to the recipe. We have tips for baking at high altitudes and for dietary needs like gluten-free and vegan. Feel free to experiment and find your favorite version.

How can I add a touch of Disney magic to my cookie presentation?

To make your cookies extra special, try Disney-themed plating and serving ideas. We have suggestions for fun arrangements and the perfect milk to pair with them. This will make your cookies feel like a treat from the Disney parks.

How to Make the Perfect Bison Burger: A Juicy Recipe

bison burger recipe​

Are you ready to elevate your burger game with a delicious bison burger recipe? What makes a bison burger unforgettable, and how can you impress your family and friends? Bison meat is now a favorite for burger lovers, making it easy to find a tasty and juicy bison burger recipe.

A great bison burger recipe begins with quality ingredients and simple tips. Whether you’re an experienced griller or new to cooking, you can make a juicy bison burger. In this article, we’ll dive into the world of bison burgers and give you the tools to make the perfect easy bison burger recipe.

Key Takeaways

  • Learn the basics of a great bison burger recipe
  • Discover the benefits of using bison meat in your burgers
  • Get tips for cooking the perfect bison patty
  • Find out how to assemble the ultimate bison burger
  • Explore different toppings and condiments to elevate your bison burger
  • Learn how to avoid common mistakes when making bison burgers

Why Choose Bison for Your Next Burger Adventure

Many people are choosing bison for their burgers because it’s leaner and tastier than beef. Making a homemade bison burger can be a fun kitchen adventure. Bison’s rich, sweet flavor and health perks make it a top pick for a great burger.

Bison meat has less fat and more protein than beef, which is good for your health. It’s also better for the planet and the animals, making it a sustainable choice.

Health Benefits of Bison Meat

Bison meat is not just tasty; it’s also good for you. It’s packed with protein, low in fat, and full of iron and other nutrients. This makes it perfect for a healthy diet.

Flavor Profile Comparison to Beef

Bison tastes richer and sweeter than beef. This unique flavor makes bison burgers unforgettable. Whether you’re a pro in the kitchen or new to cooking, a bison burger will wow your guests.

Sustainability and Ethical Considerations

Bison farming is better for the environment and animals. Bison live on grasslands, helping to keep ecosystems healthy. Choosing bison means you’re supporting sustainable farming and caring for the planet.

Bison is a great choice for a tasty and unique burger. Its flavor, health benefits, and eco-friendly farming make it popular. Try making your own bison burger today and see why it’s a favorite among chefs and home cooks.

Meat TypeFat ContentProtein Content
Bison2-3%25-30%
Beef10-15%20-25%

Essential Ingredients for the Ultimate Bison Burger Recipe

To make a healthy bison burger, start with the right ingredients. Bison meat is key, and picking the right cut is important. Choose a cut with about 20% fat for a juicy, flavorful burger.

For ingredients that complement the bison, focus on enhancing its natural taste. Some great choices include:

  • Fresh herbs like parsley, basil, or thyme
  • Aromatic spices like garlic powder or onion powder
  • A squeeze of fresh lemon juice

A grilled bison burger highlights the meat’s rich flavor. To elevate your burger, add optional ingredients like caramelized onions, crispy bacon, or melted cheddar cheese.

With these essential ingredients, you’re on your way to a healthy bison burger that’s both tasty and fulfilling. Whether you prefer a classic grilled bison burger or something more unique, the right ingredients will make a big difference.

The Secret to Perfectly Seasoned Bison Patties

To make a flavorful bison burger, seasoning is key. The right spices can make the bison meat taste amazing. It turns into a juicy bison burger that everyone will love.

Seasoning involves choosing the right spices, adding moisture, and using binders. For a flavorful bison burger, mix spices like garlic, onion, and paprika. They enhance the bison’s natural taste.

Best Spice Combinations

Some top spice mixes for bison burgers are:

  • Garlic and herb
  • Smoky paprika and chili powder
  • Italian seasoning and parmesan cheese

For more recipe ideas and cooking tips, visit manorearecipes.com. Check out their tasty dishes.

Moisture-Adding Ingredients

Adding moisture is vital for a juicy bison burger. Use onions, mushrooms, or bell peppers. They add flavor and keep the patty moist.

Step-by-Step Bison Burger Preparation Techniques

To make a tasty bison burger, start by mixing the meat gently with your chosen seasonings. Be careful not to mix too much. This keeps the meat’s texture right and prevents it from getting too dense.

Then, split the meat mix into equal parts and shape each into a ball. Make a small dent in the middle of each ball. This helps the burger cook evenly. Flatten each ball into a patty, about 3/4 inch thick. This makes your burger juicy and full of flavor.

Here are some tips for making your bison burger patties:

  • Handle the meat gently to avoid compacting it
  • Use a consistent thickness to ensure even cooking
  • Don’t overwork the meat, as this can lead to a tough patty

By following these steps and tips, you’ll make a delicious bison burger. Remember to handle the meat gently. Also, don’t be shy to try different seasonings and toppings to make your burger unique.

With a bit of practice, you’ll soon be making great bison burgers. So, go ahead and try it. Enjoy the rich taste and tenderness of a perfectly cooked bison patty.

IngredientQuantityNotes
Bison meat1 lbGrass-fed or grain-fed, depending on your preference
Salt1 tspUse a flaky sea salt for added flavor
Pepper1/2 tspFreshly ground black pepper works best

Mastering the Cooking Temperature and Time

To get a perfectly cooked grilled bison burger, knowing the right internal temperature and cooking time is key. This keeps the burger safe to eat and juicy. A juicy bison burger is what everyone wants, and with the right methods, you can make it happen.

There are different ways to cook, each with its own benefits. Here are a few popular ones:

  • Grilling: Gives a smoky taste and a nice char on the outside.
  • Pan-searing: Creates a crispy crust on the burger.
  • Oven-baking: A healthier choice that keeps the burger moist.

Getting the cooking time just right is important. Here’s a basic guide:

Cooking MethodInternal TemperatureCooking Time
Grilling130°F – 135°F4-5 minutes per side
Pan-searing130°F – 135°F3-4 minutes per side
Oven-baking130°F – 135°F10-12 minutes

The secret to a perfect grilled bison burger or juicy bison burger is cooking it to the right temperature. Don’t overcook it. With practice, you’ll be a pro at grilling, and your burgers will impress everyone.

Best Toppings and Condiments for Your Bison Burger

Creating a flavorful bison burger is all about the toppings and condiments. A delicious bison burger recipe is more than just the patty. It’s about the mix of flavors and textures that make a meal great. Try adding lettuce, tomato, and cheese for a classic taste.

For something different, think about caramelized onions, mushrooms, and bacon. You can also try spicy mayo or tangy BBQ sauce. Check out Manorearecipes for more ideas on perfecting your bison burger.

Here are a few ideas to get you started:

  • Caramelized onions and blue cheese for a sweet and savory combination
  • Grilled mushrooms and a fried egg for a hearty, satisfying meal
  • Bacon and cheddar cheese for a classic, comforting flavor

Remember, the secret to a delicious bison burger recipe is to experiment. Find the toppings and condiments that you love. Don’t be afraid to try new things and have fun. With a little creativity, you can make a flavorful bison burger that everyone will love.

Choosing the Right Buns and Assembly Tips

Choosing the right bun is key to a perfect homemade bison burger. A classic bun offers a timeless base. But, options like lettuce wraps or pretzel buns can add a fun twist. Pick a bun that matches your burger’s flavor.

Assembling your burger well is also important. Professional stacking techniques ensure every bite is balanced. Start with a strong base, add your favorite toppings, and finish with the top bun. This keeps everything in place and makes each bite enjoyable.

  • Traditional white or whole wheat buns
  • Pretzel buns for a salty, crunchy twist
  • Lettuce wraps for a low-carb alternative

By picking the right bun and mastering assembly, you can elevate your bison burger. It will become a memorable dining experience.

Common Mistakes to Avoid When Making Bison Burgers

Preparing a delicious bison burger can be exciting. But, it’s easy to overlook important steps. To make a great healthy bison burger, know the common mistakes to avoid. Paying attention to detail, like seasoning and cooking temperature, is key.

Common errors include not controlling the temperature right. This can make the patty dry or undercooked. Seasoning mishaps can also ruin the taste of the bison meat. And, not handling the meat right can make the burger dense or tough.

Temperature Control Errors

To avoid temperature issues, use a reliable meat thermometer. This tool ensures your bison burger is cooked just right.

Seasoning Mishaps

When seasoning, remember less is more. Don’t overdo it, as too much seasoning can hide the bison’s natural flavor. Use a light touch with seasonings to enhance the bison’s taste.

Handling Don’ts

It’s important to handle your bison burgers carefully. Don’t press down on the patties while they cook. This can dry out the burger. By following these tips, you’ll make a delicious healthy bison burger that everyone will love.

Conclusion: Enjoying Your Perfect Homemade Bison Burger

Making the perfect bison burger is a fun journey with tasty results. Bison meat is a tasty and healthy choice, with a rich, slightly sweet flavor. By picking the right ingredients and seasoning, you can make a juicy bison burger that wows everyone.

So, why wait? Dive into the bison burger craze and make your own. Try different toppings and sauces to find your favorite. The secret to a great bison burger is in the details, like the right temperature and bun size. With a bit of practice, you’ll make burgers that everyone loves.

FAQ

What are the health benefits of choosing bison meat for burgers?

Bison meat is leaner and has more protein than regular beef. It also has fewer calories and less saturated fat. This makes it a healthier option for burgers.

How does the flavor of bison compare to beef?

Bison has a rich, slightly sweet taste that’s different from beef. It’s described as more robust and intense. When cooked right, it’s tender and juicy.

What are the best cuts of bison to use for burgers?

The best cuts for bison burgers are chuck and sirloin. They offer the perfect mix of flavor and fat. This ensures a juicy, flavorful patty.

How do I season bison burgers to bring out the best flavor?

Use a mix of spices like garlic, onion, and black pepper to enhance bison’s natural taste. Adding moisture with Worcestershire sauce or eggs helps keep the patties tender and juicy.

What’s the ideal internal temperature for a perfectly cooked bison burger?

Bison burgers should be cooked to 160°F for safety and juiciness. This ensures they’re fully cooked without drying out.

What are some tasty topping and condiment options for bison burgers?

Bison burgers go well with many toppings. Try classic cheese and lettuce or adventurous options like caramelized onions and mushrooms. Spicy mustard, barbecue sauce, or creamy aioli add great flavor.

What are the common mistakes to avoid when making bison burgers?

Avoid overcooking, using too much seasoning, and improper meat handling. Focus on temperature control, seasoning, and gentle handling. This ensures a juicy, delicious burger.

The Best Chicken Bryan Recipe: A Mouthwatering Treat

chicken bryan recipe

What makes a chicken bryan recipe unforgettable? It’s the mix of savory flavors and how easy it is to make. This dish combines Italian and American tastes, making it both tasty and fulfilling. It’s a classic in many restaurants, and now you can make it at home.

Key Takeaways

  • Chicken Bryan is a popular Italian-American dish with a unique flavor profile
  • The recipe is known for being easy to make and requiring minimal ingredients
  • An easy chicken bryan recipe can be prepared at home with basic cooking skills
  • The dish is perfect for special occasions or a quick weeknight dinner
  • With the right ingredients and cooking techniques, you can achieve restaurant-quality results
  • The chicken bryan recipe is a great way to explore the flavors of Italian and American cuisine

The Story Behind Chicken Bryan: An Italian-American Classic

Chicken Bryan has become very popular in recent years. It was first made at Carrabba’s Italian Grill. To make homemade chicken bryan, you need to know its story. This dish is a mix of Italian and American flavors that many love.

Chicken Bryan’s success comes from its unique taste. It combines Italian richness with American boldness. For those wanting to make chicken bryan at home, understanding this mix is key. The dish has grilled chicken, a tangy lemon butter sauce, and goat cheese, making it unforgettable.

Let’s dive into Chicken Bryan’s origins and why it’s loved. Its success is in bringing people together, whether for family dinners or nights out. By learning how to make chicken bryan, you can enjoy it at home.

Origins at Carrabba’s Italian Grill

Carrabba’s Italian Grill created Chicken Bryan. They use fresh ingredients and traditional cooking. This has made Chicken Bryan a favorite on their menu.

Why This Dish Became a Restaurant Favorite

Chicken Bryan stands out because of its flavors and textures. The grilled chicken and creamy lemon butter sauce are carefully crafted. Each part of the dish is designed to create a memorable experience.

The Perfect Blend of Italian and American Flavors

In conclusion, Chicken Bryan is more than a dish; it’s an experience. It combines the best of Italian and American cuisine. This homemade chicken bryan recipe is loved by foodies and families. It’s perfect for special occasions or quick dinners.

IngredientQuantity
Chicken Breast4
Lemon Butter Sauce1 cup
Goat Cheese1/2 cup

Essential Ingredients for the Perfect Chicken Bryan

To make the best chicken bryan at home, you need the right ingredients. The dish includes chicken breasts, goat cheese, sun-dried tomatoes, and a special lemon butter sauce. Choose high-quality ingredients for the best flavor.

The chicken breasts should be fresh and lean. The goat cheese should be creamy and tangy. Sun-dried tomatoes add flavor and texture. Use freshly squeezed lemon juice and good butter for the sauce.

Here are the essential ingredients you’ll need for the perfect chicken bryan at home:

  • 4 boneless, skinless chicken breasts
  • 1/2 cup goat cheese, crumbled
  • 1/2 cup sun-dried tomatoes, chopped
  • 1/4 cup freshly squeezed lemon juice
  • 2 tablespoons unsalted butter

With these ingredients, you’re on your way to a delicious chicken bryan at home. Follow the best chicken bryan recipe for a flavorful dish.

Using these ingredients and a good recipe, you’ll make a mouthwatering chicken bryan at home. It’s sure to please even the pickiest eaters. So, give it a try and enjoy the rich flavors of this Italian-American classic.

Kitchen Tools and Equipment You’ll Need

To make an authentic chicken bryan recipe, you’ll need some essential kitchen tools and equipment. You can make it with basic kitchen equipment, even without specialized tools. The right tools help prepare and cook the ingredients efficiently.

A large skillet and a saucepan are must-haves for cookware. They’re used to cook the chicken and make the lemon butter sauce. You’ll also need utensils like tongs, spatulas, and whisks for cooking.

Essential Cookware

  • Large skillet
  • Saucepan
  • Utensils (tongs, spatulas, whisks)

Optional but Helpful Tools

  • Immersion blender
  • Stand mixer
  • Microplane grater

Having the right tools and equipment makes a big difference in your chicken bryan recipe. With these essentials, you’ll make a delicious dish that will impress everyone.

ToolDescription
SkilletUsed to cook the chicken
SaucepanUsed to prepare the lemon butter sauce
UtensilsUsed to handle and prepare ingredients

Preparing the Signature Lemon Butter Sauce

To make a delicious chicken bryan recipe, you need to prepare the signature lemon butter sauce. This sauce is a crucial component of the dish. Its preparation requires some care. When learning how to make chicken bryan, it’s essential to get the sauce just right.

The lemon butter sauce is made with a combination of ingredients. These include lemon juice, butter, and herbs. To start, melt the butter in a saucepan over medium heat. Then, add the lemon juice and stir until the mixture is smooth.

Next, add the herbs and seasonings, and stir again to combine.

Here are the ingredients you’ll need for the lemon butter sauce:

  • 2 tablespoons of butter
  • 2 tablespoons of lemon juice
  • 1 teaspoon of dried herbs, such as parsley or thyme
  • Salt and pepper to taste

Once you’ve prepared the sauce, use it to brush the chicken breasts during the last few minutes of cooking. This will give the chicken a rich, buttery flavor and a nice glaze. The lemon butter sauce is a key component of the chicken bryan recipe. It’s what sets this dish apart from other chicken recipes.

By following these steps and using the right ingredients, you can create a delicious lemon butter sauce. This sauce will elevate your chicken bryan recipe to the next level. Whether you’re a seasoned cook or just learning how to make chicken bryan, this sauce is sure to become a favorite.

IngredientQuantity
Butter2 tablespoons
Lemon juice2 tablespoons
Dried herbs1 teaspoon
Salt and pepperTo taste

The Complete Chicken Bryan Recipe: Step-by-Step Instructions

To make a delicious homemade chicken bryan, follow a few simple steps. This easy recipe is great for any night or special event. Start by getting your ingredients ready, like chicken breasts, mushrooms, and heavy cream.

For an authentic taste, check out creamy garlic chicken with mushrooms recipe for inspiration. Now, let’s break down the recipe into manageable parts.

Preparing the Chicken

Start by seasoning the chicken breasts with salt, pepper, and your favorite herbs. Heat some olive oil in a skillet and sear the chicken until it’s browned on both sides. Remove the chicken from the skillet and set it aside.

Making the Sauce

In the same skillet, add more olive oil and sauté the mushrooms until they’re tender. Add heavy cream and bring the mixture to a simmer. Let it cook for a few minutes until the sauce thickens. Stir occasionally to prevent burning.

Assembly and Final Touches

To assemble the dish, place the cooked chicken breasts on a plate and spoon the mushroom sauce over the top. Add some grated cheese and fresh herbs for extra flavor. This homemade chicken bryan recipe is sure to become a favorite, and with these step-by-step instructions, you’ll be able to make it with ease.

IngredientQuantity
Chicken breasts4
Mushrooms1 cup
Heavy cream1 cup

Mastering the Art of Goat Cheese Topping

To make a great Chicken Bryan, mastering the goat cheese topping is key. This topping adds a unique flavor and texture. When picking goat cheese, look for quality and type. Choose a creamy, mild goat cheese for the best taste.

Getting the right amount of goat cheese is important. Too little, and the dish might taste bland. Too much, and it could overwhelm the other flavors. Start with a small amount and adjust to taste. Here are some tips for an authentic Chicken Bryan:

  • Choose a mild goat cheese that won’t overpower the other flavors
  • Use the right amount of cheese to balance the dish
  • Experiment with different types of goat cheese to find the one that works best for you

By following these tips and practicing, you’ll make a delicious Chicken Bryan. The goal is to find a balance that enhances the dish’s flavors. With patience and practice, you’ll soon enjoy a top-notch Chicken Bryan.

The art of goat cheese topping is about finding the right balance and experimenting. Don’t hesitate to try new things and adjust the cheese amount to your liking. With creativity and patience, you’ll impress everyone with your authentic Chicken Bryan.

Goat Cheese TypeFlavor ProfileRecommended Amount
Mild Goat CheeseCreamy and subtle1-2 tablespoons
Tangy Goat CheeseSharp and refreshing1 tablespoon
Soft Goat CheeseButtery and mild2 tablespoons

Side Dish Recommendations and Pairing Options

Choosing the right side dishes can make your chicken bryan recipe even better. For a chicken bryan pasta, try a simple green salad or roasted veggies. A lemon butter sauce is also a great match, adding to the meal’s flavor.

Think about what flavors and textures you want in your meal. Light and refreshing sides can contrast nicely with the savory chicken bryan. Here are some ideas:

  • Grilled or roasted veggies like asparagus or Brussels sprouts
  • A simple green salad with a light vinaigrette
  • Sautéed spinach with garlic and lemon

For a heartier side, consider a creamy pasta dish. Think fettuccine Alfredo or a chicken bryan pasta with a tangy sauce. The goal is to balance flavors and textures to enhance your meal.

WinePairing Suggestions
Pinot GrigioCrisp and refreshing, pairs well with light and citrusy flavors
ChardonnayButtery and oaky, complements rich and creamy sauces

With these side dish and wine pairing ideas, you can make a complete and satisfying meal. Your delicious chicken bryan recipe will be the star of the show.

Troubleshooting Common Issues When Making Chicken Bryan

Making chicken bryan at home can sometimes be tricky. We’ll tackle common problems like sauce issues and chicken cooking. Remember, making chicken bryan is all about trying new things and learning from mistakes.

Some common issues include sauce that’s too thick or too thin, and chicken that’s not cooked right. Using quality ingredients and following a good recipe helps a lot. With a bit of patience and practice, you’ll soon enjoy delicious chicken bryan at home.

Sauce Consistency Problems

Getting the sauce just right is key. Use the right mix of ingredients and cook it for the right time. If it’s too thick, add a bit of lemon juice or chicken broth. If it’s too thin, cook it a bit longer.

Chicken Cooking Tips

Cooking the chicken perfectly is crucial. Make sure to cook it at the right temperature and for the right time. Using a meat thermometer can help ensure it’s cooked through and juicy.

Storage and Reheating Guidelines

Leftover chicken bryan needs to be stored right to stay good. Cool it down, then refrigerate or freeze it. When reheating, make sure it reaches 165°F (74°C). Reheat it in the oven or on the stovetop, and add fresh sauce for the best taste.

Follow these tips to make great chicken bryan at home. Stay calm, be patient, and don’t be afraid to try new things. With practice, you’ll become a pro at making chicken bryan, and everyone will love it.

Common IssuesSolutions
Sauce too thickAdd more lemon juice or chicken broth
Sauce too thinReduce sauce by cooking for a few more minutes
Chicken overcookedCook at lower temperature or for less time
Chicken undercookedCook for a few more minutes or at higher temperature

Dietary Modifications and Substitutions

To make the easy chicken bryan recipe more inclusive, consider these dietary modifications and substitutions. For a gluten-free version, replace traditional pasta with gluten-free alternatives. You can also use gluten-free soy sauce or tamari to season the dish.

For a dairy-free homemade chicken bryan, substitute the butter with a dairy-free alternative like coconut oil or Earth Balance. Use a non-dairy milk like almond or soy milk to create a creamy sauce. You can also use vegan cheese or nutritional yeast to replicate the cheesy flavor.

Some other options for modifying the recipe include:

  • Using leaner protein sources like chicken breast or turkey
  • Reducing the amount of oil used in the recipe
  • Adding more vegetables like bell peppers, onions, or mushrooms

By making these simple modifications, you can enjoy a delicious and easy chicken bryan recipe that suits your dietary needs and preferences. Whether you’re looking for a gluten-free, dairy-free, or lower-calorie version, the key is to experiment and find the combination that works best for you. With a little creativity, you can create a homemade chicken bryan that’s both healthy and flavorful.

Remember, the most important thing is to have fun and be creative in the kitchen. Don’t be afraid to try new ingredients and substitutions to make the recipe your own.

Conclusion: Bringing Restaurant Quality Chicken Bryan to Your Home

As we wrap up our journey with the chicken bryan recipe, it’s clear you can make it at home. With the right ingredients and a bit of practice, you can make this best chicken bryan recipe shine. This Italian-American dish has won many hearts, and now it can be yours to share.

By following our guide and using the special lemon butter sauce, you’ve learned to cook chicken perfectly. Top it with goat cheese for a delicious spread. Serve it with pasta or fresh veggies for a meal that will wow everyone.

Now, it’s time to add your own twist to this dish. Enjoy making restaurant-quality meals at home. Let the flavors of chicken bryan take you to an Italian-American trattoria. Bon appétit!

FAQ

What is Chicken Bryan?

Chicken Bryan is a tasty Italian-American dish. It has tender chicken, a creamy lemon butter sauce, goat cheese, and sun-dried tomatoes. It’s a favorite at Carrabba’s Italian Grill, loved for its rich flavors.

How did Chicken Bryan become a restaurant favorite?

Chicken Bryan was first introduced at Carrabba’s Italian Grill. It quickly won over fans with its mix of Italian and American tastes. The creamy goat cheese, tangy tomatoes, and lemon butter sauce make it irresistible.

What are the essential ingredients for making Chicken Bryan at home?

To make Chicken Bryan, you need chicken breasts, goat cheese, sun-dried tomatoes, and lemon butter sauce. Garlic, white wine, and herbs like basil or parsley are also key.

What kitchen tools and equipment are needed to make Chicken Bryan?

You’ll need a skillet, a saucepan, and a cutting board to make Chicken Bryan. A meat mallet and whisk are optional but helpful. Having everything ready will help you make a great dish.

How do I make the signature lemon butter sauce for Chicken Bryan?

Making the lemon butter sauce is key. Start by sautéing garlic in butter, then add white wine. Mix in lemon juice, heavy cream, and more butter for a smooth sauce that goes well with the chicken.

Can I make substitutions or modifications to the Chicken Bryan recipe?

Yes, you can! Chicken Bryan can be made to fit different diets and tastes. Try using dairy-free cheese or different herbs and spices. It’s also great with pasta or veggies, so you can make it your own.

What are some common issues that may arise when making Chicken Bryan at home?

You might face issues like a sauce that’s too thick or chicken that’s not cooked right. But, with a few tips, you can fix these problems. This way, you’ll always get a delicious Chicken Bryan.