>
Edit Content

Food That’s Made from the Heart
We’re all about turning simple ingredients into magical moments. From kitchen newbies to seasoned chefs, our recipes are designed to keep things fun and easy! Let’s cook, laugh, and eat together. 🥰

Contact Us

Indulge in Delicious Olive Garden Desserts

olive garden desserts​

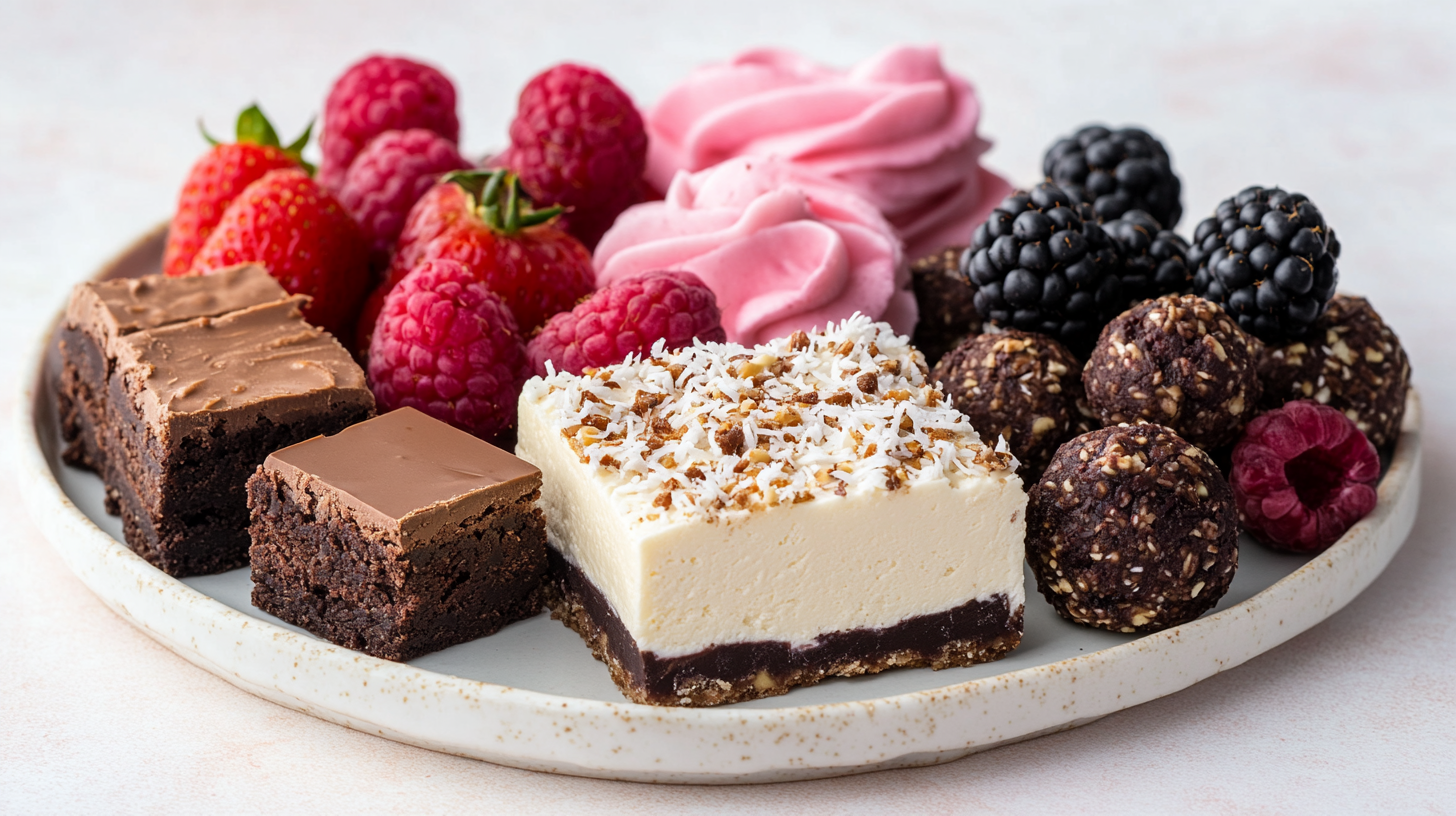
What makes olive garden desserts so irresistible? They transport us to Italy with every bite. From classic favorites to modern twists, they offer a world of sweet treats.

Imagine enjoying a decadent dessert in a warm, inviting place. That’s what olive garden desserts are all about. They provide an unforgettable experience with their wide variety of sweet treats.

Olive garden desserts are made with authentic italian flavors. They are the perfect way to end a meal or satisfy your sweet cravings. They offer a range of italian desserts and sweet treats that are sure to delight.

Key Takeaways

  • Olive garden desserts offer a wide variety of sweet treats that are sure to satisfy any sweet tooth.
  • Their italian desserts are made with authentic italian flavors and a passion for creating indulgent sweets.
  • From classic favorites to modern twists, olive garden desserts have something for everyone.
  • Their desserts are the perfect way to cap off a meal or satisfy your sweet cravings.
  • Olive garden desserts provide an unforgettable experience with their wide variety of sweet treats and inviting atmosphere.

The Sweet Legacy of Olive Garden Desserts

Olive Garden’s dessert menu celebrates the rich history of italian desserts. It offers a variety of indulgent sweets for every taste. From traditional tiramisu to creamy gelato, it’s a love letter to those with a sweet tooth. To explore italian desserts, visit delicious recipes and discover Olive Garden’s secrets.

The story of Olive Garden’s desserts starts with their italian heritage. They focus on quality ingredients and authentic flavors. Indulgent sweets like tiramisu and chocolate lasagna are made with love. They use the finest ingredients for an explosion of flavors in every bite.

Italian Dessert Heritage

Italian desserts are simple yet elegant, often with just a few high-quality ingredients. Olive Garden’s menu stays true to this, with dishes like zeppoli and gelato. Whether you prefer something classic or modern, there’s something for everyone.

How Olive Garden Adapts Traditional Recipes

Olive Garden’s chefs adapt traditional italian dessert recipes for today’s tastes. They use fresh, high-quality ingredients to create indulgent sweets. From creamy gelato to rich tiramisu, every dessert is a masterpiece.

The Restaurant’s Dessert Philosophy

Olive Garden’s dessert philosophy is about quality and authenticity. Their chefs are passionate about creating desserts that are delicious and visually stunning. They focus on using the finest ingredients and traditional techniques. This menu is a true reflection of their dedication to providing an unforgettable dining experience. Whether you’re in the mood for something classic or modern, there’s a variety of indulgent sweets to choose from.

Signature Tiramisu: The Crown Jewel of Italian Desserts

Olive Garden’s tiramisu is a true Italian dessert masterpiece. It has layers of coffee-soaked ladyfingers, creamy mascarpone, and cocoa powder. This combination will make you want more.

The heart of Olive Garden’s tiramisu is a traditional Italian recipe. It’s been perfected over time. The ladyfingers soak in a rich coffee mixture, giving it a deep flavor. The creamy mascarpone cheese balances it, and the cocoa powder adds a nice crunch.

Some key features of Olive Garden’s tiramisu include:

  • High-quality ladyfingers, soaked in a rich coffee mixture
  • Creamy mascarpone cheese, providing a smooth and velvety texture
  • A sprinkle of cocoa powder, adding a nice textural element

If you love Italian desserts or want to try something new, Olive Garden’s tiramisu is a must-try. It’s the perfect way to end a meal. So, why not indulge in a slice (or two) of this delicious tiramisu?

Olive Garden desserts, including their signature tiramisu, are the perfect way to end a meal. They offer a wide range of Italian desserts. So, why not visit Olive Garden today and try a slice of their famous tiramisu?

DessertDescriptionPrice
TiramisuLayers of coffee-soaked ladyfingers, creamy mascarpone, and cocoa powder$8.99
Italian GelatoA selection of creamy gelato flavors, including hazelnut and pistachio$7.99
ZeppoliFried dough balls dusted with powdered sugar, served with a side of chocolate sauce$6.99

Decadent Chocolate Lasagna: A Modern Classic

Olive Garden’s dessert menu has a special treat that many love: the chocolate lasagna. It’s a new take on Italian desserts, with chocolate cake, creamy filling, and chocolate sauce. This mix makes for a rich, satisfying dessert.

The chocolate lasagna stands out with its unique taste and texture. The chocolate cake base is solid, while the creamy filling is smooth. The chocolate sauce ties it all together, making it a decadent treat.

Layers of Chocolate Excellence

The chocolate lasagna shows the power of layering. The chocolate cake is the base, with creamy filling adding sweetness. The chocolate sauce brings a deep flavor, balancing everything.

What Makes It Special

So, what’s special about the chocolate lasagna? It’s the mix of textures and flavors that’s unique. High-quality chocolate and creamy filling make every bite a delight. It’s perfect for those who love Italian desserts or want to try something new.

The chocolate lasagna is a must-try for those who love sweets. It’s a mix of textures and flavors that’s hard to resist. You can find it on Olive Garden’s dessert menu, along with tiramisu and gelato.

DessertPriceDescription
Chocolate Lasagna$8.99Layers of chocolate cake, creamy filling, and rich chocolate sauce
Tiramisu$7.99Coffee-soaked ladyfingers layered with mascarpone cheese
Gelato$6.99Italian-style ice cream available in a variety of flavors

Creamy Italian Gelato Selections

Olive Garden’s gelato is a refreshing treat after any meal. It has a denser, creamier texture than ice cream. This is because it has less air and more milk and cream.

Popular flavors include stracciatella, pistachio, and tiramisu. These italian desserts use top-notch ingredients. They’re made to highlight the rich flavors gelato is known for.

Here are some reasons why you should try Olive Garden’s gelato:

  • Unique and authentic Italian flavors
  • Creamy texture and intense flavors
  • Lighter alternative to traditional desserts
  • Perfect for warm weather or any time of the year

Gelato is a fantastic way to end a meal at Olive Garden. It’s rich and creamy. So, why not try it and see why gelato is loved worldwide? Enjoy it as a sweet treat anytime.

At Olive Garden, you can try many gelato flavors. Each one is made to give you a special and tasty experience. So, go ahead and treat yourself. Discover why gelato is a favorite italian dessert globally.

FlavorDescription
StracciatellaA classic Italian flavor with chocolate chips
PistachioA creamy and nutty flavor perfect for pistachio lovers
TiramisuA unique and decadent flavor inspired by the popular Italian dessert

Fresh-Made Zeppoli: Italian Doughnut Delights

Try the sweet treats at Olive Garden, like zeppoli. These Italian doughnuts are made fresh, offering a cozy experience. With many flavors and toppings, zeppoli are a must-try.

Zeppoli come with powdered sugar, but you can also get them with cinnamon sugar or chocolate sauce. Enjoying them with coffee or other Italian desserts is unforgettable. Zeppoli are perfect for satisfying your Italian dessert cravings.

Traditional Preparation Methods

Making zeppoli involves frying the dough in hot oil. This makes them crispy on the outside and soft inside. It’s what makes zeppoli special in the world of Italian desserts.

Available Flavors and Toppings

Zeppoli come in many flavors and toppings:

  • Powdered sugar
  • Cinnamon sugar
  • Chocolate sauce
  • Fresh fruit

Best Ways to Enjoy

Pair zeppoli with coffee or other Italian desserts for the best experience. This combo will make you crave more. Zeppoli’s fresh quality and variety make them a highlight of Olive Garden desserts.

Seasonal Dessert Specialties at Olive Garden

Olive Garden’s dessert menu is full of sweet treats that change with the seasons. They use fresh, seasonal ingredients for every dessert. This makes every visit a chance to try something new and exciting.

In the past, they’ve had pumpkin cheesecake in the fall and berry-inspired treats in the summer. These desserts add a fun element to your meal. They make you want to come back and see what’s new.

Here are some reasons to look forward to Olive Garden’s seasonal desserts:

  • Unique flavor combinations with fresh ingredients
  • Limited-time desserts that create excitement
  • A menu that always changes, keeping things interesting

Whether you like classic or adventurous desserts, Olive Garden has something for you. So, stop by and check out the new desserts. Your taste buds will love it!

Dietary-Friendly Sweet Options

Olive Garden’s dessert menu has many sweet treats for all tastes and dietary needs. They make sure their gluten-free desserts are just as tasty as the regular ones. You can find everything from rich tiramisu to lighter options.

For those who can’t or don’t want to eat gluten, Olive Garden has plenty of choices. These desserts are made with the same care and taste as the regular ones. Some favorites include:

  • Fresh fruit salads
  • Sorbet
  • Gluten-free cheesecake

Olive Garden also has lighter dessert options for those who want something less rich. These include smaller sizes, fruit-based desserts, and other treats that are lower in calories but still delicious. This way, you can enjoy sweet treats without feeling guilty.

Olive Garden is a great place for anyone with a sweet tooth. They offer both indulgent and lighter desserts. So, whether you’re craving something decadent or something a bit healthier, Olive Garden has you covered.

Perfect Pairings: Desserts and Italian Coffee

Enjoying italian desserts is even better with the right drink. Olive Garden’s dessert menu pairs well with italian coffee or other drinks. For example, tiramisu and espresso are a classic match. The coffee’s bold taste goes well with the dessert’s creamy texture.

Don’t miss out on trying Olive Garden’s desserts with italian coffee. Zeppoli with cappuccino is a sweet and rich choice. For a unique twist, try traditional italian digestifs like limoncello or grappa with your dessert.

Espresso Combinations

  • Tiramisu and espresso: a classic combination that is both bold and creamy
  • Zeppoli and cappuccino: a sweet and rich pairing that is perfect for any occasion
  • Cannoli and macchiato: a delicate balance of flavors and textures

After-Dinner Drink Suggestions

Try something new by pairing Olive Garden desserts with limoncello or grappa. These italian digestifs add a unique twist to your dessert. They complement many sweet treats, offering a new flavor experience.

Exploring different pairings can make your dessert experience unforgettable at Olive Garden. With their wide variety of desserts and drinks, you’ll find the perfect match for your sweet tooth.

DessertPairing Suggestions
TiramisuEspresso, cappuccino
ZeppoliCappuccino, macchiato
CannoliMacchiato, limoncello

Dessert Portions and Sharing Options

When it comes to olive garden desserts, the portions are big. They’re great for sharing with friends and family. If you want to try a few sweet treats, get a dessert flight or sampler platter. This way, you can enjoy many indulgent sweets without eating too much.

A visit to Manorea Recipes can give you ideas for making your own dessert flights at home. But at Olive Garden, you can enjoy their expertly chosen desserts. Some favorites include:

  • Tiramisu
  • Chocolate Lasagna
  • Zeppoli

These olive garden desserts are made for sharing. The restaurant wants you to have a fun dining experience. Sharing a few sweet treats lets you taste different flavors and textures without feeling too full.

To get the most out of your dessert time, here are some tips:

  1. Choose a few indulgent sweets to share with your group
  2. Ask your server for advice on pairing desserts with coffee or other drinks
  3. Don’t be shy to try something new and exciting

By following these tips and enjoying the sharing spirit, you can have a memorable dessert time at Olive Garden. You’ll be surrounded by their tasty olive garden desserts and sweet treats.

How to Order Like a Dessert Connoisseur

When you’re at Olive Garden, you want to enjoy every bite of your dessert. Order your dessert at the right time, after your main course arrives. This way, you can savor every flavor and texture of your olive garden desserts.

Don’t forget to ask about daily specials. The staff at Olive Garden knows their sweet treats well. They can help you choose the perfect dessert, whether you like something classic or something new.

Expert Tips for the Best Experience

  • Customize your dessert to your liking by asking for modifications or special requests.
  • Consider pairing your dessert with a complementary drink, such as a coffee or tea, to elevate the experience.
  • Don’t be afraid to ask for recommendations or advice from the staff, as they are well-versed in the olive garden desserts and can provide valuable insights.

Popular Combinations

For a complete Italian meal, pair your sweet treats with appetizers and main courses. This way, you can enjoy a well-rounded meal. Here are some great combinations:

DessertAppetizerMain Course
TiramisuBruschettaLasagna
Chocolate LasagnaFried MozzarellaFettuccine Alfredo

Conclusion: Making Your Sweet Ending Memorable

The Olive Garden dessert menu is a true celebration of authentic Italian desserts. It offers a delightful array of indulgent sweets to cap off your dining experience. From the iconic Tiramisu to the decadent Chocolate Lasagna, each dessert is crafted with care.

Whether you’re craving a classic treat or eager to explore seasonal dessert specialties, Olive Garden invites you to indulge. Don’t forget to pair your dessert with a soothing cup of Italian-style coffee for the ultimate after-dinner experience.

As you plan your next visit to the Olive Garden, be sure to savor the diverse dessert offerings. From creamy Italian gelato to freshly made zeppoli, there’s something for everyone. With dietary-friendly options available, everyone can enjoy a delectable conclusion to their meal. Embark on a journey of sweet discovery and make your Olive Garden dessert experience truly memorable.

FAQ

What are some of the most popular desserts offered at Olive Garden?

Olive Garden is famous for its authentic Italian desserts. You can enjoy their signature tiramisu, rich chocolate lasagna, creamy gelato, and fresh zeppoli (Italian doughnuts).

How does Olive Garden incorporate traditional Italian dessert recipes?

Olive Garden is proud to mix traditional Italian dessert recipes with modern tastes. They use quality ingredients and true Italian cooking methods. This keeps the desserts’ authentic flavors alive.

Can I find gluten-free or lighter dessert options at Olive Garden?

Yes, Olive Garden has options for everyone. They offer gluten-free desserts and lighter choices like fruit-based desserts or smaller sizes. This is for those who want a less rich sweet treat.

What are some of the unique or seasonal dessert offerings at Olive Garden?

Olive Garden changes its dessert menu with the seasons. You might find pumpkin cheesecake in fall or berry desserts in summer. This shows their commitment to fresh ingredients.

How can I enhance my Olive Garden dessert experience?

To enjoy your dessert more, try it with an Italian coffee like espresso or cappuccino. Olive Garden also suggests drinks like limoncello or grappa to go with your dessert.

Can I sample multiple desserts at Olive Garden?

Yes, Olive Garden offers sharing options or dessert flights. This lets you try different desserts and find your favorite without overeating.

What tips can you share for ordering the best Olive Garden desserts?

To order like a pro at Olive Garden, ask about daily specials and customize your dessert. Pairing it with an appetizer or main course makes for a complete Italian meal.

Mouthwatering Beef Back Ribs Recipe

Beef Back Ribs Recipe

What makes the perfect beef back ribs recipe? How can you get them tender and fall-off-the-bone every time? The debate among barbecue fans is ongoing. But one thing is clear: it takes quality ingredients, precise cooking, and patience.

Whether you’re an experienced pitmaster or just starting, this guide will help. You’ll learn how to make beef back ribs that will wow your guests.

This guide will teach you how to pick the best beef back ribs. You’ll learn about different cooking methods and how to pair your ribs with the perfect BBQ sauce. We’ll cover everything from the basics to advanced techniques, so you can make the best beef back ribs recipe.

Key Takeaways

  • Understanding the basics of beef back ribs is crucial for creating a mouthwatering recipe
  • Selecting the right cut of meat is essential for tender and flavorful results
  • Mastery of various cooking methods, including smoking and oven-baking, can elevate your rib game
  • Pairing your beef back ribs with the perfect BBQ sauce can make all the difference
  • With practice and patience, you can achieve perfect, fall-off-the-bone results every time
  • A good beef back ribs recipe requires quality ingredients and precise cooking techniques

Getting to Know Beef Back Ribs

Beef back ribs are a favorite in many recipes, like the beef back ribs recipe. To make a tasty dish, knowing the ribs’ anatomy and picking the right cut is key. Whether grilling, smoking, or baking, the right meat is essential for tender and flavorful ribs.

For grilled beef back ribs, the meat’s quality is crucial. These ribs come from the cow’s rib section. They can be graded differently, helping you choose the best for your recipe.

What Are Beef Back Ribs?

Beef back ribs come from the upper ribcage. They are meatier and have a complex bone structure. This makes them perfect for slow-cooking methods like braising or smoking.

Different Grades of Beef Back Ribs

Beef back ribs are graded based on quality and tenderness. The main grades are:

  • Prime: The highest grade, known for its tenderness and rich flavor.
  • Choice: A mid-range grade, offering a good balance of quality and affordability.
  • Select: A lower grade, often used for more budget-friendly recipes.

How to Select the Best Cuts

When picking beef back ribs, look for a good meat-to-bone ratio. Steer clear of cuts with too much fat or connective tissue. These can make the ribs tough. By choosing the right cut and following a simple beef back ribs recipe, you’ll make a dish that will wow everyone.

GradeQualityPrice
PrimeHigh$$$
ChoiceMedium$$
SelectLow$

Essential Equipment for Cooking Beef Back Ribs

To make tender and tasty smoked beef back ribs, you need the right tools. Whether you’re using a smoker, grill, oven, or slow cooker, the right equipment makes a big difference. Here’s what you’ll need for different cooking methods.

For smoking, a smoker with temperature control is key. You’ll also need a water pan and wood chips for flavor and moisture. If grilling is your choice, a gas or charcoal grill with a lid is crucial for that perfect char.

  • Tongs or a meat claw for handling the ribs
  • A meat thermometer for ensuring the ribs are cooked to a safe internal temperature
  • Heat-resistant gloves for protecting your hands from burns
  • A cutting board and knife for preparing the ribs

With the right equipment and utensils, you’re set to make a delicious easy beef back ribs recipe. It’s sure to impress your family and friends. Always follow safety guidelines and use your equipment responsibly for a fun and stress-free cooking experience.

Ingredients for the Ultimate Beef Back Ribs Recipe

To make a delicious beef back ribs recipe, you need quality ingredients. This includes the meat, a tasty dry rub, and an optional sauce. A top best beef back ribs recipe balances spices, herbs, and liquids well.

For the meat, you’ll need:

  • 2 pounds of beef back ribs
  • 1 tablespoon of olive oil
  • Salt and pepper to taste

The dry rub is key. You can mix:

  • 2 tablespoons of brown sugar
  • 1 tablespoon of smoked paprika
  • 1 tablespoon of garlic powder
  • 1 tablespoon of onion powder

For the sauce, try this:

  • 1 cup of ketchup
  • 1/2 cup of apple cider vinegar
  • 2 tablespoons of honey

These ingredients will make a best beef back ribs recipe that’s tender and flavorful. Always choose fresh, high-quality ingredients for the best delicious beef back ribs recipe.

Preparing Your Beef Back Ribs

To make tender and flavorful beef back ribs, you need to prepare them right. This means trimming off extra fat, cleaning the ribs, and taking off the tough membrane on the bone side. By doing these steps, you’ll make a tasty beef back ribs recipe that everyone will love.

There are important steps to take when preparing your beef back ribs. These include:

  • Trimming excess fat to promote even cooking and prevent flare-ups
  • Cleaning the ribs to remove any impurities or debris
  • Removing the tough membrane on the bone side to enhance tenderness and flavor penetration

By following these steps and using an easy beef back ribs recipe, you’ll make a dish that’s perfect for any time. Whether you’re an experienced chef or just starting out, the secret to success is in the preparation and detail.

Here’s a simple table to help you get started:

StepDescription
TrimmingRemove excess fat to promote even cooking
CleaningRemove impurities or debris from the ribs
Membrane RemovalRemove the tough membrane on the bone side

Mastering Different Cooking Methods

There are many ways to cook beef back ribs, each with its own taste and texture. Grilling and smoking are two favorites. Grilling gives a nice char, while smoking adds a deep flavor.

When picking a method, think about your gear, taste, and how tender you like it. For example, smoked beef back ribs are known for their tenderness. On the other hand, grilled beef back ribs can be cooked to your liking.

Oven-baking and slow cooking are also great options. They’re easier and need less special equipment. Your choice depends on what you like and what you have.

Here are some things to think about when choosing a cooking method:

  • Type of equipment available
  • Personal preference for flavor and texture
  • Level of tenderness desired
  • Time and effort required

By trying different methods, you can find the best way to make your grilled beef back ribs or smoked beef back ribs.

Smoking Your Beef Back Ribs to Perfection

Smoking is a great way to cook beef back ribs. It adds a rich, smoky flavor. To get this flavor, you need to know how to smoke your beef back ribs recipe. The type of wood used is key, as it affects the taste of your smoked beef back ribs.

There are many woods to choose from, like hickory, oak, and maple. Each wood gives a different flavor. So, picking the right wood for your beef back ribs recipe is important. Here are some popular choices:

  • Hickory: Strong, sweet, and smoky flavor
  • Oak: Mild, smoky flavor with a hint of vanilla
  • Maple: Mild, sweet flavor with a hint of maple syrup

Temperature control is also crucial when smoking beef back ribs. Keep the temperature between 225-250°F. This ensures even cooking. Here’s a simple table to guide you:

Temperature (°F)Time (hours)Result
225-2504-5Tender, fall-off-the-bone texture
250-2753-4Crunchy exterior, tender interior

By following these tips, you can make delicious smoked beef back ribs. They’ll impress anyone. Always use the best ingredients and follow food safety rules when cooking your beef back ribs.

Oven-Baked Beef Back Ribs Technique

Oven-baking is a tasty way to make beef back ribs without grilling or smoking. It lets you get tender, flavorful ribs with a caramelized outside right in your kitchen.

First, heat your oven to 300°F (150°C). While it warms up, season your beef back ribs with your favorite dry rub. You can buy one or mix your own spices and herbs.

Here are some tips for oven-baking beef back ribs:

  • Line a baking sheet with aluminum foil or parchment paper to make cleanup easier.
  • Place the ribs on the prepared baking sheet, bone side down.
  • Cover the ribs with another sheet of foil or parchment paper to prevent overcooking.
  • Bake for 2-3 hours, or until the meat is tender and easily shreds with a fork.

For a tasty twist, pair your ribs with sweet and tangy BBQ sauce. Brush the sauce on during the last 10-15 minutes. You’ll get a dish that’s both delicious and tender.

With these easy steps, you can make amazing oven baked beef back ribs. They’re perfect for any event. This recipe is great for both experienced cooks and beginners.

Slow Cooker Method for Tender Results

To get slow cooker beef back ribs that fall off the bone, cook them low and slow. This breaks down the meat’s connective tissues, making it tender. First, season the ribs with your favorite dry rub, covering them evenly.

Then, place the ribs in the slow cooker, bone side down. Add your favorite liquid, like barbecue sauce or stock. The slow cooker’s heat will flavor and tenderize the ribs. Cook on low for 8-10 hours or high for 4-6 hours for the best results.

Cooking times and settings can change based on your slow cooker and rib size. Here’s a general guide:

Cooking MethodCooking Time
Low8-10 hours
High4-6 hours

By following these steps and using your slow cooker, you’ll make delicious, tender slow cooker beef back ribs. This delicious beef back ribs recipe is a hit with everyone. The slow cooker method ensures perfect results every time.

Creating the Perfect BBQ Sauce Pairing

A great BBQ sauce can turn your beef back ribs recipe into something amazing. The right BBQ sauce is key to the best beef back ribs recipe. You need to mix sweet, tangy, and spicy flavors just right.

When picking a BBQ sauce, think about the flavor you want. You might choose:

  • Sweet and smoky
  • Tangy and vinegar-based
  • Spicy and bold

A classic BBQ sauce recipe has ketchup, brown sugar, vinegar, and spices. Different regions add their own twist. For example, Kansas City-style is sweeter, while Carolina-style is tangier.

Classic BBQ Sauce Recipe

To make a classic BBQ sauce, you’ll need:

IngredientQuantity
Ketchup1 cup
Brown sugar1/2 cup
Apple cider vinegar1/4 cup
Spices1 teaspoon

Just mix these ingredients and simmer them low and slow. This will make a BBQ sauce that’s perfect with your beef back ribs.

Side Dish Recommendations

To go with your tasty beef back ribs, try different side dishes. A classic coleslaw with cabbage, mayonnaise, and vinegar is a good start. You might also like baked beans, grilled veggies, or cornbread.

For something special, add smoked flavors to your sides. Smoked paprika can spice up your coleslaw or baked beans. Or, make a grilled veggie skewer with colorful peppers, zucchini, and onions.

Here are some side dish ideas that go well with the best beef back ribs recipe:

  • Coleslaw with a hint of vinegar
  • Baked beans with a sweet and smoky flavor
  • Grilled vegetables with a drizzle of olive oil
  • Cornbread with a crumbly texture and a hint of spice

A complete meal with great beef back ribs and the right sides will please your taste buds. Try out different flavors and textures to find your favorite mix.

Side DishFlavor ProfileTexture
ColeslawTangy, creamyCrisp, refreshing
Baked BeansSweet, smokySoft, comforting
Grilled VegetablesSmoky, savoryCrisp, tender
CornbreadSpicy, crumblyCrunchy, satisfying

Storing and Reheating Tips

To keep your beef back ribs recipe fresh and delicious, proper storage is key. After cooking, let the ribs cool down completely. Then, store them in an airtight container to keep the flavor and texture.

For an easy beef back ribs recipe, store cooked ribs in the fridge for up to 3 days. Or, freeze them for up to 2 months. Always heat the ribs to at least 165°F (74°C) when reheating to ensure safety.

Proper Storage Methods

  • Use airtight containers to store cooked ribs
  • Label and date the containers for easy identification
  • Store the containers in the refrigerator or freezer

Reheating Without Drying

To reheat your beef back ribs recipe without drying, wrap the ribs in foil. Heat them in the oven at a low temperature (around 250°F or 120°C) for about 30 minutes. You can also reheat in the microwave, but be careful not to overheat.

By following these tips, you can enjoy your easy beef back ribs recipe for days. You won’t lose any flavor or texture.

Conclusion

As you finish this beef back ribs recipe guide, take a moment to enjoy the flavorful journey. You’ve learned how to pick the best beef back ribs and cook them to perfection. Now, you can make ribs that will amaze your family and friends.

Remember, the secret to this dish is to keep trying new things and finding your own style. Keep improving your skills, trying out different rubs and sauces, and let your creativity flow. With what you’ve learned, you’re ready to become a rib-making master in your kitchen.

So, get ready to fire up your grill, preheat your oven, or use your slow cooker. Let the delicious flavors of these beef back ribs take you on a savory adventure. Bon appétit, and happy cooking!

FAQ

What are beef back ribs?

Beef back ribs, also known as beef short ribs, come from the cow’s rib section. They are near the backbone, just behind the shoulder. They have a rich, beefy taste and are tender when cooked right.

How do I select the best cuts of beef back ribs?

Choose ribs with good marbling for tender and flavorful meat. Avoid dry or fatty ribs. Opt for ribs from the rib section’s center for even size and shape.

What equipment do I need to cook beef back ribs?

You’ll need a grill, smoker, oven, or slow cooker for cooking. Also, a sharp knife, tongs or spatula, and a meat thermometer are essential.

What ingredients are needed for the ultimate beef back ribs recipe?

You’ll need beef back ribs and seasonings or marinades. For the dry rub, use brown sugar, paprika, and spices. You can also make BBQ sauce with ketchup, vinegar, and spices.

How do I properly prepare beef back ribs for cooking?

Trim excess fat and remove the thin membrane on the bone side. This lets seasonings and smoke penetrate better. Apply a dry rub or marinade for even flavor.

What are the different methods for cooking beef back ribs?

You can grill, smoke, oven-bake, or slow cook beef back ribs. Each method gives unique flavors and textures, so pick what you like best.

How do I achieve perfectly smoked beef back ribs?

Choose the right wood chips or chunks for your smoker. Hickory, oak, and mesquite are good options. Keep your smoker at 225°F to 250°F. Monitor the ribs to avoid overcooking and aim for a tender, smoky texture.

Can I cook beef back ribs in the oven?

Yes! Oven-baking is great when you can’t grill outside. Start at 400°F for a caramelized exterior, then lower the heat to cook until tender.

How do I make tender beef back ribs in the slow cooker?

Season the ribs with your favorite dry rub or marinade. Layer them in the slow cooker. Cook on low for 7-9 hours or high for 4-6 hours until tender.

What type of BBQ sauce pairs best with beef back ribs?

A sweet, tangy, and smoky BBQ sauce is perfect for beef back ribs. You can make your own or try regional sauces like Kansas City-style or spicy mustard-based.

Best Fish Food Recipes: Nourish Your Aquatic Companions

fish food recipe

Imagine giving your aquarium fish the nutrients they need to thrive. You can save money and control what goes into their food. Making homemade fish food, or DIY fish food, is a great way to do this. It ensures your fish get the freshest, healthiest food without preservatives.

Exploring homemade fish food opens up many benefits. You’ll save money, control what goes into the food, and feel good about feeding your fish the best. In this article, we’ll cover the basics of DIY fish food. We’ll talk about the nutrients your fish need, the ingredients you’ll use, and the equipment you’ll need to prepare it.

Key Takeaways

  • Making homemade fish food can be a cost-effective and healthy alternative to commercial options
  • DIY fish food allows for control over ingredients and preservatives
  • Aquarium fish nutrition is crucial for the health and well-being of your aquatic pets
  • Homemade fish food recipes can be tailored to meet the specific needs of your fish
  • Creating your own fish food can be a fun and rewarding experience
  • With the right ingredients and equipment, you can provide your fish with the freshest, preservative-free options available

Why Make Your Own Fish Food?

Making your own fish food can change the game for aquarium lovers. It’s cheaper in the long run. You can pick the right ingredients for your fish, cutting down on waste and saving money. Plus, homemade food avoids preservatives and fillers found in store-bought options, which can harm your fish.

Some key benefits of homemade fish food include:

  • Control over ingredients, allowing for tailored diets that address specific health concerns
  • Fresh and preservative-free options, which improve the taste and nutritional value of the food
  • Customization to meet the unique needs of different fish species

By making your own fish food, you can make sure your fish get the nutrients they need. Homemade fish food offers many benefits. With a bit of practice, you can make food that’s better than what you buy.

Exploring homemade fish food lets you control what goes into your fish’s meals. You can make food that’s fresh and free from preservatives. This not only keeps your fish healthy but also brings you joy and satisfaction as an aquarium enthusiast.

Benefits of Homemade Fish FoodDescription
Cost-EffectiveReduced waste and savings in the long run
CustomizationTailored diets for specific fish species and health concerns
Fresh and Preservative-FreeImproved taste and nutritional value

Essential Nutrients Your Fish Need

It’s important to give your aquarium fish a balanced diet for their health. Different fish need different nutrients, but some are essential for all. A good diet should have proteins, fats, carbs, vitamins, and minerals.

Proteins are key for growth and repair. Fats give energy and help with vitamin absorption. Carbs, like fiber, keep the digestive system healthy. Vitamins and minerals, like vitamin C and calcium, boost the immune system and overall health.

Creating a balanced fish food depends on your fish’s needs. Each species has its own dietary needs. A balanced food should have a mix of proteins, fats, carbs, and vitamins and minerals.

  • Proteins: 30-50% of the diet
  • Fats: 10-20% of the diet
  • Carbohydrates: 20-30% of the diet
  • Vitamins and minerals: 1-5% of the diet

Feeding your fish a balanced diet ensures they stay healthy and happy. A balanced diet is crucial for their well-being. It provides the necessary nutrients for optimal health.

Remember, a balanced fish food is key to keeping your fish healthy and thriving. By understanding the essential nutrients your fish need, you can create a diet that meets their unique requirements and helps them live their best lives.

NutrientImportanceRecommended Amount
ProteinBuilding blocks for growth and repair30-50% of the diet
FatEnergy and vitamin absorption10-20% of the diet
CarbohydratesDigestive health20-30% of the diet
Vitamins and mineralsImmune system function and overall health1-5% of the diet

Basic Ingredients for Homemade Fish Food

Creating homemade fish food requires knowing the basic ingredients. These ingredients include protein sources, plant-based parts, and supplements for vitamins and minerals. Protein is key for fish growth and development.

Common proteins in homemade fish food are fish meal, shrimp, and insects. Vegetables and algae add fiber, vitamins, and minerals. Plant-based options are good for the environment.

Vitamins and minerals are also crucial. They include vitamins A, C, and E, and minerals like calcium and phosphorus. Mixing these ingredients makes a balanced, nutritious food for your fish.

Key Ingredients for Homemade Fish Food

  • Fish meal
  • Shrimp
  • Insects
  • Vegetables
  • Algae
  • Vitamin and mineral supplements

Knowing the ingredients in homemade fish food helps you make a nutritious diet. Always choose high-quality ingredients for the best nutrition for your fish.

IngredientBenefits
Fish mealHigh-quality protein source
ShrimpRich in omega-3 fatty acids
VegetablesProvide fiber and essential vitamins and minerals

Equipment Needed for Fish Food Preparation

To make homemade fish food, you’ll need some basic fish food preparation tools. Most of these items are probably in your kitchen already. A food processor or blender is key for turning ingredients into a fine paste. You’ll also need measuring tools like cups and spoons to follow recipes right. Don’t forget storage containers to keep your fish food fresh.

For DIY fish food equipment, you can think outside the box. Use a coffee grinder to make flakes or pellets into a powder. A mortar and pestle can help mix and grind ingredients. If you’re making a lot of fish food, consider a homemade fish food supplies kit. It usually has tools and equipment made just for fish food prep.

Here are some must-haves to start:

  • Food processor or blender
  • Measuring cups and spoons
  • Storage containers
  • Coffee grinder (optional)
  • Mortar and pestle (optional)

Always clean and sanitize your tools after use. This keeps your fish healthy and prevents contamination. With the right fish food preparation tools and some creativity, you can make tasty and nutritious homemade fish food for your fish.

EquipmentDescription
Food ProcessorBreaks down ingredients into a fine paste
Measuring Cups and SpoonsAccurately measure ingredients
Storage ContainersKeep homemade fish food fresh

Simple Fish Food Recipe for Beginners

Making fish food at home is fun and rewarding. You just need a few ingredients and basic tools. It’s all about trying different things and finding the right mix for your fish.

Homemade fish food lets you pick what goes into it. This way, you can make sure your fish get the nutrients they need. By using fresh ingredients and following a simple recipe, you can make a tasty and healthy meal for your fish.

Step-by-Step Preparation Guide

  • Gather ingredients: fish meal, spirulina, vegetables, and vitamins
  • Mix the ingredients together in the right proportions
  • Add water to create a paste-like consistency

Tips for Perfect Consistency

To get the right consistency, add the right amount of water. The mix should be thick but still easy to break. With these tips, you can make a nutritious and tasty meal for your fish.

Common Mistakes to Avoid

When making homemade fish food, avoid common mistakes. Stick to a simple recipe and use fresh ingredients. This way, you can make a healthy and tasty meal for your fish. With practice, you’ll get better at making food for your fish.

IngredientQuantityNutritional Value
Fish meal1 cupHigh protein content
Spirulina1/2 cupRich in vitamins and minerals
Vegetables1/2 cupGood source of fiber and nutrients

Advanced Fish Food Recipes for Different Species

As you get better at making your own fish food, you might want to try species-specific fish food recipes. These are made for the special needs of your fish. You can make custom fish recipes for different types of fish. This includes recipes for herbivorous, carnivorous, and omnivorous fish, and even specialized aquarium diets for popular species like bettas, cichlids, or goldfish.

Some advanced recipes include:

  • Vegetable-based diets for herbivorous fish, featuring ingredients like spirulina and kale
  • High-protein diets for carnivorous fish, featuring ingredients like brine shrimp and fish meal
  • Balanced diets for omnivorous fish, featuring a mix of vegetable and protein sources

When making your own custom fish recipes, make sure to research what your fish needs. Adjust the ingredients based on their dietary needs. You can also try different ingredients and ways to present the food to keep your fish interested.

By giving your fish specialized aquarium diets that fit their needs, you help them grow healthy and strong. They will also have vibrant colors and a strong immune system. Always put your fish’s health first. If you have questions or concerns about their diet, talk to a vet or an experienced aquarist.

Storing and Preserving Homemade Fish Food Recipe

Keeping your fish food storage right is key to keeping it nutritious and fresh. After making your fish food, it’s important to store it well. This guide will show you how to keep your homemade fish food fresh, including how to refrigerate and freeze it.

To make sure your fish food shelf life is long, follow these storage tips:

  • Keep your fish food in the fridge at 39°F (4°C) or lower to slow down bacteria.
  • Freeze your fish food at 0°F (-18°C) or lower to stop spoilage and keep nutrients.
  • Use airtight containers to store your fish food and keep them away from sunlight and moisture.

Freezing is a great way to preserve homemade fish food. It keeps nutrients in and stops bacteria and mold. By using these tips, your homemade fish food will stay fresh and healthy for your fish.

Remember, the right storage and preservation are crucial for your homemade fish food’s quality. By following these guidelines, you can give your fish a healthy and nutritious diet.

Storage MethodTemperatureShelf Life
Refrigeration39°F (4°C)3-5 days
Freezing0°F (-18°C)3-6 months

Signs Your Fish Enjoy Your Homemade Food

Watching your fish eat can be exciting. When they love their food, they move more during meals. This shows they really enjoy eating.

Healthy fish look different too. They might grow faster and show brighter colors. This is because they’re getting the nutrients they need.

  • Increased swimming activity during feeding times
  • Enthusiastic eating, such as rapid consumption of food
  • Improved appetite, with fish eagerly awaiting their next meal

By paying attention to these signs, you can see if your homemade food is working. A happy fish is a well-fed fish. With the right food, your fish will be healthy and active.

Signs of Healthy FishDescription
Enhanced ColorationVibrant colors and patterns, indicating a healthy and balanced diet
Better Growth RatesFish growing at a healthy rate, with proper nutrition supporting their development
Increased VitalityFish displaying energetic and lively behavior, with a strong immune system

Troubleshooting Common Fish Food Recipe Issues

When making homemade fish food, you might face some fish food problems. But, with some homemade fish food troubleshooting, you can fix these issues. This way, you can give your fish a healthy diet. A common issue is when the food doesn’t stick together or sinks too fast, causing aquarium feeding issues.

To solve these problems, try these steps:

  • Adjust the ingredient ratio to get the right consistency.
  • Add a binding agent, like gelatin or agar, to help the food stick together.
  • Try a different protein source, such as fish meal or shrimp, for a balanced diet.

By following these tips and being patient, you can solve common fish food problems. Creating a healthy diet for your fish is all about experimenting and finding what works best. Remember, homemade fish food troubleshooting is all about experimenting and finding what works best for your aquatic pets.

With practice and patience, you can become an expert in aquarium feeding issues. This way, you can give your fish the best care possible.

Common IssueSolution
Food not holding togetherAdjust ingredient ratio or add binding agent
Food sinking too quicklyUse a different protein source or add a floating agent

Conclusion: Enriching Your Aquatic Pets’ Lives Through Homemade Nutrition

Making your own fish food is more than saving money. It’s about giving your fish a better diet and getting closer to them. With DIY fish food, you can pick the right ingredients for your aquarium fish. This ensures they get the fish nutrition they need to stay healthy.

This guide has shown how fun and rewarding making fish food can be. It’s a great way to improve your aquatic pets‘ health and happiness. By choosing the best ingredients and recipes, you’re showing you care about their well-being. This strengthens your bond with your fish.

FAQ

What are the benefits of making your own fish food?

Making your own fish food can save money. It lets you pick the ingredients and avoid preservatives. You can also make sure your fish get the nutrients they need for a healthy diet.

What are the essential nutrients my fish need?

Aquarium fish need proteins, fats, carbs, vitamins, and minerals. These nutrients help them grow, stay healthy, and look their best. Knowing what they need is key to a balanced diet.

What are the basic ingredients used in homemade fish food?

The main ingredients are proteins like fish and shrimp, and plant-based foods like veggies. Don’t forget to add vitamins and minerals to your recipes.

What equipment do I need to prepare homemade fish food?

You’ll need a food processor, blender, measuring tools, and containers. You might already have these in your kitchen. If not, they’re easy to find or buy.

Can you provide a simple, beginner-friendly fish food recipe?

Yes! We have a simple recipe for beginners. It includes a step-by-step guide and tips for the right consistency. We’ll also cover common mistakes to avoid.

How do I store and preserve homemade fish food?

Storing and preserving homemade fish food is important. We’ll talk about refrigeration for short-term storage and freezing for longer. We’ll also cover how long it stays good.

How can I tell if my fish are enjoying the homemade food?

Look for signs like more activity during meals, better color, and growth. These are good signs your fish are doing well on homemade food.

What if I encounter issues with my homemade fish food recipes?

It’s normal to face some problems. We’ll cover issues like food that falls apart or sinks too fast. We’ll offer solutions and alternatives to help you fix these problems.

Delicious Cottage Cheese Recipes for Every Meal

cottage cheese recipes

Cottage cheese deserves more attention in your kitchen. It’s great for sweet and savory breakfasts, protein-rich meals, and desserts. This article will show you how to use it in every meal. Get ready to make your meals better with this nutritious and flavorful ingredient.

Key Takeaways

  • Cottage cheese is a nutritional powerhouse that can be used in a variety of delicious recipes.
  • Explore 15 unique cottage cheese recipes for breakfast, lunch, dinner, and dessert.
  • Discover the versatility of cottage cheese and how it can transform your meals.
  • Learn the health benefits of incorporating cottage cheese into your diet.
  • Find easy and creative ways to use cottage cheese in sweet and savory dishes.

So, what are you waiting for? Dive into the world of cottage cheese and discover new culinary possibilities. Get ready to be amazed by the delicious and nutritious ways to enjoy this versatile ingredient.

Why Cottage Cheese Is Your New Favorite Ingredient

Cottage cheese is more than just a healthy ingredient. It’s packed with benefits and can be used in many ways. It’s a must-have in every kitchen.

Nutritional Benefits of Cottage Cheese

Cottage cheese is full of good stuff. It has high-quality protein and all the amino acids your body needs. It’s also rich in calcium, phosphorus, and vitamin B12, great for strong bones and health.

It’s low in fat and carbs, perfect for those watching their diet. This makes it a great choice for a healthy meal.

Versatility in Cooking and Baking

Cottage cheese is incredibly versatile. It works well in both savory and sweet dishes. You can make creamy dips, fluffy pancakes, and more.

It’s also a great substitute for fattier ingredients. This lets you enjoy your favorite foods in a healthier way.

Storage and Shelf Life Tips

Keeping cottage cheese fresh is important. Store it in the fridge in a sealed container. Don’t leave it out for too long, as it can spoil.

With the right storage, cottage cheese stays good for 5-7 days. It’s a handy ingredient to have around.

“Cottage cheese is a nutritional powerhouse that can elevate any meal or snack.”

Essential Cottage Cheese Breakfast Bowls

Cottage cheese is a versatile ingredient that can change your breakfast. It makes your morning meal protein-rich and fulfilling. Try these recipes that mix cottage cheese with fruits, nuts, and sweeteners for a tasty start.

Blueberry Almond Cottage Cheese Bowl

Start your day with a vibrant breakfast bowl. Mix cottage cheese with blueberries, almonds, and honey. It’s a perfect mix of sweet and crunchy.

Tropical Cottage Cheese Parfait

Take a trip to the tropics with this refreshing parfait. Layer cottage cheese with pineapple, mango, and coconut flakes. It’s a taste of the islands.

Savory Cottage Cheese Breakfast Bowl

  • Mix cottage cheese with tomatoes, avocado, and chives for a savory start.
  • Add olive oil and sea salt for extra flavor.

Peach and Cinnamon Cottage Cheese Bowl

Enjoy summer flavors with this peach and cinnamon bowl. Ripe peaches and cinnamon mix well with cottage cheese.

Cottage Cheese Breakfast BowlNutrients per Serving
Blueberry AlmondCalories: 250, Protein: 20g, Carbs: 25g, Fat: 10g
Tropical ParfaitCalories: 280, Protein: 18g, Carbs: 30g, Fat: 12g
SavoryCalories: 190, Protein: 22g, Carbs: 12g, Fat: 8g
Peach and CinnamonCalories: 230, Protein: 18g, Carbs: 22g, Fat: 10g

These cottage cheese bowls are tasty and nutritious. They’re packed with protein, fruits, and nuts. They’re a great way to start your day with a healthy breakfast.

Sweet and Savory Cottage Cheese Recipes

Cottage cheese is great for both sweet and savory dishes. It adds a creamy texture to breakfast bowls. It’s also a nutritious dairy product for cooking. Here are some tasty cottage cheese recipe ideas to try.

Fruit and Honey Combinations

Start your day with cottage cheese, fresh fruits, and honey. Try strawberry and honey, peach and vanilla, or blueberry and cinnamon. The fruit’s sweetness and cottage cheese’s tanginess make a perfect breakfast.

Herbs and Spices Pairings

Make savory cottage cheese dishes with herbs and spices. Mix it with chopped chives, fresh dill, or crumbled feta for a tasty spread. Add garlic powder, onion powder, or paprika for a unique dip or topping.

Nuts and Seeds Add-ins

Add nuts and seeds for crunch and nutrition. Sprinkle toasted almonds, sunflower seeds, or chia seeds on cottage cheese. Pumpkin seeds or chopped walnuts add great texture and flavor.

Discover the many sweet and savory cottage cheese recipes. They’re perfect for breakfast, lunch, or dessert. Cottage cheese makes any meal delicious and nutritious.

Quick and Easy Cottage Cheese Recipes Snacks

Cottage cheese is not just a healthy dairy product. It’s also great for making quick and tasty snacks. Whether you need a protein boost or a healthy snack to satisfy your cravings, these ideas will please your taste buds.

Fruity Cottage Cheese Bites

Combine creamy cottage cheese with fresh fruit for a tasty and balanced snack. Top it with sliced strawberries, diced pineapple, or mango. Add a drizzle of honey for sweetness.

Savory Cottage Cheese Toasts

Make cottage cheese into a savory spread by mixing it with herbs, spices, or garlic powder. Spread it on whole-grain toast or crackers for a nutritious snack full of flavor.

Cottage Cheese SnackIngredientsPrep Time
Cottage Cheese Stuffed Cucumber BitesCottage cheese, cucumber slices, diced tomatoes, dried oregano5 minutes
Cottage Cheese and Nut Butter ParfaitCottage cheese, natural peanut or almond butter, sliced bananas10 minutes
Cottage Cheese and Avocado ToastCottage cheese, ripe avocado, whole-grain toast, crushed red pepper flakes7 minutes

The best thing about cottage cheese snacks is how easy and flexible they are. Try new flavors and get creative with your cottage cheese snacks. Enjoy these healthy snacks and quick cottage cheese recipes for a nutritious treat anytime.

“Cottage cheese is a nutritious and versatile ingredient that can turn simple snacks into something truly delightful.”

Healthy Lunch Ideas with Delicious Cottage Cheese Recipes for Every Meal

Cottage cheese is a great ingredient for lunch. It can make salads and wraps more exciting. This dairy product is full of nutrients and adds protein to your meals.

Salad Incorporations

Cottage cheese goes well with greens, veggies, and fruits. It makes salads more nutritious. Add cottage cheese to your favorite salad for extra protein and creaminess. Here are some tasty ideas:

  • Spinach salad with cottage cheese, sliced strawberries, and balsamic glaze
  • Mixed greens, cucumber, tomatoes, and cottage cheese with lemon vinaigrette
  • Arugula salad with grilled chicken, avocado, and cottage cheese

Sandwich Spreads

Cottage cheese is great in sandwiches. It adds protein and texture. Use it instead of mayonnaise or cream cheese. Try these flavors:

  1. Whole-wheat toast with cottage cheese, tomatoes, and basil
  2. Whole-grain pita with cottage cheese, carrots, and honey
  3. Multigrain wrap with cottage cheese, chicken, and veggies

Wraps and Rolls

Cottage cheese is perfect for wraps and rolls. It’s creamy and pairs well with many fillings. Here are some tasty options:

  • Cottage cheese and cucumber wrap with dill
  • Whole-wheat tortilla with cottage cheese, chicken, and salsa
  • Cottage cheese and roasted red pepper pinwheels

Explore the many uses of cottage cheese for a healthy and tasty lunch. It will keep you energized all day.

Cottage Cheese Recipes for Main Dishes

Cottage cheese is a versatile ingredient that can make ordinary meals special. It adds a creamy texture and protein to your favorite dishes. This makes it perfect for main courses.

Try these tasty cottage cheese dinner recipes for family meals or parties. They show how cottage cheese can make your main course with cottage cheese unforgettable and savory cottage cheese meals.

Baked Ziti with Cottage Cheese Recipes

Make a comforting baked dish with ziti pasta, marinara sauce, and cottage cheese. It’s a hit with everyone. You can also add your favorite veggies or Italian sausage.

Cottage Cheese Stuffed Chicken Breasts

Make your chicken dinner special by stuffing it with cottage cheese, herbs, and spices. The juicy chicken and creamy filling make it a treat.

Cottage Cheese Lasagna

Try cottage cheese instead of ricotta in your lasagna for a protein-rich twist. It’s a comforting dish with noodles, meat sauce, and cottage cheese.

These are just a few ideas for cottage cheese dinner recipes. Cottage cheese is great in many main course with cottage cheese. It’s a great choice for your next family dinner or savory cottage cheese meals.

Baked Goods and Desserts Using Cottage Cheese

Cottage cheese is great for more than just savory dishes. It adds creaminess and protein to baked goods and desserts. Try these recipes to see how cottage cheese can make sweet treats special.

Cheesecake Variations

Use cottage cheese instead of cream cheese for a lighter cheesecake. It’s creamy and packed with protein. Add fresh fruit, honey, or cinnamon for a tasty finish.

Muffins and Breads

Cottage cheese makes muffins and breads moist and rich. Try it in blueberry muffins, zucchini bread, or cheddar-chive biscuits. It’s a healthy twist on baked goods.

Protein-Rich Desserts

  • Cottage cheese pancakes or waffles with fresh berries and honey
  • Cottage cheese parfaits with granola, chia seeds, and fruit
  • No-bake cottage cheese baking recipes like protein balls or bars with maple syrup or dates
Cottage Cheese DessertNutrition Facts (per serving)
Cottage Cheese CheesecakeCalories: 250, Protein: 18g, Carbs: 20g, Fat: 12g
Cottage Cheese MuffinsCalories: 180, Protein: 12g, Carbs: 22g, Fat: 6g
Cottage Cheese Protein BallsCalories: 150, Protein: 15g, Carbs: 12g, Fat: 7g

Adding cottage cheese to your baking and desserts boosts nutrition. It also adds a unique texture and flavor. Try these healthy desserts to enjoy cottage cheese’s benefits.

High-Protein Smoothies and Drinks

Make your smoothies and drinks better with cottage cheese. It adds a creamy texture and lots of protein. Learn how to make tasty cottage cheese smoothies, protein shakes, and healthy drinks that will keep you going all day.

Cottage cheese is great for making smoothies and drinks with lots of protein. It keeps you full and gives you energy. Try mixing it with fruits, greens, and other healthy stuff to find your favorite flavor.

Cottage Cheese Smoothie Recipes

  • Strawberry Banana Cottage Cheese Smoothie
  • Pineapple Coconut Cottage Cheese Smoothie
  • Blueberry Spinach Cottage Cheese Smoothie
  • Chocolate Peanut Butter Cottage Cheese Smoothie

High-Protein Cottage Cheese Drinks

  1. Vanilla Protein Shake with Cottage Cheese
  2. Berry Cottage Cheese Protein Smoothie
  3. Creamy Matcha Latte with Cottage Cheese
  4. Spiced Pumpkin Cottage Cheese Shake

Try these cottage cheese drinks to make your day better. They’re creamy, tasty, and full of protein. Cottage cheese makes your drinks healthier and more fun.

Cottage Cheese SmoothieProtein (g)Carbs (g)Fat (g)
Strawberry Banana20305
Pineapple Coconut18256
Blueberry Spinach22284
Chocolate Peanut Butter25358

“Cottage cheese is a secret weapon for creating creamy, protein-packed smoothies and drinks. It’s a game-changer in the kitchen!”

Kid-Friendly Cottage Cheese Meals

Cottage cheese is great for making tasty, healthy meals for kids. It’s creamy and mild, perfect for picky eaters. It’s a great choice for many recipes.

It’s perfect for breakfast, snacks, and main dishes. Cottage cheese makes meals fun and nutritious for kids. It’s a great way to add flavor and nutrition to their meals.

Breakfast Bowls with a Twist

Start the day with cottage cheese breakfast bowls. Mix it with fresh fruit and honey for a sweet treat. Add granola or nuts for a fun crunch.

Snack Time Favorites

For a quick snack, try cottage cheese with fruit or crackers. It’s a healthy, tasty option. Kids love it!

Cottage Cheese-Packed Main Dishes

Make main dishes healthier with cottage cheese. Add it to mac and cheese for extra protein. Or use it in stuffed peppers for a nutritious twist.

Cottage Cheese for KidsNutritional BenefitsEasy Recipes
Cottage cheese is a great source of protein, calcium, and other essential nutrients that support a child’s growth and development.High in protein Excellent source of calcium Contains probiotics for gut health Low in fat and caloriesFruit and Honey Cottage Cheese Parfait Cottage Cheese Mini Muffins Cottage Cheese and Veggie Stuffed Peppers

Use cottage cheese to make meals fun and healthy for kids. It’s versatile and packed with nutrients. It’s a great way to ensure your kids are well-nourished.

Conclusion

In this detailed look at cottage cheese recipes, we’ve seen how versatile and nutritious it is. It can be used in everything from breakfast to desserts. This shows how well it fits into many different dishes.

Looking to add more protein to your diet? Or want to try new recipes? Cottage cheese has lots of healthy and tasty options. It makes your meals, snacks, and even baked goods more flavorful and nutritious.

Ready to try out cottage cheese in your cooking and baking? We suggest you get creative and enjoy the many ways it can improve your meals. Bon appétit!

FAQ

What is the nutritional value of Delicious Cottage Cheese Recipes?

Cottage cheese is packed with nutrients. It’s rich in protein and low in fat. It also has important vitamins and minerals like calcium and vitamin B12. Adding it to your diet can boost your protein intake.

How can I use cottage cheese in cooking and baking?

Cottage cheese is very versatile. You can use it in both sweet and savory dishes. It’s great as a base for breakfast bowls, smoothies, and dips. It’s also a key ingredient in cheesecakes, muffins, and breads.

What is the best way to store cottage cheese?

Keep cottage cheese fresh by storing it in an airtight container in the fridge. It’s best to use it within 5-7 days after opening for the best taste and quality.

Are there any health benefits to eating Cottage Cheese Recipes ?

Yes, cottage cheese has many health benefits. It’s a top source of protein, which helps build and maintain muscles. It’s also low in calories and fat, making it good for weight management. Plus, it’s rich in calcium and other nutrients that are good for your bones.

How can I incorporate cottage cheese into my child’s diet?

There are many ways to make cottage cheese fun for kids. You can mix it into smoothies or top it with fruit and honey. It’s also great as a dip for veggies or whole-grain crackers. You can even add it to baked goods like muffins or pancakes for extra nutrition.

Are you tired of the same old meals? Cottage cheese can change that! It’s a nutritional powerhouse that can make your breakfast, lunch, and dinner exciting. Find 15 tasty cottage cheese recipes to inspire you.

Irresistible Dessert Cup Recipes to Satisfy Your Cravings

dessert cup recipes​

What makes the perfect dessert cup recipe? Is it the mix of flavors, how easy it is to make, or how it looks? We’ve got you covered with our tasty and simple dessert cups. Our recipes are made to satisfy your cravings and wow your loved ones with little effort. We’ll show you both classic and new dessert cup ideas.

Our easy dessert cups are perfect for any time, like parties or just because. They’re great for both newbies and seasoned bakers. We’ll help you make your own irresistible dessert cups.

Key Takeaways

  • Discover a variety of delicious dessert cup recipes to satisfy your cravings
  • Learn how to create easy dessert cups with minimal effort
  • Explore classic and innovative dessert cup recipes
  • Find the perfect dessert cup recipe for any occasion
  • Get inspired to create your own unique dessert cup creations
  • Impress your friends and family with beautiful and delicious dessert cups
  • Enjoy the world of dessert cup recipes with our easy and delicious options

Understanding the Art of Dessert Cup Making

To make tasty and pretty mini dessert cups, you need to know the basics. You’ll need mini muffin tins, piping bags, and different tips. These tools help you make your dessert cups special for any event.

For homemade dessert cups, you must have the right ingredients. These include flour, sugar, and butter. They are the base for many cup ideas, like vanilla or chocolate. Here’s what you’ll need to start:

Essential Equipment and Tools

  • Mini muffin tins
  • Piping bags
  • Variety of tips
  • Mixing bowls
  • Measuring cups and spoons

Knowing the right serving sizes is also key. It makes sure each cup has just the right amount. This makes them easy to serve and enjoy.

Basic Ingredients You’ll Need

Here are the basic ingredients for homemade dessert cups:

  • Flour
  • Sugar
  • Butter
  • Eggs
  • Vanilla extract

By learning how to make dessert cups and using these ingredients and tools, you can create many tasty and beautiful mini dessert cups. They’re great for any event.

Classic Dessert Cup Recipes for Beginners

Starting with classic dessert cup recipes is a great idea. They are simple and need just a few ingredients. Our fillings are made from cream, sugar, and fruit. They’re perfect for hot days or if you don’t bake.

Popular recipes include cheesecake, tiramisu, and chocolate mousse. They’re easy to make and don’t need much equipment. You can also add your own twist by using different flavors and ingredients.

Here are some tips for making classic dessert cup recipes:

  • Use high-quality ingredients, such as fresh fruit and real chocolate, to ensure the best flavor.
  • Follow the recipe carefully and don’t skip any steps.
  • Experiment with different flavors and ingredients to find your favorite combinations.

No-bake dessert cups are perfect for beginners. They’re easy to make and don’t need much equipment. You can use fillings like cheesecake or chocolate mousse and customize them. With these recipes, you can make delicious treats for any occasion.

Dessert Cup RecipeIngredientsDifficulty Level
Cheesecakecream, sugar, eggs, vanilla extractEasy
Tiramisuladyfingers, mascarpone cheese, espresso, sugarMedium
Chocolate Moussechocolate, cream, sugar, eggsEasy

No-Bake Dessert Cup Creations

No-bake dessert cups are a fun way to make desserts. They let you create tasty and pretty treats easily. Our recipes are great for those looking to try something new. You can make stunning dessert cups that will wow your loved ones.

Some popular no-bake dessert cup ideas include:

  • Chocolate mousse cups, made with rich and creamy chocolate and topped with whipped cream or chocolate shavings
  • Berry cheesecake cups, featuring a mix of fresh berries and a creamy cheesecake filling
  • Tiramisu cups, with layers of ladyfingers, mascarpone cheese, and espresso

These recipes are not just yummy but also look amazing. You can mix different flavors and ingredients to make many kinds of dessert cups. They’re perfect for any event, from parties to holidays.

Our no-bake dessert cups offer great taste and look. They’re perfect for any dessert menu. Whether you’re new to baking or experienced, our recipes will inspire you to make something special.

Dessert Cup RecipeIngredientsPresentation Ideas
Chocolate Mousse CupsChocolate, whipped cream, chocolate shavingsTop with whipped cream and chocolate shavings, garnish with fresh fruit
Berry Cheesecake CupsFresh berries, cheesecake filling, graham cracker crustTop with fresh berries, garnish with mint leaves or edible flowers
Tiramisu CupsLadyfingers, mascarpone cheese, espressoLayer ladyfingers and mascarpone cheese, top with cocoa powder or chocolate shavings

Innovative Edible Cup Ideas

Explore the world of tasty dessert cups, where creativity has no limits. You can pick from many edible cups to make unique treats. From cookie cups to cake cups, the options are endless.

Picture a party where everyone enjoys their favorite desserts in edible cups. These cups can be made from chocolate, vanilla, or red velvet. Our ideas are great for parties, special events, or just a fun treat. Fill these cups with cheesecake, chocolate mousse, or other desserts for a sweet treat.

  • Cookie cups: made from your favorite cookie dough, these cups are perfect for filling with ice cream or whipped cream
  • Cake cups: made from cake mix, these cups can be filled with a range of desserts, from cheesecake to chocolate mousse
  • Chocolate cups: made from melted chocolate, these cups are perfect for filling with creamy desserts like pudding or mousse

With these ideas, you can make dessert cups that wow your friends and family. So, why not get creative and start making your own edible cups today?

Decadent Chocolate-Based Dessert Cup Recipes

Indulge in the richness of chocolate with our decadent dessert cup recipes. They are perfect for satisfying any sweet tooth. These easy dessert cups are great for impressing friends and family with minimal effort. We have a range of dessert cup recipes, from dark chocolate to white chocolate options, to suit every taste.

Our dessert cup recipes are easy to follow and require minimal ingredients. They are perfect for any occasion. Whether you’re a chocolate lover or just looking for a quick and delicious treat, our dessert cup recipes are sure to please. With their rich, velvety texture and deep, satisfying flavor, these dessert cups are the perfect way to cap off any meal.

Dark Chocolate Variations

For those who prefer a deeper, more intense chocolate flavor, our dark chocolate variations are the perfect choice. We offer a range of flavors, including espresso, orange, and mint. These dessert cups are sure to satisfy even the most discerning palate.

White Chocolate Options

Our white chocolate options offer a lighter, sweeter take on the classic dessert cup. With flavors like vanilla, strawberry, and lemon, these dessert cups are perfect for those who prefer a milder chocolate flavor.

Mixed Chocolate Delights

For those who can’t decide between dark and white chocolate, our mixed chocolate delights offer the best of both worlds. These dessert cups combine rich, dark chocolate and sweet, white chocolate. They are sure to please even the most discerning chocolate lover.

Try our easy dessert cups today and discover a world of rich, decadent flavor. With our simple recipes and minimal ingredients, you can create a variety of delicious dessert cups in no time. So why wait? Indulge in the sweetness of our dessert cup recipes and satisfy your cravings with our decadent chocolate-based dessert cup recipes.

Dessert Cup RecipeIngredientsPrep Time
Dark Chocolate VariationDark chocolate, heavy cream, sugar10 minutes
White Chocolate OptionWhite chocolate, vanilla, strawberry15 minutes
Mixed Chocolate DelightDark chocolate, white chocolate, lemon12 minutes

Seasonal Fruit Dessert Cup Inspirations

Exploring dessert cups means focusing on fresh ingredients, especially seasonal fruits. With mini dessert cup ideas, you can make fruit-filled cups for any event. Our homemade dessert cups use fresh fruit and simple ingredients, ideal for a healthy snack.

Popular fruits for dessert cups include strawberries, blueberries, and raspberries. Mixing different fruits can create unique tastes. Here are some seasonal fruit dessert cup ideas:

  • Strawberry and cream dessert cups
  • Blueberry and lemon dessert cups
  • Raspberry and chocolate dessert cups

When making your own homemade dessert cups, choose fresh, quality ingredients. Be creative with presentation by using various cups, garnishes, and toppings. These mini dessert cup ideas will wow your guests with your cooking skills.

Follow these tips and ideas to make tasty, healthy seasonal fruit dessert cups. They’re great for any occasion, whether you need a quick dessert or a special treat. Our homemade dessert cups are the ideal choice.

FruitFlavor ProfilePairing Suggestions
StrawberriesSweet and tangyWhipped cream, chocolate shavings
BlueberriesTart and fruityLemon zest, vanilla ice cream
RaspberriesSweet and tartDark chocolate, fresh mint

Professional Presentation Tips for Dessert Cups

To make your dessert cups look amazing, focus on presentation. Learn how to garnish, find cool plating ideas, and store them well. This will make your no-bake dessert cups truly special.

For garnishing, use fresh fruits, nuts, or chocolate shavings. They add color and texture. To plate, arrange your dessert cups on a decorative tray or stand. This makes them look great and appealing to guests.

Storing your dessert cups right is key. Use airtight containers or cupcake boxes. Label them with the date and what’s inside. These tips will help you make beautiful and tasty dessert cups that wow everyone.

Garnishing Techniques

  • Use fresh fruits, such as strawberries or blueberries, to add a burst of flavor and color
  • Experiment with different types of nuts, like almonds or walnuts, for added texture
  • Try using chocolate shavings or sprinkles to give your dessert cups a festive touch

Plating Ideas

Arrange your dessert cups on a decorative tray or stand to create a stunning display

Consider using a themed platter or cake stand to match your occasion or event

Make-Ahead Party Dessert Cup Ideas

Planning a party or special event means you need tasty and eye-catching treats. Creative dessert cup recipes can make your dessert table stunning. With some planning, you can prepare party dessert cups that look great and taste even better.

The look of your dessert table is key. You can make it elegant by garnishing with fresh fruits or nuts. Here are some ideas to start:

  • Use different colors and textures to make your dessert cups interesting.
  • Try various shapes and sizes of dessert cups to add depth to your table.
  • Edible flowers or leaves can add a whimsical touch to your dessert cups.

By following these tips and being creative, you can create a dessert table that wows your guests.

A well-planned dessert table can make all the difference in creating a memorable and enjoyable party or event. With a little creativity and planning, you can create a beautiful and delicious dessert table that will be the talk of the party.

Conclusion: Creating Your Perfect Dessert Cup Experience

The world of dessert cups is endless. By learning to make them, you can create treats that excite your taste and wow your guests. Our recipes and tips help you start making your dream dessert cups.

Success comes from trying new things, enjoying the process, and showing your unique style. Mix old favorites with new ideas, use fresh fruits, and show off your chocolate skills. Soon, you’ll make dessert cups that everyone will love.

So, why wait? Start making your own dessert cups today. Let them be the star of your next party. Your friends and family will be amazed by your baking skills. Bon appétit!

FAQ

What are the essential equipment and tools needed to make dessert cups?

To make dessert cups, you’ll need mini muffin tins, piping bags, and different piping tips. Also, basic baking ingredients like flour, sugar, and butter are necessary.

What are some common serving sizes and portions for dessert cups?

Dessert cups usually serve in mini or bite-sized portions. They range from 2 to 4 ounces per cup. The size can change based on the recipe and the event.

What are some classic dessert cup recipes for beginners?

Beginners can start with classic recipes like cheesecake, tiramisu, and chocolate mousse. These recipes are simple and use ingredients like cream, sugar, and fruit.

What are some no-bake dessert cup creations?

No-bake dessert cups include chocolate mousse, berry cheesecake, and tiramisu. They’re great for those who don’t bake.

What are some innovative edible cup ideas?

Innovative ideas include cookie cups and cake cups. These can be filled with various desserts.

What are some decadent chocolate-based dessert cup recipes?

Decadent options include dark, white, and mixed chocolate desserts. These are perfect for chocolate fans.

What are some seasonal fruit dessert cup inspirations?

Seasonal fruit cups use fresh fruits. They’re healthy and delicious for any event.

What are some professional presentation tips for dessert cups?

For professional looks, use garnishes, creative plating, and storage tips. These help make your dessert cups stunning.

What are some make-ahead party dessert cup ideas?

For parties, prepare creative and appealing dessert cups ahead. They’re perfect for any event.

Indulge in Guilt-Free High Protein Desserts

high protein dessert recipes​

Can you have your cake and eat it too, without feeling guilty? Now, with high protein dessert recipes, you can. These desserts let you enjoy sweet treats while keeping your body healthy. The demand for protein-rich foods has led to many tasty and nutritious desserts.

Let’s dive into the world of high protein desserts. We’ll find out about the many options, ingredients, and recipes. You can make delicious and healthy treats like chocolate mousse or Greek yogurt parfaits. And the best part? You can enjoy them without worrying about your diet.

Key Takeaways

  • High protein dessert recipes offer a guilt-free way to satisfy your sweet tooth
  • Healthy dessert ideas are now a reality with the rise of protein-rich foods
  • Guilt-free desserts can be both delicious and nutritious
  • High protein desserts can help support dietary goals
  • Innovative recipes and ingredients make high protein desserts a exciting option

The Revolution of High Protein Desserts

Desserts are changing, with more people wanting protein-rich treats. These treats are sweet but also nutritious. They’re a healthier choice for indulging.

Health-conscious consumers are driving this change. They’re looking for low sugar desserts that are tasty and nutritious. Now, there are many options like protein-enhanced cakes and Greek yogurt parfaits.

  • Increased satiety and reduced cravings for unhealthy snacks
  • Improved muscle growth and repair
  • Enhanced weight management
  • Support for overall health and well-being

Adding protein to desserts makes them better for us. Whether you’re into fitness or just want healthier sweets, there’s something for everyone.

Essential Ingredients for Protein-Rich Desserts

Creating tasty and healthy high protein snack recipes starts with the right ingredients. You’ll need protein powders, nuts, seeds, and dairy products. It’s important to pick high-quality options to get the best results.

Popular choices for protein dessert recipes include whey protein, casein protein, almond milk, and Greek yogurt. These add protein to help muscles grow and repair. You can mix them with fruits, nuts, and seeds for a variety of healthy desserts.

Here are some key ingredients for protein-rich desserts:

  • Protein powders: whey protein, casein protein, and plant-based options like pea and rice protein
  • Nuts and seeds: almonds, chia seeds, and flaxseeds
  • Dairy products: Greek yogurt, cottage cheese, and milk
  • Fruits: berries, bananas, and apples

Using these ingredients in your high protein snack recipes and protein dessert recipes lets you make many tasty treats. Whether you need a quick snack or a rich dessert, the right ingredients are key.

IngredientProtein ContentCalories
Whey Protein25g per scoop120
Greek Yogurt20g per cup100
Almonds6g per ounce161

Best High Protein Dessert Recipes for Beginners

Enjoy tasty high protein desserts without guilt. These treats are great for beginners. They use simple ingredients and methods. You’ll find creamy mousses and crunchy cookie dough bites for everyone.

Protein Chocolate Mousse

This dessert is rich and creamy, perfect for satisfying your sweet tooth. It’s made with Greek yogurt, protein powder, and dark chocolate. This mousse is a delicious, high protein dessert that’s easy to make.

Greek Yogurt Parfait

Make a healthy dessert by layering Greek yogurt, fresh berries, and granola. It’s a no-bake protein dessert ideal for hot days. You can add your favorite toppings and flavors.

Protein Cookie Dough Bites

These treats are made with protein powder, peanut butter, and oats. They’re easy to make and don’t need baking. You can add your favorite mix-ins, like chocolate chips or nuts.

These recipes are great for beginners who want to make delicious high protein desserts. They use simple ingredients and methods. So, why not try making these tasty treats and enjoy the sweet side of healthy living?

DessertProtein ContentCalories
Protein Chocolate Mousse30g200
Greek Yogurt Parfait20g150
Protein Cookie Dough Bites15g100

Decadent No-Bake Protein Treats

Enjoy easy high protein desserts that are perfect for hot summer days or for those who don’t like to bake. No-bake protein treats are a great way to satisfy your sweet tooth and get the protein you need. You can make everything from no-bake protein bars to protein puddings and cheesecakes.

Some popular protein-packed sweet treats include:

  • No-bake protein bars made with rolled oats, nuts, and protein powder
  • Protein puddings made with Greek yogurt, protein powder, and honey
  • Protein cheesecakes made with a cashew cream base and topped with fresh fruit

These no-bake protein treats are not only delicious but also easy to make. They require minimal ingredients. You can customize them to your taste by adding different flavors and toppings. So why not give them a try and indulge in some easy high protein desserts today?

With a little creativity, you can create protein-packed sweet treats that are both healthy and delicious. So go ahead, get creative, and indulge in some decadent no-bake protein treats!

TreatProtein ContentCalories
No-bake protein bar20g200
Protein pudding30g250
Protein cheesecake40g300

Baked High Protein Dessert Masterpieces

Explore the world of high protein desserts, where healthy treats come alive. Baking is an art that needs precision and patience. But with the right ingredients and techniques, you can make delicious and nutritious desserts.

Baked high protein desserts offer endless choices. You can make everything from rich protein brownies to creamy protein cheesecakes. Here are some tips to help you get started:

  • Use high-quality protein powder as a substitute for some of the flour in your recipes.
  • Choose healthy fats like nuts and seeds to add flavor and texture.
  • Don’t be afraid to experiment with different flavors and ingredients to create unique and delicious high protein dessert recipes.

Some popular baked high protein dessert masterpieces include:

Protein Brownies

These treats are rich and fudgy. They’re made with protein powder, nuts, and seeds, making them a healthy option.

Protein Cheesecake

This dessert is creamy and indulgent. It’s made with protein powder, Greek yogurt, and healthy fats, making it a great high protein choice.

Protein Muffins

These muffins are delicious and nutritious. They’re made with protein powder, nuts, and seeds, making them a great option for a healthy breakfast or snack.

With these tips and recipes, you can make delicious and healthy high protein desserts. So why not get baking and explore the world of high protein dessert recipes?

DessertProtein ContentCalories
Protein Brownies20g200
Protein Cheesecake30g300
Protein Muffins15g150

Seasonal High Protein Dessert Specialties

Exploring guilt-free desserts means looking at the seasons for inspiration. Protein dessert recipes let us make tasty, healthy treats for any time.

Some favorite seasonal desserts include:

  • Summer fruit salads with Greek yogurt and nuts
  • Winter warm spices like cinnamon and nutmeg in protein cookie dough bites
  • Spring floral flavors like lemon and lavender in protein cheesecakes

These desserts are great for any special event. With the right ingredients, you can make many healthy, delicious protein desserts.

Using seasonal ingredients in your protein desserts makes them unique and exciting. So, why not try making some new guilt-free desserts today?

SeasonPopular FlavorsProtein Dessert Recipes
SummerFruit, citrusGreek yogurt parfaits, protein smoothie bowls
WinterWarm spices, chocolateProtein cookie dough bites, protein brownies
SpringFloral, lemonProtein cheesecakes, protein muffins

Quick Five-Minute Protein Desserts

For those with a sweet tooth and a busy schedule, easy high protein desserts are a game-changer. These quick treats can be prepared in just five minutes. They’re perfect for a post-workout snack or a late-night craving. High protein snack recipes are not only delicious but also provide the necessary protein to support muscle growth and repair.

Some popular options for quick protein desserts include:

  • Protein smoothie bowls made with Greek yogurt, frozen fruit, and a scoop of protein powder
  • Microwave protein cakes that can be cooked in just one minute and topped with nuts or seeds
  • Instant protein puddings that can be mixed with milk or water and chilled in the fridge for a few minutes

These easy high protein desserts are perfect for anyone looking for a quick and delicious way to satisfy their sweet tooth. With high protein snack recipes, you can indulge in your favorite treats without compromising on nutrition.

DessertPrep TimeProtein Content
Protein Smoothie Bowl5 minutes30-40 grams
Microwave Protein Cake1 minute20-30 grams
Instant Protein Pudding2 minutes15-25 grams

With these quick and easy high protein desserts, you can enjoy a guilt-free treat that supports your fitness goals. Whether you’re a fitness enthusiast or just looking for a healthier dessert option, high protein snack recipes are the way to go.

Smart Substitutions for Healthier Desserts

Making smart substitutions is key to healthier desserts. Choosing the right ingredients can cut sugar and boost nutrition. This is crucial for those seeking low sugar or protein-rich desserts.

Natural Sweetener Options

Using natural sweeteners is a simple way to make desserts healthier. Honey, maple syrup, and stevia are great alternatives to sugar. They add flavor and offer nutritional benefits. Honey, for instance, has antibacterial properties, while maple syrup is rich in manganese and zinc.

Protein Powder Selection Guide

Choosing the right protein powder is vital. With many options, picking the best can be tough. Look for the type of protein, amino acid profile, and any added ingredients. Whey, casein, and plant-based proteins like pea and rice are popular choices.

Flour Alternatives

Using flour alternatives can also help. Almond flour, coconut flour, and oat flour are good options. They add texture and flavor while providing nutritional benefits. Almond flour is rich in healthy fats and protein, while coconut flour is high in fiber.

By making these substitutions, you can create healthier desserts. Whether you’re after low sugar or protein-rich treats, these changes can help you meet your goals.

Natural SweetenerCalories per tablespoonNutritional benefits
Honey64Antibacterial properties, vitamins, and minerals
Maple syrup64Minerals like manganese and zinc, antioxidants
Stevia0Zero calories, natural sweetener, may help lower blood pressure

Common Mistakes to Avoid When Making Protein Desserts

When making high protein dessert recipes, watch out for common mistakes. Overmixing can make your desserts tough and dense. To fix this, mix ingredients just until they’re combined, then stop.

Using low-quality ingredients is another mistake. It can lower the nutritional value of your healthy dessert ideas. Pick high-quality protein powders, nuts, and seeds for tasty and nutritious desserts. Here are some common mistakes to avoid:

  • Underbaking or overbaking, which can affect the texture and consistency of your desserts
  • Not using the right ratio of ingredients, which can throw off the balance of flavors and textures
  • Not storing your desserts properly, which can cause them to become stale or spoiled

Knowing these mistakes helps you make high protein dessert recipes that are both delicious and healthy. Always use top-notch ingredients, mix just enough, and store desserts right to keep them fresh.

With practice and patience, you can make amazing healthy dessert ideas. They’ll satisfy your sweet tooth without hurting your diet. So, get creative and try out new high protein dessert recipes today!

MistakeEffectSolution
OvermixingTough and dense textureMix ingredients just until combined
UnderbakingSoft and raw textureBake for the recommended time
Low-quality ingredientsCompromised nutritional valueChoose high-quality protein powders and nuts

Conclusion: Embracing the Sweet Side of Healthy Living

Discovering guilt-free desserts and protein dessert recipes changes how we enjoy sweet treats. Adding high-quality protein makes them both tasty and healthy. This shows that you can have both healthy and delicious desserts at the same time.

If you love fitness, health, or just enjoying treats, this guide is for you. It gives you the tools to make guilt-free desserts that fit your diet. You can make quick treats or fancy baked goods, all while staying healthy.

Finding the right mix of taste, texture, and nutrition is key. With a little creativity, you can make desserts that are both sweet and good for you. This way, you get to enjoy treats and also get more protein.

Now, it’s time to get creative and make your own protein dessert recipes. You’ll make desserts that are not only delicious but also healthy. Enjoy the sweet side of healthy living and feel great about it.

FAQ

What are the benefits of adding protein to desserts?

Adding protein to desserts can help you feel full longer. It also supports muscle health and keeps blood sugar stable. This makes protein-rich desserts a smart choice for a healthy lifestyle.

What are some common high-protein ingredients used in desserts?

Common high-protein ingredients include protein powder, Greek yogurt, and cottage cheese. Nuts, seeds, and nut butters are also great options. They boost protein in your desserts without losing flavor or texture.

What are the best high-protein desserts for beginners to try?

Beginners should try protein chocolate mousse, Greek yogurt parfait, and protein cookie dough bites. These recipes are simple, need few ingredients, and are great for starting with protein-rich desserts.

How can I make traditional desserts healthier by adding protein?

To make desserts healthier, swap flour for protein-rich options and use natural sweeteners. Add protein with nuts, seeds, and protein powder. This way, you can enjoy tasty, nutritious desserts.

What are some common mistakes to avoid when making protein-rich desserts?

Avoid overmixing, underbaking, and using low-quality ingredients. Follow recipes well, measure ingredients accurately, and choose top-notch protein sources. This ensures your desserts are moist, flavorful, and good for you.

Tantalize Your Tastebuds with These Mango Dessert Recipes

mango dessert recipes

What makes the perfect mango dessert recipes? Is it the mangoes’ sweetness, the creativity, or something else? There are many delicious mango desserts to choose from. You can find the perfect recipe to match your taste.

From classic to fusion-style treats, mango desserts offer endless possibilities. They are perfect for anyone who loves mangoes and desserts.

Whether you’re a beginner or an experienced baker, mango desserts are for you. They let you impress your friends and family with your cooking skills. So, why wait? Explore mango dessert recipes and enjoy the sweetness of mangoes in your desserts.

Key Takeaways

  • Explore a variety of mango dessert recipes to delight your palate
  • Discover the sweetness of mangoes in delicious mango desserts
  • Find the perfect mango dessert recipes to suit your taste
  • Impress your friends and family with your culinary skills
  • Learn how to tantalize your tastebuds with mango dessert recipes
  • Get inspired by the creativity of dessert making with mangoes

The Magic of Mangoes in Dessert Making

Mangoes are a versatile fruit great for many desserts. From simple salads to complex cakes, they’re perfect. With easy mango dessert ideas, you can make delicious treats for any occasion.

Choosing the right mango variety is key for homemade mango dessert recipes. There are many types, each with its own flavor and texture. Alphonso, Ataulfo, and Haden are some popular ones. Knowing about these varieties helps you make a variety of tasty desserts.

Selecting the Perfect Mangoes for Desserts

When picking mangoes for desserts, think about the flavor and texture you want. Alphonso mangoes are sweet and creamy, great for mango ice cream and pudding. Ataulfo mangoes are sweet and tangy, perfect for mango salsa and salad.

Understanding Mango Varieties and Their Uses

Here are some popular mango varieties and their uses in dessert making:

  • Alphonso: perfect for desserts like mango ice cream and mango pudding
  • Ataulfo: perfect for desserts like mango salsa and mango salad
  • Haden: perfect for desserts like mango cake and mango tart

Essential Tools for Mango Dessert Preparation

To make delicious mango desserts, you’ll need a few tools. A sharp knife, a cutting board, and a blender are must-haves. With these, you can create a variety of easy mango dessert ideas and homemade mango dessert recipes for any event.

ToolDescription
Sharp KnifeUsed to cut and chop mangoes
Cutting BoardUsed to chop and prepare mangoes
BlenderUsed to blend mangoes into a smooth puree

Classic Mango Dessert Recipes You Need to Try

Looking for best mango dessert recipes? There are a few classic options that are hard to beat. These traditional desserts are great for impressing friends and family. With these recipes, you’ll make delicious mango desserts that everyone will love.

Some top picks include mango sorbet, mango tart, and mango creme brulee. These desserts are tasty and easy to make. They require just a few ingredients and basic kitchen tools. Whether you’re an experienced baker or new to it, these recipes are a fantastic starting point.

To begin, you’ll need fresh mangoes, sugar, and cream. You can also add spices or nuts for extra flavor. Here are some tips for making these classic mango desserts:

  • Use fresh, ripe mangoes for the best flavor
  • Don’t overmix your ingredients, as this can create a tough or dense texture
  • Experiment with different spices and flavorings to create unique and delicious variations

Follow these tips and try out these classic mango dessert recipes. You’ll soon be making delicious and impressive best mango dessert recipes that everyone will enjoy.

No-Bake Mango Treats for Hot Summer Days

Summer heat makes baking a chore. No-bake mango treats are perfect for these days. They’re cool, refreshing, and easy to make. You don’t need many ingredients, making them great for anyone looking for a simple tropical dessert.

Try quick mango puddings, frozen mango delights, or mango parfaits. These treats are not only tasty but also refreshing. You can prepare them ahead of time and keep them chilled. They’re ideal for summer gatherings or barbecues.

Quick Mango Pudding Ideas

  • Mango pudding with coconut milk and toasted nuts
  • Mango pudding with yogurt and honey
  • Mango pudding with cream and fruit sauce

Frozen Mango Delights

Frozen mango treats are perfect for hot days. You can make mango ice cream, popsicles, or smoothies. These are great for cooling down and are loved by both kids and adults.

Mango Parfait Variations

Mango parfaits are an easy way to enjoy a tropical dessert. Layer mango with yogurt, granola, and honey for a healthy treat. Or, use cream, fruit sauce, and nuts for a richer dessert.

TreatIngredientsPrep Time
Mango PuddingMango, coconut milk, toasted nuts10 minutes
Frozen Mango Ice CreamMango, cream, sugar20 minutes
Mango ParfaitMango, yogurt, granola, honey15 minutes

Fusion-Style Mango Desserts

Fusion-style desserts are a fun way to mix different flavors and ingredients. They’re perfect for those who want to try something new and exciting.

Some popular fusion-style mango desserts include mango salsa, mango chutney, and mango curry. These desserts will wow your friends and family with their unique tastes. Here are a few ideas to get you started:

  • Mango salsa with a hint of spice, perfect for topping ice cream or yogurt
  • Mango chutney with a blend of Indian spices, great for serving with naan or as a side dish
  • Mango curry with a creamy coconut milk base, ideal for a warm and comforting dessert

These refreshing mango dessert recipes are just a few examples of the many delicious fusion-style desserts you can create. With a little experimentation and creativity, you can come up with your own unique flavor combinations and ingredients.

Tips for Creating Perfect Mango Desserts Every Time

Creating delicious mango desserts requires a few key tips. It’s important to use fresh, high-quality ingredients and avoid common mistakes. By following these tips, you’ll make mouth-watering mango desserts that will impress everyone.

Fresh, ripe mangoes are crucial for perfect mango desserts. It’s also key to store and preserve your desserts properly. This keeps them fresh for longer and improves their quality and texture.

Common Mistakes to Avoid

  • Using overripe or unripe mangoes
  • Incorrect storage and preservation techniques
  • Poor presentation and plating

Avoiding these mistakes will help you create impressive mango desserts. With the right ingredients and techniques, you can make everything from classic mango pies to innovative fusion desserts. Success comes from using fresh ingredients and following proper techniques.

Storage and Preservation Guidelines

To keep your mango desserts fresh, follow proper storage and preservation. Store them in a cool, dry place and use airtight containers. This prevents moisture and contaminants from affecting your desserts. By doing this, you can enjoy your mango desserts for days.

Healthy Alternatives in Mango Dessert Recipes

Looking for easy mango dessert ideas? There are many healthy options beyond traditional sweets. Try making homemade mango desserts with natural sweeteners and wholesome ingredients. This way, you can enjoy your favorite mango treats without feeling guilty.

Some healthy alternatives to consider include:

  • Sugar-free mango sorbet made with fresh mango puree and a touch of honey
  • Gluten-free mango cake made with almond flour and coconut sugar
  • Vegan mango pudding made with plant-based milk and natural sweeteners

These homemade mango desserts are great for anyone who wants a sweet treat without dietary worries. With a bit of creativity, you can make delicious and healthy mango desserts for any occasion.

Choosing easy mango dessert ideas and making homemade mango desserts lets you enjoy mango’s sweet taste while staying healthy. So, why not try these healthy options and explore a world of tasty and nutritious mango desserts?

“Healthy eating is not just about cutting out unhealthy foods, it’s about adding in nutritious and delicious options like homemade mango desserts.”

Mango DessertIngredientsHealth Benefits
Sugar-free Mango SorbetFresh mango puree, honeyLow in calories, high in fiber
Gluten-free Mango CakeAlmond flour, coconut sugarGluten-free, low in carbs
Vegan Mango PuddingPlant-based milk, natural sweetenersDairy-free, high in protein

Seasonal Mango Dessert Ideas

As the seasons change, so do the chances to enjoy tasty mango desserts. With a bit of creativity, you can make sweet mango treats for any season. From summer treats to holiday desserts, mangoes can be a key ingredient in many desserts.

Looking for the best mango dessert recipes? Think about the season and what flavors are in. For example, summer is great for mango sorbet or a cool mango salad. In winter, try mango crisps or bread pudding to warm up by the fire.

Summer Specials

Summer is mango season, and there are many ways to enjoy them. Some favorite summer mango desserts include:

  • Mango salsa with fresh fruit and whipped cream
  • Mango ice cream with a sprinkle of sea salt
  • Grilled mango with a dollop of vanilla ice cream

Holiday Mango Treats

Holidays are a great time to get creative with mango desserts. Try making:

  • Mango trifle for a festive holiday dessert
  • Mango cheesecake with a graham cracker crust
  • Mango creme brulee with a caramelized sugar crust

With a little imagination, you can make sweet mango treats for any season. Whether you’re searching for best mango dessert recipes or just want to try something new, there are endless ways to enjoy mangoes in your desserts.

Pairing Suggestions for Mango Desserts

Enjoying tropical mango desserts is even better with the right pairings. Try pairing your favorite mango desserts with wine, cheese, or nuts. These options make for a unique and exciting dessert experience.

Here are some popular pairing suggestions for mango desserts:

  • Mango sorbet with a dry Riesling wine
  • Mango cheesecake with caramel sauce and toasted nuts
  • Mango tart with whipped cream and fresh fruit

These pairings show how versatile mango desserts can be. They offer a variety of flavors for everyone’s taste.

If you’re after refreshing mango dessert recipes, try pairing with milk or ice cream. The creamy texture and sweetness of milk or ice cream go well with mango’s tropical flavor. It makes for a delicious and refreshing treat.

Conclusion: Embracing the Sweet World of Mango Desserts

Our journey through mango dessert recipes has shown us endless possibilities. Whether you love classic desserts or want to try new delicious mango desserts, this guide has helped you. It’s given you the tools to make your desserts stand out.

Fresh mangoes bring vibrant, tangy flavors to your treats. Mango-infused desserts offer creamy indulgence. The fruit’s versatility is clear. By choosing the right mango and using its unique traits, you can make desserts that wow everyone.

Now, dive into the world of mango desserts and let your creativity shine. Try new recipes, mix different flavors, and add your twist to classics. With the tips from this guide, you’re ready to impress your friends and family with every bite.

FAQ

What are the best mango varieties for desserts?

For desserts, choose mangoes that are sweet, creamy, and firm. Alphonso, Ataulfo (also known as Champagne or Honey mangoes), and Kent mangoes are great options.

How can I tell if a mango is ripe and ready for dessert?

Check if a mango is ripe by gently squeezing it. It should be soft but still firm. The skin should be vibrant and golden-yellow, without blemishes.

What are some essential tools for preparing mango desserts?

You’ll need a sharp knife, a sturdy cutting board, a blender or food processor, and a mango pitter or peeler.

Can I use frozen mangoes for desserts?

Yes, frozen mangoes work well for desserts. They’re convenient and cost-effective, especially when fresh mangoes are out of season. Just thaw them first.

How can I store leftover mango desserts?

Store leftover mango desserts in an airtight container in the fridge for 3-5 days. For longer storage, freeze them for 2-3 months.

What are some healthy alternatives to traditional mango desserts?

Try sugar-free mango sorbet, mango chia pudding, or mango smoothie bowls. These options use natural sweeteners for a healthier treat.

How can I pair mango desserts with other flavors?

Mango desserts pair well with coconut, lime, ginger, cardamom, and even chili or herbs. Mixing flavors can create unique and tasty mango desserts.

Easy Leftover Rotisserie Chicken Recipes

leftover rotisserie chicken recipes

Ever come home with a tasty rotisserie chicken and then wonder what to do with leftovers? Don’t let that delicious meat go to waste. Instead, turn it into a variety of tasty dishes. Easy Leftover Rotisserie Chicken Recipes is perfect for quick, easy meals that are 1 also budget-friendly.

In this article, we’ll show you simple, flavorful recipes for leftover rotisserie chicken. From classic chicken salads to warm soups and stews, we’ve got you covered. Get ready to explore the endless possibilities of this convenient kitchen staple!

Key Takeaways

  • Leftover rotisserie chicken is a versatile ingredient that can be repurposed into a variety of easy, cost-effective meals.
  • Rotisserie chicken saves time and money, making it a convenient option for busy families.
  • Rotisserie chicken is nutritious and can be used in a wide range of dishes, from salads to soups and casseroles.
  • Proper storage and reheating techniques can help maximize the shelf life and quality of leftover rotisserie chicken.
  • Experimenting with different flavors and cuisines can transform leftover chicken into exciting and family-friendly meals.

Why Rotisserie Chicken Makes the Perfect Leftover Ingredient

Rotisserie chicken is a favorite in many homes. It’s loved for its tasty flavor and how well it works as a leftover. It’s perfect for making meals that are both affordable and healthy.

Cost-Effective Meal Planning Benefits

Buying a rotisserie chicken can save you money. It’s cheaper than buying a whole chicken. Having cooked chicken ready means you can make many dishes quickly, saving time and money.

Time-Saving Advantages for Busy Families

Busy families love rotisserie chicken for its quick use. You can shred or dice it for salads, sandwiches, pasta, or casseroles. This makes meal prep fast and easy.

Nutritional Value and Versatility

Rotisserie chicken is also very nutritious. It’s full of healthy protein. You can use it in many healthy chicken recipes, from simple meals to fancy dishes.

“Rotisserie chicken is the ultimate kitchen multitasker – it’s delicious, nutritious, and endlessly adaptable. It’s the secret ingredient that can transform even the simplest of meals into something special.”

Essential Tips for Storing and Reheating Rotisserie Chicken

Leftover rotisserie chicken is a treasure trove of flavors. It’s perfect for many dishes. But, to keep it safe and tasty, you must store and reheat it right.

Storing Rotisserie Chicken:

  • Put the chicken in a sealed container or bag in the fridge within 2 hours.
  • Eat it within 3-4 days for the best taste and safety.
  • Freeze it in a sealed container or bag for up to 4 months.
  • Don’t let the chicken sit at room temperature for over 2 hours. Bacteria can grow fast.

Reheating Rotisserie Chicken:

  1. Heat your oven to 400°F (200°C).
  2. Put the chicken in a dish and cover it with foil to keep it moist.
  3. Reheat for 10-15 minutes, or until it’s 165°F (75°C) inside.
  4. You can also shred the chicken and heat it in a skillet or microwave, stirring often, until warm.

By using these food safety, chicken storage, and reheating techniques, your leftover rotisserie chicken stays fresh and delicious. It’s perfect for many tasty recipes.

“Proper storage and reheating of leftover rotisserie chicken are key to maximizing its versatility and preserving its quality.”

Quick and Easy Chicken Salad Variations

Leftover rotisserie chicken is great for making many tasty chicken salads. You can choose from a classic mayo version or something new. These ideas are perfect for a quick, healthy lunch or a no-cook meal.

Classic Mayo-Based Chicken Salad

This classic chicken salad uses shredded rotisserie chicken, mayonnaise, celery, onion, and spices. You can serve it on greens, whole-grain bread, or crackers. It’s a quick and tasty meal.

Mediterranean Style Chicken Salad

Try this Mediterranean chicken salad for a fresh twist. It has shredded chicken, cucumber, cherry tomatoes, olives, feta, and a lemon-herb dressing. It’s full of flavor.

Asian-Inspired Chicken Salad

For an international taste, try the Asian-inspired chicken salad. It mixes chicken with mandarin oranges, almonds, snap peas, and a sesame-ginger dressing. It’s crunchy and zesty.

Chicken Salad VariationKey IngredientsServing Suggestions
Classic Mayo-BasedRotisserie chicken, mayonnaise, celery, onion, seasoningsGreens, whole-grain bread, crackers
MediterraneanRotisserie chicken, cucumber, tomatoes, olives, feta, lemon-herb dressingPita, salad greens, whole-grain crackers
Asian-InspiredRotisserie chicken, mandarin oranges, snap peas, almonds, sesame-ginger dressingLettuce wraps, rice cakes, or served over mixed greens

These chicken salad recipes are great for a quick, healthy lunch or a no-cook meal. With leftover rotisserie chicken, you can make a new chicken salad every day.

Comforting Chicken Soups and Stews

Comfort food is all about warmth and nourishment. A hearty chicken soup or stew is hard to beat. Luckily, leftover rotisserie chicken is perfect for making homemade chicken soup, one-pot meals, and other comfort food recipes.

Shredded rotisserie chicken is a delicious base for many soups and stews. Just add your favorite veggies, grains, and broth. You’ll have a complete, satisfying meal.

  1. For a classic homemade chicken soup, mix the chicken with carrots, celery, onions, and egg noodles in chicken broth.
  2. Make a hearty one-pot meal by adding wild rice, mushrooms, and spinach to the chicken.
  3. Try a spicy comfort food recipe like chicken tortilla soup. It has shredded chicken, black beans, corn, and chili peppers.
DishKey IngredientsTime to Prepare
Chicken Noodle SoupRotisserie chicken, carrots, celery, onions, egg noodles, chicken broth30 minutes
Chicken and Wild Rice StewRotisserie chicken, wild rice, mushrooms, spinach, chicken broth45 minutes
Chicken Tortilla SoupRotisserie chicken, black beans, corn, chili peppers, tortilla chips40 minutes

There are endless ways to turn leftover rotisserie chicken into comforting meals. With a bit of creativity and simple ingredients, you can enjoy homemade chicken soup, one-pot meals, and more comfort food recipes.

Leftover Rotisserie Chicken Recipes for Busy Weeknights

Weeknights can be tough, especially when you’re short on time. But, leftover rotisserie chicken can save the day. It lets you make tasty, family-friendly meals fast. Try these quick dinner ideas and make them part of your family’s favorites.

15-Minute Chicken Quesadillas

Turn leftover rotisserie chicken into a tasty quesadilla. Shred the chicken and mix it with cheese. Then, grill or pan-fry until crispy and melted. Add salsa or guacamole for a full meal in 30 minutes.

Quick Chicken Alfredo Pasta

Make a creamy, comforting dish with your chicken. Mix shredded chicken with homemade Alfredo sauce and pasta. This easy chicken Alfredo recipe is ready in under 20 minutes. It’s perfect for busy weeknights.

Easy Chicken Fried Rice

Use leftover chicken in a tasty fried rice dish. Cook the chicken with veggies, rice, and spices. This 15-minute meal is a hit with the whole family.

These rotisserie chicken recipes show you can have great meals even on the busiest nights. With a few ingredients and a bit of effort, dinner is ready fast.

Healthy Bowl Creations with Shredded Chicken

Want to make tasty and healthy meals with leftover rotisserie chicken? Power bowls are the answer! They let you mix and match ingredients to create balanced meals. Plus, they’re a great way to use up shredded chicken.

Begin with a base of whole grains like quinoa, brown rice, or farro. Add a big helping of the tender chicken on top. Then, get creative with fresh veggies. Choose from crisp greens, roasted sweet potatoes, crunchy carrots, or juicy cherry tomatoes.

Don’t forget the dressing to make your bowl even better. A tangy vinaigrette or a creamy yogurt sauce can tie all the flavors together. These meals are also easy to prep ahead, making them perfect for busy weeks.

Turn that leftover chicken into a nutritious power bowl. These meals are not only tasty but also keep you full and energized. Be creative, try new ingredients, and enjoy these balanced meals with meal prep ideas in mind.

Family-Friendly Chicken Casseroles

Rotisserie chicken makes classic meals into comforting family favorites. These easy recipes are great for weeknights and weekend gatherings. They’re perfect for busy families.

Cheesy Chicken and Rice Bake

This creamy casserole is loved by all. It mixes shredded chicken, rice, cheese, and sauce. It’s ready in 30 minutes. Serve with a salad for a meal everyone will love.

Buffalo Chicken Casserole

Make dinner exciting with this buffalo chicken casserole. It has chicken in buffalo sauce, ranch dressing, and breadcrumbs. It’s a tasty, easy meal.

Broccoli Chicken Casserole

This casserole is full of broccoli and chicken. It’s a healthy, tasty dish. The cheesy sauce and crumb topping make it a hit.

RecipePrep TimeCook TimeServings
Cheesy Chicken and Rice Bake10 mins30 mins4-6
Buffalo Chicken Casserole15 mins45 mins6-8
Broccoli Chicken Casserole20 mins50 mins4-6

These one-dish meals are easy and perfect for families. They’re quick to prepare and cook. They’re also great for freezing and reheating later.

International Dishes Using Leftover Chicken

Having leftover rotisserie chicken is a great thing. It’s not just for classic American dishes. You can use it in many global cuisine and fusion recipes. Try turning your leftover chicken into these tasty international dishes.

For a Mexican flavor, shred the chicken and mix it with spices, salsa, and cheese. It makes easy chicken enchiladas. Or, add it to a chicken tortilla soup with avocado, tortilla strips, and lime.

For Asian tastes, stir-fry the chicken with veggies, soy sauce, and sesame oil. It’s quick and tasty. You can also use it in Thai red curry or Malaysian coconut chicken.

For a Mediterranean twist, mix the chicken with olive oil, lemon, garlic, and herbs. It’s perfect for chicken shawarma wraps. Or, mix it with feta, olives, and tomatoes for a Greek chicken salad.

There are countless ways to use leftover rotisserie chicken in international dishes and fusion recipes. With a few ingredients, you can explore the world’s flavors. Enjoy a wide range of ethnic food options.

Low-Carb and Keto-Friendly Chicken Recipes

Following a keto diet or low-carb lifestyle doesn’t mean you have to give up taste or creativity. Leftover rotisserie chicken is great for making tasty and healthy high-protein recipes. These recipes fit well with your diet.

Chicken Lettuce Wraps

Turn leftover chicken into a quick, easy keto-friendly meal. Shred the chicken and serve it in crisp lettuce leaves. Add your favorite low-carb toppings like avocado, diced cucumber, and a tangy dressing. This makes for a refreshing and filling lunch or dinner.

Cauliflower Rice Chicken Bowls

Replace traditional rice with riced cauliflower for a low-carb and nutritious option. Mix the shredded chicken with cauliflower rice, sautéed veggies, and a creamy sauce. This creates a wholesome and protein-rich meal.

RecipeCarbs (per serving)Protein (per serving)
Chicken Lettuce Wraps5g25g
Cauliflower Rice Chicken Bowls8g30g

Using leftover rotisserie chicken in these keto-friendly and low-carb recipes lets you enjoy tasty meals. These meals support your dietary goals without losing flavor or nutrition.

Meal Prep Ideas for the Week Ahead

Meal prepping with leftover rotisserie chicken is a game-changer for busy families. It makes mealtime easier and more enjoyable. By starting the week with a few simple steps, you can enjoy tasty and healthy meals all week. This way, you avoid the daily stress of planning and cooking meals.

Start by shredding or dicing the leftover chicken and storing it in airtight containers. This versatile ingredient can be used in many dishes. From quick quesadillas and pasta bakes to hearty soups and flavorful fried rice, the possibilities are endless.

  • Portion the shredded chicken into single-serve containers for easy grab-and-go lunches or dinners.
  • Create a batch of chicken salad by mixing the shredded meat with your favorite dressing, vegetables, and seasonings.
  • Combine the chicken with pre-chopped vegetables, cooked grains, and sauces to assemble nutrient-dense power bowls.

By spending a little time at the start of the week, you’ll have many time-saving and organized meal planning options. Enjoy the ease of batch cooking with rotisserie chicken. You’ll have a variety of wholesome and delicious meals all week.

“Meal prepping with leftover rotisserie chicken is a game-changer for busy families.”

Conclusion

Leftover rotisserie chicken is a great way to save money and reduce waste. It can turn simple meals into something special. This makes cooking fun and helps you feed your family well.

Using rotisserie chicken is smart because it cuts down on food waste. You can make tasty soups, stews, and quick meals with it. It’s a great way to use up extra food.

Getting creative with rotisserie chicken opens up a world of flavors. You can make everything from chicken salad to keto-friendly dishes. It’s a versatile ingredient that lets you try new things in the kitchen.

FAQ

What are the benefits of using leftover rotisserie chicken?

Leftover rotisserie chicken is great for saving time and money. It’s perfect for busy families. You can use it in many dishes, making meals easy and affordable.

How do I properly store and reheat leftover rotisserie chicken?

Keep leftover rotisserie chicken fresh by storing it in an airtight container in the fridge for up to 4 days. When reheating, make sure it reaches 165°F. This keeps its taste and texture good.

What are some quick and easy chicken salad variations I can make with leftover rotisserie chicken?

You can make tasty chicken salads with leftover rotisserie chicken. Try a classic mayo-based salad, a Mediterranean-style one, or an Asian-inspired version. These are healthy and don’t require cooking.

What are some comforting soup and stew recipes I can make with leftover rotisserie chicken?

Leftover rotisserie chicken is perfect for making hearty soups and stews. These one-pot meals are great for cold weather.

What are some quick and easy dinner recipes I can make with leftover rotisserie chicken?

Use leftover rotisserie chicken to make fast dinners like chicken quesadillas, chicken alfredo pasta, and chicken fried rice. These can be ready in under 30 minutes.

How can I create healthy and balanced meals with leftover rotisserie chicken?

Leftover rotisserie chicken is a great base for nutritious power bowls. Add grains, veggies, and your favorite dressings to make complete meals.

What are some family-friendly chicken casserole recipes I can make with leftover rotisserie chicken?

Make delicious casseroles with leftover rotisserie chicken. Try cheesy chicken and rice, buffalo chicken, or broccoli chicken. These are great for freezing and reheating.

How can I use leftover rotisserie chicken in international dishes?

Leftover rotisserie chicken is perfect for international dishes. Use it in enchiladas, curry, and stir-fries for flavorful meals.

What are some low-carb and keto-friendly recipes I can make with leftover rotisserie chicken?

For low-carb or keto diets, use leftover rotisserie chicken in chicken lettuce wraps and cauliflower rice bowls. These dishes are protein-rich and fit specific diets.

How can I incorporate leftover rotisserie chicken into my meal prep routine?

Leftover rotisserie chicken is great for meal prep. Portion and store it for quick meals all week. It saves time and reduces waste.

Delectable Sourdough Dessert Recipe: A Sweet Twist

sourdough dessert recipe

What makes a sourdough dessert recipe special? Is it the unique flavor, the ease of making it, or the joy of sharing it with others? We’ll explore the best sourdough dessert recipes that are easy to make and full of flavor. From classic treats to new creations, we’ll discover the secrets to making the perfect easy sourdough dessert.

Key Takeaways

  • Discover the benefits of using sourdough in desserts for a unique flavor and texture
  • Learn the basics of creating a sourdough dessert recipe from scratch
  • Explore the best sourdough dessert recipes for beginners and experienced bakers
  • Get tips for making easy sourdough dessert recipes that are perfect for any occasion
  • Understand the importance of using high-quality ingredients in sourdough dessert recipes
  • Find inspiration for creating your own unique sourdough dessert recipes
  • Learn how to troubleshoot common issues with sourdough dessert recipes

Understanding the Magic of Sourdough in Desserts

Sourdough is not just for bread anymore. It’s now a key ingredient in homemade sourdough desserts. With patience and practice, anyone can make amazing sourdough dessert ideas that wow everyone.

Great sourdough desserts start with knowing the fermentation science. This process uses the starter’s yeast and bacteria to break down sugars. This makes the dough unique and delicious. For instance, a sourdough cake recipe uses starter instead of yeast, making it moist and flavorful.

The Science Behind Sweet Sourdough

The fermentation process is what makes sourdough special. It lets the dough ferment longer, breaking down sugars and creating complex flavors. This method can be used for many homemade sourdough desserts, like cakes, cookies, and pastries.

Benefits of Using Sourdough in Desserts

Sourdough desserts offer unique flavors and textures. They also last longer and are often healthier, with less sugar and more fiber. Some tasty sourdough dessert ideas include sourdough chocolate cake, apple pie, and cinnamon rolls.

How Fermentation Enhances Flavor

The fermentation process is key to sourdough’s taste and texture. It breaks down sugars, creating complex flavors. This makes for a variety of sourdough cake recipe options, like vanilla, chocolate, and red velvet.

DessertIngredientsFermentation Time
Sourdough CakeFlour, sugar, eggs, sourdough starter24 hours
Sourdough CookiesFlour, sugar, butter, sourdough starter12 hours
Sourdough PastriesFlour, sugar, eggs, sourdough starter48 hours

Essential Tools and Ingredients for Sourdough Desserts

To make tasty sourdough bread desserts, you need the right tools and ingredients. A digital scale, stand mixer, and glass bowls are key for measuring and mixing. High-quality flour, sugar, and yeast are must-haves for sweet sourdough recipes.

You can also try different flavors like vanilla, chocolate, or nuts. This will help you create unique sourdough starter dessert recipes.

Here are some key ingredients to keep in mind:

  • Flour: Choose a high-protein flour, such as bread flour or all-purpose flour, for the best results.
  • Sugar: White granulated sugar or brown sugar can be used, depending on the desired flavor.
  • Yeast: While sourdough starter is the primary leavening agent, a small amount of commercial yeast can help with fermentation.

For beginners, getting a good sourdough starter is crucial. You can either make your own or buy one from a trusted supplier. With the right tools and ingredients, you’ll be ready to make delicious sourdough desserts.

When looking for ingredients, visit local bakeries or specialty stores. This ensures your sourdough desserts are light, fluffy, and full of flavor. With practice and patience, you’ll master making delicious sourdough desserts.

IngredientQuantityNotes
Flour2 cupsHigh-protein flour recommended
Sugar1 cupWhite granulated or brown sugar
Yeast1 tspCommercial yeast for fermentation

Preparing Your Sourdough Starter for Sweet Recipes

To make an easy sourdough dessert, you need a ready sourdough starter. This means feeding it the right stuff and keeping a regular schedule. A well-fed starter is crucial for tasty homemade desserts.

Think about the flour you use for your starter. Mixing all-purpose flour with whole wheat flour adds depth to your desserts. Use this mix and keep your feeding schedule consistent.

Feeding Schedule for Sweet Applications

For sweet recipes, you might need to change your starter’s feeding schedule. Try feeding it every 4-6 hours to make it more lively and bubbly.

Testing Starter Readiness

To check if your starter is ready, just drop some into water. If it floats, it’s good to go. If it sinks, it needs more time.

Adjusting Hydration Levels

Changing your starter’s hydration can affect your dessert’s texture. More water makes it tender, while less makes it denser. Play with hydration levels to find your favorite texture.

Hydration LevelResult
HighTender crumb
LowDenser texture

The Perfect Sourdough Dessert Recipe for Beginners

Making a tasty sourdough dessert recipe starts with the basics. A best sourdough dessert needs a healthy sourdough starter. This starter is the key to any sourdough recipe. To make a delicious sourdough cake recipe, mix your starter with flour, sugar, and eggs.

Customizing your sourdough dessert recipe is fun. Try adding fruits, nuts, or spices for a unique flavor. For instance, you can make a sourdough cake recipe with apples and cinnamon. Or, a best sourdough dessert with chocolate and nuts.

  • Use a digital scale to measure your ingredients accurately
  • Keep your sourdough starter at room temperature to ensure it’s active and healthy
  • Don’t overmix your dough, as this can lead to a dense and tough texture

Follow these tips and try different flavors. You’ll make a best sourdough dessert that will wow your friends and family.

Mastering Sweet Sourdough Techniques

To make a tasty sourdough bread dessert, you need to learn some key techniques. One important step is folding the dough right. This helps the dough develop and makes it soft. When you’re making a sourdough starter dessert, fold the dough softly. This prevents the dough from becoming too dense and hard.

Temperature control is also crucial when making sweet sourdough recipes. The dough’s temperature and the room’s temperature affect how it ferments. Keeping the temperature between 75°F and 78°F is best for fermentation. This ensures your sourdough starter dessert ferments well.

Proper Folding Methods

  • Fold the dough gently to avoid over-developing the gluten
  • Use a gentle folding technique to create a tender crumb
  • Avoid over-folding, which can lead to a dense and tough texture

Temperature Control

Keeping the temperature steady is key for fermentation. The best temperature for fermentation is between 75°F and 78°F. This temperature helps the sourdough starter ferment evenly, making your dessert delicious. By mastering these techniques and using a sourdough starter dessert recipe, you can make many sweet sourdough recipes that will wow everyone.

TechniqueImportanceTips
Proper FoldingDevelops glutenFold gently, avoid over-folding
Temperature ControlRegulates fermentationMaintain consistent temperature

Creative Flavor Combinations and Add-ins

Exploring sourdough desserts opens up a world of possibilities. You can mix and match flavors and add-ins to make unique treats. Fruits, nuts, and spices can turn simple recipes into something special.

Dried fruits, nuts, and spices are great for adding flavor. Try using brown sugar or honey for a richer taste. For example, a sourdough apple crisp with cinnamon and walnuts is perfect for fall.

Start by listing your favorite ingredients. Then, mix and match them to find new flavors. Look at other desserts for ideas, like cakes or pies. This way, you can create your own unique sourdough desserts.

Try making sourdough chocolate chip cookies, banana bread, or cinnamon rolls. These are great for beginners. You can add your favorite ingredients to make them even better. Sourdough desserts are a fun way to get creative in the kitchen.

Troubleshooting Common Sourdough Dessert Challenges

Making a sourdough dessert can sometimes come with challenges. These issues can affect how your dessert turns out. It’s important to quickly find and fix these problems to get the best results.

Understanding how to solve common problems is key. This includes texture issues, flavor problems, and managing fermentation times. These are all important for a perfect sourdough cake.

Spotting trouble early is crucial. If your dessert isn’t rising, it might be a fermentation issue. Temperature control is vital in fermentation. Small changes in temperature can greatly affect your dessert’s texture.

  • Check the expiration dates of your ingredients to ensure they are fresh and effective.
  • Verify that your sourdough starter is healthy and active before using it in your recipe.
  • Monitor the fermentation process closely, making adjustments as needed to achieve the desired texture and flavor.

By following these tips, you can make a delicious sourdough dessert. This will let you enjoy the unique flavors of this traditional baking method.

Advanced Sweet Sourdough Variations

Looking to level up your sourdough bread dessert game? Try advanced sweet sourdough recipes. Mixing different flours, like whole wheat or rye, into your starter can add depth to your creations.

Want to make your sourdough even more special? Try unique flavor combos. Here are some ideas:

  • Pair sourdough with fresh fruits like strawberries or blueberries
  • Add a touch of spice, like cinnamon or nutmeg, to your recipes
  • Use honey or maple syrup instead of regular sugar for a richer taste

Remember, practice is key when trying new things. Your first attempts might not be perfect. But keep at it, and you’ll soon master the art of sourdough desserts.

Exploring new sourdough recipes can lead to amazing desserts. They’ll wow your friends and family. So, don’t be shy to experiment and discover new flavors.

Sourdough VariationIngredientsFlavor Profile
Strawberry SourdoughStrawberries, sugar, flourSweet, fruity, tangy
Cinnamon SourdoughCinnamon, sugar, flourWarm, spicy, comforting

Storage and Preservation Tips

Keeping your easy sourdough dessert fresh is crucial. To keep your homemade treats in top shape, proper storage is key. Freezing is a great way to preserve your desserts. It keeps their texture and taste just right for later.

Freezing your desserts is easy. Just wrap them well in plastic or foil and put them in a freezer bag. When you want to eat them, thaw at room temperature or reheat in the oven. Here’s a simple guide:

  • Wrap your dessert tightly to prevent freezer burn
  • Label and date your frozen desserts for easy identification
  • Store your frozen desserts at 0°F (-18°C) or below

Freezing isn’t the only way to keep your desserts fresh. You can also store them in the fridge or at room temperature for up to 3 days. But for longer storage, freezing is best. By following these tips, you can enjoy your desserts longer and try out new recipes.

Seasonal Sourdough Dessert Ideas

As seasons change, so do flavors and ingredients in sourdough desserts. A good recipe can fit any season, making it versatile. Use seasonal ingredients for unique and tasty flavors.

In summer, try fresh fruits like strawberries or blueberries in your sourdough cake. These fruits’ sweetness and tanginess match sourdough’s slight sourness. For winter, warm spices like cinnamon and nutmeg add coziness to your desserts.

Summer Favorites

  • Strawberry sourdough shortcake
  • Blueberry sourdough muffins
  • Lemon sourdough pound cake

Holiday Specialties

  • Pumpkin sourdough bread with cream cheese frosting
  • Cranberry sourdough cake with orange zest
  • Gingerbread sourdough cookies with icing

Fall and Winter Comfort Desserts

In colder months, warm desserts are key. Use apples or pears in your recipe for a cozy treat. A sourdough cake with caramelized apples and cinnamon is perfect for a chilly fall night.

SeasonFlavorsIngredients
SummerStrawberry, blueberry, lemonFresh fruits, citrus zest
WinterCinnamon, nutmeg, gingerWarm spices, apples, pears

Transforming Traditional Desserts into Sourdough Versions

Want to make your desserts stand out? Try turning traditional treats into sourdough delights. This method uses a sourdough starter to add a tangy taste and a moist feel. It’s a way to mix up old favorites and make them new again.

Using sourdough in desserts brings enhanced flavor and improved texture. You can make cakes, cookies, and pastries with sourdough starter. When you change traditional recipes to sourdough, remember to adjust the flour and liquid ratios. Also, give it more time to ferment.

Here are some tips for making traditional desserts into sourdough treats:

  • Start by replacing a portion of the flour with sourdough starter dessert
  • Adjust the amount of liquid in the recipe to achieve the right consistency
  • Allow for a longer fermentation time to develop the flavors and texture

Follow these tips and try out different sourdough recipes. You’ll make desserts that are both tasty and unique. Whether you’re an experienced baker or just starting, sourdough desserts can add fun to your baking.

Conclusion: Embracing the Art of Sourdough Dessert Making

Our journey into sourdough desserts has shown us its endless possibilities. It’s perfect for both seasoned bakers and newcomers. Making sourdough desserts is a fun and creative adventure.

Learning to make sourdough desserts takes time and practice. Every bake is a chance to get better and try new things. Be open to new ideas and don’t be scared to try new recipes.

Looking for more ideas? There are many online resources and baking communities out there. Dive in, have fun, and find the sourdough desserts you love.

FAQ

What are the benefits of using sourdough in desserts?

Sourdough desserts offer a unique taste and texture. The fermentation process makes them sweeter and more complex. They also have a tender, moist crumb.

What equipment and ingredients are needed for making sourdough desserts?

You’ll need a mixer, bowls, measuring cups, and spoons. A sourdough starter is also essential. Key ingredients include flour, sugar, butter, eggs, and your starter. You might also use vanilla, spices, or fruit.

How do I prepare my sourdough starter for sweet recipes?

Adjust the starter’s feeding schedule and hydration for sweet recipes. Feed it more often with a sugar-rich mix. You might also need to add extra water for the right consistency.

What are some common challenges when making sourdough desserts?

Achieving the right texture and managing fermentation times can be tough. Flavor issues are also common. Experiment with techniques and ingredient ratios to solve these problems.

How can I get creative with sourdough dessert flavors?

You can mix fruits, nuts, spices, and more to create unique flavors. Try different flours, sugars, and add-ins for new recipes. This way, you can make your own signature treats.

How do I properly store and preserve sourdough desserts?

Store them in an airtight container at room temperature for 3-4 days. For longer storage, freeze them. Thaw them properly before serving to keep the texture and flavor right.

Best Creamy Banana Pudding Crunch Cheesecake Recipe

banana pudding crunch cheesecake

Imagine a dessert that mixes the creamy joy of a homemade banana pudding Crunch cheesecake with a crunchy Southern crust. This creamy banana dessert is a mix of classic tastes, ideal for those who love a Southern dessert fusion. But what makes this recipe special? Find out how to make the perfect crunchy cheesecake crust that goes great with the smooth banana cheesecake filling.

Key Takeaways

  • Discover the secrets to creating a mouthwatering fusion of banana pudding and cheesecake
  • Learn how to achieve the perfect balance of creamy texture and crunchy crust
  • Unlock the techniques for incorporating fresh bananas into a luscious cheesecake filling
  • Explore the Southern-inspired roots of this indulgent dessert
  • Uncover the tips and tricks for preventing common baking issues and ensuring professional results

Introduction to Banana Pudding Crunch Cheesecake

The mix of banana pudding and cheesecake has created a new dessert. It’s a blend of old favorites, showing how desserts evolve. This mix offers a unique taste experience.

History of Combining Classic Desserts

The story of this dessert starts with banana pudding and cheesecake. Banana pudding is a Southern favorite, loved for years. Cheesecake, with its creamy taste, is enjoyed globally. When people started mixing these, the Banana Pudding Crunch Cheesecake was born.

Why This Recipe Stands Out

This unique cheesecake recipe stands out because it combines the best of both worlds. It has a creamy cheesecake base and crunchy elements, like banana pudding. The addition of fresh bananas and creamy pudding makes it a must-try for dessert lovers.

“The Banana Pudding Crunch Cheesecake is a culinary masterpiece that pays homage to the timeless classics while offering a unique and indulgent twist.”

Essential Ingredients for Perfect Results

Making the ultimate ripe bananas, cream cheese, and vanilla wafers banana pudding crunch cheesecake is all about the right ingredients. The creamy heavy cream and the rich pudding mix are key. They help get the perfect texture and flavor.

Choosing fresh ripe bananas is crucial. They add natural sweetness and color to the filling. Look for bananas with a slight speckle on the peel for the best taste. The cream cheese should be full-fat and at room temperature for a smooth consistency. The vanilla wafers add a crunchy base that contrasts the creamy layers.

IngredientPurpose
Ripe bananasProvide natural sweetness and flavor to the filling
Cream cheeseContribute to the rich, creamy texture of the cheesecake
Vanilla wafersCreate a crunchy, flavorful base for the dessert
Heavy creamAdd a luxurious, velvety mouthfeel to the filling
Pudding mixEnhance the creamy consistency and flavor of the cheesecake

Using the finest, freshest ingredients ensures your banana pudding crunch cheesecake is irresistible. It will have a perfect texture and taste.

Kitchen Tools and Equipment Needed

To make the perfect Banana Pudding Crunch Cheesecake, you’ll need some key baking tools and optional gear. Let’s look at the must-haves and how they help make this dessert a hit.

Must-Have Baking Tools

  • A springform pan is crucial. It lets you easily remove the cheesecake without messing up its shape.
  • An electric mixer or a stand mixer with a paddle is key for a creamy cheesecake filling.
  • A food processor helps with the crunchy graham cracker base and blending the banana pudding layer.
  • An offset spatula is great for smoothing the batter and making the layers look neat.
  • A kitchen scale ensures you measure ingredients right, for consistent results.

Optional Equipment for Professional Results

While the basic tools are essential, some extra gear can make your cheesecake even better:

  1. A hand-held electric mixer is handy if you don’t have room for a stand mixer.
  2. A pastry bag and piping tips let you add fancy designs on top, making it look amazing.
  3. A culinary torch can caramelize the cheesecake’s top, adding flavor and beauty.
  4. A cake turntable helps with frosting and decorating, making it look polished.

While extra equipment can make your Banana Pudding Crunch Cheesecake look great, the basic tools are what really matter. With the right tools, you’ll make a dessert that will wow everyone.

Preparing the Signature Crunchy Base

Making the perfect crunchy base is key for a great banana pudding crunch cheesecake. You can choose between a classic graham cracker crust or a tasty vanilla wafer crust. The goal is to mix buttery richness with a satisfying crunch.

To make a graham cracker crust, just pulse graham crackers in a food processor until they’re fine crumbs. Mix the crumbs with melted butter and a bit of sugar. Press this mix into a springform pan’s bottom. Bake at 350°F for 10 minutes to set it, then cool it completely before adding the cheesecake.

Or, you can go for a vanilla wafer crust. It brings a lovely vanilla taste and a softer texture. Crush vanilla wafers in a bag or food processor, then mix with melted butter and a bit of sugar. Press it into the pan and chill it for 30 minutes before making the cheesecake.

For something different, try a no-bake crust. Mix crushed nuts like almonds or pecans with graham cracker or vanilla wafer crumbs. This mix makes a textured base that goes well with the banana cheesecake.

Whichever crust you pick, make sure to press it well into the pan. This ensures a solid base that can hold the filling’s weight. With some planning and care, you’ll get a crunchy cheesecake base that makes your banana pudding crunch cheesecake stand out.

Creating the Creamy Banana Cheesecake Filling

Making the perfect banana cheesecake filling is crucial. It’s all about getting a smooth, creamy texture and blending fresh bananas well. This will make your cheesecake incredibly tasty and indulgent.

Achieving the Perfect Texture

For a silky-smooth cheesecake batter, blend ingredients right. First, cream your cream cheese mixture until it’s light and fluffy. Then, add eggs, sugar, and sour cream one at a time, mixing well after each.

Incorporating Fresh Bananas

Use ripe, fragrant bananas for the best flavor. Mash them into a banana puree before mixing with the cheesecake batter. This spreads the banana flavor evenly. When adding the banana puree, mix gently to avoid air pockets.

Adding the Pudding Layer

To elevate your cheesecake, add a pudding swirl. Prepare vanilla pudding as directed, then place it on the cheesecake batter. Use a knife or skewer to swirl it in for a beautiful look.

Assembly and Layering Techniques

Making the perfect cheesecake layering is an art. Start with a pre-baked crust or graham cracker base. Then, layer the creamy banana cheesecake filling.

To spread the filling evenly, use a spatula. Be gentle to avoid disturbing the crust. Next, create a swirl effect with a knife or spoon. This adds beauty and texture contrast.

  1. Spread the cheesecake filling evenly over the pre-baked crust.
  2. Use a knife or spoon to create a gentle swirling pattern through the filling.
  3. Carefully smooth the top to ensure a professional-looking finish.

Chill the layered cheesecake in the fridge for at least 4 hours. Or, better yet, overnight. This lets the flavors mix and the texture set.

Layering TechniqueBenefits
Even DistributionEnsures consistent texture and flavor in every slice.
Swirling TechniquesAdds visual interest and creates a unique marbled effect.
Texture ContrastThe combination of smooth filling and crunchy base provides a delightful mouthfeel.

By using these techniques, you’ll make a cheesecake that’s stunning and delicious. It will have a perfect mix of flavors and textures in every bite.

Baking Tips and Temperature Guide

To get the perfect cheesecake baking temperature, it’s key to bake it evenly. This ensures a creamy, crack-free texture. Here are some expert tips and techniques to help your Banana Pudding Crunch Cheesecake turn out right.

Preventing Common Baking Issues

Cracks on the surface are a common problem when baking cheesecake. To avoid this, remember these tips:

  • Avoid over-mixing the batter, which can incorporate too much air and lead to cracks.
  • Use the water bath technique to bake the cheesecake in a gentle, moist environment.
  • Gradually cool the cheesecake in the oven after baking to prevent rapid temperature changes that can cause cracking.
  • Ensure even baking by placing the cheesecake in the center of the oven and rotating it halfway through the baking time.

Water Bath Methods

The water bath technique, also known as a bain-marie, is a foolproof way to bake a creamy, crack-free cheesecake. Here’s how to do it:

  1. Wrap the springform pan containing the cheesecake batter in heavy-duty aluminum foil to prevent water from seeping in.
  2. Place the wrapped pan in a larger baking dish and pour hot water into the dish, coming about halfway up the sides of the springform pan.
  3. Bake the cheesecake in the water bath at the recommended cheesecake baking temperature until the center is just set.

The moist environment created by the water bath helps the cheesecake bake slowly and evenly. This prevents cracks and ensures a smooth, creamy texture.

By following these baking tips and temperature guidelines, you’ll be well on your way to creating a show-stopping Banana Pudding Crunch Cheesecake. It’s sure to impress.

Cooling and Setting Instructions

Getting the cheesecake cooling process right is key for a delicious Banana Pudding Crunch Cheesecake. After baking, the cheesecake needs a special cooling and refrigeration step. This step is important for the right texture and a clean, professional slicing.

After baking, let the cheesecake cool completely on a wire rack before putting it in the fridge. This slow refrigeration time helps the center set and the texture firm up. It prevents cracks and a sunken middle.

  1. Let the cheesecake cool at room temperature for at least 1 hour, or until it reaches room temperature.
  2. Then, move the cheesecake to the fridge and chill for at least 4 hours, or up to 24 hours, for the best texture development.
  3. When you’re ready to serve, use a sharp knife dipped in hot water for clean, precise slicing tips. Clean the knife between each slice for a polished look.

By following these steps, your Banana Pudding Crunch Cheesecake will be perfectly set. It will have a luscious, creamy texture and look stunning.

Decorative Toppings and Presentation Ideas

Adding the final touches to your banana pudding crunch cheesecake is key to a stunning dessert. You can use whipped cream, caramelized bananas, and more. Mastering plating techniques lets you show off your skills and impress your guests.

Creative Garnishing Options

Begin by topping the cheesecake with a dollop of whipped cream. Add a sprinkle of vanilla wafer crumbs for extra flavor. Arrange fresh banana slices around the cake for a beautiful pattern.

To add a caramelized touch, cook banana slices in butter and brown sugar until they’re golden. Place these on the cheesecake for a striking contrast.

Serving Suggestions

  • Serve the banana pudding crunch cheesecake chilled to highlight the flavors.
  • Offer small plates and forks for easy serving of this rich dessert.
  • Drizzle caramel sauce or sprinkle toasted coconut on top for extra flavor.

With creative plating and garnishing, your banana pudding crunch cheesecake becomes a showstopper. It’s perfect for any special occasion.

Conclusion

Perfect for any occasion, this crowd-pleasing dessert is a hit. Its vibrant flavors and stunning look make it a standout. Your loved ones will love it and talk about it for a long time.

We invite you to try this Southern-inspired dessert and share your thoughts.

FAQ

What are the key ingredients that make this banana pudding crunch cheesecake so special?

The cheesecake’s uniqueness comes from ripe bananas, quality cream cheese, and a crunchy vanilla wafer base. These ingredients combine to create a creamy yet crunchy dessert. It perfectly balances banana and cheesecake flavors.

How do you achieve the perfect texture for this banana pudding crunch cheesecake?

To get the perfect texture, blend the cheesecake batter carefully for a smooth consistency. Adding fresh banana puree and pudding mix makes the filling creamy but structured. The crunchy vanilla wafer crust contrasts beautifully with the soft cheesecake layers.

What is the recommended baking method for this banana pudding crunch cheesecake?

Baking the cheesecake in a water bath is recommended for the best results. This method prevents cracking and ensures even cooking. It keeps the temperature consistent, resulting in a smooth, professional-looking cheesecake.

How should the banana pudding crunch cheesecake be cooled and stored for optimal texture and flavor?

Cooling and storing the banana pudding crunch cheesecake properly is key. Let it cool slowly at room temperature and then in the fridge. This slow cooling helps it set and develop its creamy texture. Refrigerate it for at least 4 hours or overnight for the best flavor.

What are some creative topping and presentation ideas for this banana pudding crunch cheesecake?

There are many ways to enhance this cheesecake’s presentation. Try topping it with whipped cream, caramelized banana slices, or caramel sauce. Sprinkle crushed vanilla wafers or cinnamon sugar for crunch. For a professional look, pipe whipped cream swirls or arrange banana slices decoratively.