... >
Edit Content

Food That’s Made from the Heart
We’re all about turning simple ingredients into magical moments. From kitchen newbies to seasoned chefs, our recipes are designed to keep things fun and easy! Let’s cook, laugh, and eat together. 🥰

Contact Us

Simple Baby Pancake Recipe: A Fluffy Delight

baby pancake recipe

What makes a baby pancake recipe special? How can you make a simple recipe that your little one will love? A tasty baby pancake recipe is a great way to start your baby’s day.

A simple baby pancake recipe is easy to follow. It needs just a few ingredients, perfect for busy parents. We aim to give you a recipe that makes fluffy, delicious pancakes your baby will adore.

Introduction to Baby Pancakes

Our simple baby pancake recipe is easy to follow. It needs just a few ingredients. It’s perfect for parents who want a tasty, healthy breakfast for their little ones.

Key Takeaways

  • A simple baby pancake recipe can be a great way to start your baby’s day off right
  • Our simple baby pancake recipe is easy to follow and requires minimal ingredients
  • A delicious baby pancake recipe can be a great option for busy parents
  • Our goal is to provide you with a simple baby pancake recipe that is perfect for your little one
  • With this recipe, you can create fluffy and delicious pancakes that your baby will love
  • A simple baby pancake recipe is a great way to create a tasty and healthy breakfast for your baby

Why Baby Pancakes Are Perfect for Your Little One

Looking for a nutritious breakfast for your baby? An easy baby pancake recipe is a great choice. These pancakes are tasty and can be made with different ingredients to match your baby’s preferences. You can use whole wheat flour, fruits, and nuts for a healthy option.

Baby pancakes are simple to make and can be made ahead of time. This is perfect for busy parents who need a quick, healthy meal. Plus, you can try different flavors like blueberry or banana to keep breakfast exciting.

Some of the key benefits of baby pancakes include:

  • Easy to make and customize
  • Can be made with wholesome ingredients
  • Can be prepared in advance
  • Can be made in a variety of flavors

Overall, a healthy baby pancake recipe is a wonderful addition to your baby’s diet. They are easy to make and can be tailored to your baby’s tastes. This makes them a great choice for a nutritious and tasty meal.

IngredientBenefits
Whole wheat flourHigh in fiber and nutrients
FruitsRich in vitamins and antioxidants
NutsGood source of healthy fats and protein

Essential Ingredients for Baby Pancakes

To make tasty homemade baby pancakes, you need a few basic things. You’ll need flour, eggs, and milk. You can also add a bit of salt and honey for extra taste. Think about what your baby likes and needs when picking ingredients.

Here are some key ingredients to get you started:

  • 1 cup of all-purpose flour
  • 2 eggs
  • 1 cup of milk
  • A pinch of salt
  • A drizzle of honey (optional)

For a quick baby pancake recipe, you can add some extra ingredients. Try mashed banana, blueberries, or cinnamon. Always check with your pediatrician before trying new foods with your baby.

By using these ingredients and adding your own twist, you can make many tasty baby pancake recipes. Whether it’s a simple or elaborate recipe, keep it fun and simple for your little one.

Kitchen Tools You’ll Need

To make a delicious baby pancake recipe, you’ll need some essential kitchen tools. A mixing bowl, whisk, and frying pan are must-haves. When choosing a frying pan, consider a non-stick surface. This prevents pancakes from sticking and makes flipping easier.

A silicone spatula is also handy for scraping the sides of the bowl and folding ingredients together. For a baby pancake recipe, it’s best to use a small non-stick pan. This helps achieve the perfect size and texture. Here are some tools you’ll need:

  • Mixing bowl
  • Whisk
  • Non-stick frying pan
  • Silicone spatula

Having the right tools makes making a delicious baby pancake recipe easier and more enjoyable. With these tools, you’ll be able to create a tasty and healthy meal for your little one.

Remember to always use your tools safely. Follow proper cleaning and maintenance procedures to ensure they last a long time. By investing in these essential kitchen tools, you’ll be well on your way to making a delicious baby pancake recipe that your baby will love.

ToolDescription
Mixing BowlUsed to mix ingredients together
WhiskUsed to whisk eggs and mix batter
Non-stick Frying PanUsed to cook pancakes

The Perfect Baby Pancake Recipe Step by Step

To make a delicious baby pancake recipe, start by mixing the batter. Use flour, eggs, and milk. It’s important not to overmix the batter for fluffy pancakes.

Next, heat a non-stick pan over medium heat and add a bit of oil. When the pan is hot, pour in the batter. Cook until bubbles appear, then flip and cook for another minute.

  • Use fresh ingredients for the best flavor.
  • Don’t overmix the batter to ensure the pancakes are fluffy.
  • Cook the pancakes over medium heat to prevent burning.

By following these steps and tips, you can make a delicious fluffy baby pancake recipe that your baby will love. Always watch your baby while they eat. Cut the pancakes into small pieces to avoid choking hazards.

Nutritional Benefits for Your Baby

A healthy baby pancake recipe can give your little one the nutrients they need to grow. Made with wholesome ingredients, baby pancakes are a nutritious choice. An easy recipe that includes fruits, vegetables, and whole grains introduces new flavors and textures.

Some key nutritional benefits of baby pancakes are:

  • Whole grains: provide fiber, vitamins, and minerals
  • Fruits and vegetables: rich in vitamins, minerals, and antioxidants
  • Protein: essential for growth and development

To make a healthy baby pancake, use ingredients like oats, bananas, and eggs. Adding spinach, carrots, or sweet potatoes is also good. An easy recipe mixes a few ingredients and cooks on a griddle or in a pan.

Choosing a healthy baby pancake recipe helps your baby develop good eating habits. A balanced diet with fruits, vegetables, whole grains, and protein supports their health. Try an easy pancake recipe with these ingredients for a great start in life.

NutrientBenefits
Whole grainsFiber, vitamins, and minerals
Fruits and vegetablesVitamins, minerals, and antioxidants
ProteinEssential for growth and development

Storage and Reheating Guidelines

After making a delicious homemade baby pancake recipe, it’s key to store and reheat them safely. This keeps them fresh and tasty. To keep your baby safe, follow these tips for storing and reheating baby pancakes.

Refrigeration Tips

To store baby pancakes in the fridge, put them in an airtight container. Keep it at 40°F (4°C) or below. They can stay fresh for up to 3 days. When reheating, heat them to 165°F (74°C) to stop bacteria growth.

Freezing Methods

Freezing is a great way to store baby pancakes. Put them in a single layer on a baking sheet. Then, move them to a freezer-safe bag or container. To reheat, just toast or microwave them until they’re warm and fluffy.

Safe Reheating Practices

When reheating baby pancakes, use a food thermometer to check the temperature. You can reheat them in the microwave or oven. Always check the temperature to avoid overheating. By following these guidelines, you can enjoy your homemade baby pancake recipe safely with your baby.

Age-Appropriate Pancake Variations

As your baby grows, their food needs change. You can adjust a simple pancake recipe for their age and diet. Try adding mashed fruits or veggies for a tasty and healthy option.

Here are some pancake ideas for different ages:

  • For 6-8 months: Mix in mashed bananas or avocados for a creamy, nutritious pancake.
  • For 9-12 months: Add eggs, cheese, or whole wheat flour for a more complex flavor.

Make a tasty baby pancake with whole wheat flour, eggs, and milk. Add cinnamon or vanilla for a special taste.

AgeIngredientsTips
6-8 monthsMashed fruits or vegetablesUse a single-ingredient puree to introduce new flavors.
9-12 monthsEggs, cheese, whole wheat flourCombine ingredients to create a more complex flavor profile.

Follow these tips and use a simple pancake recipe. You’ll make a delicious, healthy breakfast for your baby that fits their growing needs.

Common Mistakes to Avoid

When making fluffy baby pancakes, it’s key to know common mistakes. These small errors can ruin your pancakes. To make them fluffy, avoid batter issues, temperature problems, and wrong sizes.

Using the wrong ingredient ratio can make your batter too thick or too thin. Temperature control is also crucial. It affects how long your pancakes cook and how they taste. A thermometer helps get the perfect temperature.

Batter Consistency Issues

To fix batter issues, measure ingredients right and mix just enough. Overmixing makes pancakes tough and dense.

Temperature Control Problems

Fix temperature issues by using a thermometer. Medium heat is best for fluffy pancakes.

Sizing and Portion Errors

Use a cookie scoop or 1/4 cup measuring cup for even sizes. This ensures your pancakes cook well.

Avoiding these mistakes makes your baby pancakes delicious. Use fresh ingredients and follow the recipe closely for the best results.

MistakeSolution
Batter consistency issuesMeasure ingredients accurately, mix batter just until combined
Temperature control problemsUse a thermometer to ensure right temperature
Sizing and portion errorsUse a cookie scoop or 1/4 cup measuring cup to portion out batter

Making Pancakes Fun and Interactive

Making pancakes can be a fun and interactive experience for your baby. With an easy baby pancake recipe, you can create a healthy and delicious meal together. Letting your baby help with simple tasks, like mixing the batter or flipping the pancakes, makes it enjoyable.

A healthy baby pancake recipe introduces your baby to new flavors and textures. Making it a fun experience helps create a positive association with mealtime. Here are some tips to make pancake-making a fun and interactive activity:

  • Let your baby help with measuring ingredients, such as pouring in the flour or sugar.
  • Use a kid-friendly mixing bowl and utensils to make it easy for your baby to participate.
  • Make a game out of flipping the pancakes, and see who can flip the most pancakes in a row.

By making pancake-making a fun and interactive experience, you can help create a positive and enjoyable mealtime experience for your baby. With an easy baby pancake recipe and a healthy baby pancake recipe, you can create a delicious and nutritious meal that your baby will love.

RecipeIngredientsInstructions
Easy Baby Pancake Recipe1 cup flour, 2 eggs, 1 cup milkMix ingredients, cook on pan
Healthy Baby Pancake Recipe1 cup whole wheat flour, 2 eggs, 1 cup milkMix ingredients, cook on pan

Safety Considerations and Allergen Information

When making a homemade baby pancake recipe, safety and allergen info are key. A quick recipe is handy, but safety first is always best. This ensures your baby stays healthy and happy.

Knowing common allergens is crucial. Watch out for peanuts, tree nuts, milk, eggs, fish, shellfish, wheat, and soy. If your baby has an allergy, be extra careful with new foods, like pancakes.

Common Allergens to Watch For

  • Peanuts and tree nuts
  • Milk and dairy products
  • Eggs
  • Fish and shellfish
  • Wheat and gluten
  • Soy

Serving Temperature Guidelines

When serving pancakes, keep the temperature right. Make sure they’re at least 165°F (74°C) and warm, not hot. A quick recipe helps you get this temperature safely.

By focusing on safety and allergens, you can make mealtime fun and healthy for your baby. Always put your baby’s health first. If you’re unsure, talk to your pediatrician.

AllergenPrecautions
Peanuts and tree nutsAvoid introducing these allergens until your baby is at least 3 years old
Milk and dairy productsIntroduce in small amounts and monitor for signs of allergy
EggsIntroduce in small amounts and monitor for signs of allergy

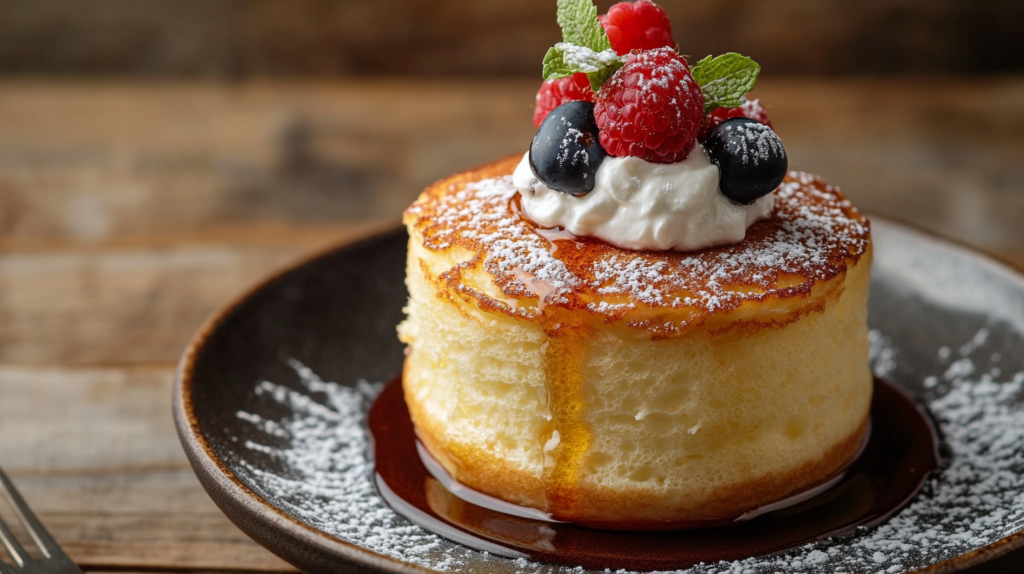
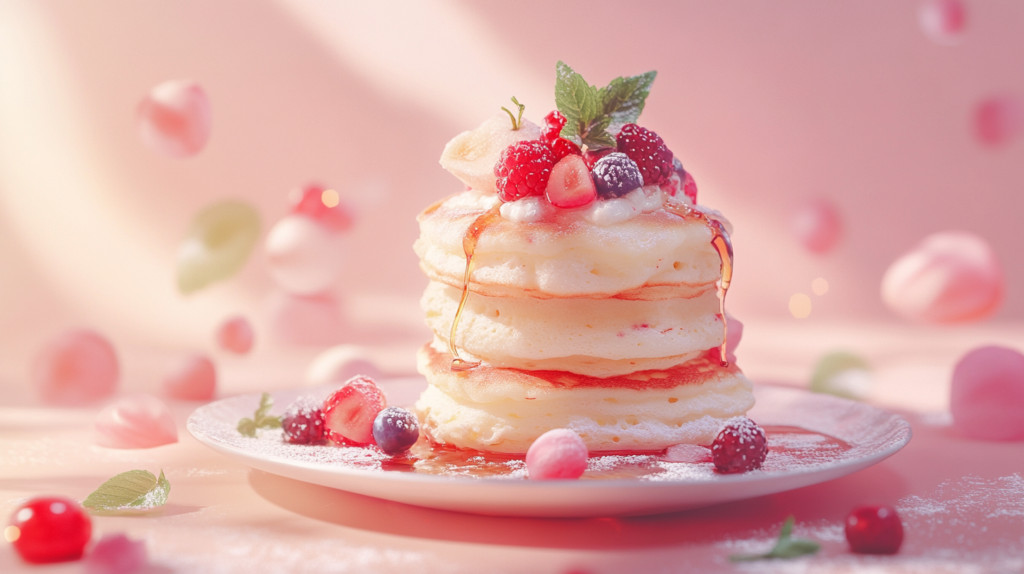
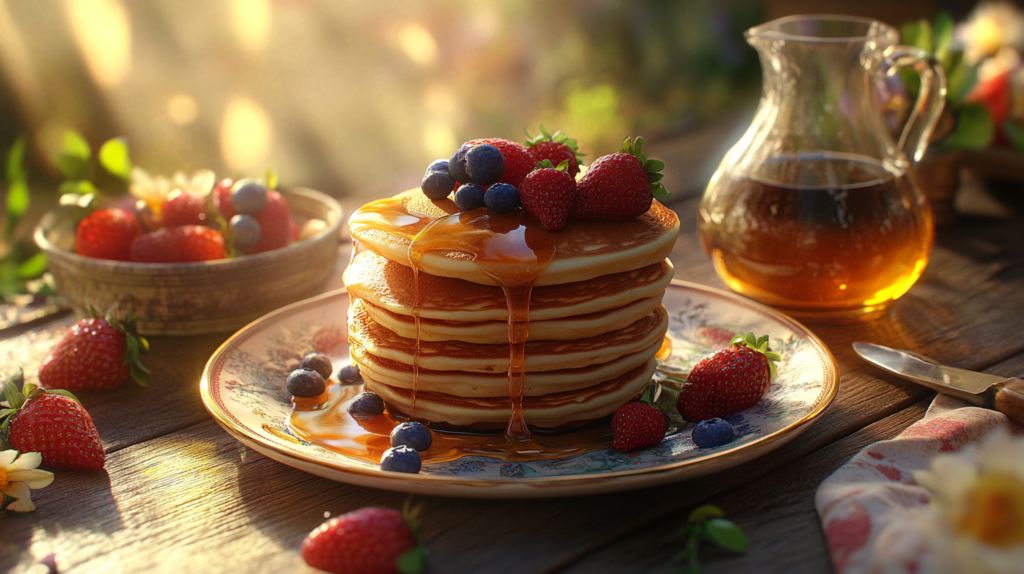
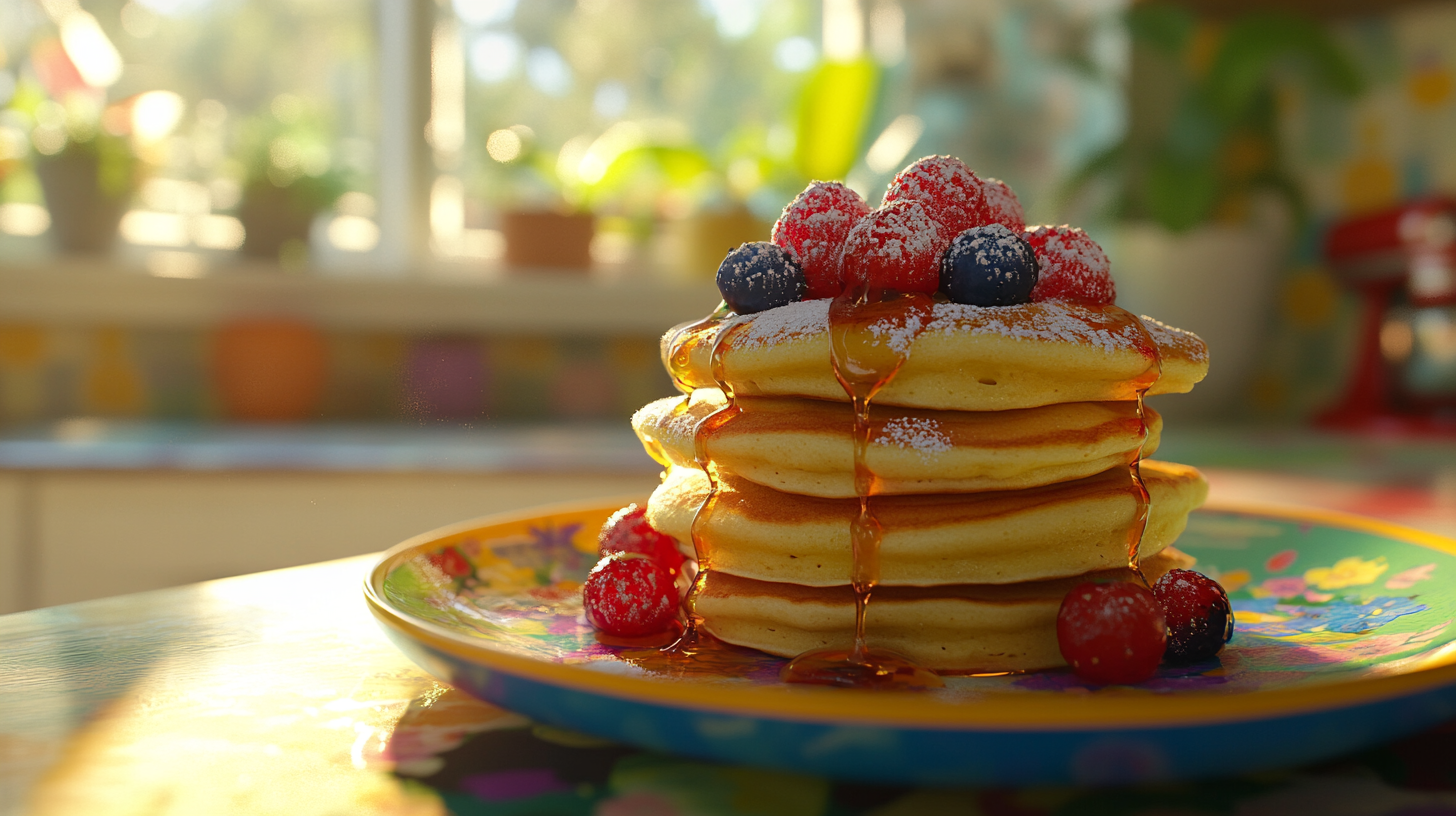
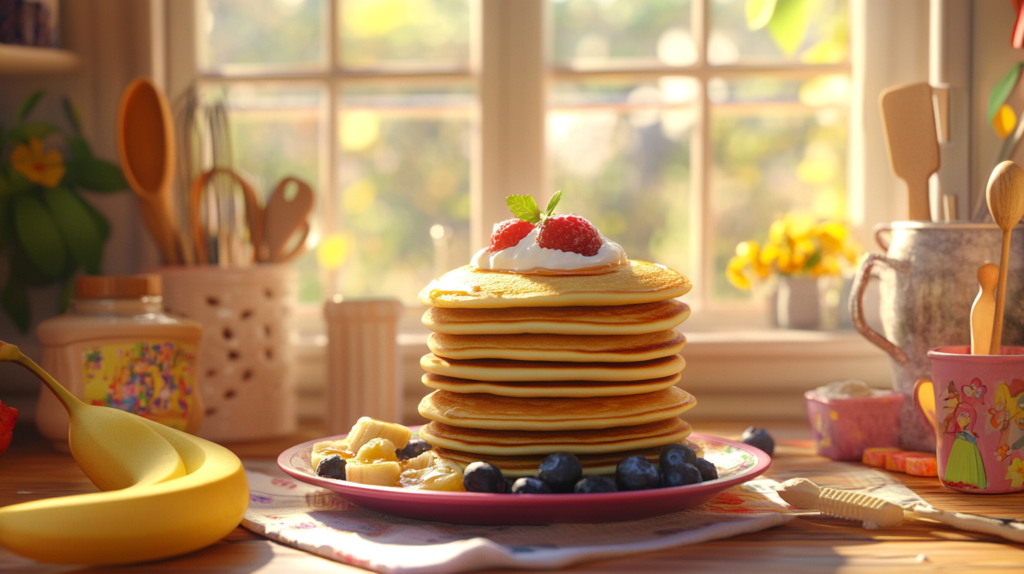
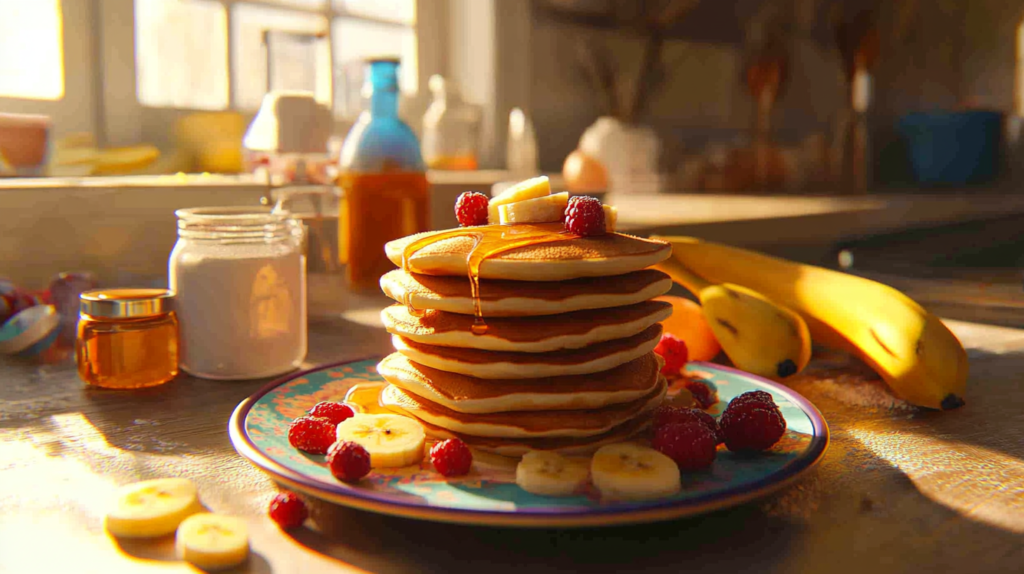
Topping Ideas and Serving Suggestions

Now that you’ve made your delicious baby pancake recipe, it’s time to get creative. You can add tasty and healthy toppings to make it even better. A simple recipe can become a feast for the eyes and taste buds.

Try using fresh fruits like blueberries or bananas. A drizzle of honey or maple syrup can also add sweetness. Whipped cream or yogurt can make the pancakes creamy and smooth.

Here are some fun ways to serve your pancakes:

  • Use a fun shape cookie cutter to cut out the pancakes
  • Serve the pancakes with a side of fresh fruit or a fruit salad
  • Try using different types of milk, such as almond or soy milk, to add variety to the recipe

Always watch your baby during meals and never leave them alone with food. A little creativity can make mealtime fun and special for your little one.

ToppingDescription
Fresh FruitsBlueberries, bananas, strawberries
Whipped Cream or YogurtAdds a creamy texture
Honey or Maple SyrupNatural sweeteners

Conclusion

Creating fluffy and nutritious baby pancake recipes is a fun task for parents and kids. Our simple guide helps you make delicious baby pancakes that your child will love. Paying attention to the batter, cooking temperature, and flipping is key.

With the right ingredients and flavors, you can make mealtime exciting. Try different toppings and serve these pancakes as part of a healthy diet. This makes mealtime fun and helps your child develop a good relationship with food.

So, become a pancake master and make batches of these fluffy baby pancakes today. Your little one will enjoy every bite, and you’ll both smile.

FAQ

What are the base ingredients for baby pancakes?

Baby pancakes need flour, baking powder, milk, eggs, and a bit of sugar or honey.

Can I add any optional ingredients to the baby pancake batter?

Yes, you can add mashed bananas, pureed fruits, cinnamon, or vanilla extract to the batter.

What kitchen tools do I need to make baby pancakes?

You’ll need a mixing bowl, whisk, frying pan or griddle, and a spatula for flipping.

How do I mix the baby pancake batter properly?

Mix the dry and wet ingredients gently until just combined. Be careful not to overmix.

What’s the ideal cooking temperature for baby pancakes?

Cook baby pancakes at 350°F to 375°F. This ensures they cook evenly and stay fluffy.

How can I make sure the baby pancakes are nutritious?

Use whole-wheat flour and reduce sugar. Add healthy ingredients like pureed fruits or veggies.

How should I store and reheat leftover baby pancakes?

Store leftover pancakes in the fridge for up to 3 days or freeze for 3 months. Reheat in the microwave or oven at low temperature.

How can I make baby pancakes age-appropriate?

Adjust size, texture, and ingredients as your baby grows. This meets their changing needs and preferences.

What are some common mistakes to avoid when making baby pancakes?

Avoid issues with batter consistency, temperature control, and sizing or portion errors.

How can I make pancake-making fun and interactive for my baby?

Let your baby help mix the batter, choose toppings, or even flip pancakes (with your help).

What safety considerations and allergen information should I be aware of?

Watch out for common allergens like dairy, wheat, and eggs. Always check the serving temperature. Consult your pediatrician if you’re unsure.

What are some tasty topping ideas for baby pancakes?

Try pureed fruits, Greek yogurt, nut butters, and a drizzle of honey or maple syrup on top.

Souffle Pancake Recipe: Achieve Heavenly Fluffiness

souffle pancake recipe

Ever wondered how to make souffle pancakes as fluffy as they look? You’re in the right spot if you want to learn. Making souffle pancakes is an art that needs the right ingredients and techniques. With a good recipe and practice, you can wow your loved ones with these heavenly pancakes.

First, learn the basics of souffle pancakes. You’ll need fresh eggs and top-notch flour. Also, mastering the folding technique is key for that light, airy texture. Stick to a reliable recipe and keep practicing to make pancakes that look as good as they taste.

Key Takeaways

  • Understanding the basics of souffle pancake recipe is crucial for achieving the perfect fluffiness
  • Using high-quality ingredients, such as fresh eggs and real butter, is essential for creating a delicious and authentic taste
  • Mastery of the folding technique is necessary to create a light and airy texture
  • Practicing your skills and being patient is key to perfecting the art of making souffle pancakes
  • Following a tried-and-true souffle pancake recipe can help you achieve consistent results
  • Experimenting with different flavors and toppings can help you create a unique and personalized dish

The Magic Behind Japanese Souffle Pancakes

Japanese souffle pancakes have become a global sensation. They are known for their fluffy texture and tasty flavor. To make these pancakes, you need to know the secret ingredients and cooking techniques.

Japanese souffle pancakes are unique. They use special flour, eggs, and milk. These ingredients are mixed and cooked carefully to achieve a light texture. The right ingredients and cooking temperature are key to making perfect pancakes.

Origins of Souffle Pancakes

Souffle pancakes started in Japan, where they’re called “fuwa fuwa” pancakes. They’re a favorite breakfast dish, often served with fruits, whipped cream, and syrup. To make great pancakes, use quality ingredients and a tested recipe.

What Makes Them Different from Regular Pancakes

Japanese souffle pancakes differ from regular ones. They use protein-rich flour for a light texture. They’re cooked at a lower temperature to keep the eggs and milk delicate. Using the right flour and cooking temperature is crucial for the best pancakes.

The Science of Soufflé Rise

The science behind soufflé rise is interesting. It involves mixing eggs, flour, and milk for a light texture. Eggs add structure and lift, while flour adds texture and flavor. Milk makes the pancakes moist and tender. With a simple recipe, anyone can make impressive homemade pancakes.

IngredientQuantity
Flour1 cup
Eggs2
Milk1 cup

Essential Ingredients for Perfect Souffle Pancakes

To make delicious japanese souffle pancakes, you need the right ingredients. The key to a perfect pancake batter recipe is using high-quality ingredients. These ingredients help your pancakes rise and give them a light, fluffy texture.

Here are the essential ingredients you’ll need:

  • Flour: All-purpose flour is best for souffle pancakes, as it has the right balance of protein and starch to help them rise.
  • Eggs: Fresh eggs are essential for souffle pancakes, as they provide structure and moisture.
  • Milk: Whole milk or a non-dairy milk alternative is necessary for adding moisture and tenderness to your pancakes.
  • Sugar: A small amount of sugar is added to balance out the flavor and help the pancakes brown.

When making japanese souffle pancakes, it’s crucial to use the right ratio of ingredients in your pancake batter recipe

By using these essential ingredients and following a tried-and-true pancake batter recipe, you’ll be well on your way to making delicious japanese souffle pancakes. These pancakes will impress your friends and family.

Kitchen Tools and Equipment You’ll Need

To make delicious souffle pancakes, you need the right tools and equipment. Having a well-stocked kitchen is key. The right tools make an easy pancake recipe a breeze.

First, you’ll need a mixer, whisk, and spatula. A mixer creams ingredients together. A whisk beats eggs and makes the batter smooth. A spatula is for folding and scraping the bowl.

Must-Have Utensils

  • Mixer
  • Whisk
  • Spatula

There are also optional tools that can help. A pancake pan and a thermometer are great. A pancake pan prevents pancakes from sticking. A thermometer ensures they’re cooked right.

Optional but Helpful Tools

  • Pancake pan
  • Thermometer

Setting up your workspace is also important. A clean and organized space helps you focus. It ensures your pancakes are light and fluffy. With these tips and tools, you’ll make delicious souffle pancakes easily.

The Ultimate Souffle Pancake Recipe

To make the perfect souffle pancake recipe, focus on the right ingredients and techniques. The secret to fluffy japanese pancakes is to separate eggs and whip the whites until stiff. This adds air to the batter, making the pancakes light and airy.

Here are the essential ingredients you’ll need:

  • 1 1/2 cups all-purpose flour
  • 3 1/2 teaspoons baking powder
  • 1 teaspoon salt
  • 1 cup granulated sugar
  • 1/2 cup whole milk
  • 2 large egg yolks
  • 2 large egg whites

Cooking the souffle pancake recipe requires attention to temperature and timing. Heat a non-stick pan over medium heat. Cook the pancakes for 2-3 minutes on each side, until golden brown. To keep them fluffy japanese pancakes, don’t overmix the batter and avoid opening the pan too often.

By following these tips and using the right ingredients, you’ll create a delicious souffle pancake recipe. Remember, practice makes perfect. If your first batch of fluffy japanese pancakes doesn’t turn out right, don’t worry. With time and patience, you’ll get the hang of it.

IngredientQuantity
Flour1 1/2 cups
Baking Powder3 1/2 teaspoons
Salt1 teaspoon
Granulated Sugar1 cup
Whole Milk1/2 cup
Egg Yolks2 large
Egg Whites2 large

Mastering the Meringue Technique

To make perfect japanese souffle pancakes, mastering the meringue technique is key. This means whipping egg whites to the right consistency, which can be tricky. The meringue is what makes these pancakes light and airy.

Here are some tips to help you achieve perfect meringue:

  • Make sure your egg whites are at room temperature before whipping.
  • Use a clean and dry bowl to prevent any fat or moisture from interfering with the whipping process.
  • Whip the egg whites until they become frothy, then gradually add sugar and continue whipping until stiff peaks form.

Egg White Tips

When whipping egg whites, be gentle to avoid over-whipping. This can make the meringue dense and flat. Stop whipping when you reach the right consistency. Then, gently fold the meringue into the rest of the batter.

Perfect Peaks Guide

To get perfect peaks, whip the egg whites until stiff and hold their shape. This will help your japanese souffle pancakes rise beautifully and keep their texture.

Cooking Methods and Temperature Control

To make the perfect souffle pancake, you need the right cooking methods and temperature control. A best pancake recipe often calls for cooking in a non-stick or cast-iron pan over medium heat. This method ensures even cooking and prevents the pancakes from burning or sticking.

Temperature control is key. Use a thermometer to check if your pan is at the right temperature. For an easy pancake recipe, aim for a temperature between 375°F and 400°F. This range helps the pancakes cook slowly and evenly, making them fluffy and tender.

Here are some tips for cooking souffle pancakes:

  • Use a non-stick pan or cast-iron pan to prevent sticking
  • Cook over medium heat to prevent burning
  • Use a thermometer to ensure the right temperature

By following these tips and using the right cooking methods and temperature control, you can make a delicious and fluffy souffle pancake. Always use a best pancake recipe and avoid overmixing the batter. Overmixing can make the pancake dense and tough.

With practice and patience, you can become a pro at making souffle pancakes. Enjoy a delicious and easy pancake recipe for breakfast or brunch.

Troubleshooting Your Souffle Pancakes

Learning to make souffle pancakes can be tricky. Japanese souffle pancakes, in particular, need some special care. But with the right tips, you can get those fluffy pancakes just right. One big problem is when they deflate, often because of mixing too much or cooking too little.

To solve this, tweak your mixing or cooking time. If your pancakes are too heavy, add more flour or eggs. But if they’re too runny, a bit more flour can help. Keeping the right temperature is key, as wrong heat can make them sink or get too thick.

Common Issues and Solutions

  • Deflation: Check your mixing technique and cooking time
  • Texture issues: Adjust the amount of flour or eggs in the batter
  • Temperature problems: Ensure your cooking surface is at the right temperature

Follow these tips and keep practicing. Soon, you’ll be making tasty Japanese souffle pancakes. Be patient and try different ingredients and times to find what works for you.

Toppings and Serving Suggestions

Choosing the right toppings can really make your fluffy Japanese pancakes special. Classic souffle pancake recipes often come with butter, syrup, and fresh fruit. These toppings highlight the pancakes’ natural sweetness and add a cozy feel to your meal.

For those who love to try new things, there are many modern toppings to explore. Whipped cream, chocolate sauce, and caramel sauce are great for adding a sweet twist. You can also try different fruits like strawberries or blueberries for extra flavor.

Traditional Japanese Toppings

  • Butter
  • Syrup
  • Fresh fruit

Creative Modern Options

  • Whipped cream
  • Chocolate sauce
  • Caramel sauce

Whether you like traditional or modern toppings, the secret to perfect souffle pancakes is finding the right mix. By pairing your fluffy Japanese pancakes with the perfect toppings, you can make a meal that’s truly memorable. So, don’t be afraid to experiment and find your favorite souffle pancake recipe!

ToppingDescription
ButterRich and creamy, perfect for adding warmth and flavor
Whipped creamLight and airy, great for adding a touch of sweetness and indulgence
Fresh fruitNatural and delicious, perfect for adding flavor and nutrition

Conclusion: Your Path to Souffle Pancake Perfection

As we wrap up, the secret to fluffy homemade pancakes is your hard work and curiosity. The best pancake recipe is unique to you, blending ingredients and techniques that suit your kitchen. Souffle pancakes need patience and practice, but the joy of biting into them is worth it.

Face the challenges, learn from your errors, and keep trying new flavors. With the right attitude and this guide, you’re on your way to making perfect souffle pancakes. So, be bold, have fun, and share your tasty pancakes with others. The world of souffle pancakes is full of possibilities.

FAQ

What are souffle pancakes?

Souffle pancakes are a special type of Japanese pancake. They are known for their light and fluffy texture. This is thanks to a unique batter that creates a souffle-like effect.

What makes souffle pancakes different from regular pancakes?

Souffle pancakes stand out because of their special batter. It includes whipped egg whites for a light and airy texture. They also look taller and fluffier than regular pancakes.

What are the essential ingredients for making souffle pancakes?

To make souffle pancakes, you need flour, eggs, milk, and sugar. Whipping the egg whites is key. It creates a meringue-like texture that makes the pancakes light and fluffy.

What kitchen tools and equipment do I need to make souffle pancakes?

You’ll need a few tools to make souffle pancakes. A mixer or whisk is needed for whipping egg whites. A non-stick pan or griddle is essential for cooking. And a spatula is important for flipping the pancakes gently.

What’s the secret to achieving the perfect souffle pancake texture?

The secret is mastering the meringue technique. Whipping the egg whites to the right consistency is crucial. This is what makes souffle pancakes light and airy.

How do I troubleshoot common issues with souffle pancakes?

Common problems include deflation and texture issues. To fix these, adjust the flour or eggs. Cooking at the right temperature helps. And be gentle when handling the pancakes.

What are some traditional and creative toppings for souffle pancakes?

Traditional toppings include butter, syrup, and fresh fruit. For something different, try whipped cream, chocolate sauce, or even savory toppings like bacon or cheese.

Cracker Barrel Pancake Recipe: Fluffy & Delicious

cracker barrel pancake recipe​

Many love the Cracker Barrel pancake recipe for its fluffy and delicious taste. But how can you make it at home? The secret is in the special mix of ingredients and cooking methods used by Cracker Barrel. They are famous for their Southern-style comfort food.

The Cracker Barrel pancake recipe is a favorite in American breakfasts. It’s known for its light texture and sweet flavor. By using the best recipe, you can make a tasty breakfast treat that everyone will enjoy.

Key Takeaways

  • Cracker Barrel is a popular American chain of restaurants known for their Southern-style comfort food
  • The cracker barrel pancake recipe is a beloved breakfast staple
  • The best cracker barrel pancake recipe uses a unique blend of ingredients and cooking techniques
  • The cracker barrel pancake recipe is known for its light and airy texture, and sweet, subtle flavor
  • By following the best cracker barrel pancake recipe, you can create a delicious breakfast treat at home
  • The cracker barrel pancake recipe is a great option for a weekend breakfast or brunch

The Magic Behind Cracker Barrel’s Iconic Pancakes

Cracker Barrel is a favorite American restaurant chain. They’ve been serving tasty breakfasts for years. Their homemade cracker barrel pancakes are a big hit, loved by many.

So, what makes Cracker Barrel’s pancakes so special? It’s their unique recipe and cooking method. Their fluffy cracker barrel pancakes are made with a special mix. This gives them a light and airy texture.

  • High-quality ingredients, including fresh eggs and real butter
  • A special leavening agent that helps the pancakes rise to perfection
  • A unique cooking technique that involves cooking the pancakes on a griddle at just the right temperature

Making homemade cracker barrel pancakes is all about the right ingredients and technique. With practice, you can make fluffy cracker barrel pancakes just like the restaurant’s.

Cracker Barrel offers both classic buttermilk pancakes and unique options. Their fluffy cracker barrel pancakes are a must-try. So, why not give them a try and taste the magic for yourself?

Essential Ingredients for Perfect Cracker Barrel Pancakes

To make an easy cracker barrel pancake recipe, you need the right ingredients. The quality and type of ingredients greatly affect the taste and texture. For fluffy pancakes, you’ll need these essential ingredients:

A cracker barrel pancake recipe includes:

  • 1 cup all-purpose flour
  • 2 tablespoons sugar
  • 2 teaspoons baking powder
  • 1/4 teaspoon salt
  • 1 cup milk
  • 1 large egg
  • 2 tablespoons melted butter

With these ingredients, you can make a simple easy cracker barrel pancake recipe. This recipe will give you delicious and fluffy pancakes. Always choose high-quality ingredients for the best results.

Kitchen Tools You’ll Need

To make a tasty cracker barrel pancake recipe, you need the right tools. A well-stocked kitchen is key to great pancakes. The right tools help get the perfect texture and flavor.

Essential Equipment

You’ll need a mixing bowl, whisk, and measuring cup for pancakes. These tools ensure the batter is just right. Also, a griddle or frying pan is essential for cooking.

Optional but Helpful Tools

Tools like a blender, electric mixer, and spatula are nice to have. They make mixing and flipping pancakes easier. This leads to a delicious cracker barrel pancake recipe.

Griddle vs. Pan Considerations

Choosing between a griddle and pan depends on your kitchen size and pancake number. Griddles are great for big batches, while pans work for smaller ones. The right tool makes a big difference.

Here is a summary of the essential tools you’ll need:

  • Mixing bowl
  • Whisk
  • Measuring cup
  • Griddle or frying pan

With these tools, you’re ready to make a delicious cracker barrel pancake recipe. Your family and friends will love it.

The Original Cracker Barrel Pancake Recipe

To make traditional cracker barrel pancakes, you’ll need a few simple ingredients. The key is using high-quality ingredients and a tried-and-true recipe. Buttermilk is essential for the signature tang and tenderness of these pancakes.

A close approximation of the original Cracker Barrel pancake recipe includes:

  • 1 cup all-purpose flour
  • 2 tablespoons sugar
  • 2 teaspoons baking powder
  • 1/4 teaspoon salt
  • 1 cup buttermilk
  • 1 large egg
  • 2 tablespoons melted butter

First, mix dry ingredients in a bowl and whisk them together. Then, whisk wet ingredients in another bowl. Gently fold the wet ingredients into the dry ingredients until just combined. The batter should still be slightly lumpy. This recipe is a staple for making traditional cracker barrel pancakes that are fluffy and delicious.

By following this recipe, you’ll be able to make traditional cracker barrel pancakes that are sure to please. The combination of buttermilk, sugar, and melted butter gives these pancakes a unique flavor and texture that’s hard to resist. Whether you’re serving them with butter and syrup or getting creative with toppings, traditional cracker barrel pancakes are a breakfast classic.

Step-by-Step Mixing Technique

To make delicious copycat Cracker Barrel pancakes, follow a step-by-step mixing technique. This ensures your batter is smooth, fluffy, and full of flavor. The key is to balance the dry and wet ingredients perfectly.

Begin by preparing your dry ingredients. This includes flour, sugar, and baking powder. In a large bowl, whisk these ingredients together until well combined. This step is crucial for a uniform texture in your pancakes.

Dry Ingredient Preparation

In another bowl, mix your wet ingredients. These are eggs, milk, and melted butter. Whisk until smooth and creamy. This mixture adds moisture and richness to your pancakes.

Wet Ingredient Mixing

Now, combine your dry and wet ingredients. Gently pour the wet ingredients into the dry and mix until just combined. Be careful not to overmix, as this can make your pancakes tough.

Combining for Perfect Batter

The batter should be smooth and free of lumps. If needed, add a little more milk or flour to get the perfect consistency. With this technique, you’ll make delicious copycat Cracker Barrel pancakes.

By following these simple steps, you can make a mouthwatering breakfast dish like Cracker Barrel pancakes. So, try this recipe and enjoy a stack of fluffy, flavorful pancakes.

IngredientQuantity
Flour2 cups
Sugar1 cup
Baking Powder2 teaspoons
Eggs2
Milk1 cup
Melted Butter2 tablespoons

Cooking Tips for Restaurant-Style Results

To get restaurant-style pancakes, follow some expert tips. Cooking on a griddle is key for perfect pancakes. Make sure the griddle is hot and use a little oil or butter to prevent sticking.

Here are some tips for a delicious cracker barrel pancake stack:

  • Use a reliable recipe and adjust to taste.
  • Avoid overmixing the batter to prevent tough pancakes.
  • Choose fresh ingredients like real butter and pure maple syrup for the best flavor.

By following these tips, you’ll make a cracker barrel pancake stack that will wow everyone. Serve it with fresh fruit or whipped cream for a special treat.

Remember, practice makes perfect. If your first batch doesn’t turn out right, don’t worry. Keep trying, and you’ll soon be a pro at making delicious cracker barrel pancakes.

Tips for Cooking PancakesBenefits
Use the right temperatureEven cooking and golden-brown color
Don’t overmix the batterTender and fluffy pancakes
Use fresh ingredientsBest flavor and texture

Serving Suggestions and Toppings

There are countless ways to serve iconic cracker barrel pancakes. You can go for the classics or try something new. A simple yet delicious choice is butter and syrup, a favorite for many.

A warm stack of iconic cracker barrel pancakes is ready for your favorite toppings. Here are some popular ones:

  • Fresh fruits, such as strawberries or blueberries
  • Whipped cream or powdered sugar
  • Nuts, like walnuts or pecans
  • Chocolate chips or shavings

Seasonal toppings can add a special touch. Try pumpkin puree or cinnamon in the fall. Or, go for lemon zest and fresh berries in the spring. It’s all about having fun and finding your perfect mix.

Here’s a simple table to get you started:

ToppingSeason
Fresh berriesSpring/Summer
Pumpkin pureeFall
Whipped cream and chocolateWinter

Troubleshooting Common Pancake Problems

When making fluffy cracker barrel pancakes or homemade cracker barrel pancakes, several issues can arise. These problems can affect the final product’s texture and quality. To ensure your pancakes turn out light and delicious, it’s essential to identify and address these common problems.

Texture Issues

Texture issues, such as dense or tough pancakes, can be caused by overmixing the batter or using incorrect ingredient ratios. To achieve the perfect texture, mix the wet and dry ingredients separately. Then, gently fold them together. This technique will help you create fluffy cracker barrel pancakes that are similar to those served at the restaurant.

Temperature Control

Temperature control is crucial when cooking pancakes. If the griddle or pan is too hot, the pancakes will burn on the outside before they’re fully cooked on the inside. On the other hand, if the heat is too low, the pancakes will be dense and soggy. To avoid these issues, use a thermometer to ensure the ideal temperature, usually between 375°F and 400°F. Adjust the heat as needed to achieve perfectly cooked homemade cracker barrel pancakes.

Storage Solutions

To keep your fluffy cracker barrel pancakes fresh for a longer period, it’s essential to store them properly. Cool the pancakes completely on a wire rack, then place them in an airtight container or freezer bag. This will help maintain their texture and flavor, allowing you to enjoy your delicious homemade cracker barrel pancakes for several days.

By following these troubleshooting tips, you’ll be able to identify and resolve common issues. This ensures a delicious breakfast or brunch every time.

Common ProblemCauseSolution
Dense PancakesOvermixing or incorrect ingredient ratiosMix wet and dry ingredients separately, gently fold them together
Tough PancakesOvercooking or high heatAdjust heat, cook for recommended time
Soggy PancakesLow heat or undercookingIncrease heat, cook for recommended time

Making Ahead and Storage Options

When you’re making an easy cracker barrel pancake recipe, it’s key to think about making ahead and storage. This makes breakfast time less stressful. It’s important to know how to prepare and store your pancakes for the best taste.

One way is to make the batter the night before and keep it in the fridge. This lets the flavors mix well, making your pancakes more tender and tasty. In the morning, just mix the batter again and cook the pancakes on a griddle or pan.

  • Prepare the batter ahead of time and store it in the refrigerator overnight
  • Cook the pancakes on a griddle or in a pan in the morning
  • Freeze cooked pancakes for up to 3 months and toast or microwave when needed

Another choice is to cook the pancakes first and then freeze them. This is perfect for a quick breakfast on a busy day. Just thaw and warm the pancakes in the toaster or microwave to get them fluffy and flavorful again.

Using these making ahead and storage tips in your easy cracker barrel pancake recipe makes breakfast easy and enjoyable every time.

Conclusion: Mastering the Art of Cracker Barrel Pancakes

Creating the perfect Cracker Barrel pancake recipe is an art. It involves the right ingredients and cooking techniques. Every step is important to make those fluffy, golden pancakes.

By following this guide, you now know how to make the best cracker barrel pancake recipe. You can impress your family and friends with your cooking skills.

These pancakes are great for any meal, from weekend brunch to weekday breakfast. Try different toppings and make the recipe your own. With practice, you’ll make perfect pancakes and enjoy a great breakfast at home.

FAQ

What are the key ingredients needed to make Cracker Barrel-style pancakes at home?

To make tasty Cracker Barrel-style pancakes, you’ll need a few key ingredients. These include all-purpose flour, baking powder, sugar, and salt. You’ll also need milk, eggs, and melted butter.

How can I achieve the signature fluffiness of Cracker Barrel pancakes?

For fluffy Cracker Barrel pancakes, mix wet and dry ingredients well but don’t overdo it. Let the batter rest for a few minutes before cooking. This helps get the perfect texture.

What kitchen tools are recommended for making the best Cracker Barrel pancakes?

To make great Cracker Barrel pancakes, you’ll need a few tools. A good griddle or non-stick skillet is key. You’ll also need a whisk or hand mixer for mixing and a ladle or measuring cup for portioning.

Can I make Cracker Barrel pancakes ahead of time?

Yes, you can make Cracker Barrel pancakes ahead of time. Mix the batter and refrigerate it for up to 2 days. Cooked pancakes can be frozen for months, making it easy to prepare in advance.

How do I troubleshoot common issues when making Cracker Barrel-style pancakes?

If your pancakes aren’t fluffy, check if you’re overmixing the batter. Adjusting the cooking temperature and time can help. For storing, wrap pancakes tightly and reheat in the oven or microwave.

What are some creative topping ideas for Cracker Barrel pancakes?

You can top Cracker Barrel pancakes with more than just butter and syrup. Try fresh fruit, whipped cream, chocolate chips, nuts, or even savory toppings like beef, sausage, or cheese.

Can I make a copycat version of the Cracker Barrel pancake stack at home?

Absolutely! Follow the right cooking techniques and stack the pancakes neatly. This way, you can easily make the iconic Cracker Barrel pancake stack at home for a delicious and authentic meal.

Bake the Best Banana Bread with Simply Recipes

simply recipes banana bread

What makes banana bread truly special? Is it the moist texture, the perfect flavors, or the amazing aroma? With simply recipes banana bread, you can get all these and more. Our recipe is designed to help you make a delicious treat for any time.

Whether you’re new to baking or have lots of experience, our guide will help you make a perfect loaf. We’ll cover everything from the ingredients to the steps. So, what are the secrets to baking the best banana bread? Let’s find out.

Key Takeaways

  • Learn the basics of baking the best banana bread with simply recipes banana bread
  • Discover the essential ingredients for a moist and delicious loaf
  • Get tips on choosing the perfect bananas for your recipe
  • Understand the importance of using the right kitchen tools
  • Follow our step-by-step guide to achieve a perfect banana bread
  • Explore variations and add-ins to make your banana bread unique
  • Learn how to store and freeze your banana bread for freshness

Why Simply Recipes Banana Bread Stands Out

Many recipes claim to be the best homemade banana bread. But Simply Recipes’ version is truly special. It has a rich history and a unique mix of ingredients. This makes it a top choice for home bakers.

The secret to its success is simple. It uses basic ingredients and a straightforward method. This recipe is loved by many because it always makes a moist and tasty loaf. It’s perfect for both experienced and new bakers.

The History Behind Our Recipe

Our recipe has been passed down for generations. Each version has brought its own twist. From the flour type to the addition of nuts or chocolate chips, every detail is carefully chosen.

What Makes This Recipe Special

So, what makes this banana bread recipe stand out? It starts with ripe bananas for natural sweetness and creaminess. The mix of all-purpose and whole wheat flour adds a nutty flavor and extra nutrition. Here are some key features:

  • Simple ingredients
  • Easy preparation process
  • Moist and flavorful texture
  • Customizable with nuts, chocolate chips, or other add-ins

Why Home Bakers Love It

Home bakers adore this recipe because it’s easy to make and always turns out great. It’s also versatile, letting bakers try different ingredients and flavors. Whether you want a classic banana bread or something new, this recipe will satisfy.

IngredientQuantity
Ripe bananas3-4
All-purpose flour2 cups
Whole wheat flour1 cup
Sugar1 cup

Essential Ingredients for Perfect Banana Bread

To make a delicious classic banana bread, you need the right ingredients. High-quality ingredients are key for a perfect loaf. For a moist banana bread recipe, ripe bananas, flour, sugar, and spices are essential.

The flour type greatly affects the bread’s texture. All-purpose flour is a good choice. You can also try whole wheat or oat flour. Sugar adds sweetness and tenderness. Spices like cinnamon and nutmeg enhance the flavor.

Here are the essential ingredients for your classic banana bread recipe:

  • Ripe bananas
  • All-purpose flour
  • Granulated sugar
  • Spices like cinnamon and nutmeg
  • Large eggs
  • Unsalted butter, melted

Using these ingredients and a simple moist banana bread recipe will help you make a delicious loaf. It’s perfect for snacking or serving to guests.

Choosing and Ripening Your Bananas

Choosing the right bananas is key for a tasty ripe bananas recipe. Look for bananas that are a bit soft and have brown spots. They should also be heavy for their size and smell sweet and slightly spicy.

To ripen bananas at home, try a few easy methods. Place bananas in a paper bag with an apple or avocado. These fruits release ethylene gas, speeding up ripening. You can also leave bananas near a window or in a warm spot to ripen them faster.

Selecting the Perfect Bananas

  • Look for bananas with a few brown spots
  • Choose bananas that are heavy for their size
  • Check for a sweet, slightly spicy aroma

Quick Ripening Methods

  • Place bananas in a paper bag with an apple or avocado
  • Put bananas near a window or in a warm spot

Storage Tips for Ripe Bananas

To keep ripe bananas fresh, store them in a cool, dry place. You can also refrigerate them to slow down ripening. Here’s a table with the best storage methods:

Storage MethodShelf Life
Room temperature3-5 days
Refrigerator5-7 days
Freezer2-3 months

Kitchen Tools You’ll Need

When you’re baking with bananas, the right tools are key. To make the best banana bread, you’ll need some essential tools. These will help you mix, measure, bake, and serve a moist loaf.

First, you’ll need basic tools like:

  • Mixing bowls
  • Measuring cups and spoons
  • An electric mixer
  • A loaf pan

These tools are crucial for mixing, measuring, and baking your banana bread. Also, having a silicone spatula and a wire rack for cooling is important.

Consider getting specialty tools too, like a banana slicer or a pastry brush. These make preparing and baking easier. They’re also useful for other baking with bananas recipes.

With the right tools, you’ll be on your way to making tasty banana bread. It’s perfect for snacks, sharing, or at gatherings. Soon, you’ll be a pro at baking with bananas.

Step-by-Step Simply Recipes Banana Bread Method

To make the best banana bread, follow a simple method. Simply recipes banana bread is a classic choice. Our guide will help you make a delicious and moist loaf. Start by preparing your ingredients, including 2 ripe bananas, which are the foundation of this recipe. You can find a great example of a best banana bread recipe online, which will walk you through the entire process.

Next, mix the batter. Combine the bananas with flour, sugar, and eggs. This is where the magic happens, and your simply recipes banana bread starts to take shape. Be sure to mix everything thoroughly, but don’t overmix, as this can lead to a dense loaf.

Preparing Your Ingredients

  • 2 ripe bananas
  • 1 1/2 cups of flour
  • 1 tsp of baking powder
  • 1/2 tsp of salt
  • 1/4 cup of sugar
  • 1/2 cup of melted butter
  • 2 large eggs

Mixing the Batter

In a large bowl, combine the dry ingredients, including flour, baking powder, and salt. In a separate bowl, mix the wet ingredients, including sugar, melted butter, and eggs. Once you’ve mixed both sets of ingredients, combine them and add the mashed bananas.

Baking Instructions

Preheat your oven to 350°F (180°C) and grease a 9×5-inch loaf pan. Pour the batter into the pan and bake for 55-60 minutes, or until a toothpick inserted into the center comes out clean. Remove the loaf from the oven and let it cool on a wire rack. With these simple steps, you’ll be enjoying a delicious simply recipes banana bread in no time.

Common Banana Bread Mistakes to Avoid

When making homemade banana bread, it’s easy to make mistakes. These mistakes can affect how your easy banana bread recipe turns out. Here are some common errors to avoid:

Some common mistakes to avoid include:

  • Overmixing the batter, which can lead to a dense bread
  • Underbaking the bread, which can result in a soggy texture
  • Not using ripe bananas, which can affect the flavor and texture

By avoiding these mistakes, you can make a delicious and moist homemade banana bread. It’s perfect for any occasion. Always follow your easy banana bread recipe carefully. Make sure each step is done right.

With a little practice and patience, you’ll soon be making perfect homemade banana bread. You’ll use your favorite easy banana bread recipe in no time.

Delicious Variations and Add-ins

There are endless ways to make a classic banana bread. You can try different ingredients to find a flavor you love. A moist banana bread recipe is great for adding nuts, chocolate chips, or fruits.

Adding nuts like walnuts or pecans can give your banana bread a nice crunch. Chocolate lovers can enjoy dark or semi-sweet chocolate chips. For a fruity twist, mix diced apples or berries with cinnamon or nutmeg.

Nuts and Chocolate Options

  • Walnuts: add a rich, earthy flavor
  • Pecans: provide a nice crunch and buttery taste
  • Dark chocolate chips: intense, velvety chocolate flavor
  • Semi-sweet chocolate chips: balanced, sweet flavor

Fruit and Spice Combinations

Try mixing different fruits and spices to make your banana bread special. Diced apples with cinnamon or nutmeg give a warm, autumnal taste. Diced berries with sugar add a sweet and tangy flavor.

Dietary Modifications

If you have dietary restrictions, there are many options for delicious banana bread. Use gluten-free flours or vegan alternatives to make a recipe that fits your needs. With a little creativity, you can enjoy a classic banana bread that’s both tasty and fits your dietary preferences.

Dietary ModificationIngredients
Gluten-freeAlmond flour, coconut flour, or gluten-free all-purpose flour
VeganPlant-based milk, vegan eggs, or flaxseed

Storage and Freshness Tips

After baking a delicious banana bread, it’s important to store it right. This keeps it fresh for longer. Freshness is key to enjoying the best flavors in your banana bread.

To keep your banana bread fresh, store it on the counter for up to three days. Make sure it’s in an airtight container to prevent staleness. For longer storage, freezing is a great option. This way, you can enjoy your banana bread for months.

Counter Storage Methods

  • Store in an airtight container
  • Keep it away from direct sunlight
  • Check on it daily to ensure it doesn’t become stale

Freezing Instructions

Freezing is a great way to keep your banana bread fresh for longer. Wrap it tightly in plastic wrap or foil and put it in a freezer-safe bag. When you’re ready, thaw it at room temperature or reheat it in the oven.

Reheating Guidelines

To reheat your frozen banana bread, preheat your oven to 350°F (180°C). Wrap the bread in foil and heat it for 10-15 minutes. This will warm it through. You can also reheat it in the microwave for a few seconds, but be careful not to overheat it.

Troubleshooting Your Banana Bread

When you make simply recipes banana bread, you might run into some problems. We’ve listed common mistakes and how to fix them.

Issues like a dense or dry bread, or one that doesn’t rise, are common. These can happen if you overmix the batter, use old baking powder, or pick the wrong flour.

  • Check your ingredients: Use fresh, high-quality bananas and the right flour.
  • Don’t overmix: Mix just until combined, then stop to avoid toughening the bread.
  • Use the right leavening: Fresh baking powder is key for a good rise.

By following these tips and using simply recipes banana bread as a guide, you can fix any problems. This will help you make a delicious, moist banana bread.

Remember, getting it right takes practice. Don’t worry if your first loaf isn’t perfect. Keep trying, and soon you’ll be making amazing simply recipes banana bread.

Common IssueSolution
Dense or dry breadCheck your ingredients and mixing technique
Bread not rising properlyCheck your leavening and make sure your baking powder is fresh

Serving Suggestions and Pairings

Now that you’ve baked your perfect banana bread, it’s time to think about how to serve it. Whether you’re looking for a delicious breakfast idea or a sweet dessert presentation, your homemade banana bread is versatile. It can be paired with a variety of options.

For a classic breakfast idea, try serving your banana bread with a dollop of whipped cream or a sprinkle of cinnamon. You could also pair it with a hot cup of coffee or tea for a cozy morning treat. For a dessert presentation, consider topping your banana bread with a scoop of ice cream or a drizzle of chocolate sauce.

Some other complementary spreads to try with your banana bread include:

  • Butter or cream cheese for a rich and creamy flavor
  • Peanut butter for a nutty and indulgent taste
  • Honey or jam for a sweet and fruity flavor

With these serving suggestions and pairings, you can enjoy your homemade banana bread in a variety of ways. So go ahead, get creative, and find your favorite way to serve and savor your delicious banana bread made with the best banana bread recipe.

Expert Tips from Simply Recipes

At Simply Recipes, we love baking and sharing our knowledge with you. To make the perfect easy banana bread recipe, ripe bananas and the right spices are key. We recommend mixing white and brown sugar for better flavor and texture.

To elevate your classic banana bread, add nuts or chocolate chips. Here are some expert tips to remember:

  • Choose high-quality ingredients, like fresh bananas and real vanilla extract.
  • Avoid overmixing the batter to prevent a dense, tough bread.
  • Try different spices, like cinnamon or nutmeg, for unique flavors.

By following these tips and using a reliable easy banana bread recipe, you’ll make a delicious, moist classic banana bread. It’s perfect for any time.

“The key to making a great banana bread is to use ripe bananas and to not overmix the batter. With these simple tips and a classic recipe, you’ll be enjoying a delicious homemade banana bread in no time.”

Banana Bread TipsBenefits
Use ripe bananasEnhances flavor and texture
Don’t overmix the batterResults in a lighter and fluffier bread
Experiment with spicesAdds unique flavors and aromas

Conclusion: Your Path to Perfect Banana Bread

Baking the perfect moist banana bread is within reach with Simply Recipes’ help. Choose the ripest bananas and use the right tools. Follow our steps to make a treat that will impress everyone.

Success comes from focusing on details and trying new things. Don’t hesitate to tweak recipes as you go. Soon, you’ll be a banana bread pro. So, get your oven ready, collect your ingredients, and start baking.

Happy baking, and enjoy the delicious results of your efforts!

FAQ

What makes Simply Recipes’ banana bread recipe stand out?

Simply Recipes’ banana bread recipe is loved for its rich history and special ingredients. It’s easy to make, making it a hit with home bakers. The secret ingredients and techniques make it unique.

What are the essential ingredients for making the perfect banana bread?

To make the perfect banana bread, you need ripe bananas, flour, sugar, eggs, butter, and spices like cinnamon. The right mix of these ingredients gives the bread its flavor and texture.

How do I choose and ripen the perfect bananas for banana bread?

Choose bananas with lots of brown spots for the best banana bread. If they’re not ripe, you can speed up the process by placing them in a paper bag or baking them. Keep ripe bananas fresh by storing them properly.

What kitchen tools do I need to bake the perfect banana bread?

You’ll need basic kitchen tools like mixing bowls, a hand mixer or stand mixer, measuring cups and spoons, a loaf pan, and a spatula. These tools help you prepare and bake the bread perfectly.

What are the steps to bake the Simply Recipes’ banana bread?

To bake the Simply Recipes’ banana bread, first prepare the ingredients. Then mix the batter and bake the bread. The guide will walk you through each step for a perfect banana bread.

What common mistakes should I avoid when baking banana bread?

Avoid overmixing the batter, underbaking the bread, and using unripe bananas. The guide will show you how to avoid these mistakes for the best banana bread.

What are some delicious variations and add-ins for banana bread?

You can make your banana bread special by adding nuts, chocolate, fruits, and spices. The guide will share many variations, including gluten-free and vegan options, to match your taste.

How do I properly store and reheat my banana bread?

Store your banana bread at room temperature, in the fridge, or freezer to keep it fresh. The guide will tell you how to store and reheat it to keep it delicious.

What troubleshooting tips can I use if my banana bread doesn’t turn out as expected?

If your banana bread is dense, dry, or doesn’t rise, the guide has tips to fix these issues. Follow these to make your banana bread perfect.

How can I serve and pair my homemade banana bread?

The guide will suggest ways to serve your banana bread, like for breakfast or dessert. It also offers ideas for spreads and toppings to enhance your treat.

What expert tips can I learn from Simply Recipes to take my banana bread to the next level?

Simply Recipes’ experts will share their best tips for baking banana bread. They’ll talk about the importance of ripe bananas and spices. You’ll learn their favorite techniques and how to avoid common mistakes.

Fried Chicken Prime: The Ultimate Crispy, Flavorful Dish

fried chicken prime

What makes fried chicken prime so special? It’s the perfect mix of a crispy outside and a juicy inside. This magic comes from combining old cooking ways with top-notch ingredients. Every bite of fried chicken prime shows off the skill of chefs.

Fried chicken prime is a favorite in many great restaurants. It’s loved for its delicious taste and satisfying crunch. But what makes the best fried chicken, and how can you make it at home? Learning about fried chicken prime starts with its basic elements.

Key Takeaways

  • Fried chicken prime is known for its crispy exterior and juicy interior
  • High-quality ingredients are essential for making the best fried chicken
  • Traditional cooking methods are crucial for achieving the perfect crunch
  • Fried chicken prime is a popular dish in many top-rated restaurants
  • Crispy fried chicken can be made at home with the right techniques and ingredients
  • Fried chicken prime is a versatile dish that can be enjoyed in many different ways

The Evolution of Fried Chicken Prime

Fried chicken has a rich history. It started in the Southern United States, becoming a key part of traditional cuisine. Over time, it has changed a lot, thanks to different cultures and cooking styles.

The fried chicken recipe has gotten better, with each region adding its own twist. The fried chicken restaurant industry has also helped make it popular. Many restaurants now offer their own special fried chicken dishes.

  • New seasonings and spices have made the dish more complex and flavorful.
  • Techniques like pressure frying and air frying have made the chicken crunchier.
  • Now, there are fancy and gourmet fried chicken options that take it to the next level.

Today, fried chicken is loved all over the world. You can find many different kinds, from traditional southern fried chicken to new and exciting fried chicken recipes. Its lasting popularity shows how much people love this tasty food.

YearDevelopmentInfluence
1800sOrigins of southern fried chickenAfrican and European cuisine
1900sIntroduction of new seasonings and spicesGlobal trade and cultural exchange
2000sRise of premium and gourmet fried chickenFried chicken restaurant industry and food trends

What Makes Fried Chicken Prime Different

Fried Chicken Prime is famous for its juicy fried chicken and crispy outside. It’s a top choice for fried chicken lovers. The secret is in the quality ingredients and cooking skills.

Fresh chicken, special seasonings, and a unique coating make it stand out. These elements give Fried Chicken Prime its unique taste.

Here’s what makes Fried Chicken Prime special:

  • It uses fresh, never frozen chicken for tenderness and flavor.
  • A special seasoning blend adds depth and complexity.
  • The coating process makes the outside crispy and the inside delicious fried chicken juicy.

Chefs at Fried Chicken Prime combine old and new cooking methods. They focus on every step to ensure top quality and taste.

Fried Chicken Prime is a hit with food lovers and fans of delicious fried chicken. Its unique flavors and textures make it a favorite. Don’t settle for ordinary fried chicken. Try Fried Chicken Prime today and see the difference!

CharacteristicsDescription
FreshnessUse of fresh, never frozen chicken
SeasoningsProprietary blend of premium seasonings
CoatingSpecial coating process for crispy exterior and juicy interior

Essential Ingredients for Perfect Fried Chicken Prime

To make the best fried chicken, focus on key ingredients and cooking methods. Choosing top-notch chicken is crucial for a tender and tasty dish. Opt for fresh, hormone-free birds for better texture and flavor.

Seasoning is key for fried chicken prime’s unique taste. Signature seasonings like paprika, garlic powder, and onion powder add depth. The right mix of seasonings makes fried chicken prime unforgettable.

Premium Chicken Selection

Choosing premium chicken is vital for crispy fried chicken. Look for chicken that’s fresh, never frozen, and hormone-free. This ensures the chicken is tender, juicy, and full of flavor.

Signature Seasonings

Signature seasonings are crucial for fried chicken prime. A mix of herbs and spices, including paprika, garlic powder, and onion powder, creates a unique flavor. These seasonings add depth and complexity, making the dish delicious and unique.

Oil and Coating Choices

The right oil and coating are key for a perfect crispy exterior. Use a mix of all-purpose flour, cornstarch, and spices for a light coating. Choose a neutral-tasting oil like peanut or avocado oil for frying. This ensures the chicken is crispy outside and juicy inside.

By focusing on these essential ingredients and techniques, you can make the best fried chicken prime. Whether you’re an experienced chef or a kitchen newbie, using high-quality ingredients and paying attention to cooking details is the key to success.

The Art of Brining and Marination

Creating the perfect fried chicken recipe starts with brining and marination. This step is key to the chicken’s flavor and texture. In the fried chicken restaurant industry, chefs use it to make dishes that customers love.

To brine or marinate chicken, you can use herbs, spices, and acids like vinegar or lemon juice. The goal is to balance flavors to enhance the chicken’s natural taste. Techniques include:

  • Using a wet brine to add moisture and flavor to the chicken
  • Creating a dry rub with spices and herbs to add depth and complexity
  • Mixing acids like vinegar or lemon juice with oil and spices to create a marinade

By using these techniques, you can make a dish that’s both delicious and unique. Whether you’re a chef or a home cook, mastering brining and marination is essential.

In the world of southern fried chicken, brining and marination are traditions. By mastering this process, you can create unforgettable dishes. So, why not try it and see how it changes your fried chicken recipe?

Brining and Marination TechniquesBenefits
Wet BrineAdds moisture and flavor to the chicken
Dry RubAdds depth and complexity to the chicken
MarinadeEnhances the natural flavor of the chicken

Secret Techniques for Extra Crispy Coating

To get the perfect crispy fried chicken, top-rated restaurants use secret techniques. The coating process is key. A good coating can turn a juicy fried chicken into a dry one. It’s all about using the right ingredients and following the right steps.

Some top techniques for extra crispy coating include double-dredging, controlling temperature, and timing. Double-dredging means coating the chicken twice. First, in a mix of flour, spices, and herbs, then again in a lighter coat. This makes the outside crunchy and the inside juicy.

Double-Dredging Method

This method is great for crispy fried chicken. It uses a mix of heavy and light coatings. This creates a crunchy outside that matches the juicy inside of the chicken. Getting the coating just right is crucial for top-rated fried chicken.

Temperature Control

Temperature control is also key for a crispy coating. If the oil is too hot, the coating burns before the chicken is cooked. If it’s too cold, the coating won’t crisp up. Finding the right balance is essential for juicy fried chicken.

By using these secret techniques, you can make crispy fried chicken that will wow anyone. These tips are great for both seasoned chefs and beginners. They’ll help you get the perfect coating for your fried chicken.

Deep-Frying vs. Air-Frying Methods

Choosing between deep-frying and air-frying for fried chicken prime is a big decision. Both methods have their good points and bad points. Deep-frying is often preferred for its crispy outside and juicy inside.

Air-frying, on the other hand, is getting more popular. It uses very little oil, which is good for those watching their fat intake. It’s also easier to clean up than deep-frying. For a tasty and simple fried chicken recipe, air-frying is a great choice.

Here are some key differences between deep-frying and air-frying:

  • Deep-frying: produces a crispy exterior, juicy interior, and rich flavor
  • Air-frying: healthier, more convenient, and easier to clean up

Choosing between deep-frying and air-frying depends on what you want. If you’re craving a traditional fried chicken prime dish, deep-frying might be for you. But if you’re looking for a healthier option, air-frying is a good choice.

By weighing the pros and cons of each method, you can pick the best one for you. Experiment with different techniques to find your favorite fried chicken recipe.

MethodProsCons
Deep-fryingCrispy exterior, juicy interior, rich flavorHigh fat content, messy cleanup
Air-fryingHealthier, more convenient, easy cleanupLess crispy exterior, may lack flavor

Common Mistakes to Avoid When Making Fried Chicken

Making delicious fried chicken can be tricky. Especially in the southern fried chicken tradition, there are common mistakes to watch out for. These mistakes can turn a tasty dish into a greasy, bland one. Chefs in the fried chicken restaurant industry know how important it is to be precise and pay attention to detail.

To get the perfect fried chicken, temperature, seasoning, and coating are key. Temperature control is crucial for a crispy outside and juicy inside. The ideal frying temperature is between 350°F and 375°F. If the oil is too hot or too cold, the chicken won’t turn out right.

Temperature Pitfalls

Staying away from temperature mistakes is essential. Don’t overcrowd the pot, as it can lower the oil temperature. Also, frying at too low a temperature can make the chicken greasy. By keeping the temperature right, your fried chicken will be crispy and juicy, just like in the best southern fried chicken restaurants.

Seasoning Errors

Seasoning mistakes can also ruin your fried chicken. Too much or too little seasoning can mess up the flavors. The right seasoning can make your fried chicken truly delicious. In the fried chicken restaurant industry, chefs know that the right seasoning is key to a great dish.

Coating Problems

Coating mistakes are another common issue. The coating should be light and even, not too thick or too thin. A good coating makes the fried chicken crispy and flavorful. By avoiding these mistakes, you can make delicious fried chicken that will impress even the pickiest eaters.

MistakeEffectSolution
Temperature too highBurned exteriorLower oil temperature
Temperature too lowGreasy chickenIncrease oil temperature
Over-seasoningUnbalanced flavorUse less seasoning
Under-seasoningLack of flavorUse more seasoning

Serving Suggestions and Pairings

There are many ways to serve top-rated fried chicken. Try it with mashed potatoes and coleslaw for a classic taste. The creamy mashed potatoes and the crispy chicken go well together. The coleslaw adds a nice crunch.

For something different, pair fried chicken prime with waffles and maple syrup. The syrup’s sweetness pairs well with the chicken’s savory taste. Here are more ideas:

  • Roasted vegetables, such as broccoli or carrots, for a healthy and flavorful side dish
  • Mac and cheese, for a comforting and creamy complement to the crispy chicken
  • Biscuits and gravy, for a traditional Southern-style breakfast or brunch

These are just a few ideas to get you started. Don’t be afraid to try new pairings. With its crispy outside and juicy inside, fried chicken prime is a hit with everyone.

PairingDescription
Mashed Potatoes and ColeslawA classic combination that complements the crispy exterior and juicy interior of fried chicken
Waffles and Maple SyrupA sweet and savory pairing that balances the flavors of the chicken

Health-Conscious Adaptations

For those who love fried chicken recipe but care about health, there are ways to adapt. Using whole wheat flour or panko breadcrumbs can cut down on calories and fat. This is especially true for southern fried chicken, where the coating is a big part of the dish.

Trying different cooking methods can also make fried chicken healthier. Baking or grilling instead of deep-frying cuts down fat. This change is seen in the fried chicken restaurant industry, with more places offering baked or grilled options.

Portion Control Guidelines

To eat fried chicken healthily, controlling portions is key. Serve smaller portions or pair it with healthy sides like salads or steamed veggies. Making a few tweaks to the fried chicken recipe lets you enjoy it without sacrificing health.

Lighter Coating Options

  • Whole wheat flour
  • Panko breadcrumbs
  • Grilled or baked instead of deep-fried

Exploring these healthier choices makes fried chicken a part of a balanced diet. This is true whether you’re cooking at home or eating out at a fried chicken restaurant.

Conclusion: Mastering Your Fried Chicken Prime Journey

As we wrap up our look at fried chicken prime, the main thing is to enjoy the learning process. It’s all about using top-notch ingredients, getting the brining and marination right, and perfecting the crispy coating. With some patience and practice, you’ll soon make fried chicken that’s as good as the best places.

The real fun of fried chicken prime is trying new things and learning as you go. Enjoy the journey, have fun, and don’t hesitate to try new ideas. Whether you like the traditional southern style or something new, the goal is to find what you love. With the right skills and a bit of creativity, you’ll become a pro at making fried chicken prime.

FAQ

What makes Fried Chicken Prime so unique?

Fried Chicken Prime is special because of its crispy outside and juicy inside. It uses top-notch ingredients and special seasonings. The cooking methods are also key to its unique taste.

How does the history of Fried Chicken Prime compare to traditional Southern fried chicken?

Fried Chicken Prime comes from Southern fried chicken traditions. But, it has grown to include new cooking ideas. It focuses on quality ingredients and advanced cooking.

What are the essential ingredients for making the perfect Fried Chicken Prime?

To make Fried Chicken Prime, you need fresh, high-quality chicken. You also need a special mix of seasonings and herbs. The right oil and coating are crucial for the crispy outside.

Why is the brining and marination process so important for Fried Chicken Prime?

Brining and marinating are key steps. They add flavor and make the chicken tender and juicy. This makes the final dish better.

What are some of the secret techniques for achieving an extra crispy coating on Fried Chicken Prime?

For an extra crispy coating, use the double-dredging method. Control the frying temperature well. Also, rest and time the chicken right before frying.

What are the pros and cons of deep-frying versus air-frying when it comes to Fried Chicken Prime?

Deep-frying gives a classic crispy and juicy result. Air-frying is healthier but might not be as indulgent. It still offers a good crunch.

What are some common mistakes to avoid when making Fried Chicken Prime?

Avoid temperature mistakes, seasoning errors, and coating problems. These can ruin the quality and texture of Fried Chicken Prime.

What are some suggested pairings and serving ideas for Fried Chicken Prime?

Pair Fried Chicken Prime with mashed potatoes, coleslaw, and biscuits for a classic taste. Try waffles with maple syrup or pickled vegetables for something new.

Are there any health-conscious adaptations for Fried Chicken Prime?

Yes, you can make Fried Chicken Prime healthier. Use lighter coatings, bake or grill instead of deep-fry, and control your portions.

Delicious Chicken Fries: The Ultimate Comfort Food

chicken fries

What makes chicken fries so irresistible? Is it the crispy outside, the juicy inside, or the mix of flavors? Chicken fries are a big hit in America, and their fame keeps growing. They’re loved by all, whether you enjoy them from fast food or make them at home. They’re truly the ultimate comfort food.

Chicken fries are loved in many ways, from spicy to herb-crusted. In this article, we’ll explore their history, how to cook them, and different types. If you want to make homemade chicken fries, you’re in the right spot. We’ll guide you on how to make the crispiest chicken fries ever.

Key Takeaways

  • Chicken fries are a popular comfort food in the United States
  • Crispy chicken fries can be made at home with the right ingredients and techniques
  • Homemade chicken fries offer a healthier alternative to fast food options
  • Chicken fries can be customized with various seasonings and sauces
  • Understanding the history and evolution of chicken fries can appreciate their cultural significance
  • Perfecting the art of making chicken fries requires practice and patience

What Makes Chicken Fries So Irresistible

Chicken french fries are a hit in fast food places. They mix crispy outside with juicy inside perfectly. This mix, along with many flavors, makes them a top choice for many.

People love them because they’re easy to eat on the move. They’re also cheap and come with lots of dipping sauces. You can pick from classic ketchup to spicy mayo, matching your taste.

The quality of chicken finger fries matters a lot. Restaurants use fresh chicken and special seasonings for the best taste. This makes fast food chicken fries a go-to for quick, tasty meals.

Chicken french fries are also very flexible. You can have them as a side, in salads, or on sandwiches. Their crispy and juicy nature makes them a favorite fast food item.

The History Behind Your Favorite Chicken Fries

Chicken fries have a long history that goes back decades. The idea of breaded chicken fries started in the southern United States. Cooks there would bread and fry chicken strips to make them crispy on the outside and juicy inside.

As time went on, chicken strip fries became a favorite in many American restaurants. Each place put their own spin on the dish.

The rise of fast food chains also helped make chicken fries more popular. Places like KFC and Chick-fil-A started serving them as a side. Now, you can find chicken strip fries on menus worldwide, with many places offering their own special versions.

Some popular types of chicken fries include:

  • Spicy chicken fries with a kick of heat
  • Breaded chicken fries with a tangy dipping sauce
  • Chicken strip fries topped with melted cheese and beef

The story of chicken fries shows how food can unite people. Whether you prefer breaded chicken fries or chicken strip fries, they’re a favorite dish. Their crispy outside and juicy inside make them a comfort food loved by many.

Type of Chicken FriesDescription
Breaded Chicken FriesCrispy exterior and juicy interior
Chicken Strip FriesTender and flavorful, often served with dipping sauce
Spicy Chicken FriesAdded kick of heat for those who like a little spice

Essential Ingredients for Perfect Chicken Fries

To make delicious homemade chicken fries, you need the right ingredients. The quality of your chicken, breading, and seasonings is key. They help achieve that perfect crispy chicken fries texture and flavor. A good chicken fries recipe balances simplicity with flavor.

Choosing the right chicken is the first step. You want chicken that can be cut into fry shapes and cooked until crispy. The breading is also crucial, as it adds crunch and flavor to the chicken. A good breading should be light and airy, letting the chicken’s taste shine.

Choosing the Right Cut of Chicken

The cut of chicken you choose matters a lot. Opt for chicken breast or tenderloins that are fresh and of high quality. These cuts will give you the best results for homemade chicken fries.

Breading Components

A successful breading for crispy chicken fries needs flour, spices, and sometimes eggs or buttermilk. The right breading can take your chicken fries recipe from good to great.

Seasoning Secrets

Seasoning is where you can get creative with your chicken fries recipe. Whether you like classic salt and pepper or something adventurous like garlic parmesan, the seasoning is crucial. It can make or break the flavor of your homemade chicken fries.

Step-by-Step Guide to Homemade Chicken Fries

Making homemade chicken fries is easier than you think. With the right ingredients and techniques, you can get restaurant-quality results. Start by preparing your chicken strips, cut from breast or thigh meat.

A good chicken fries recipe will have you marinating the chicken in spices and herbs before breading.

The breading process is key to making delicious breaded chicken fries. You’ll need to dip the marinated chicken in flour, eggs, and breadcrumbs. For an extra crispy coating, try double breading your chicken fries. Here’s a simple outline to follow:

  • Prepare your chicken strips and marinade
  • Dip the chicken in flour, shaking off excess
  • Dip the floured chicken in beaten eggs
  • Finally, dip the egg-coated chicken in breadcrumbs

Once your homemade chicken fries are breaded, fry them in hot oil until golden brown and crispy. Or, bake them in the oven for a healthier option. Make sure to cook your chicken to a safe internal temperature for food safety.

With these simple steps, you can make your own delicious chicken fries recipe at home. Try different seasonings and breading ingredients to find your favorite flavors. Whether you prefer spicy breaded chicken fries or classic homemade chicken fries, you can experiment with endless possibilities.

IngredientQuantity
Chicken breast or thigh meat1 pound
All-purpose flour1 cup
Breadcrumbs1 cup
Eggs2

Popular Chicken Fries Variations and Flavors

Chicken fries come in many flavors and variations. They are a fun and versatile food option. You can find everything from spicy chicken fries to herb-crusted ones. Options like chicken finger fries and chicken strip fries are also popular. They can be seasoned with a variety of spices and herbs.

Spicy Chicken Fries

For those who enjoy a bit of heat, spicy chicken fries are perfect. They can be seasoned with spices like cayenne pepper or chili powder. They pair well with different dipping sauces. Some popular dipping sauces for spicy chicken fries include ranch dressing or blue cheese sauce.

International Variations

Chicken fries are loved worldwide, with each country adding its own twist. In Korea, they’re seasoned with a sweet and spicy sauce. In Japan, they’re served with wasabi mayo. Here are some international variations:

  • Korean-style chicken fries with a sweet and spicy sauce
  • Japanese-style chicken fries with wasabi mayo
  • Mexican-style chicken fries with a spicy chipotle sauce

Best Dipping Sauces for Chicken Fries

Enjoying chicken fries is even better with the right dipping sauce. For homemade chicken fries, try different sauces to find your favorite. Here are some popular ones:

  • Ketchup: a classic choice that pairs well with crispy chicken fries
  • Mayo: adds a rich and creamy texture to your chicken fries
  • BBQ sauce: sweet and tangy, perfect for those who like a little smokiness in their homemade chicken fries

Want to try something new? Make your own dipping sauces at home. With a bit of creativity, you can mix flavors that match your

Whether you like classic or new flavors, the right sauce makes crispy chicken fries even better. So, don’t be shy to try new things and find the perfect sauce for your homemade chicken fries.

Dipping SauceFlavor ProfilePairing Suggestions
KetchupClassic, sweet, and tangyCrispy chicken fries, grilled chicken
MayoRich, creamy, and savoryChicken fries, chicken tenders
BBQ sauceSweet, smoky, and tangyHomemade chicken fries, grilled meats

The Art of Achieving the Perfect Crispy Coating

To make delicious crispy chicken fries, mastering the perfect crispy coating is key. You need the right ingredients, techniques, and temperature control. A good chicken fries recipe will help, but practice is essential.

The double breading technique is a game-changer for breaded chicken fries. First, dredge the chicken in flour. Then, dip it in a wet ingredient like buttermilk or eggs. Finally, coat it in a dry ingredient, such as breadcrumbs or panko. This method gives you a crispy outside and a tender inside.

Double Breading Technique

The double breading technique involves the following steps:

  • Dredge the chicken in flour to create a dry surface
  • Dip the chicken in a wet ingredient, such as buttermilk or eggs
  • Coat the chicken in a dry ingredient, such as breadcrumbs or panko

Temperature Control Tips

Temperature control is crucial for crispy chicken fries. The ideal frying temperature is between 350°F and 375°F. Too hot oil burns the outside before the inside is cooked. Too cold oil makes the outside greasy and soggy.

Common Coating Mistakes to Avoid

When making breaded chicken fries, avoid common mistakes. Don’t skip dredging the chicken in flour before wet ingredients. Use the right breadcrumbs or panko. And fry at the right temperature.

  • Not dredging the chicken in flour before dipping it in a wet ingredient
  • Not using the right type of breadcrumbs or panko
  • Not frying the chicken at the right temperature

Follow these tips and techniques to make delicious crispy chicken fries at home. Remember, practice makes perfect. Don’t get discouraged if your first batch doesn’t turn out right. With time and patience, you’ll get the perfect crispy coating for your chicken fries recipe.

TechniqueDescription
Double BreadingA technique that involves dredging the chicken in flour, then dipping it in a wet ingredient, and finally coating it in a dry ingredient
Temperature ControlControlling the temperature of the oil to achieve the perfect crispy coating

Nutritional Information and Healthier Alternatives

When you think about chicken fries, it’s key to look at the nutrition. A serving can have 200 to 400 calories. This depends on how they’re cooked and what’s in them. To make a homemade chicken fries recipe better, try baking or grilling instead of frying.

To cut down on calories and fat, you can tweak a chicken fries recipe. Here are some tips:

  • Use leaner chicken cuts like breast or tenderloins
  • Go for whole wheat or whole grain breading for more fiber
  • Season with herbs and spices instead of salt and sugar

By making these small changes, you can still enjoy chicken fries but stay on track with your diet. For a healthier option, try baking or grilling homemade chicken fries. A few adjustments to the recipe can make this comfort food guilt-free.

In short, with a bit of creativity and trying new things, you can make a healthier and tasty chicken fries recipe. Whether you want the classic comfort food or a healthier version, chicken fries are a great choice.

NutrientValue (per serving)
Calories250-350
Protein20-25g
Fat10-15g
Carbohydrates20-25g

Serving Suggestions and Pairings

There are countless ways to serve chicken fries. You can go for something classic or try something new. Pairing crispy chicken fries with coleslaw or baked beans is a great choice. These sides add a creamy texture and sweet flavor that complements the chicken fries well.

For a fancier meal, serve homemade chicken fries with roasted veggies or a fresh salad. Mixing different flavors and textures can make your dish stand out. Don’t be afraid to try new things. Here are some ideas:

  • Chicken fries with spicy mayo and diced onions
  • Crispy chicken fries with garlic aioli
  • Homemade chicken fries with a fresh herb salad

How you present your dish matters too. Add paprika or chopped herbs to make your chicken fries look appealing. A bit of creativity can turn a simple meal into a memorable one.

Storage and Reheating Tips

To keep your chicken fries fresh and crispy, proper storage is key. Let them cool on a paper towel-lined plate to remove moisture. Then, store them in an airtight container in the fridge for up to 3 days. Make sure they don’t overlap.

For reheating, you can use the oven or a deep fryer. Preheat the oven to 400°F (200°C) and bake for 10-12 minutes. For a deep fryer, heat oil to 350°F (180°C) and fry for 2-3 minutes. An air fryer is also a great option for a healthier choice.

Here are some additional tips for storing and reheating homemade chicken fries:

  • Use a chicken fries recipe with natural preservatives like salt or sugar to extend shelf life.
  • Label and date the storage container so you can easily keep track of how long the chicken fries have been stored.
  • Reheat the chicken fries to an internal temperature of at least 165°F (74°C) to ensure food safety.

By following these tips, you can enjoy your chicken fries for longer. They’ll stay crispy and delicious. Whether you’re making them from scratch or reheating leftovers, these tips will help.

Conclusion: Why Chicken Fries Remain a Beloved Comfort Food

As we wrap up our exploration of chicken fries, it’s obvious why they’re so loved. Their mix of a crunchy outside and juicy inside wins over many. They’re perfect for a quick dinner or a party with friends, offering both joy and a sense of home.

Starting as a fast-food favorite, chicken fries have grown into a dish loved by all. With so many seasonings and flavors to try, there’s something for everyone. We hope you’ll keep trying new things with chicken fries and make them a special part of your cooking.

FAQ

What are chicken fries?

Chicken fries are strips of chicken that are breaded and fried. They have a crispy texture and are seasoned. They are often served as a side dish or snack.

What makes chicken fries so irresistible?

Chicken fries are irresistible because of their crispy texture and juicy chicken. The breading adds a satisfying crunch. The meat inside stays tender and moist, making them a favorite.

Why have chicken fries become a fast food sensation?

Chicken fries are loved for their convenience and taste. They are easy to eat on the go. Their crispy texture and savory flavor make them a hit with fast food fans.

How have chicken fries evolved over time?

Chicken fries have changed a lot. They started as simple fried chicken strips. Now, they come in many flavors and styles. Restaurants keep them exciting with new seasonings and breading.

What are the essential ingredients for making perfect homemade chicken fries?

To make great homemade chicken fries, you need the right chicken. Use tenders or breast. You also need a seasoned breading and the right frying technique for a crispy outside and juicy inside.

How can you make homemade chicken fries?

Making homemade chicken fries is easy. Cut the chicken, coat it in breading, and fry until golden and crispy. A step-by-step guide can help you make them just like a restaurant.

What are some popular variations of chicken fries?

There are many chicken fries out there. You can find spicy, herb-crusted, and international versions. Each has its own unique flavors and sauces.

What are the best dipping sauces for chicken fries?

Classic sauces like ketchup, ranch, and barbecue are great with chicken fries. But, you can also try spicy mayo, honey mustard, or creamy garlic dip for something different.

How can you achieve the perfect crispy coating on homemade chicken fries?

For a crispy coating, try double breading and fry at the right temperature. Avoid common mistakes. With these tips, you can make crispy chicken fries at home.

How can you make chicken fries healthier?

Chicken fries can be high in calories. To make them healthier, bake or grill instead of fry. Use leaner chicken and lighter breading for a guilt-free snack.

How should you store and reheat leftover chicken fries?

Store leftover chicken fries in an airtight container in the fridge. Reheat in the oven or air fryer. This helps keep them crispy.

Delicious Vegan Beef Stroganoff Recipe

vegan beef stroganoff​

What makes vegan beef stroganoff unforgettable? Is it the tender plant-based meat, the creamy sauce, or the savory mushrooms? It’s clear that a great vegan beef stroganoff is a game-changer for those seeking vegan comfort food. With more plant-based stroganoff recipes available, making a healthy and tasty dish is easier than ever. In this article, we’ll dive into vegan beef stroganoff and share a simple, delicious recipe to try at home.

Key Takeaways

  • Learn how to make a delicious vegan beef stroganoff recipe at home
  • Discover the benefits of using plant-based meat alternatives in your cooking
  • Get tips on how to create a rich and creamy sauce for your vegan beef stroganoff
  • Find out how to choose the perfect mushrooms for your dish
  • Explore the world of vegan comfort food and its many possibilities
  • Get inspired to try new and exciting vegan recipes in your own kitchen

The History of Beef Stroganoff and Its Vegan Evolution

Beef Stroganoff comes from Russia and has a long history since the 19th century. The original recipe includes sautéed beef, mushrooms, and a creamy sauce. Now, meatless stroganoff and vegan mushroom stroganoff are popular for those who want healthy vegan dinner options.

The change from Beef Stroganoff to vegan is amazing. It shows how plant-based food can be just as tasty. New ingredients and cooking methods make vegan Stroganoff just as good as the original. Key factors include:

  • Plant-based meat alternatives that taste like beef
  • Mushrooms as a protein source and flavor booster
  • Dairy-free sauces that are creamy and tasty

As vegan food becomes more popular, we’ll see more creative versions of classic dishes. Vegan mushroom stroganoff is a great example of how plant-based food can be both healthy and delicious.

If you’re vegan or just trying plant-based food, meatless stroganoff is a must-try. It has a creamy sauce, tender mushrooms, and a rich flavor. It’s a dish that will please anyone. So, why not try it and enjoy a healthy vegan dinner?

Essential Ingredients for Vegan Beef Stroganoff

To make a tasty dairy-free stroganoff, picking the right ingredients is key. You’ll need a vegan sour cream alternative for that creamy texture. Soy-based or coconut-based options are popular choices.

For the “beef” part, tofu, tempeh, or seitan work great. They can be marinated and cooked to taste like real beef. Mushrooms, especially cremini or shiitake, add a meaty texture and earthy flavor.

Having a good pantry is important for a great dairy-free stroganoff. You’ll need:

  • Vegan sour cream alternative
  • Plant-based meat alternatives (tofu, tempeh, or seitan)
  • Mushrooms (cremini or shiitake)
  • Onions and garlic
  • Dijon mustard
  • Paprika

Using these ingredients and a good recipe, you can make a dish that’s tasty, kind, and good for the planet.

With a bit of creativity, you can make a vegan beef stroganoff that’s as good as the original. So, start cooking and enjoy the taste of dairy-free stroganoff!

Kitchen Tools and Equipment Needed

To make a tasty vegan beef stroganoff, you need the right tools and equipment. Having the right utensils and gear makes cooking easy vegan recipes a breeze. Whether you’re a pro or just starting, good tools lead to better results.

For vegan comfort food, the right tools are key. They help make your dish both tasty and satisfying. Here are some essential utensils and some extra equipment you might find useful:

Must-Have Utensils

  • Large skillet or sauté pan
  • Colander or strainer
  • Measuring cups and spoons
  • Wooden spoon or spatula

Optional Equipment for Best Results

  • Immersion blender for creamy sauces
  • Stand mixer for efficient mixing
  • Silicone spatulas for easy food release

With these tools, you’re ready to make a delicious vegan beef stroganoff. It’s sure to become a hit easy vegan recipe at home. Cooking for one or many, the right tools ensure your vegan comfort food is perfect.

Preparing Your Plant-Based Meat Alternative

For a plant-based stroganoff recipe, the meat alternative is crucial. You can buy it or make it yourself. For a vegan beef stroganoff, look for plant-based beef strips or slices at your local store.

To get your meat alternative ready, marinate it in soy sauce, garlic, and herbs. This adds a lot of flavor. Then, cook it in oil until it’s browned and done. This makes it taste and feel like real beef.

  • Tofu
  • Tempeh
  • Seitan
  • Mushroom-based alternatives

These can replace traditional beef. They can be seasoned and cooked to taste and feel like meat.

By following these steps and choosing the right meat alternative, you can make a tasty plant-based stroganoff recipe. It’s perfect for a vegan beef stroganoff dish.

Creating the Perfect Dairy-Free Mushroom Sauce

To make a tasty vegan mushroom stroganoff, you need a rich, creamy sauce. This sauce is key to the dish’s flavor and texture. It should mix the earthy taste of mushrooms, the tang of vegan sour cream, and the savory spices.

Choosing the right mushrooms is important. You can pick from cremini, shiitake, or button mushrooms. Each type adds its own flavor and texture to the dish. For instance, cremini mushrooms are mild and soft, while shiitake are robust and firm.

Choosing the Right Mushrooms

  • Cremini mushrooms: mild flavor, soft texture
  • Shiitake mushrooms: robust flavor, firm texture
  • Button mushrooms: sweet flavor, crunchy texture

Creating a vegan sour cream alternative is also key. You can mix soy yogurt, lemon juice, and spices to make it. This sauce should be creamy, tangy, and delicious. With the right mushrooms and vegan sour cream, your sauce will be perfect for vegan mushroom stroganoff.

Step-by-Step Cooking Instructions

To make a tasty healthy vegan dinner, just follow these steps. First, cook your plant-based meat as the package says. Then, heat some oil in a pan and sauté the onions and mushrooms until they’re soft.

After that, add the cooked meat, vegetable broth, and spices to the pan. Stir everything together and let it simmer for a bit. For a creamy sauce, you can mix in non-dairy sour cream or yogurt.

Here are some extra tips for the perfect vegan beef stroganoff:

  • Use different mushrooms like button, cremini, and shiitake for more flavor and texture.
  • Don’t overcook the meat alternative, as it can get dry and tough.
  • Try out different spices and seasonings to find your favorite mix.

With these easy vegan recipes, you can make a delicious and healthy vegan dinner that everyone will enjoy. So, get creative and have fun cooking a tasty vegan meal.

By following these simple steps and tips, you can become a pro at vegan cooking. You’ll enjoy making a variety of tasty and healthy vegan dinner options.

IngredientQuantity
Plant-based meat alternative1 package
Mushrooms1 cup
Onions1 medium
Vegetable broth2 cups

Nutritional Benefits and Dietary Information

Vegan beef stroganoff is a healthy dinner choice. It’s tasty and packed with protein, perfect for vegans and vegetarians. The protein comes from soy, peas, or other legumes in the plant-based meat.

This dish has fewer calories and macronutrients than traditional stroganoff. A serving has about 400-500 calories. It’s balanced with carbs, protein, and healthy fats, making it a fulfilling meal.

Protein Content

The protein in vegan beef stroganoff depends on the meat alternative. But, most recipes have 20-25 grams of protein per serving.

Calories and Macronutrients

Here’s a breakdown of what’s in a serving of vegan beef stroganoff:

MacronutrientAmount (per serving)
Calories450
Protein22g
Carbohydrates40g
Fat15g

Dietary Restrictions and Alternatives

Vegan beef stroganoff is perfect for vegans and vegetarians. But, some meat alternatives may have gluten or allergens. Always pick a gluten-free and safe option for everyone’s dietary needs.

Storage Tips and Leftover Ideas

One of the best things about vegan comfort food is having leftovers. To keep your dish fresh, store it properly. You can refrigerate or freeze the stroganoff for later. For more ideas, check out easy vegan recipes websites.

Here are some tips for storing and using your vegan beef stroganoff leftovers:

  • Refrigerate: Store the stroganoff in an airtight container in the refrigerator for up to 3 days.
  • Freeze: Place the stroganoff in a freezer-safe container or bag and store it in the freezer for up to 3 months.
  • Reheat: Reheat the stroganoff in the microwave or on the stovetop until it’s hot and steaming.

Some ideas for using your leftovers include:

  1. Making a stroganoff sandwich by serving the dish over bread or crackers.
  2. Adding the stroganoff to a salad or wrap for a quick and easy meal.
  3. Using the stroganoff as a topping for baked potatoes or vegetables.

By following these storage tips and using your leftovers in creative ways, you can enjoy your vegan beef stroganoff for days. It’s perfect for a comforting bowl of noodles or a quick meal. Its rich and creamy sauce and tender ingredients make it a favorite for anyone looking for a delicious meal.

Conclusion: Mastering Your Vegan Beef Stroganoff Journey

Congratulations on mastering this delicious vegan beef stroganoff recipe! You followed the steps and used the right plant-based ingredients. Now, you have a comforting and tasty vegan comfort food dish that’s just as good as the traditional one. You’ve opened the door to endless possibilities.

Don’t be afraid to try new plant-based meat alternatives or change the spices. It’s all about having fun and making it your own. Soon, you’ll be a pro at making vegan beef stroganoff and will wow everyone with your cooking.

This recipe is easy and flexible. It’s perfect for a cozy meal or to impress at a dinner party. Enjoy your journey with this plant-based stroganoff recipe and let your creativity flow.

FAQ

What makes this vegan beef stroganoff recipe so delicious?

This vegan beef stroganoff is a hit because of its tender plant-based meat and creamy sauce. It also has savory mushrooms. Together, they make a dish that’s both comforting and healthy.

What are the essential ingredients for this vegan beef stroganoff?

The key ingredients are plant-based meat, mushrooms, and vegan sour cream or cashew cream. You’ll also need vegetable broth and spices. These make the dish plant-based and full of flavor.

What kitchen tools and equipment are needed to make this vegan dish?

You’ll need a large skillet or saucepan, a sharp knife, and a cutting board. A whisk or spoon is also essential for mixing. Optional tools like a food processor or blender can help with the vegan sour cream.

How do I prepare the plant-based meat alternative for the best texture?

To get the right texture, use a store-bought or homemade plant-based meat. Make sure to sauté or brown it before adding it to the dish. This will make it similar to ground beef.

What’s the secret to creating the perfect dairy-free mushroom sauce?

The secret is to pick the right mushrooms and make a creamy vegan sour cream or cashew cream. Adjust the broth and thickening agents to get the sauce just right.

Can I store leftovers of this vegan beef stroganoff and how do I reheat them?

Yes, you can store leftovers in an airtight container in the fridge for up to 4 days or freeze for 3 months. To reheat, warm it in a saucepan or microwave. Add broth or plant-based milk if it’s too thick.

Delicious & Healthy Beef Stroganoff Recipe

healthy beef stroganoff​

Can we make a healthy version of beef stroganoff that’s just as tasty? A low calorie beef stroganoff recipe is a great idea for those who care about their health. With a few tweaks, you can make a guilt-free, easy beef stroganoff recipe for a cozy dinner.

A healthy beef stroganoff recipe is not only tasty but also packed with nutritious ingredients. By choosing lean beef and low-calorie ingredients, you can make a dish that’s both filling and healthy. It’s perfect for busy people or anyone who loves to cook at home.

Key Takeaways

  • Healthy beef stroganoff can be a nutritious and delicious twist on a classic dish
  • A low calorie beef stroganoff recipe can be achieved with lean beef and healthy ingredients
  • An easy beef stroganoff recipe is perfect for a quick and satisfying meal
  • Using low-calorie ingredients can help reduce the guilt associated with indulging in a classic dish
  • A healthy beef stroganoff recipe can be a great way to incorporate more nutrients into your diet
  • With a few simple tweaks, you can create a healthy beef stroganoff dish that’s just as flavorful as the original

Transform Your Traditional Beef Stroganoff Into a Healthy Delight

Classic dishes like beef stroganoff are tempting with their rich flavors and big portions. But, you can make a light beef stroganoff that’s both tasty and healthy. Just use lean beef and low-calorie ingredients for a skinny beef stroganoff that’s guilt-free.

To make a nutritious beef stroganoff, choose whole, unprocessed foods. Use lean beef like sirloin or tenderloin, and add fresh veggies like mushrooms and bell peppers. Cut down on oil and cream by using Greek yogurt or low-sodium broth instead.

  • Using whole wheat pasta instead of white pasta
  • Adding plenty of spices and herbs for flavor instead of relying on salt and sugar
  • Reducing the amount of meat used in the recipe and adding more vegetables

Follow these tips to make a tasty and healthy beef stroganoff. It’s great for any night or a special event. This light beef stroganoff will quickly become a favorite.

Essential Ingredients for Healthy Beef Stroganoff

To make a tasty and healthy lean beef stroganoff, picking the right ingredients is key. Start with lean beef cuts, which are less fatty and calorie-rich. Also, choose healthy sauce options and fresh mushrooms for better taste and nutrition.

The quality of ingredients greatly affects the taste and health of lean beef stroganoff. Fresh herbs and spices can make the dish richer without adding salt or sugar. For a healthier version, use low-sodium broth and less oil.

Choosing Lean Beef Cuts

Choose “lean” or “extra lean” cuts for the healthiest option. Sirloin, tenderloin, and round are good choices. They’re low in fat but high in protein and nutrients.

Healthy Sauce Alternatives

Traditional stroganoff recipes often use heavy cream or sour cream, which are high in calories. Try Greek yogurt or low-fat sour cream instead. Adding fresh dill or chives can make the sauce tangy and fresh.

Mushroom Selection Tips

For a flavorful and healthy beef stroganoff, pick mushrooms rich in fiber and antioxidants. Button, cremini, and shiitake mushrooms are great choices. Sauteing them with garlic and onions adds flavor without extra calories.

Nutritional Benefits of Our Lightened-Up Version

Our low calorie beef stroganoff recipe is great for those who care about their health. It uses lean beef and low-calorie ingredients. This makes it tasty and easy to fit into a healthy diet.

This easy beef stroganoff recipe is full of nutrients. It has protein, fiber, and important vitamins and minerals. The sauce is made with low-fat sour cream and Dijon mustard. This keeps the calories low while keeping the flavor high.

Here is a breakdown of the nutritional benefits of our lightened-up version:

NutrientAmount per serving
Calories350
Protein30g
Fat10g
Saturated fat2.5g
Cholesterol60mg

Our healthy beef stroganoff recipe is both nutritious and delicious. It’s low in calories but high in nutrients. It’s a perfect choice for a quick and healthy meal.

Kitchen Tools and Equipment Needed

To make a tasty and healthy easy beef stroganoff recipe, you need the right tools. Having the right cookware and utensils makes cooking easier and faster.

Essential Cookware

For a light beef stroganoff recipe, you’ll need a large skillet, a saucepan, and a cutting board. Also, a sharp knife, a whisk, and a wooden spoon are necessary. These tools help you prepare and cook your skinny beef stroganoff dish.

Optional Time-Saving Tools

Optional tools like a food processor, a slow cooker, and a pressure cooker can be helpful. They save time on preparation and cooking, making a healthy meal easier to make.

Here is a list of the kitchen tools and equipment needed:

  • Large skillet
  • Saucepan
  • Cutting board
  • Sharp knife
  • Whisk
  • Wooden spoon

With the right tools, making a delicious and healthy easy beef stroganoff recipe is easy. Choose the right cookware and utensils for your skinny beef stroganoff dish. Use optional tools to make cooking more efficient.

Step-by-Step Cooking Instructions

To make a tasty and healthy beef stroganoff, follow these easy steps. First, cook the lean beef in a pan with oil until it’s browned. Then, set it aside.

Next, add mushrooms and onions to the pan. Cook them until they’re soft.

Now, add the sauce ingredients. This includes low-fat sour cream and Dijon mustard. Stir well and let it simmer for a few minutes. This will thicken the sauce.

Finally, add the cooked beef back into the pan. Stir everything together. Serve it over whole wheat noodles or brown rice. Enjoy your guilt-free meal.

When cooking healthy beef stroganoff, remember to use lean beef and plenty of veggies. They add flavor and nutrients. With these steps and tips, you can make a delicious, healthy beef stroganoff for dinner.

Smart Substitutions for a Lighter Dish

Making a low calorie beef stroganoff is all about smart choices. By picking the right ingredients, you can make a dish that’s tasty and healthy. A light beef stroganoff can be just as tasty as the traditional version, with a few simple changes.

Dairy Alternatives

Using dairy alternatives is a great way to lighten up your beef stroganoff. Try almond milk or soy milk instead of heavy cream. Choose low-fat or non-dairy yogurt to cut down on calories. These swaps make your dish healthier and lower in calories.

Pasta Options

Switching to whole wheat pasta or zucchini noodles is another smart move. It cuts calories and boosts fiber. A nutritious beef stroganoff with whole wheat pasta is a healthy and filling meal.

Seasoning Choices

Be careful with your seasonings too. Use herbs and spices instead of salt and sugar. A light beef stroganoff with fresh herbs like parsley and dill is a flavorful, low-calorie option.

Here are some tips for a low calorie beef stroganoff:

  • Use lean beef cuts to reduce the fat content
  • Choose low-fat dairy alternatives
  • Opt for whole wheat pasta or zucchini noodles
  • Use herbs and spices to add flavor instead of salt and sugar
IngredientTraditionalLow Calorie
BeefHigh-fat cutsLean cuts
DairyHeavy creamAlmond milk or soy milk
PastaEgg noodlesWhole wheat pasta or zucchini noodles

Tips for Perfect Texture and Flavor

To get the perfect texture and flavor in your healthy beef stroganoff, focus on the right ingredients and cooking methods. A great easy beef stroganoff recipe balances tender beef, flavorful sauce, and perfectly cooked noodles. Use lean beef and healthy sauce alternatives to make a nutritious and tasty skinny beef stroganoff.

Some tips to keep in mind include:

  • Use high-quality ingredients, like fresh mushrooms and lean beef
  • Cook noodles al dente to keep their texture
  • Don’t overcook the beef to avoid it becoming tough

By following these tips and using a balanced easy beef stroganoff recipe, you can make a healthy beef stroganoff perfect for any meal. The key is to find the right mix of flavors and textures. Don’t be afraid to try new things. With practice and patience, you can impress everyone with your skinny beef stroganoff.

Remember, the most important thing is to have fun and enjoy making a delicious and healthy meal. With these tips and a bit of creativity, you can make a healthy beef stroganoff for any occasion.

IngredientQuantityImportance
Lean Beef1 poundHigh
Fresh Mushrooms1 cupMedium
Healthy Sauce1 cupHigh

Meal Prep and Storage Guidelines

To enjoy your lean beef stroganoff at its best, follow proper meal prep and storage guidelines. This keeps the dish’s flavor, texture, and nutritional value intact. Whether it’s for a quick weeknight dinner or a special occasion, these tips are helpful.

Portion control is key in meal prep. Divide your lean beef stroganoff into individual portions for easier reheating and storage. Use airtight containers to keep moisture and other flavors out.

Proper Storage Methods

Keep your healthy beef stroganoff in the fridge at 40°F (4°C) or below. If you won’t eat it in a few days, freeze it. Frozen lean beef stroganoff can last up to three months. Always reheat it to 165°F (74°C) for food safety.

Reheating Instructions

To reheat your guilt-free beef stroganoff, use the stovetop or microwave. On the stovetop, heat it over low-medium heat, stirring often, until warm. For the microwave, cover it with a lid or plastic wrap and heat on high for 30-60 seconds, until warm.

By following these guidelines, you can enjoy your lean beef stroganoff anytime. It’s a quick, healthy meal perfect for any occasion.

Serving Suggestions and Healthy Side Dishes

There are many ways to serve your low calorie beef stroganoff. This easy recipe goes well with various healthy sides. Try it with steamed veggies like broccoli or carrots for extra fiber and vitamins.

For a healthier dish, pair it with quinoa or brown rice. These grains are full of protein, fiber, and minerals. Adding sautéed spinach or mushrooms can also boost your meal’s nutrition.

Here are some healthy side dish ideas to consider:

  • Roasted vegetables, such as Brussels sprouts or sweet potatoes
  • Grilled asparagus or bell peppers
  • A simple green salad with a light vinaigrette dressing

Pairing your low calorie beef stroganoff with these sides makes for a nutritious meal. This recipe is perfect for any night or special occasion. Its rich flavors and healthy ingredients will make it a family favorite.

Side DishCaloriesProteinFiber
Steamed Broccoli552g5g
Quinoa1504g5g
Grilled Asparagus253g3g

Common Mistakes to Avoid When Making Healthy Beef Stroganoff

When making a healthy beef stroganoff, knowing common mistakes is key. A lean beef stroganoff recipe needs careful attention. This ensures a guilt-free beef stroganoff experience.

To make the perfect healthy beef stroganoff, keep these tips in mind:

  • Temperature control: Make sure your lean beef is cooked just right. This avoids overcooking or undercooking.
  • Sauce consistency: Find the right balance of sauce and ingredients. This makes a rich and creamy guilt-free beef stroganoff sauce.

Avoiding these mistakes helps you make a tasty and healthy healthy beef stroganoff. Use top-notch ingredients and stick to the recipe for the best results.

With these tips, you can make a lean beef stroganoff that’s both healthy and tasty. Try different ingredients and seasonings to find your favorite mix.

IngredientQuantityBenefits
Lean Beef1 poundHigh-quality protein, low fat content
Mushrooms1 cupRich in antioxidants, fiber, and vitamins
Healthy Sauce1/2 cupLow-calorie, low-sodium, and rich in flavor

By following these guidelines and choosing the right ingredients, you can make a guilt-free beef stroganoff. It will be both healthy and delicious.

Conclusion: Enjoying Your Guilt-Free Beef Stroganoff Creation

As we wrap up our guide to this healthy beef stroganoff recipe, we hope you’re ready to make it yourself. Use lean beef, healthier ingredients, and our easy steps. This way, you can enjoy beef stroganoff’s rich taste without feeling guilty.

This healthy beef stroganoff meets your cravings and helps you reach your wellness goals. It’s great for building muscle, losing weight, or keeping a balanced diet. Enjoy the cozy feel of this light beef stroganoff while feeding your body with important nutrients.

Try our guilt-free beef stroganoff and enjoy every bite. With a few changes, you can make a classic dish healthier and more fulfilling. Dive into the world of our healthy beef stroganoff and start a journey that values both taste and health.

FAQ

What makes this beef stroganoff recipe healthy?

Our recipe uses lean beef and low-calorie ingredients. It also has healthy sauce alternatives. This makes the dish nutritious and guilt-free.

How does this recipe differ from the traditional beef stroganoff?

Our version uses lean beef and low-fat dairy. The sauce is lighter, made with healthier ingredients. This makes it lower in calories and fat, but still flavorful.

What are the key ingredients for a healthy beef stroganoff?

Key ingredients include lean beef, low-fat sour cream or yogurt, and fresh mushrooms. Use whole-grain pasta or zucchini noodles for a lighter option.

What are the nutritional benefits of this lightened-up beef stroganoff?

This recipe is lower in calories, fat, and carbs. It’s high in protein from lean beef. Mushrooms and vegetables add nutrients and fiber.

What kitchen tools and equipment are needed to make this recipe?

You’ll need a large skillet or Dutch oven, a sharp knife, and a cutting board. A spatula or wooden spoon is also essential. A slow cooker or Instant Pot can be helpful for easy cooking.

How do I make sure the beef stroganoff has the perfect texture and flavor?

Sear the beef well and cook mushrooms until they release moisture. Use the right seasonings. Let it simmer for the recommended time to get a rich, creamy texture.

How can I meal prep and store the healthy beef stroganoff?

Make it in advance and store in airtight containers in the fridge for up to 4 days. Reheat thoroughly to keep the texture and flavor.

What are some healthy side dish ideas to serve with the beef stroganoff?

Serve with roasted vegetables, a fresh salad, or steamed zucchini noodles. It also goes well over whole-grain brown rice or quinoa.

What common mistakes should I avoid when making this healthy beef stroganoff?

Avoid overcooking the beef to prevent toughness. Also, watch the sauce’s consistency to avoid it being too thick or thin. Proper temperature control ensures a perfect dish every time.

Indulge in Savory Beef Stroganoff Meatballs Tonight

beef stroganoff meatballs​

What makes a classic beef stroganoff recipe even better? Adding meatballs to it makes it both comforting and exciting. Imagine tender beef stroganoff meatballs in a rich, creamy sauce, served over egg noodles. This dish is sure to become a family favorite.

The mix of beef stroganoff meatballs and creamy sauce is perfect. Our simple recipe lets you enjoy it at home.

Beef stroganoff meatballs are great for comfort food lovers or anyone looking for a new dinner idea. Our recipe uses ground beef and a creamy sauce for a flavorful dish. With just a few ingredients and basic cooking skills, you can make a delicious beef stroganoff meatballs recipe that everyone will love.

Key Takeaways

  • Beef stroganoff meatballs are a delicious and easy-to-make dish
  • The combination of ground beef and creamy sauce creates a rich and flavorful sauce
  • This recipe is perfect for comfort food lovers and families alike
  • Our simple recipe makes it easy to create a delicious beef stroganoff meatballs dish at home
  • Beef stroganoff meatballs can be served over egg noodles for a hearty and satisfying meal
  • The creamy sauce is a key component of the dish, making it a great option for those who love savory flavors
  • This recipe is a great way to mix things up and try something new for dinner

The Perfect Marriage of Two Classic Comfort Foods

Comfort food is all about warmth and satisfaction. A homemade meal with ground beef is hard to beat. The mix of beef stroganoff and meatballs is a hit, making a great family dinner. It’s a hearty, comforting meal for any time.

Mixing these two classic dishes might sound odd, but it’s a perfect match. The creamy sauce and tender beef of beef stroganoff go great with meatballs. It’s a dish that’s both familiar and exciting. It’s perfect for a quick weeknight meal or a special occasion.

Looking for more comfort food ideas? Check out these recipes to add your own twist to this classic dish.

Some of the key benefits of this recipe include:

  • Easy to make and customize to your taste
  • Can be made ahead of time for a stress-free family dinner
  • Combines the best of both beef stroganoff and meatballs for a unique flavor experience

Ground beef and simple ingredients make this meal delicious and affordable. Try this beef stroganoff meatball recipe and enjoy the perfect mix of two classic comfort foods.

Essential Ingredients for Perfect Beef Stroganoff Meatballs

To make the perfect beef stroganoff meatballs, you need a few key ingredients. These include ground beef, breadcrumbs, and a creamy sauce. The recipe is easy to follow, needing little prep and cooking time.

Here are the main ingredients you’ll need:

  • 1 pound ground beef
  • 1/2 cup breadcrumbs
  • 1/4 cup chopped onion
  • 2 cloves garlic, minced
  • 1 cup beef broth
  • 1 tablespoon tomato paste
  • 1 teaspoon Dijon mustard
  • 1/2 cup sour cream
  • Salt and pepper to taste

These ingredients will help you make a tasty and easy beef stroganoff meatballs recipe. You can also tweak the recipe to your liking. For instance, adding chopped mushrooms or bell peppers can enhance the flavor.

Having the right tools is also crucial for making beef stroganoff meatballs. You’ll need a large skillet, a meatball maker, and a saucepan. With these ingredients and tools, you can whip up a delicious and easy beef stroganoff meatballs recipe that everyone will love.

IngredientQuantity
Ground beef1 pound
Breadcrumbs1/2 cup
Chopped onion1/4 cup
Garlic, minced2 cloves

Kitchen Tools and Equipment You’ll Need

To make a tasty homemade dish like beef stroganoff meatballs, you need the right tools. Having the right utensils makes cooking easier and faster. We’ll cover the essential tools, optional helpers, and the best cooking surfaces for perfect meatballs.

Must-Have Utensils

You’ll need a mixing bowl, a meatball maker, and a cooking spoon. These tools help mix, shape, and cook your meatballs well. Don’t forget a cutting board and knife for chopping ingredients.

Optional but Helpful Tools

Consider using a stand mixer, food processor, and silicone spatula. These tools make mixing and shaping meatballs easier. They’re also useful for other cooking tasks.

Cooking Surface Recommendations

Choose a cooking surface that heats evenly for your meatballs. Non-stick skillets, cast-iron pans, or baking sheets work well. Slow cookers or pressure cookers are great for busy days.

ToolDescription
Mixing BowlUsed to mix and combine ingredients
Meatball MakerUsed to shape and form meatballs
Cooking SpoonUsed to stir and cook meatballs

Crafting the Perfect Meatball Mixture

To make perfect beef stroganoff meatballs, you need a well-balanced mixture. This mix usually has ground beef, breadcrumbs, and a creamy sauce. The goal is to mix these right to get a tasty and savory flavor.

Here are some tips for your recipe:

  • Choose high-quality ground beef for the best taste.
  • Avoid overmixing the meatball mix to keep them tender.
  • Adding a creamy sauce boosts flavor and keeps the meatballs moist.

By following these tips and using the right ingredients, you’ll make a delicious recipe. Make sure to balance the flavors and textures for the best meatball mix.

With practice and patience, you’ll master the meatball mix. Then, you can enjoy a tasty beef stroganoff dish.

IngredientQuantity
Ground Beef1 pound
Breadcrumbs1/2 cup
Creamy Sauce1/4 cup

Creating Your Signature Stroganoff Sauce

To make a delicious beef stroganoff meatballs dish, you need a creamy sauce. The stroganoff sauce is key, and it’s easy to make. It’s made with sautéed onions, garlic, and mushrooms, plus beef broth, Dijon mustard, and sour cream.

For a great stroganoff sauce, balance the flavors and get the right consistency. Adjust the beef broth and sour cream to achieve the perfect thickness. Adding a tablespoon of flour can make the sauce even creamier. Here are some tips to help you create your signature stroganoff sauce:

Base Ingredients

  • 1 onion, finely chopped
  • 2 cloves of garlic, minced
  • 1 cup of mushrooms, sliced
  • 1 can of beef broth
  • 1 tablespoon of Dijon mustard
  • 1/2 cup of sour cream

Seasoning Tips

To add more flavor, try adding dried thyme, paprika, or chopped parsley. A pinch of salt and pepper can also enhance the taste. For a deeper flavor, reduce the beef broth and add more mustard or sour cream.

Achieving the Perfect Consistency

The sauce’s consistency is key to the dish. If it’s too thick, add more beef broth. If it’s too thin, add more sour cream or flour. Here’s a table to help you adjust the consistency:

ConsistencyAdjustment
Too thickAdd more beef broth
Too thinAdd more sour cream or flour

By following these tips and using the right ingredients, you can create a delicious stroganoff sauce. This easy recipe is perfect for any occasion.

Step-by-Step Beef Stroganoff Meatballs Recipe

To make a delicious homemade beef stroganoff meatballs dish, follow these simple steps:

First, gather all the necessary ingredients for the recipe. You’ll need ground beef, onions, and mushrooms. Then, prepare the meatball mixture by combining all the ingredients in a large bowl.

Here are the steps to cook the meatballs:

  • Preheat the oven to 400°F (200°C).
  • Form the meatball mixture into small balls and place them on a baking sheet.
  • Bake the meatballs for 15-20 minutes, or until they are cooked through.

This family dinner favorite is easy to make. It can be served with pasta or rice. The recipe is also versatile, allowing you to customize it to your taste preferences.

By following this simple recipe, you can create a delicious and satisfying homemade meal. It’s perfect for a family dinner.

Troubleshooting Common Issues

When making beef stroganoff meatballs, you might run into some problems. A broken sauce or dry meatballs can be a bummer. But, there are simple fixes to make your dish perfect. Let’s look at common issues and how to solve them.

Getting the sauce right is key. If it’s too thick, add a bit more broth. If it’s too thin, simmer it to thicken. This way, your sauce will be rich and creamy, coating your meatballs well.

Fixing a Broken Sauce

To fix a broken sauce, whisk in flour or cornstarch to thicken it. Or, add a bit more sour cream to make it creamy again. This will balance the flavors and make your sauce smooth.

Preventing Dry Meatballs

To avoid dry meatballs, don’t overmix the meat. Also, cook them until just done, then stop. This keeps them moist and flavorful, making your dish savory and delicious.

Sauce Thickness Adjustments

Getting the sauce right is important for your beef stroganoff meatballs. If it’s too thick, it can hide the meatballs. If it’s too thin, it won’t stick. Finding the right balance makes your dish savory and satisfying, with a creamy sauce that complements the meatballs.

IssueSolution
Broken SauceWhisk in flour or cornstarch, or add sour cream
Dry MeatballsDon’t overmix or overcook
Sauce too thickThin out with broth
Sauce too thinSimmer to reduce

Serving Suggestions and Pairings

Beef stroganoff meatballs are great for a family dinner. They go well with homemade noodles or rice. You can also add steamed broccoli or roasted carrots for extra flavor.

For a fancy meal, pair the meatballs with a homemade salad. Use mixed greens, cherry tomatoes, and a homemade vinaigrette. This adds a fresh touch to the meatballs. Or, try them with roasted potatoes or garlic bread for a heartier meal.

Here are more ideas:

  • Serving the meatballs as an appetizer at a party or gathering
  • Adding them to a comfort food buffet, featuring other classic dishes like mac and cheese or chicken pot pie
  • Using them as a topping for a homemade pizza or pasta dish

Beef stroganoff meatballs are a crowd-pleaser. Try them tonight for a tasty, homemade meal. It’s sure to become a favorite!

Storage and Reheating Tips

To keep your beef stroganoff meatballs fresh and delicious, proper storage and reheating are key. This easy recipe stays tasty for several days when stored right.

For an easy recipe, store the meatballs in airtight containers in the fridge. You can also explore other recipes for more storage tips.

Proper Storage Methods

When storing, cool the meatballs to room temperature first. This step prevents moisture buildup and keeps them fresh.

Reheating Without Compromising Quality

To reheat your beef stroganoff meatballs well, use the oven or microwave. For the oven, place them on a baking sheet and heat at 350°F for 10-15 minutes. For the microwave, put them in a safe dish and heat for 30-60 seconds until warm.

Freezing Guidelines

To freeze your beef stroganoff meatballs, do it before cooking. Place uncooked meatballs on a baking sheet lined with parchment paper and freeze. Then, move them to a freezer-safe bag or container. When ready to cook, thaw and follow the cooking instructions for a tasty meal.

Conclusion: Mastering Your Beef Stroganoff Meatballs

Making beef stroganoff meatballs is like combining two comfort foods into one. You now have the recipe and tips to make it in your kitchen. These beef stroganoff meatballs are perfect for any occasion, from family gatherings to cozy nights in.

The secret to a great dish is the right mix of flavors and tender meatballs. Follow the steps and fix any problems to make a dish that will wow everyone. So, put on your apron, get your ingredients ready, and start cooking.

Share your beef stroganoff meatballs with your loved ones and enjoy every bite. You’ll feel proud of your culinary success. Happy cooking!

FAQ

What is the history of beef stroganoff?

Beef stroganoff comes from Russia. It was made by a French chef for a Russian noble family in the 19th century. It has sautéed beef, mushrooms, and a creamy sauce.

Why do meatballs make beef stroganoff better?

Adding meatballs to beef stroganoff makes it unique and tasty. Meatballs make the dish fun and easy to serve at family dinners.

What makes this beef stroganoff meatballs recipe special?

This recipe is special because it mixes beef stroganoff’s classic flavors with meatballs’ convenience. It has a creamy sauce and easy steps for making the meatballs.

What essential ingredients do I need for beef stroganoff meatballs?

You need ground beef, breadcrumbs, and a creamy sauce. The sauce includes sour cream, mushrooms, and seasonings.

What kitchen tools and equipment do I need to make beef stroganoff meatballs?

You’ll need a mixing bowl, meatball maker, and a cooking surface like a skillet or baking sheet. A food processor and meat thermometer are optional but helpful.

How do I craft the perfect meatball mixture for beef stroganoff meatballs?

Mix ground beef, breadcrumbs, and creamy sauce for the perfect meatball. This creates a savory and flavorful meatball that goes well with the stroganoff sauce.

How do I create the signature stroganoff sauce for this dish?

Use sour cream, beef broth, and Worcestershire sauce as the base. Add paprika, garlic, and salt and pepper for the perfect flavor and consistency.

What are some common issues I might run into when making beef stroganoff meatballs?

You might face a broken sauce, dry meatballs, or adjusting the sauce thickness. Try fixing the sauce, adjusting the meatball mixture, and adding more broth or sour cream as needed.

How can I best serve and pair beef stroganoff meatballs?

Serve with egg noodles, mashed potatoes, or a fresh salad. Consider crusty bread or a sweet dessert to balance the flavors.

How should I store and reheat leftover beef stroganoff meatballs?

Store in an airtight container in the fridge for 3-4 days. Reheat gently in the oven or on the stovetop. Freeze for longer storage.

Delicious Shrimp Dirty Rice Recipe

SHRIMP DIRTY RICE

What makes a perfect SHRIMP DIRTY RICE dish? How can you create an authentic taste of cajun shrimp at home?

Imagine enjoying a flavorful plate of SHRIMP DIRTY RICE. It’s filled with rich Cajun spices and succulent shrimp.

Key Takeaways

  • Learn the secrets to making a delicious SHRIMP DIRTY RICE dish
  • Discover the essential ingredients for a authentic cajun shrimp flavor
  • Get tips on selecting and preparing the perfect shrimp for your recipe
  • Understand the importance of Cajun spices in SHRIMP DIRTY RICE
  • Find out how to cook the perfect SHRIMP DIRTY RICE with ease

The Rich History of Dirty Rice in New Orleans Cuisine

Dirty rice, a key part of southern comfort food, has a long history in Louisiana. It started in the 18th century with African and European settlers. Today, it’s a favorite in New Orleans cuisine.

Dirty rice’s history is interesting. Over time, different ingredients and spices were added. This made the dish we love today.

  • Geographical location: Louisiana’s unique location allowed for the blending of different cultures and cuisines, resulting in the creation of dirty rice.
  • Availability of ingredients: The use of local ingredients such as rice, meat, and spices helped to shape the dish into what it is today.
  • Culinary traditions: The influence of African, European, and Caribbean cuisines can be seen in the preparation and seasoning of dirty rice.

Exploring dirty rice’s history shows it’s more than food. It’s a symbol of New Orleans cuisine and southern comfort food. Its rich flavors and varied ingredients make it a favorite in many homes. This shows its lasting appeal in southern comfort food.

IngredientOriginRole in Dirty Rice
RiceAsiaBase ingredient
Meat (pork or chicken)EuropeAdded flavor and texture
Spices (e.g. paprika, thyme)Europe and AfricaAdded flavor and aroma

Essential Ingredients for Perfect Shrimp Dirty Rice

To make a delicious shrimp dirty rice, you need the freshest ingredients. Creole cooking stresses the importance of quality. Here are the key ingredients for shrimp dirty rice:

The “holy trinity” of onions, bell peppers, and celery is at the heart of the dish. They’re sautéed in oil to create a rich base. Adding shrimp, spices, and more, makes a tasty one-pot meal.

  • Fresh shrimp, preferably wild-caught and sustainably sourced
  • Uncooked white or brown rice, which absorbs the flavors of the dish
  • A variety of spices, such as paprika, thyme, and cayenne pepper, to add depth and heat
  • Chicken or seafood broth, which helps to cook the rice and add moisture to the dish

By mixing these ingredients and using creole cooking methods, you’ll get a delicious one-pot meal. It’s perfect for any time. Whether you’re experienced or new to cooking, shrimp dirty rice will wow everyone.

Selecting and Preparing the Perfect Shrimp

Choosing the right shrimp is key for a tasty shrimp dirty rice. You want shrimp that can handle bold flavors well. Whether fresh or frozen, the shrimp’s quality affects your dish’s taste and texture.

Fresh shrimp might be pricier but they taste sweeter and are firmer. Frozen shrimp are cheaper and just as tasty if thawed right.

Fresh vs. Frozen Shrimp

  • Fresh shrimp: sweeter flavor, firmer texture, more expensive
  • Frozen shrimp: convenient, affordable, can be just as flavorful

Proper Cleaning Techniques

It doesn’t matter if you pick fresh or frozen shrimp. Cleaning them right is crucial. Rinse them under cold water and dry with a paper towel. This makes them cook evenly and stay tender.

Size and Count Recommendations

For a traditional shrimp dirty rice, use large shrimp, about 16-20 count per pound. This size is perfect for the best taste and texture. Feel free to try different sizes and types for your favorite flavor.

Shrimp SizeCount per PoundRecommended Use
Large16-20Classic shrimp dirty rice
Medium21-25Spicy rice dishes with smaller shrimp
Small26-30Salads or appetizers

The Secret to Authentic Cajun Seasoning

To make a real SHRIMP DIRTY RICE, you need top-notch spices and seasonings. Cajun shrimp is famous for its strong tastes. This comes from mixing paprika, cayenne pepper, and thyme.

A homemade Cajun seasoning mix is key to the recipe. You can whip up your own by combining:

  • Paprika
  • Cayenne pepper
  • Thyme
  • Garlic powder
  • Onion powder

This mix adds richness and complexity to your SHRIMP DIRTY RICE. It makes it a genuineCajun shrimp dish.

When using your Cajun seasoning, adjust the amount to your liking. You can also add lemon juice or hot sauce for extra flavor. The goal is to find the perfect mix of tastes for your SHRIMP DIRTY RICE.

By following these tips and using quality ingredients, you’ll make a great Cajun seasoning blend. It will take your SHRIMP DIRTY RICE to the next level. Whether you’re an expert chef or just starting out, this blend will wow your guests with its bold and tasty flavors.

How to Make Classic Shrimp Dirty Rice

Shrimp dirty rice is a favorite southern comfort food in many homes. It’s a tasty one-pot meal that’s quick to make, ready in under an hour. First, cook the rice in a flavorful broth with onions and garlic.

After the rice is cooked, start with the holy trinity: onions, bell peppers, and celery. These add a rich flavor to the dish. Just sauté them in oil until tender, then mix with the cooked rice.

Now, add the shrimp to the pot with some seasonings and spices. Use fresh, quality ingredients for the best taste. You might also add diced tomatoes, chopped scallions, or paprika.

For the final touches, add a squeeze of lemon juice, some chopped herbs, or hot sauce. Taste and adjust the seasoning as you go. This way, you’ll make a delicious one-pot meal for any time.

Common Mistakes to Avoid When Making Dirty Rice

Dirty rice is a key dish in new orleans cuisine. But, there are mistakes to watch out for. The first mistake is using the wrong rice. You need long-grain rice for the right texture. Short-grain rice makes the dish mushy.

In creole cooking, cooking the rice right is crucial. If you overcook or undercook it, the texture won’t be good. Also, cooking shrimp too long makes them tough. Always follow a reliable recipe and keep an eye on cooking times.

Other mistakes to avoid include:

  • Using too much liquid, which can make the dish soggy
  • Not using enough seasoning, which can result in a bland flavor
  • Not cooking the holy trinity (onions, bell peppers, and celery) long enough, which can lead to an unbalanced flavor

To make great dirty rice, avoid these mistakes. Use the right ingredients, cook everything correctly, and season well. This way, you’ll get a delicious, authentic dish that everyone will love.

Variations and Regional Twists

Shrimp dirty rice is a versatile dish that can be adapted to suit various tastes and preferences. It’s an easy dinner recipe that can be made in many ways. You can add spicy sausages or hot peppers to make it a spicy rice dish.

Some popular variations of shrimp dirty rice include:

  • Adding andouille sausage for a smoky flavor
  • Incorporating crawfish for a seafood twist
  • Using different types of protein, such as chicken or tofu, for a non-seafood option
  • Adding spices and herbs, such as cumin or thyme, for extra flavor

These variations can make the dish more interesting and exciting. They keep the core flavors and textures while adding new twists. By experimenting with different ingredients and flavors, you can create your own unique versions of shrimp dirty rice. It’s a fun and easy dinner recipe to make and enjoy.

For those who like a little heat in their meal, adding spicy elements can make it a delicious spicy rice dish. You can add spicy sausages, hot peppers, or red pepper flakes to the recipe.

Overall, shrimp dirty rice is a versatile and adaptable dish. It can be made to suit a variety of tastes and preferences. Whether you like it spicy or mild, it’s a great easy dinner recipe to have in your repertoire.

VariationIngredientsFlavor Profile
Andouille SausageAndouille sausage, shrimp, riceSmoky, spicy
CrawfishCrawfish, shrimp, riceSeafood, spicy
ChickenChicken, rice, spicesMild, savory

Serving Suggestions and Pairings

SHRIMP DIRTY RICE is a classic southern comfort food. You can serve it with many side dishes to enhance its flavors. Try pairing it with cornbread, collard greens, or a simple salad with a light vinaigrette.

Choosing the right drink is key to enjoying southern comfort food. Sweet tea or lemonade are great with SHRIMP DIRTY RICE. You can also try fresh-squeezed juice or sparkling water with fruit for a lighter option.

Traditional Side Dishes

  • Cornbread: a classic southern staple that pairs perfectly with the spicy flavors of SHRIMP DIRTY RICE
  • Collard greens: braised with a hint of smokiness to complement the dish’s bold flavors
  • Side salad: a simple mix of greens with a light vinaigrette to cut the richness of the meal

Beverage Recommendations

For a true southern comfort food experience, serve SHRIMP DIRTY RICE with these drinks:

BeverageDescription
Sweet teaA classic southern staple, sweet tea is the perfect complement to the bold flavors of SHRIMP DIRTY RICE
LemonadeA refreshing and tangy alternative to sweet tea, lemonade pairs nicely with the spicy undertones of the dish

Storage and Reheating Tips

Storing and reheating cajun shrimp dirty rice, a tasty one-pot meal, is key. To keep it fresh, refrigerate or freeze it in airtight containers. This helps preserve the flavors and textures.

For the fridge, cool it down first, then store it within two hours. It stays good for up to three days. For freezing, divide it into portions, label, and date them. Frozen cajun shrimp dirty rice lasts up to three months.

When reheating, aim for 165°F (74°C) to ensure safety. You can use the microwave, oven, or stovetop. Here’s how to reheat:

  • Reheat in the microwave: Cover with a microwave-safe lid or plastic wrap. Heat for 30-45 seconds until hot.
  • Reheat in the oven: Use aluminum foil to cover. Heat at 350°F (180°C) for 10-15 minutes until hot.
  • Reheat on the stovetop: Over low heat, stir occasionally until hot.

By following these tips, you can enjoy your one-pot meal of cajun shrimp dirty rice anytime. It keeps its flavors and textures perfect.

Storage MethodStorage TimeReheating Method
RefrigerationUp to 3 daysMicrowave, oven, or stovetop
FreezingUp to 3 monthsMicrowave, oven, or stovetop

Conclusion: Mastering Your Shrimp Dirty Rice Adventure

Discovering the art of making shrimp dirty rice is a journey. It’s filled with rich history, authentic flavors, and endless possibilities. By mastering key techniques and traditional creole cooking methods, you can turn this easy dinner recipe into a mouthwatering masterpiece.

The secret to success is in the quality of your ingredients and the care in your preparation. Look for the freshest shrimp, the most fragrant spices, and the perfect blend of aromatics. This will help you create a dish that truly captures the essence of Cajun cuisine. With each batch, feel free to experiment and add your own unique twist, making this classic your signature creole cooking creation.

Shrimp dirty rice is perfect for feeding a hungry family or hosting a lively dinner party. It’s a versatile dish that showcases your culinary skills. Embrace the journey, savor the flavors, and share the love of this iconic New Orleans-inspired meal. Your shrimp dirty rice adventure awaits!

FAQ

What is shrimp dirty rice?

Shrimp dirty rice is a Cajun comfort food dish. It has Cajun-seasoned rice, sautéed shrimp, and veggies like onions and bell peppers. It’s a one-pot meal from New Orleans.

What are the key ingredients in shrimp dirty rice?

The main ingredients are rice, shrimp, and the “holy trinity” of onions, bell peppers, and celery. It also includes Cajun seasonings like paprika and cayenne.

How do you make the perfect Cajun seasoning for shrimp dirty rice?

To make great Cajun seasoning, mix spices like paprika and garlic powder. Add onion powder, cayenne, black pepper, and herbs like thyme. Use fresh spices and adjust the seasoning to your taste.

What’s the best way to prepare the shrimp for shrimp dirty rice?

Use fresh or frozen, peeled, and deveined shrimp. Choose a medium size, like 16/20 count. Clean and prepare the shrimp well before adding them.

What are some common mistakes to avoid when making shrimp dirty rice?

Avoid using the wrong rice and overcooking the shrimp. Don’t forget to season well and adjust the liquid. Cook the rice and veggies right to get the Cajun flavor.

What are some tasty serving suggestions for shrimp dirty rice?

Serve shrimp dirty rice with Southern and Creole sides like cornbread or collard greens. A green salad or sweet tea or lemonade are great too.

How can you store and reheat leftover shrimp dirty rice?

Store leftover shrimp dirty rice in the fridge for 3-4 days or freeze for 2-3 months. Reheat in the microwave or on the stove, adding water if needed.